| Report Type | Full |
| Peak(s) |
Maroon Peak - 14,163 feet |
| Date Posted | 09/26/2018 |
| Modified | 09/27/2018 |
| Date Climbed | 09/23/2018 |
| Author | BethL |
| Additional Members | thelonious |
| Follow the Robot |
|---|
|
Maroon Peak was my 52nd 14er, yet this is my very first trip report. From all my research in preparation for this mountain, I found the 14ers route description and trip reports from WildWanderer, JQDivide, and BearHamr the most informative. I took all three of these with me for my trip. Route finding was easier than we expected, but there were a few spots where I found a few more details might be helpful. First, WEAR A HELMET!! You'd think I'd be stating the obvious, but we encountered 7 other climbers throughout the day, 3 of whom went on to do the traverse. None of them were wearing helmets, or even had helmets with them. Thankfully it was a “quiet” day with few climbers so the chance of rockfall from others wasn’t too great, but I just couldn’t believe thelonious and I were the only ones on the mountain with helmets. I’ve witnessed too many rockfall events triggered by other climbers on too many mountains (Kit Carson, Eolus, Conundrum, Pyramid, to name a few). You need your head, and this mountain has plenty of loose rock. Don’t take the risk! The 2,800 ft of suck has an established trail. All the way. The route description and some trip reports imply that there are “trail segments” and that this can be hard to follow. We ascended this section almost entirely in the dark and had no issue following a trail all the way to the ridge. Don’t forget on your descent that you follow the ridge crest from 13,250 down to 12,900! Another hiker we encountered almost started to descend straight down from the notch at 13,250, forgetting he followed the ridge crest on the way up. Gully 1 FTW! Based on other's reports, I was leaning toward climbing Gully 2. I liked the idea of just climbing one gully all the way, instead of needing to cross over. But upon reading WildWanderer’s and BearHamr’s trip reports with positive feedback on Gully 1, we decided to give this a close look once we were on the mountain. Gully 1 was the clear choice. It appears a little less steep, and it’s filled more with loose rocks vs. the added sandy scree in Gully 2. We stayed climber’s right on the way up until we crossed to get to Gully 2. The right side has more stable rock to use for handholds and some optional class 2/3 climbing to save you some of the slip and slide on the loose rocks in the center of the gully. 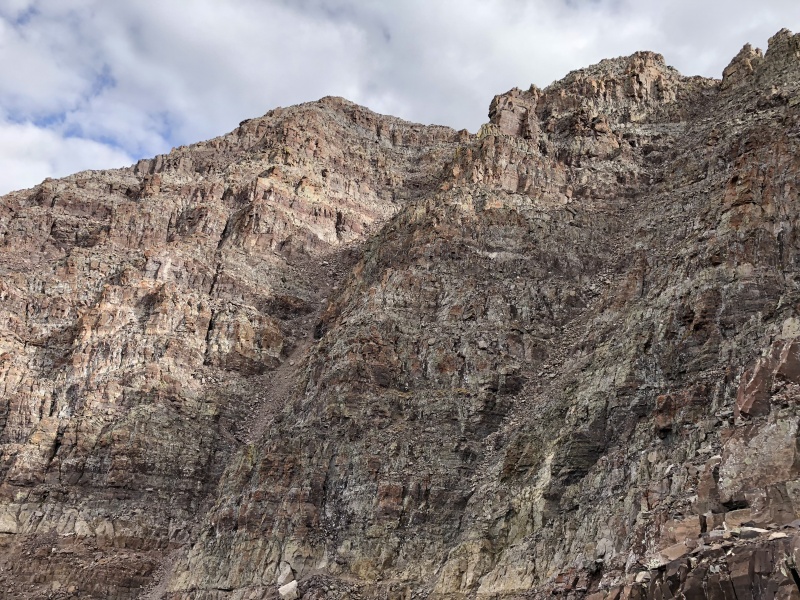 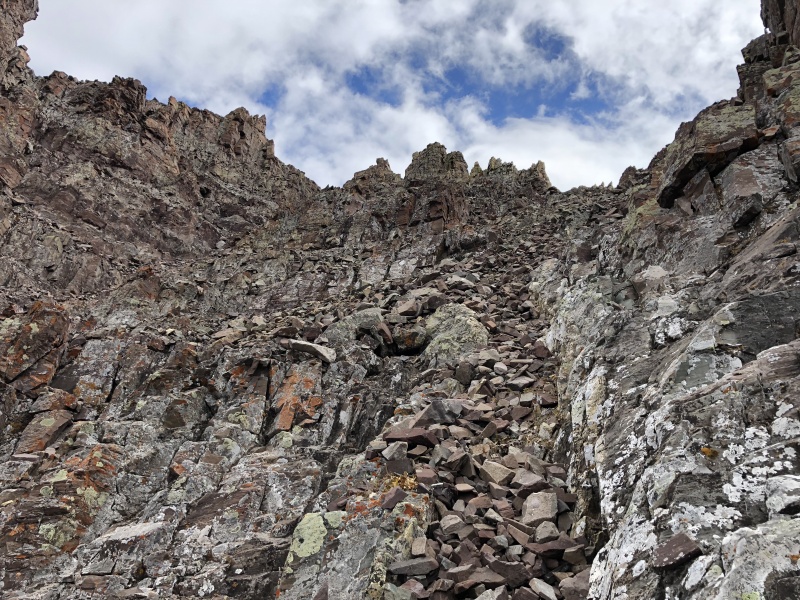 “Robot” rock. You can see this from the gullies. I didn’t realize this until looking back at pictures after our climb but knowing this in advance can really help you calibrate where to crossover between the gullies on the ascent. On our way up, we stayed in Gully 1 all the way up. We exited Gully 1 to traverse over to Gully 2 following two very prominent cairns marking the crossover. However, we realized after we crossed into Gully 2 that we exited Gully 1 higher than we’d intended. This was our first encounter of incorrect cairns. On the way back down, we entered Gully 2 coming from the “robot” ledge, and this time stayed in Gully 2 a little ways down before crossing over to Gully 1. While this is the standard crossover, it gave me just enough taste of the nasty looseness of Gully 2 to not regret our high exit from Gully 1 on the way up. 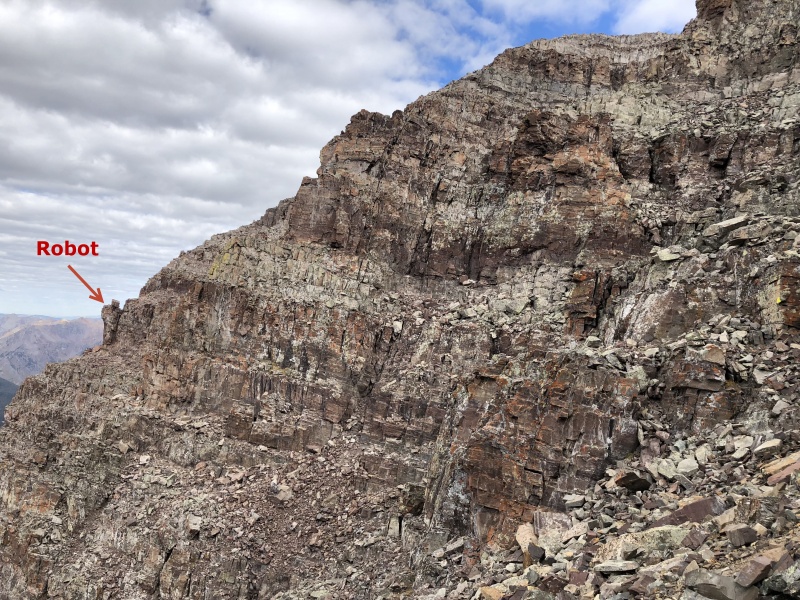 Gullies, gullies, gullies… You’ll traverse past a few smaller gullies between Gullies 1 & 2 and the Wide Gully. It’s a little more than “around a corner to reach the large gully” as the route description suggests. There are a few small gullies tucked into your traverse “around the corner” but you can quickly rule them out as the Wide Gully because they’re narrow and decrease in width as they ascend up the peak. Match what you see to the picture of the Wide Gully in the route description and you’ll do just fine avoiding a few of these other gullies that are just for show. If you can’t see the notch at the top from your entrance into the Wide Gully, you’re in the wrong spot. Ascending the Wide Gully. Same as the lower Gully 1, stay climber’s right in the large gully. It’s not as stable and has more intermittent solid rock to grab onto, but it's still more stable than the center of the gully. We stayed right all the way until we saw a large cairn in the center of the gully that marks the crossover to the left and the exit up a little wall to the next set of ledges. Note that you don’t go all the way into the notch to exit. JQDivide’s photo of climbing out of the wide gully was helpful here for us to calibrate that we were in the right spot. To the Summit! I expected to have the hardest time with route finding between the wide gully and the summit, but we found this section to be relatively well-cairned. We compared cairn placement to the route description photos a few times to make sure we were staying on track. It wasn’t until the descent that it seemed like quite a few more cairns appeared in wrong places. Do your best to remember how you came up and try to take a similar route down. We’d quickly identify we were slightly off our route if (1) the moves exceeded C3 or (2) the rock was looser than we remembered coming up. Yes there’s loose rock everywhere, but on the majority of the route there are pretty solid holds available if you take the time double-check your holds and realize they’re there.  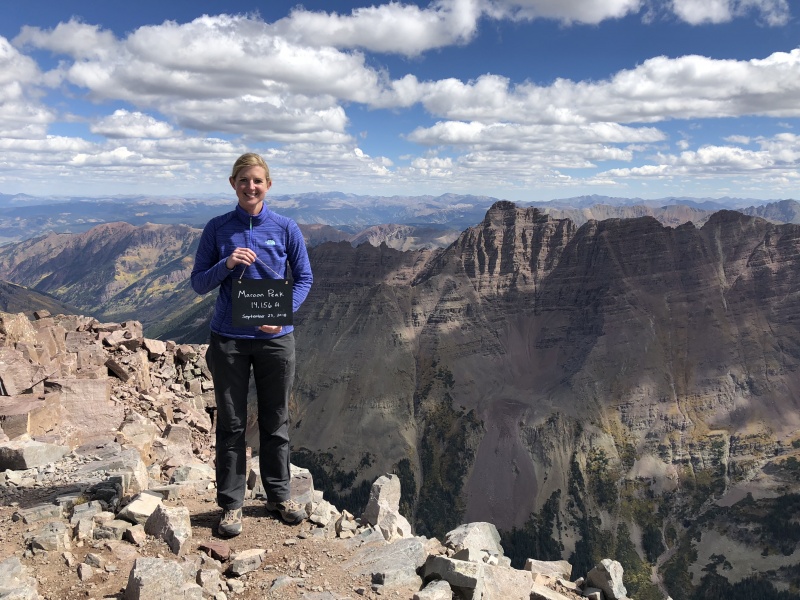 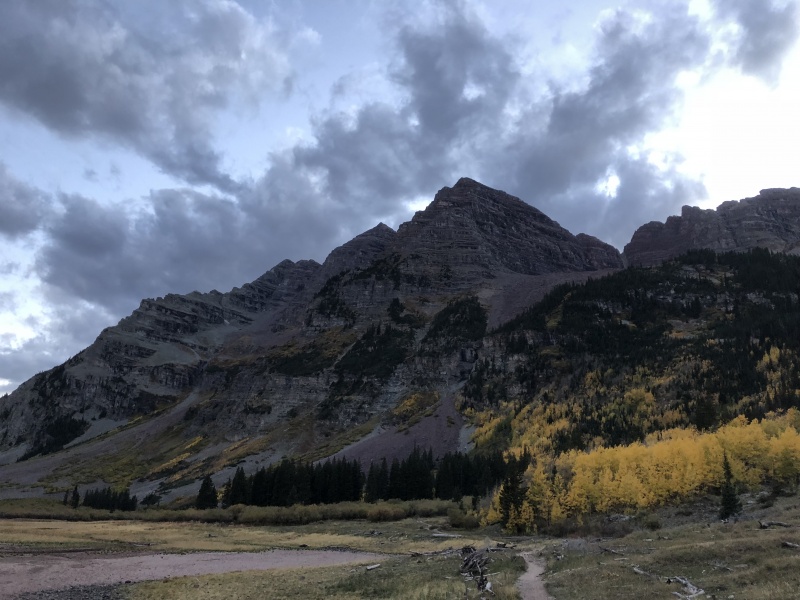 Am I Ready? I ask myself this question before every mountain I climb, especially now as I’m down to my final few 14ers. The question of whether or not you’re prepared to tackle the “next level” mountain, whether that be class 2 to class 3, or class 3 to “exposed and very loose class 3 and 4” is argued widely across the forums. This is very subjective to each person’s experience and overall comfort level, but these are a few mountains and routes that I found helpful leading-up to Maroon Peak:
With all these mountain experiences before my trip up Maroon Peak, I felt ready and confident on this climb. This is what worked for me, but YMMV. Thumbnails for uploaded photos (click to open slideshow): ")
")
")
")
")
")
|
| Comments or Questions | |||
|---|---|---|---|
|
Caution: The information contained in this report may not be accurate and should not be the only resource used in preparation for your climb. Failure to have the necessary experience, physical conditioning, supplies or equipment can result in injury or death. 14ers.com and the author(s) of this report provide no warranties, either express or implied, that the information provided is accurate or reliable. By using the information provided, you agree to indemnify and hold harmless 14ers.com and the report author(s) with respect to any claims and demands against them, including any attorney fees and expenses. Please read the 14ers.com Safety and Disclaimer pages for more information.
Please respect private property: 14ers.com supports the rights of private landowners to determine how and by whom their land will be used. In Colorado, it is your responsibility to determine if land is private and to obtain the appropriate permission before entering the property.


