| Report Type | Full |
| Peak(s) |
Little Bear Peak - 14,041 feet Blanca Peak - 14,350 feet |
| Date Posted | 07/20/2024 |
| Modified | 07/30/2024 |
| Date Climbed | 07/13/2024 |
| Author | daway8 |
| LB-B Traverse via West Ridge Indirect |
|---|
|
This is often described as the hardest of what are known as the 4 Great Traverses in Colorado. There's plenty of documentation on this route already but since it was so delightfully fun, I wanted to share some of my own photos and take on this Traverse. Included in this report will be:
Trailhead: Standard Lake Como approach, having parked at 9,500ft in a pulloff Route: West Ridge Indirect to Little Bear, then traverse to Blanca and down the standard NW Ridge route for Blanca (already did lap 2 of Ellingwood as a spring snow climb so didn't need to add it on). Time: ~6.5 hours from 9,500ft to LB (including waiting to meet group at Lake Como and going slow to scout out West Ridge Indirect), 4 hours for the Traverse itself, 4 hours 40 min for the return to 9,500ft: total time: 15 hours 40 minutes. Milage/Gain: 12.75mi, 6,300ft from pull-off at 9,500ft on Lake Como road. 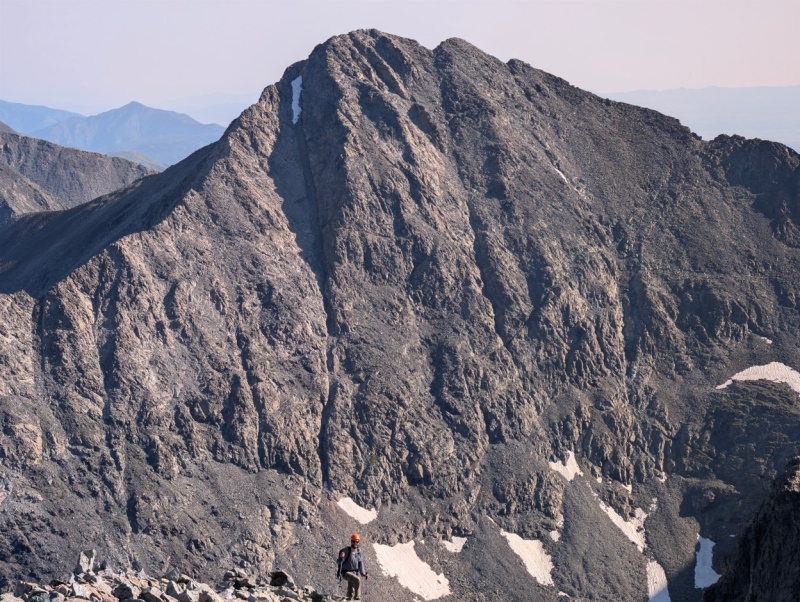
Options for Getting up Little Bear to Start the Traverse There are actually quite a few options for kicking this traverse off. I'll give brief notes on them here with some other details in my report specifically about the West Ridge Indirect route. Standard route, West Ridge and Hourglass: This is the route most people take up Little Bear. It's class 4 in the Hourglass itself but is infamous for potential rockfall danger funneling down into the Hourglass from the huge field of loose rocks above. See the standard route description for this route and/or check out my Finisher trip report that really highlights the rockfall potential: Little Bear, Big Finish West Ridge Direct: This is a funner option with a little class 5 action and a ton of exposure - excellent trial run if you're not confident about doing the Traverse. If you can handle this route you can handle the Traverse. If you barely make it up - don't proceed. See my trip report Wrestling with Bears: West Ridge Direct plus South Little Bear for details on this route. West Ridge Indirect: This a class 4 route CaptainSuburbia came up with that mostly follows the Hourglass route but cuts up to the West Ridge Direct route just prior to the Hourglass and then fans right to come up between the difficulties of those two routes. See the trip report, West Ridge Indirect, that I just published which includes links as well for the ones CaptainSuburbia wrote up. It's minimal class 4 but maximal exposure, with a little more route-finding than the standard route. NW Face: This is a class 5 alternative that, unlike the routes above, I haven't done yet. But ellenmseb has a good writeup of using that as the start of the traverse. See Finishing the Great Traverses with much love for Cottonwood approach. Reportedly a much less crowded route than the standard due to the added difficulty and route-finding. SW Ridge: This would be a long and punishing day but allows you to get the 14er sub-summit South Little Bear in the same day. There are lots of good reports on this route - one interesting one is where arthurspiderman sadistically banged out this route in calendar winter in less time than I did my shorter route in summer. See that impressive feat by reading Little Bear but Big Traverse Comparisons to Other Traverses/Routes: Here are a few thoughts on how this route stacks up to some comparisons. El Diente - Wilson standard Traverse: This is considered the easiest of the 4 Great Traverses. If you follow the standard route then this is much tamer climbing than LB-B and the exposure isn't as dramatic. El Diente - Wilson Ridge Proper with Organ Pipes and PinPoint: This variation greatly spices up the easiest of the Traverses. I would argue the climbing difficulty is in fact greater than LB-B, especially if taking on PinPoint from the class 5 El Diente side. This also adds a dramatic increase in exposure, though not as sustained as LB-B. If you add "the Knife Edge of Castration&Death" then this route would greatly exceed anything you face on LB-B. See my TR Playing the Organ Pipes on Pins and Needles Bells Traverse: I did a variation of the Bells Traverse where I stayed largely, but not completely ridge proper. The climbing on that variant was more sustained than the climbing encountered on LB-B (there really isn't a great deal of significant climbing on LB-B) but the exposure - while epic at times - did not feel as sustained as for LB-B. I did a report of these as back to back day hikes but for whatever reason, I didn't end up doing a trip report when I went back for the Traverse. But for a report with gpx file and photos giving a good feel for it, see Maroon Peak Traverse by harryschmach. Crestone Traverse with North Buttress approach over NE Crestone: Stay tuned - this is on my summer to-do list if I can find a good enough weather window. The North Buttress approach should significantly ramp up the difficulty. I'll hopefully have a trip report of my own to add for this one but in the meantime check out Crestone Centennial Circuit (Part II) by Eli Watson or Crestones classic class 4 linkup: KC north ridge, Crestone north buttress, and Crestone traverse by polar. Little Bear West Ridge Direct: As alluded to above, the West Ridge Direct is basically a mini-Traverse but with more of an upward slant. If you can handle this approach then you can handle anything the Traverse throws at you, including the intense exposure. If you turn back and take the Hourglass route up instead, then don't try the Traverse - it's just a much longer version of West Ridge Direct. I already linked my report Wrestling with Bears: West Ridge Direct plus South Little Bear Capitol: It's inevitable when talking about exposure that people will bring up the King of exposure for 14er standard routes: the Knife Edge on Capitol. So how does that compare to LB-B? Well, imagine taking the Knife Edge and stretching it out for a little over a mile long. Then imagine an enormous giant comes along and smashes his hand on the ridge at various places, creating huge ripples in spots, flattening it out a bit in others and leaving still other places very, very thin. That's kinda what LB-B is like. If you crawled across the Knife Edge weeping then don't even think about trying the Little Bear - Blanca Traverse - you'll run out of tears before making it halfway across. See my trip report Capitol Lake camping and walking the Knife Edge for details on the Knife Edge. Backstory So I had been eyeing this traverse for at least a few years now but in keeping with my strategy of slowly ramping up the difficulty of the climbs I take on, I had decided to hold off a bit on this traverse until I was fully confident that it was well within my capabilities and comfort zone. After doing the West Ridge Direct route up Little Bear in September of 2022 I was assured by several experienced, qualified people that I should have no issue with the traverse. But it's a big day and doesn't have decent bailout options between summits so you really kind of need a very good weather day unless you're really fast, which I'm not. So this kept sliding back with thoughts of - I'll get to it eventually... In the period leading up to this weekend I noticed the typical summer monsoons seemed to be kicking into action so plans for big days probably needed to be pushed out. There was a semi-decent looking forecast for Iowa-Emerald which is long but not especially difficult, so I had more or less settled in on an early start Saturday for that route. But just before the weekend - and by that I mean mid-morning Friday - I finally spotted the post by joey_parm on the forum saying he was going to go scout out CaptainSuburbia's West Ridge Indirect route and was looking for partners. I had been saying for years that I had in mind to check that route out and here was an opportunity to do so with another pair of eyes to help route-find and evaluate. I took a look at the forecast for Little Bear... No way!!! Despite typical summer storms in most parts of the state, the forecast was showing extremely little chance of storms down there! It was the about the best forecast you could hope to see for the Traverse! Well, Joe had posted his number and so I took a stab at texting him despite the last minute nature of the idea. He was still in signal range and responded. After a couple texts back and forth we concluded that he and another person (I later learned was mindfolded - or Jay in real life) were doing West Ridge Indirect with plans to camp at Lake Como Friday night. I told them I would drive down Friday night, hike up to the lake and go on to the Traverse afterwards. Not being sure how high up I might park or how fast I would be moving after having just got back from a week on the East Coast, I told them to just do their own thing and I may or may not be able to meet them along the way. Well, it turns out I got to Lake Como before they were even ready to go so I got to rest a bit from the two hour hike up from 9,500ft while they got ready. You can read the rest of that experience in the TR linked above in the Options... section. Before racing off for the trailhead on Friday night I texted a good friend my plans and jokingly sent along this picture saying to post it to my memorial thread if I didn't make it back... 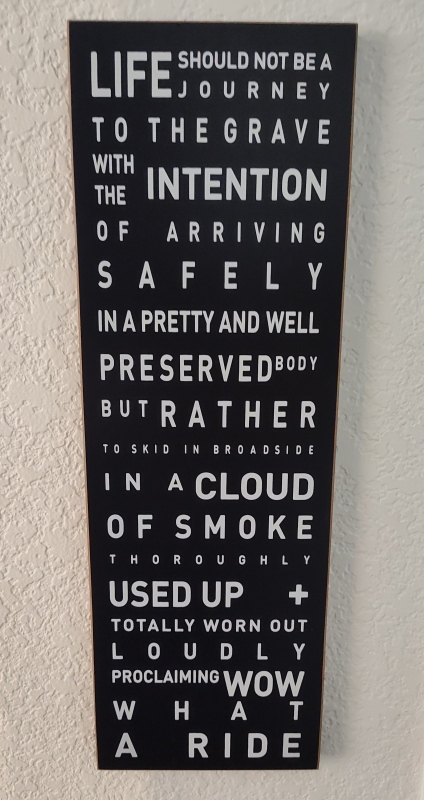
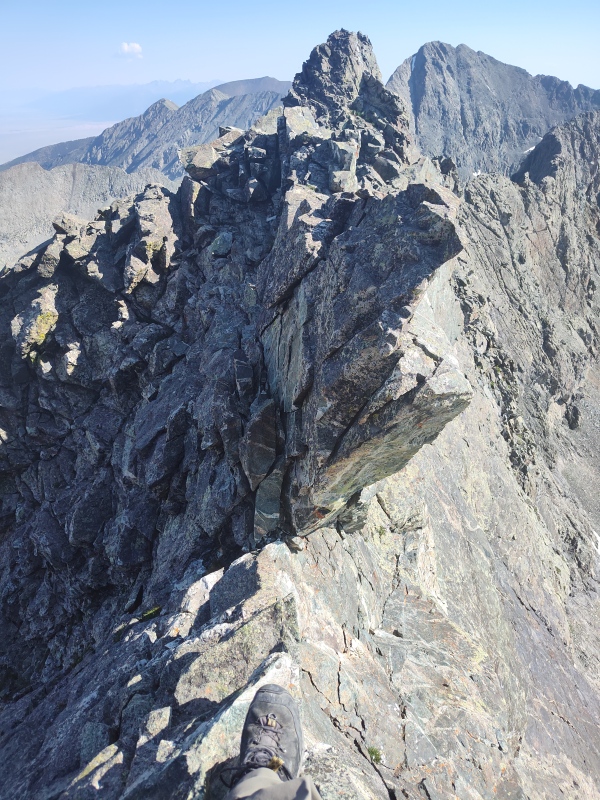
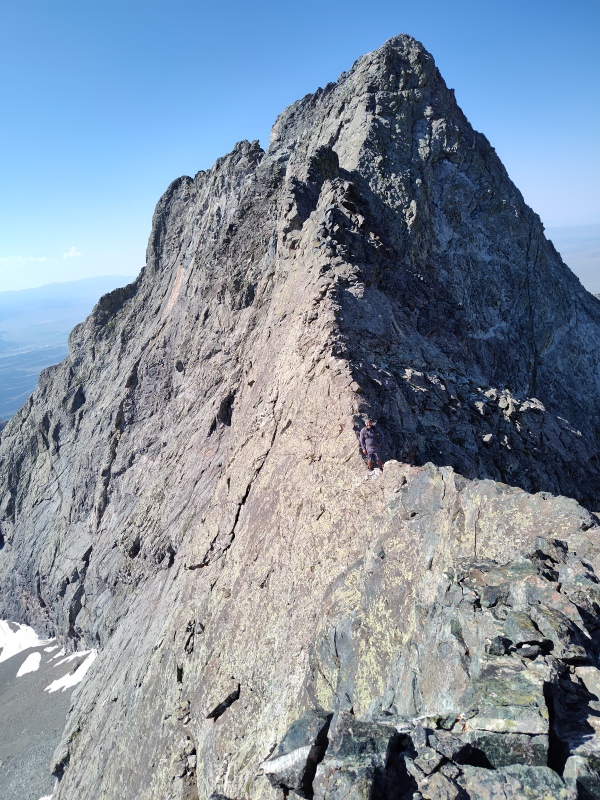
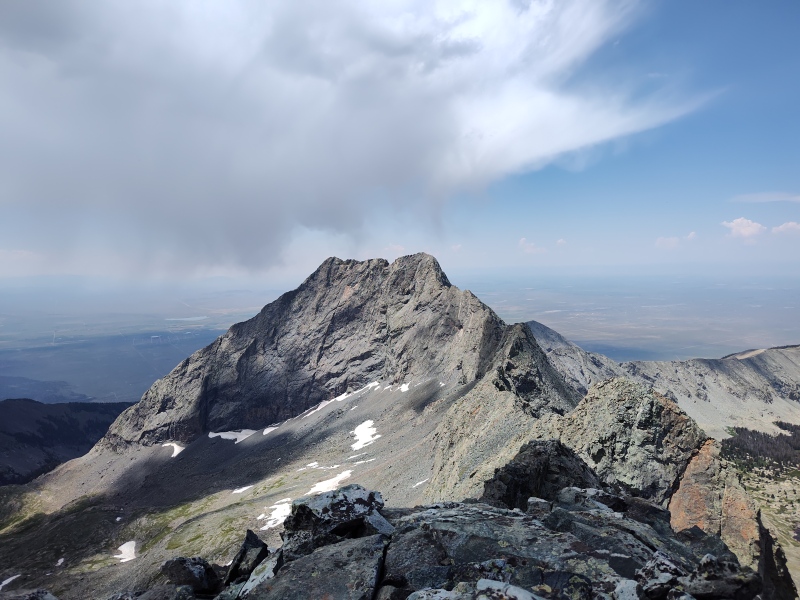
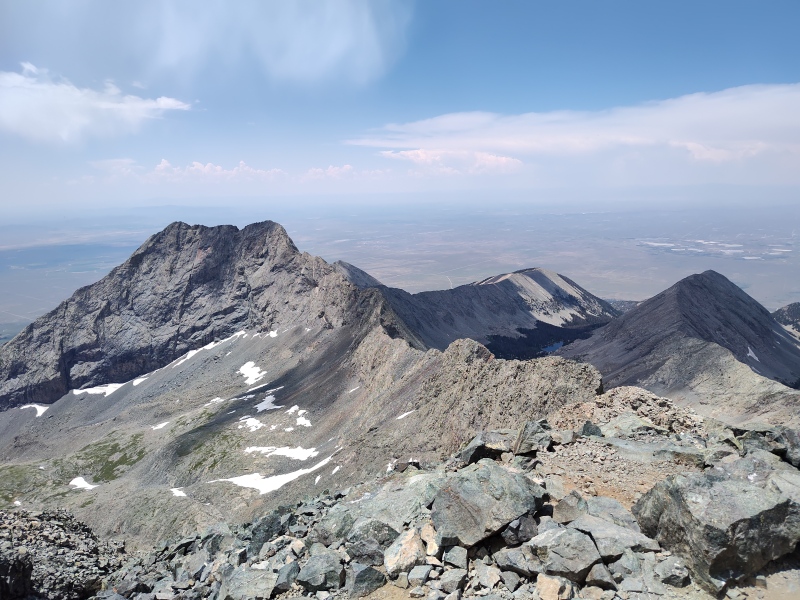
Overview This Traverse clocks in at just a smidge over 1 mile summit to summit with plenty of scrambling, though relatively little sustained climbing, and generally has bypass options for the more challenging climbs. I did climb the optional Captain Bivwacko Tower but skipped the first of 3 big towers at the end, following someone who overtook me - this was primarily because I was concerned about overdoing it on such a long traverse (in retrospect I don't think that needed to be a concern and would likely take a stab at staying fully ridge proper if I were to ever do it again). But the real stand-out feature of this traverse is the exposure. Take just 10 paces from the summit of Little Bear over towards the Traverse and then look down to your left - the exposure is absolutely off the charts!!! And you'll continue to have that kind of intense exposure for a pretty good chunk of the 1 mile Traverse. It relents periodically so there are plenty of safe places to rest, but there are cozy catwalks near the beginning and end of the Traverse and lots of other points where a fall would be unquestionably fatal. The below photo has been stolen a couple of times with annotations being added along the way. I'm hoping to help make it one of the most stolen photos on 14ers.com and see how many annotations get squeezed in 5 years from now, lol. The version of the photo below is taken from a report by ellenmseb I already linked above, but where I added a slight bit of extra wording in read. That report is called Finishing the Great Traverses with much love for Cottonwood approach. It was in turn originally stolen from natebennett in Little Bear, Blanca and Ellingwood Traverses, Solo 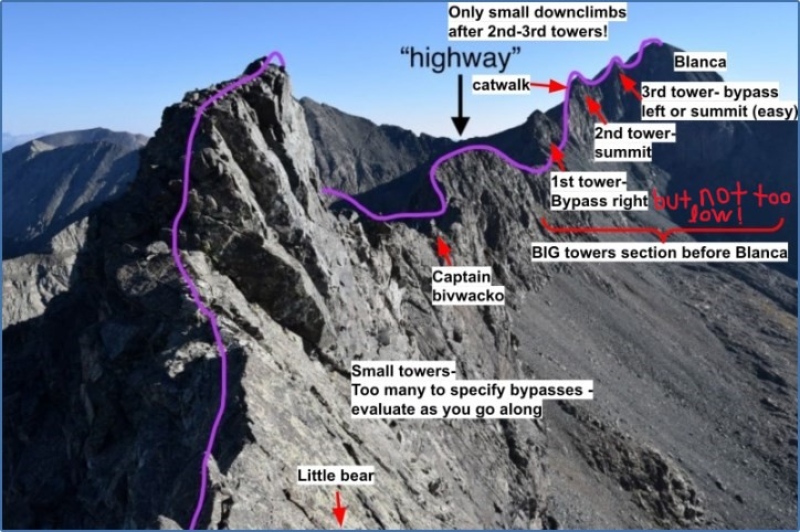
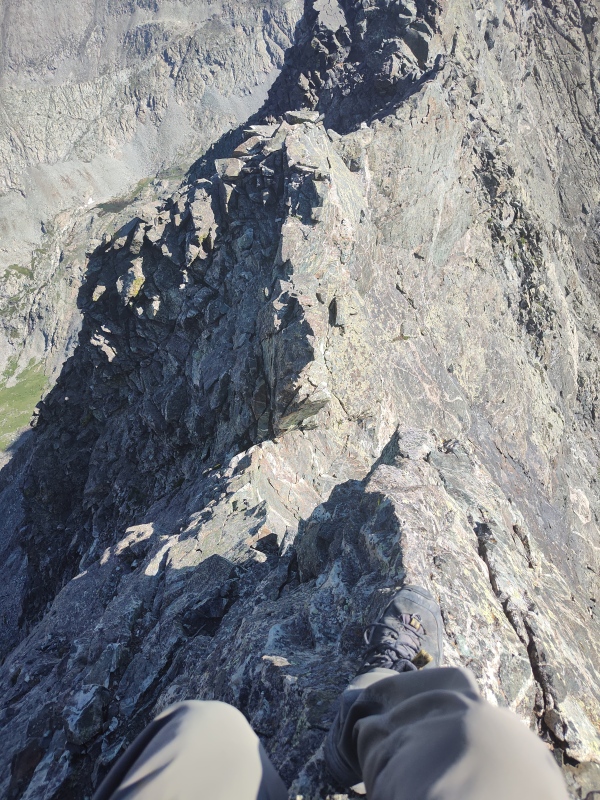
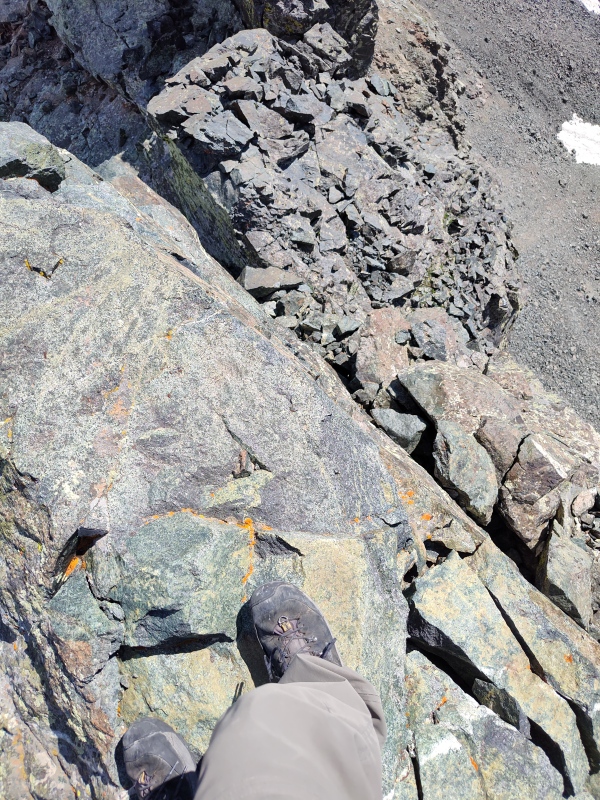
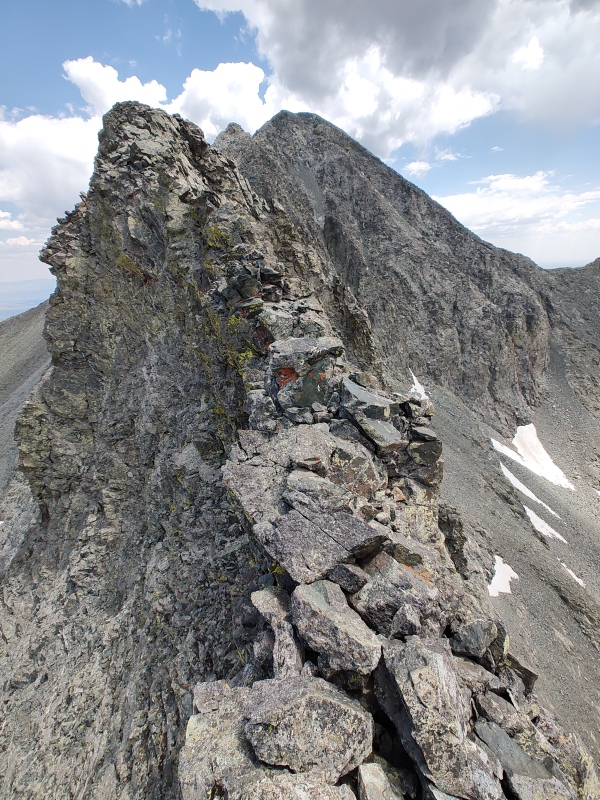
The Initial Challenges As stated before, the exposure ramps up to extreme very, very fast. After taking a few steps away from the summit of Little Bear and looking to the left, the drop-off was jaw-dropping! Not too far down the ridge from there, the ground takes such a rapid downward plunge that it looks at first like you're surely going to cliff-out. A lot is said about the downclimb and its difficulty. While it is visually eye-popping enough to make it mentally intimidating, I didn't really think the actual climbing aspect of it was all that difficult. But as I explained above, I've been very slowly ramping up the difficulty of my climbs over the years and have been doing more and more class 5 fun on often exposed terrain, so this wasn't anything outside of what I had experienced already, besides how incredibly sustained the exposure was going to be. But if you're not as comfortable with exposed scrambling then this initial class 4 section might really do a number on you. It is however, the most sustained of the steep climbing on the route - with the possible exception of the 1st of the last 3 big towers, which I bypassed very easily on the right. To be clear, there will be some other class 4 and perhaps occasional class 5 moves you'll need to make here and there, but generally these are short, easy bursts up little towers and humps - not big, multi-pitch spiderman like walls to climb. Just keep in mind, some of those spots have that one little class 4 move hanging over immense exposure. If you're mentally prepared for and comfortable with that, the Traverse really isn't that bad. But if exposure freaks you out, then this route will be, um, killer. 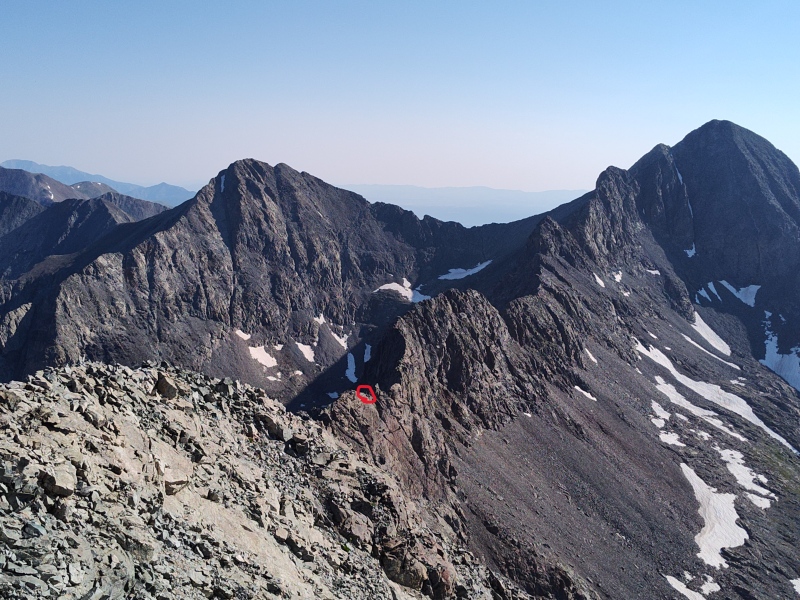
If you ever find yourself on Little Bear but aren't necessarily ready for the Traverse, go ahead and take 10 paces over towards Blanca and then look down to the left. That'll give you a really good feel for the exposure you'll need to be comfortable with if you ever come back for the Traverse. For some of you, that may be adequate to firmly convince you to never come back! 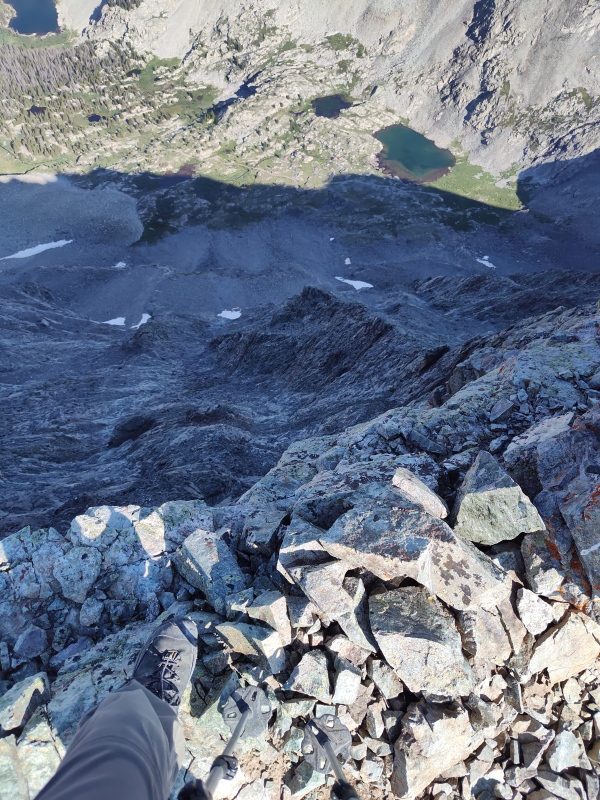
In a lot of my reports I drop all sorts of waypoints and give a bunch of photos with route lines drawn, etc. But due to the length and complexity (in terms of a bunch of little towers, humps, catwalks, etc) of this route I'm not going into that level of detail. Instead I'll just give enough photos and captions to give a pretty solid feel for the route and only occasionally thrown in specific tips, until coming to Captain Bivwacko. 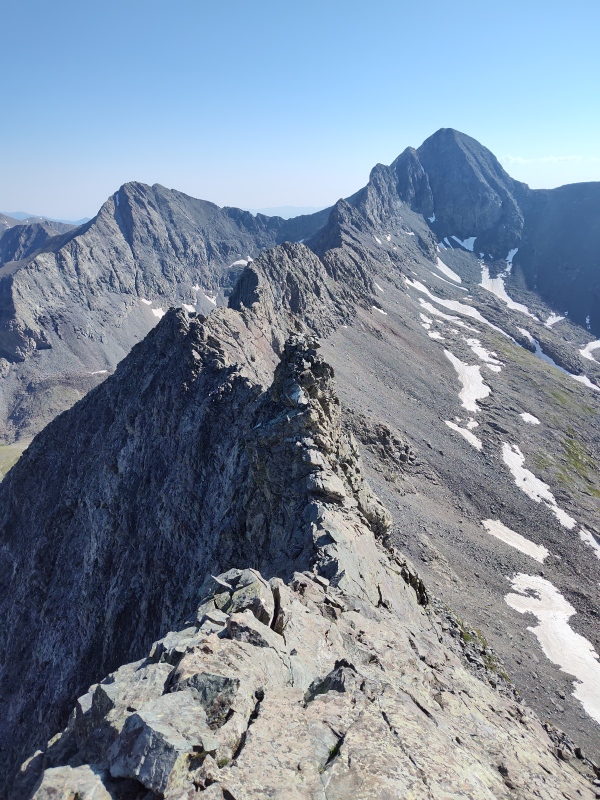
Partway across the ridge a guy overtook me but paused first to chat briefly. He introduced himself as Felipe and said this was his second time on the Traverse. The first time he got most of the way across but then a storm blew in and he decided to bail off the SE side of the ridge into Blanca Basin. You might recall I said there aren't really any good bail-off options on the ridge. Felipe's story confirms that. While he did make it down, it required Search and Rescue and some medical intervention to help him get the rest of the way out from Blanca Basin - which is on the opposite side of the ridge from where the trail is. This time, he was moving at a more aggressive pace than me and I didn't see him again so I'm assuming he got it done this time. 
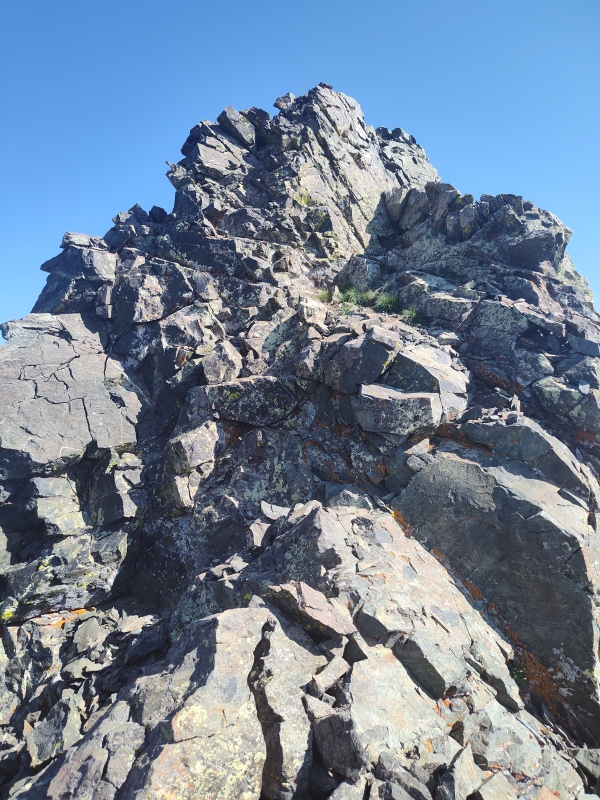
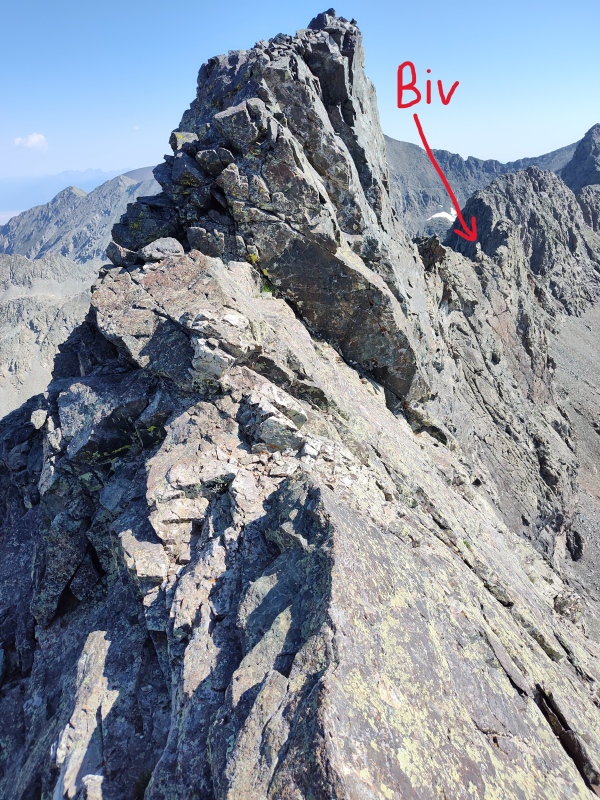
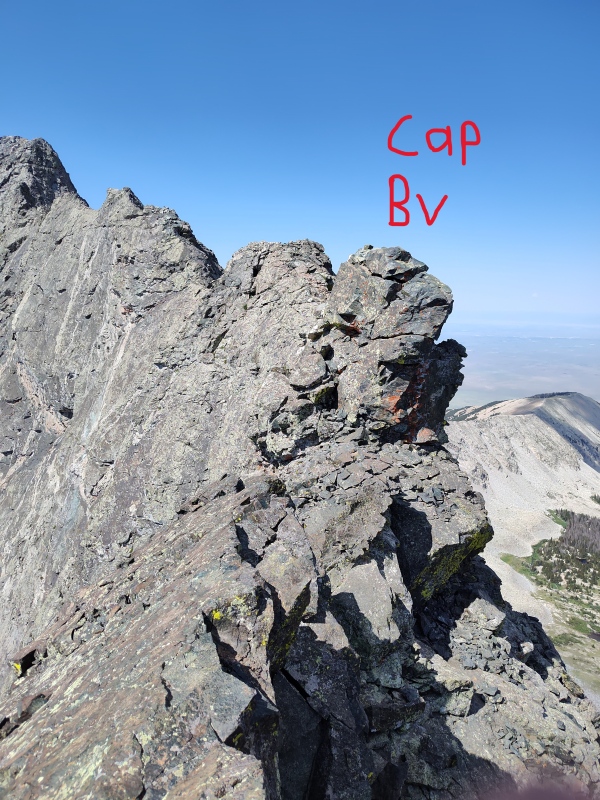
Captain Bivwacko Tower In and of itself this is actually a pretty small, minor little tower tucked in between much larger bulges. But it gained fame in Gerry Roach's classic guide: "Colorado Fourteeners" amongst other sources. There are a couple variant spellings but I'm going with Gerry's version which is the most fun. Besides having a really fun name, it's the first spot along the ridge where it is no longer relatively trivial to stay ridge proper. This little tower is class 5. As to 5.what... there's always debate on those numbers but I'd agree with the assessment that it's low 5th class. The amount of space and number of photos I'm devoting to this little tower is completely out of all proportion to it's size and significance along the ridge. Most people just bypass it on the left using a highly exposed but easy class 4 ledge. But since this fun little tower with a delightful name doesn't often get a lot of love, I'm devoting an entire section to this special little class 5 tower. One thing to note is that listofjohn - the website known as the clearing house for the most authoritative and precise pinpointing of all high peaks in Colorado - as of the time of this trip had incorrectly marked Captain Bivwacko at a point that didn't match any of the descriptions given of the tower. It wasn't quite far enough along to be considered about 1/4 of the way as most reports states. It very clearly wasn't class 5 - but a rather easy class 4. There were no red rocks in front of it like some reports mention, and there was no exposed class 4 ledge on the left side providing an obvious bypass. I was actually slightly depressed for a while after passing the tower loj marked, thinking if that was supposed to be an intimidating class 5 tower then this whole ridge may be lame and overblown. But thankfully, I later determined that was not the real Captain Bivwacko and there was indeed plenty of fun yet to be had on the Traverse. So I dropped a waypoint on the actual summit and passed my analysis on to loj for them to hopefully update. 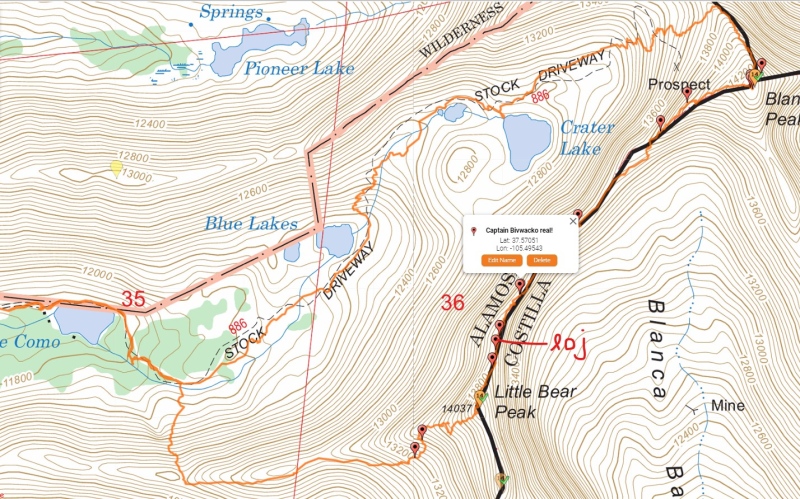


So to tackle this tower, I went up a little ramp like feature on the left side. I had to stretch a little bit to get the best holds to safely get up on it. Then the easiest thing to do, since there's a little bit of an overhang of the rock on this side, was to crawl around the front onto the far side. From there, there are enough holds to make it fairly simple to get up on the summit of this tower. Going up this tower was really not that hard but it was clearly not necessary for doing the Traverse. The far side looked slightly sketch so I just reversed my moves to get down and then took the standard bypass. 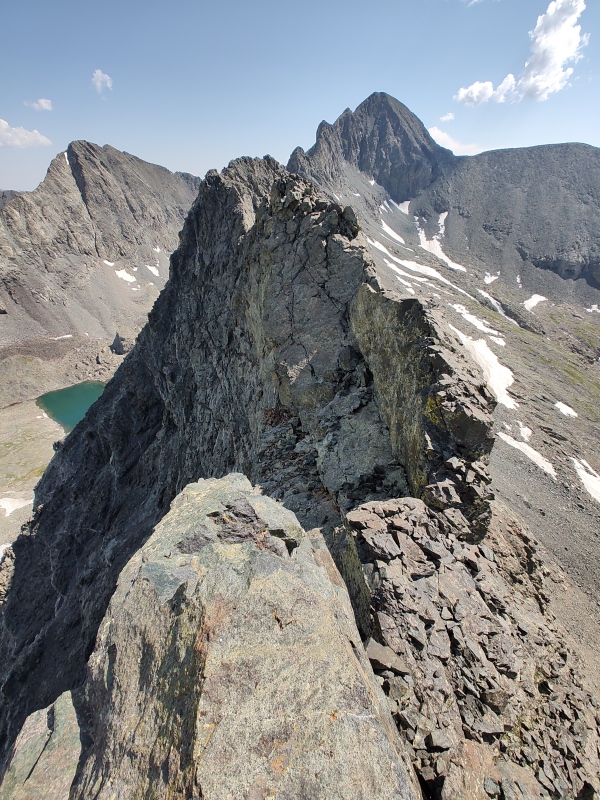
Getting off had my 6'2" frame fully extended and then hopping the last half inch as the easiest way to get down, rather than contorting too much on the ramp. After that, I just simply took the typical bypass. People call it class 4 but it's basically just one single awkward step around of the backside of the tower that you have to deal with. The only thing that makes it significant at all is that the exposure you're stepping over is absolutely off the charts, but as mentioned before - exposure is a fairly consistent companion on this traverse. 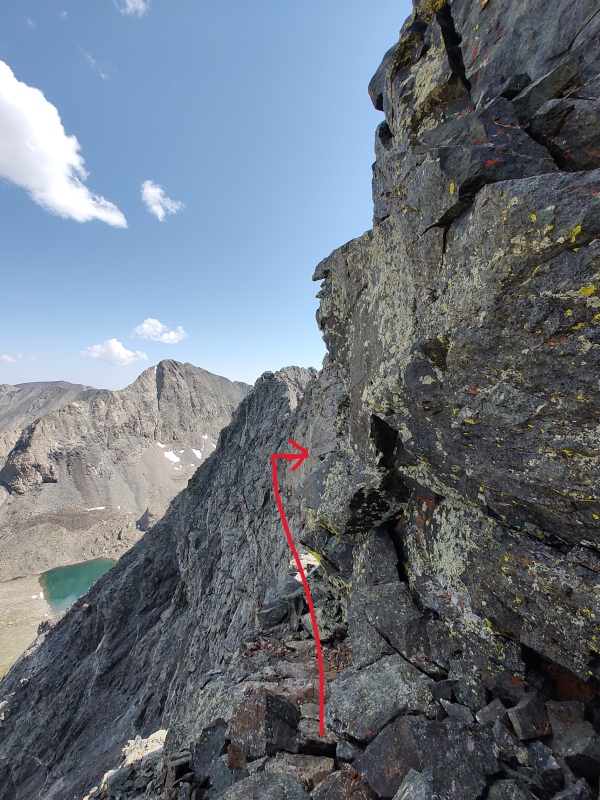
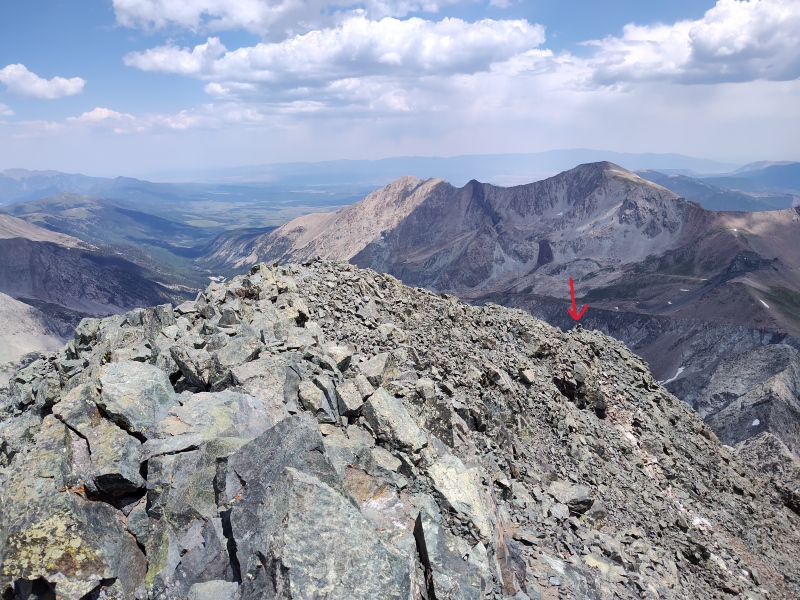
Continuing Along the Ridge So after Captain Bivwacko, there's a spot where your vantage point makes it look like you're getting somewhat close to the end of the Traverse. But remember, Bivwacko is only about a quarter of the way along the ridge - and that first quarter is more time consuming than expected with all the little towers to scramble over. I made sure to hit everything along this first section just to be fully certain I had gotten Captain Bivwacko just in case the beta I had for Bivwacko was wrong. From researching photos and descriptions, I'm highly confident in my identification of Captain Bivwacko. Plus, I climbed all the other towers before and after during this first section of the ridge and nothing else felt class 5 or matched any of the descriptions/photos. 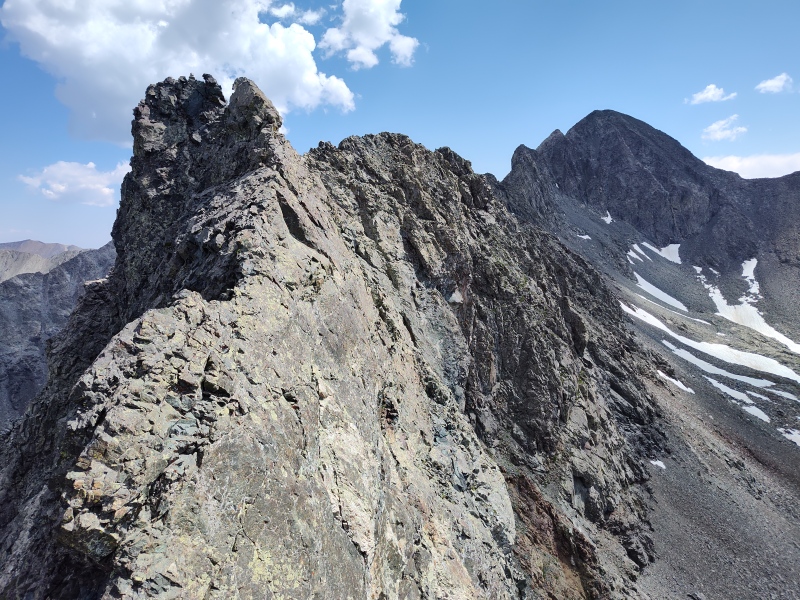
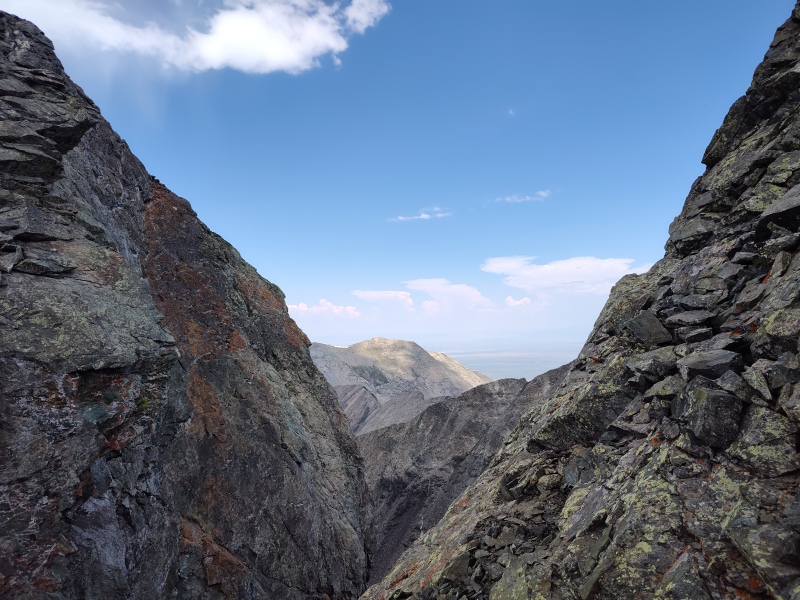
Occasionally I would pause along the ridge and just sit and look down into the valley below to soak in the experience. But apparently I never quite soaked it in enough because somehow on the descent I had the impression that I just had a quick little jaunt past a couple lakes to get back to Lake Como. Haha. There is a long string of lakes and a trail that goes on and on. Instead of false summits you end up with false valley floors which create the same kind of motivational drain if you don't realize they're coming. 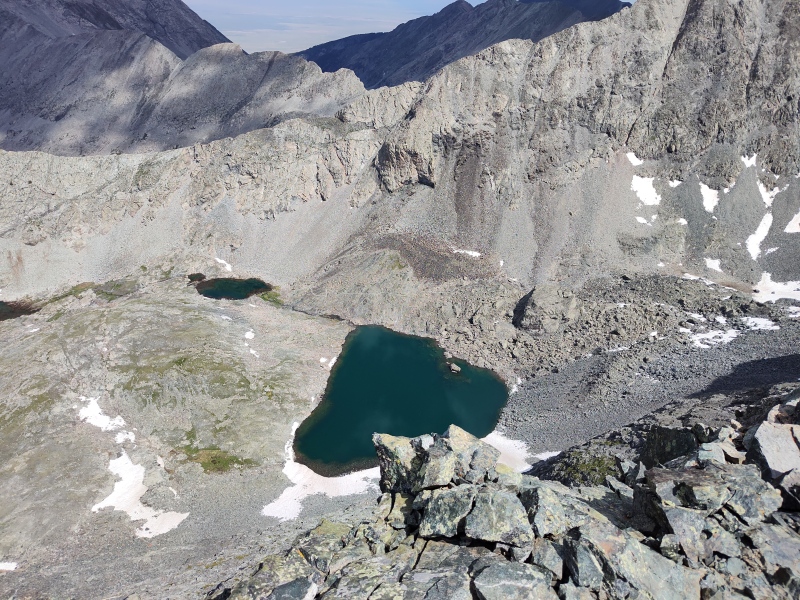
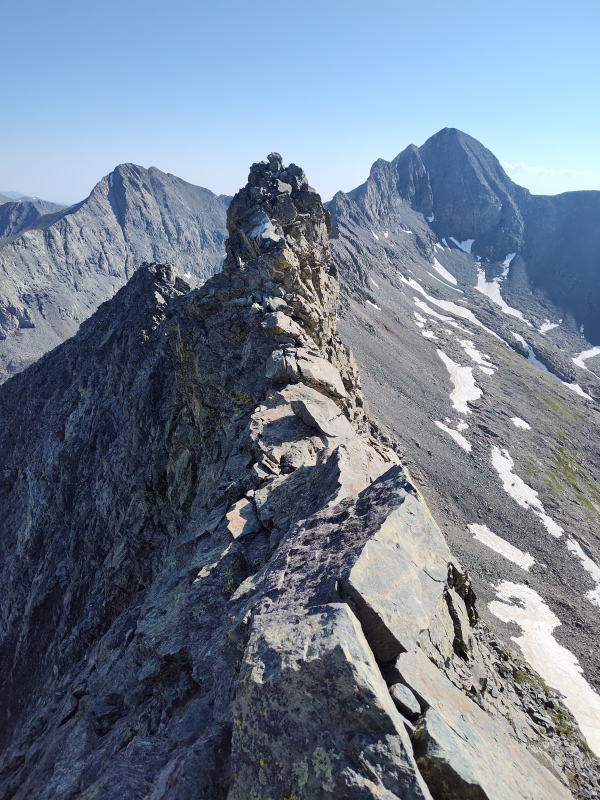
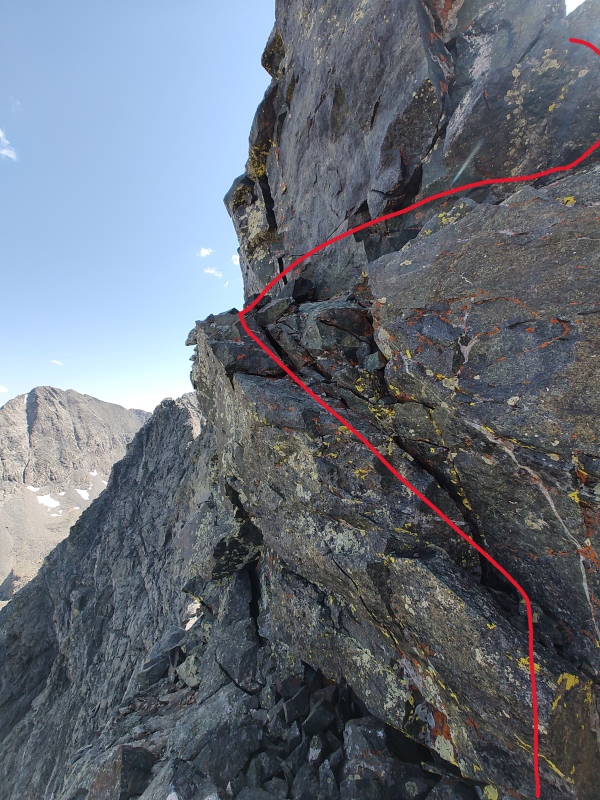
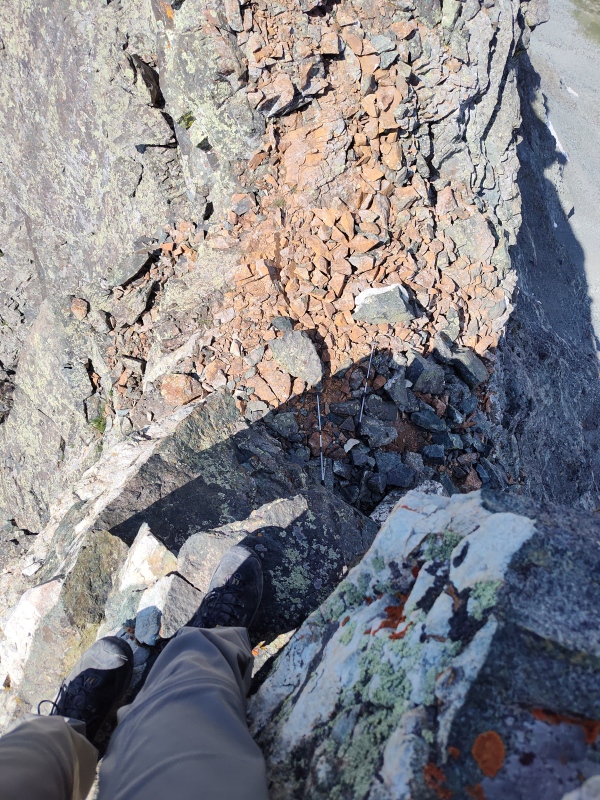
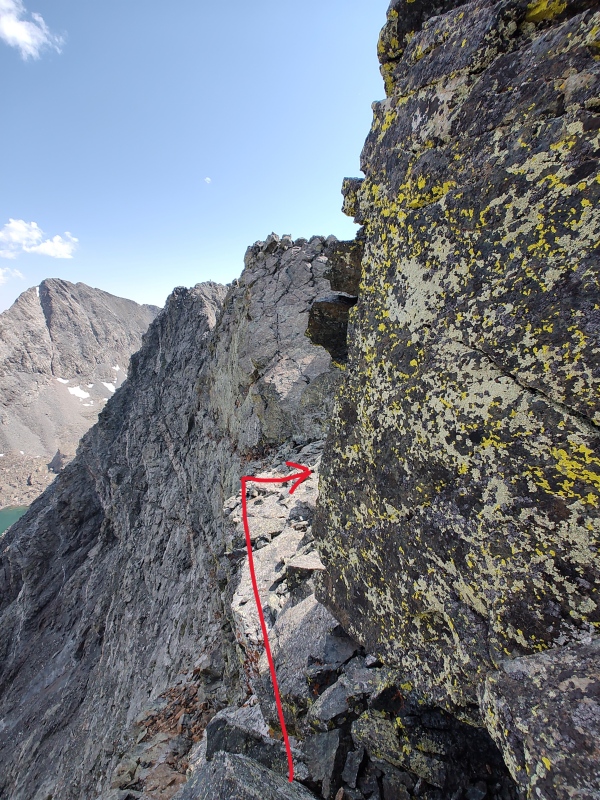
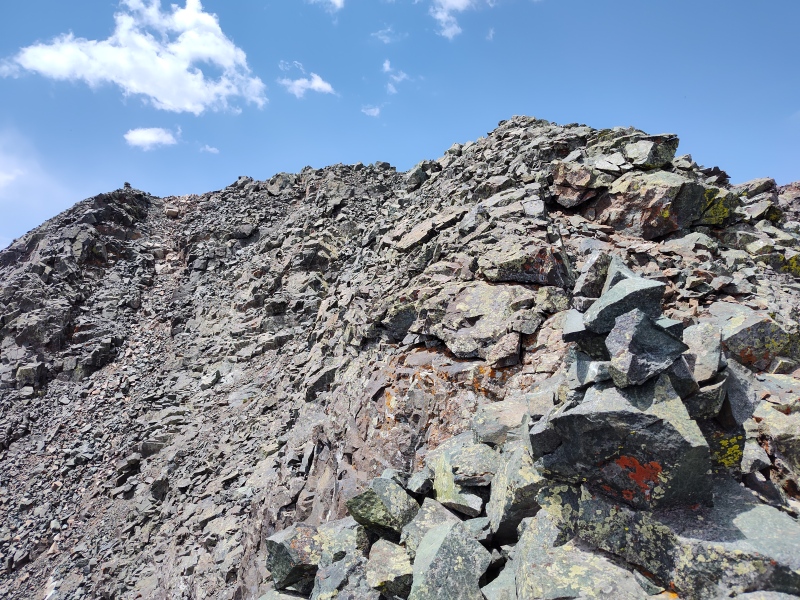
A little before the final 3 big towers you are confronted with a bit of a headwall type feature. The photo below only partly captures its steep, rugged nature. It wasn't necessarily a showstopper compared to the stuff I had already scrambled but it wasn't totally trivial looking either and there was a fascinatingly placed cairn off to the right side. That cairn was on a disturbingly exposed little ledge and just getting over to it looked like it might possibly be as bad or worse than going over top. But that got me intrigued so I decided to go ahead and delicately step over to the ledge holding the cairn. 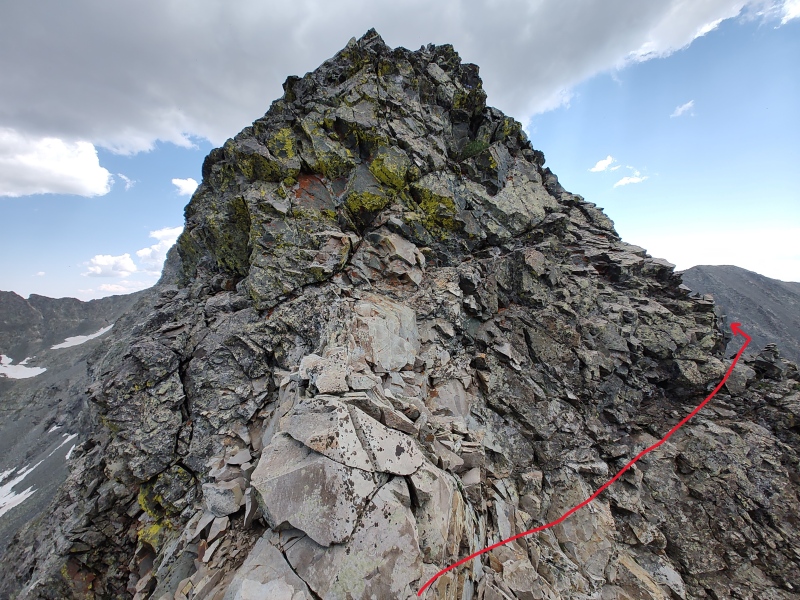

Turns out on the other side of that tower it looks like the downclimb would have probably been pretty wicked. So I suppose that's why someone stuck a cairn in such an odd seeming spot on an exposed ledge. 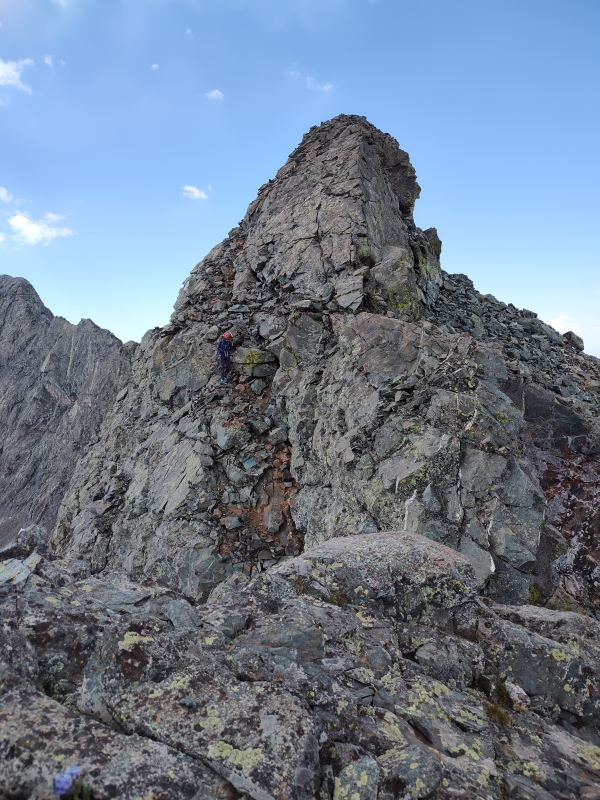
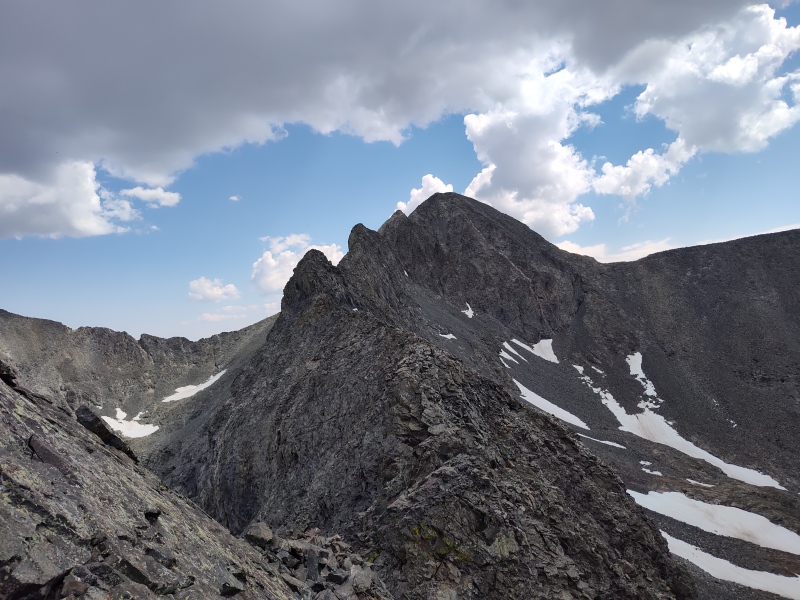
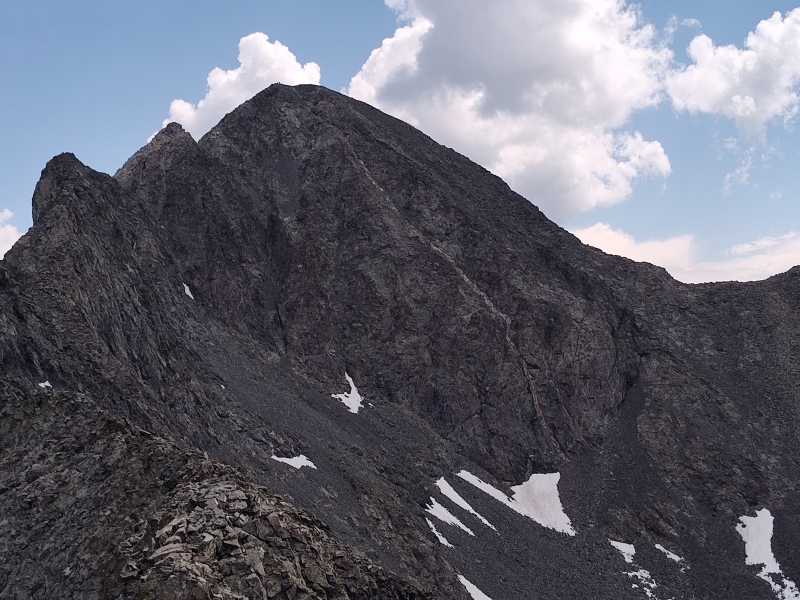
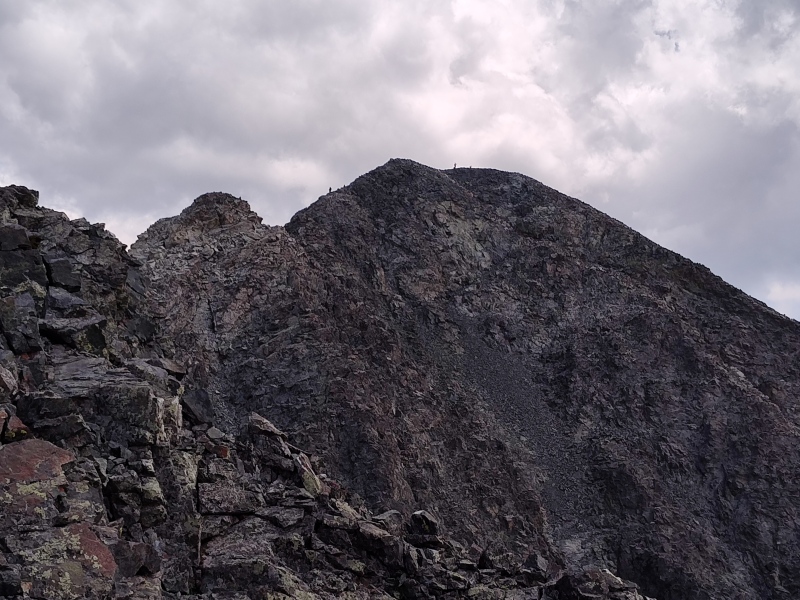
The Final 3 Towers So after this, you are confronted with 3 big towers between you and the summit of Blanca. I had read some people advising to skip the first tower on the right, and just as I got to that point another person overtook me (did I mention I'm not really FKT material?) and so I ended up more or less following where he went, only I regretted it afterwards since he dropped down rather too far to the right and created a lot of needless regain. 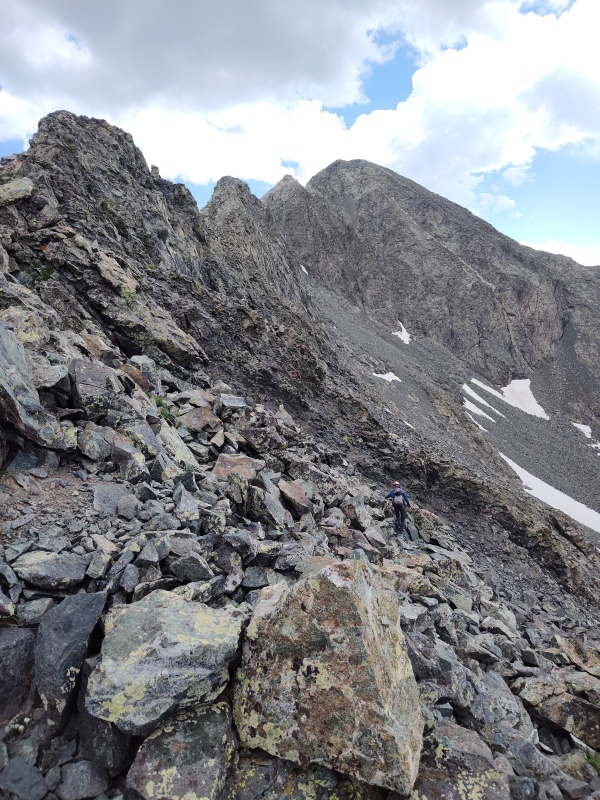
From my overly low position of having dropped down to follow this random guy I did get to see why a lot of people tend to bypass tower 1 - a direct frontal assault would appear to require climbing up from under an overhang. The rock to either side though looks chunky enough that I imagine it probably wouldn't be too terribly hard to find a path up it. If I ever go back I'll have to investigate that - but I have a lot of other things on my mountain to-do list... 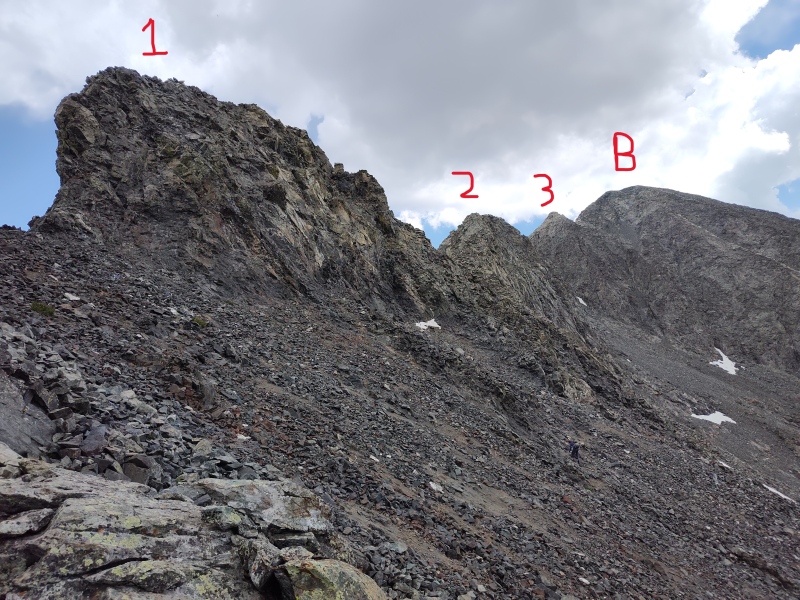
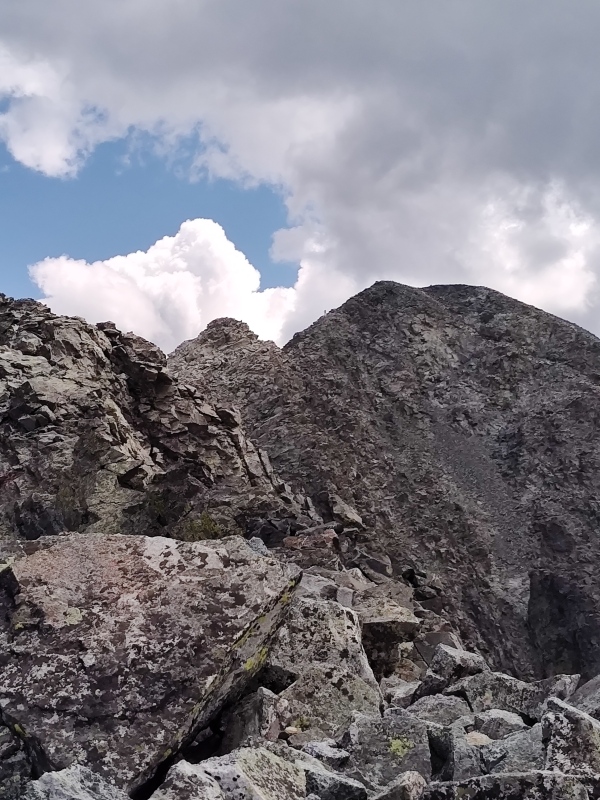
I eventually decided that guy wasn't the best choice to follow since he dropped way, way low around tower 1 then was hitting some questionable lines up Tower 2. So I went back to my own route-finding and came up in between Tower 1 and Tower 2. 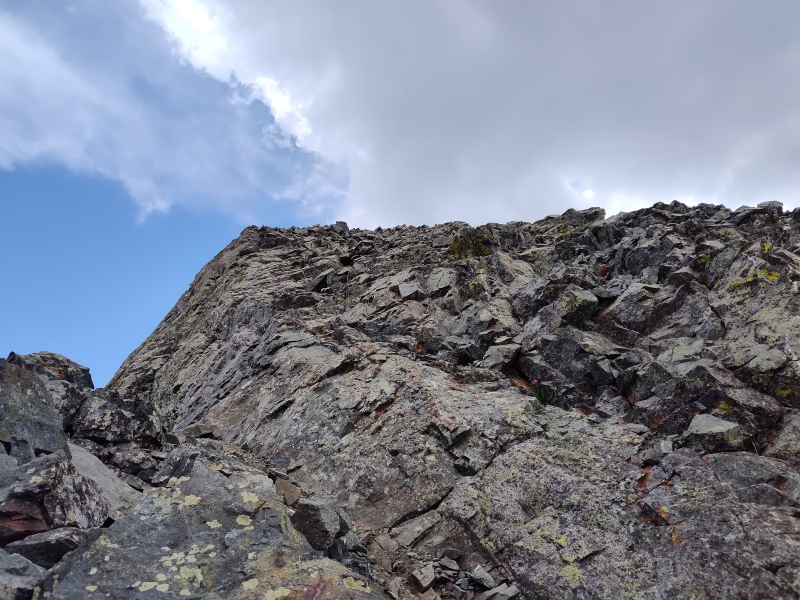
Once I got up in between the two towers (queue LOTR music - wait, no, there are 3 towers here!) I could again see why people tend to bypass Tower 1 - it look like the far side getting down could be quite interesting. Though if you trended a little to your right as you came off the summit it looks like that would be viable. 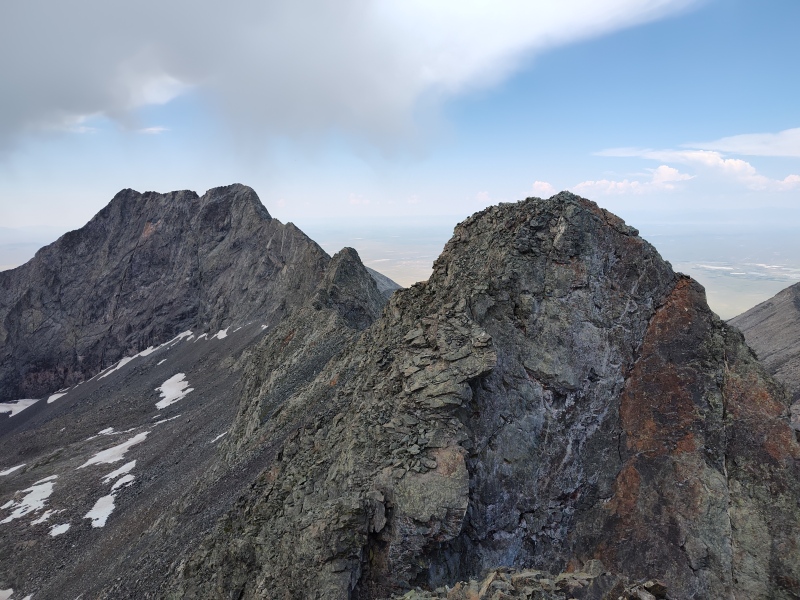
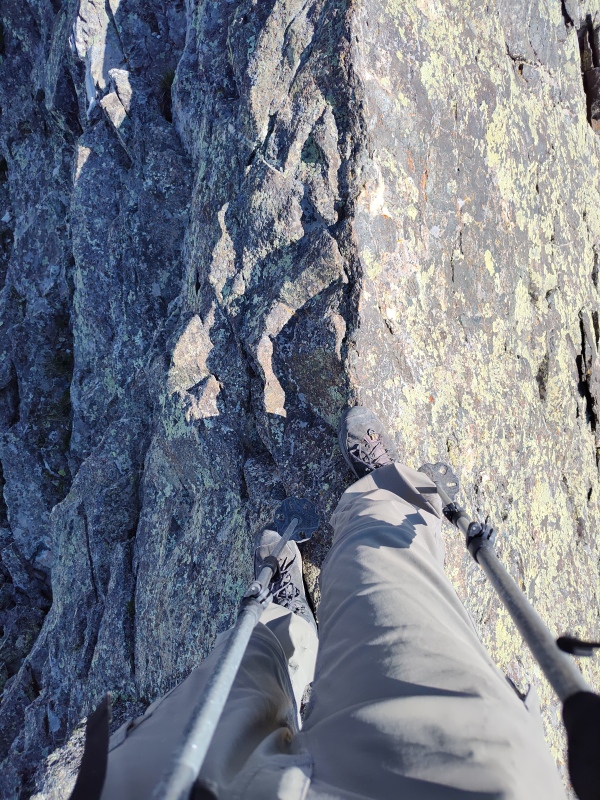
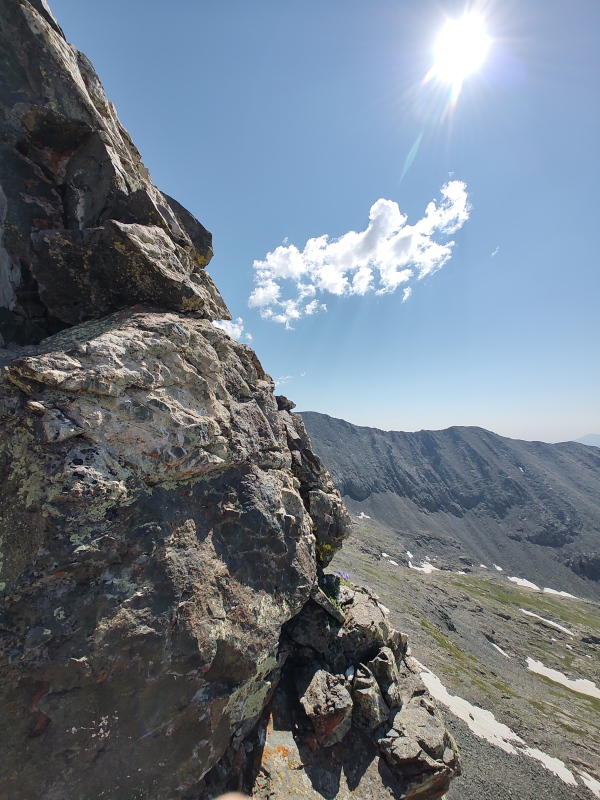
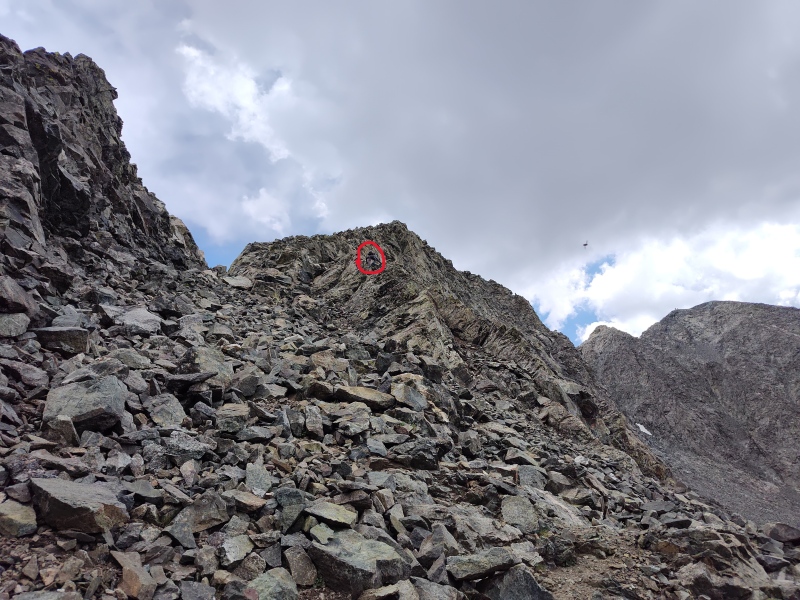
Before you can finish getting through this section there is a pretty impressive catwalk you must go over. I walked it upright and even paused to take some cool photos but I'll admit even I had a little bit of unease perched on this little crossing. 

Blanca's Summit(s) So after the 3 towers, you drop just a bit then have one final push to the summit. Up till now, despite hearing tales of epic quantities of mosquitoes in the Sangres this season, there had been relatively few bugs encountered - a few mosquitoes around my parking area at 9,500ft and some mild harassment around Lake Como, but nothing overly notable. But up on the summit of Blanca was a ridiculous infestation of some manner of bug. Thankfully it wasn't mosquitoes - it was some funky little insect somewhere between a gnat and a fly, but there were thousands of them! It was really rather annoying. If you kept moving they wouldn't bug you as much as if you stopped, so I didn't spend a lot of time up there. But I did take the little extra time to go investigate the Huerfano County High Point, which is not as high as the actual Blanca summit. There's a cairn a good ways away from the summit and very clearly lower. In fact, I think there may have been a couple odd points marked and loj throws down a random seeming point for the HP. I went over and tagged all these odd little sites to cover my bases in case I someday decide I care about that. 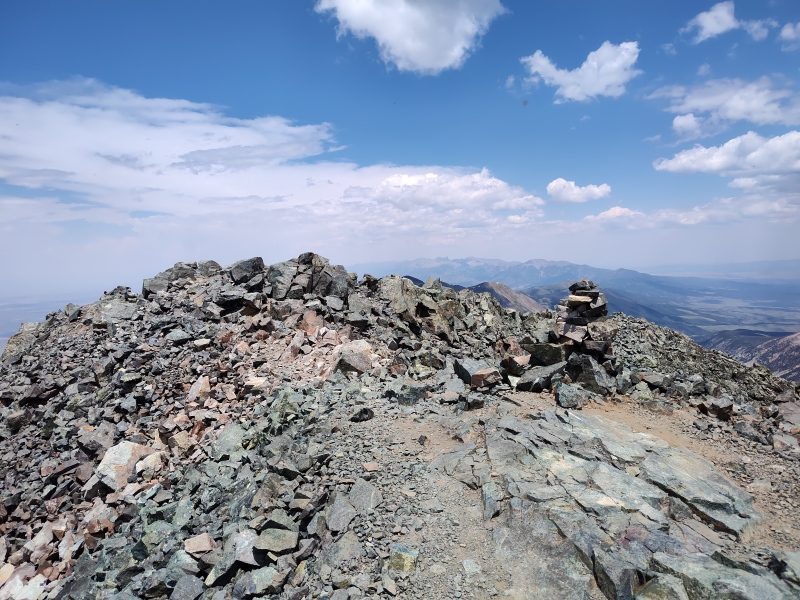
The Return Trip So after the relentless, epic exposure mixed with occasional fun scrambles, coming down from Blanca and hiking out is just plain boring. The fact that I got zero sleep on Friday night and just a few hours of overheated rest before starting the day, finally started to catch up to me here, as did my bizarre misconception that I just had a short jaunt past a couple lakes to get back to Lake Como. Even the photo below clearly shows there is a long string of little lakes to go past to re-trek below the mile long traverse. I guess I'll blame it on sleep deprivation and a desire to end the long day. But from here on out it's just a big long trudge to get back to the trailhead. I should have pulled out my earbuds and put on some music to make the time pass more pleasantly. Oh, and apart from some clouds rolling in with even a few brief sprinkles of moisture, it was otherwise oppressively hot on the return trip and back at my parking area at 9,500ft. I was so tired and so hot by then that I collapsed shirtless in the 4Runner for a bit with a battery operated fan blowing on me just long enough to take the edge off the exhaustion and then drive to Fort Garland for a hotel (just 15 minutes from the lower trailhead). That way I could get some actual sleep before making the long drive back to Fort Collins in time for the 11am church service. 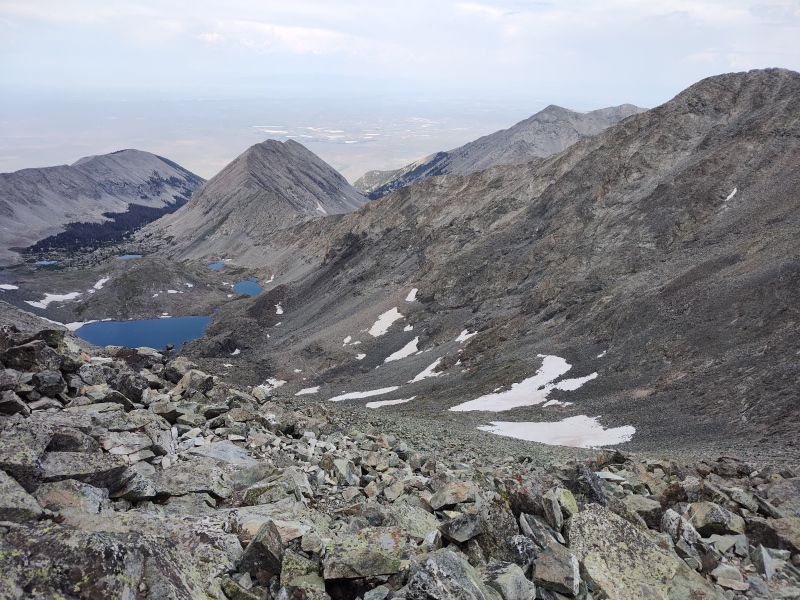
All in all, despite the long trudge out, I really enjoyed the day on the whole and was pleasantly surprised to find the effort really not as difficult as I thought it might be, despite operating on no sleep and having just come back from a week on the East Coast visiting family and laying around eating junk food at sea level. And I was extremely pleased that my times on the traverse, despite the above caveats, were half the longest average time and only 2x that fastest typical time (I forget where I read that typical times for the traverse range from 2 to 8 hours - so my 4 hour traverse time - having gone leisurely with plenty of time for photos and occasionally stopping to soak in the experience - was quite satisfactory to me). My Times 1:40am start from pull-off at 9,500ft 3:40am reach Lake Como where I met Joe and Jay and waited for them to finish getting ready. A little after 4am? Start off from Lake Como 4:30am at the turn-off for the first gully 5:21am at the top of the gully 8:16am Little Bear summit after scouting out the West Ridge Indirect Route 8:40am start the LB-B Traverse 9:26am pausing before what was supposed to be Captain Bivwacko, but wasn't 10:50am at next to the last tower before the final 3 big towers 12:04pm finally on top of Tower 2 - which took forever to get up 12:21pm Tower 3 12:40pm tagged all the potential summits and high points at/around Blanca 12:43pm start down to get away from the bugs 1:33pm after long break, start heading down from the Blanca - Ellingwood saddle (no bugs down there) 3:26pm rest for a while at Lake Como 3:47pm Jaws 3 A bit after 5pm - back at the 9,500ft parking Thumbnails for uploaded photos (click to open slideshow): ")
")
")
")
")
")
")
")
")
")
")
")
")
")
")
")
")
")
")
")
")
")
")
")
")
")
")
")
")
")
")
")
")
")
")
")
")
")
")
")
")
")
")
")
")
")
")
")
")
")
|
| Comments or Questions | ||||||||||||
|---|---|---|---|---|---|---|---|---|---|---|---|---|
|
Caution: The information contained in this report may not be accurate and should not be the only resource used in preparation for your climb. Failure to have the necessary experience, physical conditioning, supplies or equipment can result in injury or death. 14ers.com and the author(s) of this report provide no warranties, either express or implied, that the information provided is accurate or reliable. By using the information provided, you agree to indemnify and hold harmless 14ers.com and the report author(s) with respect to any claims and demands against them, including any attorney fees and expenses. Please read the 14ers.com Safety and Disclaimer pages for more information.
Please respect private property: 14ers.com supports the rights of private landowners to determine how and by whom their land will be used. In Colorado, it is your responsibility to determine if land is private and to obtain the appropriate permission before entering the property.


