| Report Type | Full |
| Peak(s) |
Little Bear Peak - 14,041 feet Blanca Peak - 14,350 feet Ellingwood Point - 14,057 feet |
| Date Posted | 09/12/2018 |
| Date Climbed | 09/08/2018 |
| Author | natebennett |
| Little Bear, Blanca and Ellingwood Traverses, Solo |
|---|
|
Little Bear Peak (West Ridge and Southwest Face) to Blanca Peak via the Little Bear-Blanca traverse, then over to Ellingwood Point via the Ellingwood-Blanca traverse, before descending Ellingwood's South Face. Ever since I first heard about the great four traverses, I've dreamed of attempting the mile-long serpentine ridge from Little Bear to Blanca. Since it is so exposed and technically difficult, however, I've been waiting for a solid climbing buddy and a perfect forecast to try for the attempt. Last summer, in a blatant display of disloyalty and unfaithfulness, my regular adventure partner completed the traverse while I was on a family trip in Canada. After several unsuccessful attempts and bribes to convince him to climb it again with me, I was presented with the opportunity to try for it all by myself this past weekend. My girlfriend, Leilani, told me that her twin sister, Lina, and father, John, were traveling down to the area, so we decided to join them. Leilani would join Lina for the Blanca-Ellingwood traverse, and I would join John for the Little Bear attempt, hopefully continuing on by myself to complete the traverse over to Blanca. The weather forecast looked ideal, with clear sunny skies all day, and I had done tons of research on the traverse already with multiple trip reports downloaded to my phone just in case I got confused on the route (including a particularly encouraging report done by another solo climber). Since the weather was looking so good, I was also betting that there would be others trying to complete the traverse that I could join up with on the summit of Little Bear. John picked us up from Boulder in his 4Runner around 3:30pm Friday afternoon, and we set off towards the magnificent Sangre de Cristo range. We carbed up at the Hunger Shack near Poncha Springs, and rolled up to the beginning of the Lake Como road around 8:30pm. The 4Runner made it probably two miles before deciding it was time to stop, so we strapped on our backpacks and set out under a beautiful Milky Way-adorned sky a little after 9 pm. Weather on the way into the basin was ideal! Temperatures were perfect for hiking, and we got great views of the plains lit up below us. We took our time on the way in, finally arriving at Lake Como and pitching our tents. John and I froze our fingers off filtering water from a stream right next to our campsite, but Lina and Leilani were able to go right to sleep since they were absurdly prepared and had carried up enough water for the next day. At last, after creating an excellent bear hang, John and I retreated to our tent and set our alarms for 3:45am, just a few sweet hours away. It was not a good night of sleep for me. Between still digesting my hamburger from dinner and being excited (nervous?) for the next day's adventures, I think I got around one hour of sleep. John had a similar experience, so when our alarms went off, we both felt rather lifeless. Nevertheless, we crawled out of our sleeping bags, woke the girls, prepped our daypacks, and set out on the road. We quickly found the obvious cairn marking the turn-off for the Little Bear route, so we bid farewell to the girls and headed our separate ways. The initial climb up the talus hill was well-marked and easy to navigate by headlamp, putting us right at the base of the gully up to Little Bear's West Ridge. As others have discovered, heading up the right side of the gully yields much more solid rock and easier progress than slogging up the loose dirt and rock in the middle. We were the first ones heading up Little Bear that morning, which meant that my plan to be the first ones to the hourglass was going well. By the time we got to the top of the gully, we noticed a few other headlamps meandering up towards us. Overall, the gully wasn't too bad and we made it to the top of the ridge earlier than expected! The rock gets MUCH better once you are out of the gully, and our progress really started speeding up. We climbed up the ridge to a cairn, then dropped below the ridge crest to start traversing across the slope. There were a few times that we lost the cairns, but we were generally able to stay on course and eventually they would reappear. I wasn't too concerned about it, as the route here is fairly straightforward. Staying off of the ridge proper definitely saves you from gaining and then losing unnecessary elevation.
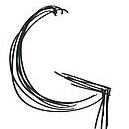
The purple line is our approximate route across the slope of the West Ridge. There's a notch somewhere that can't be seen clearly in this picture, and for me it marked the end of merely traversing and starting to gain some significant elevation up towards the hourglass.
By the time we reached the base of the hourglass, dawn had started spilling light onto the plains and we were able to turn our headlamps off. There was a well-loved black fixed rope dangling down the gulley, which I decided to test by giving a good tug. Much to my dismay, this tug immediately sent a grapefruit-sized rock hurtling down the slope towards my face. I expertly dodged it thanks to my catlike reflexes, but it was a close call. This would turn out to be the only rockfall I would deal with all day, so of course it was brought about by my own stupidity. I'd advise anyone testing the ropes in a similar fashion to just be aware that moving the ropes around can definitely dislodge rocks that have fallen down into the hourglass already! John starting up the solid class 3 rock that marks the beginning of the hourglass.
There was a fair bit of water coming down the hourglass. At the beginning of the gully, this wasn't a problem because there was plenty of room to climb around it, but in the narrowest part of the gully it turned out that the easiest way up was over a section of slick wet rock. Not too bad, but definitely the hardest thing I've done on a standard route, much more technically challenging than the knife edge on Capitol, which is more of a mental game with exposure on each side but plentiful good holds. At this point, John decided to head back to camp, not being overly excited to downclimb the section I had just described. If I hadn't already been planning to take the traverse over to Blanca, I wouldn't be too stoked about the downclimb of the hourglass myself. Call me crazy, but my moves up the hourglass seemed to me to be the hardest from a technical standpoint I would do the entire day. The rock was solid, but holds at the crux were smaller and with more limited options than anything I would do on the traverse over to Blanca. The water probably had a part to play as well; I could see it being much less challenging with a smaller trickle and more dry rock.
Anyways, I parted ways with John and clambered up the anchor to take a good look at it. Below you can see a picture of its status on 9/8/18. It looked reasonably solid, with newish slings and hardware. That being said, the integrity of the ropes themselves is another issue altogether. Both ropes had a healthy number of core shots that seemed to be sufficiently tied off, but I didn't spend a lot of time checking it out.
After passing the anchor, I started making my way up to the summit. I climbed up immediately to the right of the large block directly above the anchor, which was fun, solid and definitely class 4, but also a little wet. Above the block, I moved left and found the most solid rock I could find on my way up. Due to the shape of the gully and the way that pretty much everything that falls is funneled down into the hourglass, I can definitely see why rockfall is such a big issue in this area, and I'm glad that I was the first one up there that day. That being said, from just moving carefully and being super mindful of where I was placing my feet, I was able to find solid enough rock the whole way that I didn't knock any rocks down. Maybe halfway from the hourglass to the summit, I think I found the same "escalator" that glassbead describes in his trip report. Nice and solid.
At last, I saw sunlight coming over the top of the ridge and topped out on Little Bear a little after 7am. There was nobody else in sight, so I made myself comfortable, put some much needed food and water into my body, and warmed up my toes in the warm sun. First time I've ever had a 14er summit completely to myself! This was surprising to me, especially since the weather still looked absolutely perfect.
After seeing pictures of this ridge for years, it was strange to finally see it right in front of me, twisting and undulating across the valley. I was definitely a little nervous about doing it solo, especially since I was the only one up here so far, but weather looked amazing and I felt pretty confident as I started towards the downclimb off of Little Bear. Quick apology for all of the photos of the traverse: Sorry that there are no other humans in these pictures for scale. I wish that someone else could have been involved in pictures, both to give a better glimpse of what the climbing actually looks like to a human, and to take pictures of me looking really cool. Instead, the best I could manage were a bunch of selfies, which I have mostly spared you dear readers from. Anyways... Just before the downclimb... the exposure is starting to ramp up!
I remembered from other trip reports that it was easier to drop slightly to the left of the ridge crest on this downclimb, so I looked to the left side once at the top of the steep section, and sure enough, the terrain was much less smooth and slabby and more nuanced, with ample holds. I carefully lowered myself down, testing each foothold and handhold before trusting them (a theme for the day!). Looking back up at the downclimb (picture below), it actually looked worse from below than the climb felt.
Below is a quick video that might show more perspective on the downclimb from Little Bear: I'm going to be honest. Despite all of the trip reports I had read in preparation to this trip, I got very confused by how many different towers were on the first part of the traverse, and am not sure where exactly I hit the infamous Captain Bivwacko tower that I expected to be the crux. Basically, whenever I hit a tower that looked unreasonable to climb straight over, I was able to find an easier way around to the left of the tower, generally on exposed ledges with plenty of things to grab onto. Below is the view looking towards Ellingwood and Blanca as I went around the first tower on one such ledge.
And looking back at where I came around the tower:
A little farther on, this is one of the smaller towers that I was able to just go up and over:
And another one! So many towers! They all started to blur together after a little while for me, but they are all a ton of fun to navigate.
This tower looked especially cool. Farther down you can see the "highway," a section that has more moderate exposure for a few hundred feet.
Looking back at the traverse around a tower from later on. For some reason, possibly the way that I decided to downclimb it, this section seemed like one of the sketchier ones to me. To avoid the steep drop on the left side (right side in this picture, looking backwards at the tower in Little Bear's direction), I decided to climb on the smoother but less exposed knife edge.
Another catwalk-y section, shortly before what I believe to be Bivwacko Tower and the highway.
Okay, I forgot to take a picture of the front of this tower, but I think this is looking backwards at Captain Bivwacko tower. Many have described this as the crux of the traverse. Perhaps because I had already seen some beta from a youtube video, I slid around it quite smoothly.
At a few (2?) points during the traverse, including the one pictured below, I would be following the ridge and come to a drop-off with no sign of a reasonable downclimb. It was simple to backtrack a few feet and find access to a lower ledge that would continue me on the route.
This next picture is part of the "highway", a section of the traverse where the exposure relents for several hundred feet. A nice mental break!
Below, you can see a gully and a thin ledge that goes around to less steep terrain. At the top of the gully, not pictured, is the easily identifiable white-colored section of rock that marks the low point of the Little Bear-Blanca saddle. You can see a cairn on the right side of the picture, just above the purple line on the ridge. The next picture is taken from the same place but looks backwards, showing a ramp that leads down to the white rock and the saddle.
Ramp going down to the saddle:
After going past the saddle and around the ledges, the terrain follows another section of ledges towards Blanca (first photo) before turning into a talus field that is much less exposed than the rest of the traverse (second photo). After skirting the first of Blanca's three towers, take the talus field straight to the bottom of the second tower and pick your line up it (second photo).
Follow the talus field around the first tower to the base of the second tower and start climbing.
Looking up at the second tower, I decided to go up this cool looking class 4ish gully because it looked sweet to climb up and more solid than the rest of the slope. You can probably pick whatever line you want to climb here and still get to the same place.
Another shot of the gully, looking up.
After climbing up the gully and some more pretty solid class 3/4 stuff to a high point, you can see the catwalk ahead and the top of the second tower (tower 3 and Blanca's summit with some folks on the top visible in the background). This catwalk narrows to about a foot wide, with vertical cliffs on both sides. Mostly solid, but as always test everything and take your time. You do not want a rock to fail here.
Video of part of the catwalk: After what seemed like forever, I reached the top of the second tower! Climbing up to this tower from the talus field below is a nontrivial amount of elevation gain. The picture below looks backwards at the first tower, and the catwalk portion of the ridge is just hidden.
Looking back at the second tower, you drop a bit to clamber onto the base of the third tower and then start climbing towards the top of that one and Blanca's summit. Notice the intense cliffs on the NW side of the second tower! After dropping off the top of the second tower, I felt the route was mostly class 3. The closer you get to the summit, the more the exposure starts to mellow.
At long last, I had made it to Blanca's summit. I ate a ton of food, drank some cold water and relaxed. By crazy chance, a friend of mine who I had climbed Capitol Peak with this summer summited Blanca from the standard route around the same time as I got there! She was the first soul I had seen since parting ways with John on the hourglass. Shortly after that, Leilani and Lina made it to the top, coming over from Ellingwood on the traverse (see picture. Yes, I know I look like a tomato. Fashion is not my strong suit). Good timing! The traverse took me a little over 2 hours total from Little Bear to Blanca.
Once I had taken a healthy break, I contemplated the traverse over to Ellingwood. It looked much farther away than it actually ended up being. I was pretty exhausted, but felt I had a little more in me. Plus, I had to impress my girlfriend. As my legs surely shed some tears in protest, I practically jogged down Blanca's ridge to reach the Blanca-Ellingwood saddle and followed cairns across the traverse. It was pretty fun, despite the fact that my body and brain were beginning to turn into mush. I took 0 photos on the Ellingwood-Blanca traverse, and only mustered the energy to take one photo on Ellingwood's summit as proof I was there, the masterpiece you see below this paragraph.
At last, it was time to return to camp. Knowing that my potential to do something dumb was higher with my exhaustion levels, I moved quickly but kicked my brain into gear for the descent back into the basin. I arrived at Lake Como around 1:45pm and quickly flopped onto my zlite to give my feet a break while I hung out with Lina, Leilani and John. They were troopers and had packed up camp already, so all I had to do was nurse my legs back to health for an hour while I productively dreaded the hike back to the car and got stuff ready for departure. Finally, I said farewell to the beautiful Lake Como basin and headed down the road. Made it down to our car in about an hour fifteen, practiced gratitude for air conditioning, and after a bumpy few miles back to the plains, we were on our way back to Boulder.
A few final thoughts: obviously, the exposure on this thing is pretty dramatic. Going solo on this traverse, I think I was even more careful than if I had been with a group. The thought came into my mind on the summit of Little Bear that if anything at all happened to me, I would be totally alone with no cell service and little hope of rescue, especially since I hadn't even seen any other climbers up there. I would be completely in control of my success, with absolutely no backup plan or safety net. This level of climbing demands complete focus and confidence. There was never a time where I felt anxious or bothered by the exposure, but it's because I had 100% trust in myself and the rock, moving carefully and testing literally every hold before putting weight onto it. If you are relatively confident with high exposure, go slow, test everything, and avoid any chance of bad weather, you'll have a blast on this thing. It was a truly great weekend. Thumbnails for uploaded photos (click to open slideshow): ")
")
")
")
")
")
")
")
")
")
")
")
")
")
")
")
")
")
")
")
")
")
")
")
")
")
")
")
")
")
")
")
")
")
|
| Comments or Questions | ||||||||||||||||||||||||
|---|---|---|---|---|---|---|---|---|---|---|---|---|---|---|---|---|---|---|---|---|---|---|---|---|
|
Caution: The information contained in this report may not be accurate and should not be the only resource used in preparation for your climb. Failure to have the necessary experience, physical conditioning, supplies or equipment can result in injury or death. 14ers.com and the author(s) of this report provide no warranties, either express or implied, that the information provided is accurate or reliable. By using the information provided, you agree to indemnify and hold harmless 14ers.com and the report author(s) with respect to any claims and demands against them, including any attorney fees and expenses. Please read the 14ers.com Safety and Disclaimer pages for more information.
Please respect private property: 14ers.com supports the rights of private landowners to determine how and by whom their land will be used. In Colorado, it is your responsibility to determine if land is private and to obtain the appropriate permission before entering the property.