First, climb to the summit of Little Bear Peak. Most people use the standard
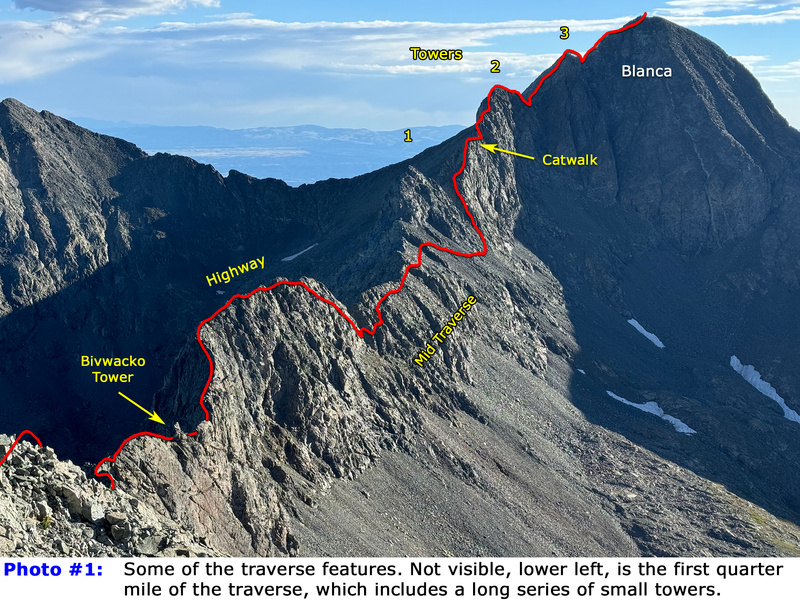
West Ridge and Hourglass Route and others climb portions of Little Bear's upper west ridge to avoid the Hourglass. From Little Bear's summit, Blanca is over 1 mile to the northeast and you can see portions of the ridge connecting the two peaks (
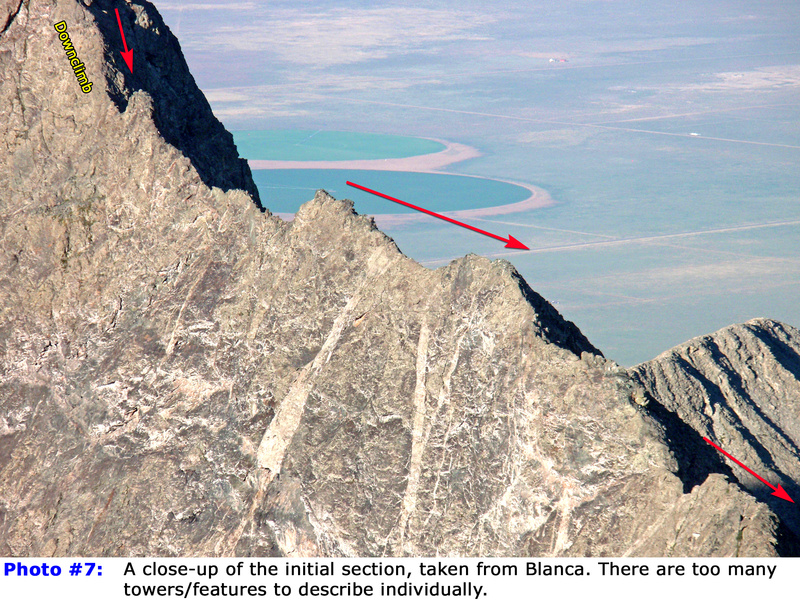
1). However, nearly 1/4 mile of initial difficulties cannot be seen from this vantage. For most climbers, the traverse takes at least 3 hours but it can take far longer if you are moving slowly. So, only proceed if you're up to it and the weather forecast is optimal.
Here's a breakdown of the route:
- Initial Downclimb: Steep.
- Small Towers, extreme exposure: This first 1/4 mile is time consuming.
- Captain Bivwacko Tower: Bypass this small tower on the north side.
- The Highway: A break from the ups and downs.
- Mid Traverse: Halfway across. Traverse the right side of the ridge, across gullies and rock fields.
- Three Large Towers: Bypass the 1st on the right, climb the 2nd (which includes a very exposed section called the "Catwalk") and 3rd.
- Final Pitch: It's a breeze.
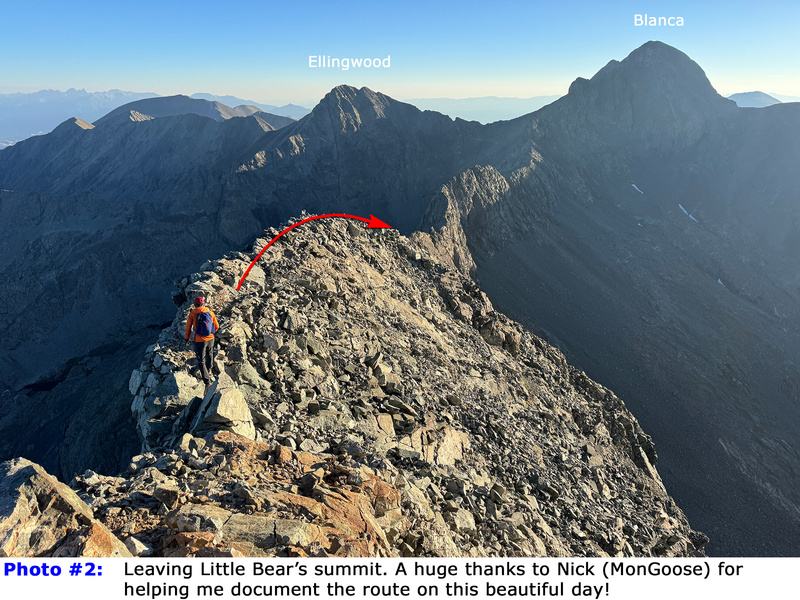
Drop north off Little Bear's summit and follow the obvious ridge. It starts out nice and easy (
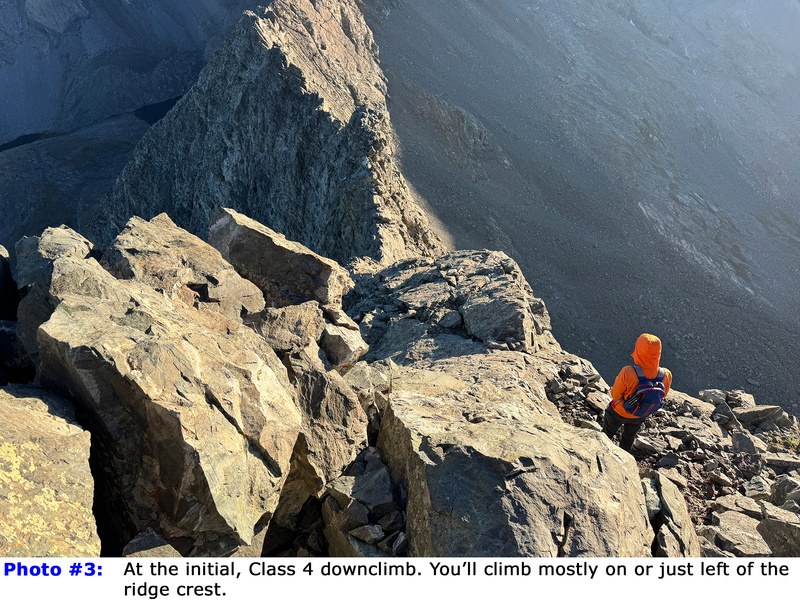
2) but you'll soon reach the steep, Class 4 downclimb section (
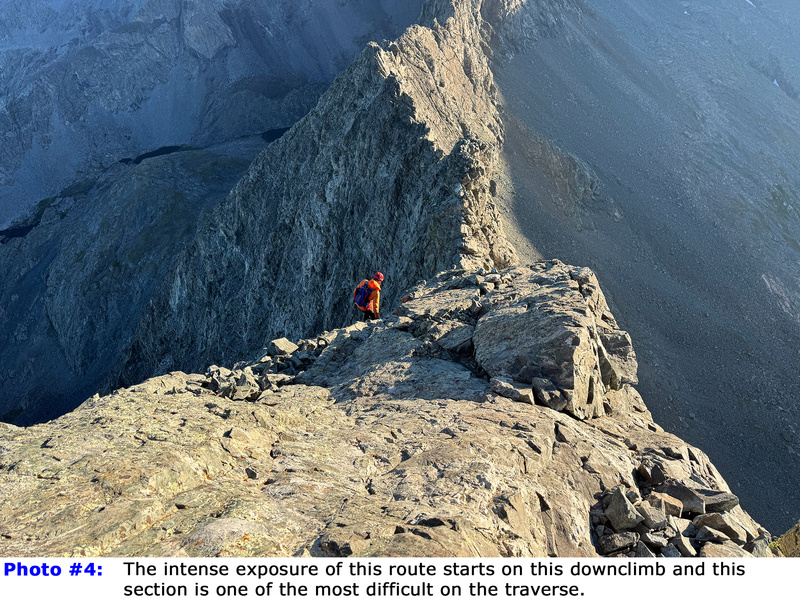
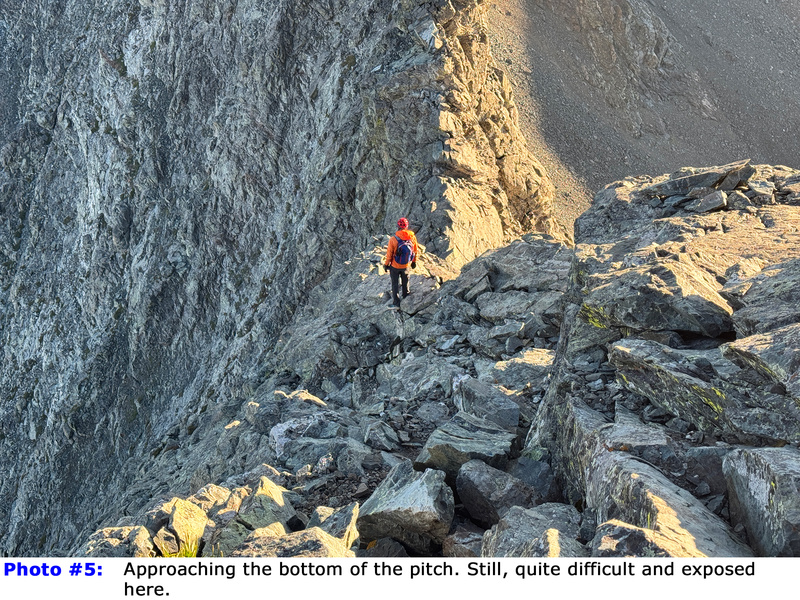
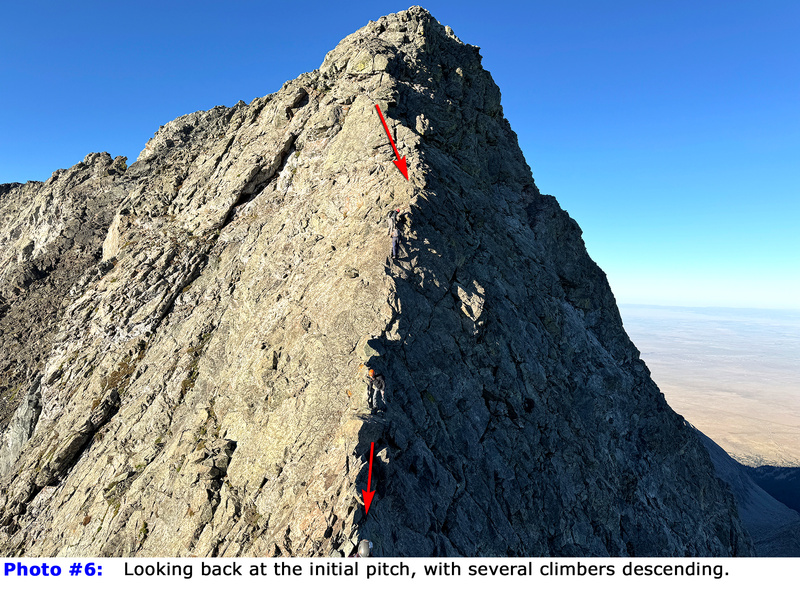
3). Exposure is immediate and significant; even early in this route, the ridge drops sharply on both sides. Staying on or near the ridge crest, carefully work your way down toward an obvious saddle (
4,
5). Near the base of the pitch, you'll need to make moves over strong exposure on your left. When you reach the bottom, take a look back at this striking pitch (
6). If it scared the heck out of you and you don't think you can handle anything worse or more exposed, abort the traverse, climb back to the summit and descend via an easier route.
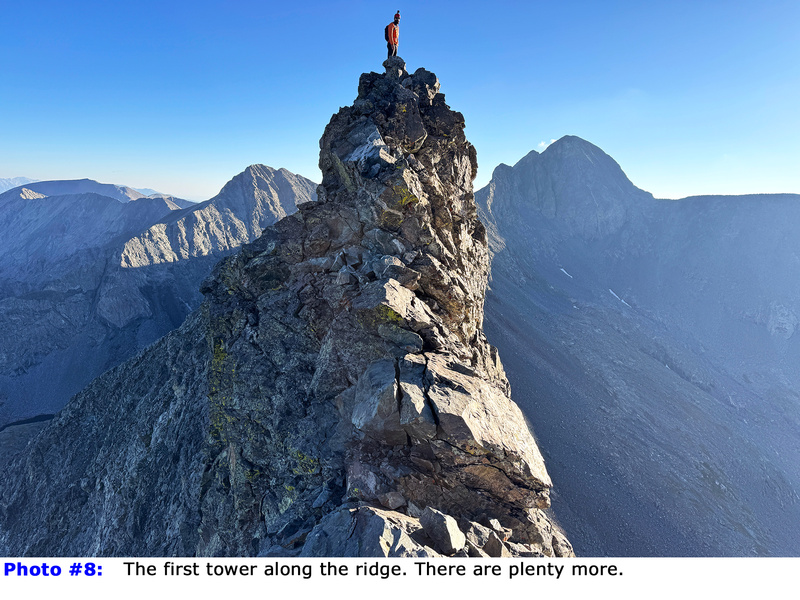
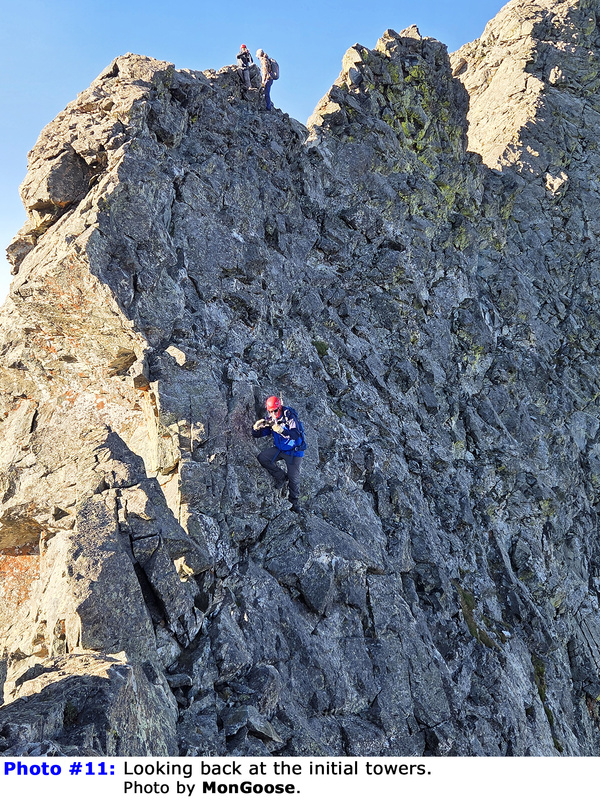
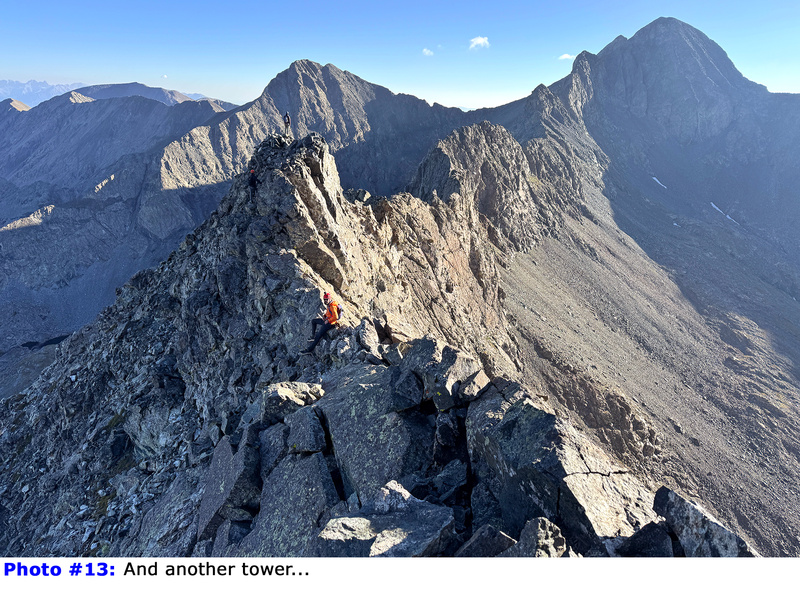
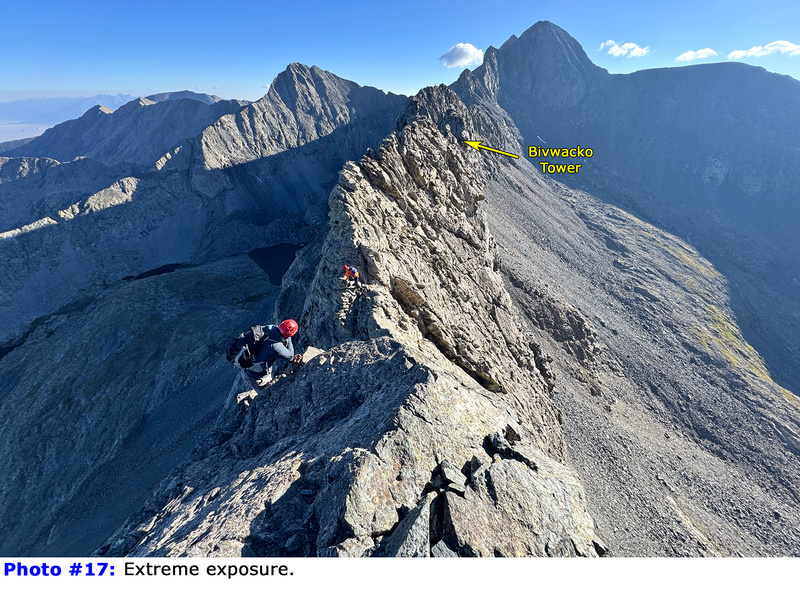
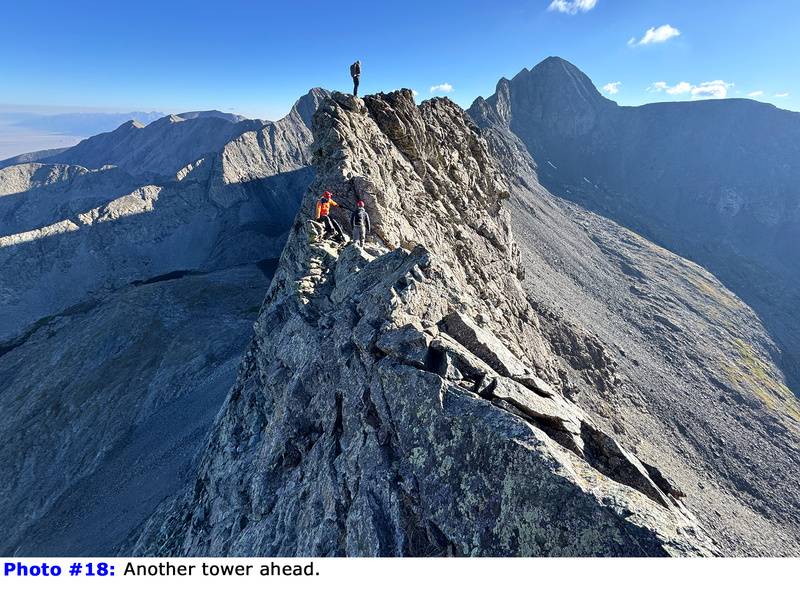
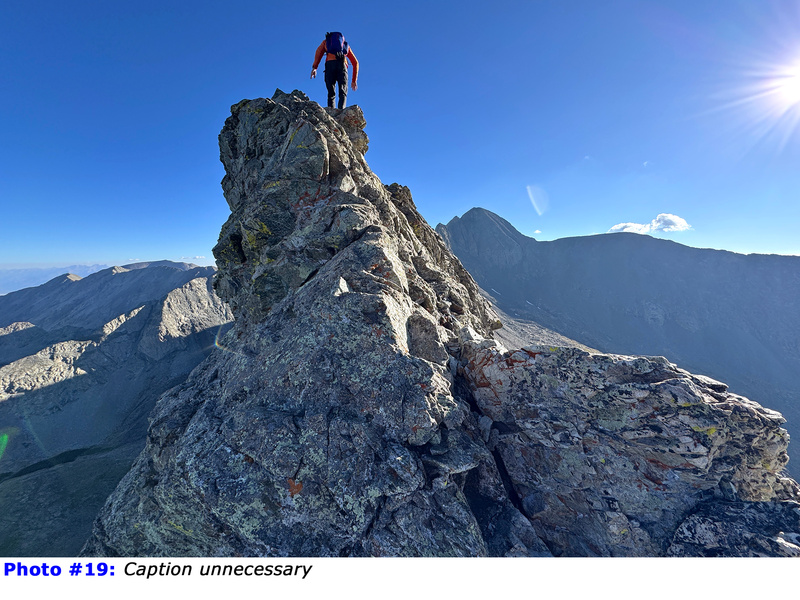
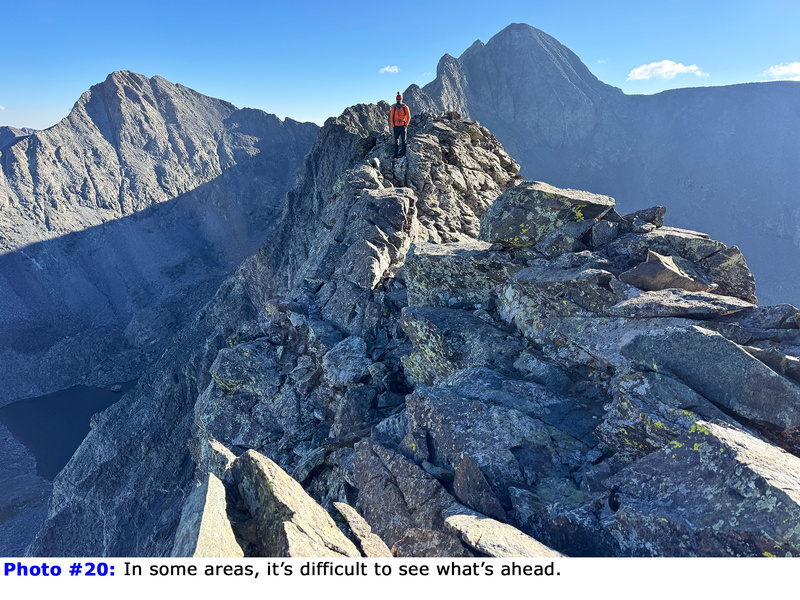
Next, the ridge progresses over a long series of small towers (
7). The first is quite dramatic and one of the larger ones in this section (
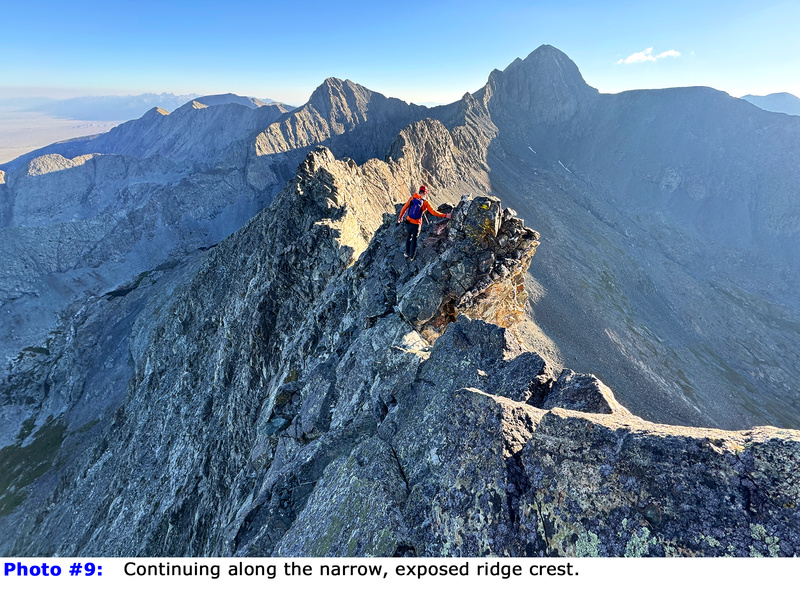
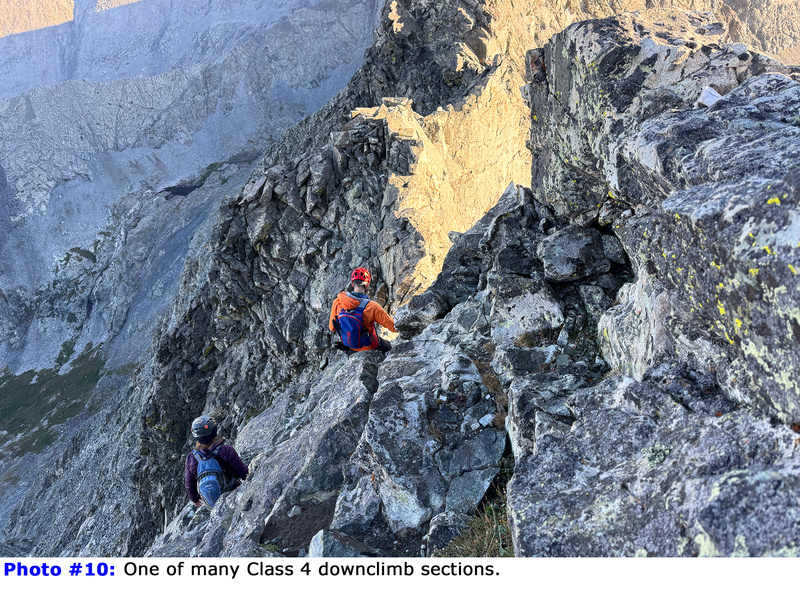
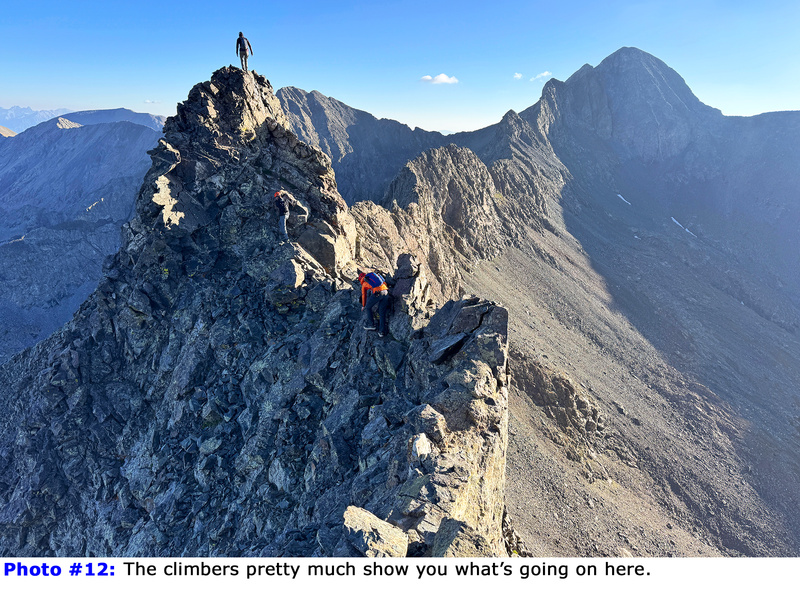
8). Continue scrambling on or very near the ridge crest, expecting frequent downclimbs, narrow sections, and little break from the exposure (
9,
10,
11,
12,
13). Through this first 1/4 mile of the ridge, you don't drop far from the ridge to get through difficulties, but there is one section where you'll find a cairn 30 feet down on the left which provides a bypass of some ridge difficulties (
14,
15). This short section provides a short mental break but once you get around this tower, the difficulty spikes again with another exposed, Class 4 downclimb (
16,
17). Back on the ridge crest, continue to another tower (
18,
19) and through another section of exposed, jumbled ridge (
20,
21).
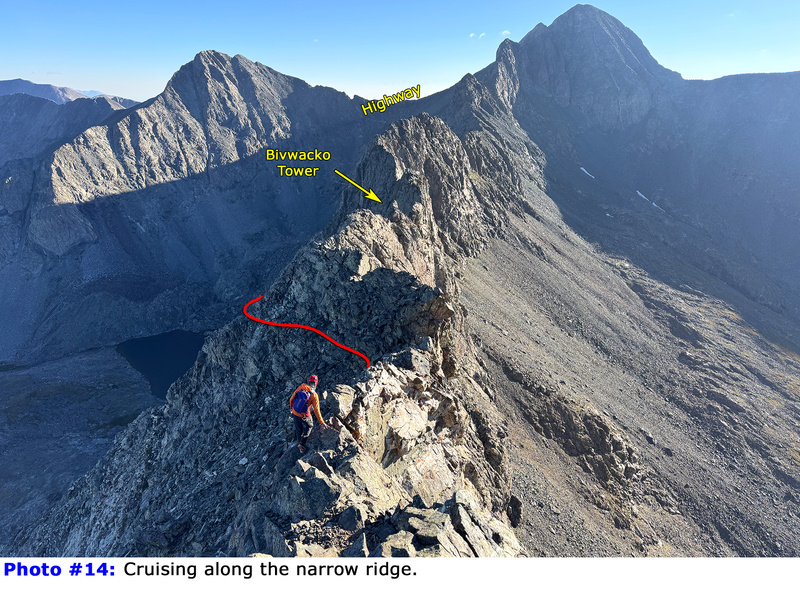
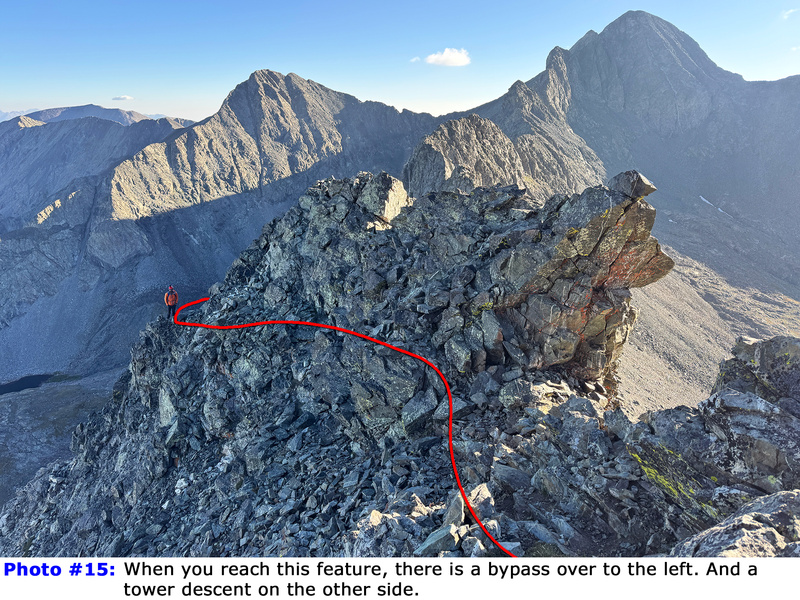
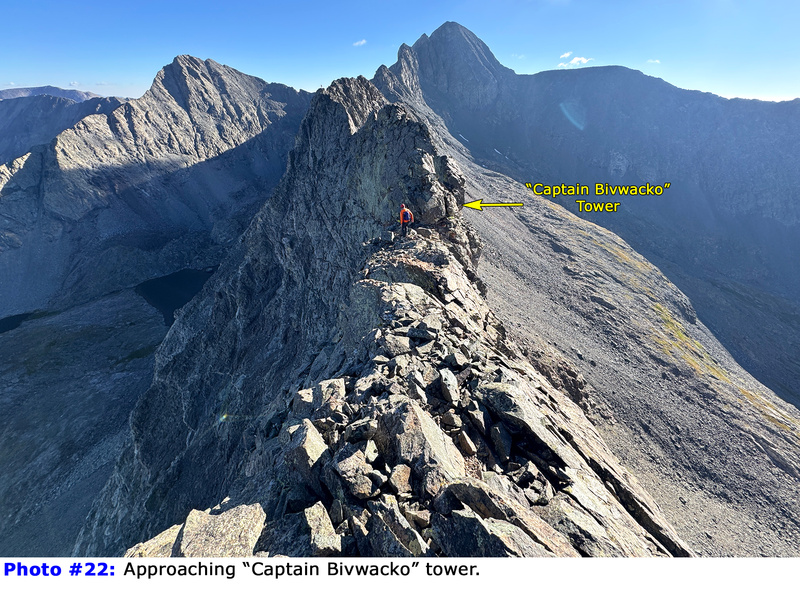
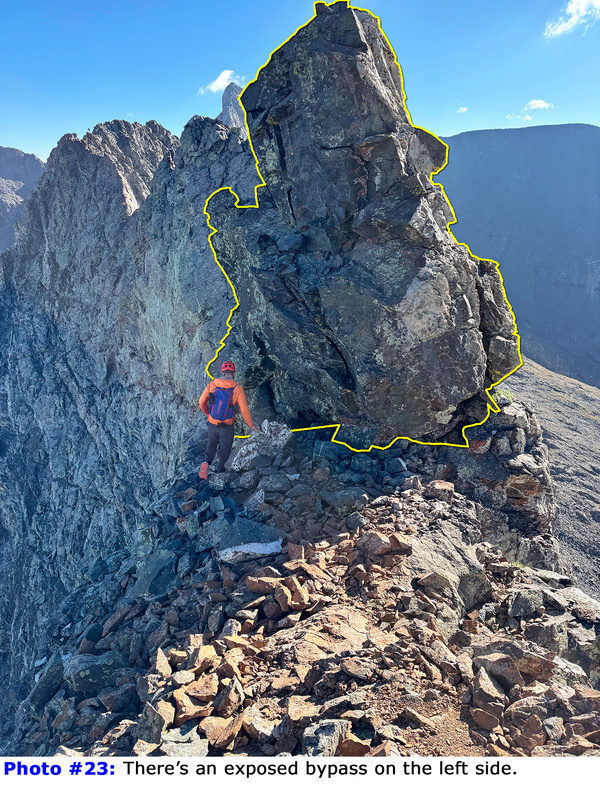
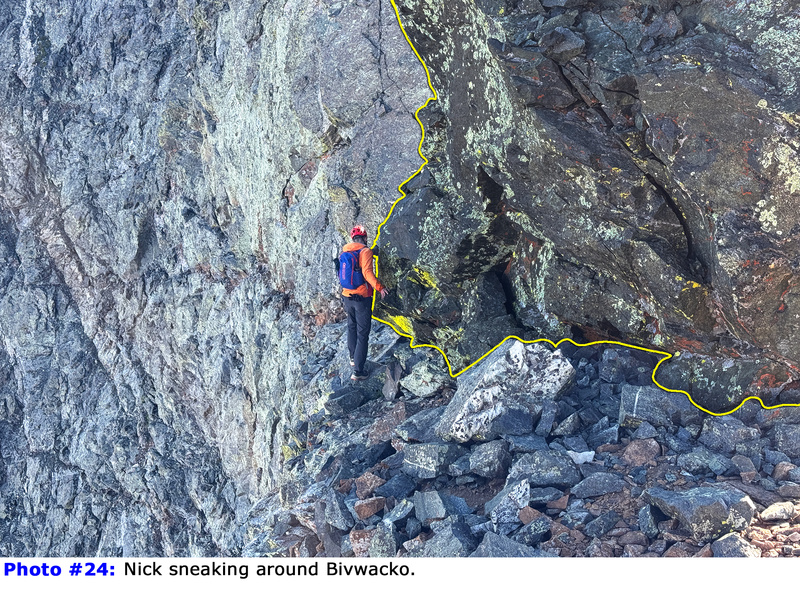
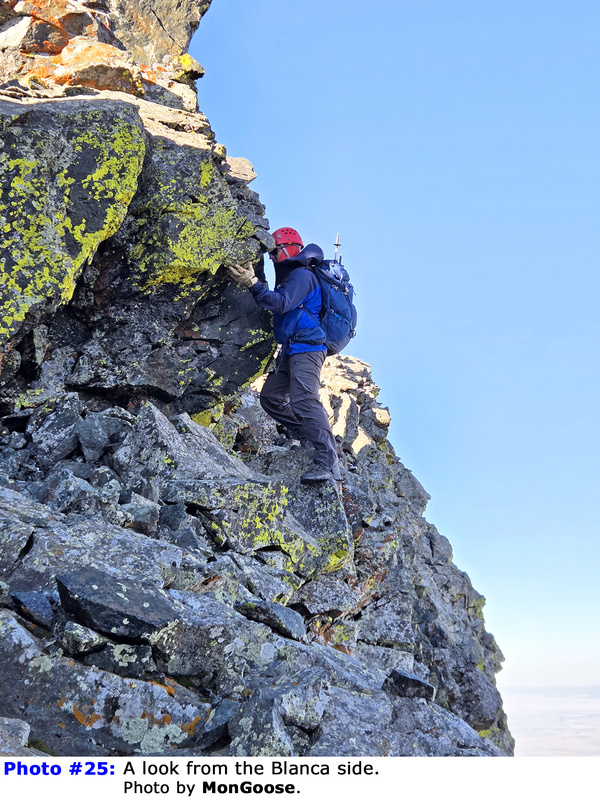
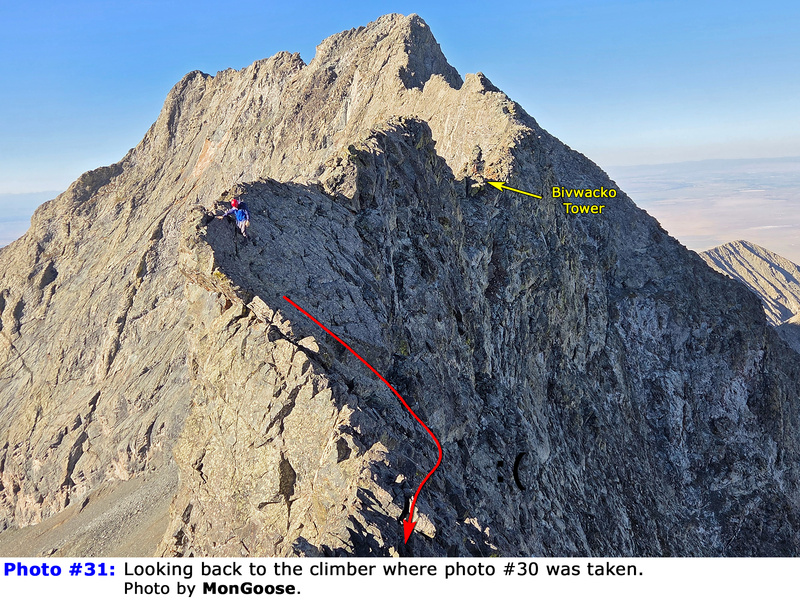
After what may seem like endless, stressful climbing, you finally reach the Captain Bivwacko Tower
(
22). While not particularly large, this tower obstructs the ridge, and climbing directly over it isn't a great option. Luckily, there's a fairly "easy" bypass on the left (north) side. Approach Bivwacko and carefully navigate the bypass (
23,
24). There's just enough room to sneak around but don't be fooled, you're making these moves above some big exposure (
25). Many consider this bypass less daunting than earlier sections. You are now just over a quarter of the way through the traverse!
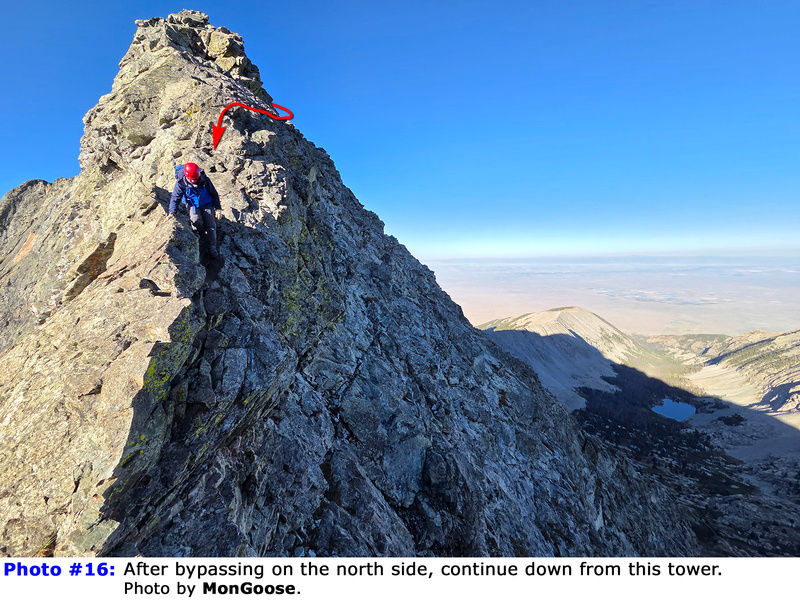
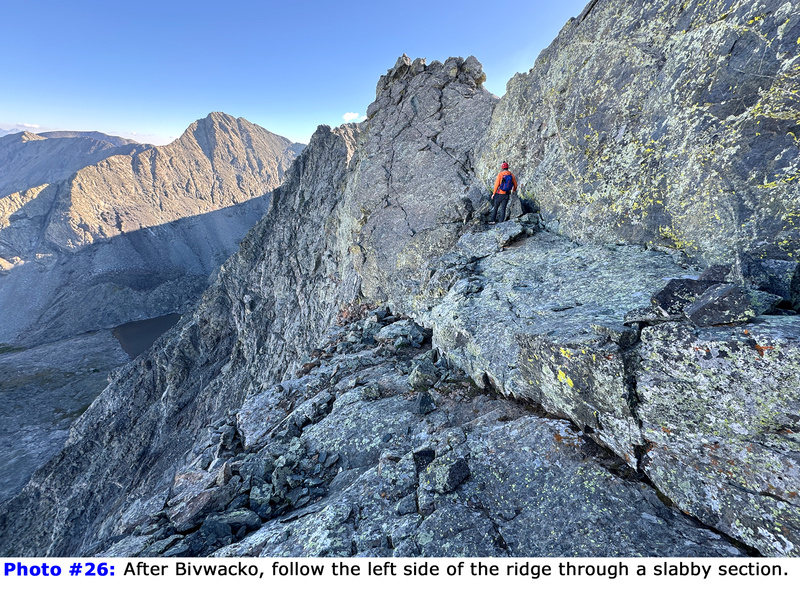
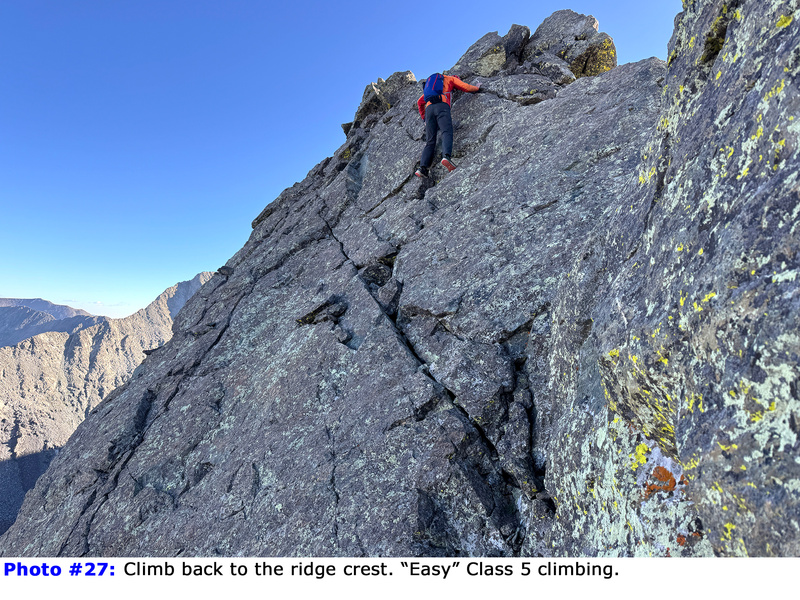
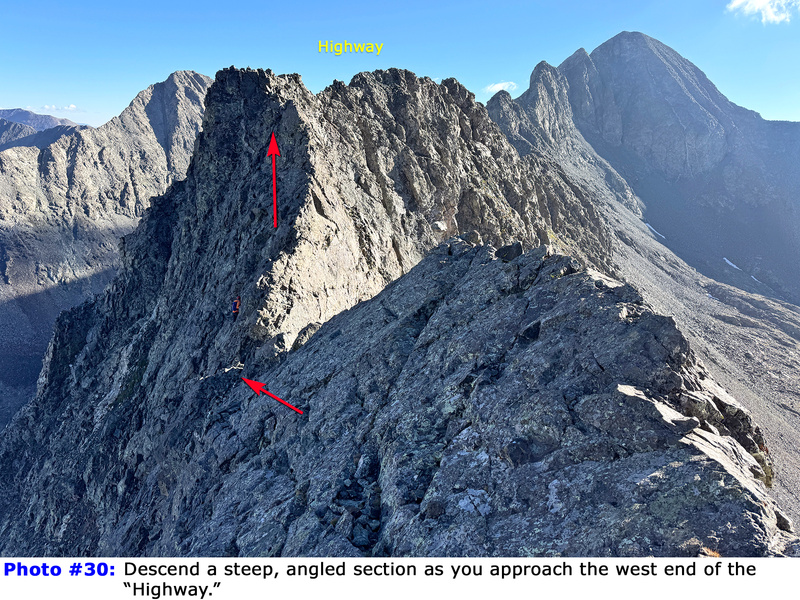
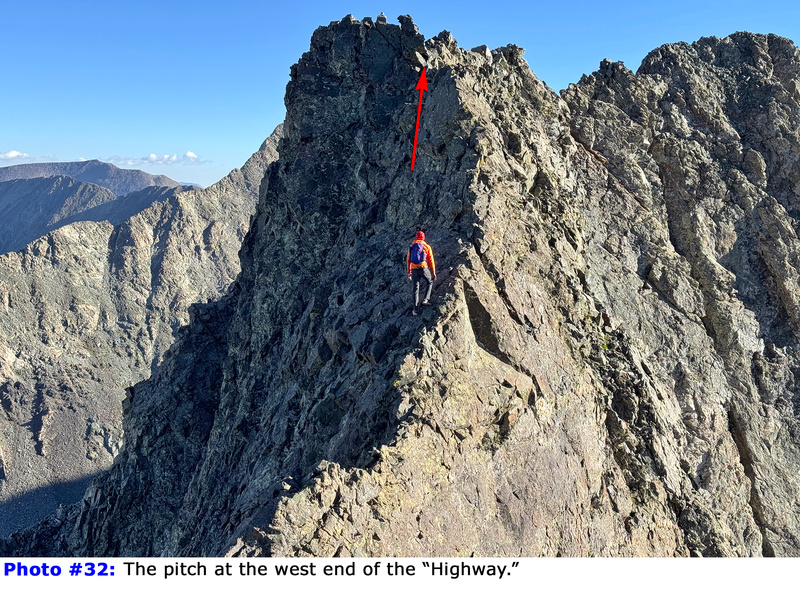
Directly after Bivwacko, continue over slabs and regain the ridge by climbing a steep, angled pitch (
26,
27). Navigate more difficulties (
28,
29) to reach another steep, angled pitch (
30). Downclimb it (
31) and climb another pitch before the "Highway" (
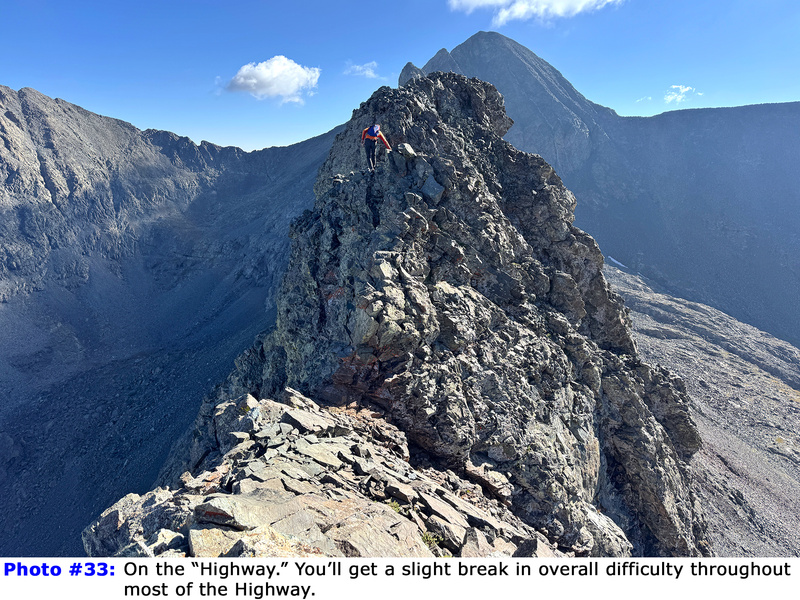
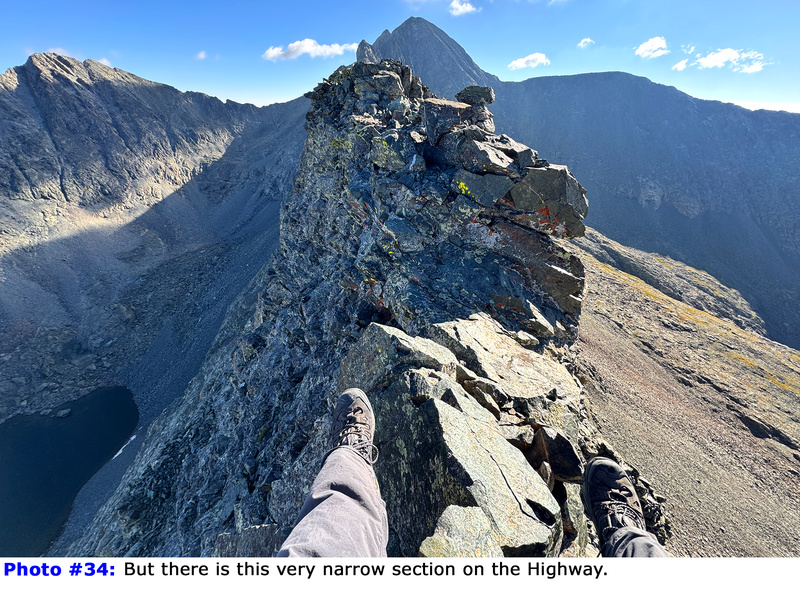
32). This portion provides a slight respite from constant climbing (
33). However, there is a narrow, exposed section on the Highway that requires careful maneuvers (
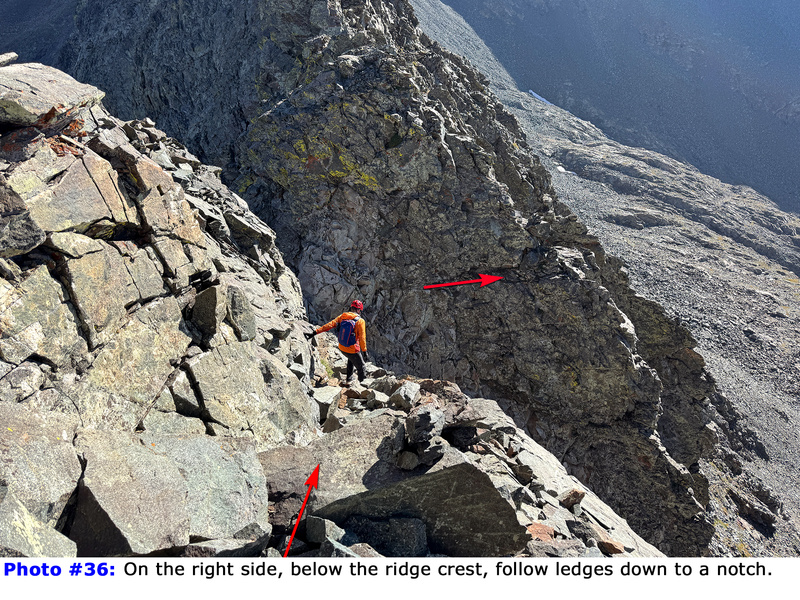
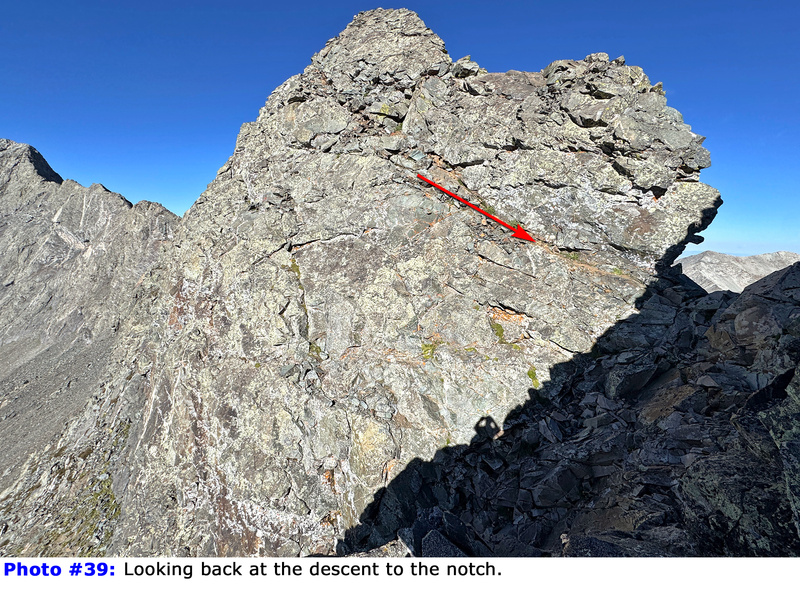
34). At Highway's east end, descend along ledges on the south side of the ridge to reach a notch (
35,
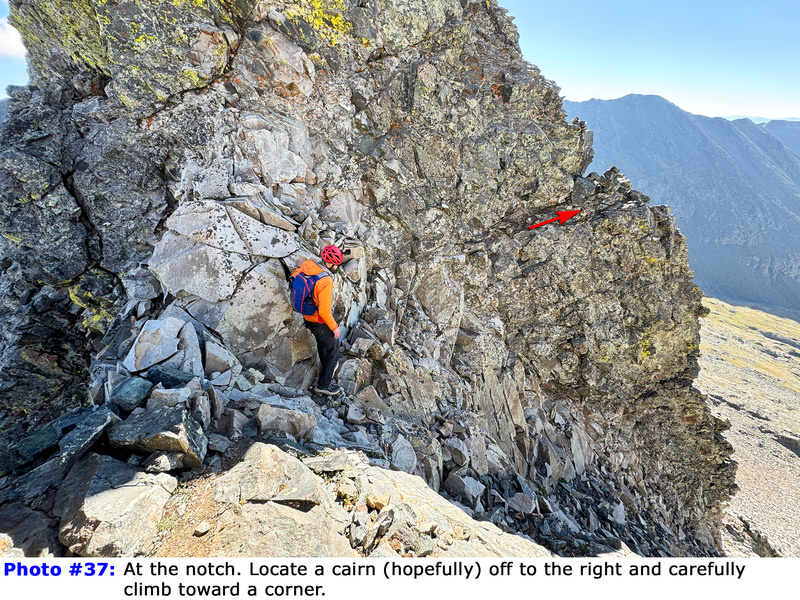
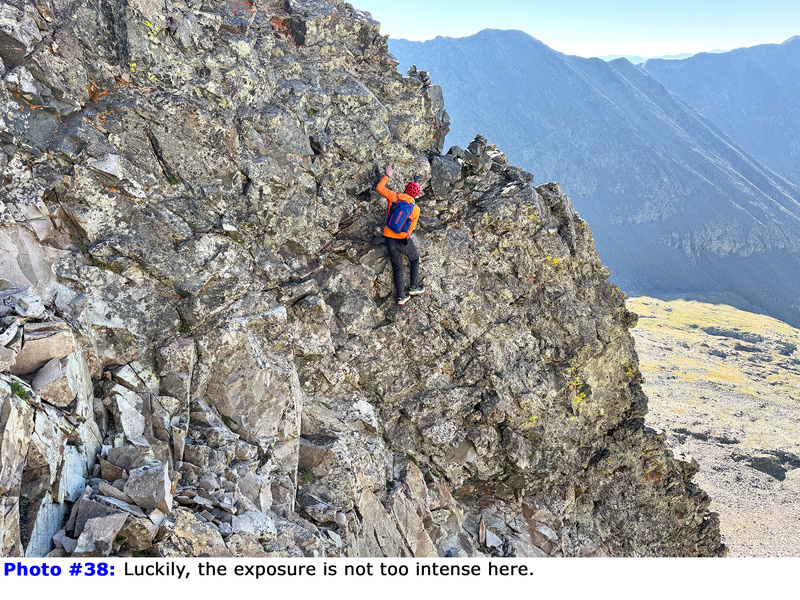
36). To the right, you should see a cairn perched on an exposed corner. Yes, it goes. Scramble onto a wall and work your way to the corner (
37,
38,
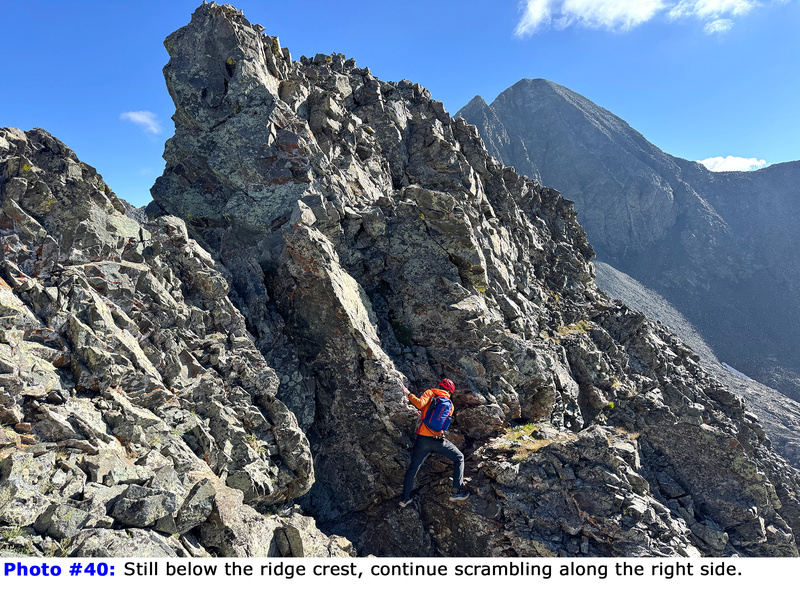
39). Rounding the corner, proceed along the south side, below the ridge crest. Scramble over gullies and along ledges (
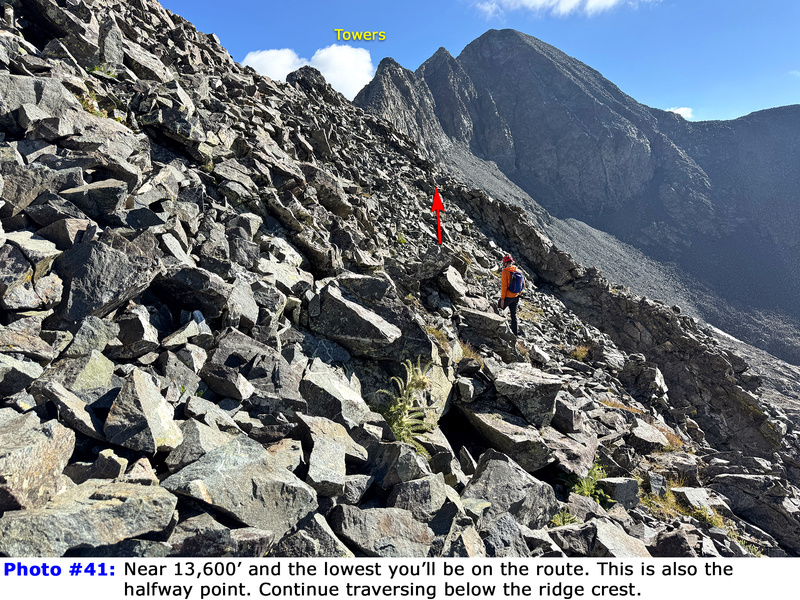
40) to reach rock fields at the mid point, and lowest elevation point, of the traverse (
41).
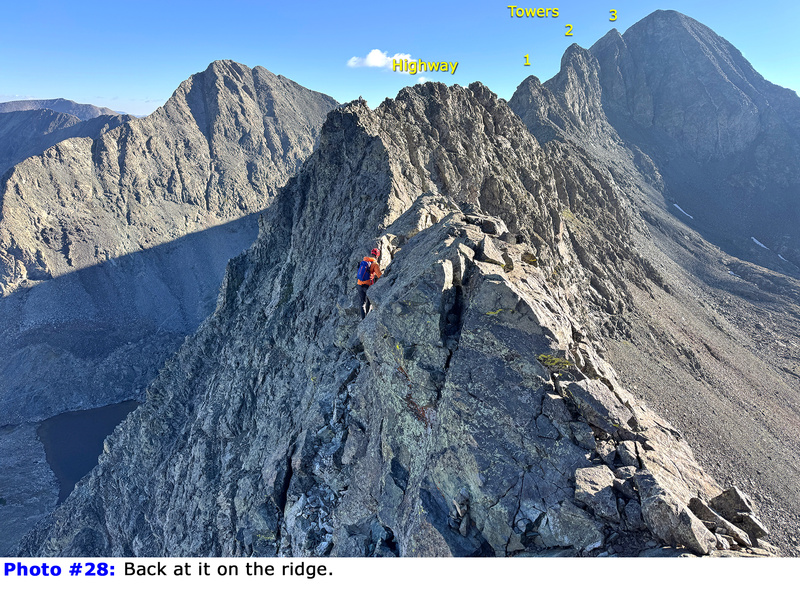
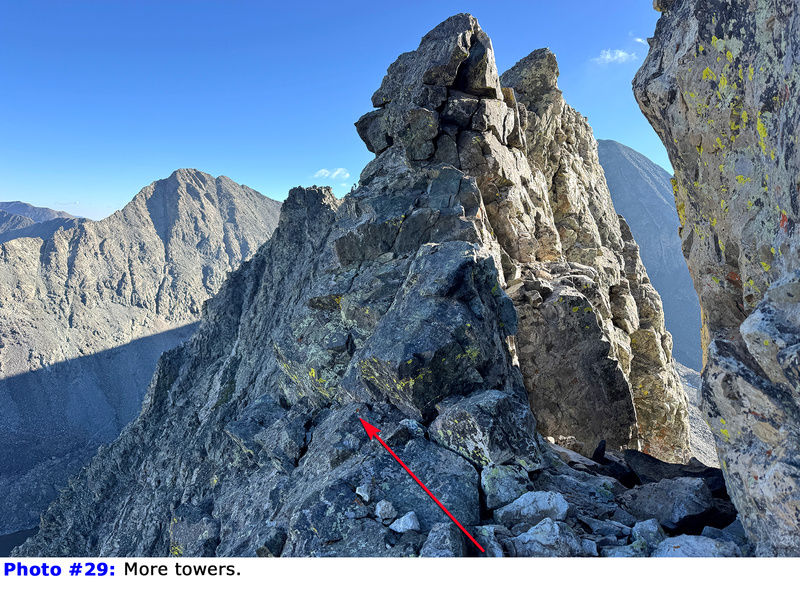
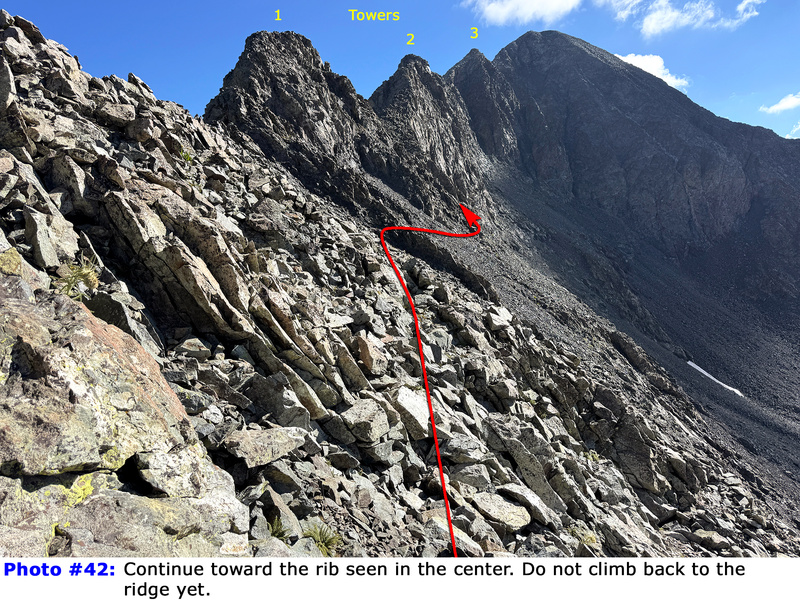
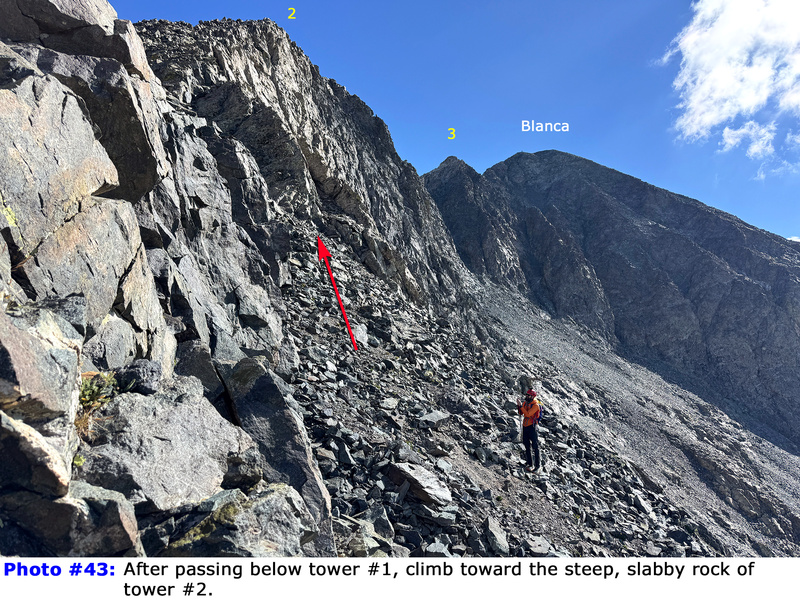
Now comes the final challenge: the three large towers (
42). Traverse the rock fields and cross a rib of rock just before tower #1. Maintain your elevation as you pass below tower #1, then climb to the slabby base of tower #2
(
43). You have a couple of options here and sticking to the solid rock is the way to go (
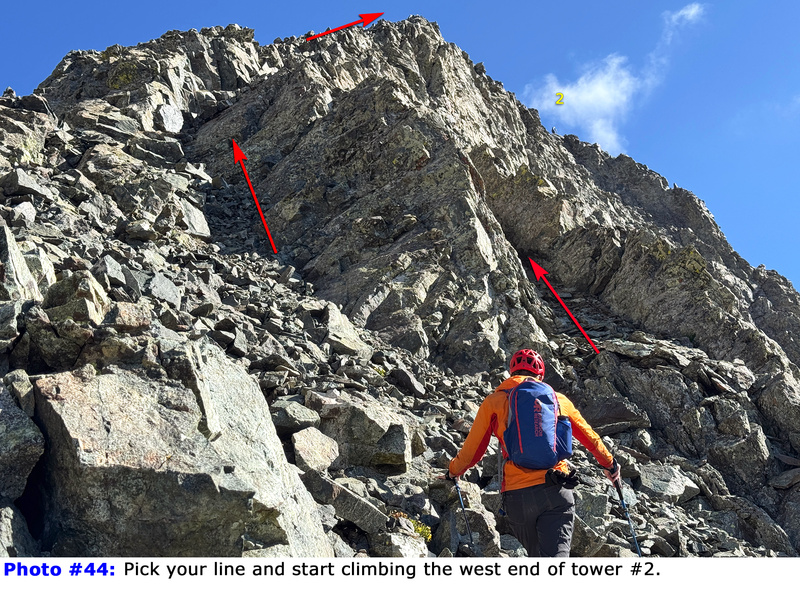
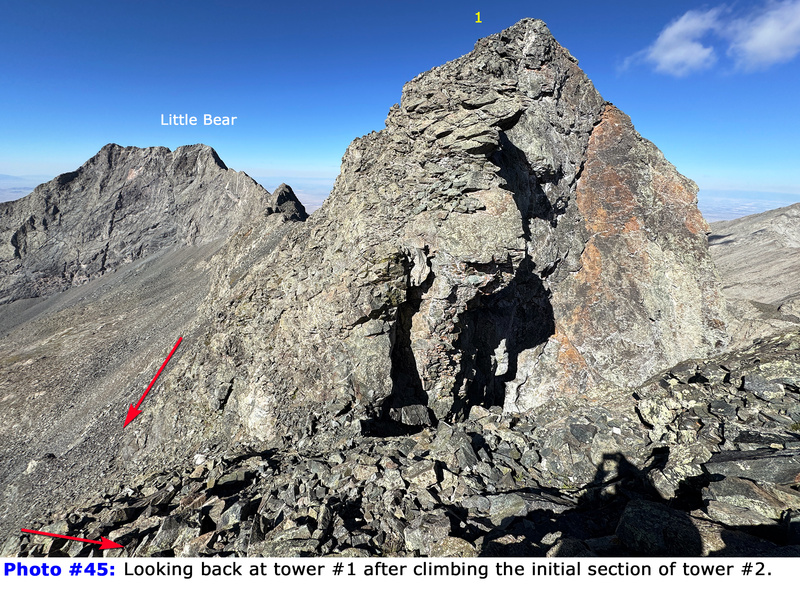
44). Climb the first pitch on tower #2, and looking back, you'll see the bypass below tower #1 (
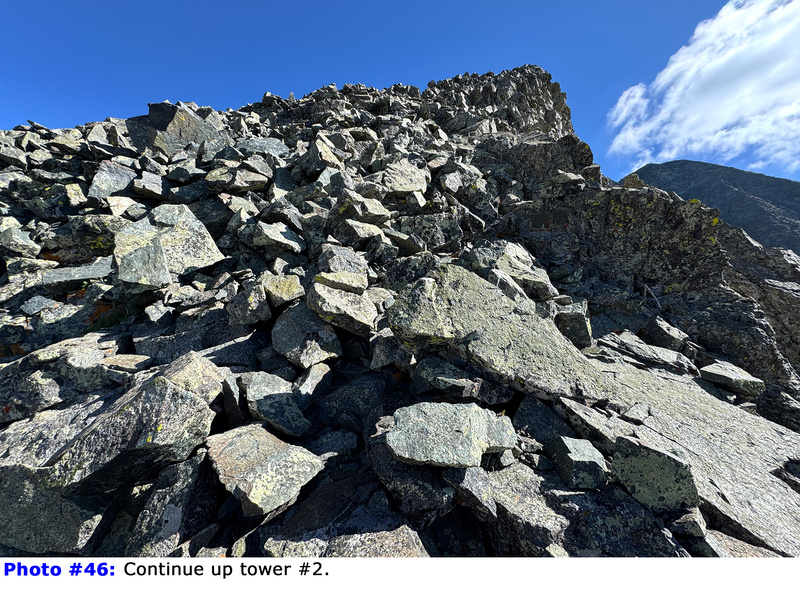
45). Continue climbing tower #2 (
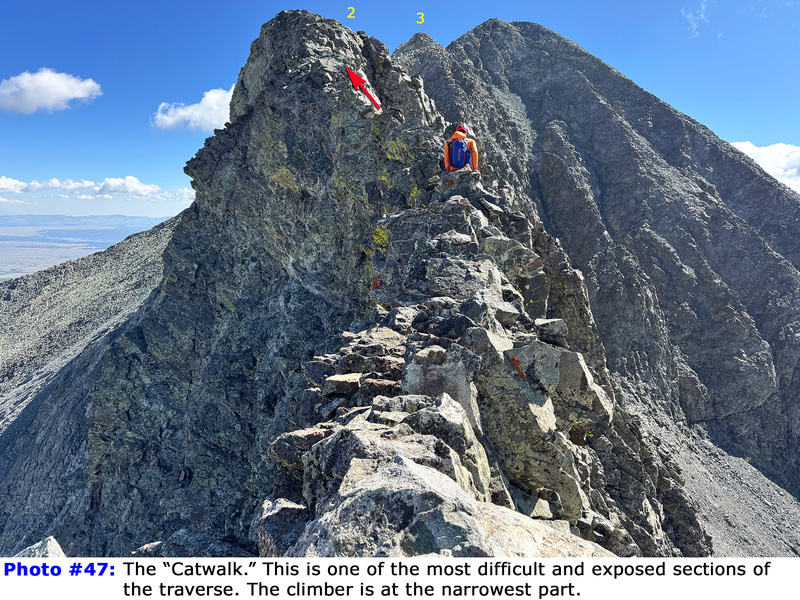
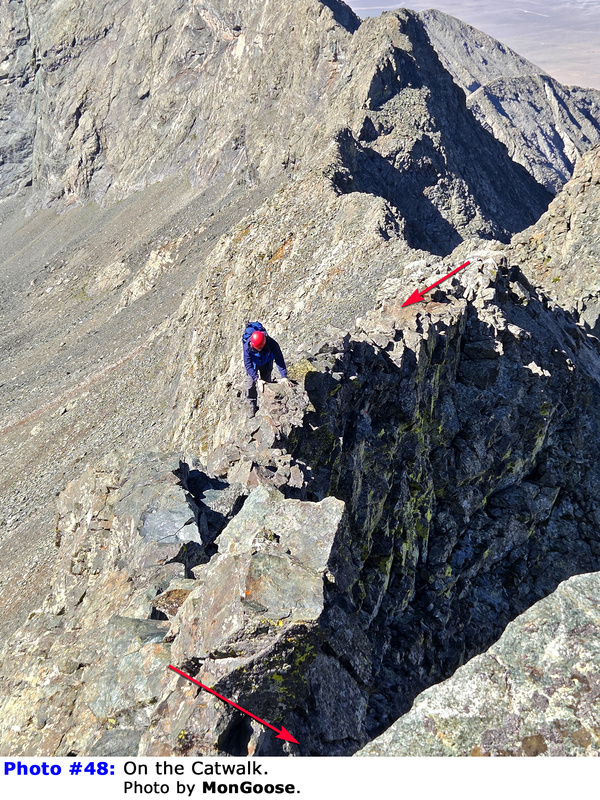
46) to reach the "Catwalk," a narrow, exposed, and horizontal section (
47,
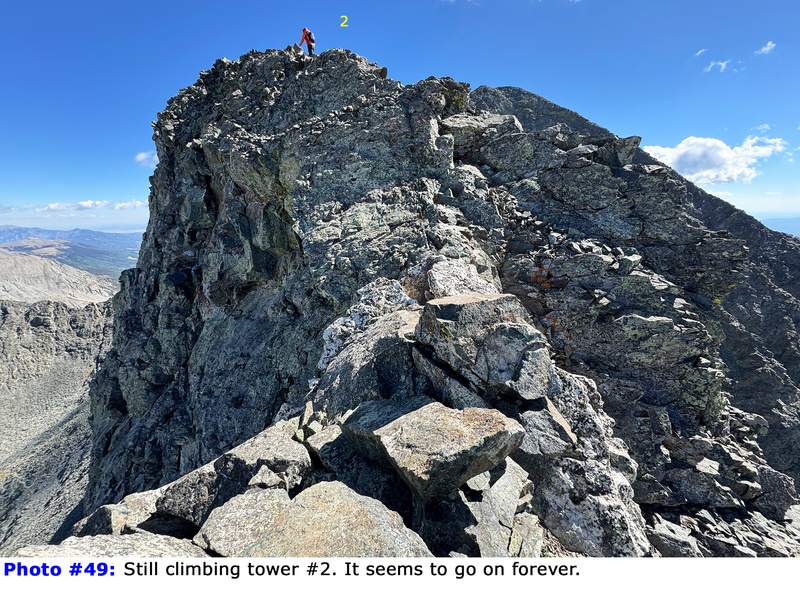
48). After crossing the Catwalk, finish climbing tower #2 (
49,
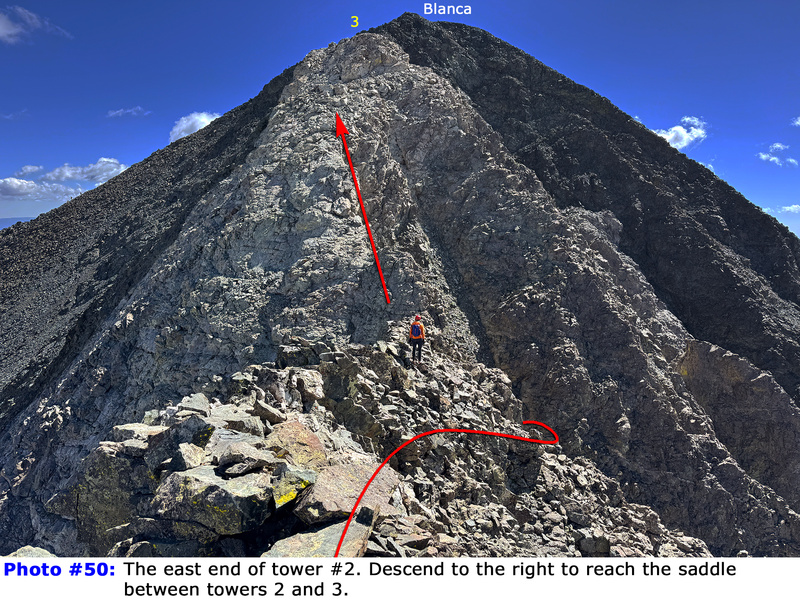
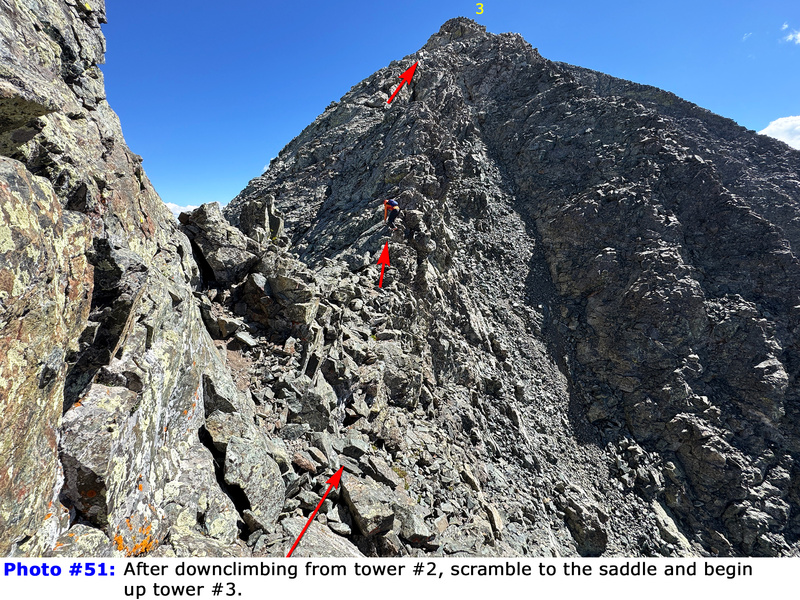
50) and descend to the saddle before tower #3 (
51). Climb tower #3 (
52,
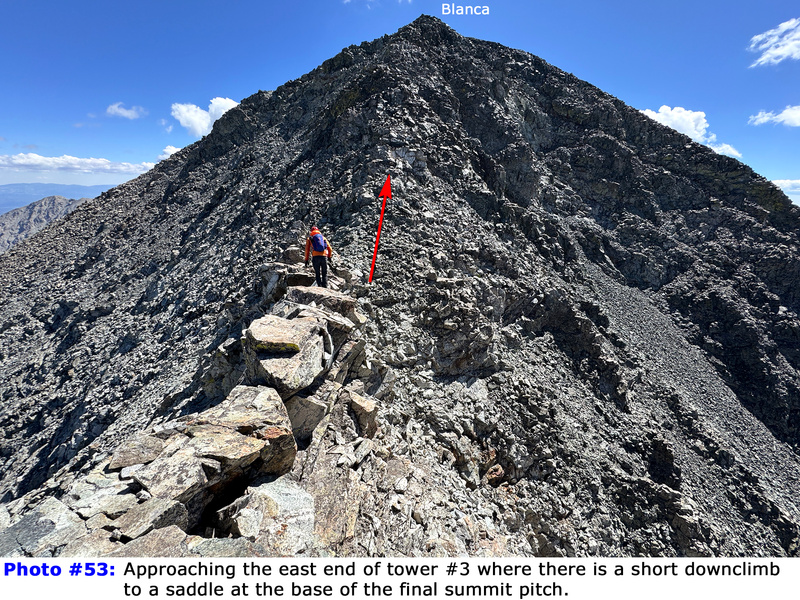
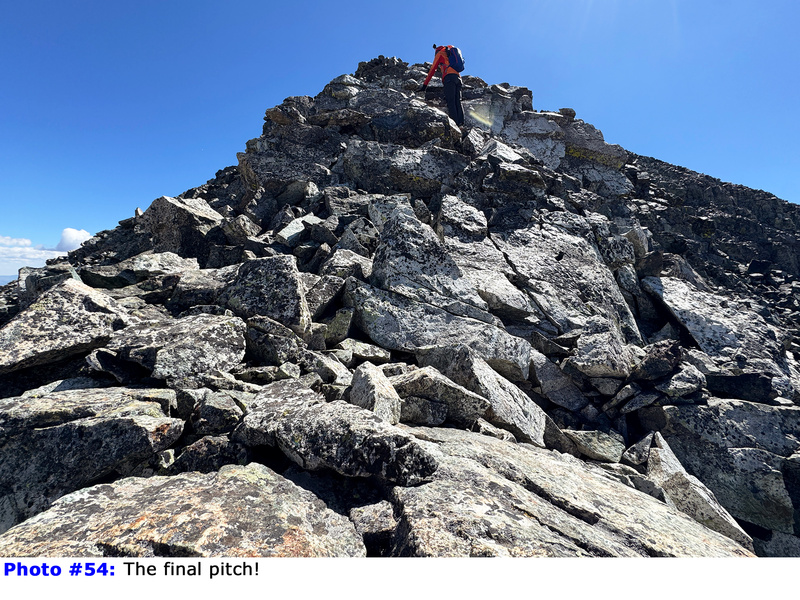
53) and downclimb its eastern end to the final saddle. From there, scramble up the final pitch to Blanca's summit (
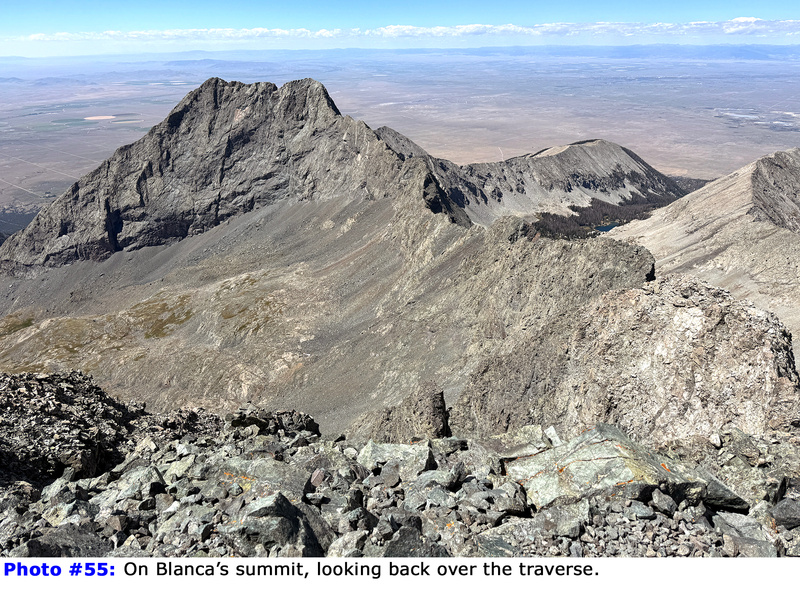
54). From Blanca, enjoy the stunning view back toward the entire traverse (
55). Descend via Blanca Peak's
Northwest Ridge Route.

 GPX Track File


