First, hike up the nasty
Lake Como/Blanca Peak road to reach the lake
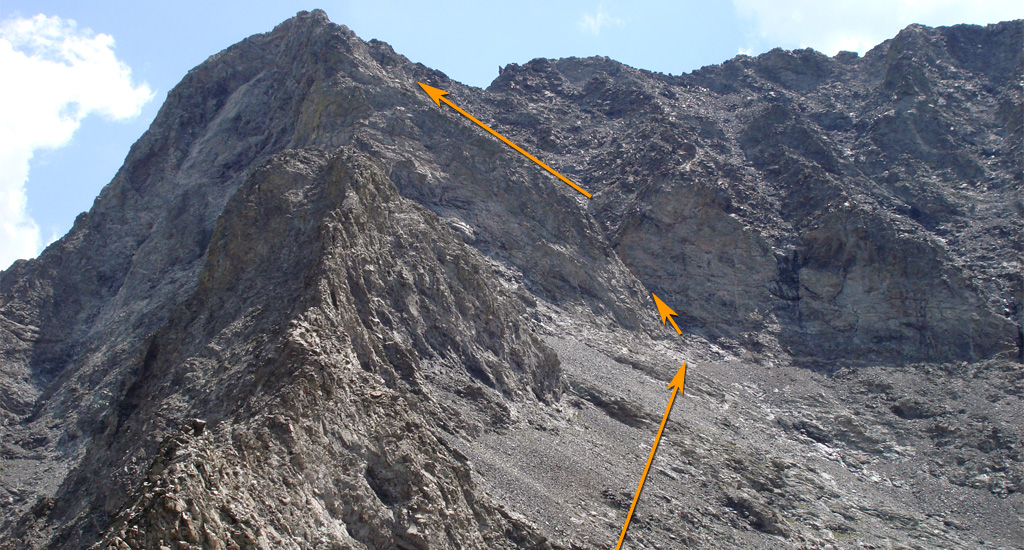
, at 11,750'. Little Bear Peak dominates the view to the east. Viewing Little Bear's west ridge, locate a gully that leads to a notch in the ridge -
1 and
2. You'll use this gully to gain the west ridge. Staying on the road, continue around the lake and back into the forest. Near 11,900', exit the forest, drop slightly, and look for a cairn on the right
-
3. Leave the road, cross a stream, and follow cairns onto a talus pile. Continue up to 12,000' where the gully comes into view -
4. Continue across talus and climb into the gully, following cairns and/or faint trail segments. It's fairly steep and loose, so care must be taken not to roll rocks. Once you reach the confines of the gully, the easiest way up is usually on the right side -
5. Reach the top of the gully near 12,600', at a notch
in the west ridge -
6.
Turn left (east), climb out of the notch, and begin maneuvering along the south side of the west ridge -
7. Staying below the ridge crest most of the time, look for trail segments and cairns. Approximately 1/4 mile after leaving the notch, bypass the top of a 12,960-foot ridge point to see the route ahead -
8. Descend slightly to a notch in the ridge where you'll notice a gully that drops to your right. Continue traversing east -
9. With cliffs up to your left, continue to 13,300' and the base of the Hourglass
gully -
10. To this point, the route has barely exceeded Difficult Class 2, but that's about to change. The Hourglass and southwest face require Class 3 and 4 climbing, with a high risk of rockfall, so take a careful look at the weather and turn back if you don't think you'll have enough time to summit and return to this point before weather rolls in.
Climb the initial rock slabs to reach a couple of orange rock veins, just below the choke in the Hourglass -
11 and
12. As you peer up the Hourglass, you may see a fixed rope. An existing rope may be helpful for support, but it's not a great idea to rely on it without having inspected the condition of the entire rope and its anchor. Be on high alert for rockfall from this point forward and start climbing -
13 and
14. You may encounter water or ice, which may force you to climb along the side. Continue up steep, smooth, solid rock to reach an anchor area and top of a fixed rope, if present -
15 and
16. From this point, there are two main options: LEFT or RIGHT. The LEFT option is more stable, holds less loose rock but is a bit complex. The RIGHT option starts out steep, then fairly straightforward, but has a lot of loose rock. If the face is mostly snow-covered, the RIGHT option is best. If it's dry, most climbers prefer the LEFT.
LEFT OPTION: From the anchor area, climb left a short distance -
17. Follow a vein of orange rock for a short distance, and then left to the ridge crest, or stay slightly right below the ridge crest -
18. After nearly 200 feet of climbing, angle right to bypass steep rock on the west ridge -
19. Continue a short distance to the right and look for cairns to climb back toward the ridge -
20. Near 13,900', and just below the ridge crest, follow cairns higher to finally see the summit -
21 and
22.
RIGHT OPTION: From the anchor area, climb right a short distance to the base of steep, angled slabs -
23. You have a few choices here, but all require nearly 100 feet of steep climbing -
24. Above this pitch, you'll find a lot of loose rock hanging above the Hourglass -
25. With great care, continue higher as the pitch gradually becomes more straightforward, with less danger of rocks rolling directly into the Hourglass -
26. Staying on the easiest terrain, near the middle of the face, continue right then slightly left -
27. For the final 300 feet, follow the path of least resistance to reach the summit -
28 and
29.


