Follow the trail past Maroon Lake and enter the forest, on the Crater Lake trail (
1). As you ascend into Maroon Creek, you'll get a preview of the lower route on Pyramid (
2). After nearly 1.5 miles on the Crater Lake trail, and near 10,100', turn left onto the Pyramid trail
(
3). There are two entry points to the Pyramid trail, both cairned, and they intersect soon after entering the trees. Hike southeast across a rocky area and switchback up a 1,000-foot slope (
4). Near 11,200', exit the final trees to reach the entrance to the amphitheater, below Pyramid's north face. The maintained trail ends here and several large cairns form a sort of gateway (
5).
Follow cairns across rocky terrain as you continue south into the amphitheater, along the right side of a rock glacier for nearly 1/2 mile (
6,
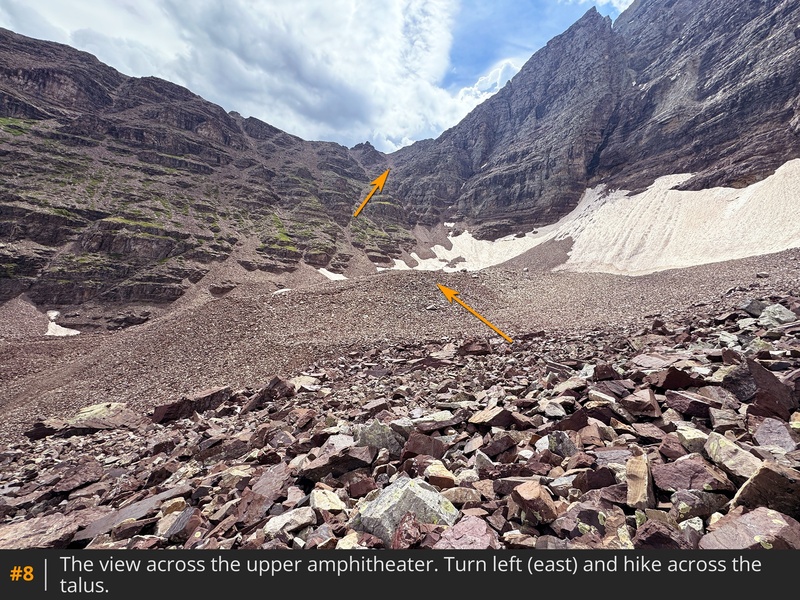
7). Before reaching the base of Pyramid's north face, turn left (east) toward the center of the amphitheater (
8). Hop across the rock glacier toward a steep slope, below Pyramid's northeast ridge, and locate a trail at the base of the slope
(
9). Next, exit the amphitheater and climb 1,000 feet up this steep, scree-covered slope. A trail exists for much of the way, and multiple trail options are available on some of the steeper sections (
10,
11). After ascending this miserable pitch, you'll reach a 13,000-foot saddle
on Pyramid's northeast ridge (
12).
From the saddle, turn right (southwest) and follow a trail along the right side of the ridge, traversing ledges to reach another saddle (
13). The remaining 1,000 feet requires Class 3 and 4 climbing, careful route-finding, and has no consistent trail. It is also time-consuming. From the saddle, follow cairns along the right side of the ridge before climbing back to the ridge crest (
14,
15). Near 13,200', before the ridge becomes more difficult, follow cairns that lead left (south) (
16). Continue traversing as you ascend, crossing loose rock ribs (
17). Near 13,300', turn a corner and pass through steep terrain to reach a small platform
(
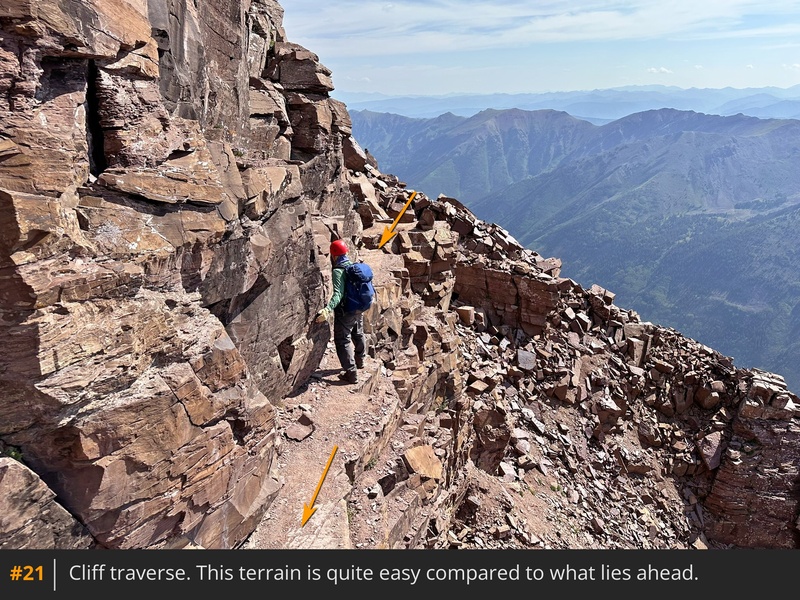
18). Beyond the platform, jump over a gap known as "the leap of faith" (
19) to reach a narrow ledge ("cliff traverse"), which provides passage through steep, exposed terrain (
20,
21). After the ledge, continue higher, and around another corner to reach a steep gully (
22,
23). Cross the gully and follow ledges to a strip of greenish, light-colored rock near 13,400' (
24).
Above this point, the route becomes more difficult, time-consuming, and dangerous. Study the area carefully because you'll want to return to this exact spot on your descent. Climb the initial green wall
(
25) and continue up the strip (
26,
27). Loose rock and gravel settle on this section, so take care to avoid rolling rocks. After climbing about 200 feet on the strip, and before reaching the ridge crest, look for cairns that direct you left, exiting the green rock near 13,600' (
28,
29). The remaining 400 feet is complex but usually marked by cairns. Continue left and zigzag upward through loose, red rock (
30). Throughout this section, you'll encounter exposed Class 3 ledges and a couple of short Class 4 pitches (
31,
32,
33). Above 13,900', the terrain eases, and you can walk the final stretch to the summit (
34,
35,
36).


 GPX Track File
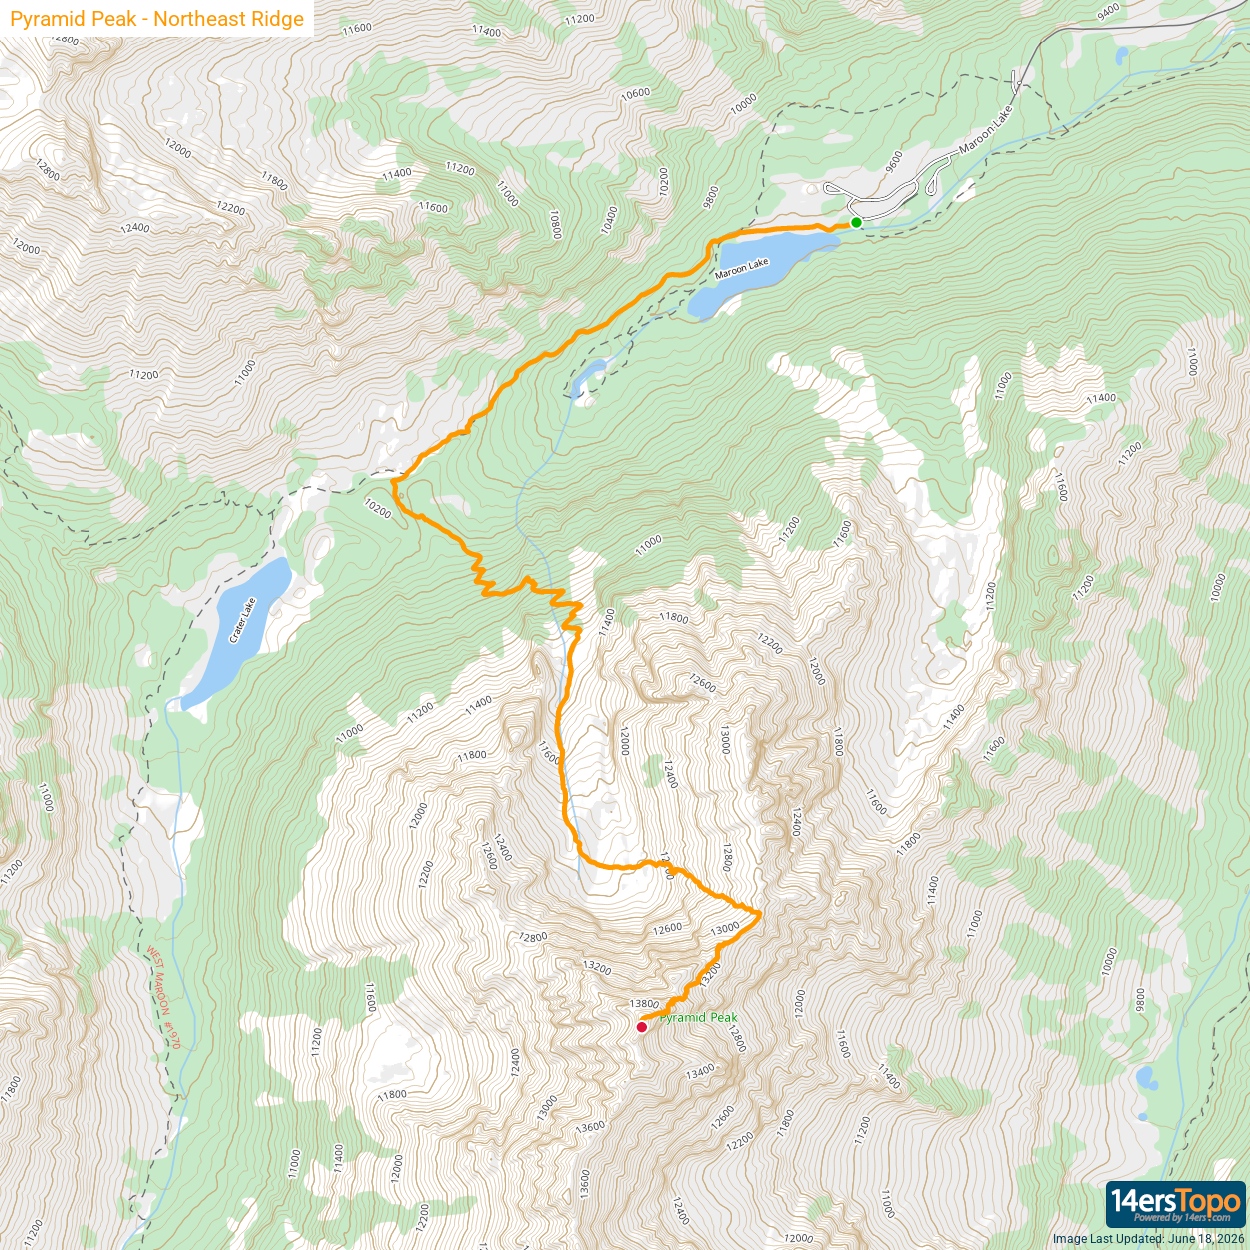


