| Report Type | Full |
| Peak(s) |
Mt. Blue Sky - 14,268 feet Mt. Bierstadt - 14,066 feet |
| Date Posted | 07/17/2026 |
| Date Climbed | 07/16/2026 |
| Author | DC703 |
| Tour de Abyss Bliss |
|---|
|
Hopefully these details of my 7/16 Tour de Abyss hike will be useful to those planning on tackling this fantastic route in the future. All in all, about 7.5 hours to complete the ~6 mile loop with about 3,000 feet of gain......by far my slowest pace for any recent 14er ascents. The combination of the altitude (you're never lower than 12,300', and above 13,000 for most of the route), a lot of off-trail hiking, and a bit of soreness from Quandary West Ridge the day prior did me in. Certainly the most taxing "short" hike I've done yet. Of course, I flew in from the East Coast two days prior, so lack of acclimatization didn't help. I parked at the Blue Sky summit parking lot at about 4am. I cursed that decision for a solid 30 minutes stumbling down the talus in the dark while fighting off hordes of moths (which I did not expect at all), but came to thank my lucky stars 7.5 hours later upon summiting Blue Sky. The truth is, I think I completely missed the turn-off at 13,300' on the road, so rather than backtrack, I pushed ahead to the summit parking lot. More descending in the morning, but less at the end. Step 1: Descend to the gully: The descent from the summit parking lot to the Blue Sky-Epaulet saddle was pretty straight forward. I made the mistake of following a path right off the 13,300' turn-off for a tad bit although the route description clearly warns against it. After correcting that mistake, I pushed downward toward the saddle with Epaulet to about 13,100' and spotted the gully descending into the basin. (it was completely dark at the time, so unfortunately I have no photos of that part). Step 2: Descend the gully to the basin: Pretty simple -- down the gully. Incredibly loose in many spots, so I tended to stick to the right side hugging the cliff. I'm terrible on scree and descend more gingerly than a 90-year-old man, so this part took me longer than necessary. A fairly demoralizing way to start the hike, but pretty straight forward. The gully widens at about 12,300' and the terrain evens out into a much more pleasant experience. The photo below somewhat shows the gully I had just descended. Looking down into that thing from 13,100' in the pitch black was far worse than the view from the bottom. 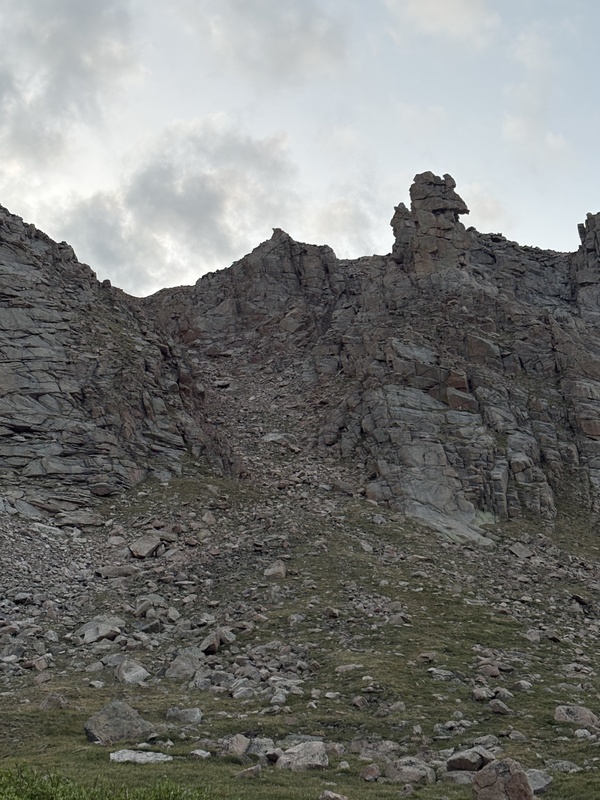
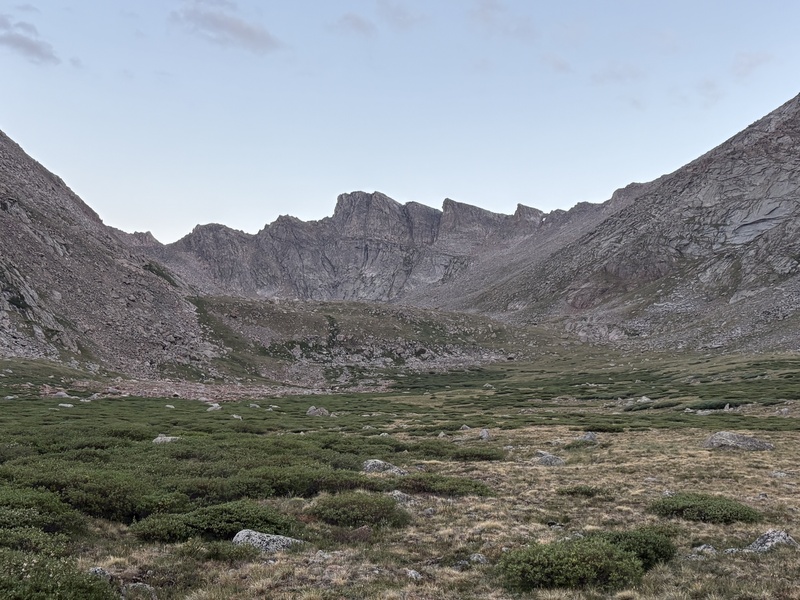
Step 3: Across the basin toward Bierstadt. The only real challenge here was veering too far south (left) which nearly put me in Lake Fork. After bushwhacking a tad bit through the willows (which were fairly dry), I crossed the stream and made my way to the grassy slopes of Bierstadt's eastern flank. The distant.....and increasingly not-so-distant howls......of coyotes (I think) put a bit of urgency in my steps across the basin. I prefer to watch wildlife from afar.....not be chased by them. 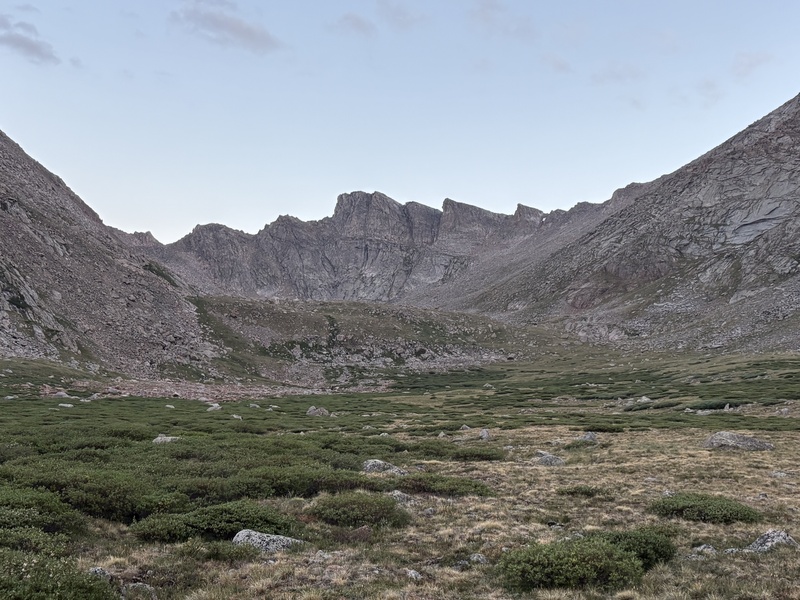
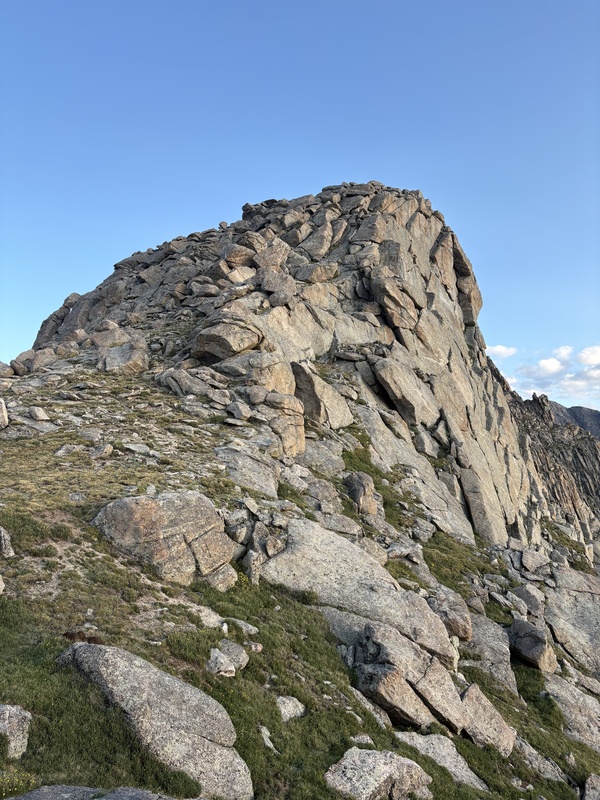
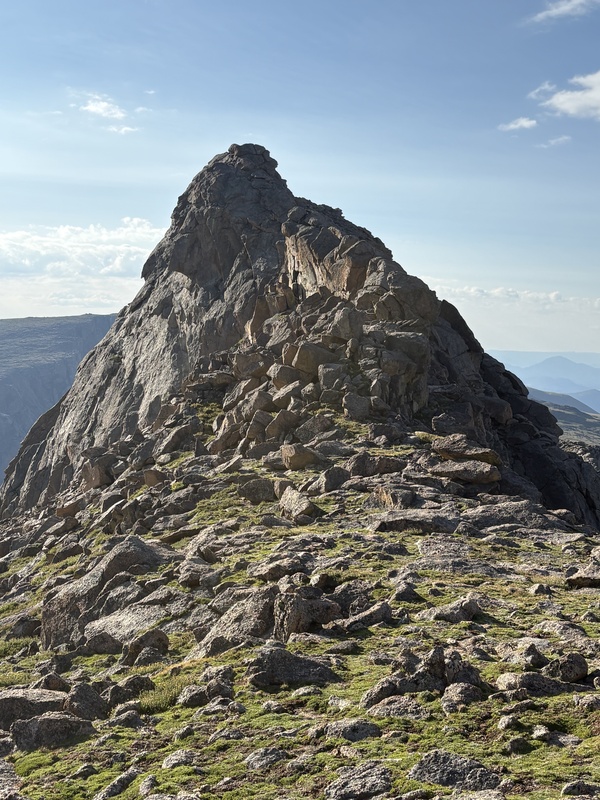
Step 4: Up Bierstadt's eastern flank. I never really spotted much of a path, so I did my best to stick as close as possible to the GPX track from the site, which mostly pointed me straight up. Zig-zagging a bit, this ascent was surprisingly taxing. Clearly I didn't zig-zag enough and instead implemented the "shortest way between two points is a straight line" approach, which was probably dumb. At least the terrain was grassy, doing my best to avoid trampling on flowers. I made the ridge just southeast of the first few points along the East Ridge. Step 5: Bierstadt's East Ridge. The first few points on the ridge were fairly simple to ascend. The second of the two (pictured below) was delightfully challenging, although very manageable with fantastic rock and plenty of holds. A direct route up the middle worked for me. Once up and over those two, PT 13,641 quickly comes into view. 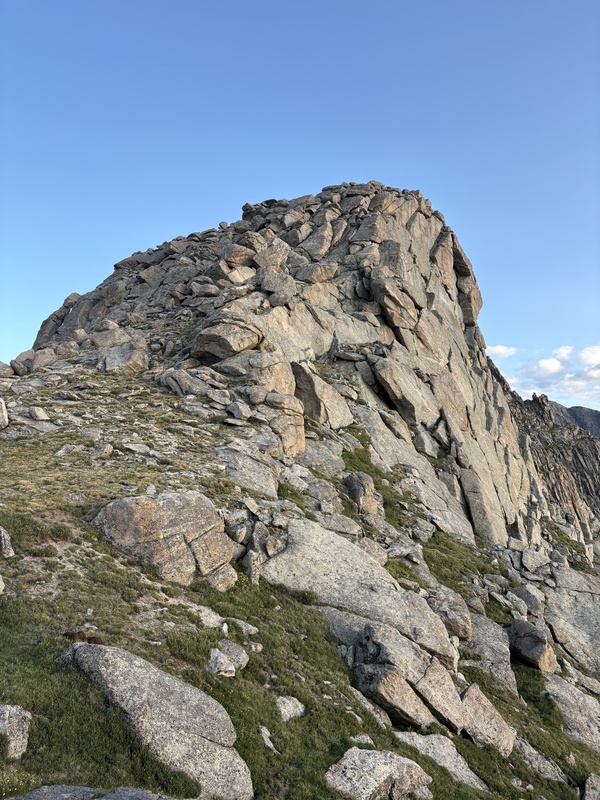
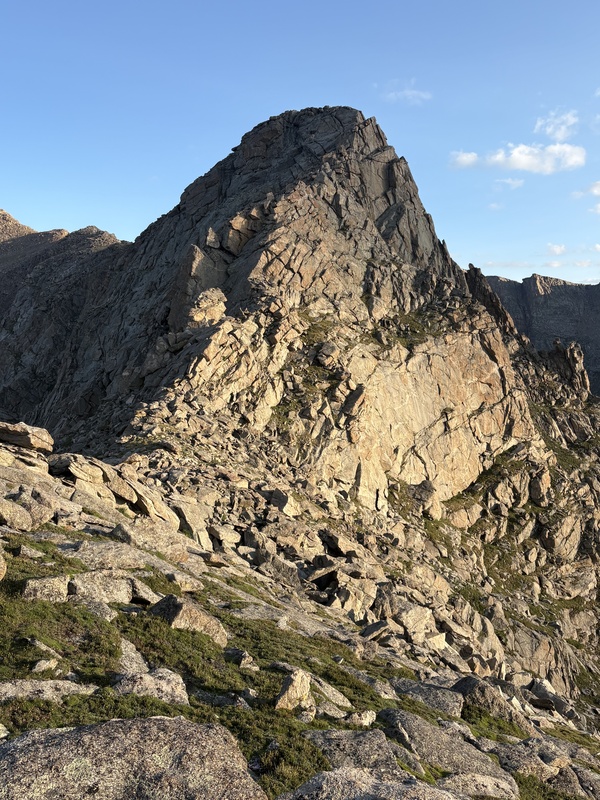
PT 13,641 caught my attention the most reading prior trip reports and descriptions online -- particularly the down-climb. As the photo below shows -- and the route description on the site marks very well -- ascending via the higher of the two grassy ramps on the right is the first step. Once the ramp gave way to a cliff and class 5 climbing, I had a bit of a problem finding the best class 3 line up to regain the ridge but improvised a bit and never exceeded class 3. Great rock throughout the climbing on this point. 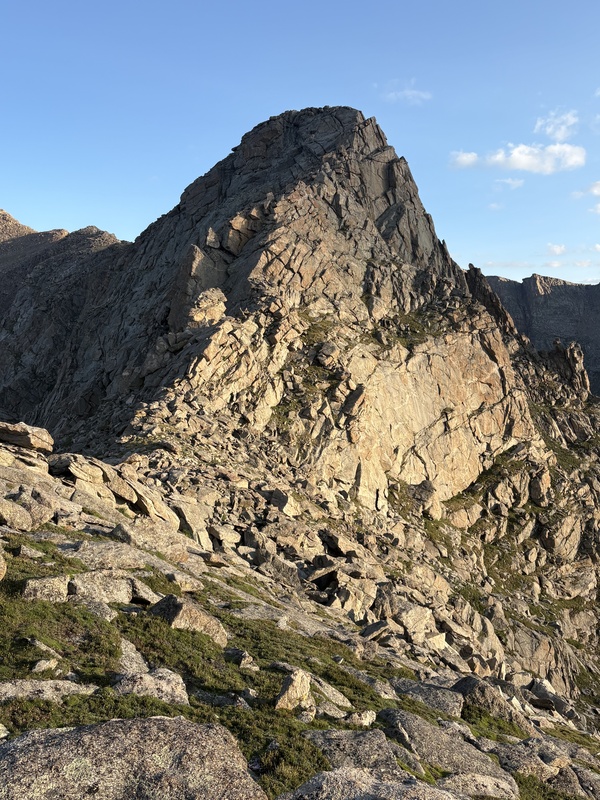
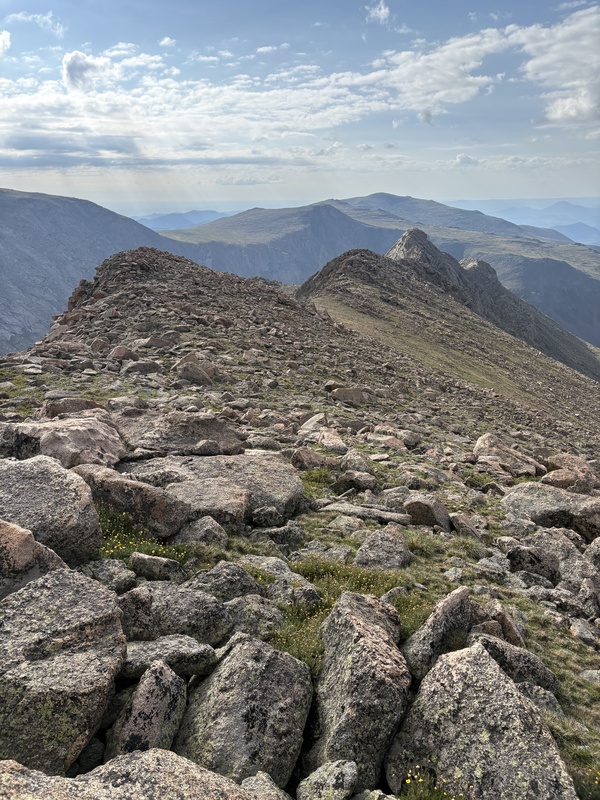
Once atop PT 13,641, I looked for the best down-climb option. Previous trip reports suggested that dropping down off the center of the top felt very exposed, although I did notice the possibility of swinging to the left prior to ascending to the top and tip-toeing along some ledges to bypass the exposed down-climb (see photo below -- right side on the photo, which is climber's left). I didn't investigate that option, mostly because I didn't want to further disturb the goat that insisted on making that spot theirs -- rightfully so. So rather than front-face the rock and down-climb that way, I sat on the top and extended my legs to touch rock immediately below and carefully shimmied down the first 5-10 feet to more solid ground. It helps being tall, so to me this down-climb was very manageable and by no means unnerving (as somebody who is often unnerved by exposure). As you can see below, down-climbing from the center is far less exposed than taking the right side (left side on the photo, climber's right). 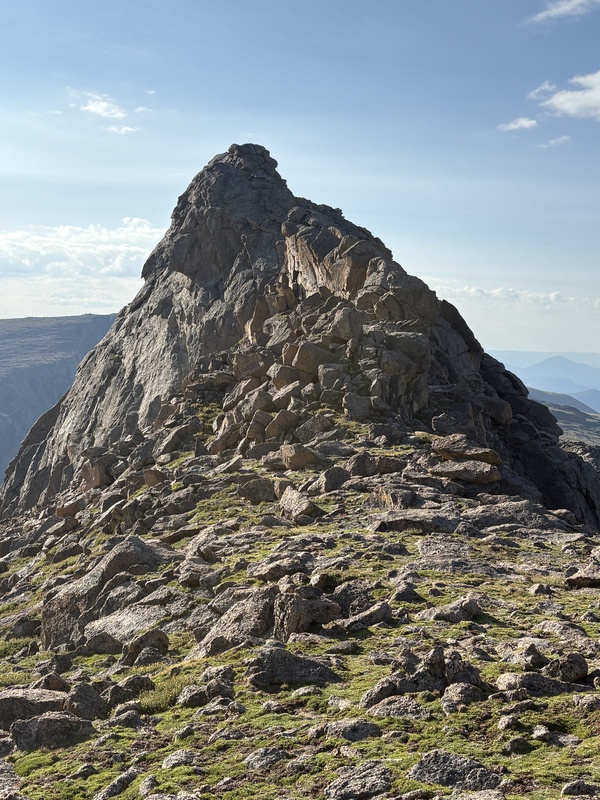
After the down-climb, it was mostly smooth sailing to the Bierstadt summit.....nothing exceeding difficult class 2. After ascending or bypassing a few bumps along the ridge, there's a ~200 foot scamper up Bierstadt's summit where I'm met by dozens of people enjoying the summit, presumably ascending via the Western Slopes route because I was the only soul on the East Ridge by that point in the morning. I got a few of those "why is that guy wearing a helmet?" looks, much like I got on Quandary the day prior. Probably didn't need a helmet on the East Ridge -- virtually no rock fall. But I've already had a few concussions, am not yet a polished climber, and would prefer not to add another head bump to my health record. 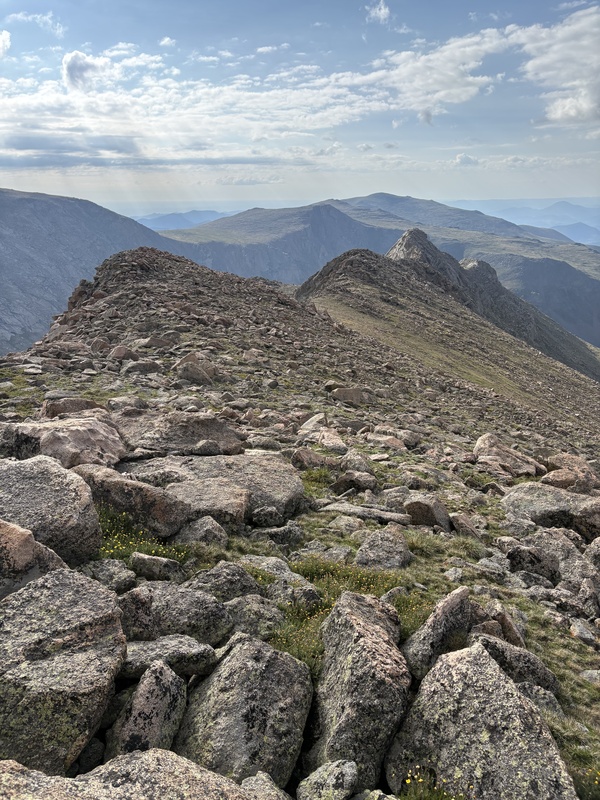
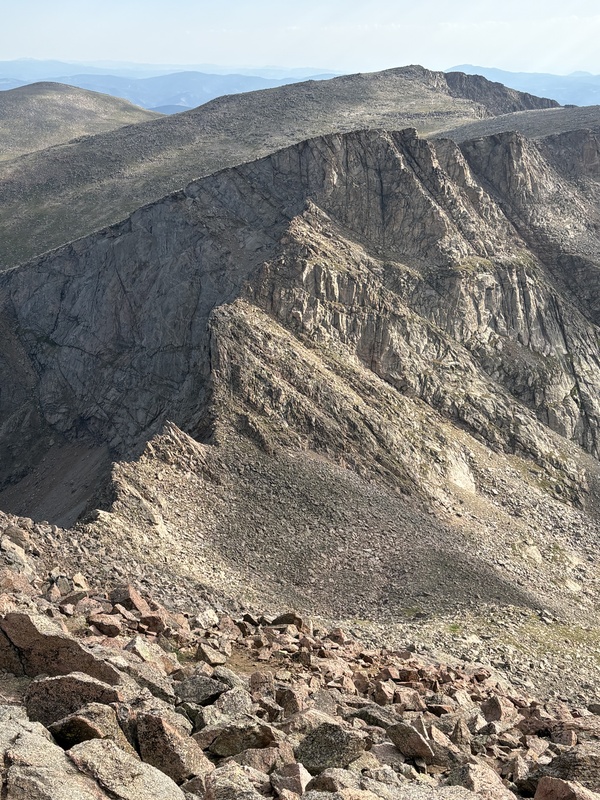
Step 6: Descend down to the Sawtooth. This was a bit trickier and looser than I expected. Descending off the north side of Bierstadt was a bit of a "pick your own adventure". There were several dirt trails that marked the best way down, although some seemed to descend further off the ridge crest than I would have preferred. The route description recommends staying east (right) of the ridge itself, which makes sense as the ridge proper is very exposed. 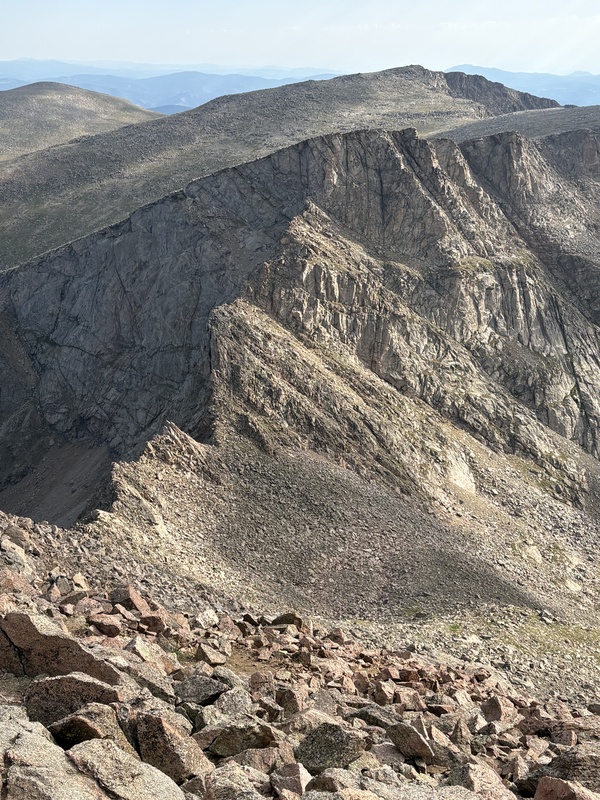
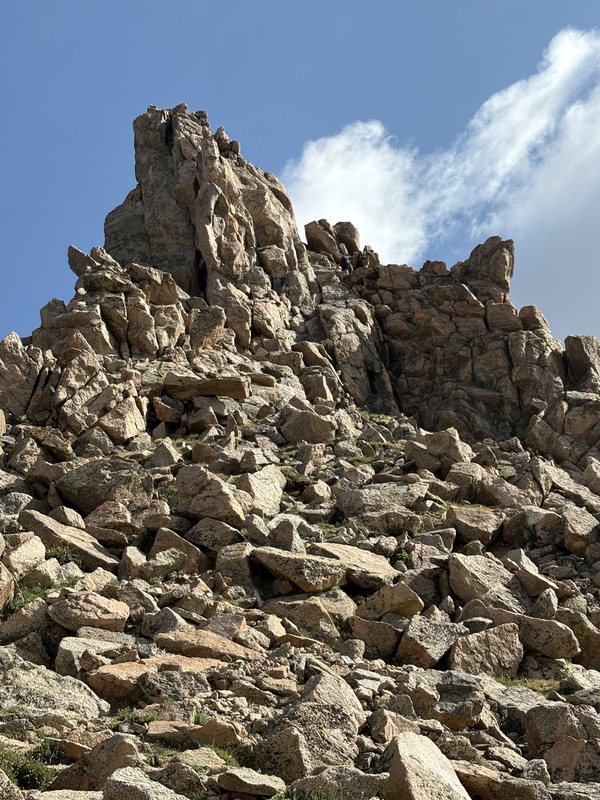
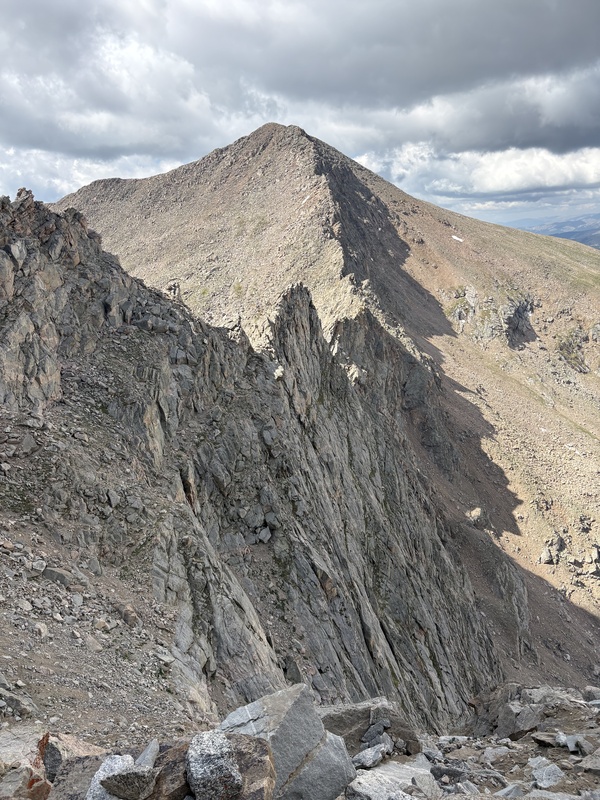
After descending down onto the ridge, I stayed higher than the route description recommended, mostly to avoid having to regain that elevation later. I went up to the ridge proper a few times to peek over the edge......a very gnarly traverse if you stay on the ridge. The problem staying high is that I found myself in a few down-climb situations......to include one in which I had a solid 3-4 feet of air between my feet and slabbed rock below. But all's well that ends well. I eventually made my way to the gendarme (located on the second "tooth" along the ridge, as shown above). I sat for a bit to watch the group in front of me, observing the lines they picked -- which kept it to a manageable class 3. No problem, I thought.....I'll just do what they do. And of course, once I got to the base of the gendarme, I forgot absolutely everything I had just studied.....probably a combination of nerves and fatigue at that point. 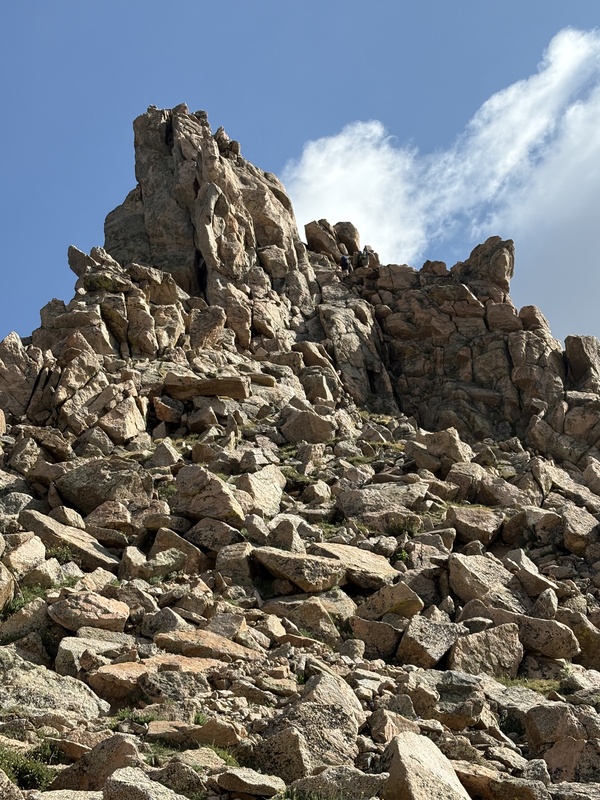
As the photo above shows, there are class 5 options by staying left up the gendarme itself, and the route description shows a very mellow class 3 option of swinging right (my photo cuts off on the right side which showed a route on the right) and avoiding most of the difficulties. I opted for the middle approach -- dead center in this photo. Pretty solid rock all the way up, I ended up ascending a bit of a chimney or crack in the wall......juuuuuust big enough for a guy of my size wearing a backpack, but barely any bigger. Probably the toughest climbing of the entire route was here, mostly because I neglected the simpler class 3 options to my right. Fortunately having long legs paid off again, and while the bruises on my shins tell the full story, I flopped around enough to make my way up and over the difficulties and crossed over to the west (left) side of the ridge. That brought me to a steep-ish path that led to the exit ramp (seen below). 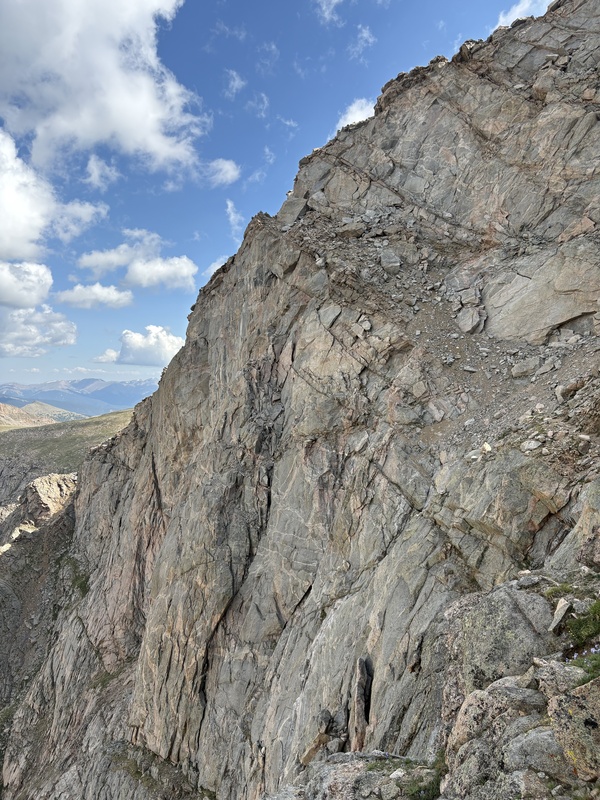
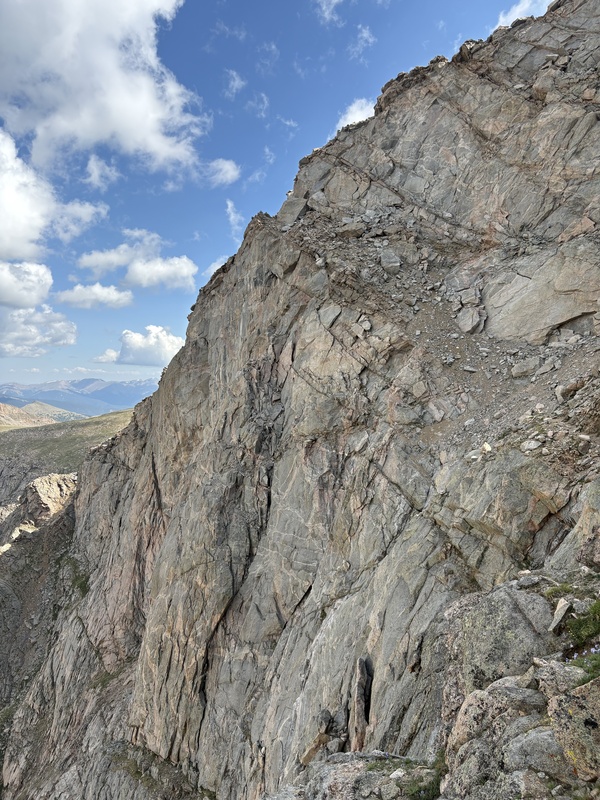
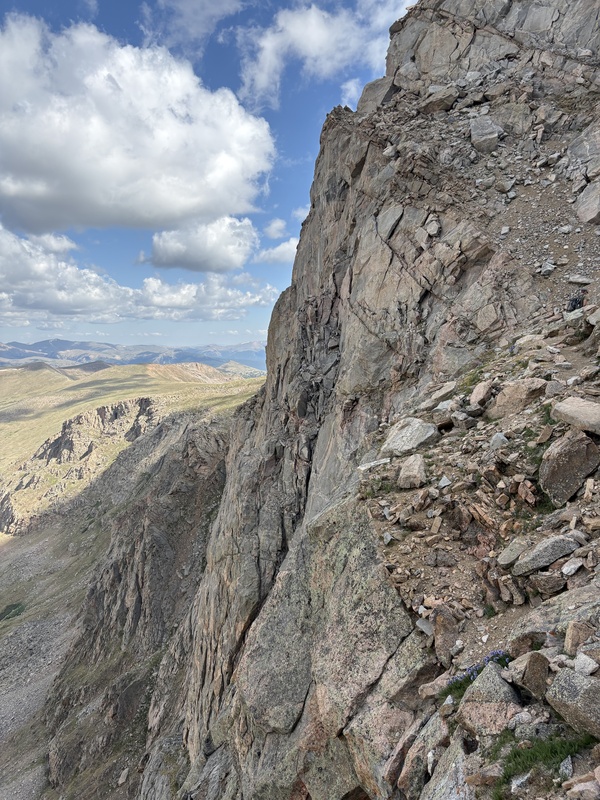
The first glimpse was terrifying, and neither I nor the group in front of me really had a great initial hunch on the best approach. The drop-off to the left is extreme, and the route description offers two general options: (1) stay below the slab in the upper right portion of the photo above, which is more direct, or (2) stay above the slab which keeps you further from the exposed cliff. We all opted for the second. And as we got closer, we saw how manageable it was......in fact, other than one awkward move to duck under or wrap around a rock protruding from the cliff to our right, the hike was quite simple and safely far removed from the drop-off. The photo makes it look much worse than reality. 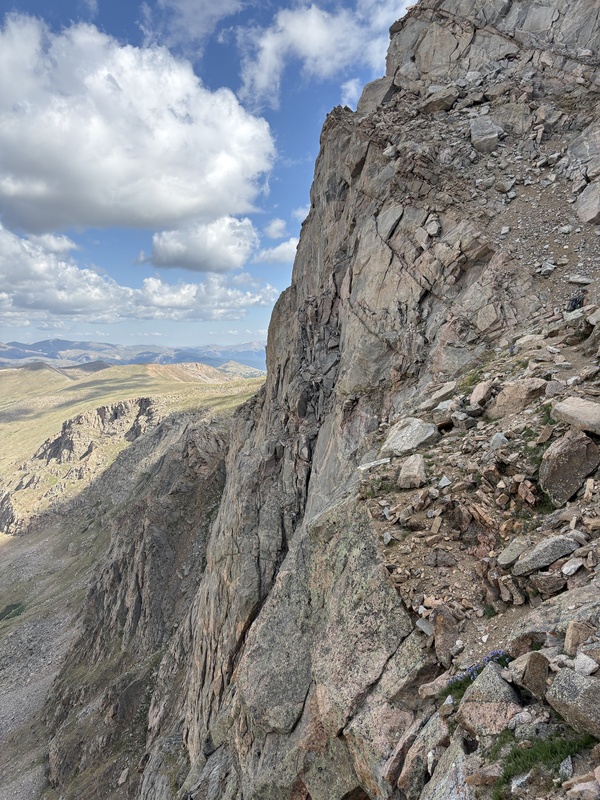
Tough to tell in the photo above, as the higher of the two paths is just off the photo's top right. But you can clearly see the lower of the two paths, which looked loose and way too close to a 1,000' drop for my comfort. Once through this portion, the trail bends east and you're home free.......almost. 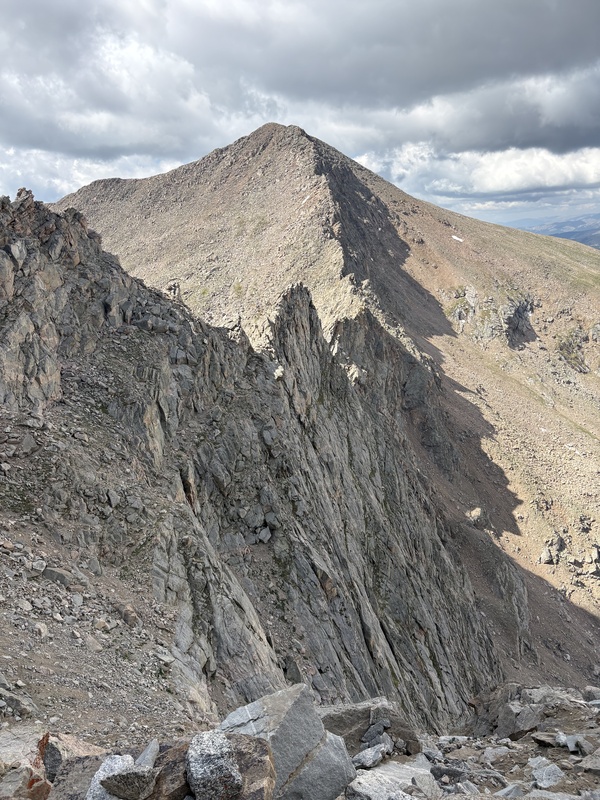
Step 7: Hump it to the Blue Sky summit. This is the part that surprised me most -- the length of time it took to get from the end of the Sawtooth to the Blue Sky summit. It's not like it's a secret -- the route description and virtually any map will make this clear. But something about clearing the Sawtooth ridge created for me a sigh of relief and a mental belief that I was home free. Turns out, I had a long walk ahead......but over simple class 2 terrain. By this point, I had descended that God forsaken gully in the pitch dark, splashed through the willows, went straight up Bierstadt's eastern flank, scrambled along the East Ridge, slid my big behind down Bierstadt onto the Sawtooth, and picked my way carefully through that. I ate too little -- altitude always suppresses my appetite -- I wasn't drinking enough water, and the sun was beating upon me in ways that made me beg for winter conditions. Blue Sky itself isn't immediately visible, but the ridge is.......and par for today's course, I got off route and went ridge direct rather than skirt the right side of the Blue Sky summit ridge as the route description recommends. After eventually making my way to the correct route, stopping for a breather every few moments, I boulder-hopped my way to the area where the parking lot becomes visible and a class 1 trail leads up the final 150' feet to the summit. Joined by throngs of visitors streaming in from the summit parking lot in shorts, flip-flops, and carrying nothing but a camera, I made my way to the official summit, snapped a few photos, had my customary peanut M&Ms (my ritual summit pleasure), and walked down to my car at the summit. #20/58 for me, and my 6th class 3 route. A really fantastic route, but as I started with...... a route that punches far above it's 5.75 mile weight. This was more draining than any Sawatch slog I've been on, but it offered so much. Great class 3 scrambling (more than on Quandary West Ridge or Kelso Ridge or Wetterhorn, in my opinion), a sufferfest down a steep scree slope, two very different but challenging ridge scrambles, and really solid rock where it mattered. I wouldn't want to be stuck here when bad weather rolls in, and escape seems difficult. But no amount of un-acclimatized suffering could take away the bliss on the Abyss -- not on such a beautiful summer day. Thumbnails for uploaded photos (click to open slideshow): 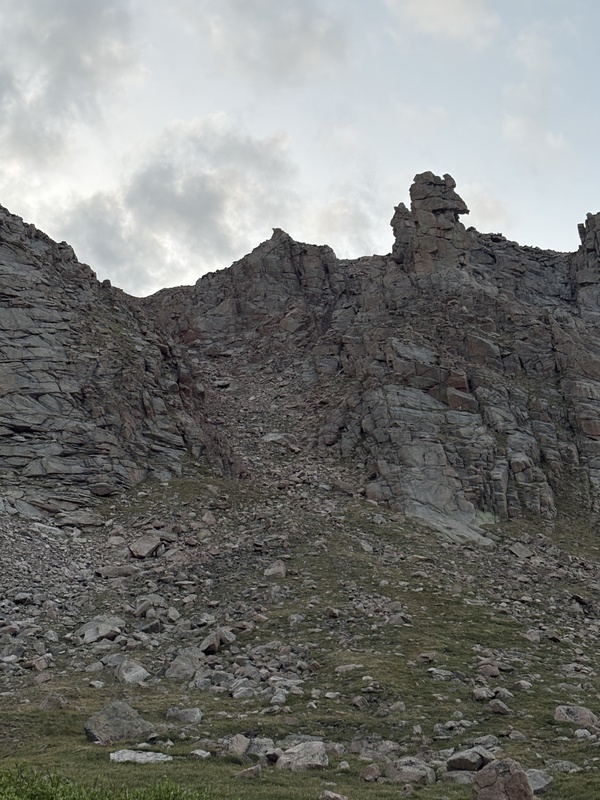
|
| Comments or Questions |
|---|
|
|
Caution: The information contained in this report may not be accurate and should not be the only resource used in preparation for your climb. Failure to have the necessary experience, physical conditioning, supplies or equipment can result in injury or death. 14ers.com and the author(s) of this report provide no warranties, either express or implied, that the information provided is accurate or reliable. By using the information provided, you agree to indemnify and hold harmless 14ers.com and the report author(s) with respect to any claims and demands against them, including any attorney fees and expenses. Please read the 14ers.com Safety and Disclaimer pages for more information.
Copyright: Route information, text, risk factors, maps, GPX files, charts, photos, 14ers.com-created map imagery, flythroughs, and other content provided in this route description are copyrighted by 14ers.com and may not be copied, reproduced, republished, distributed, modified, or used to create derivative works without prior written permission.
Please respect private property: 14ers.com supports the rights of private landowners to determine how and by whom their land will be used. In Colorado, it is your responsibility to determine if land is private and to obtain the appropriate permission before entering the property.