Download Agreement, Release, and Acknowledgement of Risk:
You (the person requesting this file download) fully understand mountain climbing ("Activity") involves risks and dangers of serious bodily injury, including permanent disability, paralysis, and death ("Risks") and you fully accept and assume all such risks and all responsibility for losses, costs, and damages you incur as a result of your participation in this Activity.
You acknowledge that information in the file you have chosen to download may not be accurate and may contain errors. You agree to assume all risks when using this information and agree to release and discharge 14ers.com, 14ers Inc. and the author(s) of such information (collectively, the "Released Parties").
You hereby discharge the Released Parties from all damages, actions, claims and liabilities of any nature, specifically including, but not limited to, damages, actions, claims and liabilities arising from or related to the negligence of the Released Parties. You further agree to indemnify, hold harmless and defend 14ers.com, 14ers Inc. and each of the other Released Parties from and against any loss, damage, liability and expense, including costs and attorney fees, incurred by 14ers.com, 14ers Inc. or any of the other Released Parties as a result of you using information provided on the 14ers.com or 14ers Inc. websites.
You have read this agreement, fully understand its terms and intend it to be a complete and unconditional release of all liability to the greatest extent allowed by law and agree that if any portion of this agreement is held to be invalid the balance, notwithstanding, shall continue in full force and effect.
By clicking "OK" you agree to these terms. If you DO NOT agree, click "Cancel"...
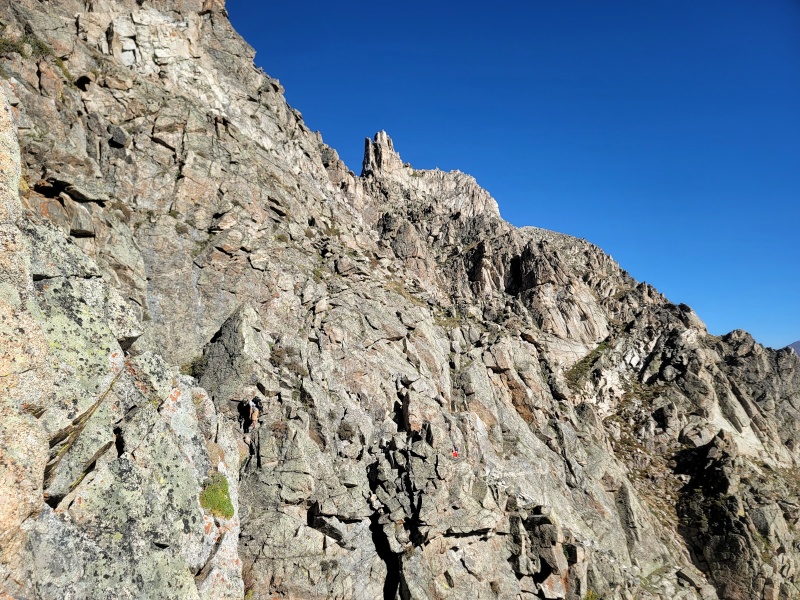
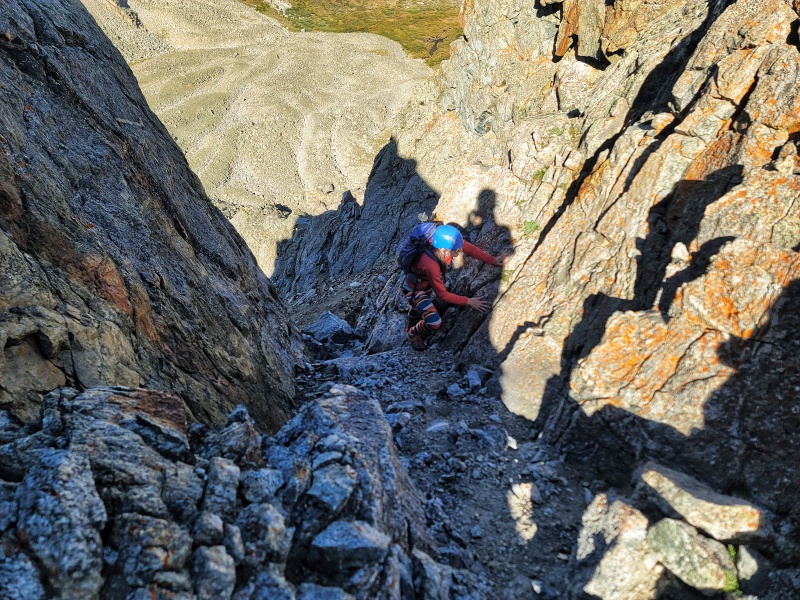
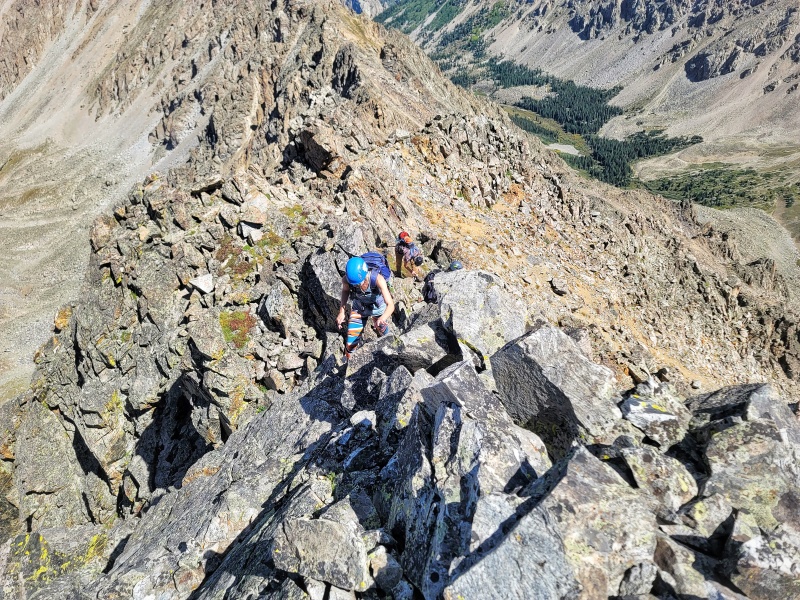
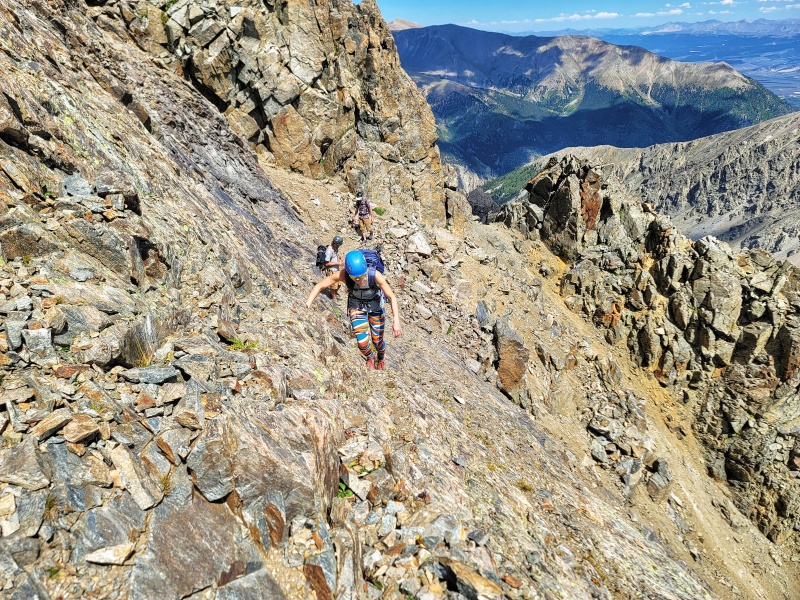
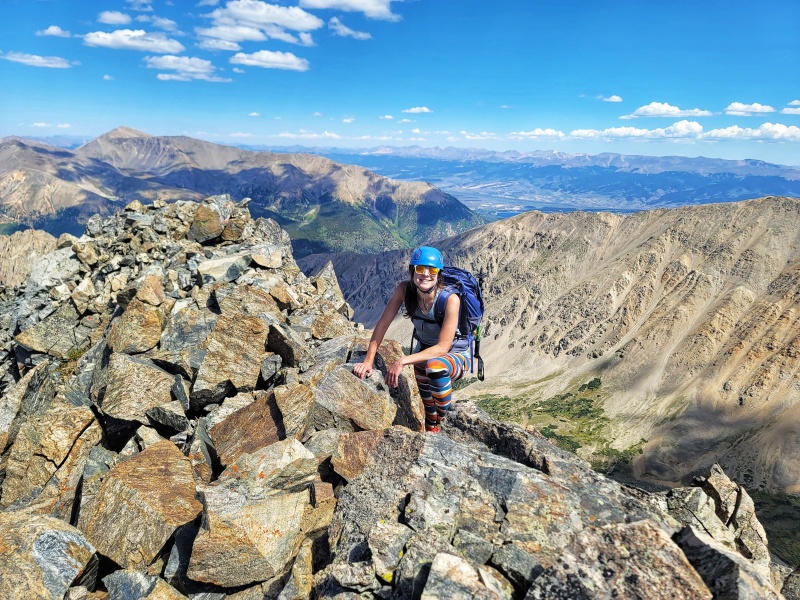
Prelude: After reading through some independent reports on this ridge, the 14ers description, and seeing some GPS tracks, I wanted to write this report to present an alternative path through the crux section. Upon reaching the crux, most people either drop below the towers to the grassy slopes below tor traverse a series of hairy and exposed ledges... we found an alternative path that serpentines along the top of the crux towers/gendarmes. To get on that path, we went up, over, and around the tower that marks the start of the crux section rather than trying to traverse horizontally or go down and around. The climb up the tower was pretty exposed 4th class, but once at the top, the path of least resistance stays at Class 2/3. It's important to note that we split between the East and West sides of the crux towers fairly often. Easier terrain down and to the East side of the ridge holds generally true except in this crux section. This route may be slightly more difficult than descending down and around, but it's more efficient and holds some really entertaining route finding and fun ledges!
I'd also like to make a recommendation of not doing this ridge early in your scrambling career. This route is best done after you've accomplished some of the more difficult 4th class 14ers so you feel fully confident when the route finding gets rough in complex terrain. While the ridge can be done as Class 3, it's difficult and slow-going to find the easiest path. Best of luck and happy scrambles!
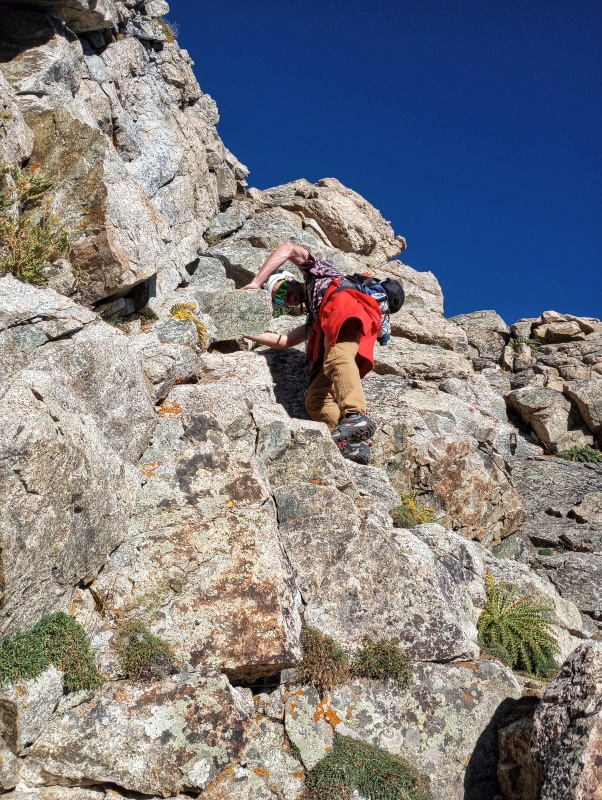
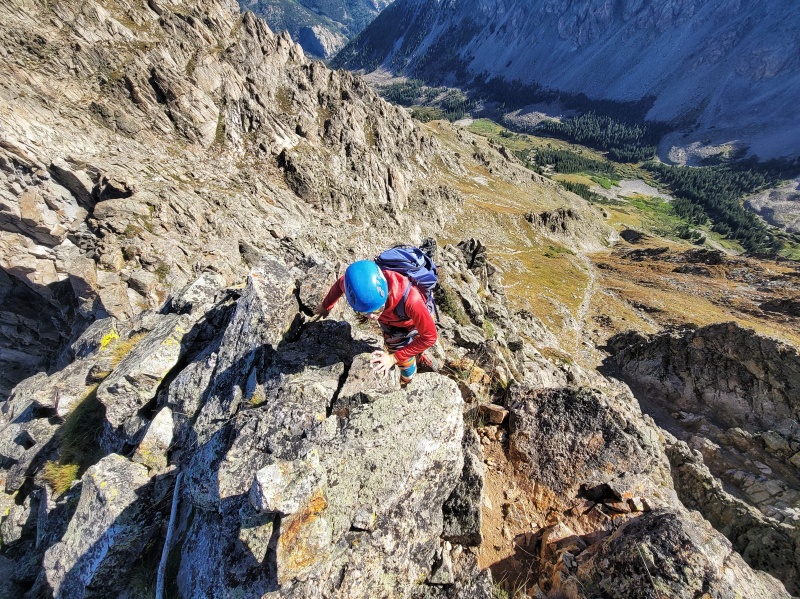
Tip: Pretty early on in the traverse you'll see two towers. We actually ended up joining up with two guys from Aspen who had attempted this route a few weeks earlier. While not consequential either way, taking middle route across the two towers significantly reduces the amount of time you'll need to spend in the loose gullies between the towers. The traverses themselves were pretty easy with a little bit of route finding and one or two tricky downclimb moves.
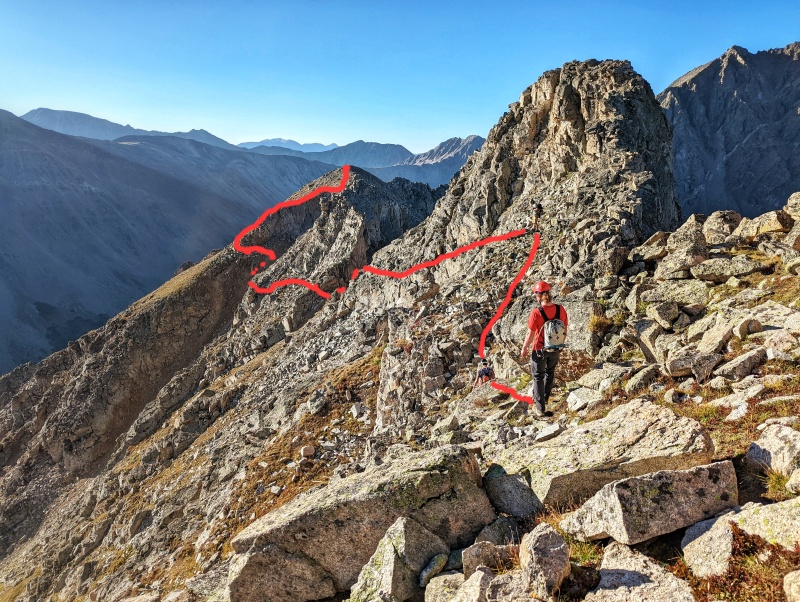
Approximate route in red - follows some fairly well-defined ledges across the middle of each towerSlightly tricky downclimb on the backside of the second tower - easy class 4 and not a lot of exposure
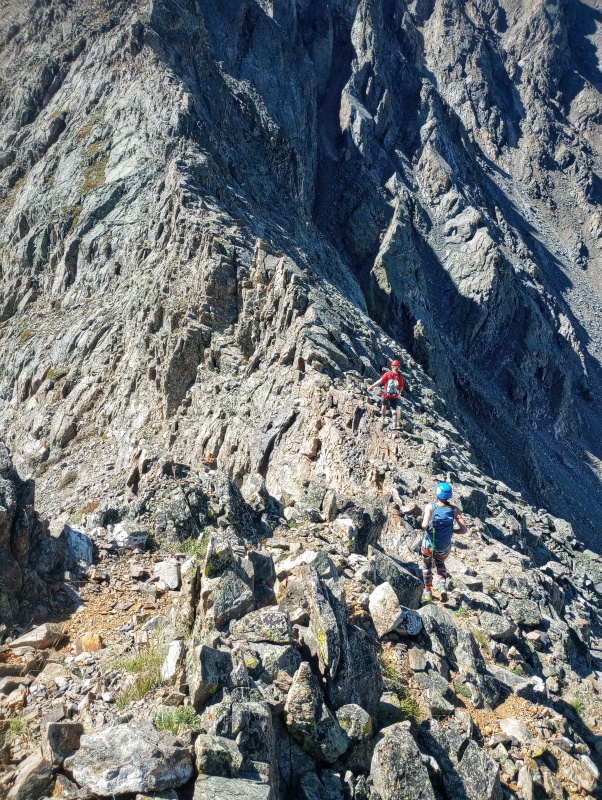
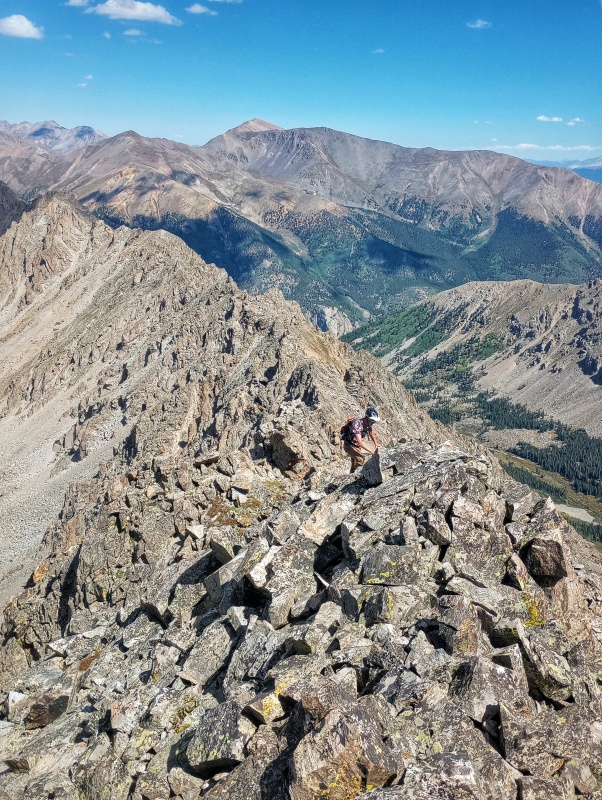
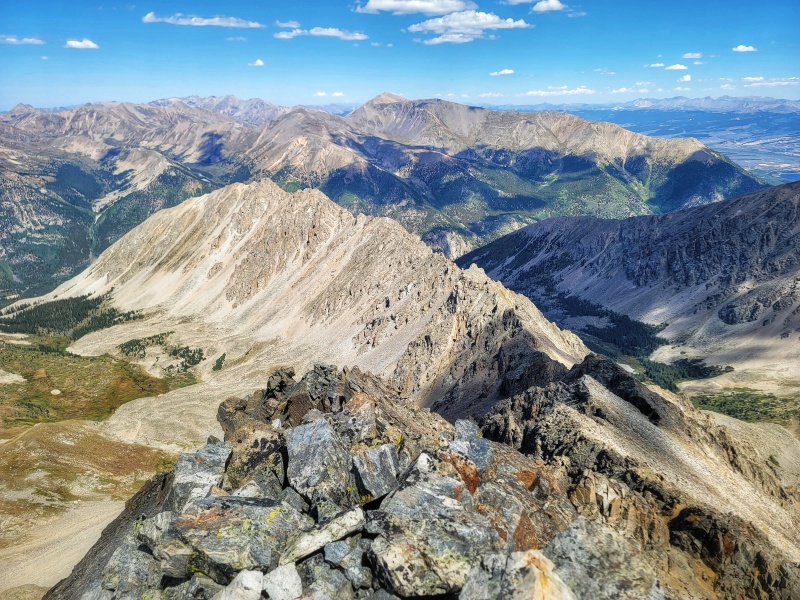
The next couple of photos show some of the terrain we took on the ridge proper. Easier routes exist a very short distance down on the East Face, though the scrambling here was fun.
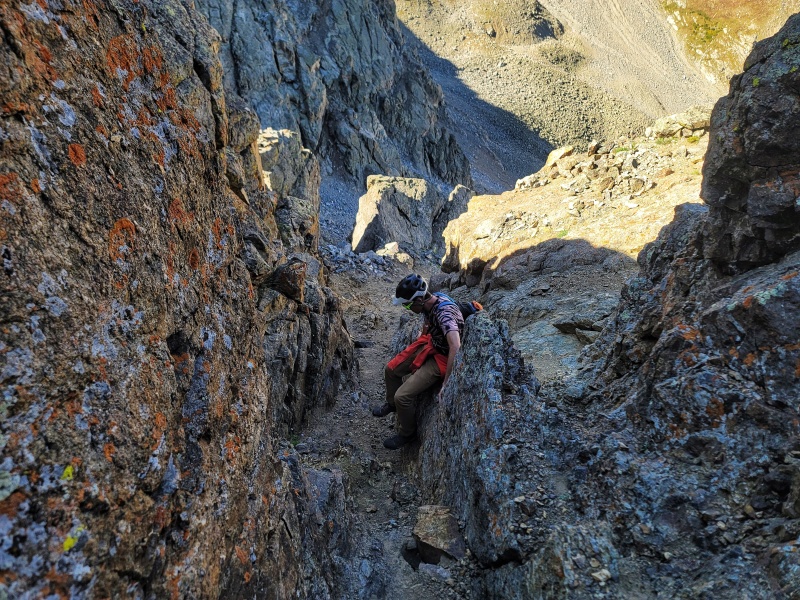
The downclimb in the previous photo is below the V notch to the left of the prominent spire (4th Class). This can likely be bypassed with some careful route finding down and around on the East Face, but was the most intuitive route at the time.
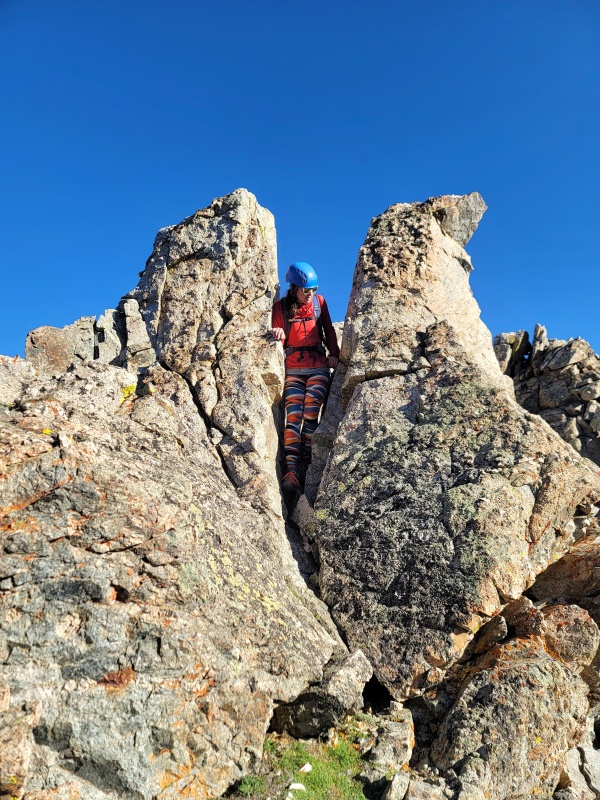
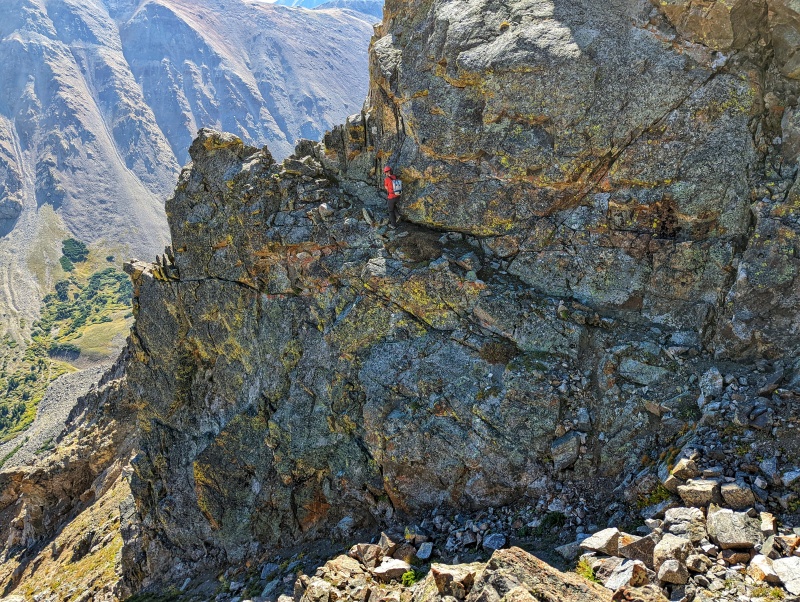
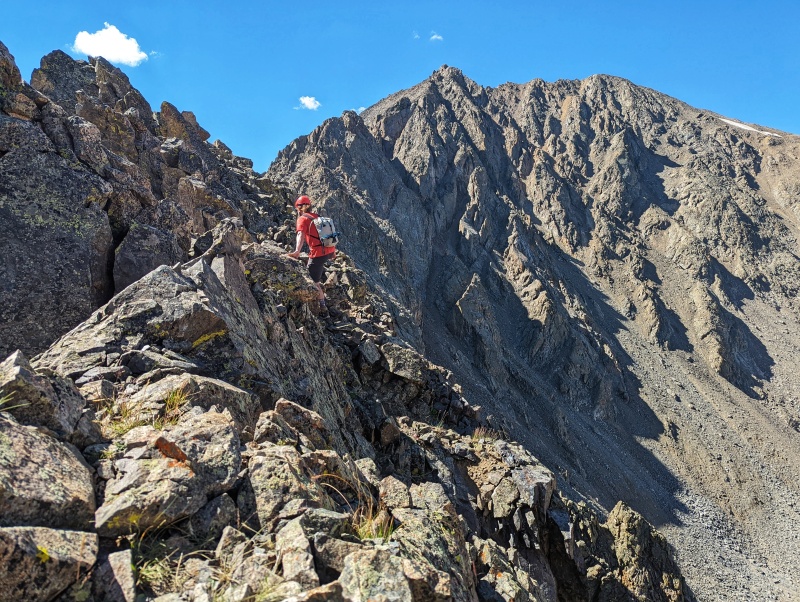
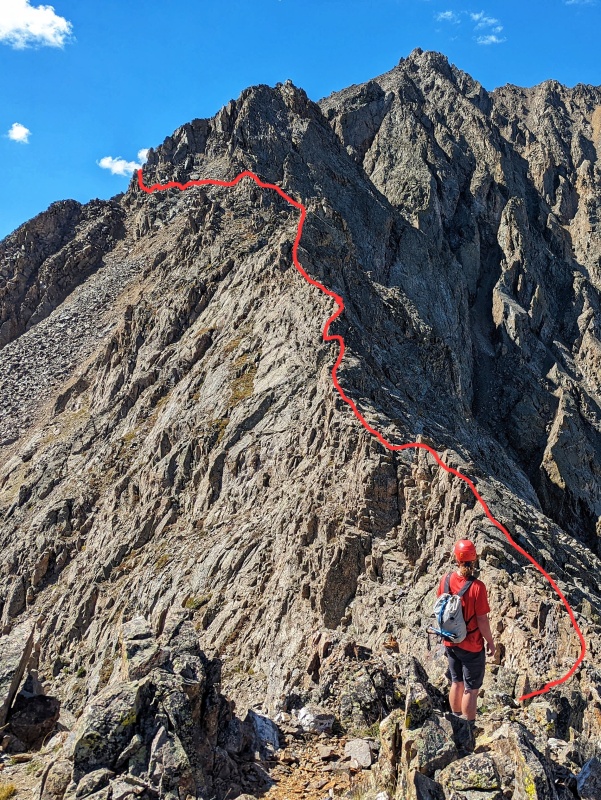
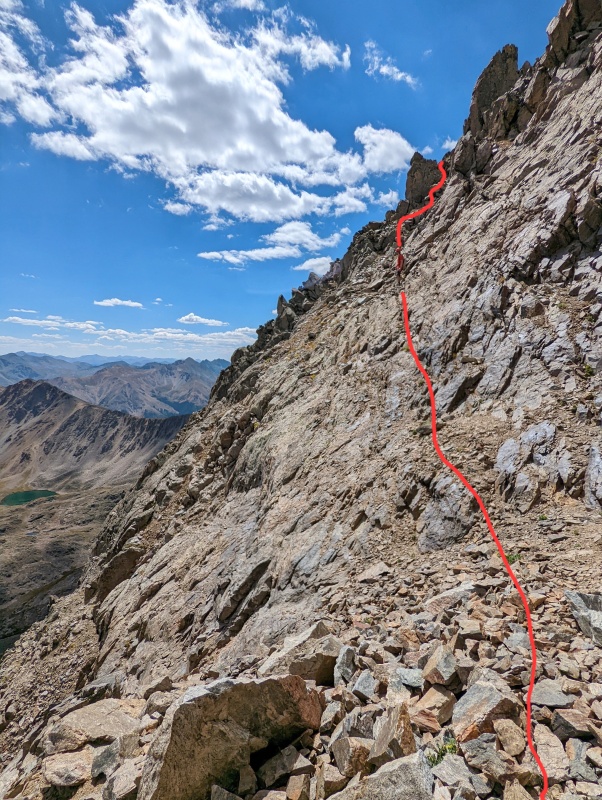
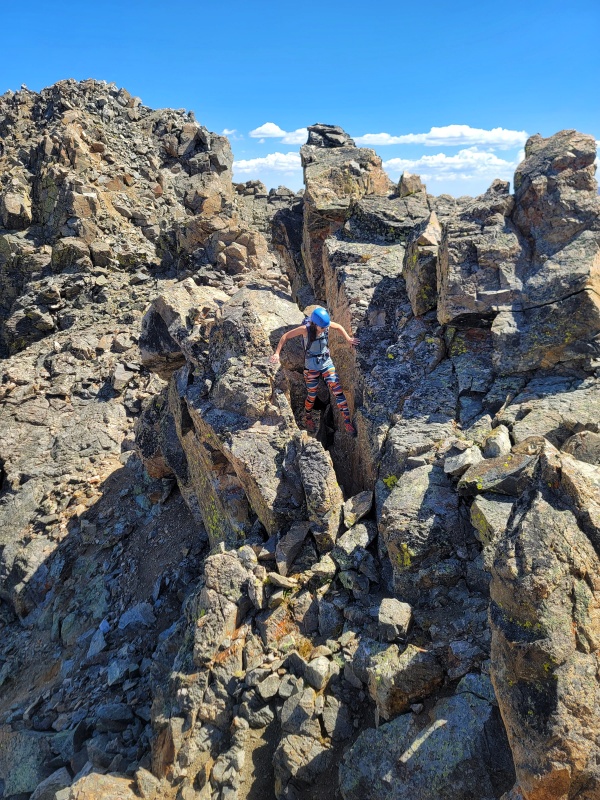
Turnkey Tower Looking towards the "Turnkey Tower." We initially headed down because we thought it would be better to traverse around the tower to the East or go down below the cliffs based on what we'd read in prior trip reports and route descriptions. However, upon arriving at this spot we realized just how much elevation we would have to loose to go down and around the cliffs. The ledge that continued around the tower sloped down towards a cliff and had a good amount of rubble. Not really satisfied with either option, we decided to scramble to the top of the current tower to see what our options were. The scramble to the top was fun and well worth the effort! From the top of the tower, we crossed over to the West side and found a well-defined ledge that took us to the next notch. The "crux section" turned into an intuitive serpentine through the various notches between the towers with some minor descent/ascent of gullies from the notches. The terrain stayed Class 2 and 3.
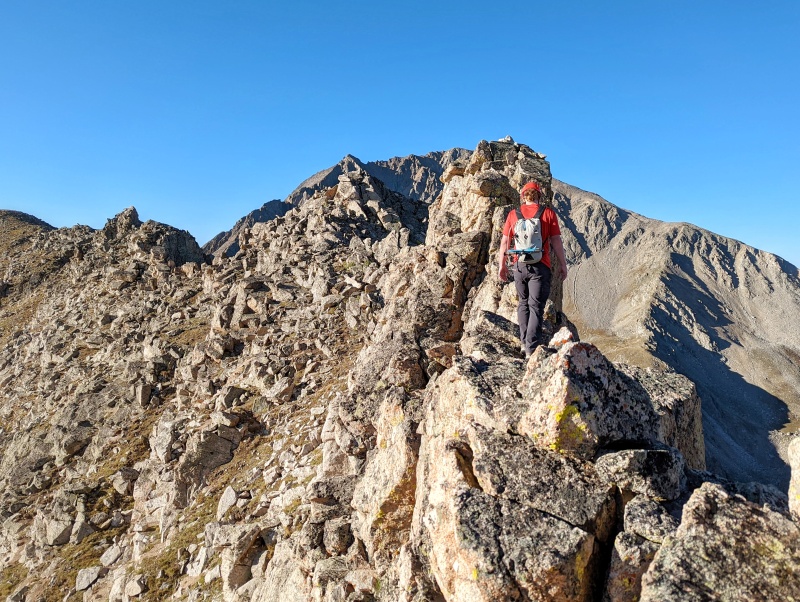
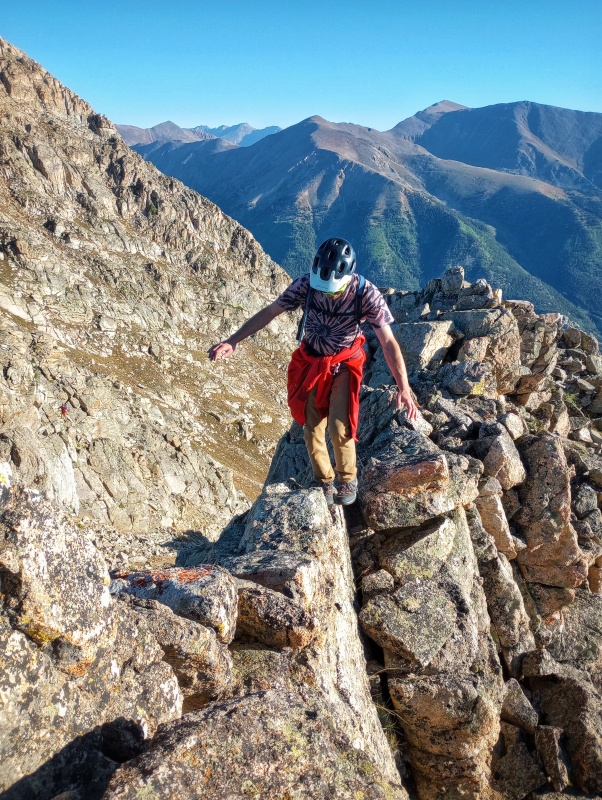
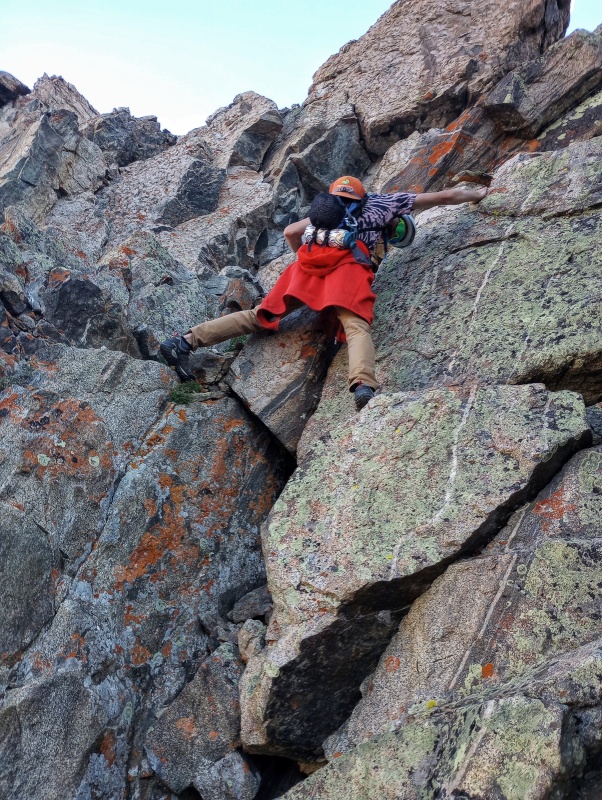
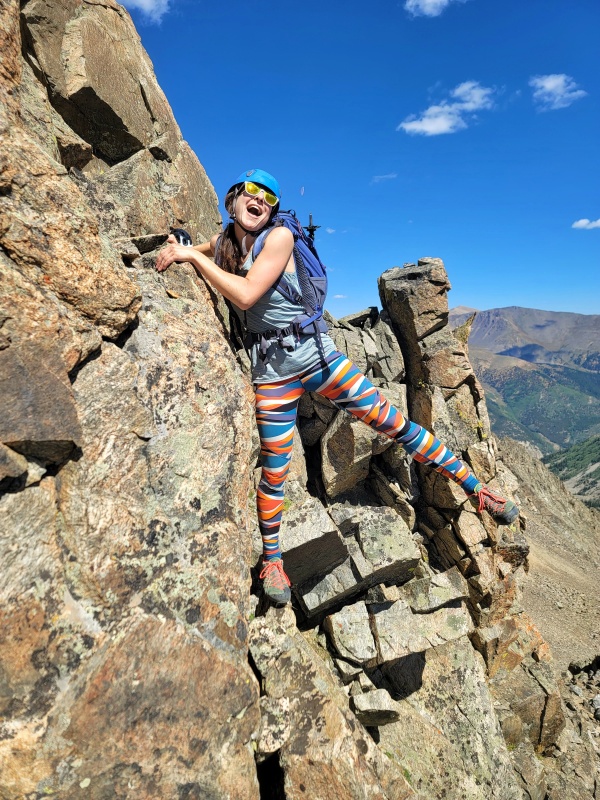
Turnkey Tower route in red.Looking back up towards the spire from the lower Turnkey Tower Ledge. We proceeded along the ridge proper further than we should have, which resulted in some low-5th downclimbing to avoid backtracking. The better route comes in the form of a gully that drops down after the prominent spire, which stays 3rd class.Topping out on Turnkey TowerTraversing around to the right side of the Turnkey TowerAn example of one of the gullies we climbed up to get to the next notch. Climbs/descents were short and fast.Wrapping around the East Side of another tower.Descending back onto the West Face, aiming for the ledge in the sun in the top left of the photo.Another shot to the West.Scouting the ledge.You know you've reached the end of the crux section once you arrive here. There's a well defined ledge that cuts through the cliff band and leads to the obvious notch. The ledge is wider than it appears in the photo.Me doing my best to look aesthetic for Instagram
Pass to the Left of Some Stuff Pretty chill part of the traverse
A Path!There wasn't really anything worth climbing in this section. It's a pretty chill Class 1/2 traverse below the cliffs.Eventually the orange-hued rock will end and it's worth aiming back onto the ridge proper for some fun scrambling.Le Crew
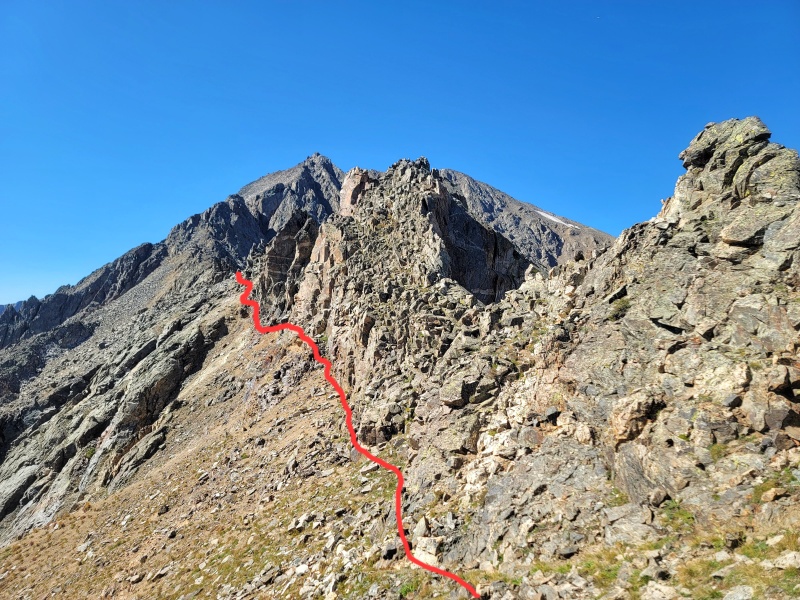
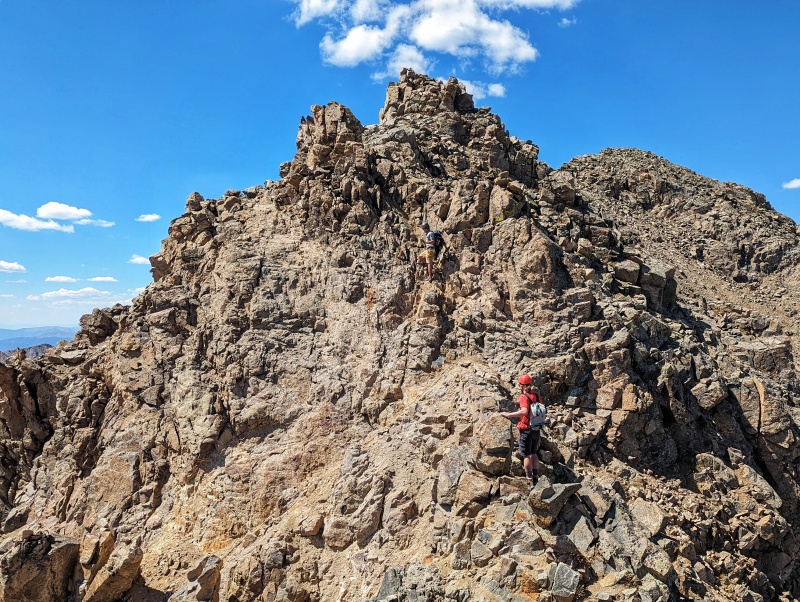
Approaching the Buttress The ridge continues up to the buttress on an solid and fun catwalk. We took the path in red. Once at the buttress, traverse across the middle of the face on a fairly-obvious ledge system... this ledge is just below the cliffs on the buttress. Aim for the smaller notch just above the obvious ledge (crossing looked easier here despite a funky move on the backside).
The Catwalk and path around the buttressFunky move on the backside of the small notch.Regaining ridge proper between the buttress and East La PlataCaption Here
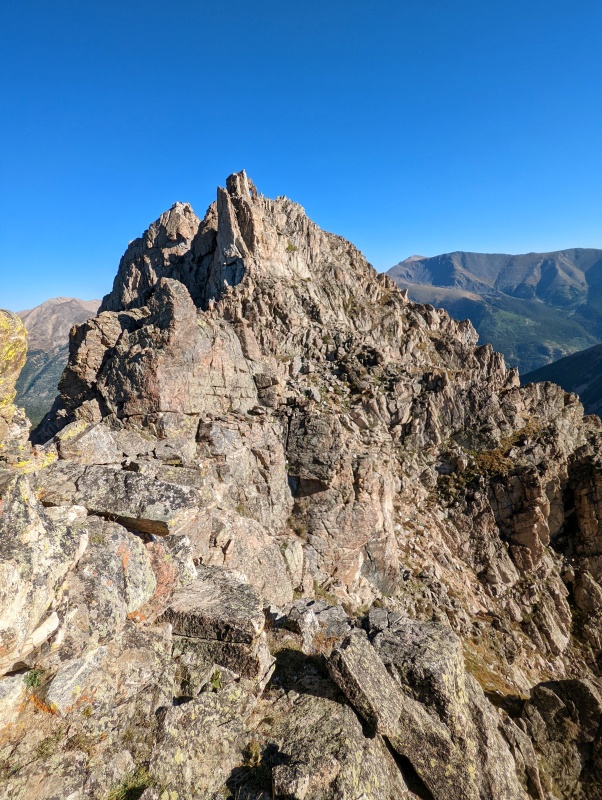
East La Plata You'll eventually reach a point on the ridge proper where the cliffs of East La Plata will drive you towards the left. There's a great ledge just below the cliffs you can follow to a notch and wrap around, and up.
Path around East La Plata.Looking backThe gully we ascended to the summit of East La Plata after going around the corner.On the summit of East La Plata!Looking back at the ridge from the top of East La Plata
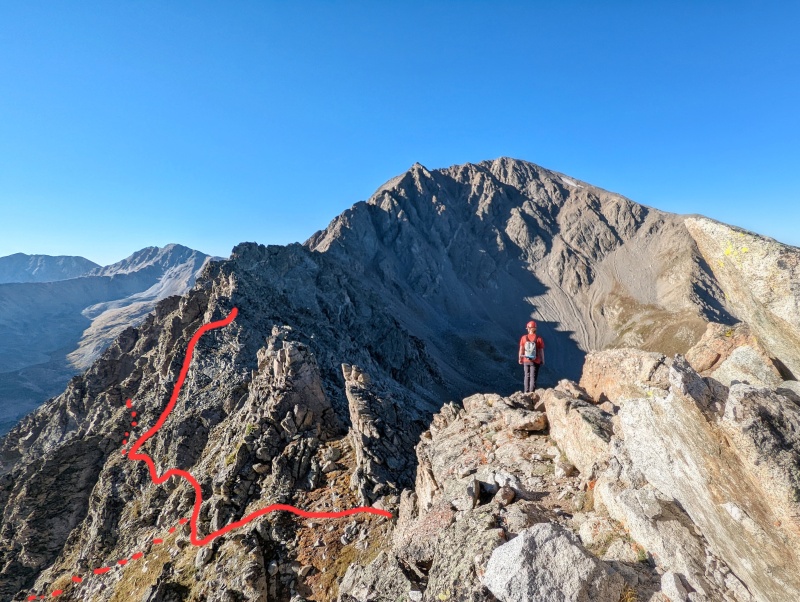
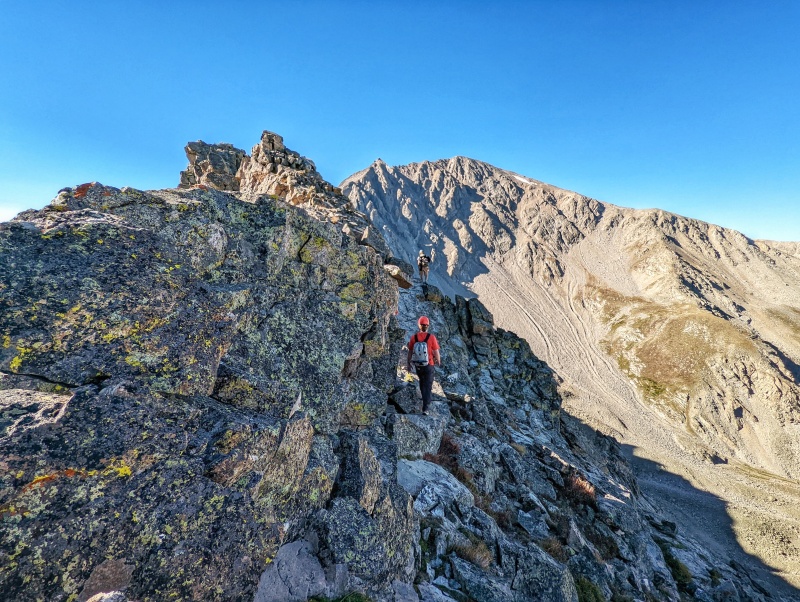
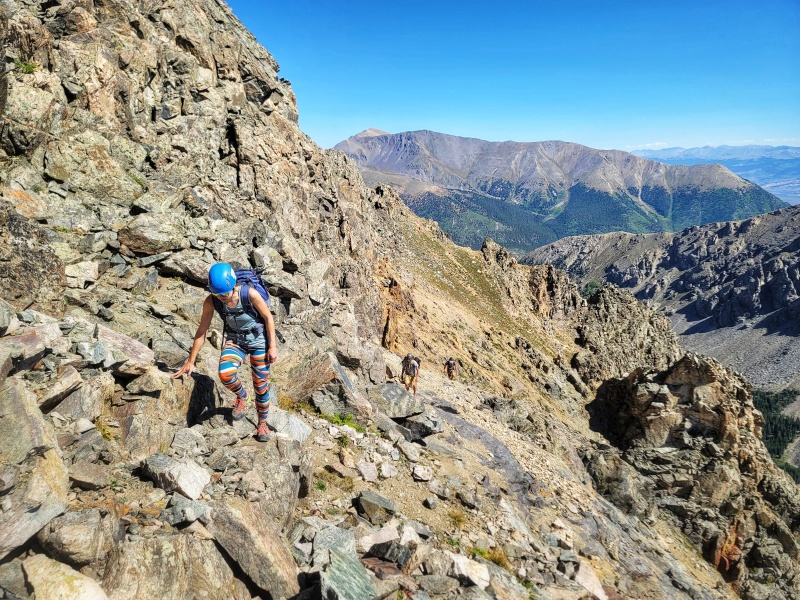
La Plata Summit From the summit of East La Plata, it's generally possible to keep the ridge at Class 2. However, we wanted to get in a bit more scrambling, so we continued to stay on the ridge proper as much as possible.
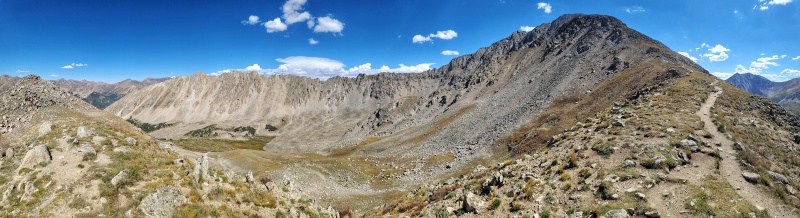
Looking back on a good day's work
Thumbnails for uploaded photos (click to open slideshow):
Congratulations on your climb, and anytime people are there for scale it really makes the picture better. Having done the ridge as well I think your advice is also very spot on.
Good to hear! Yeah, people definitely help provide perspective, especially since cell phones cameras can tend to flatten the photo making it hard to discern depth, especially when it's a photo of a pile of rocks against another pile of rocks! Appreciate the feedback :)
Caution: The information contained in this report may not be accurate and should not be the only resource used in preparation for your climb. Failure to have the necessary experience, physical conditioning, supplies or equipment can result in injury or death. 14ers.com and the author(s) of this report provide no warranties, either express or implied, that the information provided is accurate or reliable. By using the information provided, you agree to indemnify and hold harmless 14ers.com and the report author(s) with respect to any claims and demands against them, including any attorney fees and expenses. Please read the 14ers.com Safety and Disclaimer pages for more information.
Please respect private property: 14ers.com supports the rights of private landowners to determine how and by whom their land will be used. In Colorado, it is your responsibility to determine if land is private and to obtain the appropriate permission before entering the property.


")
")
")
")
")
")
")
")
")
")
")
")
")
")
")
")
")
")
")
")
")
")
")
")
")
")
")
")
")
")
")
")
")
")
")
")
")
")
")
")
")
")
")
")


