| Report Type | Full |
| Peak(s) |
Longs Peak - 14,259 feet Torreys Peak - 14,272 feet Grays Peak - 14,275 feet Mt. Blue Sky - 14,268 feet Mt. Bierstadt - 14,066 feet |
| Date Posted | 07/27/2020 |
| Date Climbed | 07/21/2020 |
| Author | SpeedWalker |
| Front Range 14ers in 3 Days |
|---|
|
Front Range 14ers in 3 Days Alex "SpeedWalker" Walker Introduction On the last trip my the journey to finish all 58 of Colorado's 14ers within one calendar summer, I narrowed the remaining peaks down to just three mountain ranges. Two of these, the San Juan and Elk ranges, would require extensive week-long trips to complete, so in the meantime, my goal was to finish the easiest of the three: the Front range 14ers. I had already completed Pikes Peak on a previous trip, meaning I had 5 more to go; I aimed to complete these in 2 more days, for a total of 6 Front range 14ers in 3 days. Now, I had begun working on this summer goal with my usual hiking partner Tim, but he soon decided to forgo the occasional peak to let me move faster alone. He also didn't want to repeat the peaks we had already done last summer, whereas I was eager to do all of them again. So, our plan was to hike Longs Peak together on the first day, which we hadn't done before, then I would hike Bierstadt, Evans, Grays, and Torreys alone in one long day, as we had completed those peaks previously. However, a last minute schedule change meant Tim couldn't make it even to Longs, so I was forced to be solo for the entire trip. Day 0 - July 20, 2020 This was by far the easiest "day 0" trip I've made to a trailhead this summer. I always prefer to sleep in my car in the parking lot the night before, that way I can get up early and start my hike immediately. The Longs Peak TH is the closest of any 14er trailheads, plus I only had to deal with enough gear for one person for two days. I simply packed my stuff, quickly drove up to the parking lot, and arrived at around 7:00 PM. Rocky Mountain National Park does require a reservation if you arrive between 6:00 AM and 5:00 PM, although luckily those are about the least likely times you'd be arriving to climb Longs Peak. Parking is probably your main concern, especially if you get there in the morning. 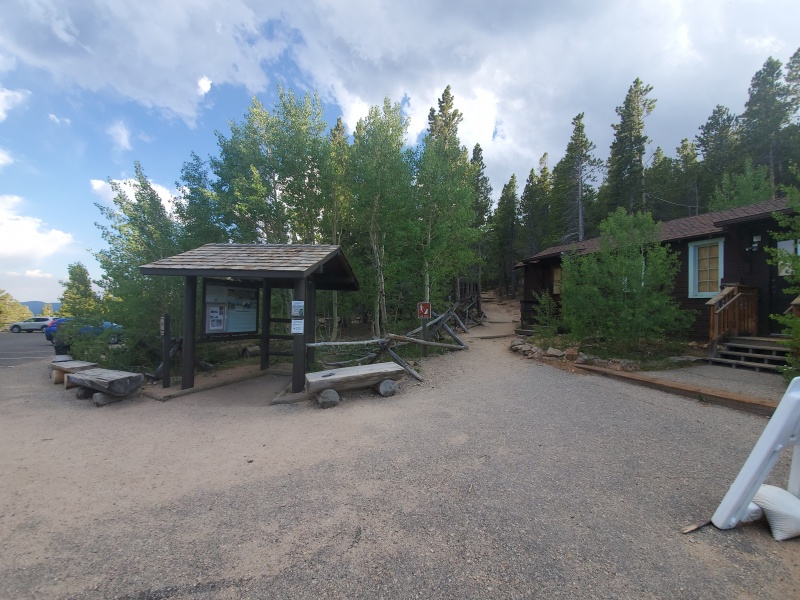
I was impressed with how developed the area was compared to most other trailheads: there's a fully paved parking lot, a few random buildings, and like 6 bathrooms. It's definitely the nicest starting point for any 14er I've been to. I was asleep around 8:00 PM, ready for an early start the next morning. I did have a bit of a rude awakening at 11:55 PM, as a bunch of hikers conversed very loudly in the parking lot. I was confused to see a few headlamps presumably starting on down the trail. Most early starters plan to hit the Keyhole around sunrise, though I can't imagine it taking anyone 6 hours. Day 1 - July 21, 2020 Longs Peak - Keyhole Class 3 | Distance: 13.80 mi | Gain: 4,993 ft
I awoke at 4:00 AM to a nearly-full parking lot. I was pretty efficient as I got ready, and was already hiking by 4:15 AM. The beginning of the trail is incredibly well-built, probably the best section of a 14er trail I've ever seen. It does get a little bit bumpier as you go further up, but it was very pleasant up to around treeline. I was surprised to emerge from the largest of the trees well before reaching even 11,000 ft, instead of the typical height of close to 12,000 ft. You're soon walking through a bare alpine tundra, where the rocky trail looks like a lot of work has been put into it, although it has been widened significantly from such heavy use. About 3 miles in, there's a junction with a distant view of Longs Peak, although it was hard to see much of anything in the dark. 
The trail continues upwards gradually, before coming to a set of large switchbacks. It gets rockier and rockier until the Boulderfield officially begins, at around 5 miles in. 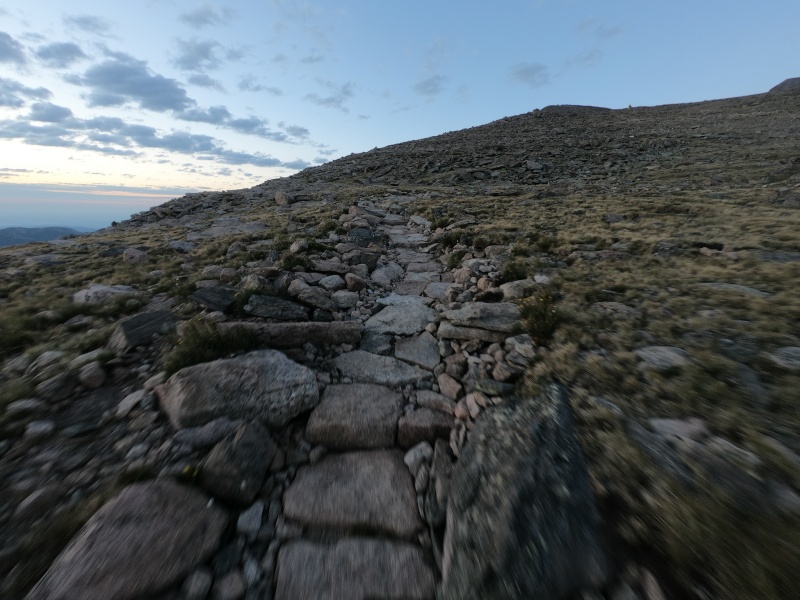
The beginning of the Boulderfield contains a big mess of faint intersecting trail segments, with two major routes that seem to be the most popular. Near its beginning, you pass a campsite with a number of huge wind shelters where you can set up a tent, plus even a few bathrooms. 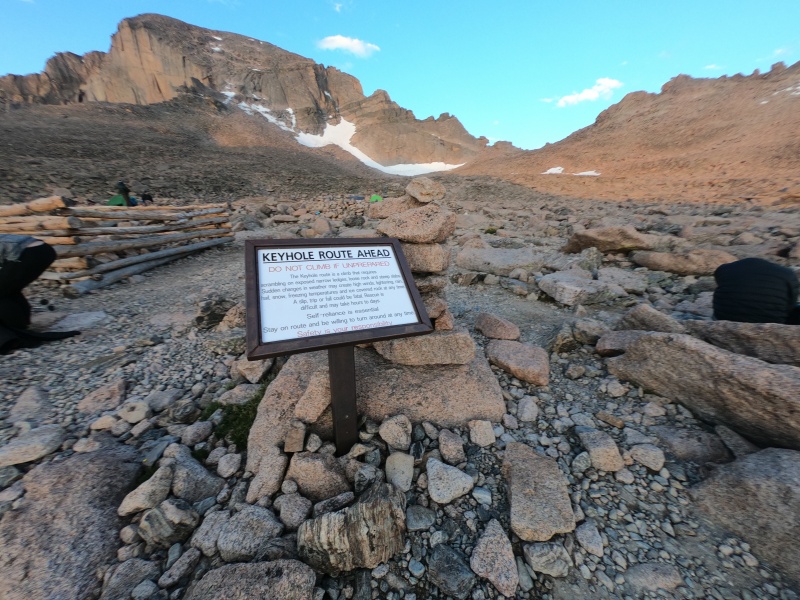
As it goes, the boulder hop gets progressively more intense, with larger rocks, less of a trail, and an increasing slope. Eventually though, all routes converge on the Keyhole, a cool rock formation that marks the beginning of the exposed scrambling sections on this easiest route up Longs Peak. There's a cool little lightning shelter right here too, which looked to still be half-filled with snow. 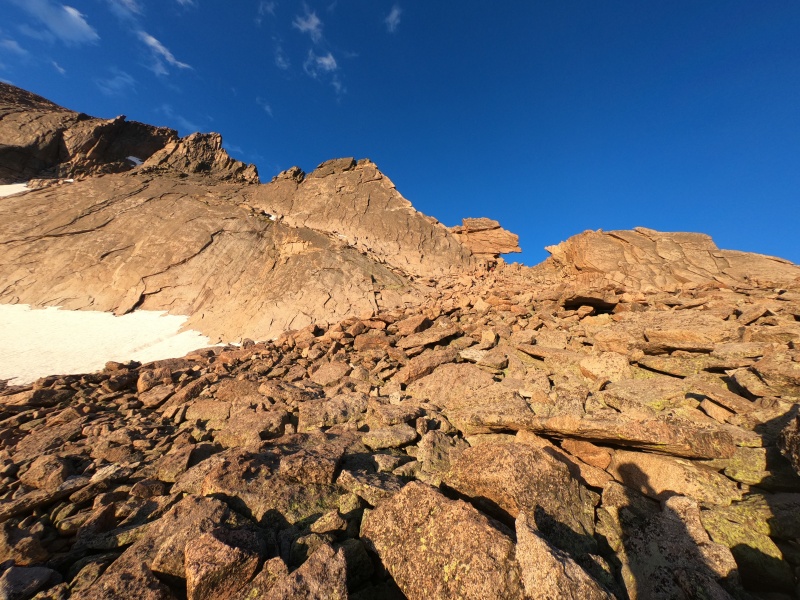
From here, it's less than a mile of much slower-moving terrain, which is generally broken up into four sections. The first is the Ledges, which is pretty easygoing compared to what is to come. I put on my helmet, put away my trekking poles, and made my way through the Keyhole. Route-finding past this point is incredibly simple because of the painted red and yellow markings everywhere along the path. If ever in doubt, just look for the nearest one; they should never be out of sight. 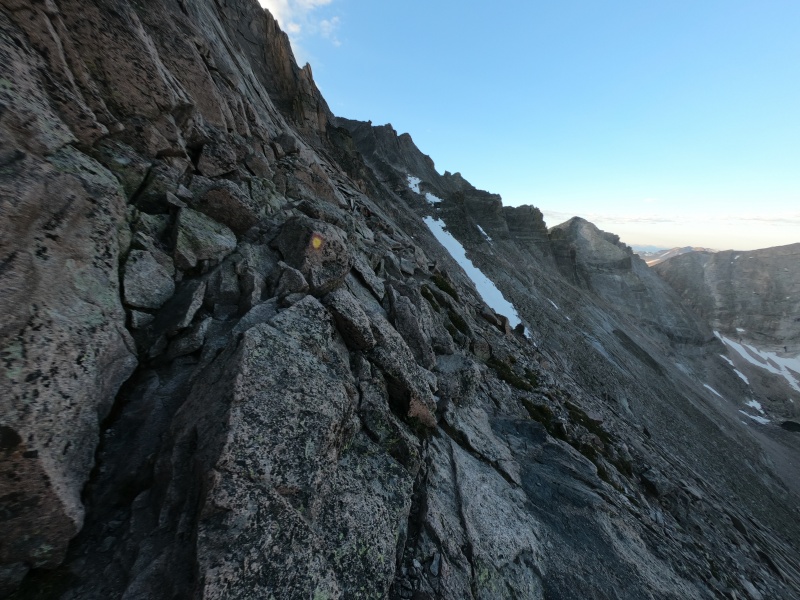
The Ledges are probably the longest and easiest section of the Keyhole route; you can walk along most of it, with some occasional easy scrambling. I was amazed at how worn down most of the rock was along the route, making it difficult to gain traction on anything slanted. I found myself slipping on a lot of rocks that would normally work just fine as a foothold, in one case even hurting my elbow after sliding down from what looked like a secure step. But with tens of thousands of people having traversed this section, it's easy to see why it's all so smooth. 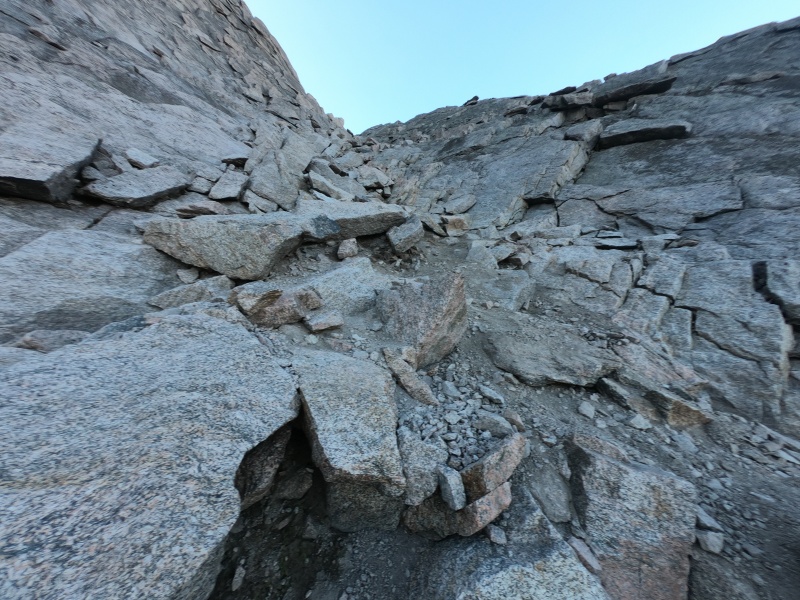
The Trough is also quite long, and it's where you gain the majority of the remaining elevation past the Keyhole. It's basically a loose rocky gully, reminding me of similar locations like Crestone Peak's Red Gully. Though you do have to be careful not to knock anything down, it's so well-traveled that most of the dangerous stuff has probably already fallen already. A helmet is certainly a good idea for this section, and I was surprised at how few other hikers had them on. I guess it's a reasonable risk to take to save some weight, as the rockfall potential isn't particularly high. 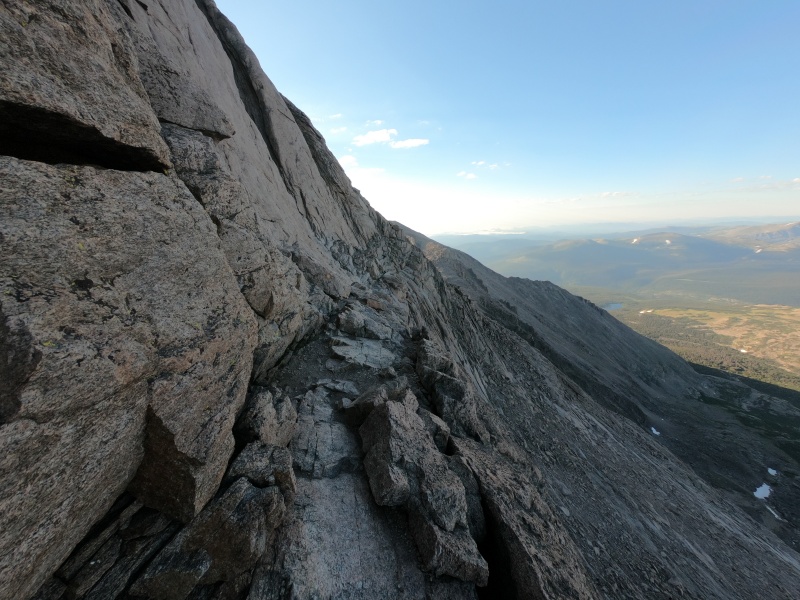
The Narrows is perhaps the scariest, most exposed section of the route, but it's also the shortest. Personally, I found it a lot easier than it looks in the pictures, and no harder than what has come before. It's wider than it looks, and I always felt very secure walking across it. As long as you're reasonably careful, at no point should it feel like you might fall off. 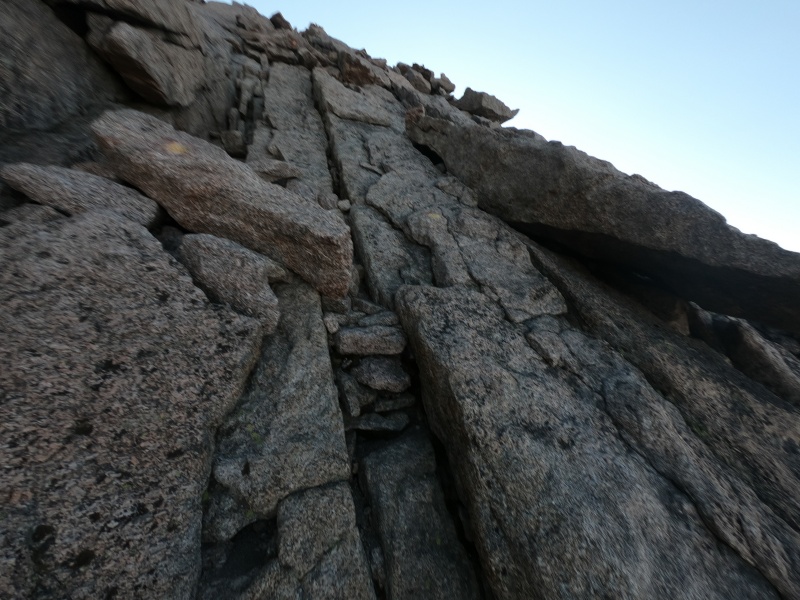
The Homestretch begins with a sharp left turn, after which you'll be going up steep but very solid rock. It's at an angle where you could almost walk up it if you had enough traction, but you'll probably want to use your hands for most of the way. It's really not too difficult for a Class 3 scramble, but it is probably the technically hardest terrain on the route. There were a number of other people on an obvious path to the left, but there's also a parallel way up on the right that looked no harder, which I used to pass them. Based on my count, I was the 8th person to summit that morning (there were seven people already on the summit or descending earlier), although I passed a total of 65 people on the way up. I was at the top of my 33rd 14er of the summer, at just past 7:00 AM. 
I spent a lot of time on top taking pictures and enjoying the views. This definitely was one of my favorite routes up a 14er, perhaps second to my favorite so far, Crestone Needle. The approach was enjoyable, and the section past the Keyhole was fun without seeming too difficult or dangerous. Combine that with its location, and I can now see why this peak is so popular. The crowds of people do detract from the experience a little (we saw no one on our way up the Needle), but it's not quite as bad as the other Front Range 14ers. 
Around 45 minutes later, I finally decided to head down. The weather forecast looked like it might remain good enough for an afternoon summit of Grays and Torreys, which would make for a long day, but save a lot of time tomorrow. Either way, I wanted to get down as fast as possible, just in case. 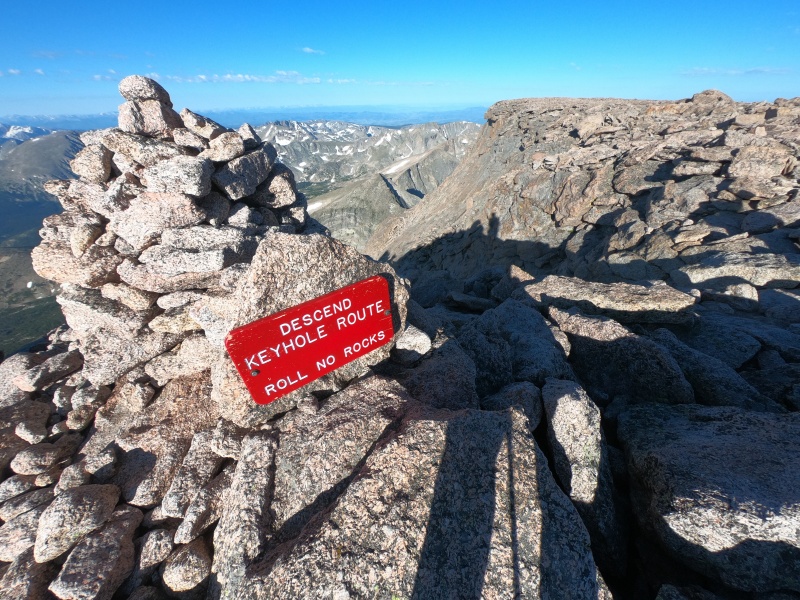
I made it back to the Keyhole mostly without incident. Note that there is one rock formation high above the Ledges that looks kind of like the Keyhole, with a sign pointing downwards away from it. It did trick me for a minute, leading me away from the painted markings, although once I saw the sign it was easy enough to descend back down to the proper route. From there, it was uneventful hiking all the way back down. 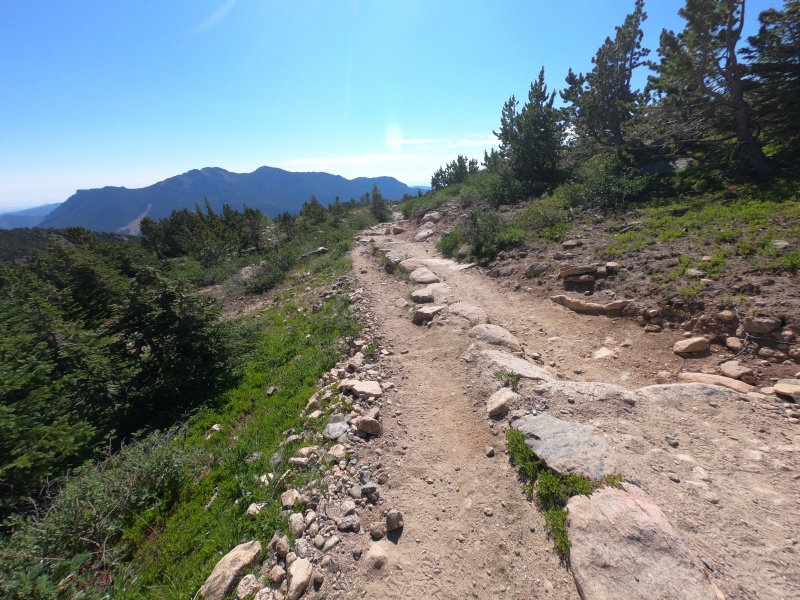
Just like usual, I saw the most number of people right before and around the Keyhole, as many people tend to slow down significantly on these higher sections. After that, there was hardly anyone down to around treeline, where I began to see more casual day hikers checking out the trails. 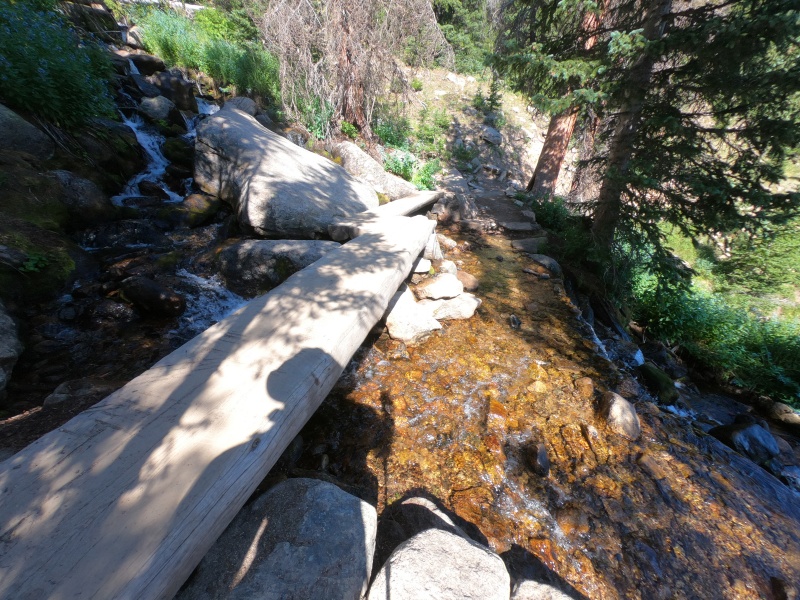
Still, I did end up seeing more people on the way down than up, with a total of 85. Normally I see way more people on the way down than up, so the fact that it was pretty close must mean that my 4:00 AM start was a lot later than most people seriously aiming for Longs Peak. I was pretty happy with my 7:00 AM summit, though. 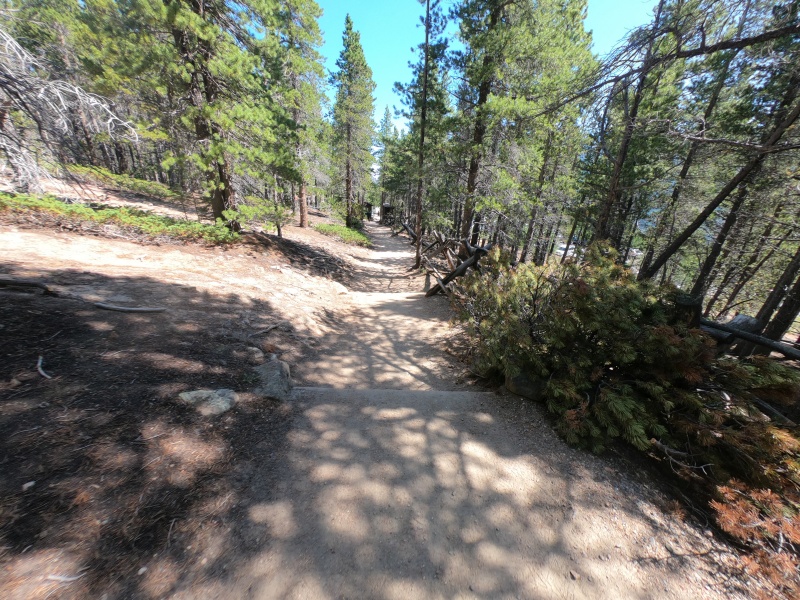
I was reminded once again of the amazing trail work as I got lower; parts of this trail are practically as smooth as a sidewalk. It almost makes me wish that more cool 14ers were in National Parks, although I guess I probably prefer the lack of tourists instead. Anyway, I made it back down to the car just after 10:00 AM (for a total of just over 5 hours of hiking), and rushed out of the parking lot because of another car waiting for my spot. I guess even with the reservation system, the lot is still packed from so many people arriving overnight. It kind of seems pointless if it's already going to be full when the reservation period begins. Anyway, I took some winding roads down to I-70, got some gas, and proceeded to the Grays and Torreys TH. Once you're off the highway, the "rough 2WD" approach road is fairly short, but very rough. The trailhead is only 3 miles from the highway, so it's at least doable if hiking it is your only option. I would say that any car with good clearance could make it, with 4WD probably not being strictly necessary. A Subaru would be about the minimum I would consider taking, although I'm sure an experienced driver could do it with a lot less. Still, it's a very bumpy ride, with some especially washed-out spots around a mile from the highway. It was nonetheless easier than any of the "easy 4WD" roads on this site that I've attempted. 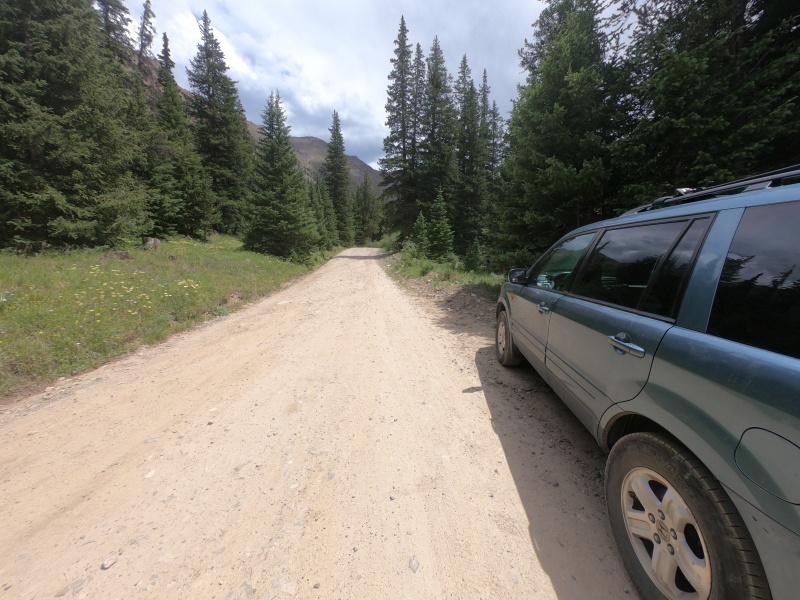
Torreys Peak/Grays Peak - Combination Class 2 | Distance: 11.91 mi | Gain: 4,806 ft
Now, one thing that I haven't yet mentioned on this trip report is that I'm one of those crazy people following the "3,000 ft rule" for all of my major summits. This means that I always aim to start at least 3,000 vertical feet below the lowest peak on any hike. This normally wouldn't be a problem, as Grays and Torreys are both just barely over 3,000 ft above their standard trailhead. However, I've also been going for some centennial 13er ascents, and let's just say that I had more planned than just Grays and Torreys. I talk about this rule a lot more in my last trip report, if you're interested. For now, let's just say that I'm following it, because reasons. So, I set out on the mile of dirt road up to the trailhead, and was soon hiking on the trail. 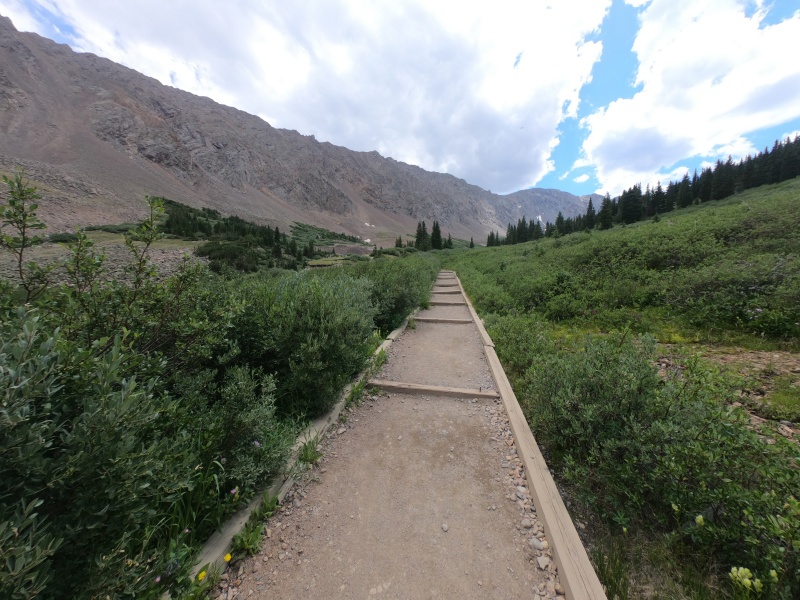
Now, as I mentioned before, this actually wasn't my first ascent of Grays and Torreys. The first time, well, I was a little unsure of what to expect, and I definitely got more than the standard 14er experience. It was mid-June 2019, the last few days of Spring in a record-breaking snow year. I had done just one 14er, three years previously, with a large group in the middle of August. This time, I was the sort-of leader of two other friends, and our cumulative 14er experience amounted to 2 ascents of Bierstadt. The avalanche debris blocking the road over a mile down was a clue that we were in for an interesting time. We were equipped with proper winter boots, clothing, and even snowshoes (which we somehow never actually ended up using, even while postholing through feet of snow for the better part of an hour on our descent), although it was still quite the adventure. Even though we didn't really know where the trail was most of the time, we eventually made it atop Grays and later Torreys, then descended safely before a thunderstorm rolled in. Here is a picture of a similar segment of trail from that trip; note that the morning snow did eventually stop in favor of beautiful clear skies. 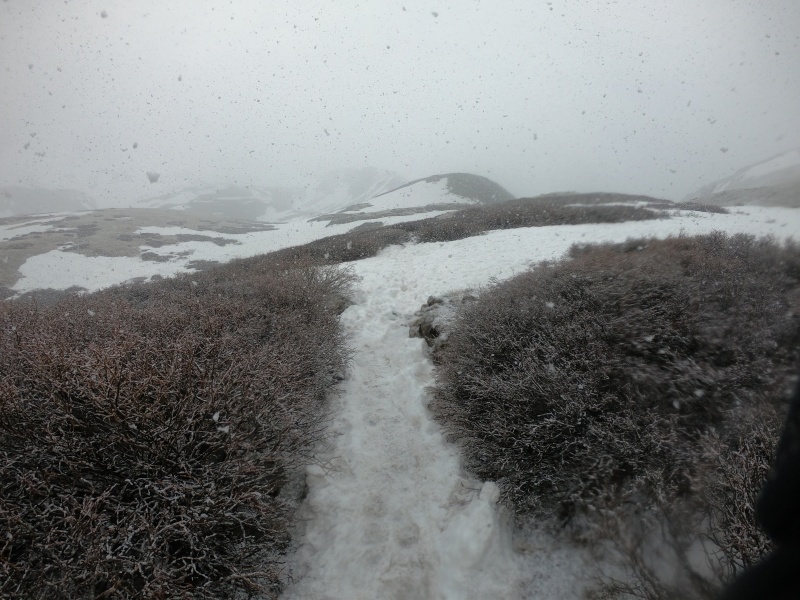
Needless to say, I was surprised this year at how nice of a trail had been hiding underneath all that snow. It's relatively smooth and not too steep for the first couple miles. 
Eventually, the elevation gain picks up, and you begin walking on rocks. Still, the trail is quite well-maintained for a 14er and very easy to follow all the way up. There's one major junction from which you can turn left for Grays, or continue straight for Torreys. I actually decided to do the latter first because of my planned centennial later on. 
Right under the ridge, there's a large snowfield to cross, but it was packed down enough that I made it across fine, even this late in the day. 
And speaking of the time of day, I was very surprised to see literally no one past around 13,000 ft for the entire time. Yes, I got the entire two summits and miles of trail leading up to them all to myself. There were probably hundreds of people swarming these peaks earlier this morning, all committed to the idea of an early start, and being off the summit by noon. And yeah, that's generally the best way to avoid the risk of afternoon storms, and absolutely a good idea to guarantee a safe summit. There were some ominous clouds around that I was paying attention to as I went, but in the end, I was met with hardly a drop of rain all day. So I guess if you want solitude on some high peaks close to home, and you're willing to take a bit of a risk with weather, just go in the afternoon! It was actually a much nicer experience than I expected, and now after two summits I've still never seen a single person atop Grays Peak, supposedly one of the most popular 14ers. 
Anyway, back to Torreys. Since it was snow-covered last time, I was even more surprised to see just how easy the trail continued to be to the top. Sure, it's rocky and all, but it sure wasn't what I think of as Class 2. It's practically as much of a walk-up as Class 1 Grays. The hardest section of the trail is probably on the connecting ridge between them, and even that is still quite easy. I reached the top at 3:30 PM, with the weather looking questionable in the distance, but still mostly blowing away from me. 
I quickly hurried down to the saddle between Torreys and Grays, and headed up the connecting trail. This too was new to me, as my utter inexperience on the first outing meant that I was unsure if this was even part of the route, so I had instead cautiously descended Grays down most of the standard route before carefully contouring to the saddle. I was surprised at how quick it was to get from one peak to the other, under 25 minutes, compared to over an hour last time. 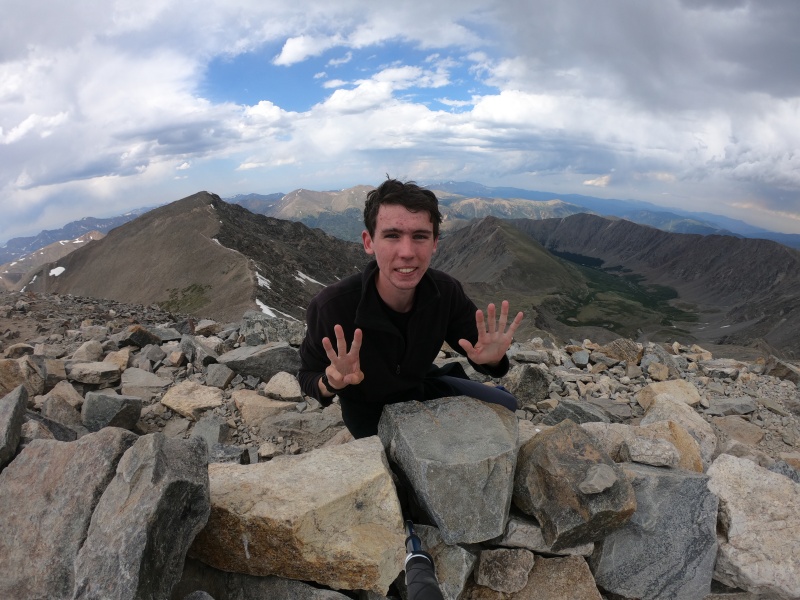
With all my 14ers done for the day, and the weather looking like it would hold off for the rest of the afternoon, I decided to head down the East Ridge of Grays towards centennial Mount Edwards. The hike over to this peak is much rougher than that from Torreys to Grays: a proper Class 2, somewhat off-trail, over a mile-long ridge walk, with lots of little ups and downs along the way. Still, I knew that it was officially part of the Continental Divide Trail, meaning that thru-hikers with large backpacking backpacks regularly make this trek to reach the high point of their 3,100 mile long trail, Grays Peak. 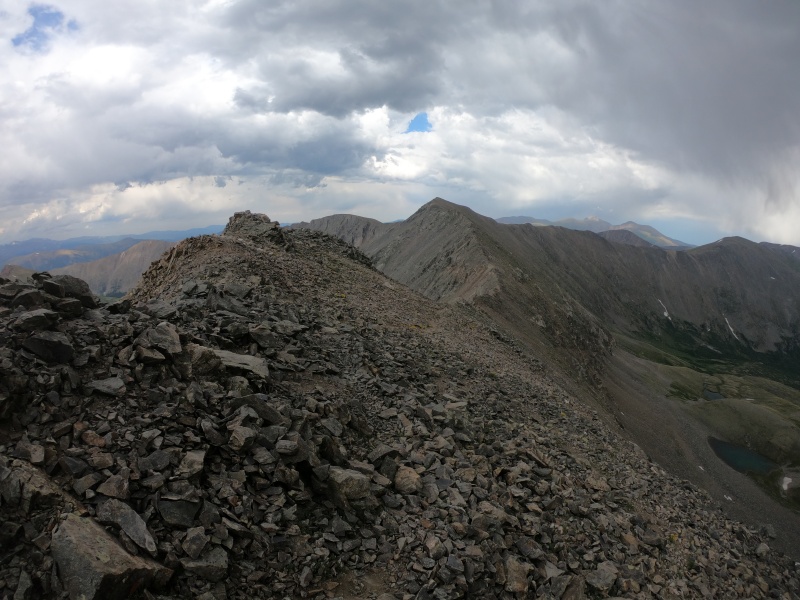
It's really not your everyday easy ridgeline, although anyone who's done some decent Class 2 hikes should be able to manage. It is longer than it looks though, taking me nearly an hour just to gain a couple hundred feet and reach Edwards. The trail is slightly to the south of the ridge most of the way, but it does switch over at one point, which I didn't realize at the time. Unless there's an obvious trail contouring around it, try to stay near the top of ridge even when it gets bumpy, as it's easy to lose the correct path otherwise. The summit was underwhelming, but it did have a very unique view of Grays and Torreys. 
It was around 5:00 PM at this point, and I knew I needed to get down quick to arrive at my next trailhead before sunset (and get some good sleep). So, I headed nearly all the way back across the ridge, which was painfully slow, before reaching the standard trail. As I was descending back into the valley, I saw my first person for hours, who just looked to be taking pictures of the evening light on the mountains. It was rather pretty when the sun came out from behind the clouds. 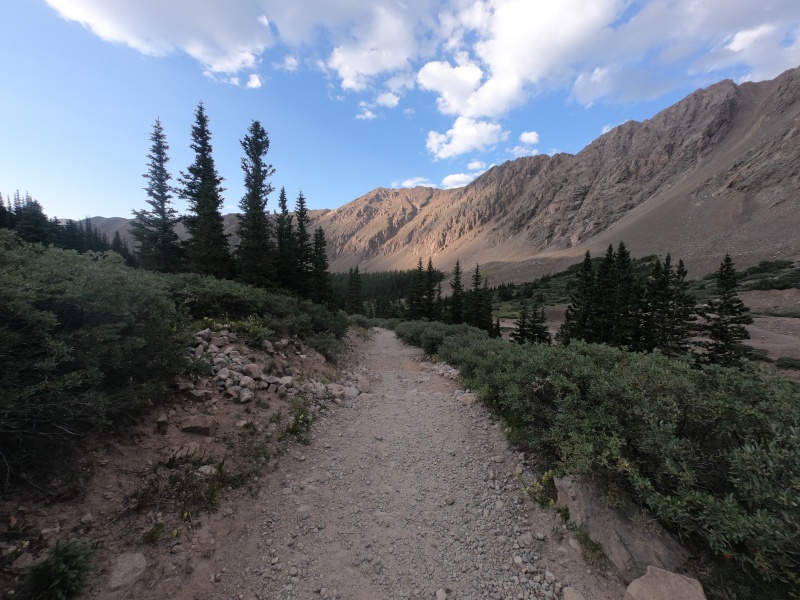
I made it back down to the trailhead and eventually to the car. I decided to immediately pack things up for the following morning, rather than do it in the dark at the next trailhead. I uneventfully drove to Guanella Pass, the trailhead for Bierstadt and Evans. In order to gain 3,000 ft while climbing these two peaks, I did have to stop a little below the standard parking lot, but there were plenty of convenient pulloffs. I set up everything for the night and fell asleep around 9:00 PM. Day 2 - July 22, 2020 Mount Evans/Mount Bierstadt Class 3 | Distance: 11.59 mi | Gain: 4,075 ft
I awoke to my alarm in the car at 4:00 AM, just like I had done exactly one month prior, to begin my first 14er of the summer. That day, I would tackle Mount of the Holy Cross, only my 11th 14er ever. But today, I planned to reach the top of my 36th and 37th 14ers of the summer, finishing up all but the last two mountain ranges in the state, in the span of just 31 days. And these two peaks were ones I had done before, so I felt confident I could cover the terrain quickly. But first, I needed to get onto the standard trail from my low starting point. The simplest way to do this is simply to walk up the road for a mile and a half, where you can start at the standard parking lot. But along the way, you'll pass through two giant switchbacks, which although are great for cars, they really aren't necessary if you're hiking. Plus, you're literally gaining elevation that you'll lose in the first section of the hike anyway, so I decided to try a couple shortcuts. The first is simple enough: at the corner of the first switchback, just keep walking in the same direction, and make your way up the hill, onto the next section of road. It gets pretty steep at the top, and you have to hit the road in just the right spot to avoid a vertical wall. I took some pictures later in the day to demonstrate. 
The next shortcut, well, let's just say that you absolutely shouldn't do it. But for the curious, it starts out the same way from the second switchback, into what seems like a well-established path through the willows. You may be able to find a proper route that ends up on the trail, but both times I tried, it ended up being a full-on head-height bushwhack, followed by getting my shoes completely soaked before eventually meeting up with the route. I ultimately saved around a mile round trip by doing it this way (the first shortcut saves about half that), but it was terribly unpleasant. 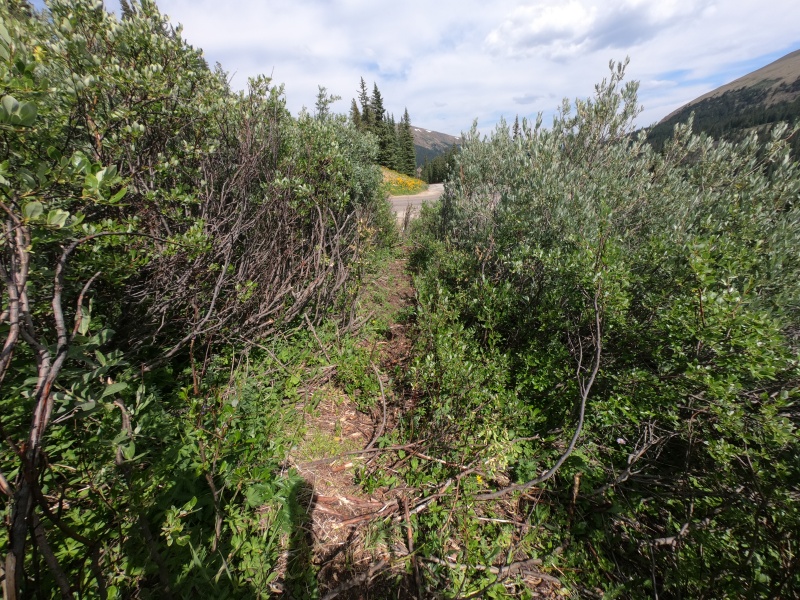
Anyway, I planned to hike up Bierstadt and Evans through the Class 3 Sawtooth connecting ridge. Most people do Bierstadt first, like I did last time, up the standard route, across to Evans, then down an annoying gully and through a terribly-muddy section of willows. But since my feet were already wet, and since I'd already done it the standard way, I decided to switch it around and go up Evans first. I also definitely do not recommend this, for many reasons I will explain along the way. The first is that you'll get your feet muddy and wet at the very start, which ended up annoying me all day, even after changing into dry socks. 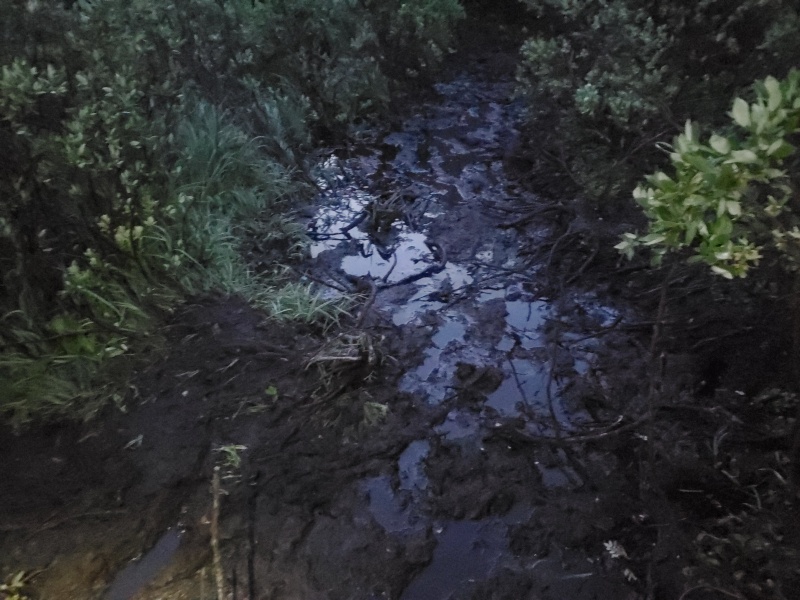
Still in the dark, I turned off from the main trail, into the confusing maze of willows towards Evans. In reality, the vast majority of this route isn't that bad, although it's very easy to get lost and have to bushwhack your way back to an established path. There are quite a few alternate turnoffs, making you often unsure of where to go next. Every once and a while, there's a really muddy section like in the picture above; if you're really careful, you can usually hug the willows and avoid getting your feet wet. I wasn't being particularly careful, because my feet were already wet, so I ended up ankle-deep in mud a few times. After about a mile of this, I eventually emerged from the willows, into the gully. There's a trail that starts out more to the right (south) side, which gets pretty rocky with some real Class 2 hopping around. Eventually, it leads straight into the center of the gully, which is loose enough to be annoying and potentially dangerous, but probably not steep enough for any rocks to fall for long. 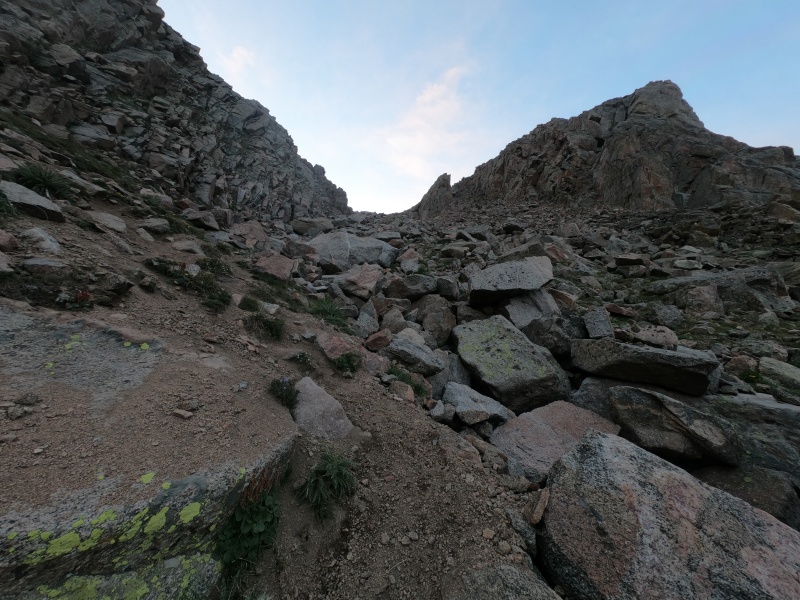
This is perhaps the second-most annoying part of the entire route, depending on how much you enjoy the Sawtooth. It wasn't too hard to go up, and wasn't terrible going down either; you just have to be a little careful. I guess the biggest advantage of doing the loop in this direction is that you get the two worst parts out of the way immediately, rather than being at the very end (still, it's best to save the willows until last). 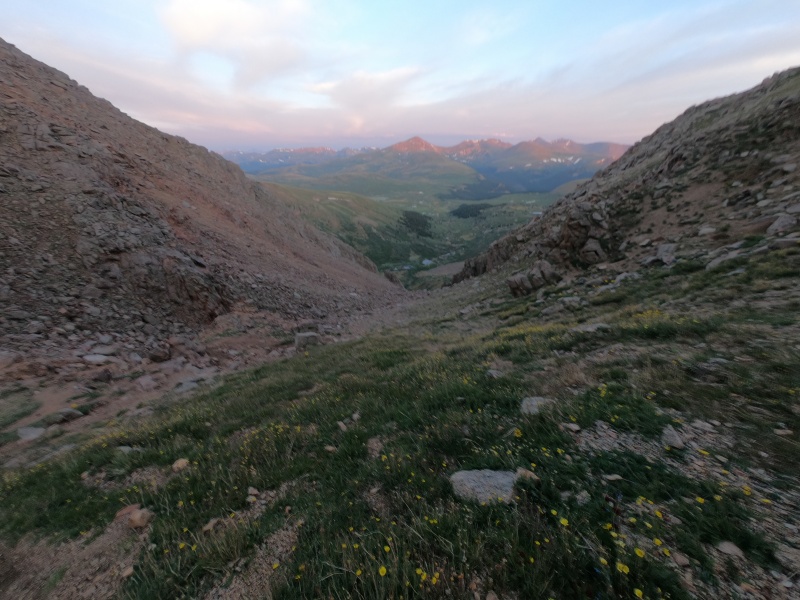
I made it to the top of the gully, and just kept walking until I first felt the sun. At this point, I took a little break to change my wet socks, move around some layers, eat a snack, drink some water, change my camera battery, assess the route on my phone, take some pictures, and stretch. I don't take breaks often while I hike, but when I do, I make sure they're as productive as possible. 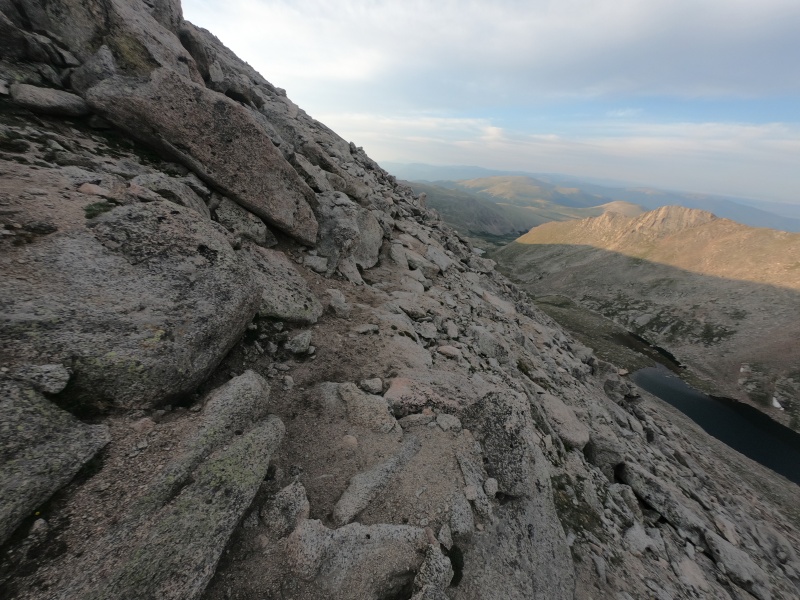
After walking from the gully across a big open field, you soon hit the standard trail up Evans. It gains elevation gradually along the right side of the ridge, before hitting the top nearly a mile later. The terrain is rocky and the trail can be hard to follow at times, but as long as you don't get too far off, it's all pretty solid, easy hiking. It was as I approached the summit that I realized the other advantage of doing the loop in this direction. I had seen absolutely no one all day so far, and now standing atop a 14er with a road to the top, there was still nobody around. Now, for the rest of this year, the summit will be considerably less busy than usual at all times of day, as the road is currently closed for the season. But even if it were open, they only allow cars past 8:00 AM. So since most other hikers, either on the long trail from Echo Lake, or moving in the other direction along the Sawtooth, won't have made it to the top yet either, you have a good chance of being alone at the top of Evans if you get an early start. 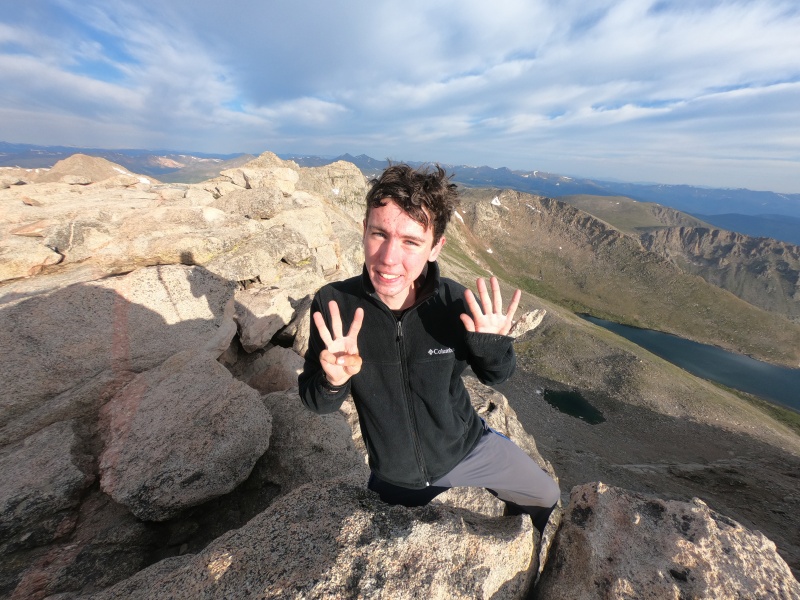
There were also tons of mountain goats running around in the structures by the parking lot. I guess they've reclaimed the summit as their own, since all the cars are gone. Well, there was suspiciously one car up there, and a few in the lower lot, probably related to the road work they're doing. 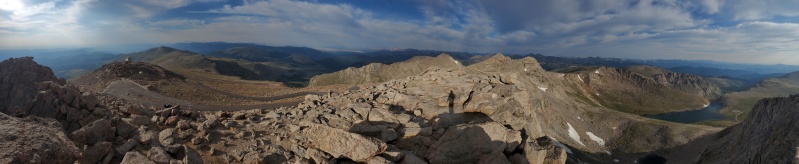
Still, I knew there were bound to be dozens of people on top of Bierstadt by now, with plenty of people who I would meet along the Sawtooth, as well. So, I began the walk back over the ridge while enjoying my last few minutes of solitude. 
A trail breaks off from the standard route, which takes a right, by heading straight towards The Sawtooth. You can either follow the ridge up to the top of The Sawtooth, a high unranked 13er, or just contour around it to hit the correct entry point, on the west side of the connecting ridge. Once you enter (and put your helmet on), a Class 2+ steep walk down loose dirt begins, with extreme exposure to your right. This is the scariest part of the entire ridge, which usually comes at the end. 
Your goal at this point is to cross over to the gentler east side of the ridge. You follow a series of ledges down and over a passage to the other side, from which you can complete the long remainder of the route. This first section may be scary, but the walkway is wider than it looks, and doesn't really require any real scrambling. Just be careful as you go not to step on anything loose. As you look back (or forwards, if you're going the standard direction), these ledges just look like a dirt ramp along the side of a vertical face; though it's quite exposed, it looks much easier once you get up close. 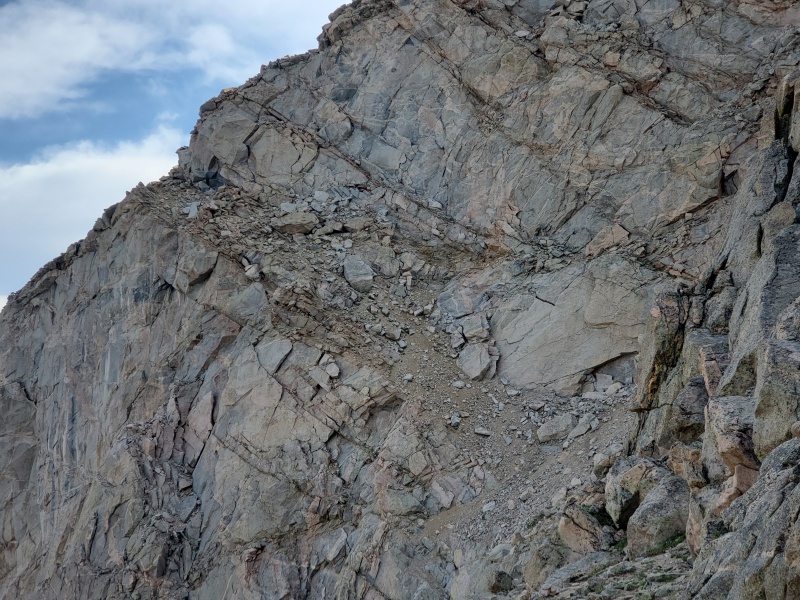
Once I crossed over to the safer side of the ridge, I followed a convenient series of easy paths around the biggest obstacles of this route, some huge gendarmes sticking up out of the ridge. It descended much further than I expected, so I ended up missing one section, opting for a Class 3 scramble down some rocks instead. These were probably the technically hardest moves I did on the route; if you follow the easiest path, it's hardly Class 3. 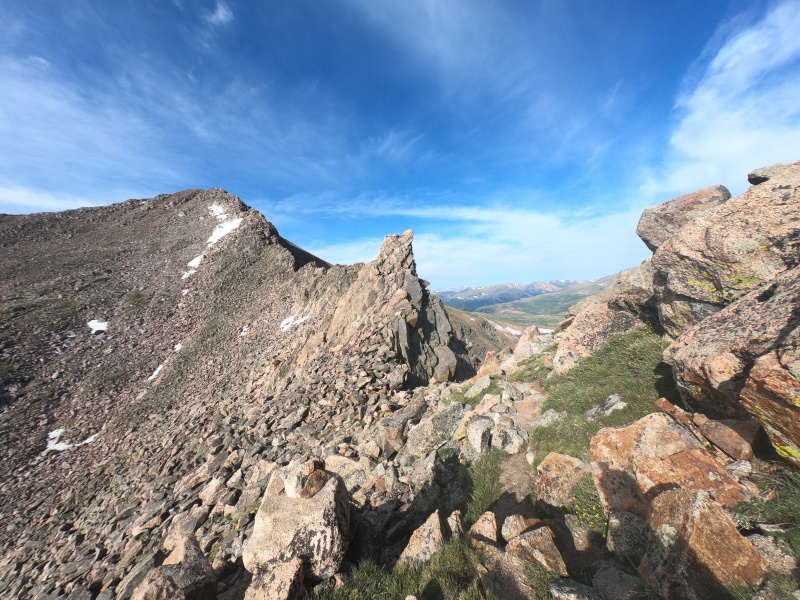
From here on, the most popular route involves gaining the ridge, scrambling just to the east side for a while, then following a sequence of cairns up the slope to the summit. I followed this somewhat, although I definitely deviated in quite a few little places. I felt like I was just wandering up the rocks along my own path, happening upon a cairn every once and a while. 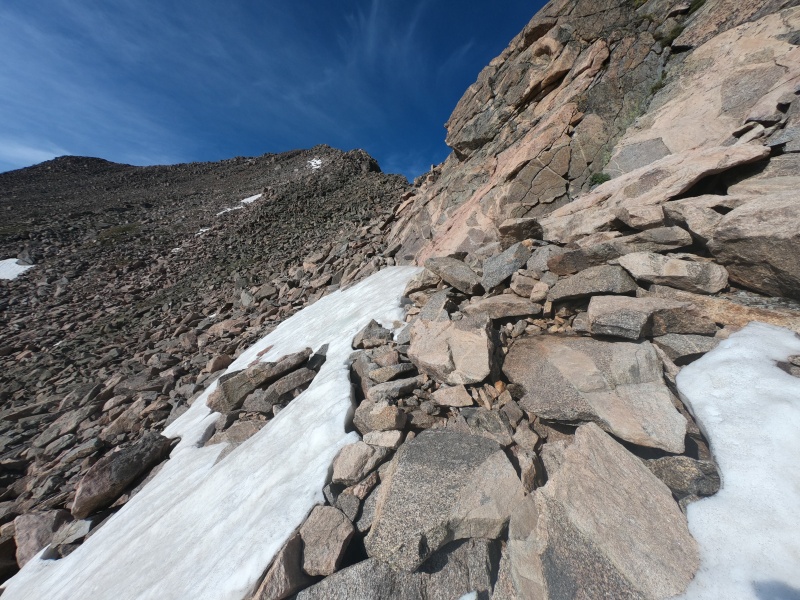
There were a few totally avoidable snowfields, although I think one blocked a popular path near the summit. You can actually stay near the ridge for a lot longer than I did, which we did last time, and it'll definitely lead to more scrambling and less rock hopping. The easiest path is still along the slope for many sections, but you may find the ridge more fun. 
I had seen a few groups of people up to this point, but nothing could prepare me for what I was about to see on top of the peak. I emerged from the rocky slope to see literally 50 people in my immediate view (I counted), so I quickly moved partway down one side of the summit so I could take my pictures in (relative) peace. This is the final advantage of going the standard direction across the Sawtooth: you can beat the morning crowds to the summit of Bierstadt. 
37 peaks down in 31 days, and it's not even 10:00 AM. Though one of the easiest trails up a 14er is all the lies between me and the car, attempting to dodge literally hundreds of people (again, I counted) at a 6 foot distance would make for a formidable challenge. I quickly squeezed my way through the crowd on top, as there was no way to avoid it, then began my descent. I weaved in and out of other hikers, trying to give as much space as possible, and eventually breaking into a rock-hopping jog. It was easier to avoid people up here because of the many paths through the boulders, but it became increasingly difficult as the trail narrowed. 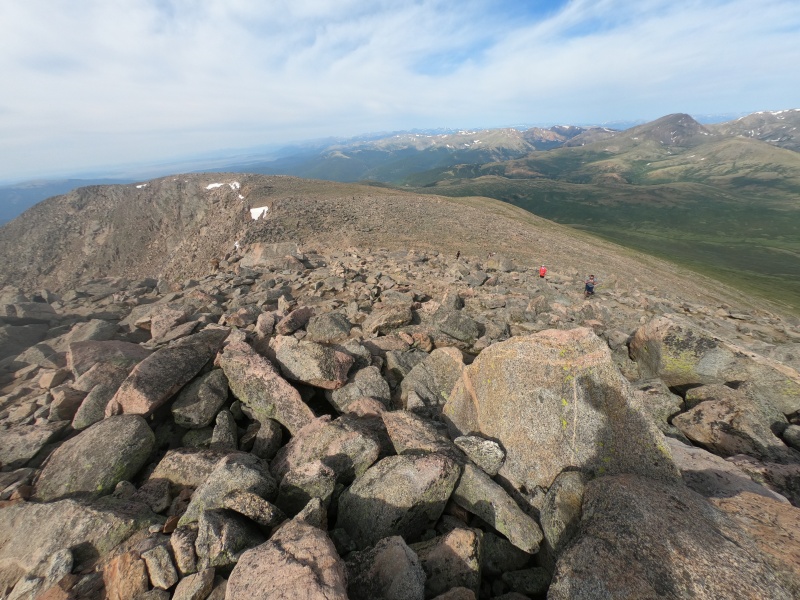
You always encounter the most people between around 13,000 ft and the top of a 14er, because that's where most people slow down considerably. I understand it, as I had such an experience back on the slopes Bierstadt nearly 4 years ago now. You take a couple steps, then stop, gasping for breath, before you eventually work up the energy to keep moving. My only request is that when you stop, just move to the side of the trail and give plenty of distance to the people passing you. On the narrow portions of trail, most of the moving hikers saw me coming, and we both moved to opposite sides of the trail to avoid each other. But most of the stopped hikers just stood there, right in the middle of the trail, forcing me way off the standard path to go around them. Many people advocate for wearing masks on popular trails, but it's impossible to get enough air to breathe properly through one. Sure, you can take it on and off for every person you see, but based on my count, that would be about every 10 seconds. I always use trekking poles, which would make it even more difficult, and slow me down a ton. Plus, in my experience hiking with one, taking a mask on and off just means that you're touching your face constantly, and I doubt it's much more effective than just staying far enough away. 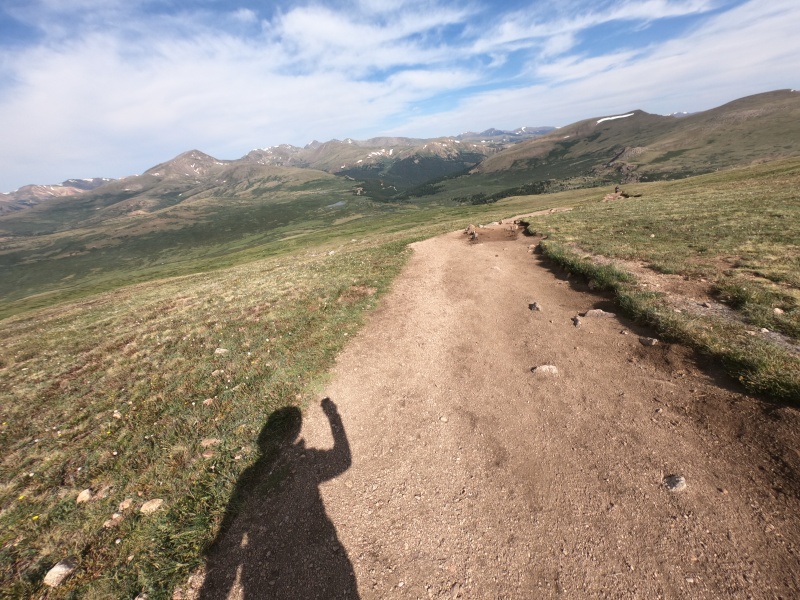
Anyway, let's just say I'm glad to be done with my last of the ridiculously-popular peaks for the summer. The San Juan and Elk ranges should be a lot less crowded. Oh yeah, and I saw a total of 254 people coming down Bierstadt, a new record for me, and all on the least popular hiking day of the week. Soon enough, I was back into the willows, and I hit the turnoff for my questionable shortcut, deciding to follow it one more time for the sake of consistency. 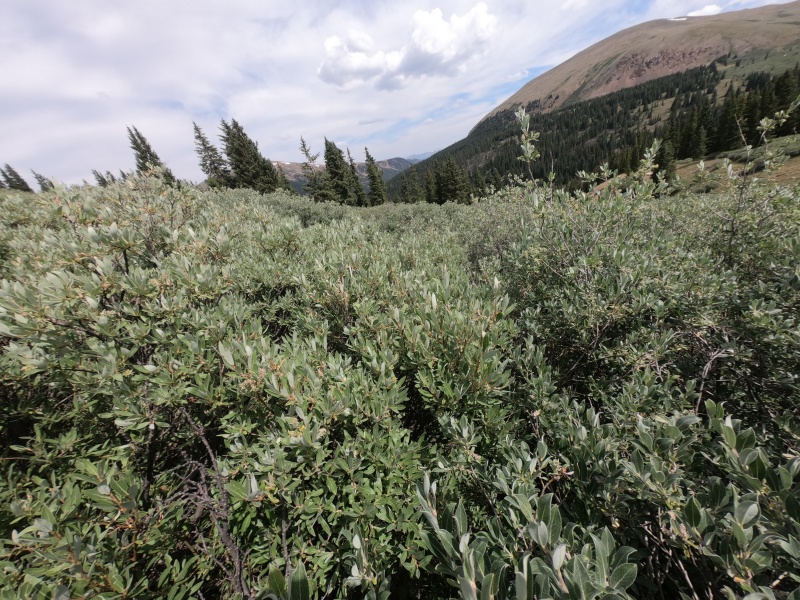
After getting my feet soaked and pushing through the willows for the final time, I finally made it back to the road, down the easier shortcut, and back to the car, over 3,000 ft below the summit of Bierstadt. I immediately changed my socks, had some snacks, and set off down the road back home. My next adventure was planned to begin in about a week, a 7-day trip through the San Juan range. Thumbnails for uploaded photos (click to open slideshow): ")
")
")
")
")
")
")
")
")
")
")
")
")
")
")
")
")
")
")
")
")
")
")
")
")
")
")
")
")
")
")
")
")
")
")
")
")
")
")
")
")
")
")
")
")
|
| Comments or Questions |
|---|
|
|
Caution: The information contained in this report may not be accurate and should not be the only resource used in preparation for your climb. Failure to have the necessary experience, physical conditioning, supplies or equipment can result in injury or death. 14ers.com and the author(s) of this report provide no warranties, either express or implied, that the information provided is accurate or reliable. By using the information provided, you agree to indemnify and hold harmless 14ers.com and the report author(s) with respect to any claims and demands against them, including any attorney fees and expenses. Please read the 14ers.com Safety and Disclaimer pages for more information.
Please respect private property: 14ers.com supports the rights of private landowners to determine how and by whom their land will be used. In Colorado, it is your responsibility to determine if land is private and to obtain the appropriate permission before entering the property.

