Download Agreement, Release, and Acknowledgement of Risk:
You (the person requesting this file download) fully understand mountain climbing ("Activity") involves risks and dangers of serious bodily injury, including permanent disability, paralysis, and death ("Risks") and you fully accept and assume all such risks and all responsibility for losses, costs, and damages you incur as a result of your participation in this Activity.
You acknowledge that information in the file you have chosen to download may not be accurate and may contain errors. You agree to assume all risks when using this information and agree to release and discharge 14ers.com, 14ers Inc. and the author(s) of such information (collectively, the "Released Parties").
You hereby discharge the Released Parties from all damages, actions, claims and liabilities of any nature, specifically including, but not limited to, damages, actions, claims and liabilities arising from or related to the negligence of the Released Parties. You further agree to indemnify, hold harmless and defend 14ers.com, 14ers Inc. and each of the other Released Parties from and against any loss, damage, liability and expense, including costs and attorney fees, incurred by 14ers.com, 14ers Inc. or any of the other Released Parties as a result of you using information provided on the 14ers.com or 14ers Inc. websites.
You have read this agreement, fully understand its terms and intend it to be a complete and unconditional release of all liability to the greatest extent allowed by law and agree that if any portion of this agreement is held to be invalid the balance, notwithstanding, shall continue in full force and effect.
By clicking "OK" you agree to these terms. If you DO NOT agree, click "Cancel"...
Peaks: Ellingwood Ridge (13,220')
"East La Plata" (14,180')
La Plata Peak (14,336') Route: Ellingwood Ridge ascent, standard route (mostly) descent Distance: 9.5 miles Difficulty: Class 4 (could probably be kept to Class 3)
The Ellingwood Ridge of La Plata Peak has impressed and daunted me since I saw it for the first time while climbing La Plata's standard route in 2008. As I stared in amazement at the jagged, two-mile ridge, it never occurred to me that I would ever even attempt it. However, the time came to give the Ellingwood Ridge a shot. After a few unsuccessful attempts at scheduling this climb, my sister and I settled on Friday, July 13. We, along with three capable climbing partners, set out a bit too late on Thursday evening to car camp at the trailhead, which we reached at 11:30 pm. We caught a few hours of sleep and took off on the standard trail at 4:45 am.
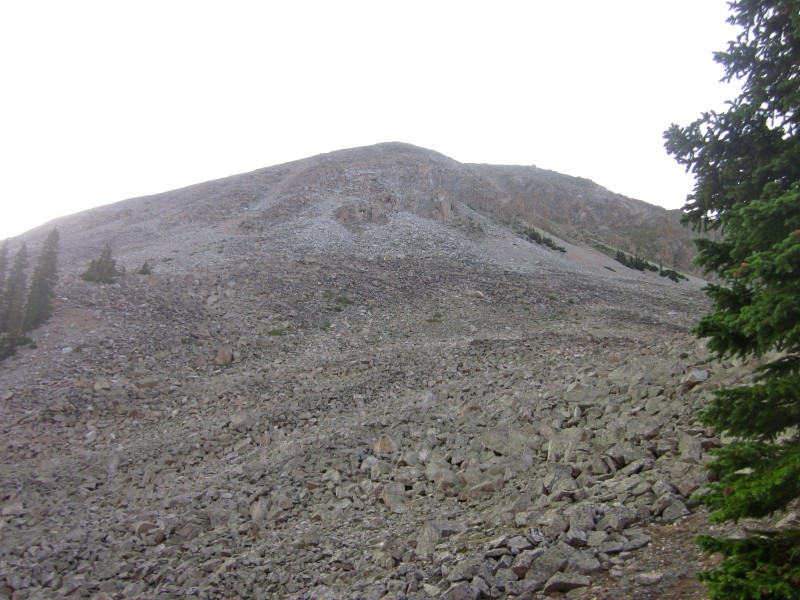
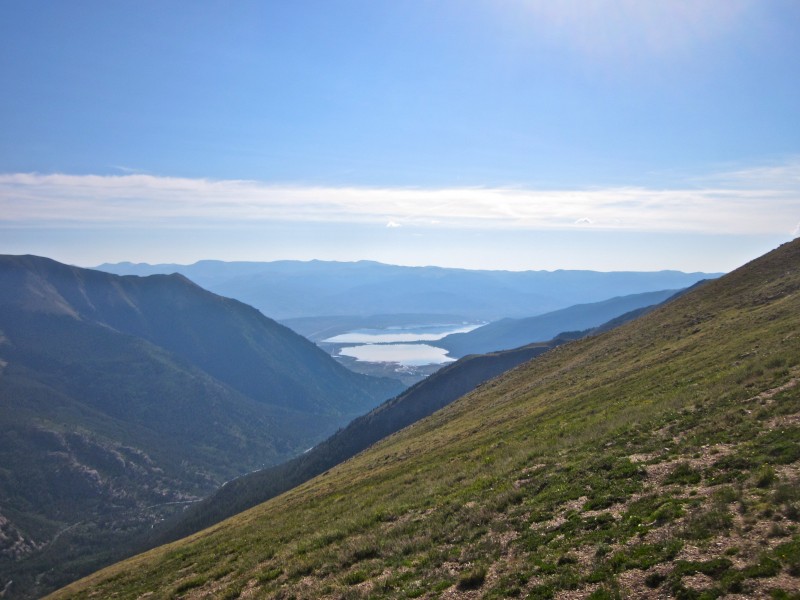
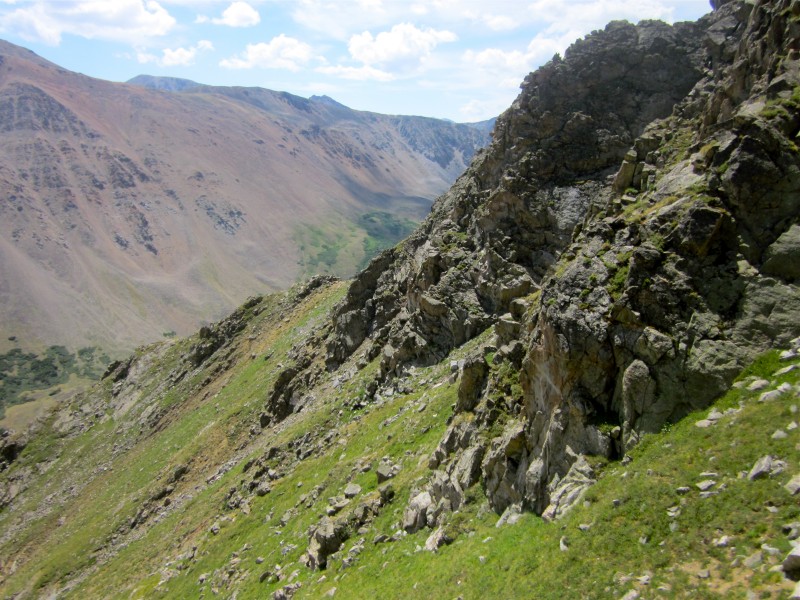
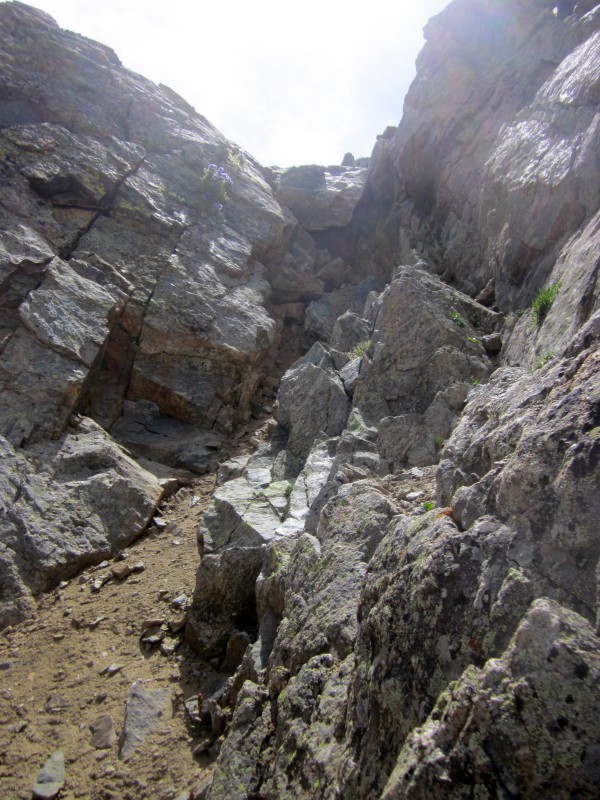
After crossing a stream on a log bridge (third crossing), the Ellingwood Ridge trail breaks off from the standard trail. We spent a few minutes with two or three vague trails to choose from and decided to follow one that was marked by a pink ribbon. As we followed this much less defined trail, we found that the key to staying on track was to look for the pink ribbons. We lost the trail and the ribbons a few times, but eventually we reached the base of a steep and very distinct ridge that the trail climbs up until treeline. Here, we got our first view of the long talus slope and beginning of the Ellingwood ridge:
The steep, rocky slope above treeline
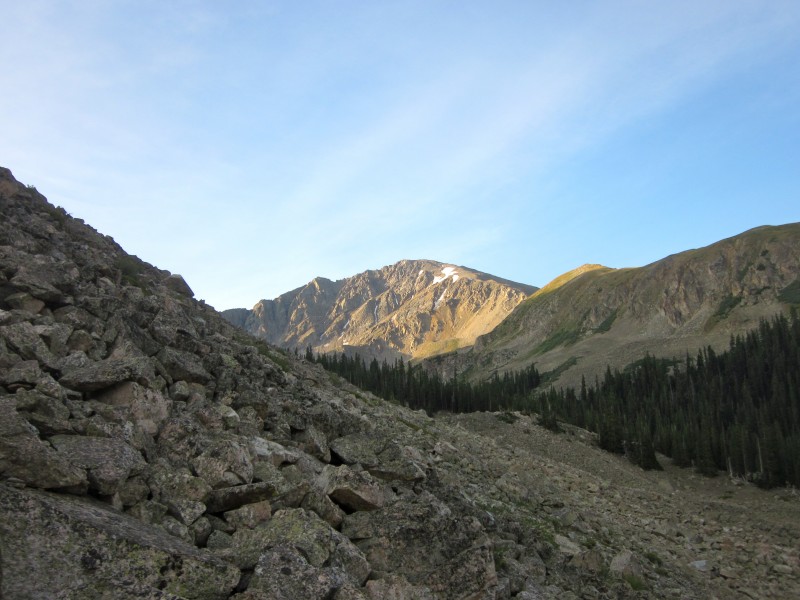
We started to climb the big boulder field and soon got our first view of La Plata Peak:
Our first view of La Plata
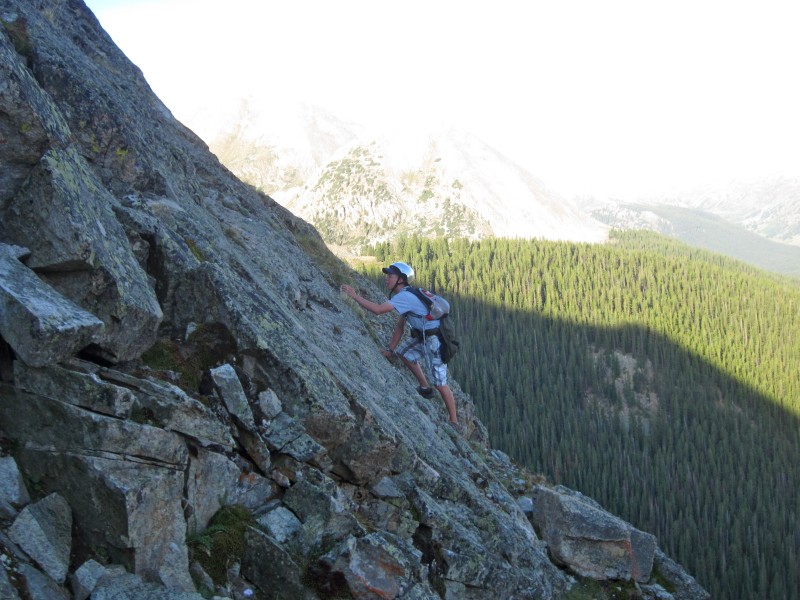
We aimed for the top of the trees slightly to the left and then climbed up the loose gully above. As we climbed up the gully, we found the rock to the right far more solid and as a result, much quicker to climb.
Class 3 scrambling to the right of the gully
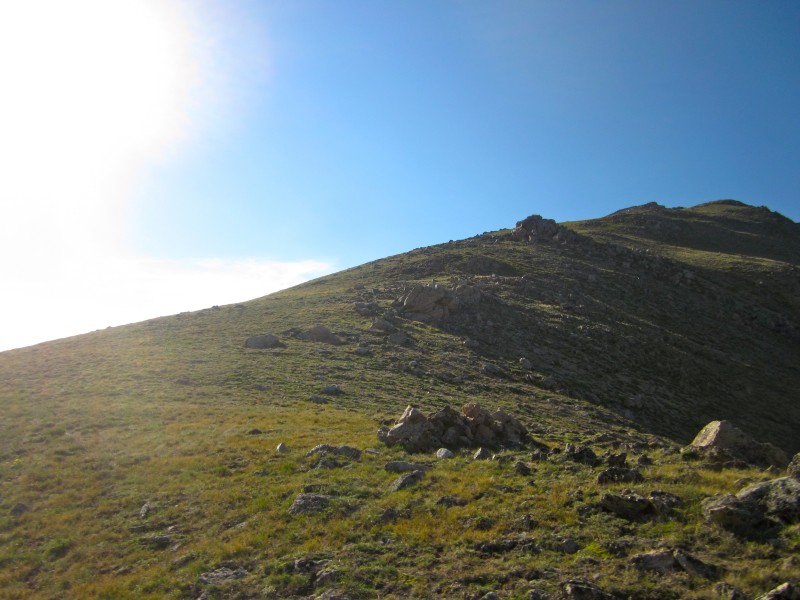
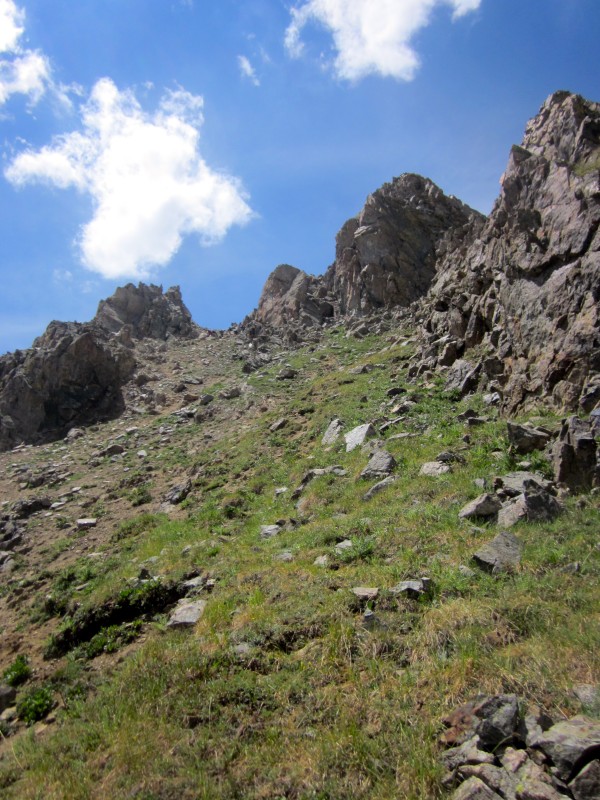
At 8:15, we got to the top of the long, rocky slope, took a break for snacks and energy, and began climbing the Ellingwood Ridge, which begins as comparatively gentle, grassy terrain.
On the Ellingwood Ridge crest
Looking down to the Twin Lakes
Before too long, the ridge started getting bumpier:
Bumps along the ridge
We stuck to the ridge crest as much as possible early on, and very soon encountered our first real obstacle:
Our first obstacle
We climbed up the bump in the picture above and reached a gap in the ridge that was small enough to jump across "safely". We continued on the ridge crest but very soon we were cliffed out and had to down-climb loose Class 3 and 4 terrain. Eventually, we realized that the only way to continue was to give up the ridge crest and drop down to the left, which was a very good decision that saved us a lot of time. After leaving the ridge crest, we aimed for the point marked in the photo below:
On the ridge crest, not the right place to be!
We reached the top of the above marked point and discovered that there are trail segments that traverse below many of the gendarmes on the ridge. We saw very few cairns but the trail segments worked even better.
Traversing below gendarmes on the ridge
Many times it was difficult to tell when the "path" was a trail and when it was not, but we were able to cover a lot of ground much more efficiently than expected. We kept traversing and quickly re-crested the ridge, where we saw the next stretch:
Our route to the next grassy point
This section was not difficult, and we aimed for the gully and next grassy point in front of us. Once on this point, the route starts getting more complicated, as described in the route description on this site.
More complicated terrain ahead
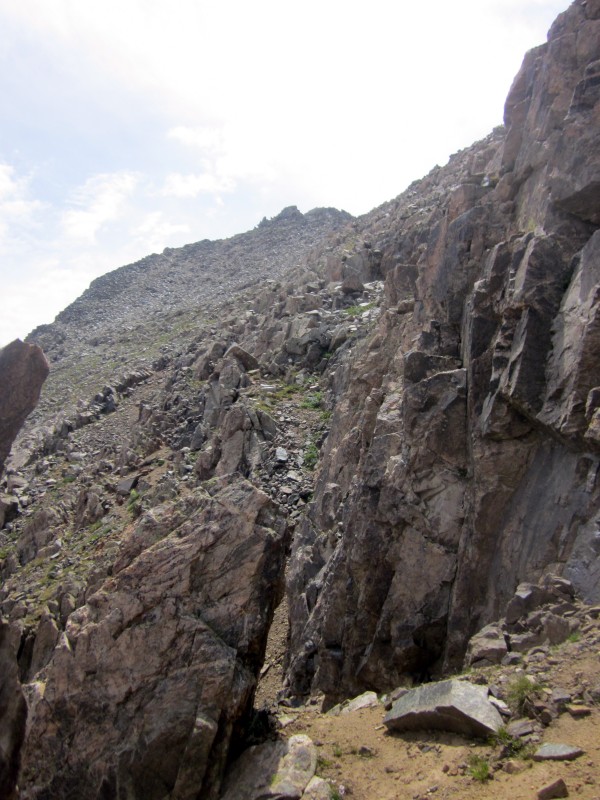
We kept following trail segments and dropping lower and lower from the ridge crest. Eventually, we caught up to a group of hikers that had tried to climb over one of the gendarmes on the ridge crest and had to backtrack. We ended up following them the rest of the way. The route continued to drop until we reached a dirt bench on a rib, shown in the photo below:
The dirt rib
I had read in a trip report that this is the low point in the traverse, and we found that to be correct. From the rib, we pretty much stopped losing elevation. Before the final stretch of ridge, we climbed two gullies...
Gully #1
...and the view from the top of the first gully:
Gully #2
After the two gullies, we had to traverse one more slope before regaining the ridge crest:
One more slope to traverse
Crossing semi-loose dirt and rock
Getting back on the ridge crest
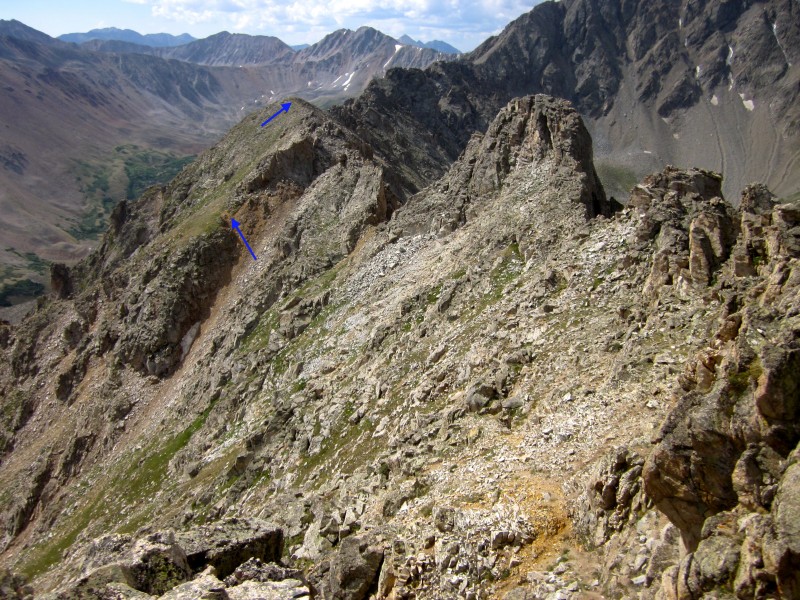
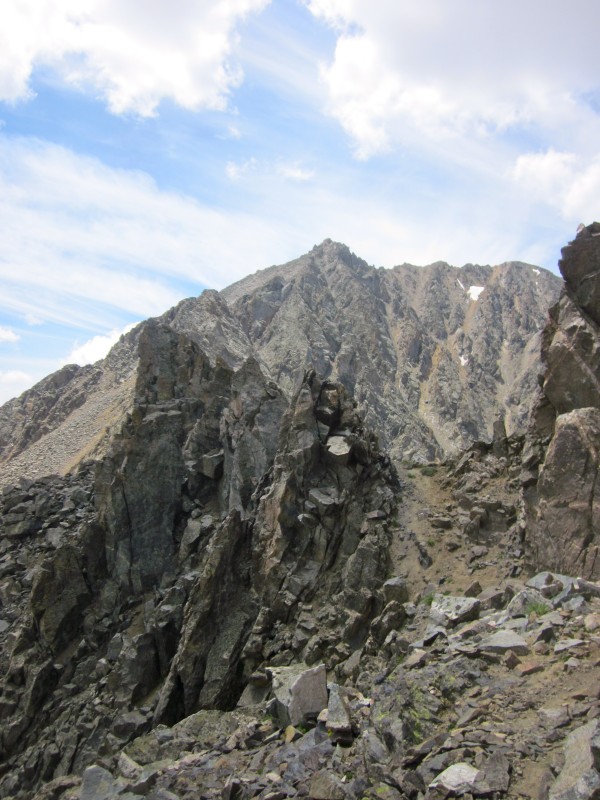
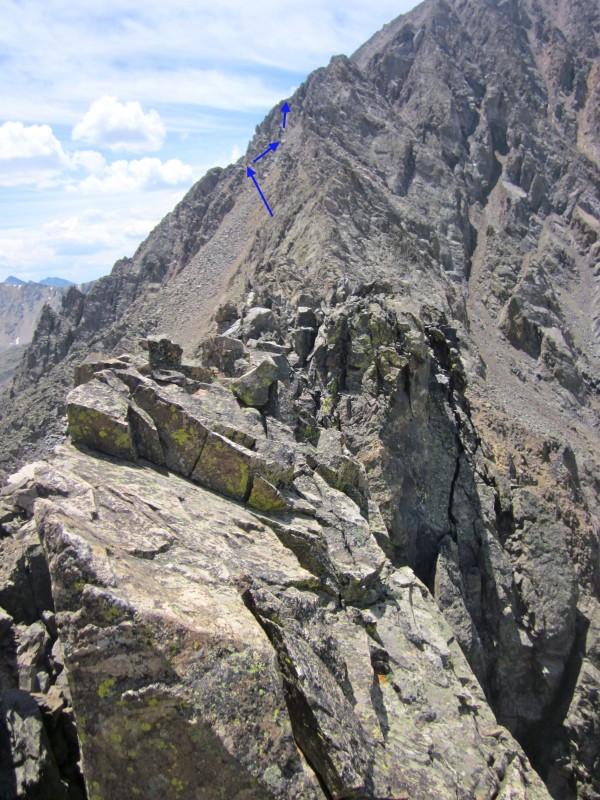
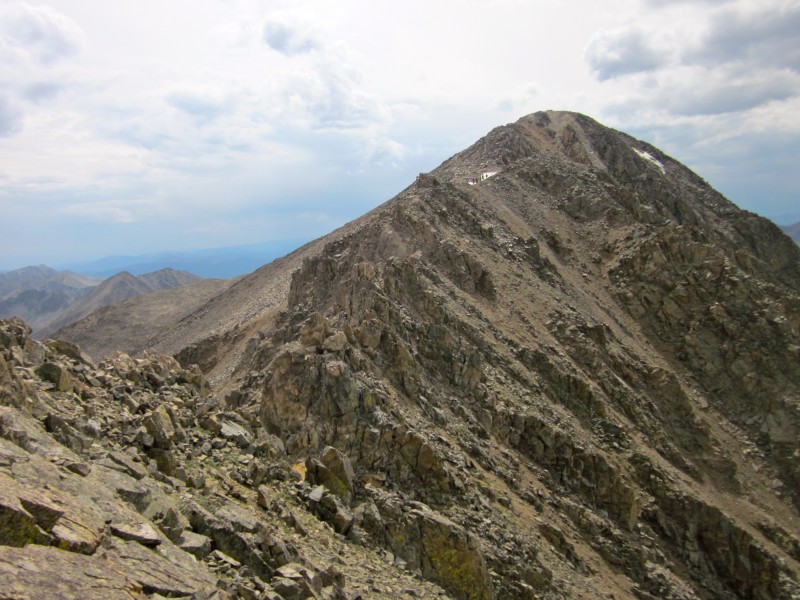
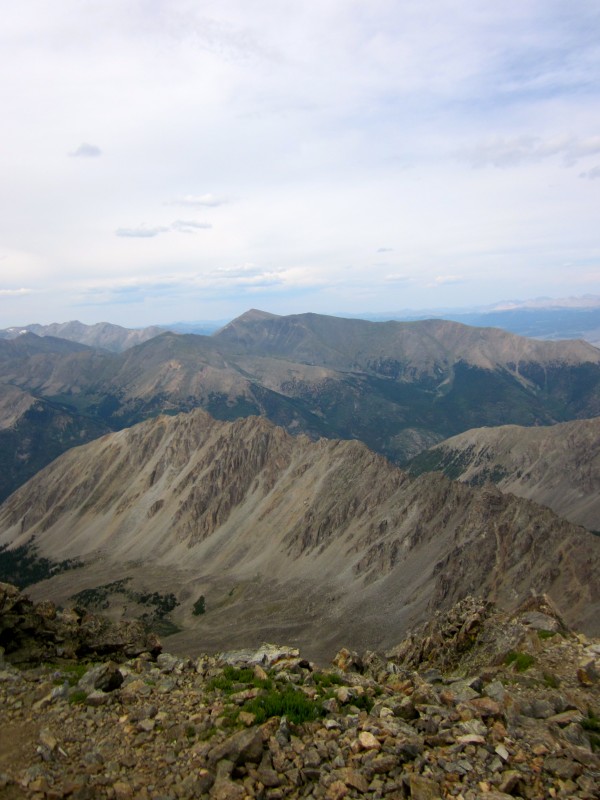
Whew! This route is hard work. We were finally back on the ridge crest with a much more rewarding view of La Plata! It was past noon at this point, but the weather was not threatening at all, so we continued. We tried again to stick to the ridge crest, and this is certainly an option, however we found that climbing just to the left of the crest was fun and still somewhat efficient. We aimed for the route marked by the arrows:
Approaching the last difficulties
We realized that we didn't have to climb all the way up the gully marked by the first arrow, but we did anyways. From this point, we traversed right of the buttress that bars easy access to the final slope to East La Plata until we saw a decent opportunity to climb over the buttress, shown in the photo below:
A good place to climb over the buttress
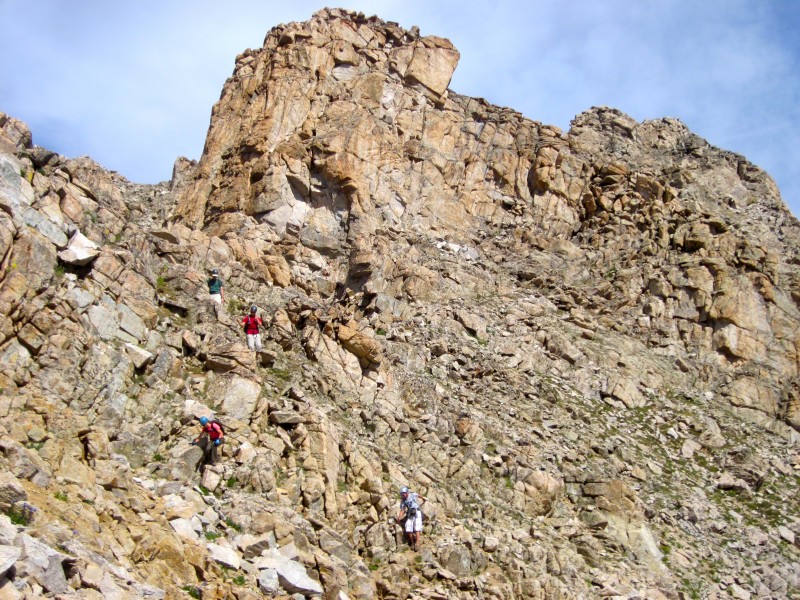
We climbed up the left side of the picture, and kept the difficulty to Difficult Class 3/Easy Class 4:
Climbing up the wall
After this point, the route gets much easier all the way to East La Plata:
The remaining route to East La Plata
On top of East La Plata with the final stretch ahead!
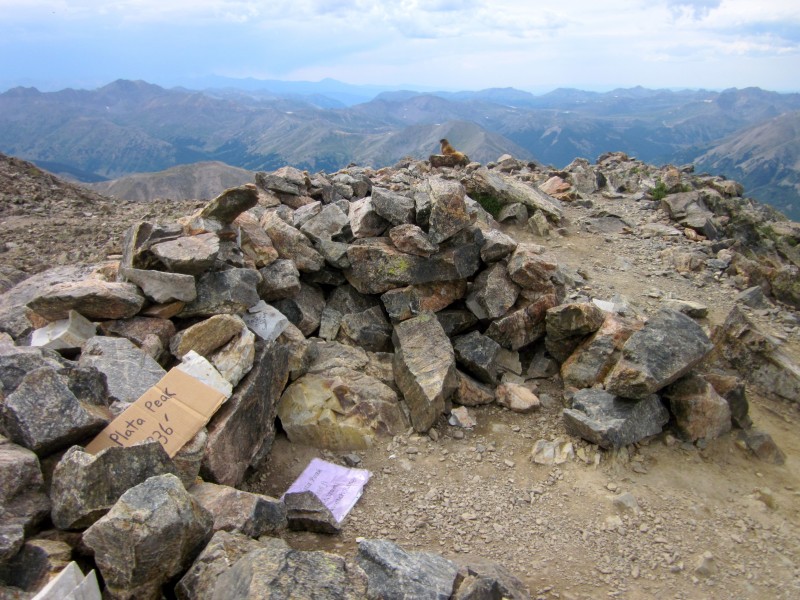
We summited East La Plata at about 3:30 pm, tuckered out and ready to get this climb over with. The remaining route from East La Plata to the true summit of La Plata Peak was short but grueling. We dropped down to the left of the ridge crest at first and slowly crossed loose dirt and rock, weary but excited for the summit. I couldn't wait for the top, so I took off as fast as I could go, legs burning but desperate to finish. Finally, at 4:15 pm, I reached the summit of La Plata Peak!
SUMMIT!
I let out a yell of relief and delight, and felt a thrill of accomplishment that I had been looking forward to all day! A few minutes later, the rest of our group summited and we took a much needed break.
A long, hard day's work accomplished
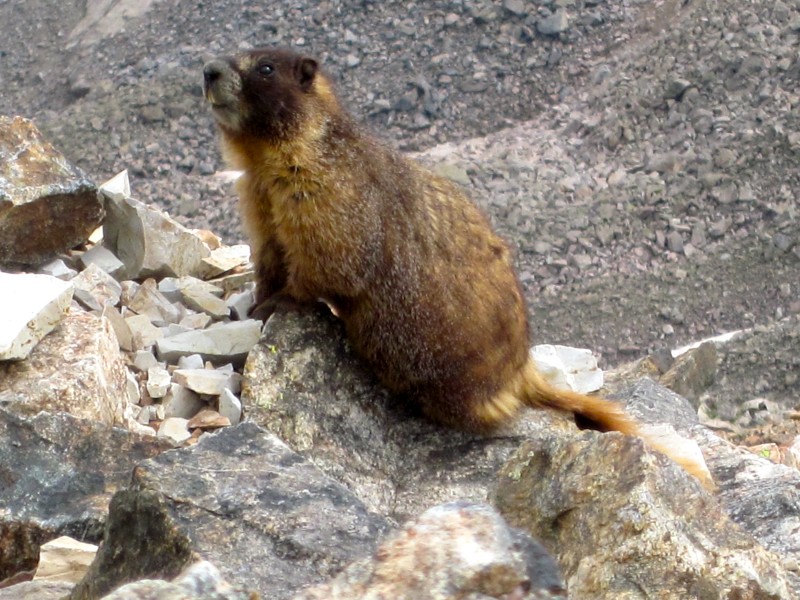
We were soon joined by one of the locals:
Hello marmot...
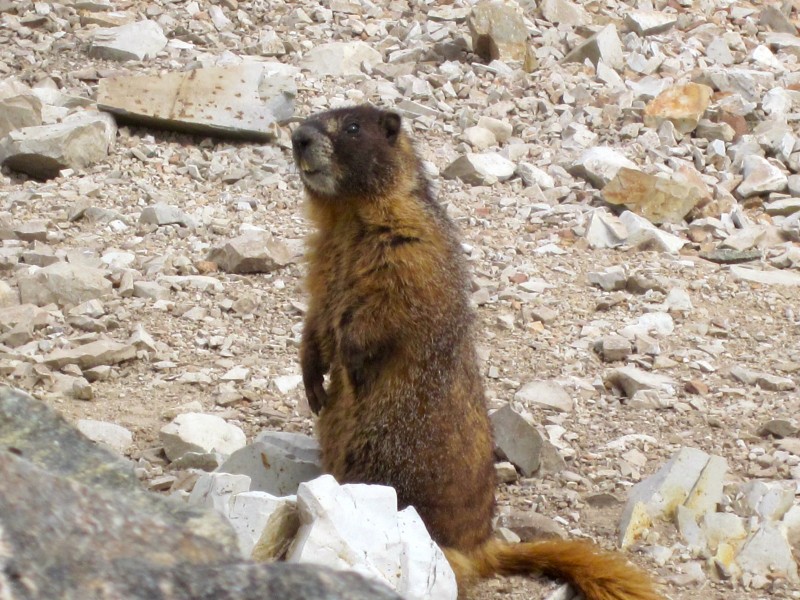
Nice teeth!
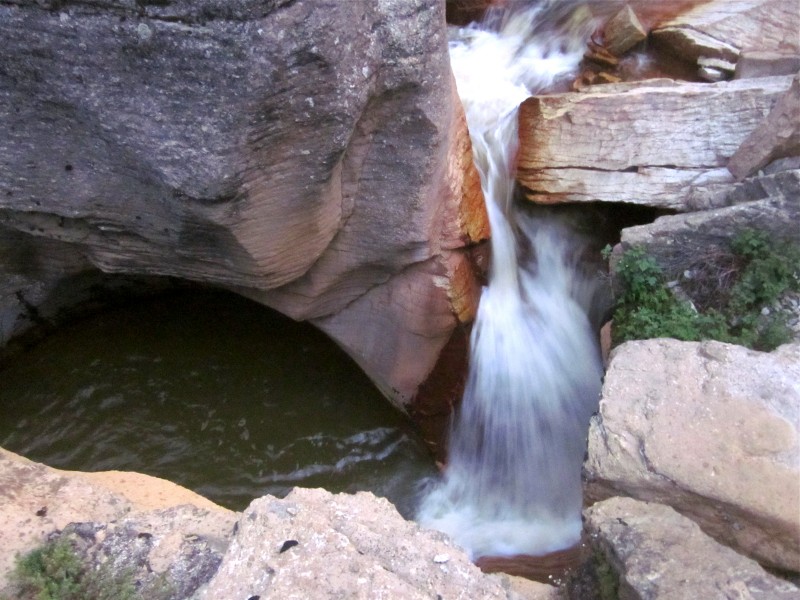
Our descent ended up being more difficult than we had hoped, as we found out that a trail and cairn we followed off the summit ridge led nowhere. We had gone too far, dropped off of the summit ridge and had to backtrack across a rocky slope for a while to get back to the correct trail that descends the northwest ridge. This turned out to be the last of our troubles, and we made good time down the trail as it lightly rained and snowed/hailed. Finally, at 8:30 in the evening, we were back at the trailhead!
Beautiful falls near the trailhead
To sum it all up, the Ellingwood Ridge took an unbelievable amount of time to climb (7-8 hours on the ridge) - all the factors combined to make this the most difficult climb that I've done so far. However, this route was a great experience and I really enjoyed it! We stopped at Subway in Leadville for some amazing sub sandwiches and headed out of the mountains to end a long but rewarding day.
Thumbnails for uploaded photos (click to open slideshow):
Great, informative report. I had to turn around on Ellingwood Ridge 2 years ago because I couldn't figure out where to go on the ridge. Great info thanks!!!
I've been looking at doing this for a while now, but with how committing the route is, you truely need a perfect weather day. Thanks for the great route description.
I did this a few weeks ago and it is definitely an ass kicker. I have never been so tired on a summit as I was that day. It took me about 8 hours to summit as well. Glad to see I'm not as slow as I thought. The physical strain of this route cannot be understated I don't think. For some reason it is just brutal.
Caution: The information contained in this report may not be accurate and should not be the only resource used in preparation for your climb. Failure to have the necessary experience, physical conditioning, supplies or equipment can result in injury or death. 14ers.com and the author(s) of this report provide no warranties, either express or implied, that the information provided is accurate or reliable. By using the information provided, you agree to indemnify and hold harmless 14ers.com and the report author(s) with respect to any claims and demands against them, including any attorney fees and expenses. Please read the 14ers.com Safety and Disclaimer pages for more information.
Please respect private property: 14ers.com supports the rights of private landowners to determine how and by whom their land will be used. In Colorado, it is your responsibility to determine if land is private and to obtain the appropriate permission before entering the property.