Log In 
Difficulty
 Class 3 

 Extreme, D13 / R3 / IV
Risk Factors
ExposureHigh
RockfallConsiderable
Route-FindingConsiderable
CommitmentConsiderable
Trailhead
South Colony Lakes 9,900 feet
Summit
14,299 feet
Elevation Gain
From Lower SC Lake: 4,200 feet
From SC 4WD TH: 6,200 feet
From SC 2WD TH: 7,400 feet
Length Round-TripRT
From Lower SC Lake: 5 miles
From SC 4WD TH: 13.5 miles
From SC 2WD TH: 19 miles
Peak Conditions
Downloads
Photo
Show More
Route Last Updated: Aug 2026

Trailhead

Take Colorado 69 south from Westcliffe. Drive 4.5 miles and turn right on Colfax Lane. Drive 5.5 miles to the end of Colfax. Turn right and drive 1 mile on a dirt road to a junction. Continue straight up the 120 Road for 0.3 mile to the 2WD Trailhead at 8,800'. To reach the 4WD Trailhead, continue 2.7 miles to parking/camp spots before a river crossing, near 9,950'. In 2009, the South Colony Lakes road was permanently closed at this point (with a gate), and the official trailhead was established here. The trail begins next to the trailhead kiosk located in the main parking area.

Route Description

This route assumes your are using the standard South Colony Lakes Approach to start. If you choose to use the more difficult Cottonwood Lake Approach, ignore the first paragraph since that approach intersects this trail just west of Cottonwood Lake. Climbing this route after an approach from Cottonwood results in 6,000' of elevation gain in 12 miles roundtrip.

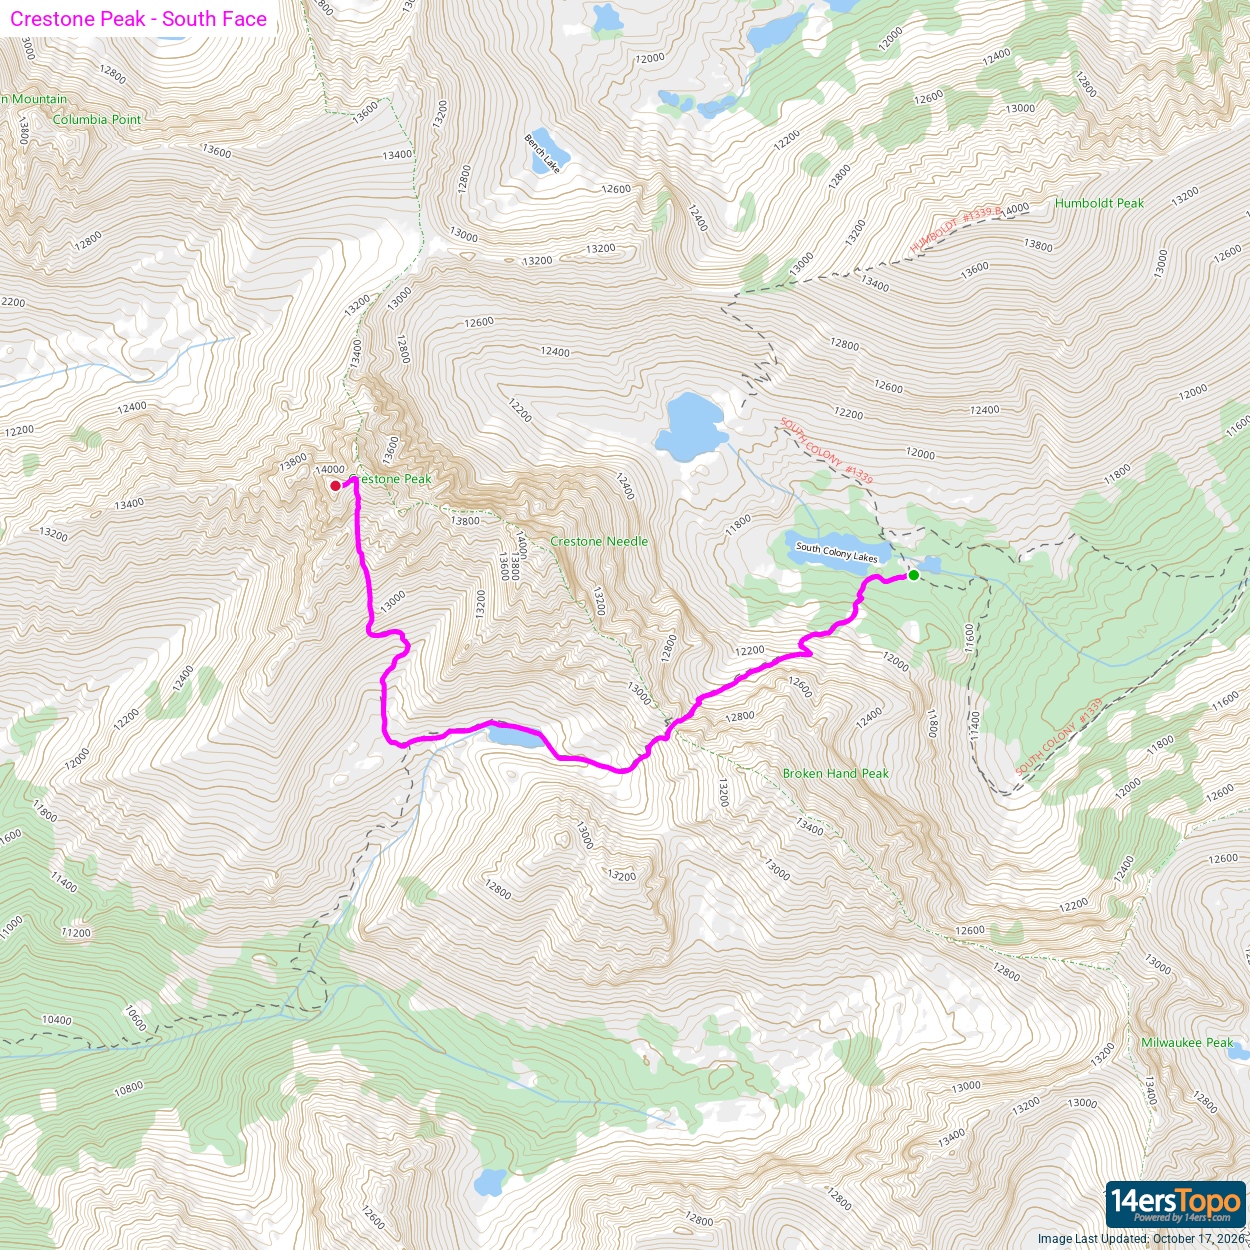
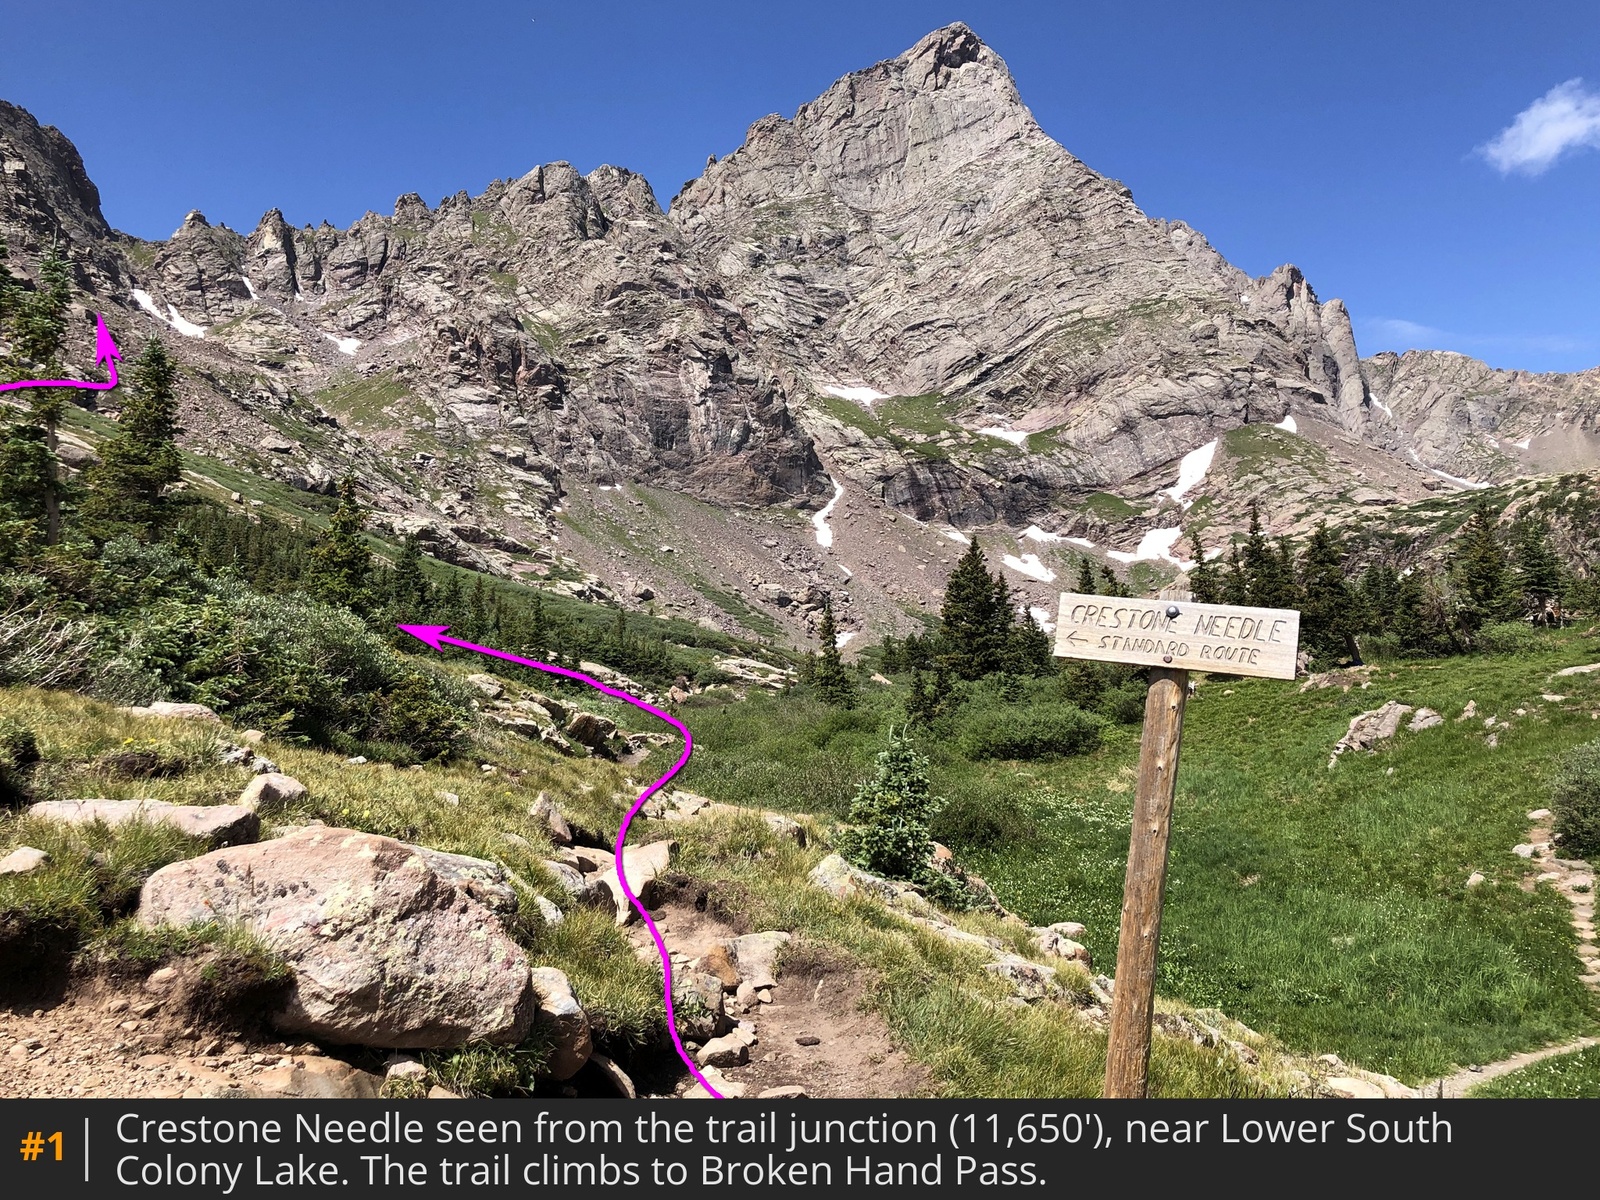
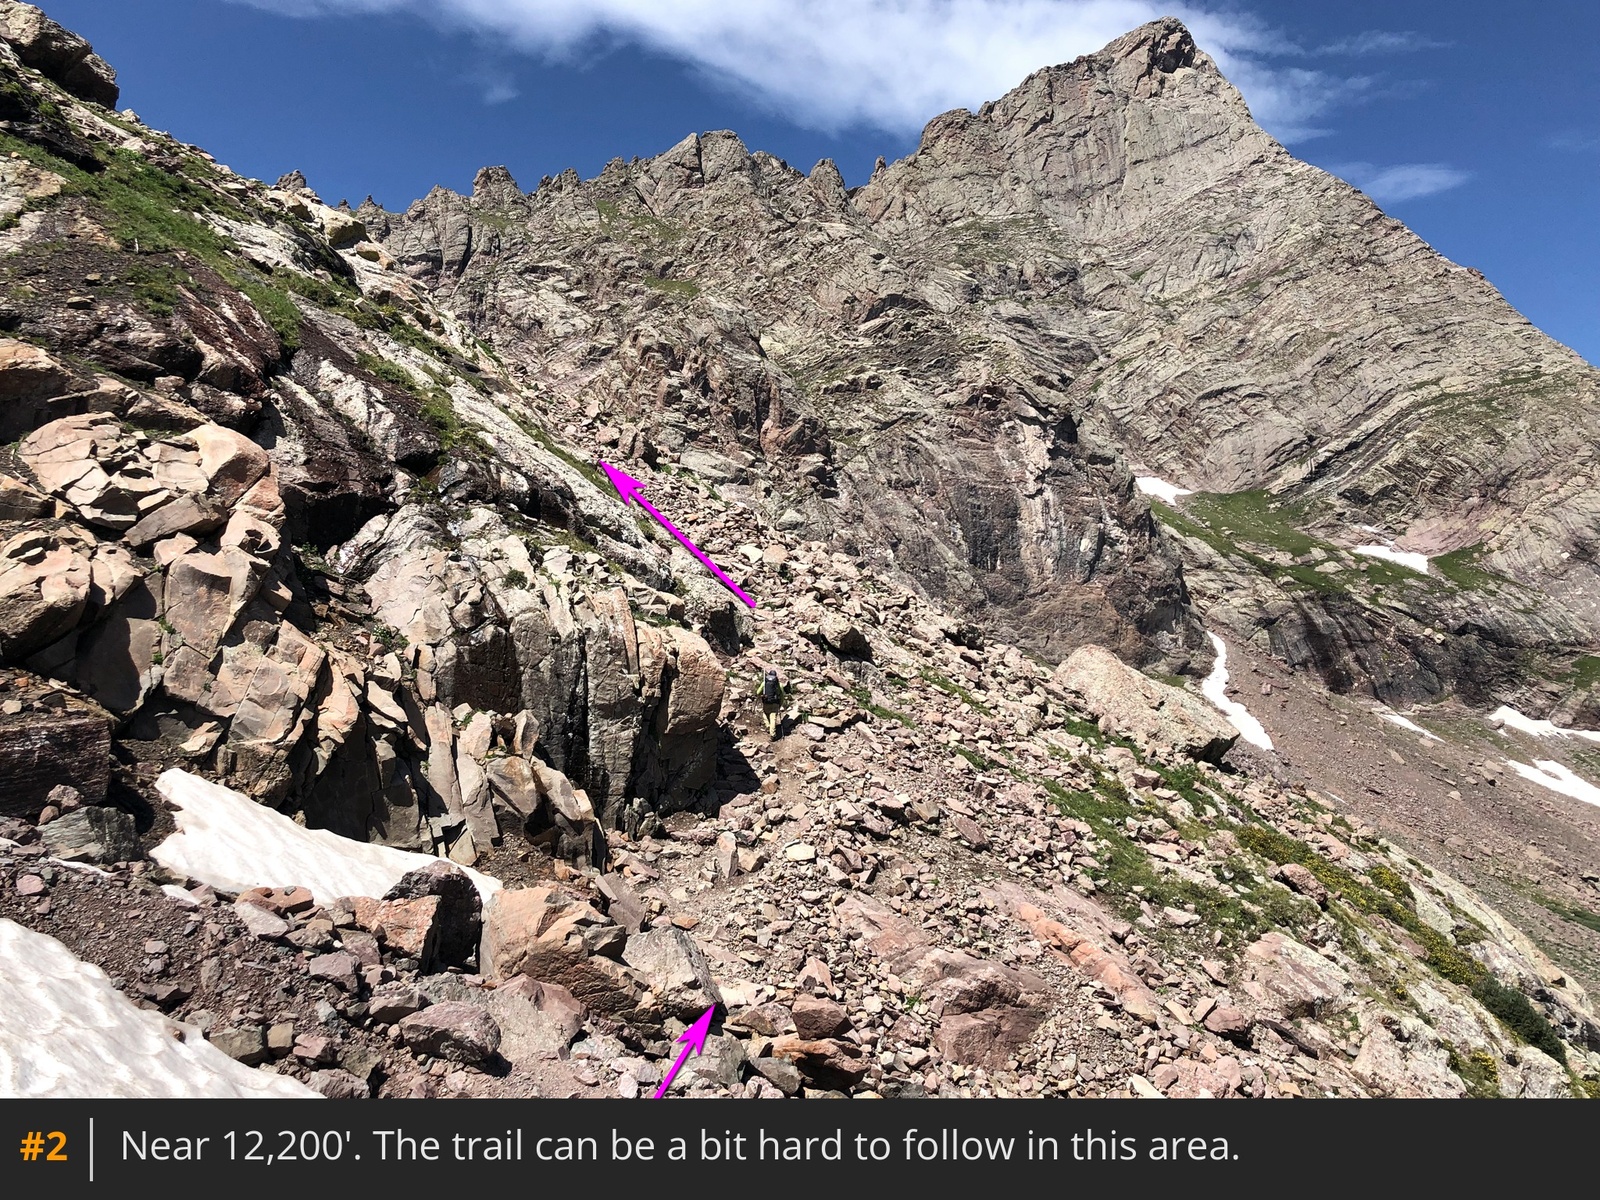
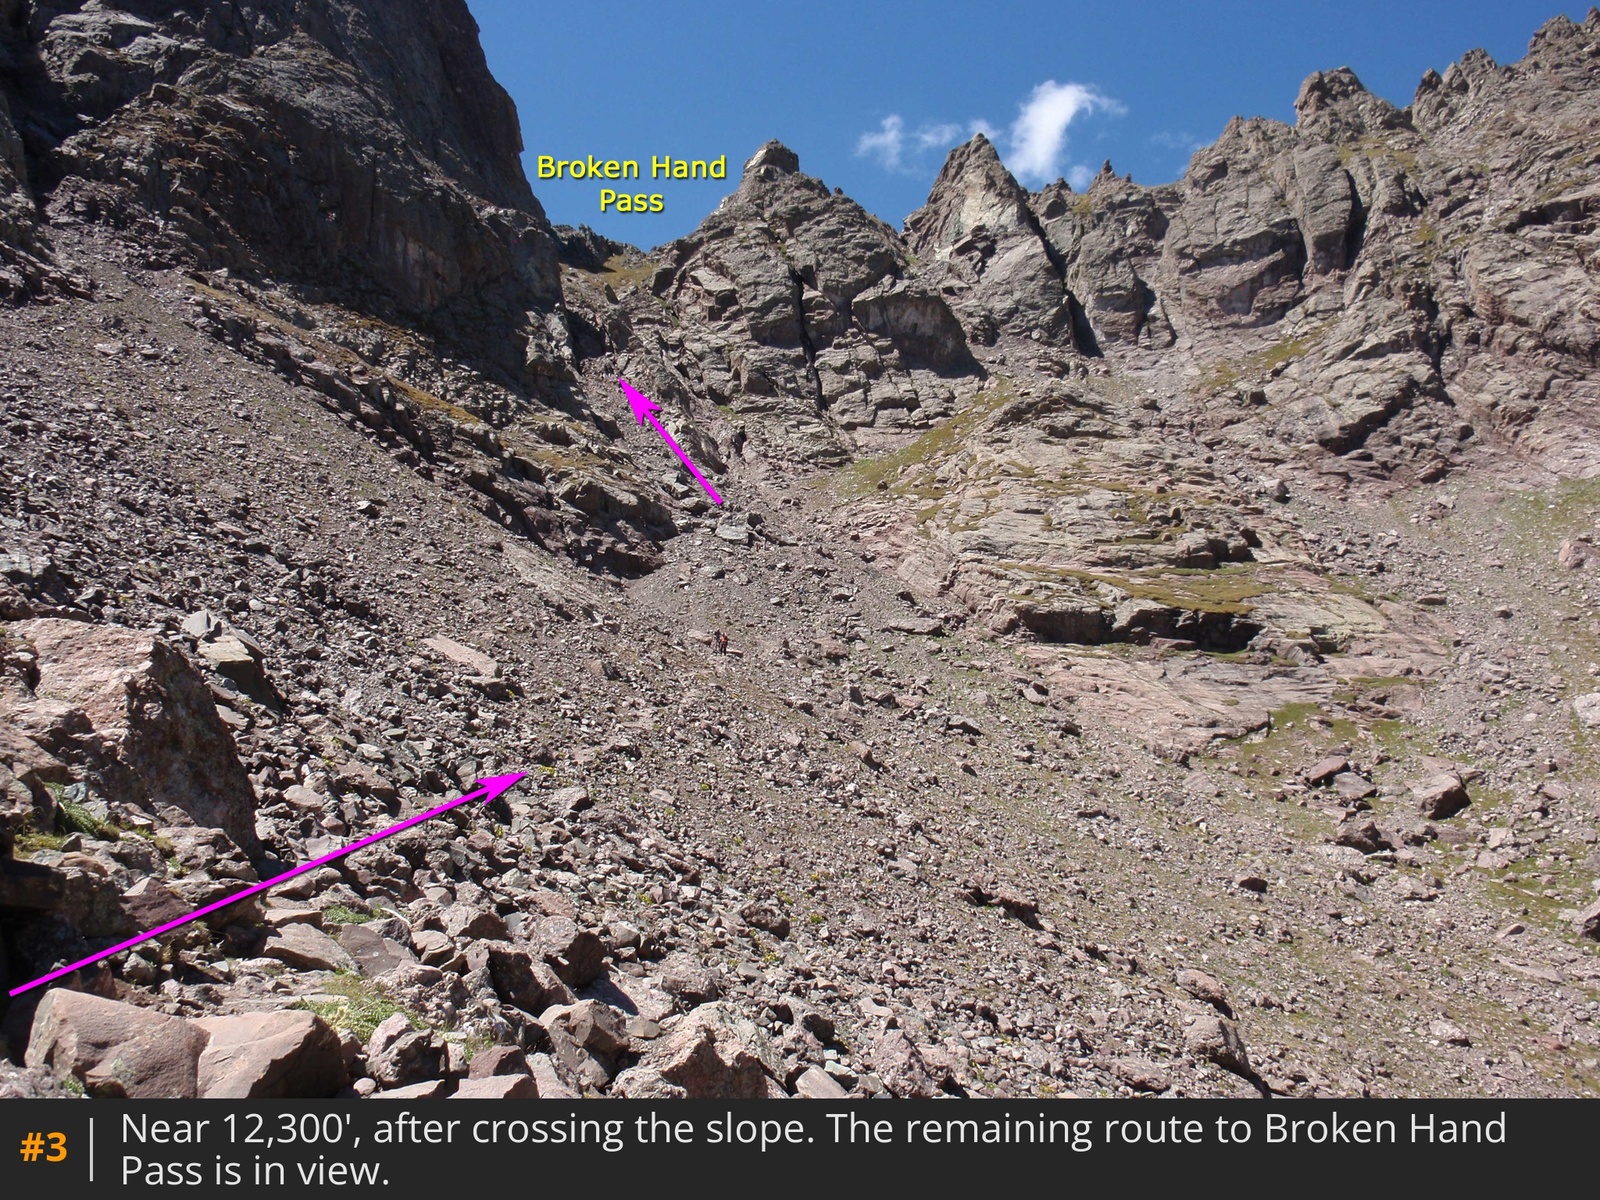
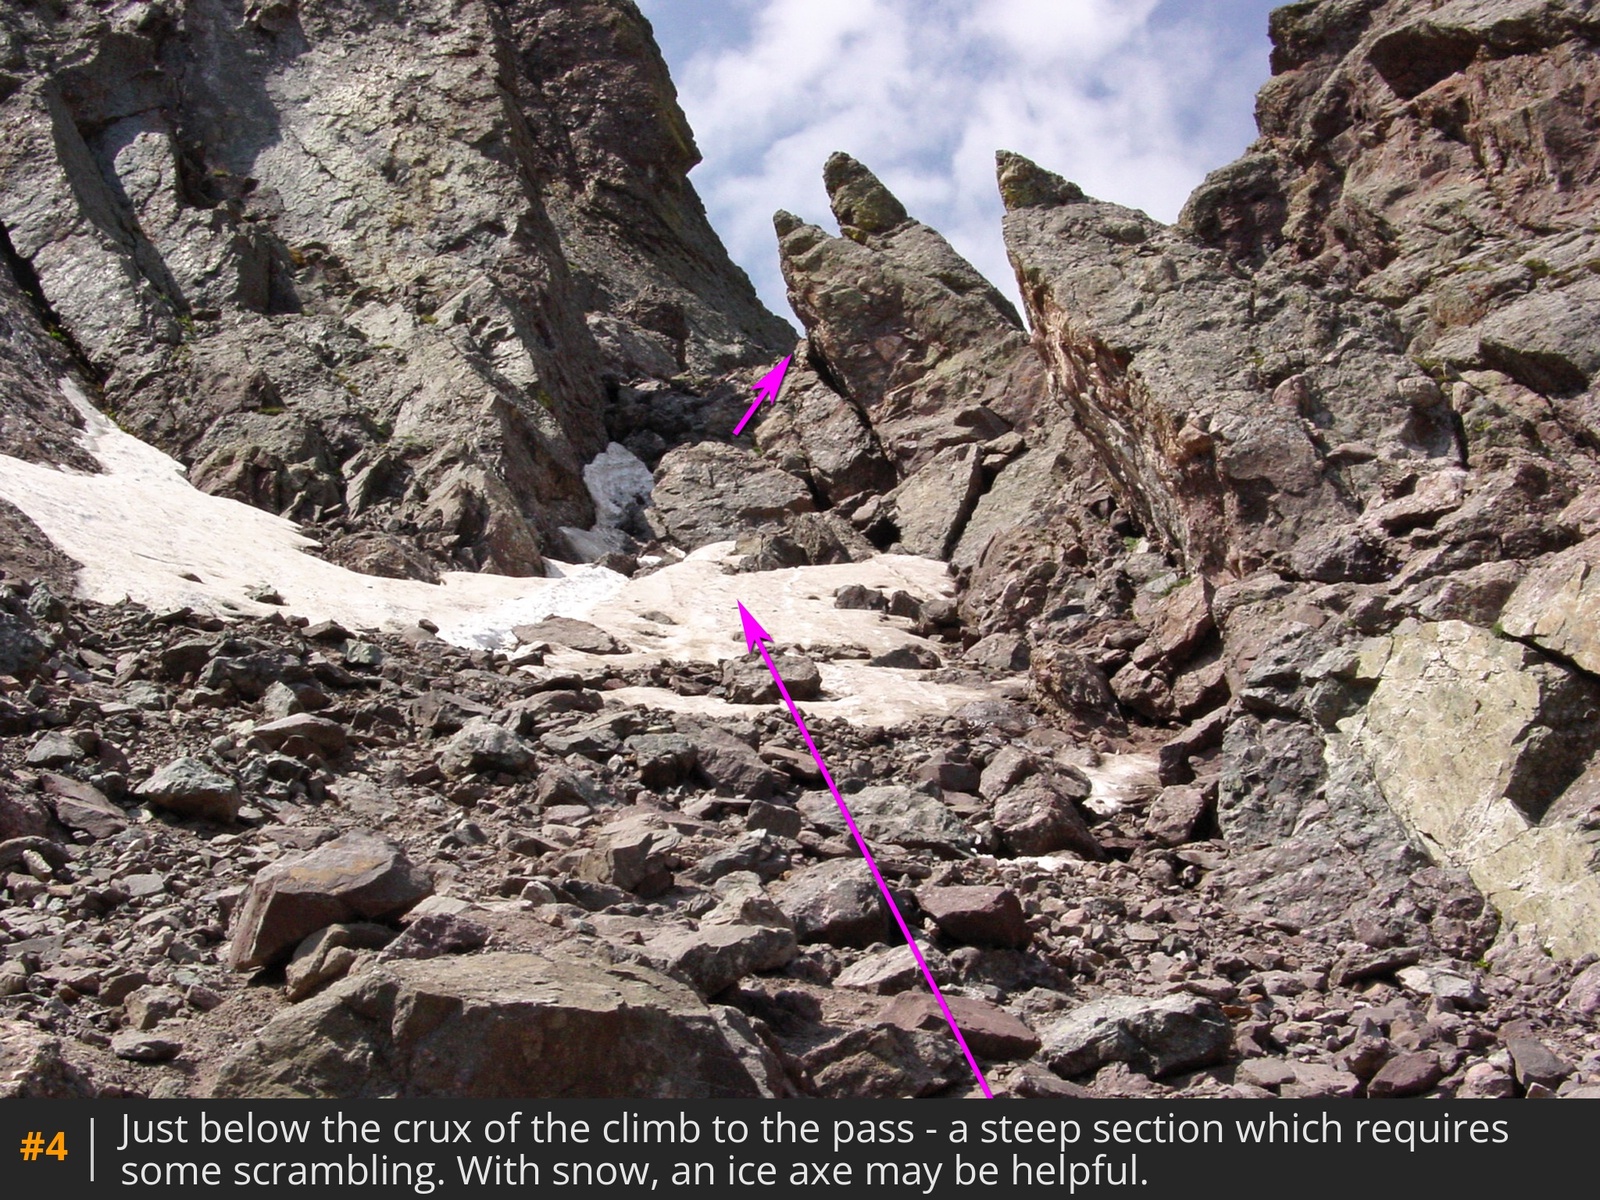
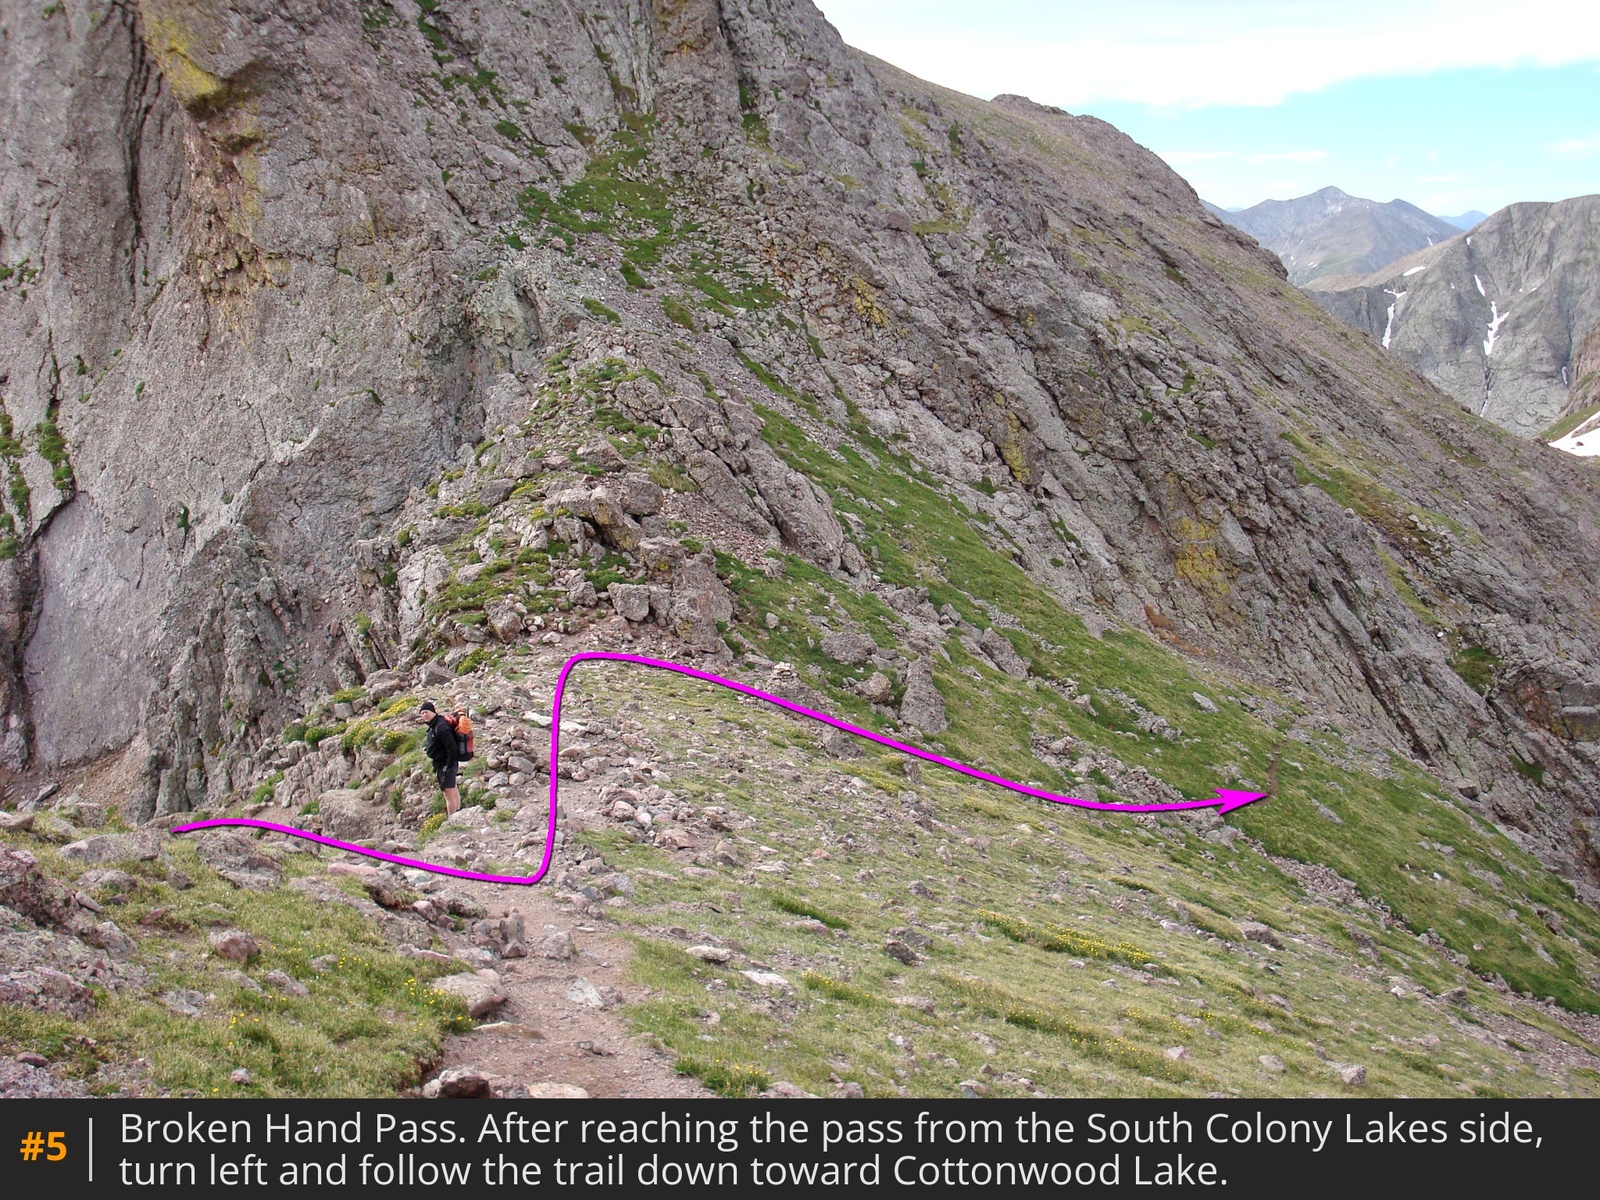
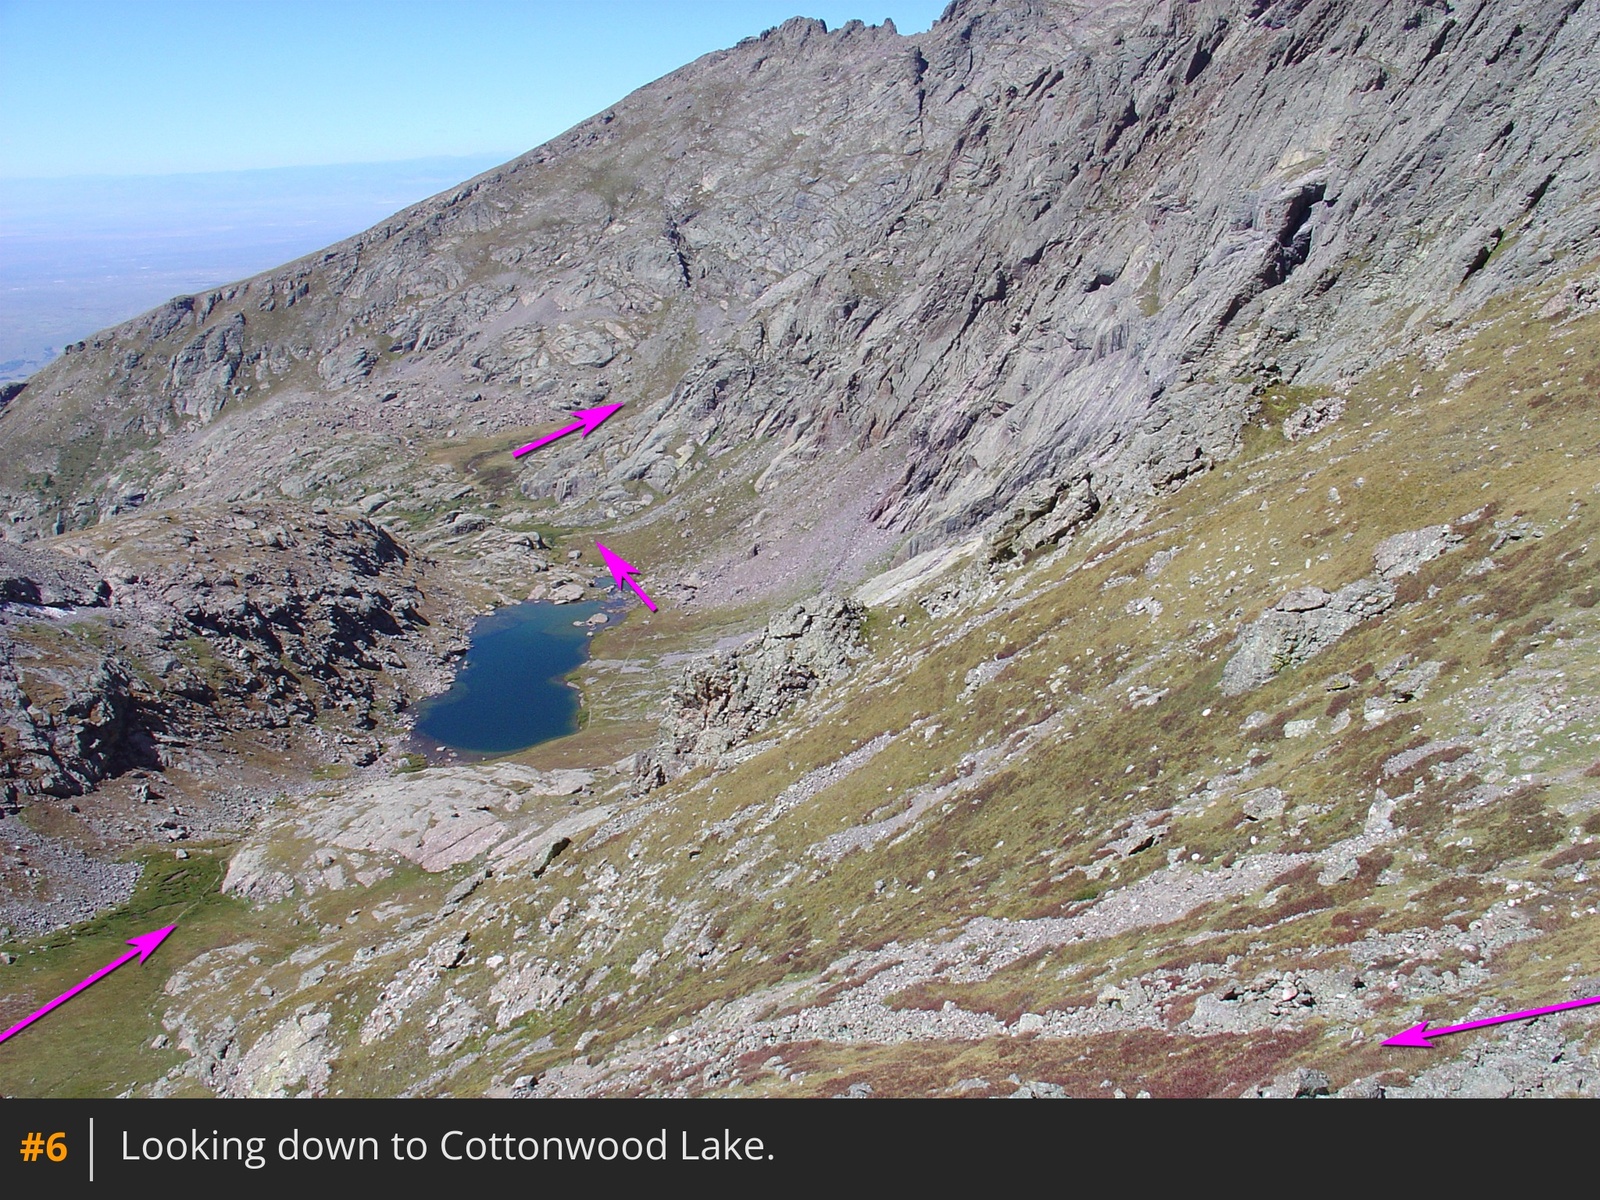
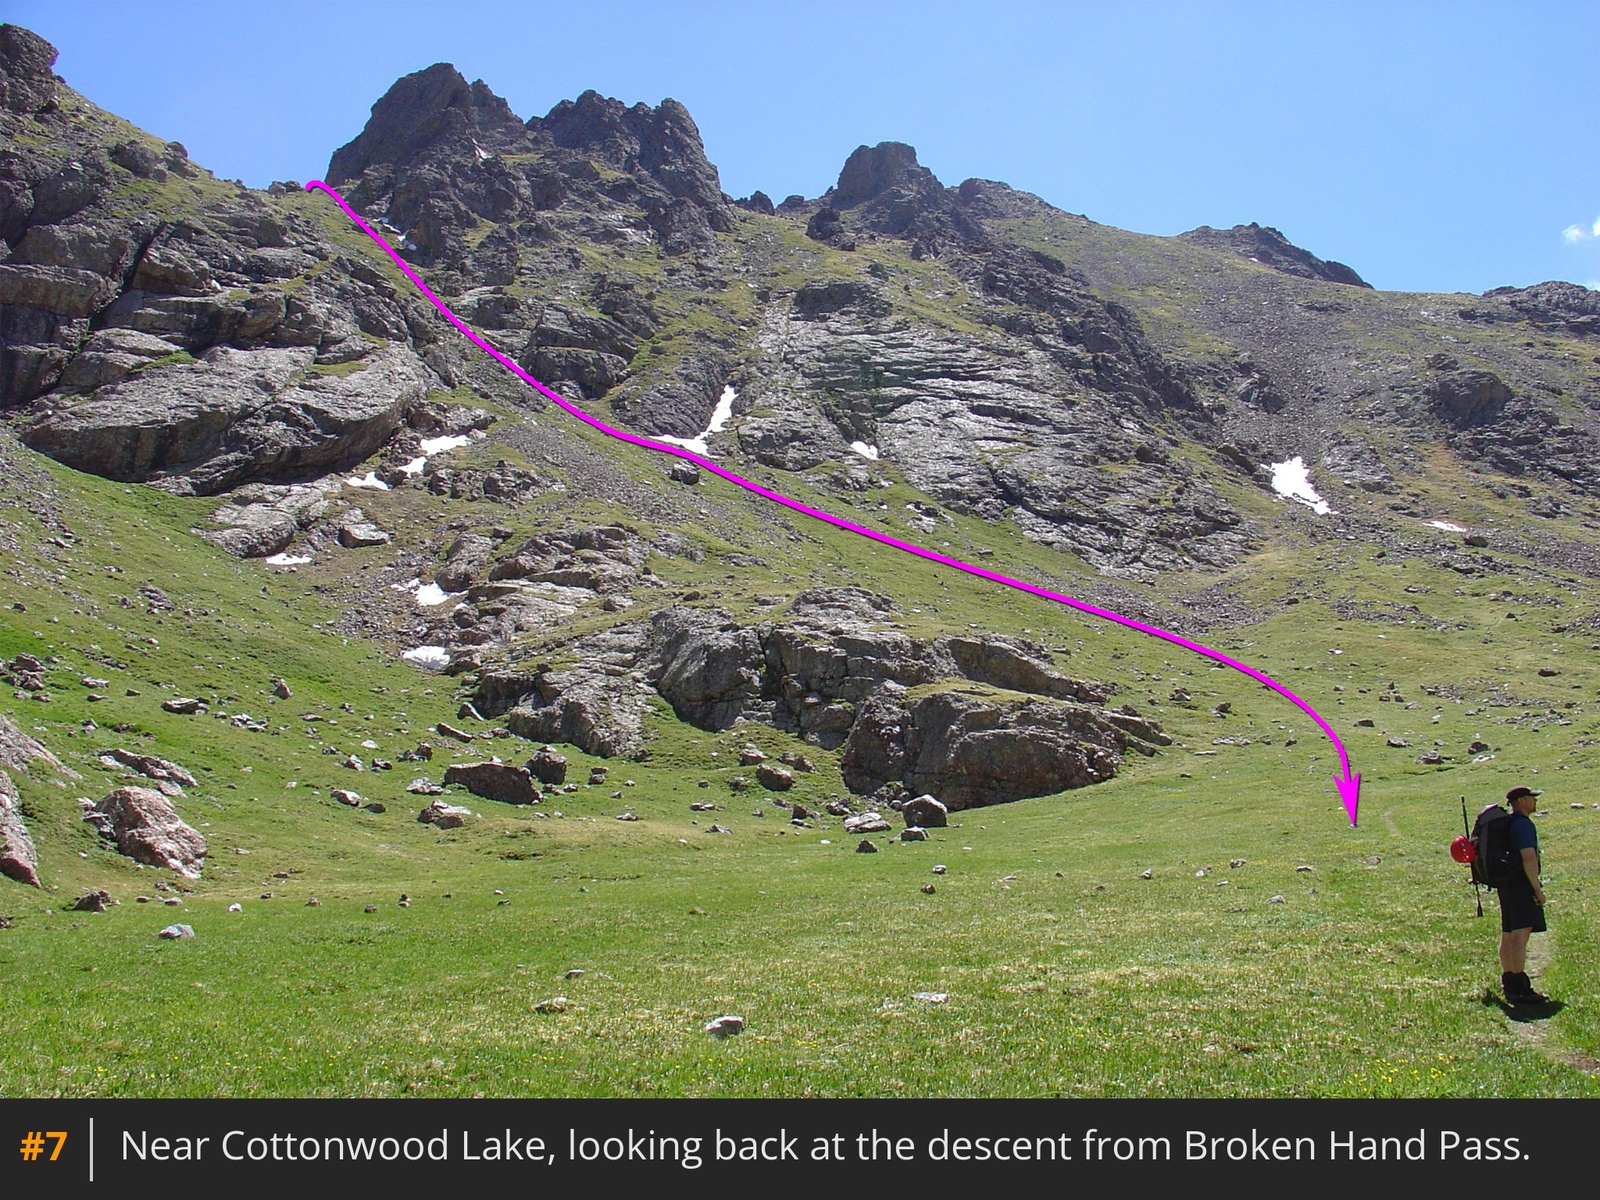
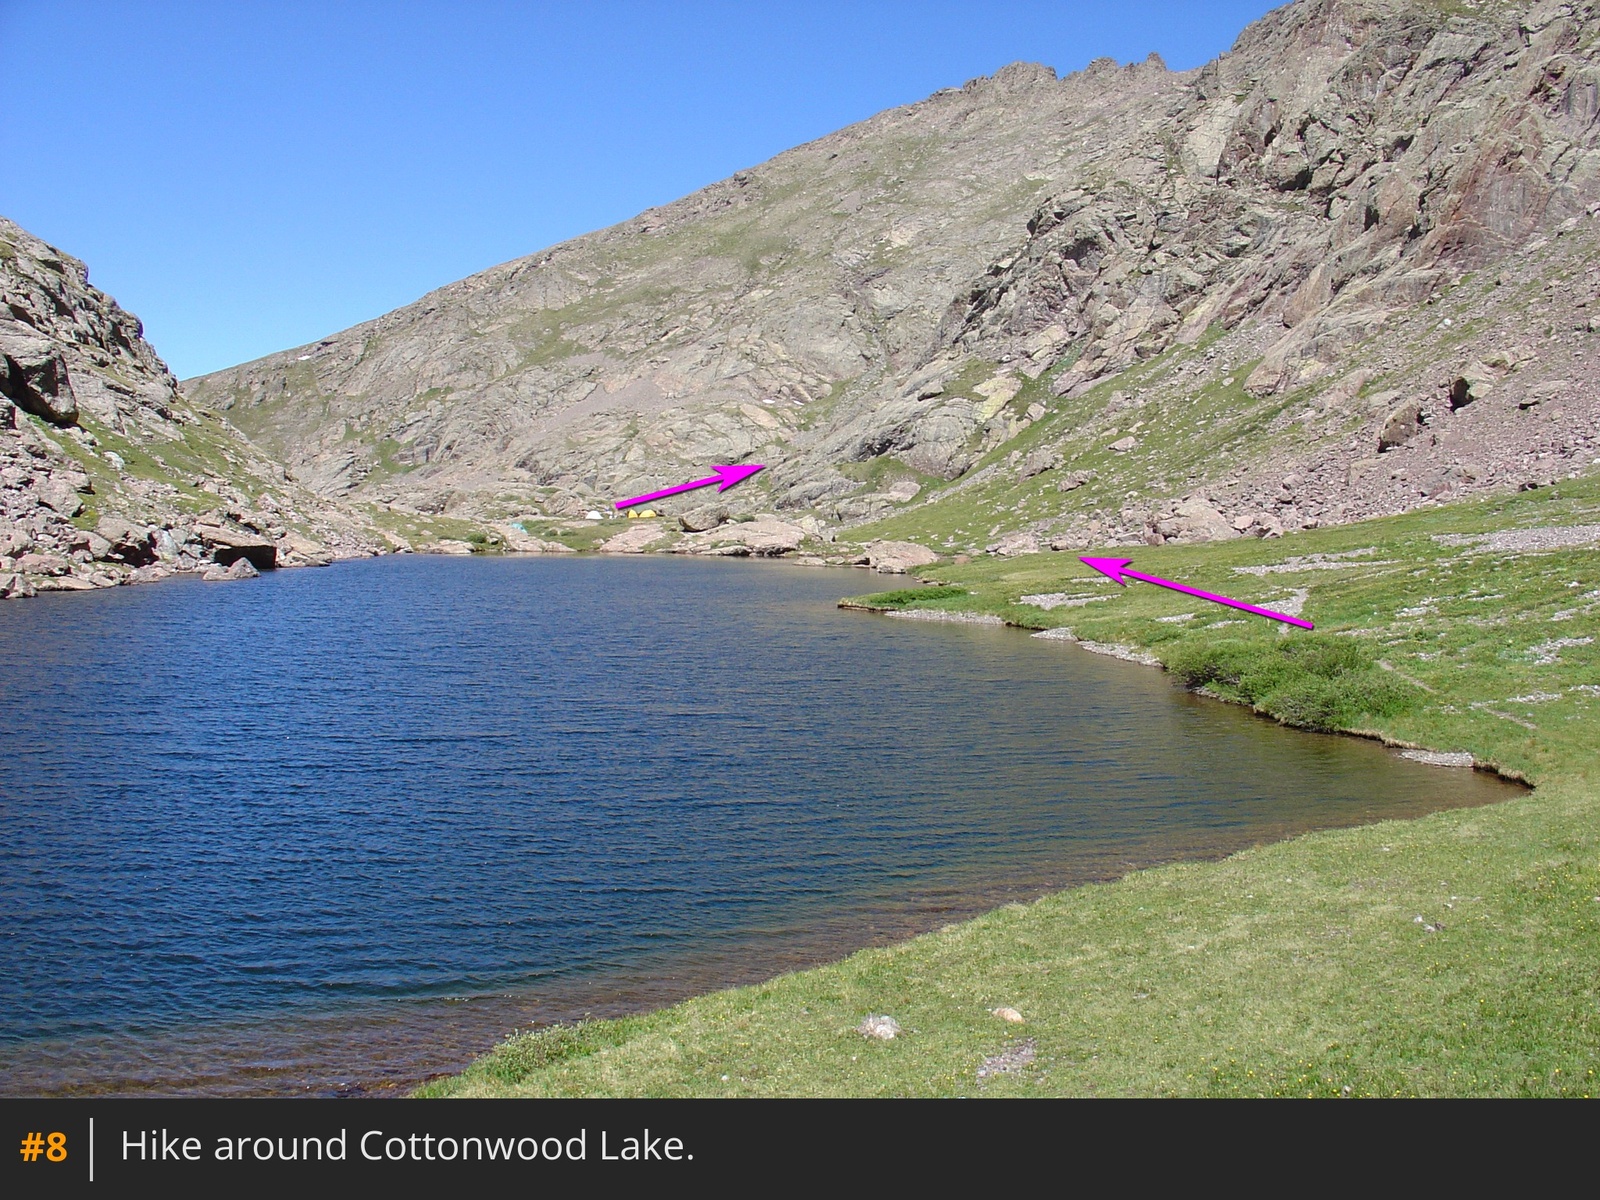
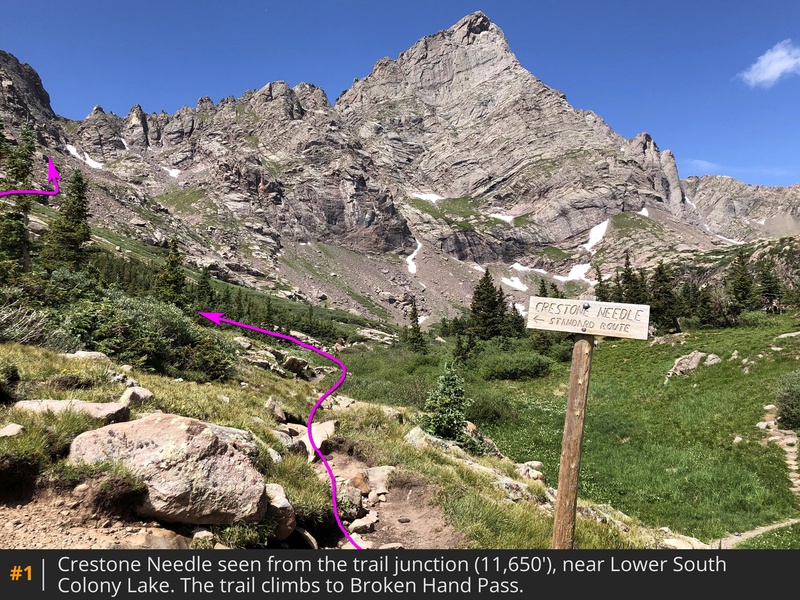
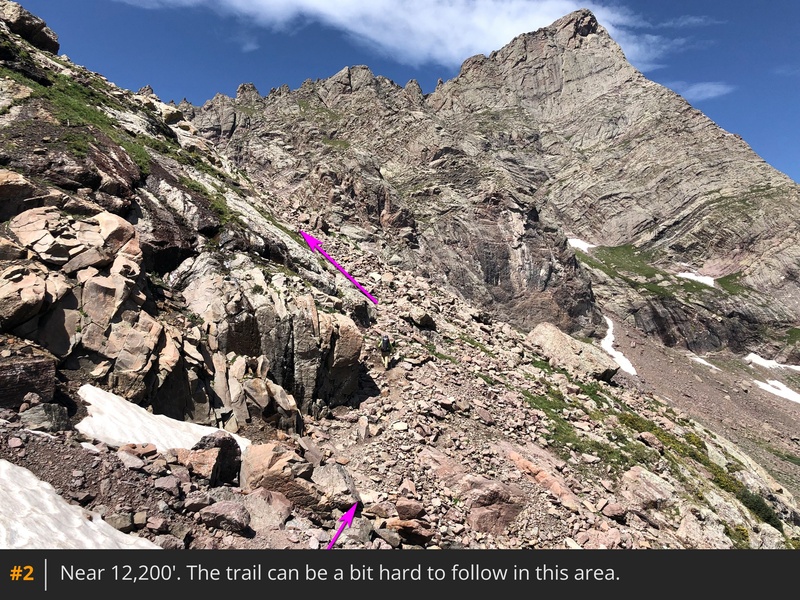
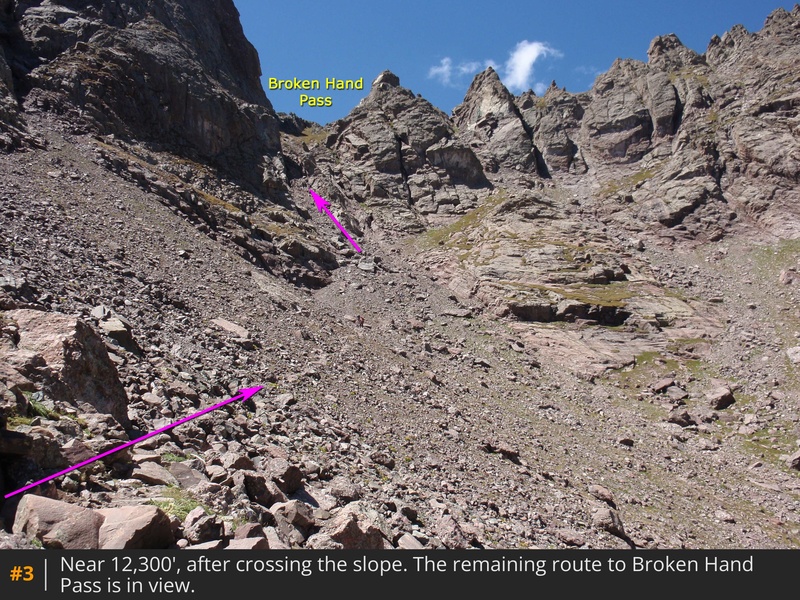
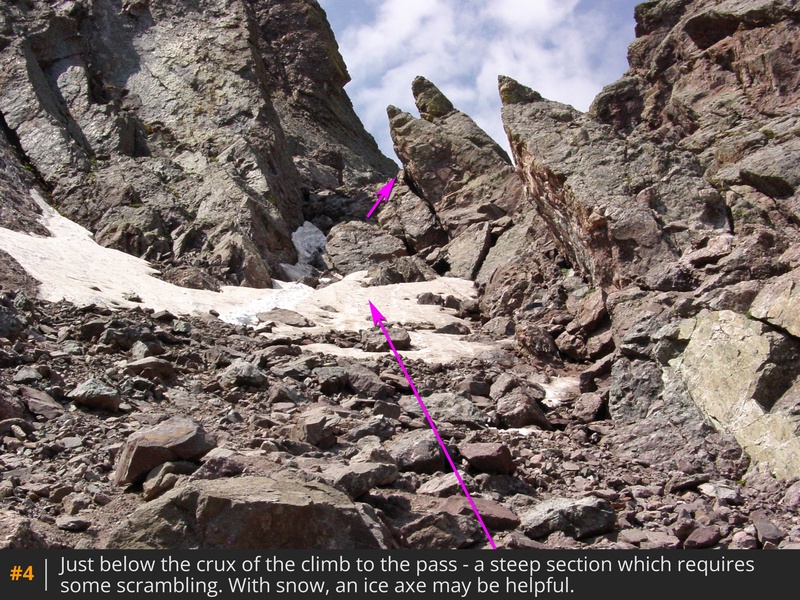
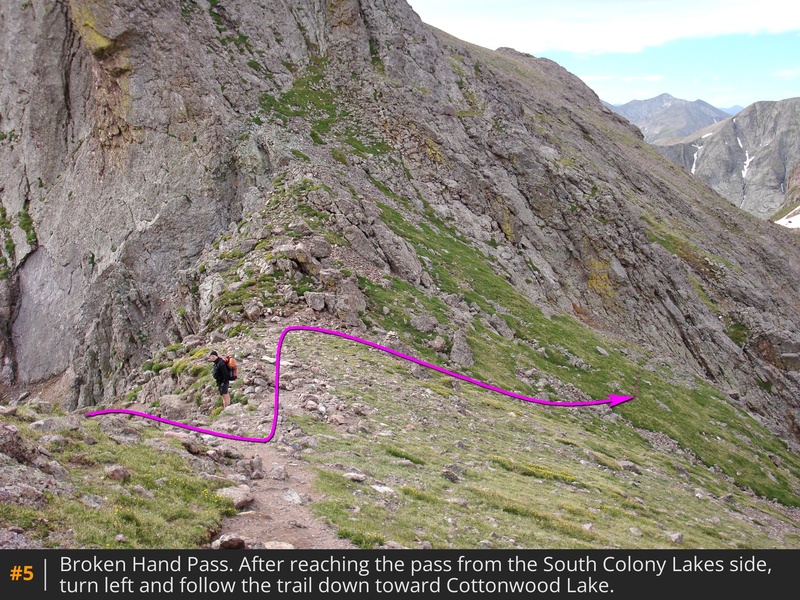
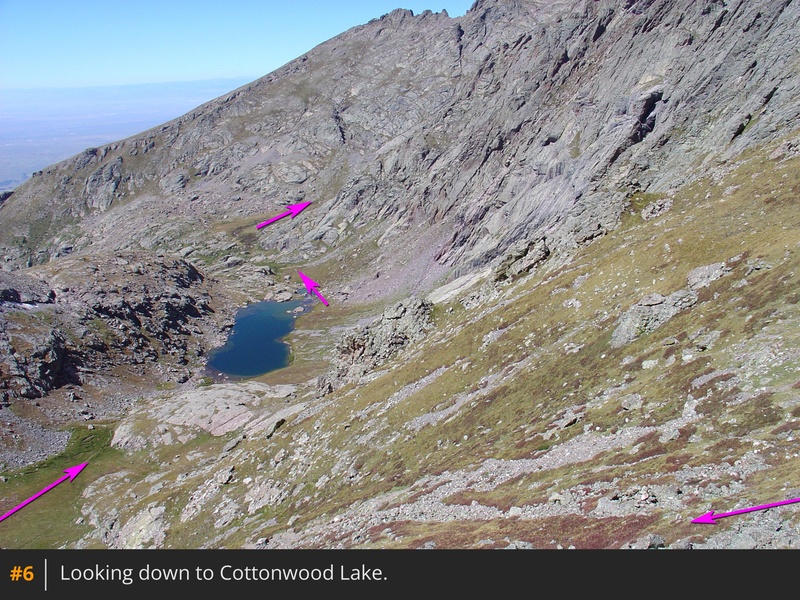
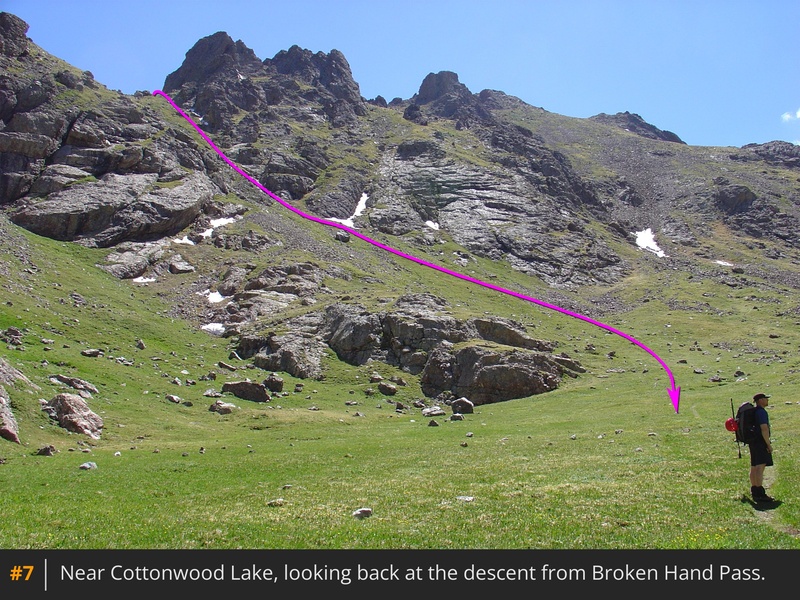
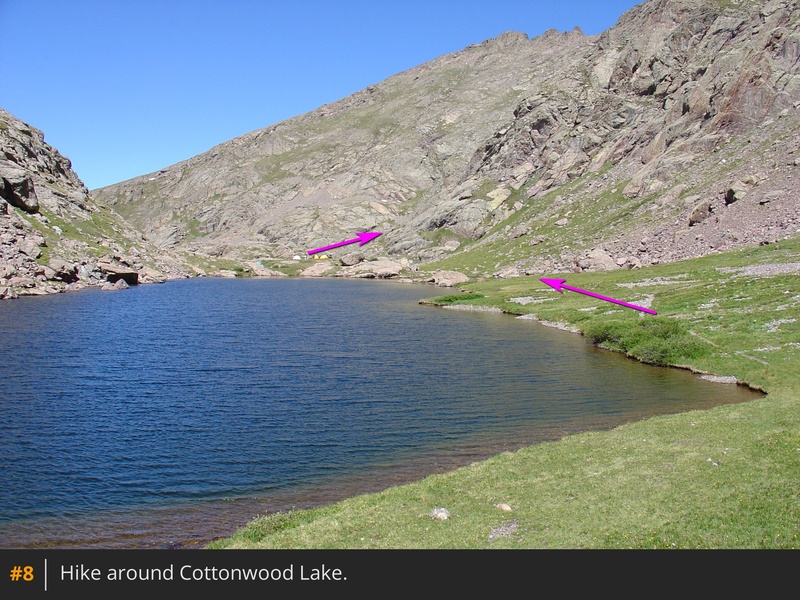
Near 11,650', and before Lower South Colony Lake, turn left on the trail towards Broken Hand Pass  1. Follow the mostly-defined trail as it climbs south up the slope before turning west into rugged terrain below Broken Hand Pass  2. Traverse right before ascending steep, loose terrain  3 to reach a narrow section (Class 3) below the pass  4. Scramble up through the rocks and hike another 200 feet to reach the pass , near 12,900'. On the west side of the pass  5, follow a trail down the steep slope and west to Cottonwood Lake  6  7  8.

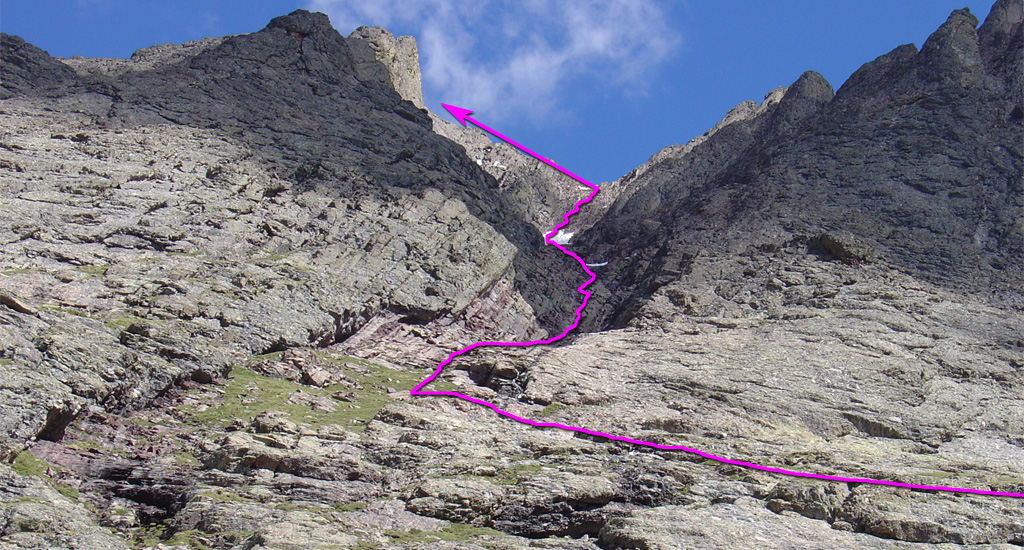
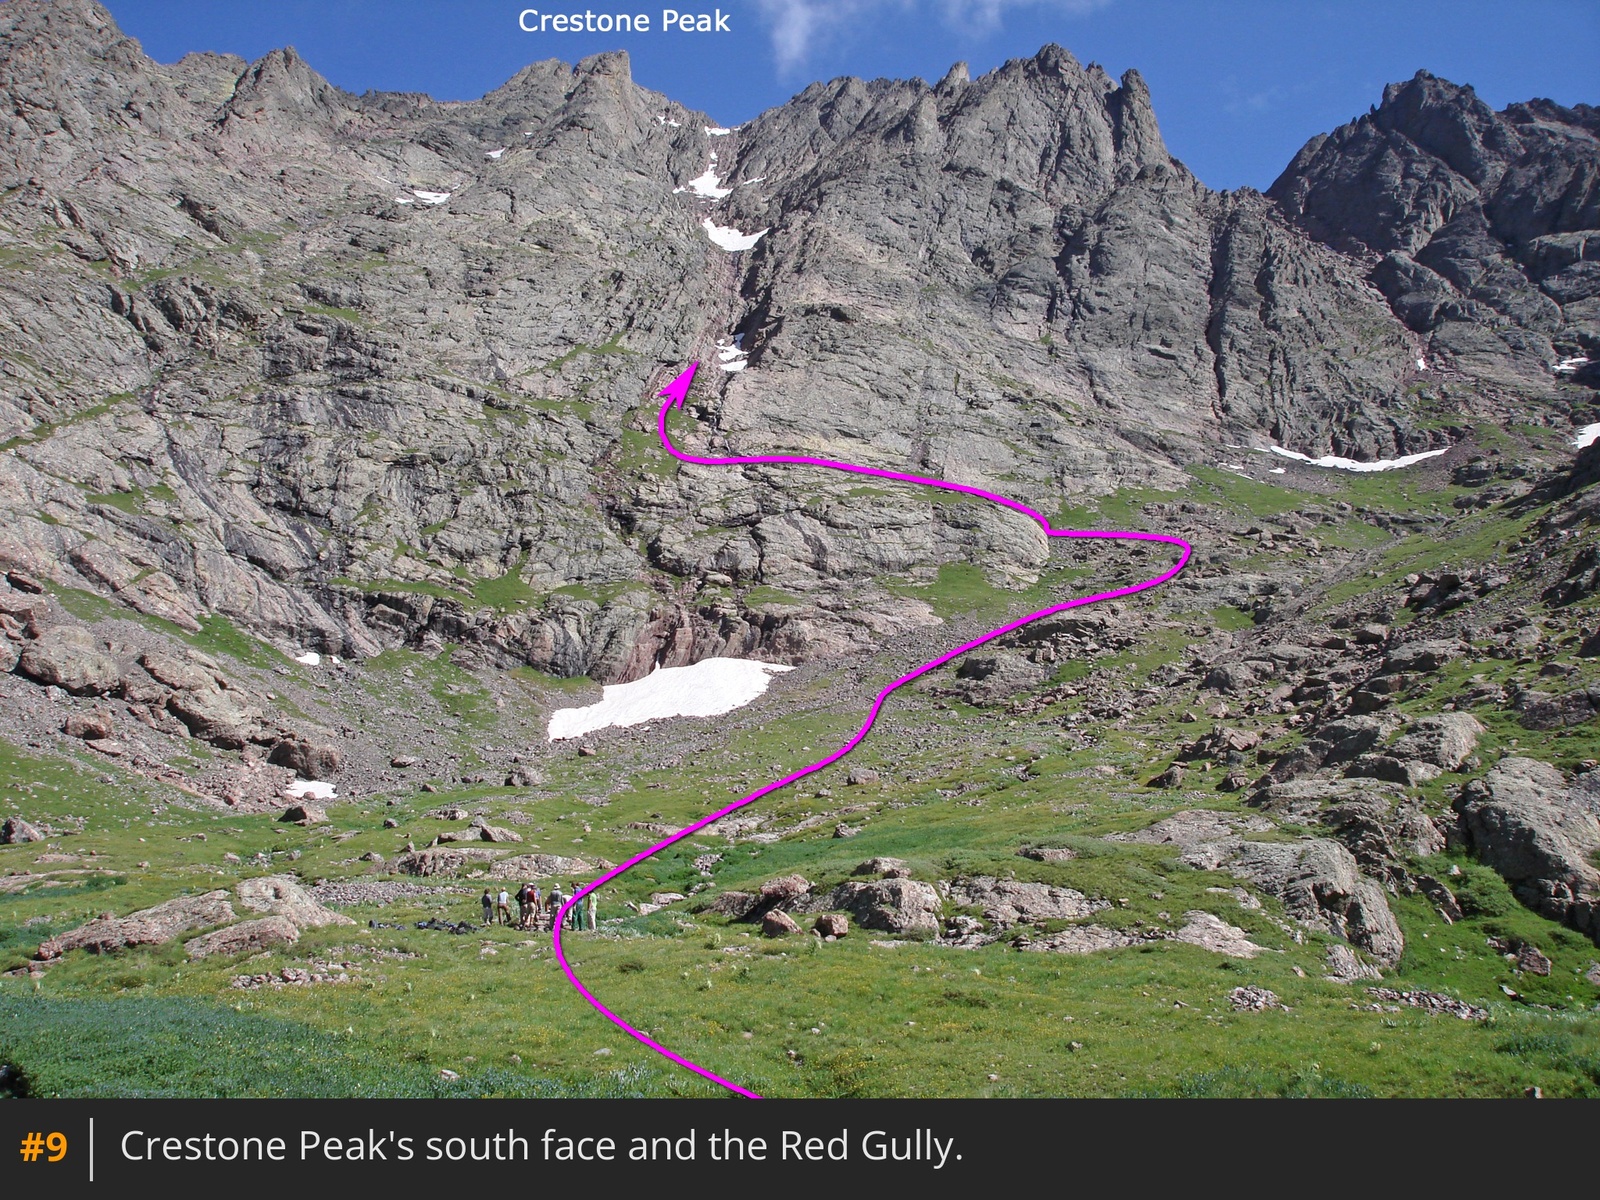
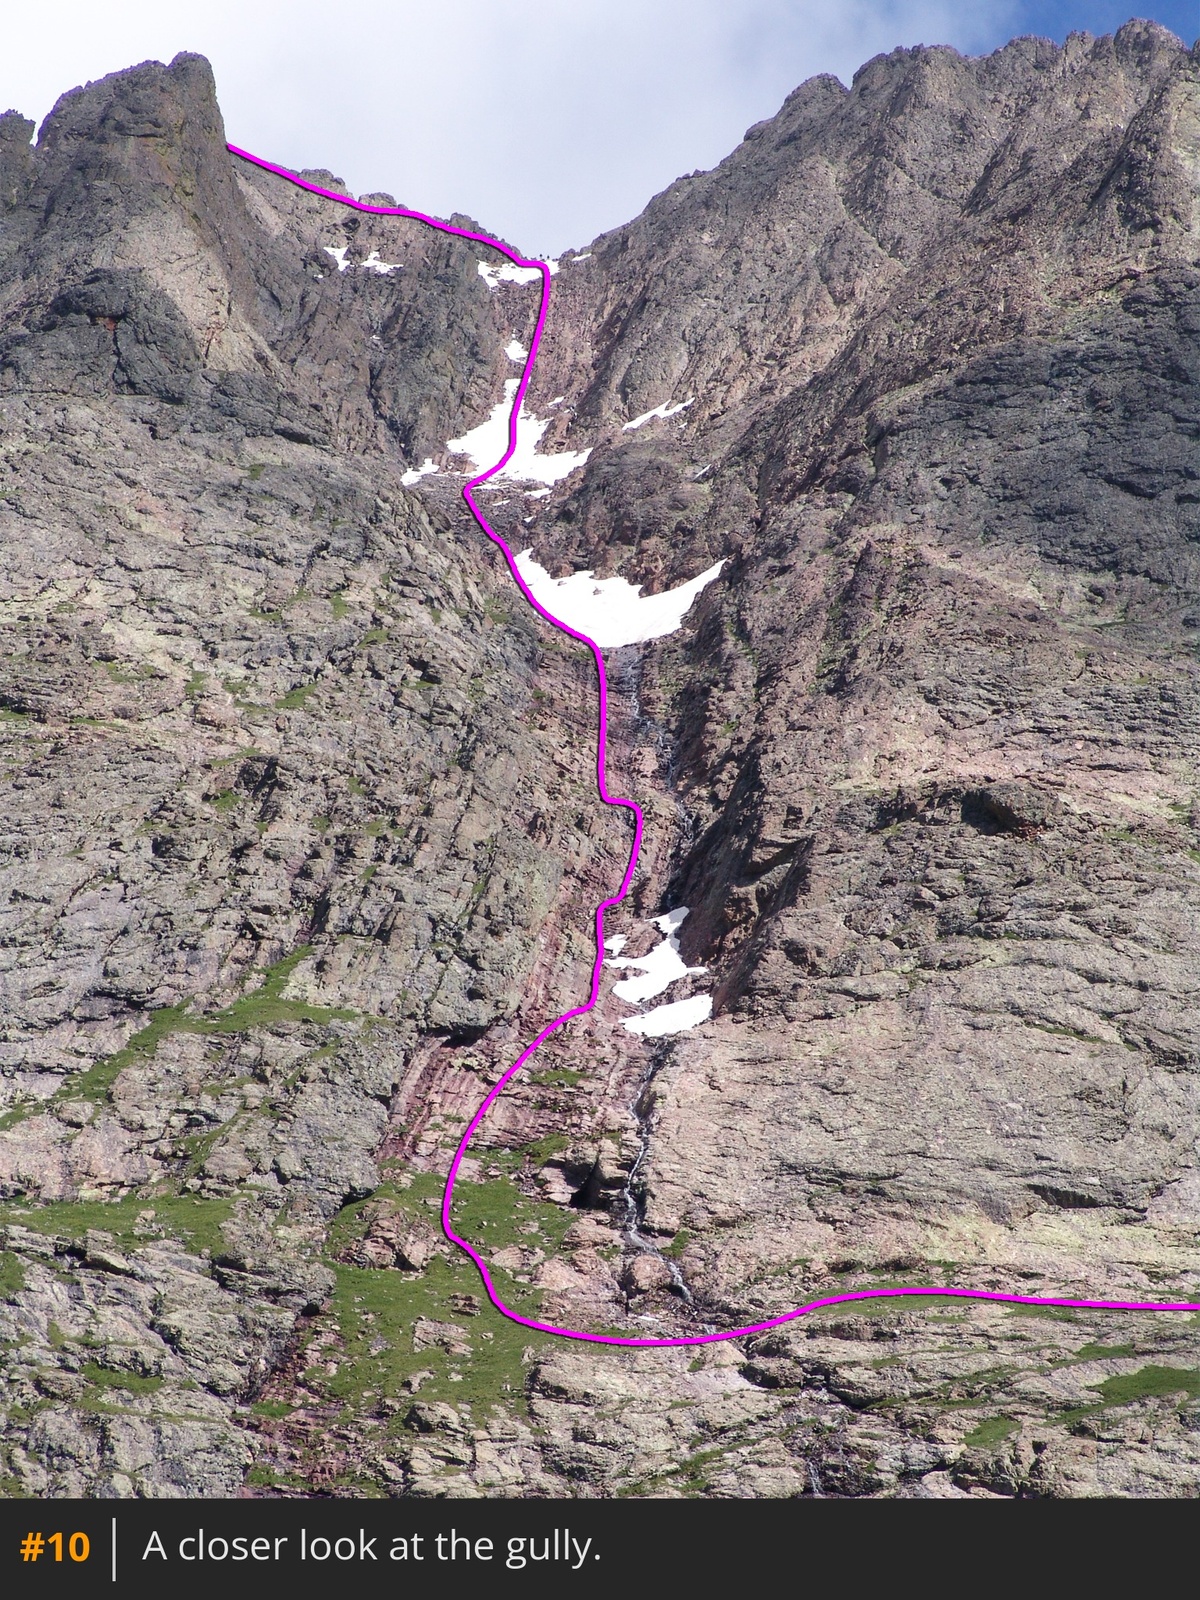
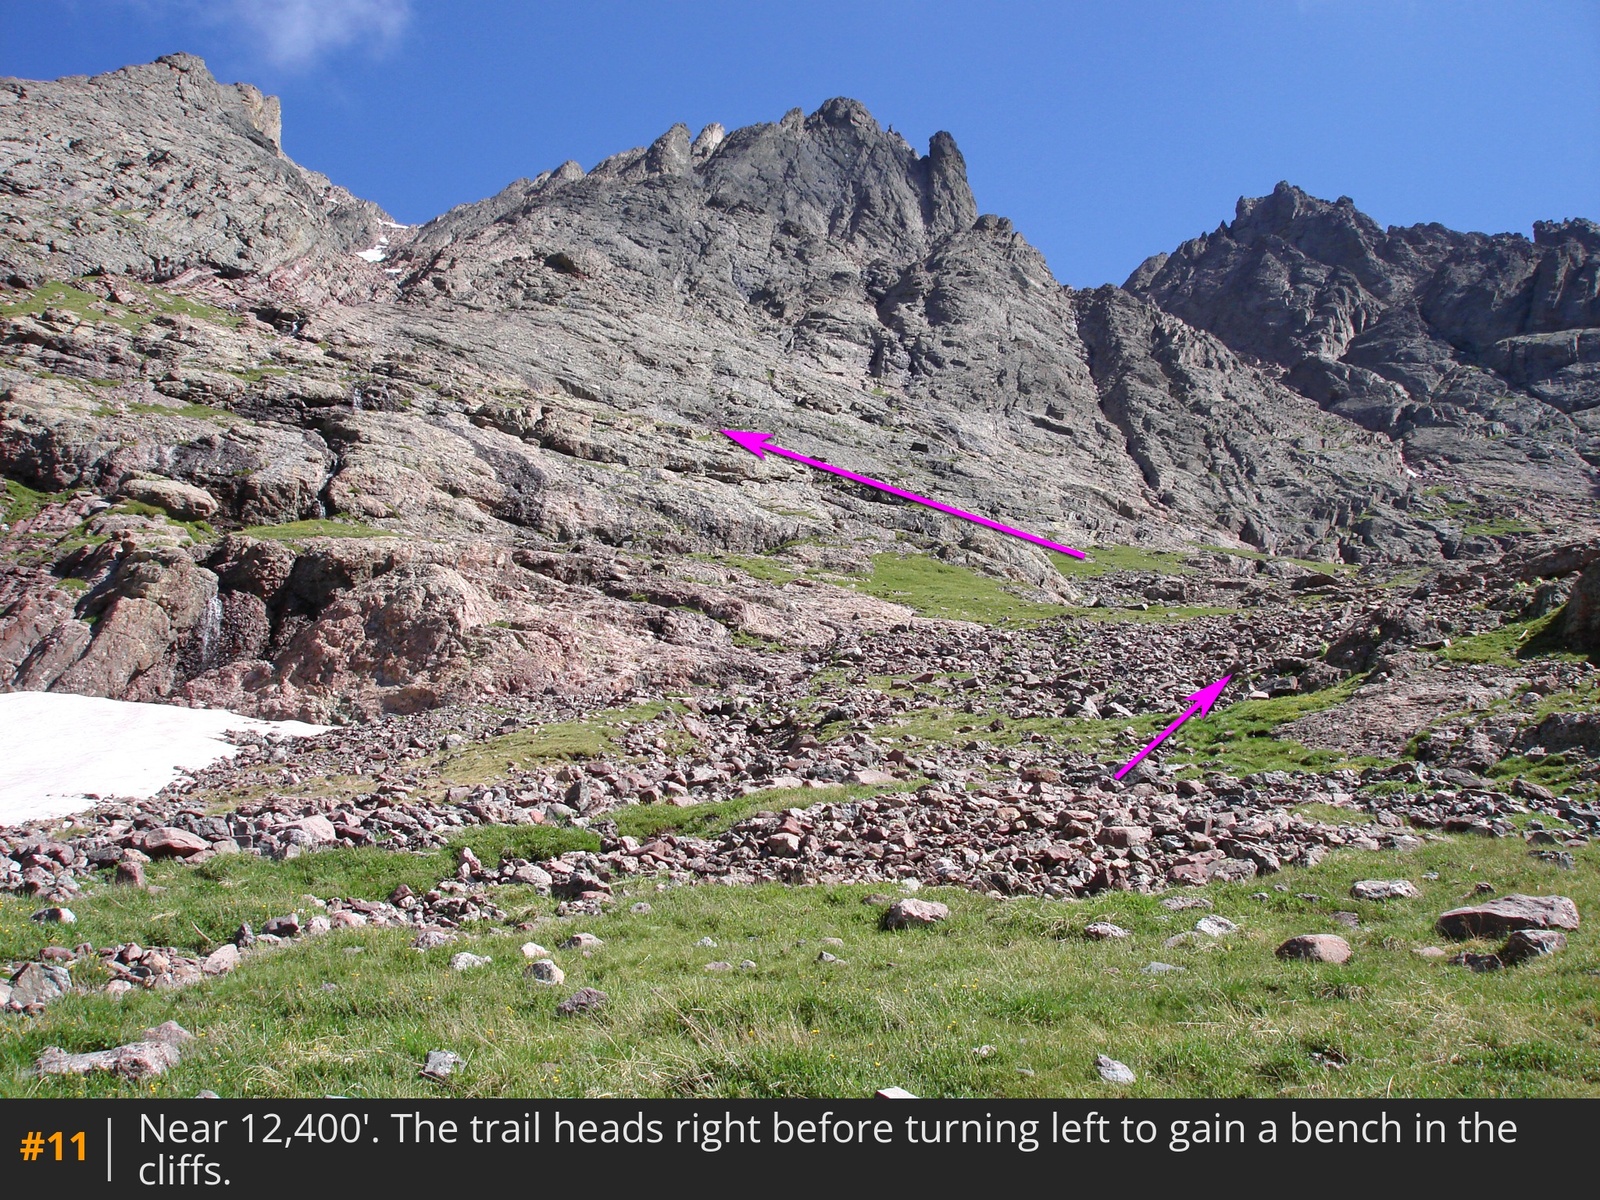
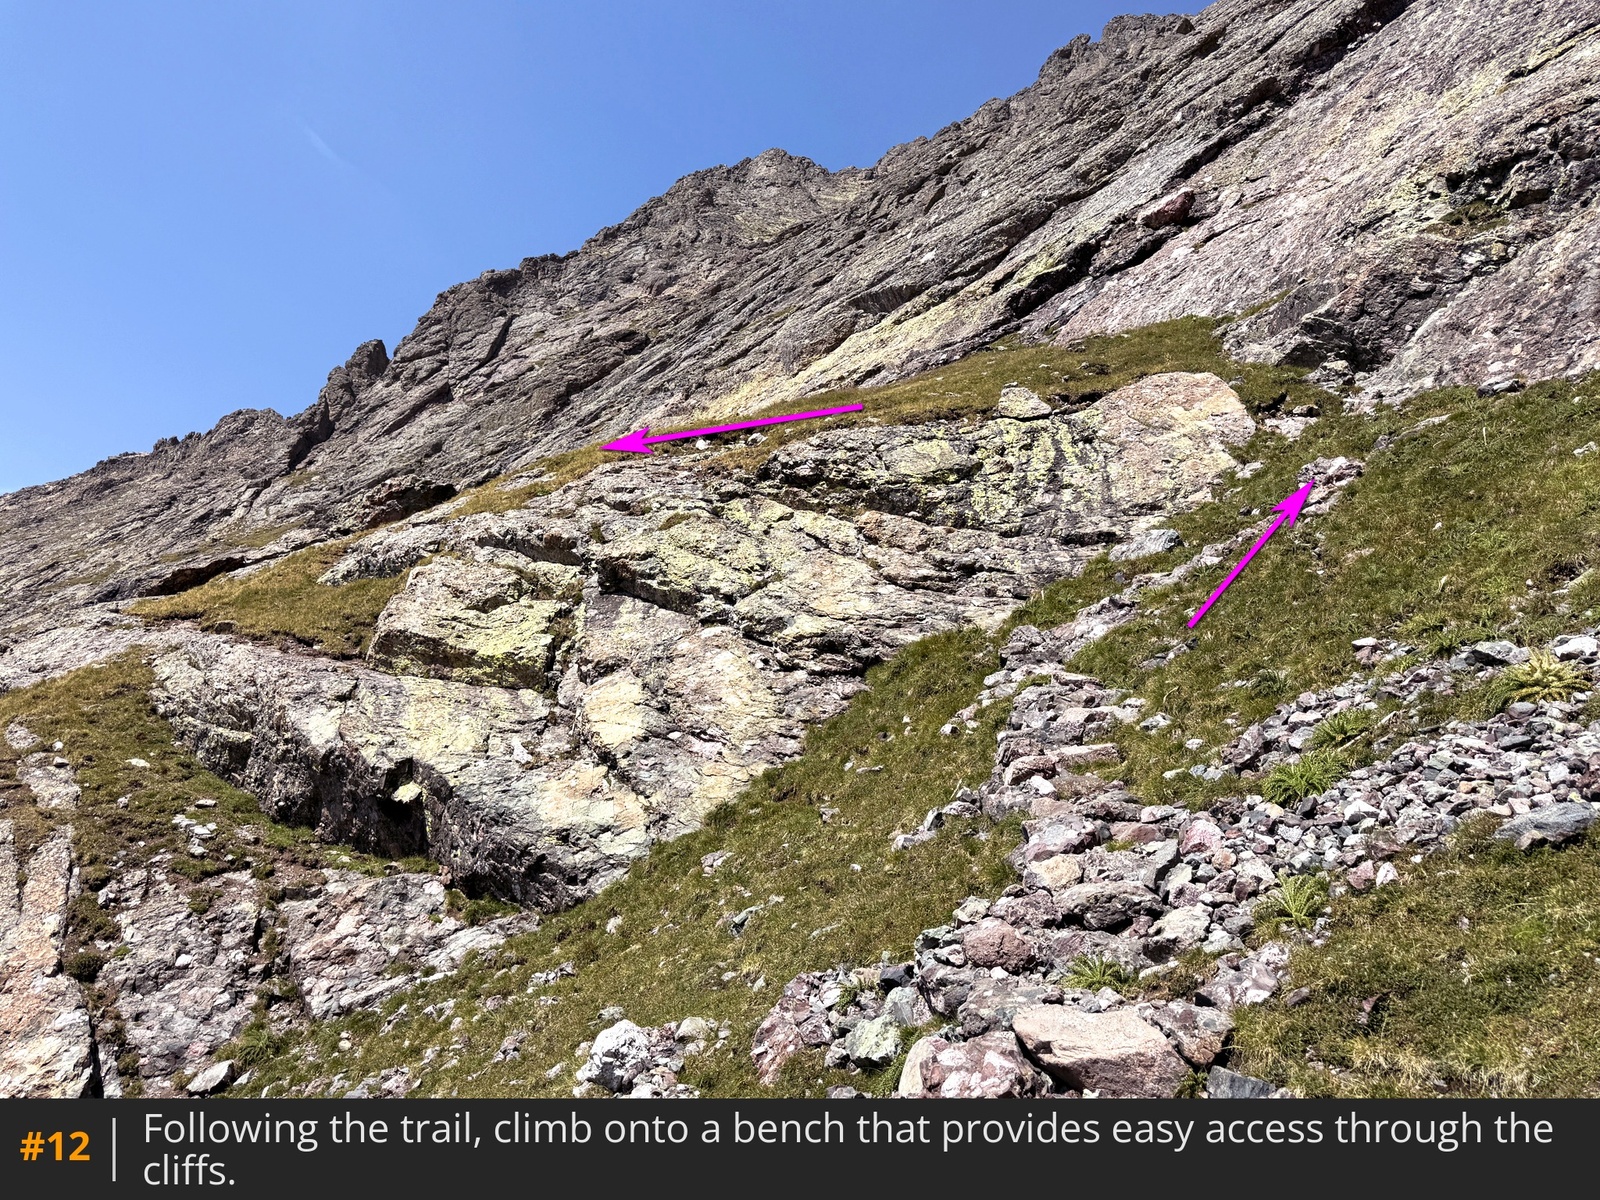
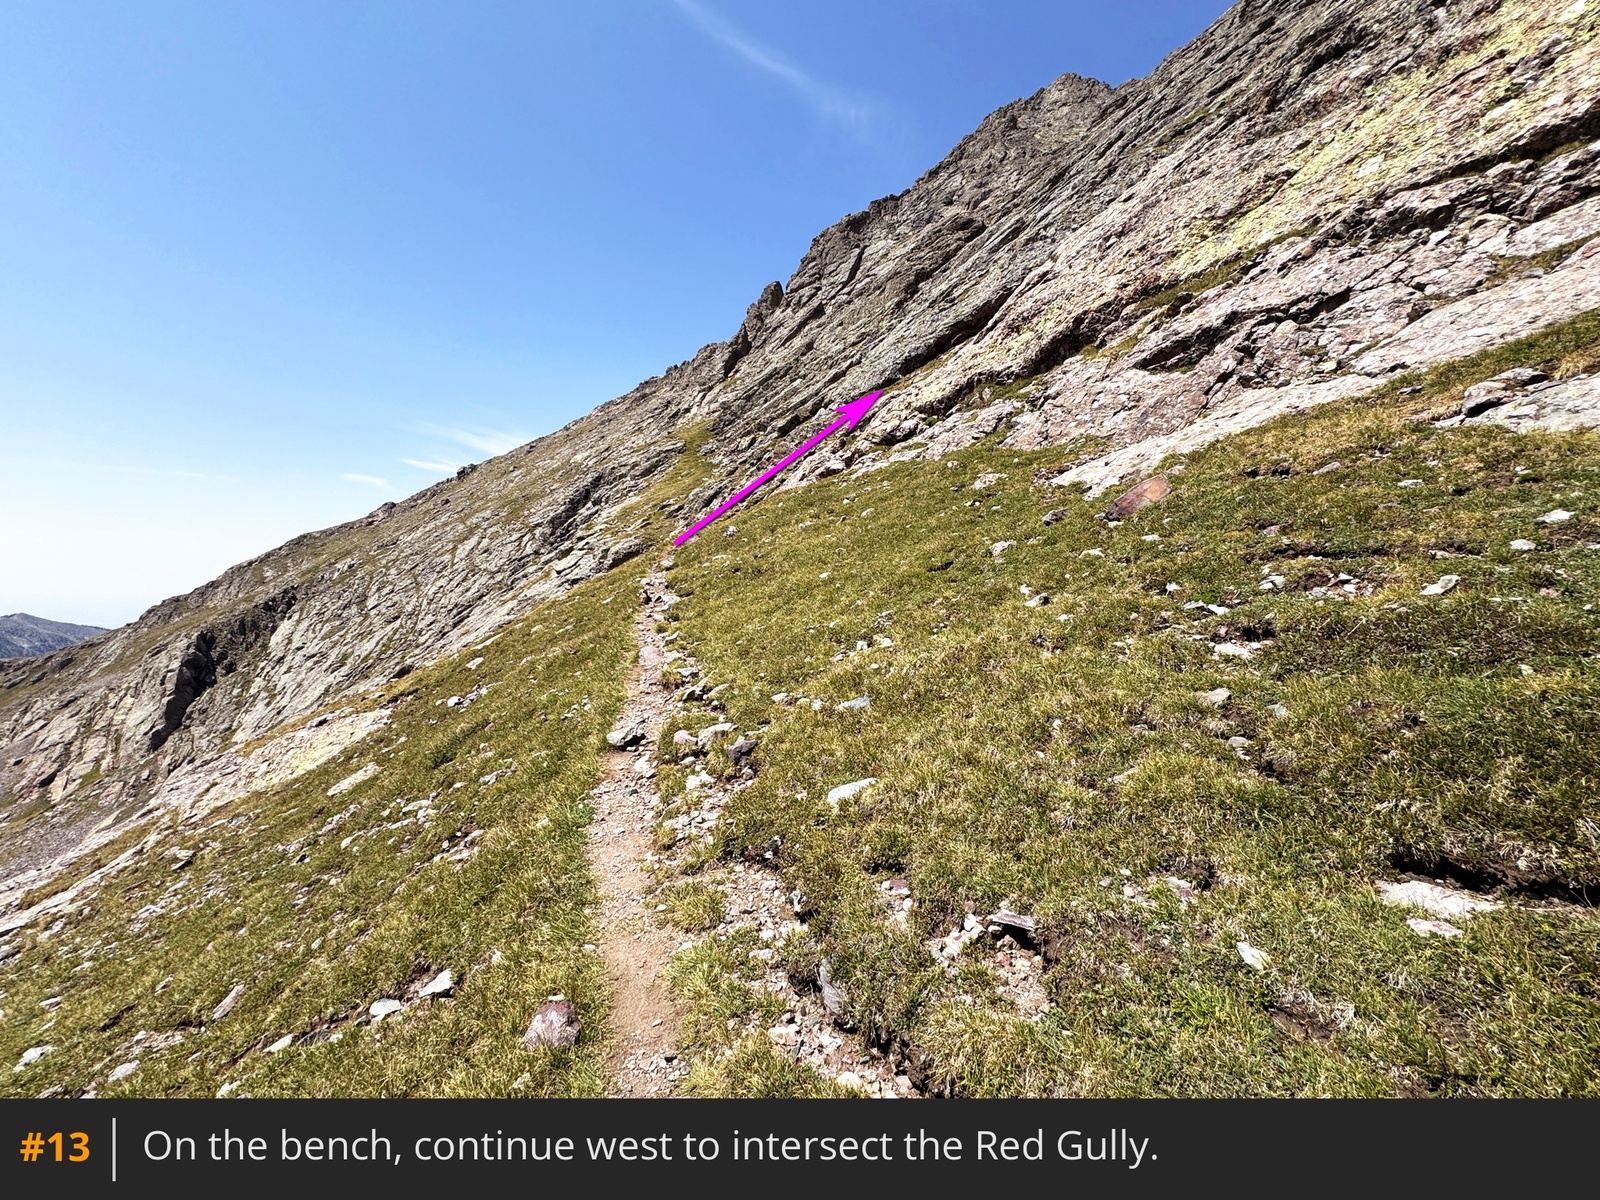
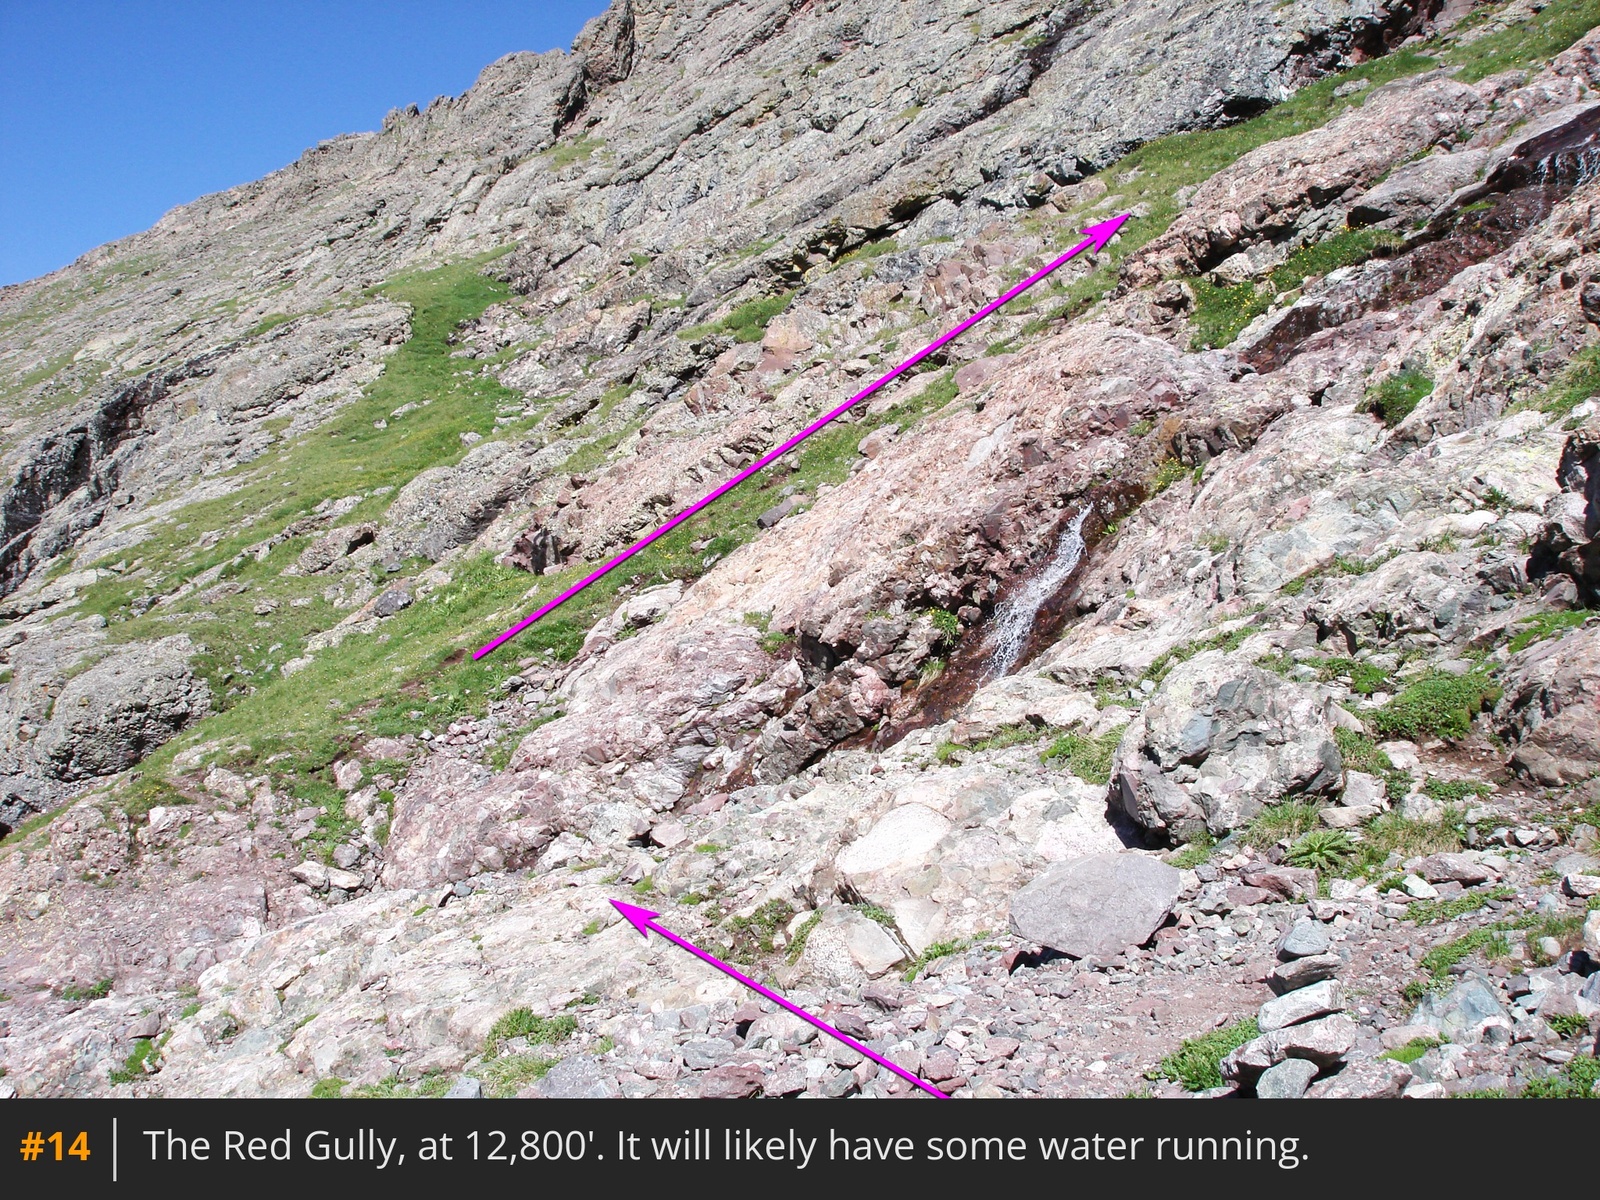
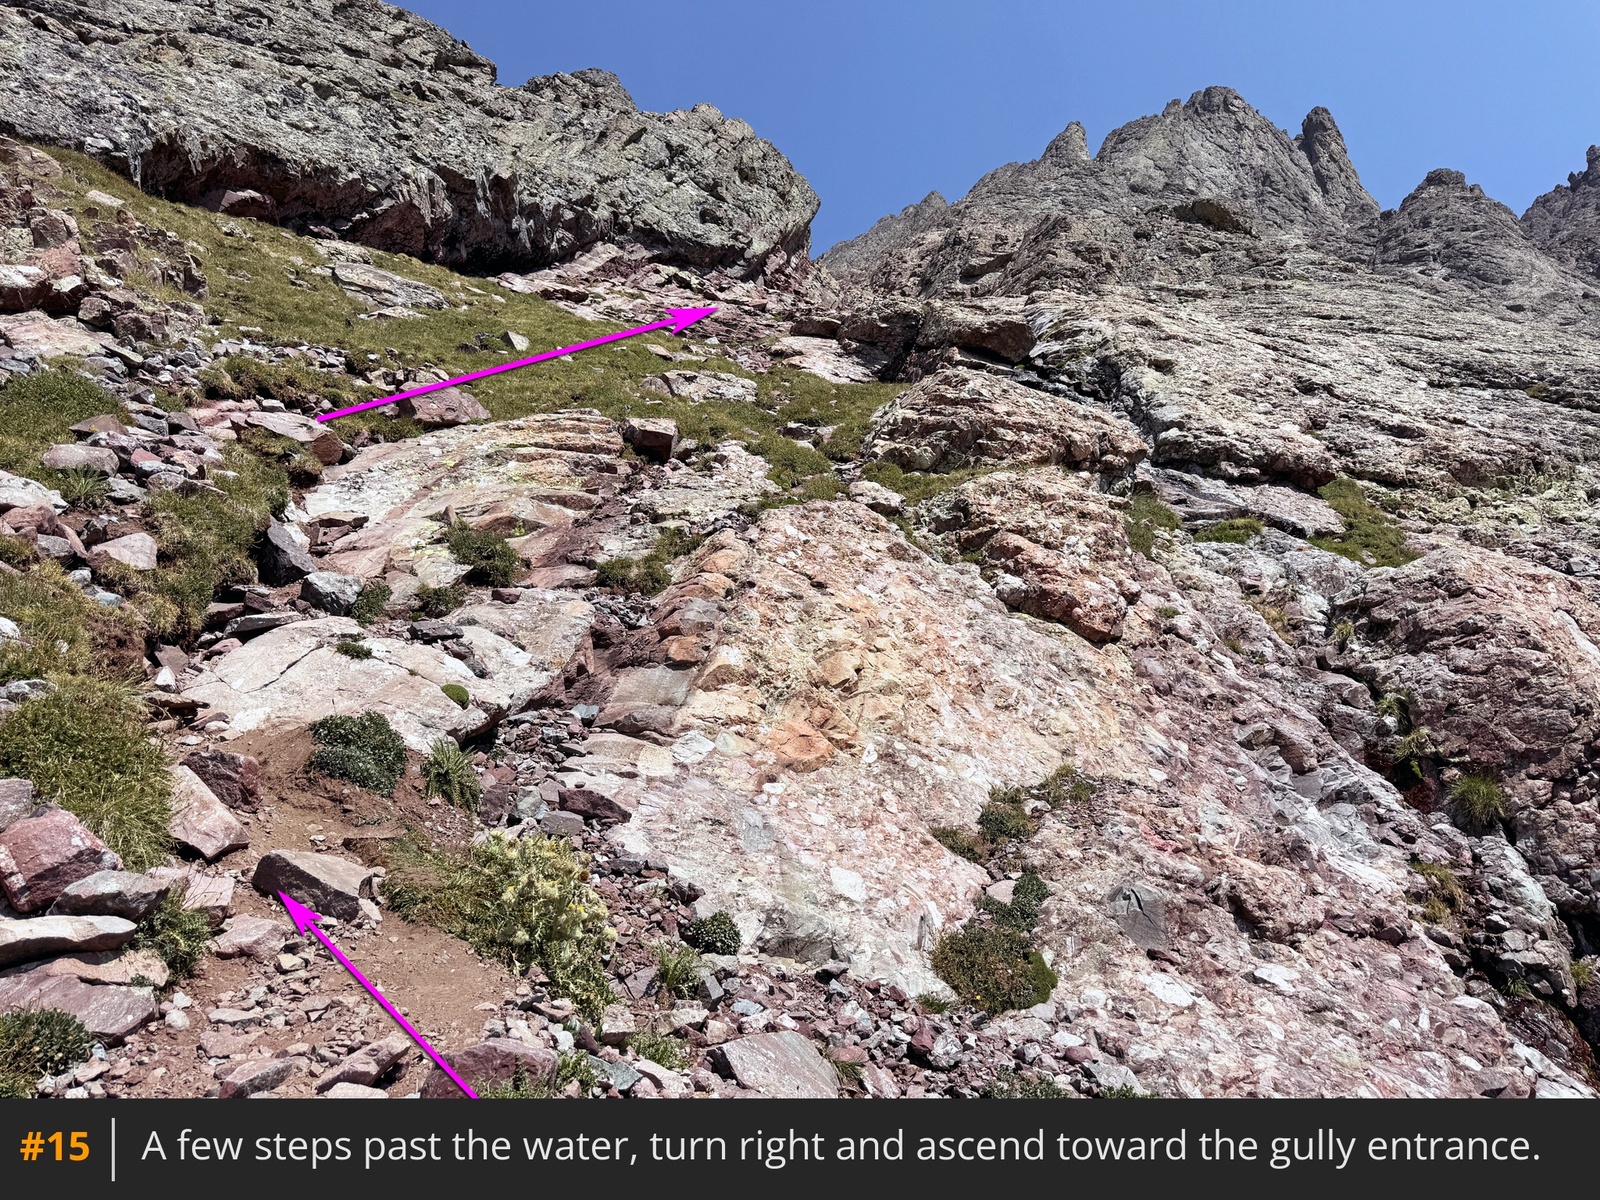
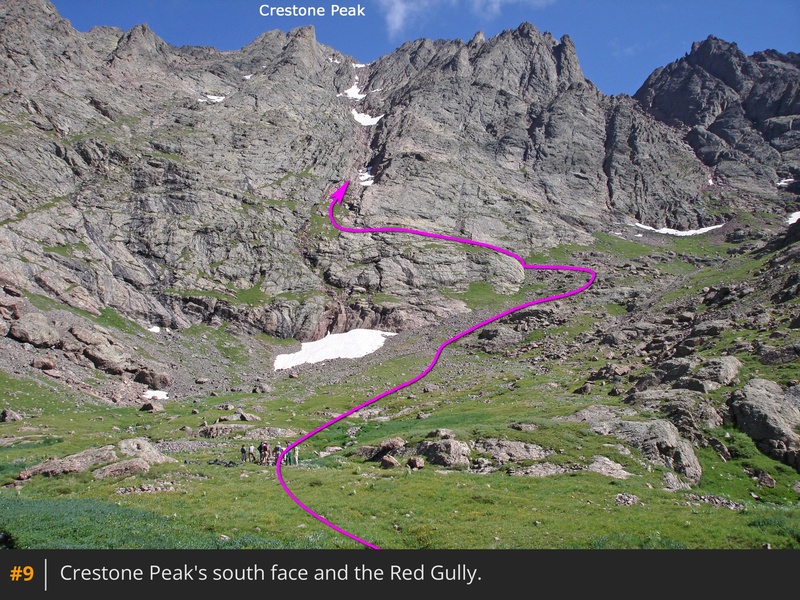
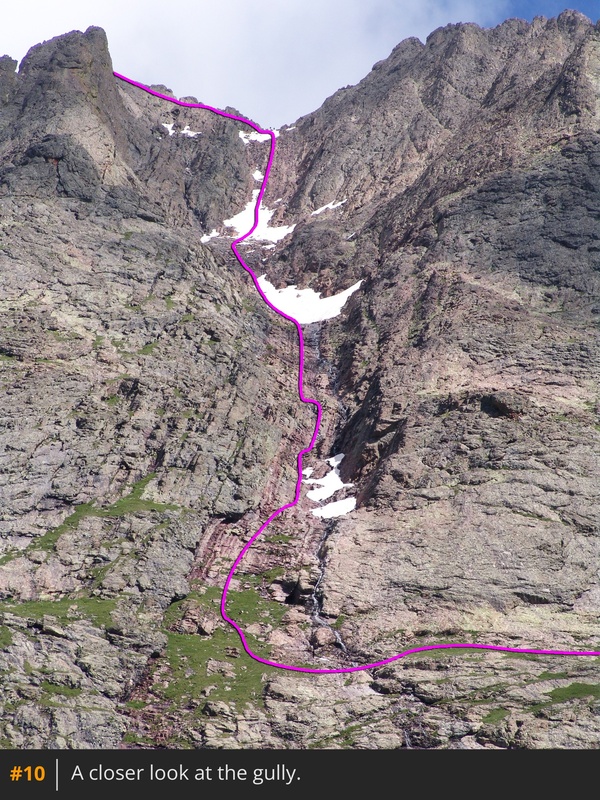
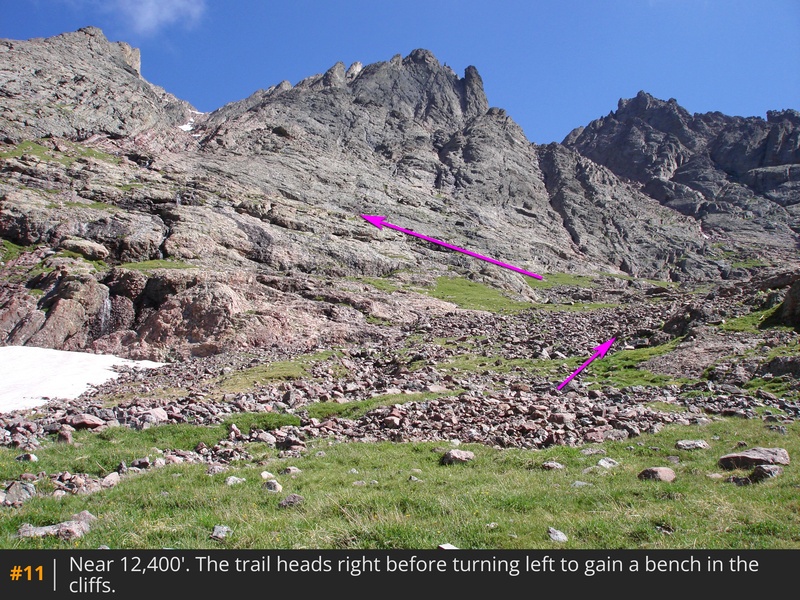
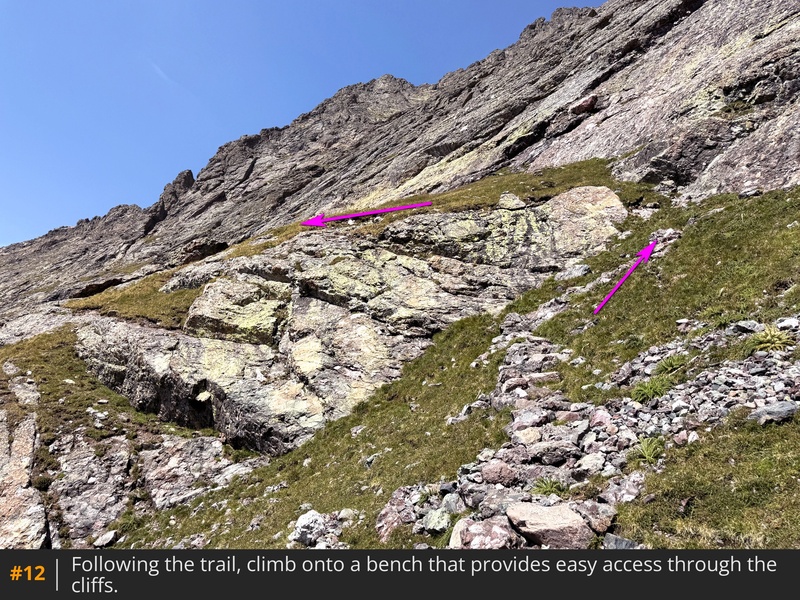
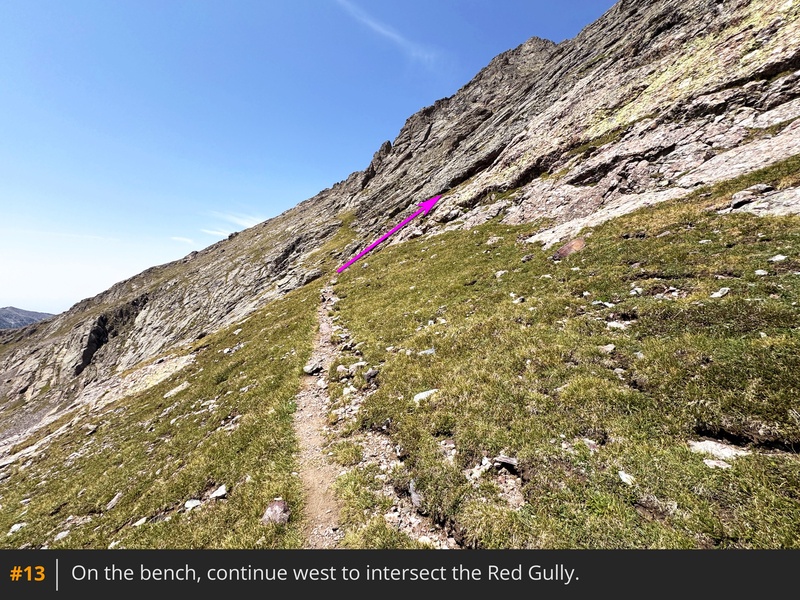
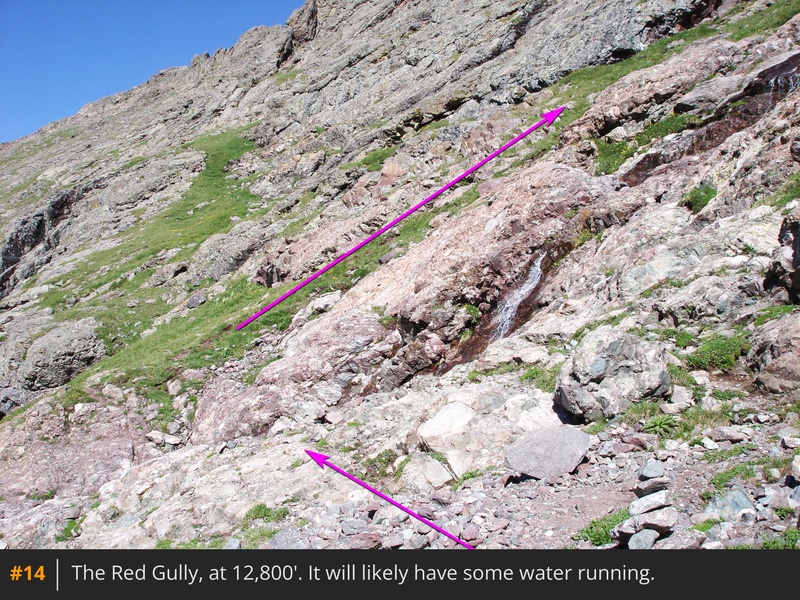
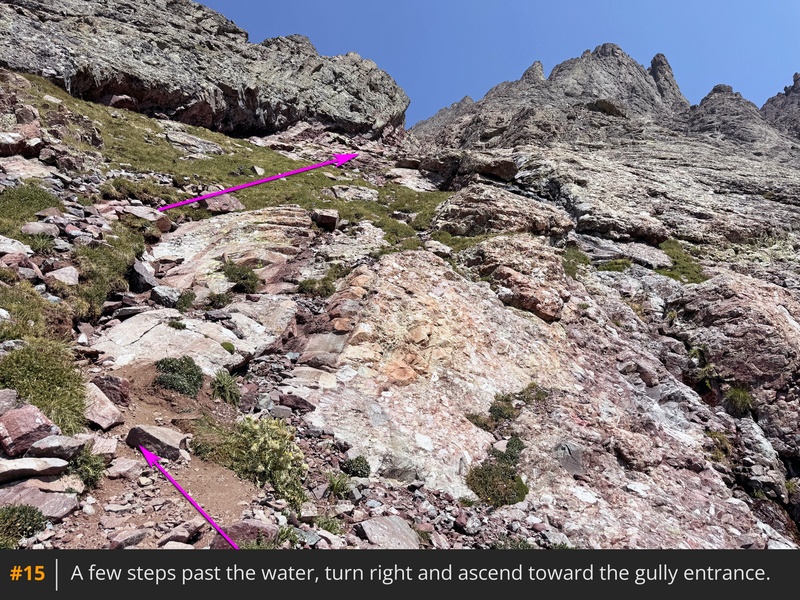
Pass the lake and continue west. Shortly after the lake, the view opens up, and you can see Crestone Peak and the upper route to the north  9  10. To avoid the cliffs below the gully, follow the defined trail northeast  11 through a rocky area at 12,800' and onto the east end of a bench, near 12,900'  12. Gain the bench and follow the trail west to intersect the Red Gully near 13,100'  13  14. The gully is fairly obvious, and there's usually some water running down from it. Cross the water, take a few steps, and turn right to see your entrance to the gully, on the left side as you look up  15.

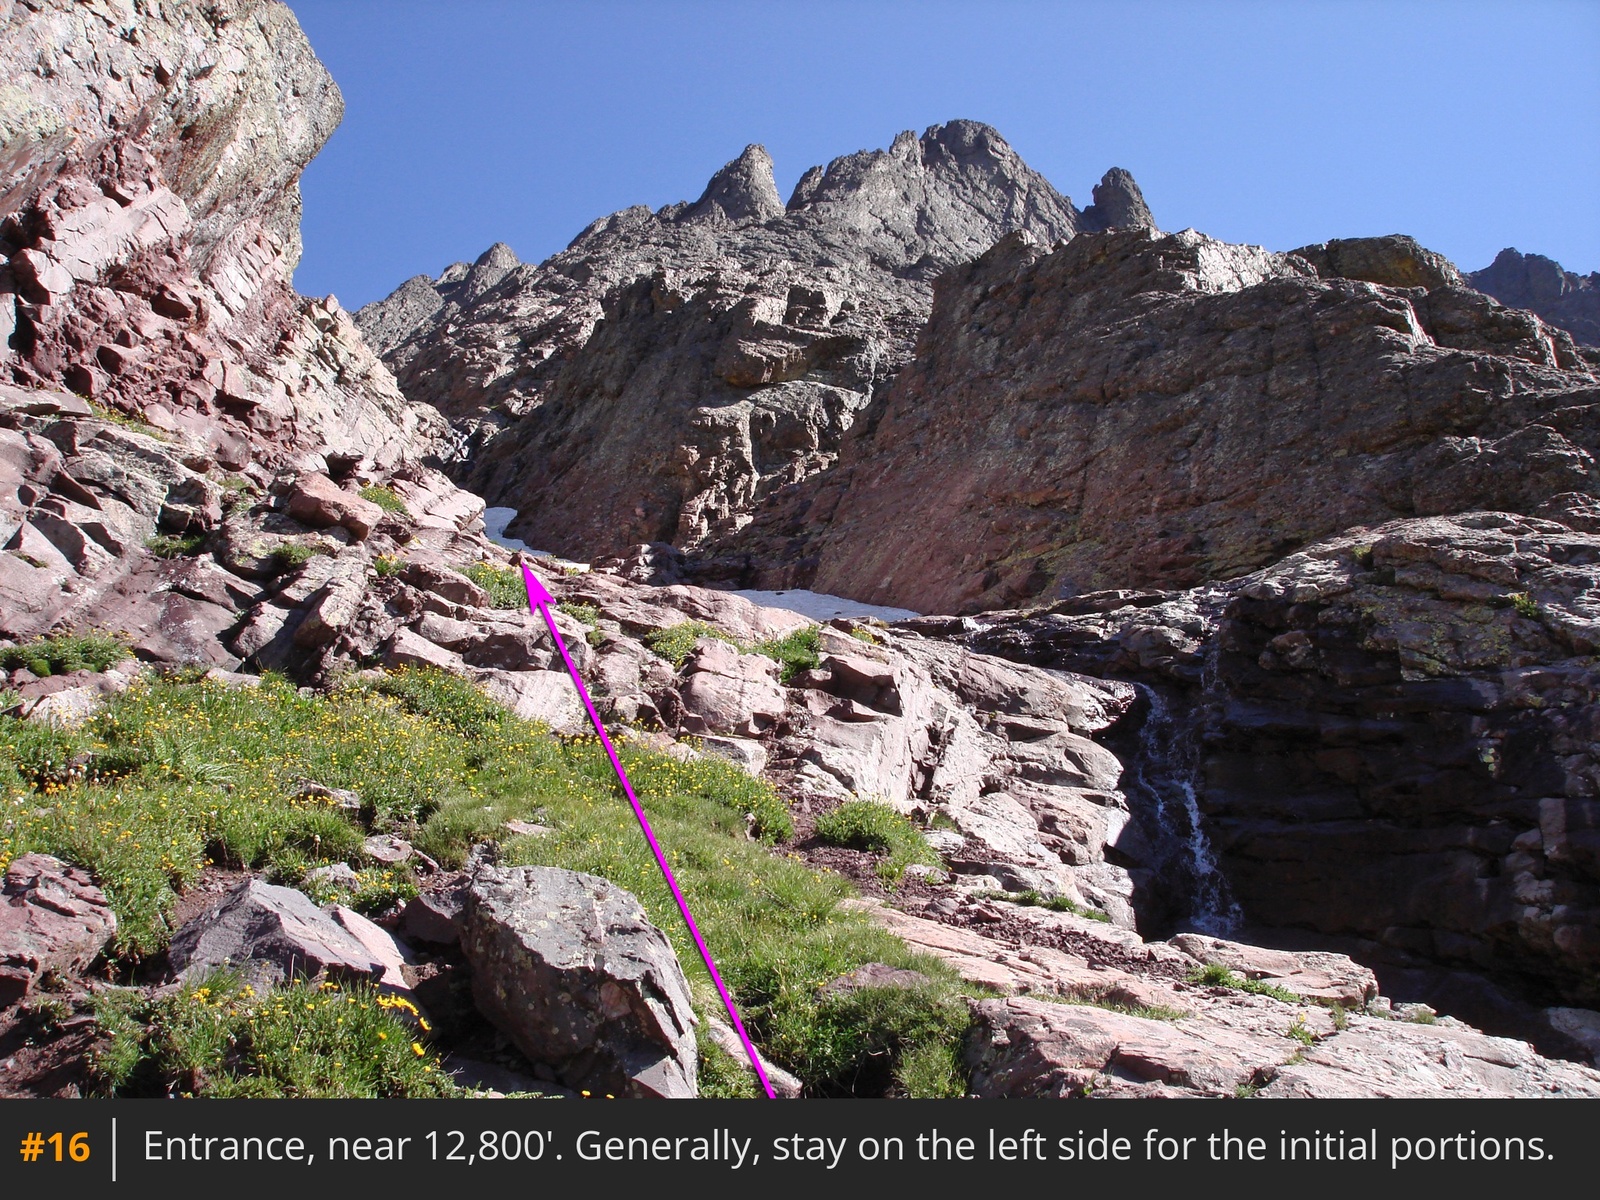
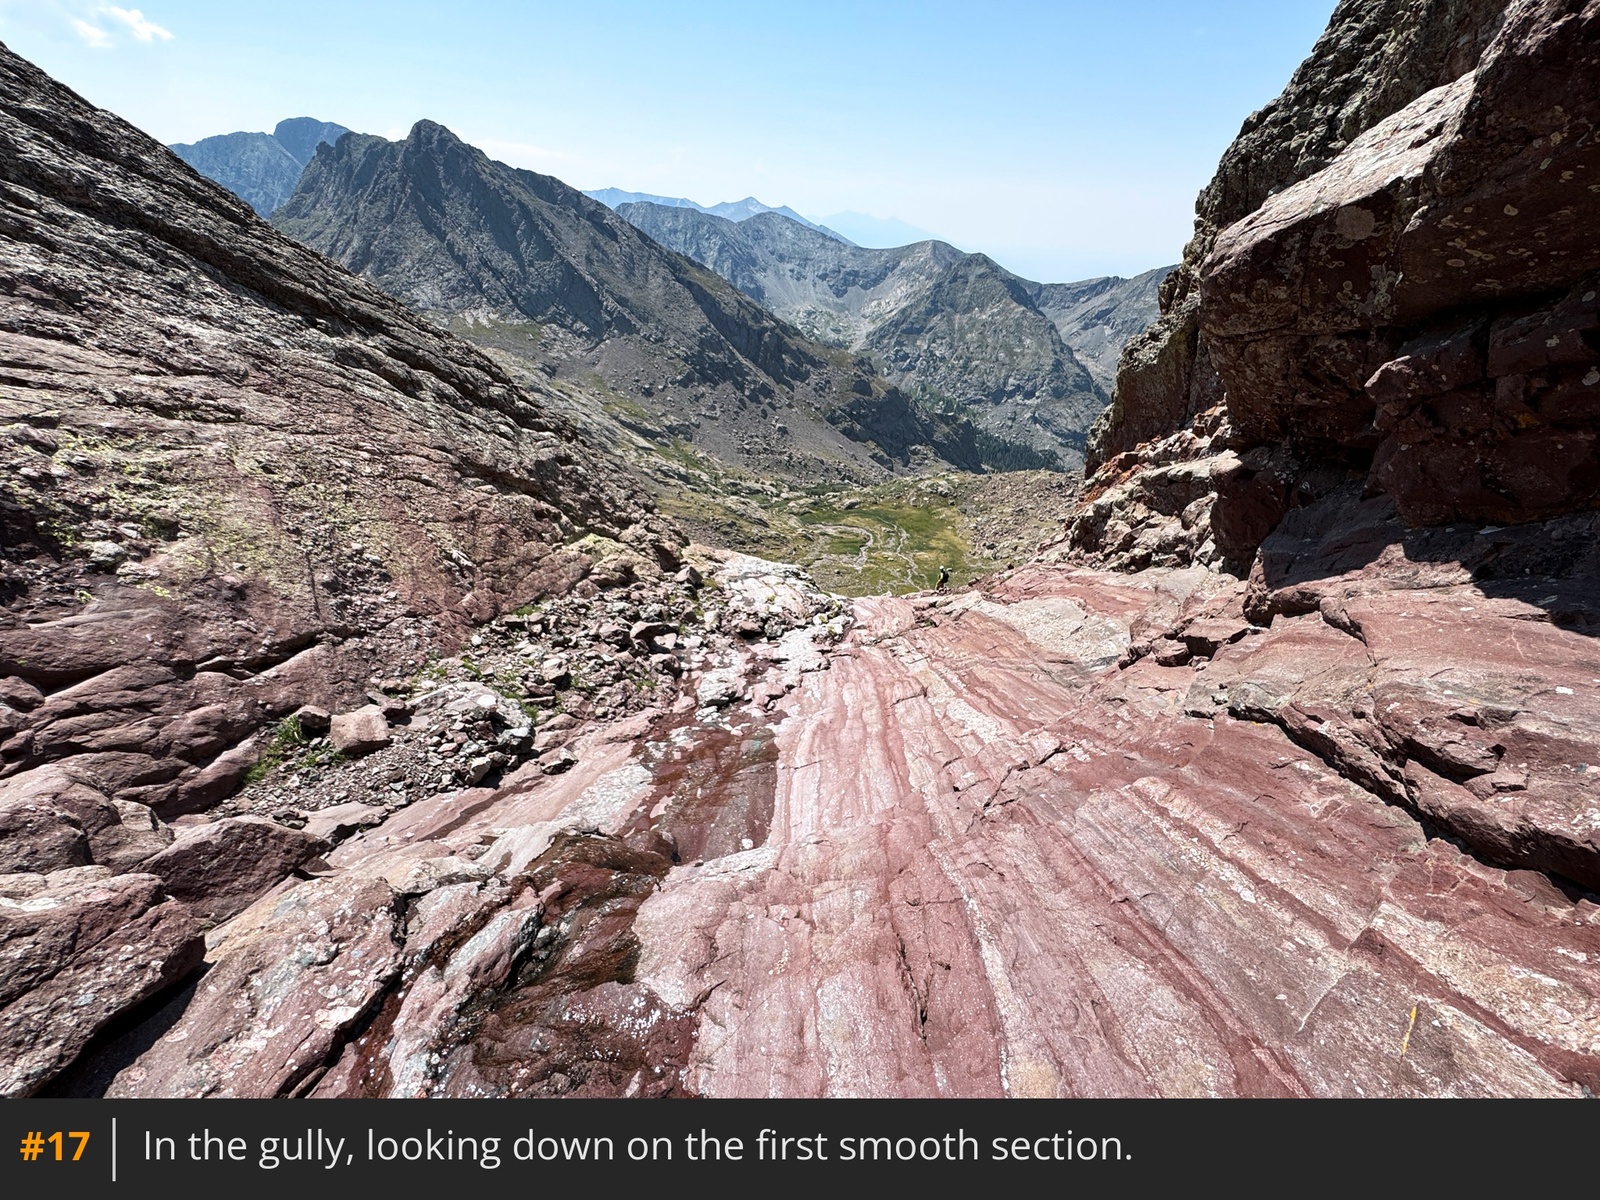
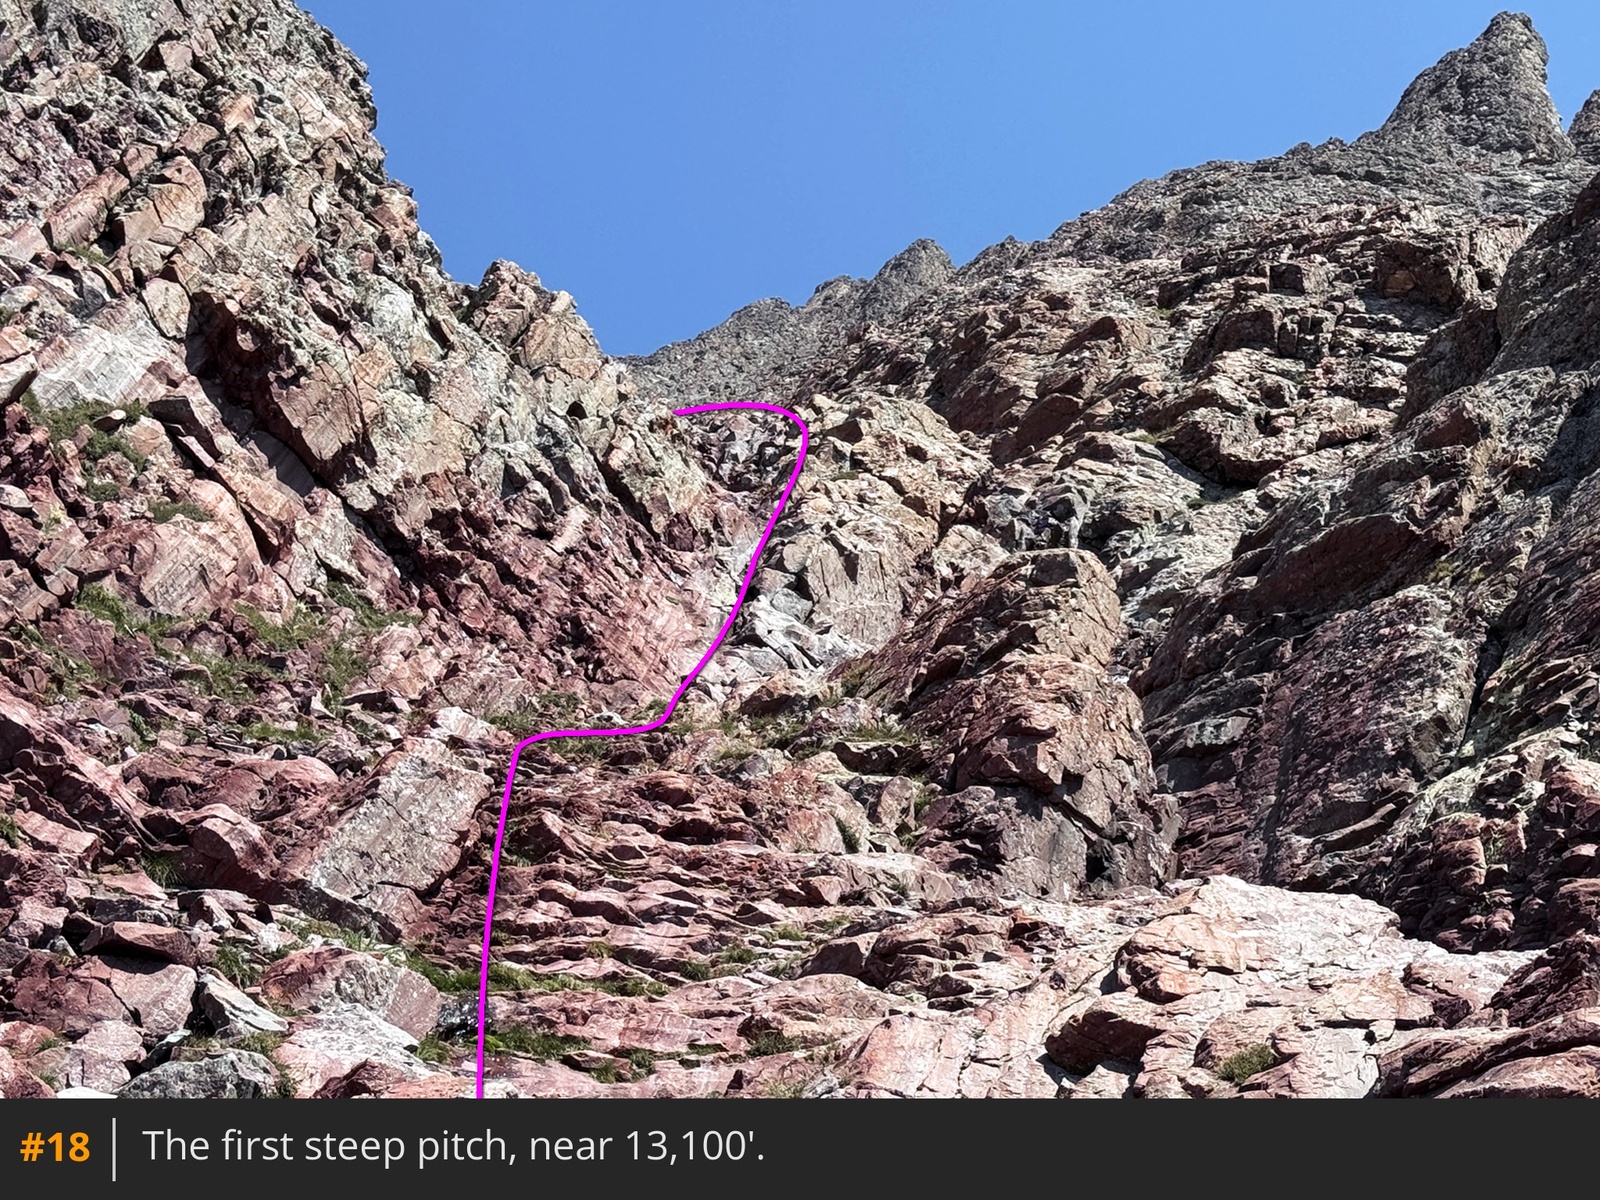
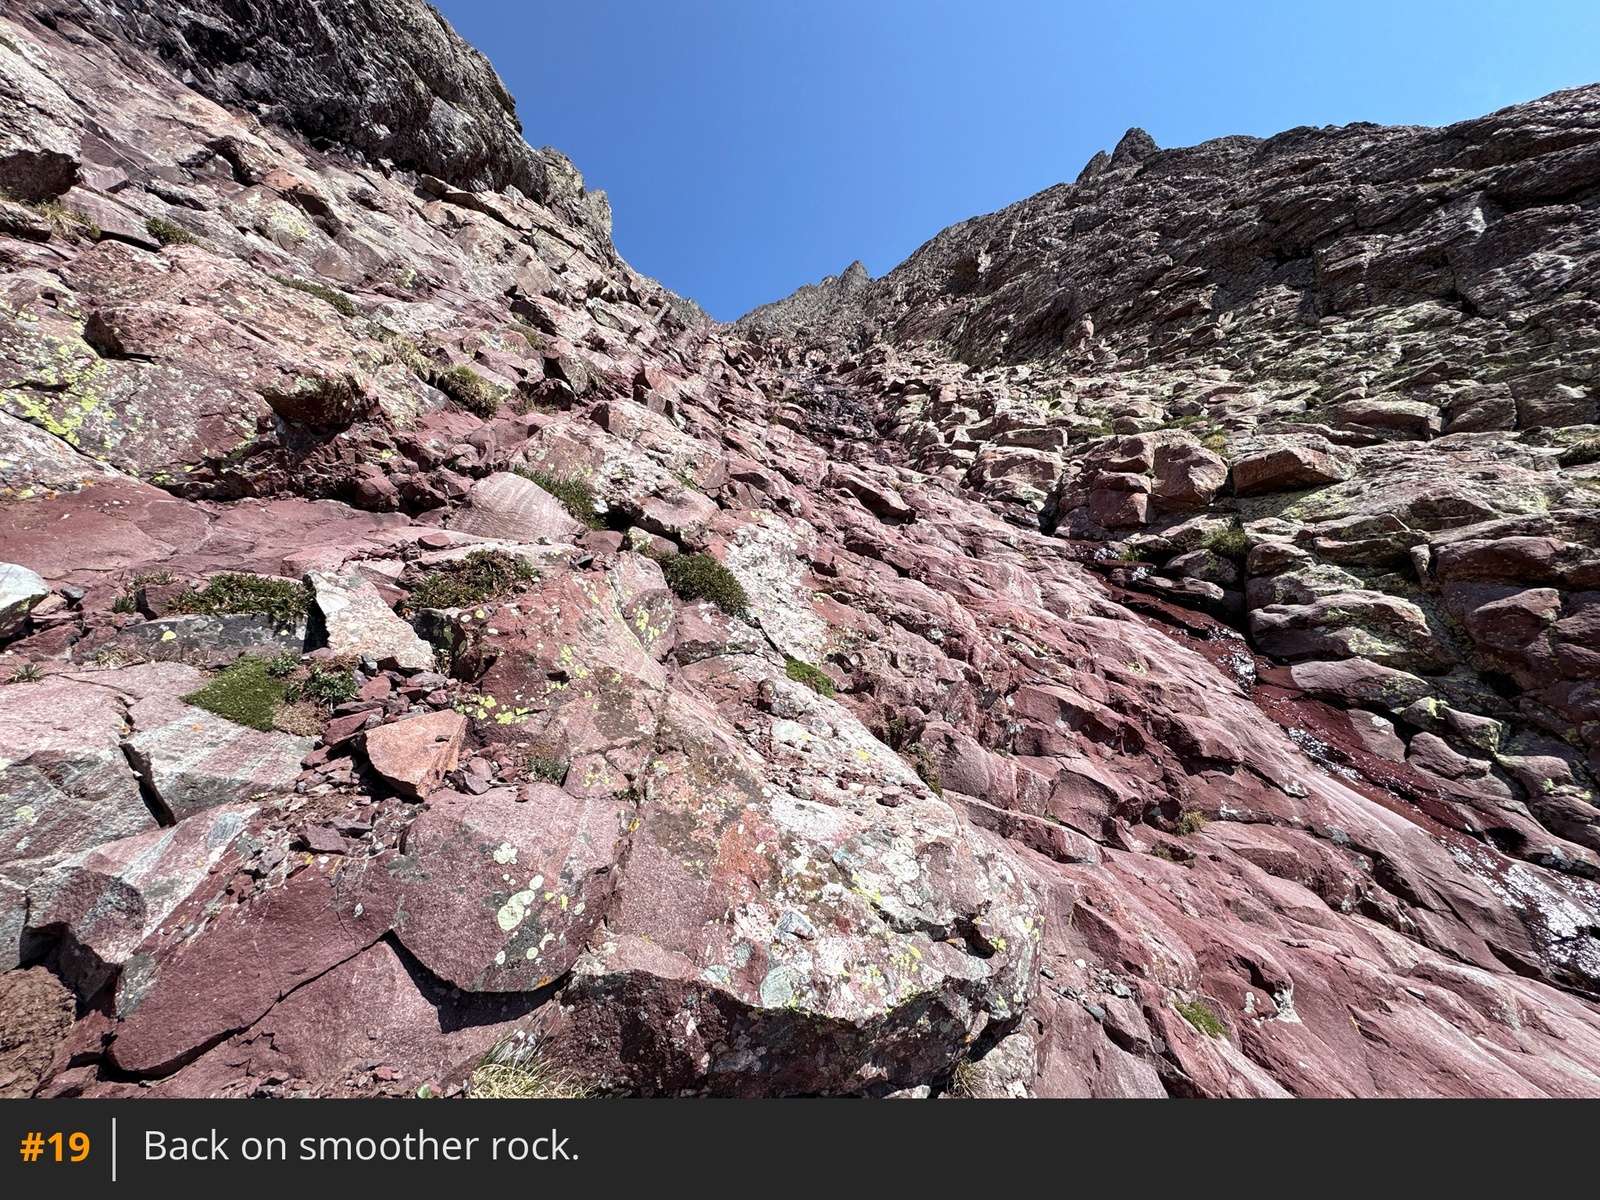
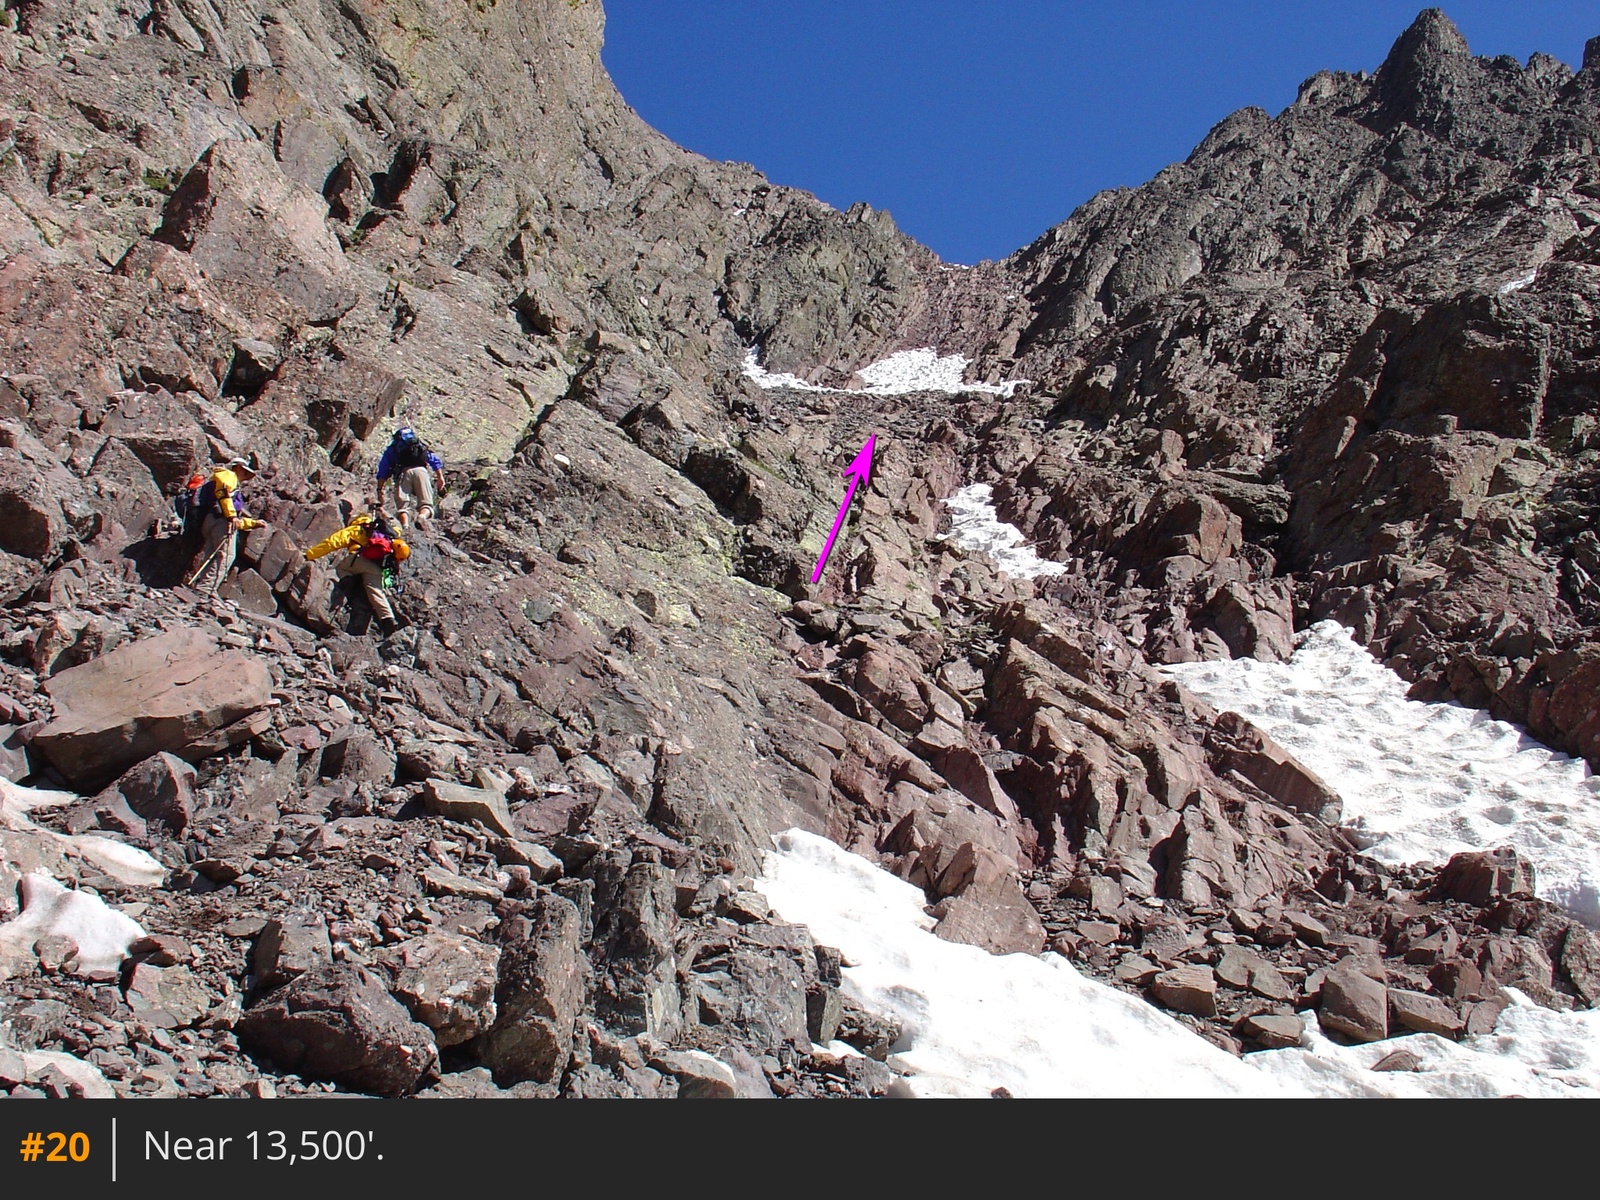
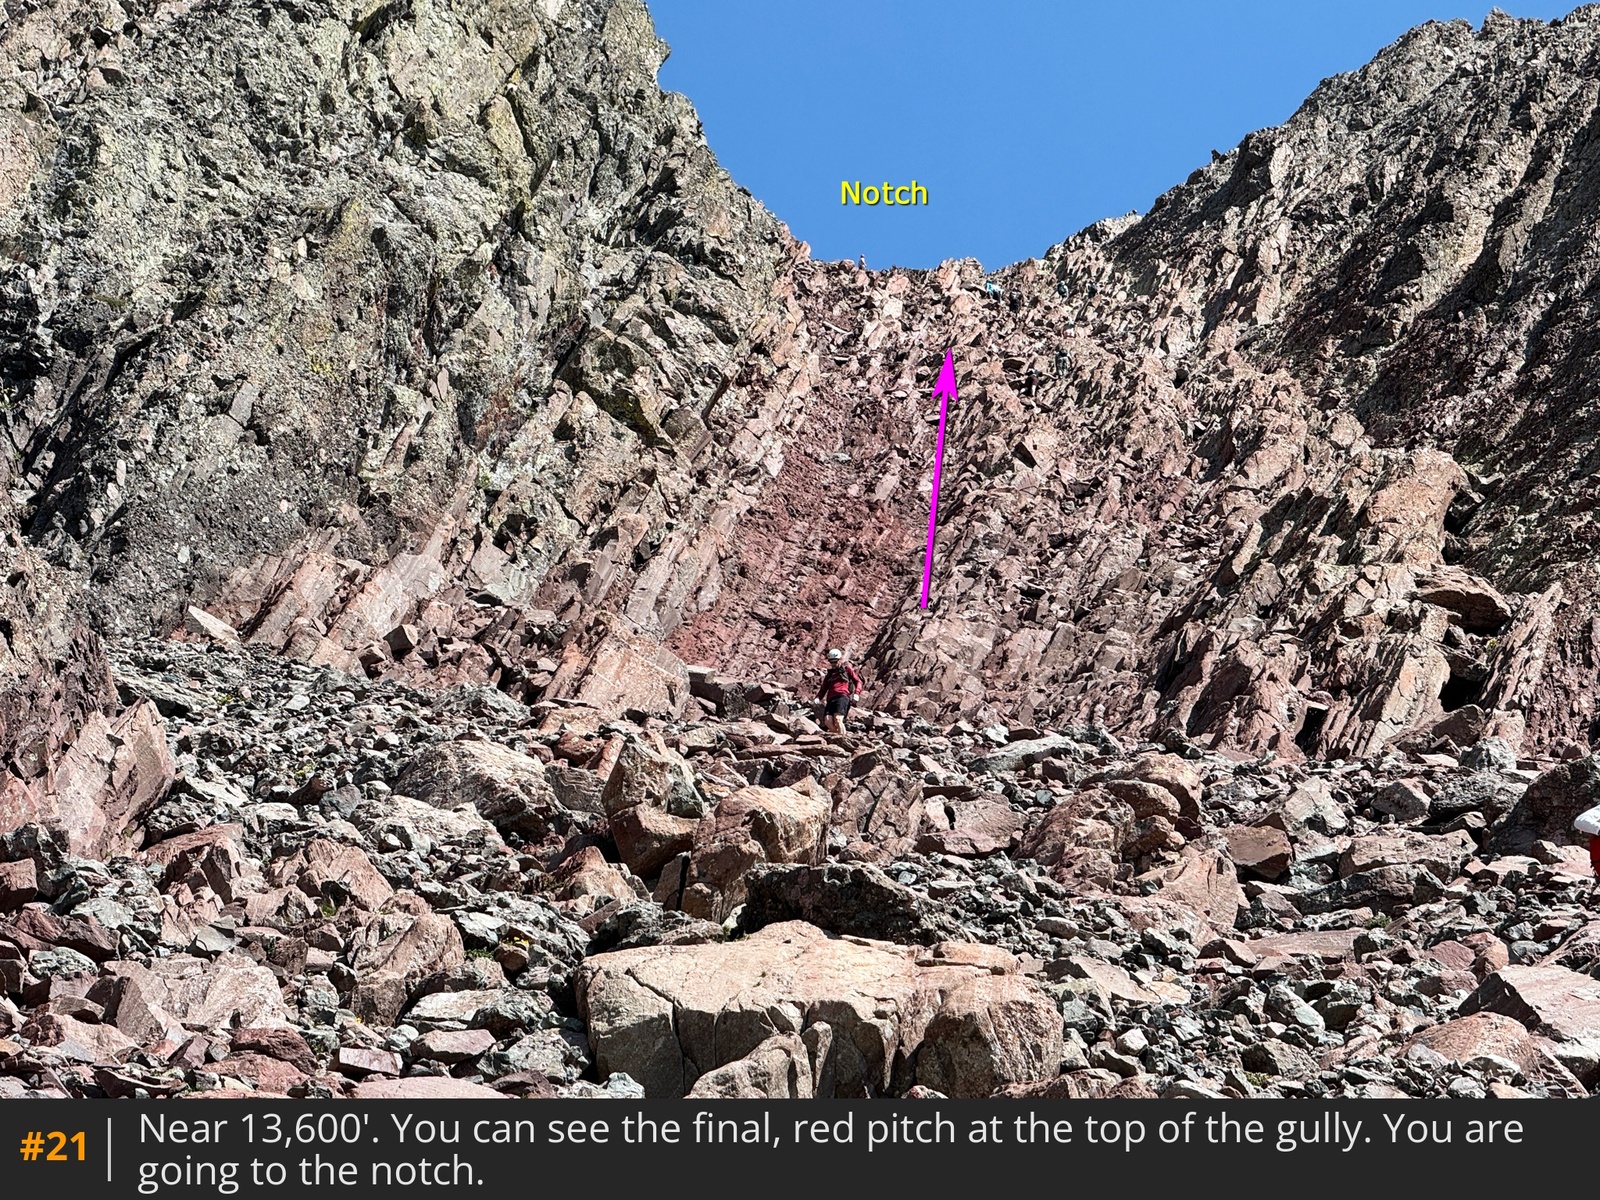
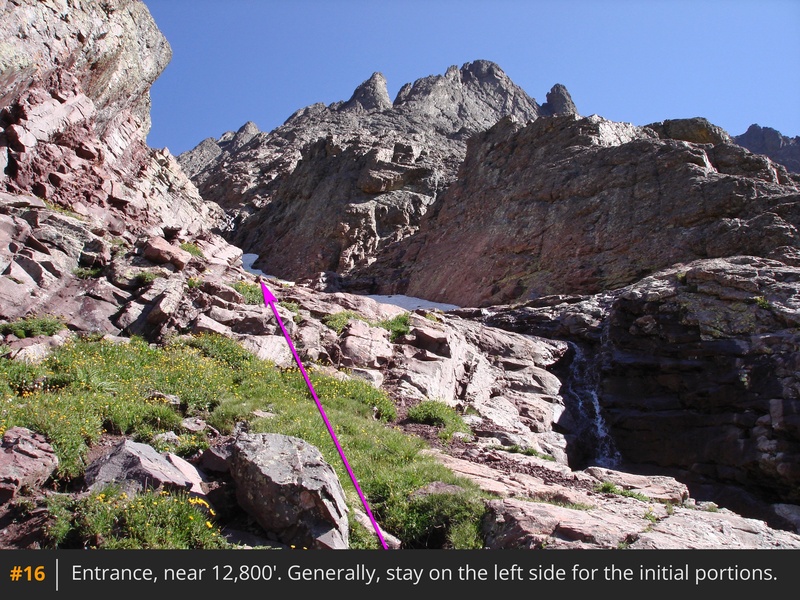
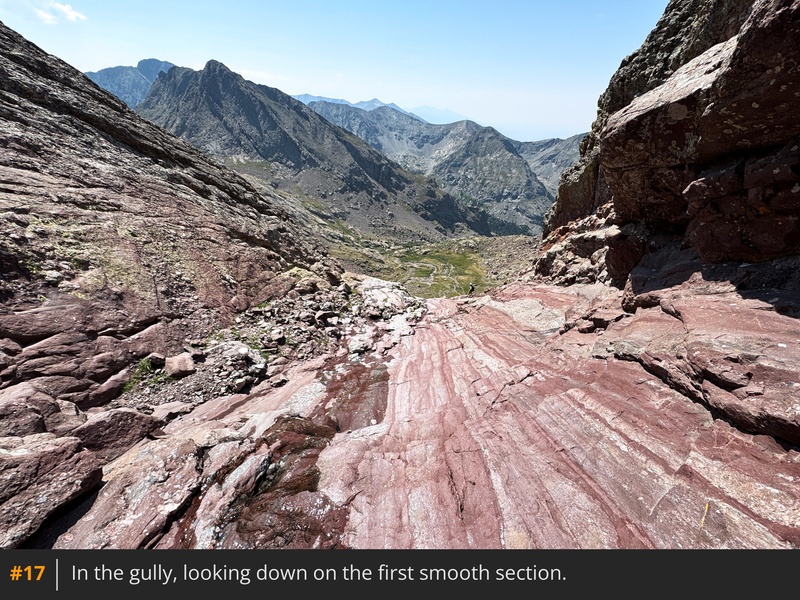
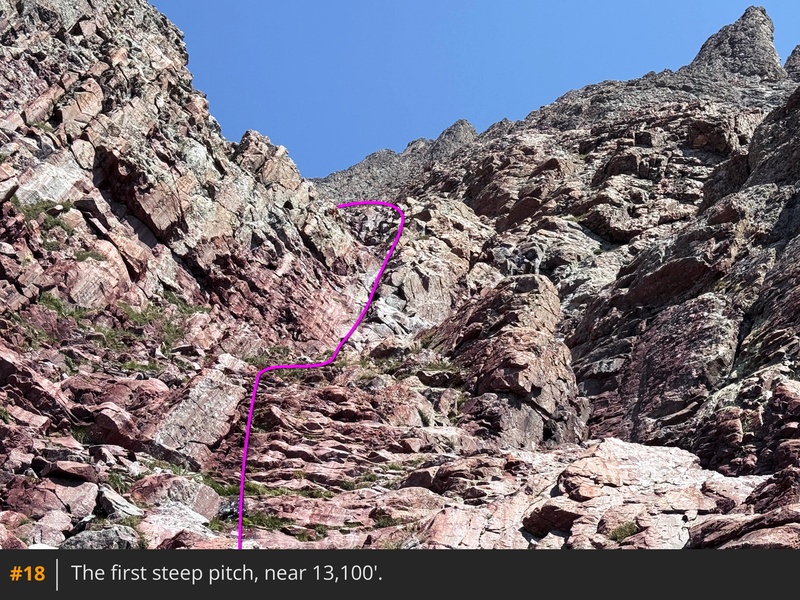
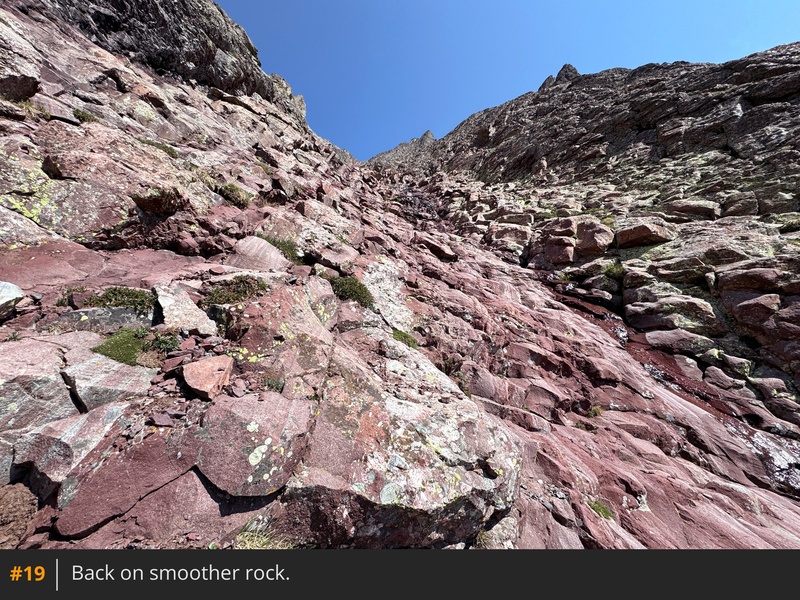
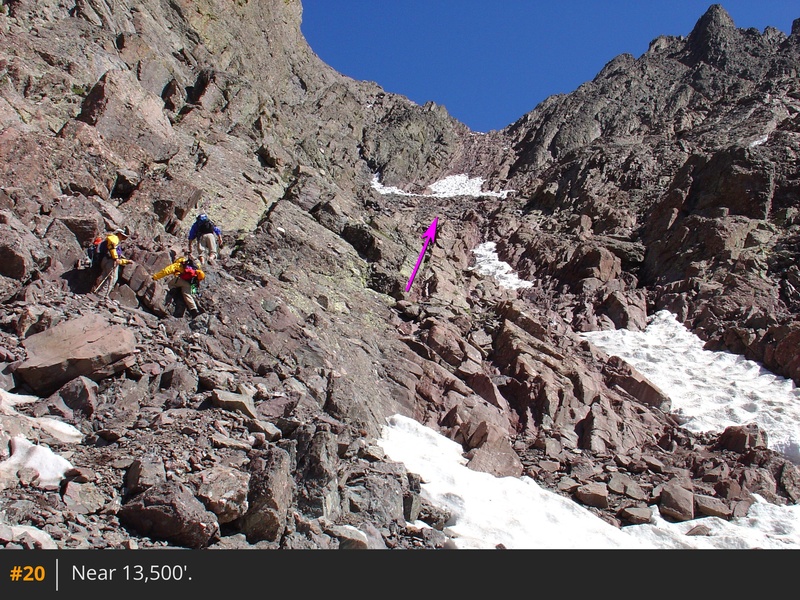
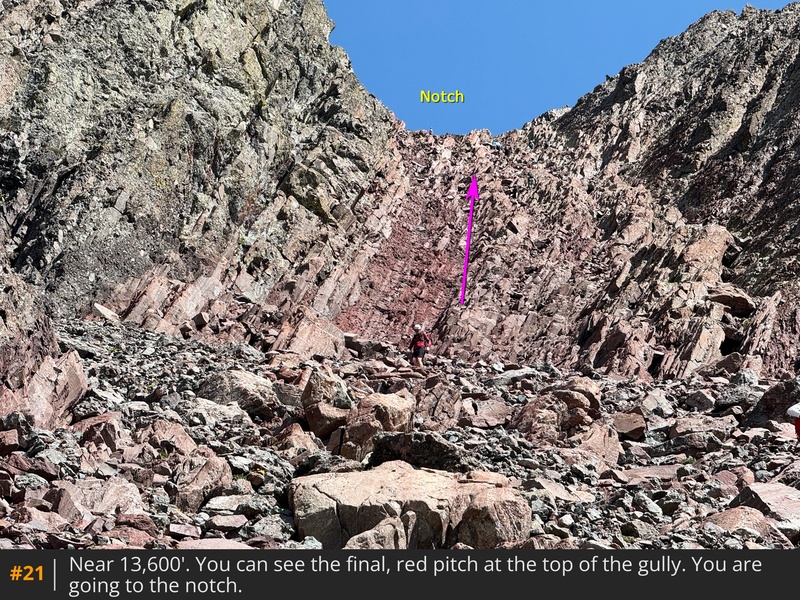
Continue a bit higher and the entrance becomes more obvious  16. Start by climbing the smooth, red rock on the left side  17. Shortly after this initial section, you'll reach a steeper pitch  18. Like much of the climbing in this gully, there are multiple ways to climb this pitch. Now, back to more smooth rock  19 before the difficulty increases once again, near 13,500'  20. Near 13,600', the gully flattens a bit and turns into a jumbled mess of rock, but beyond it, you'll see a red pitch leading to a notch  21.

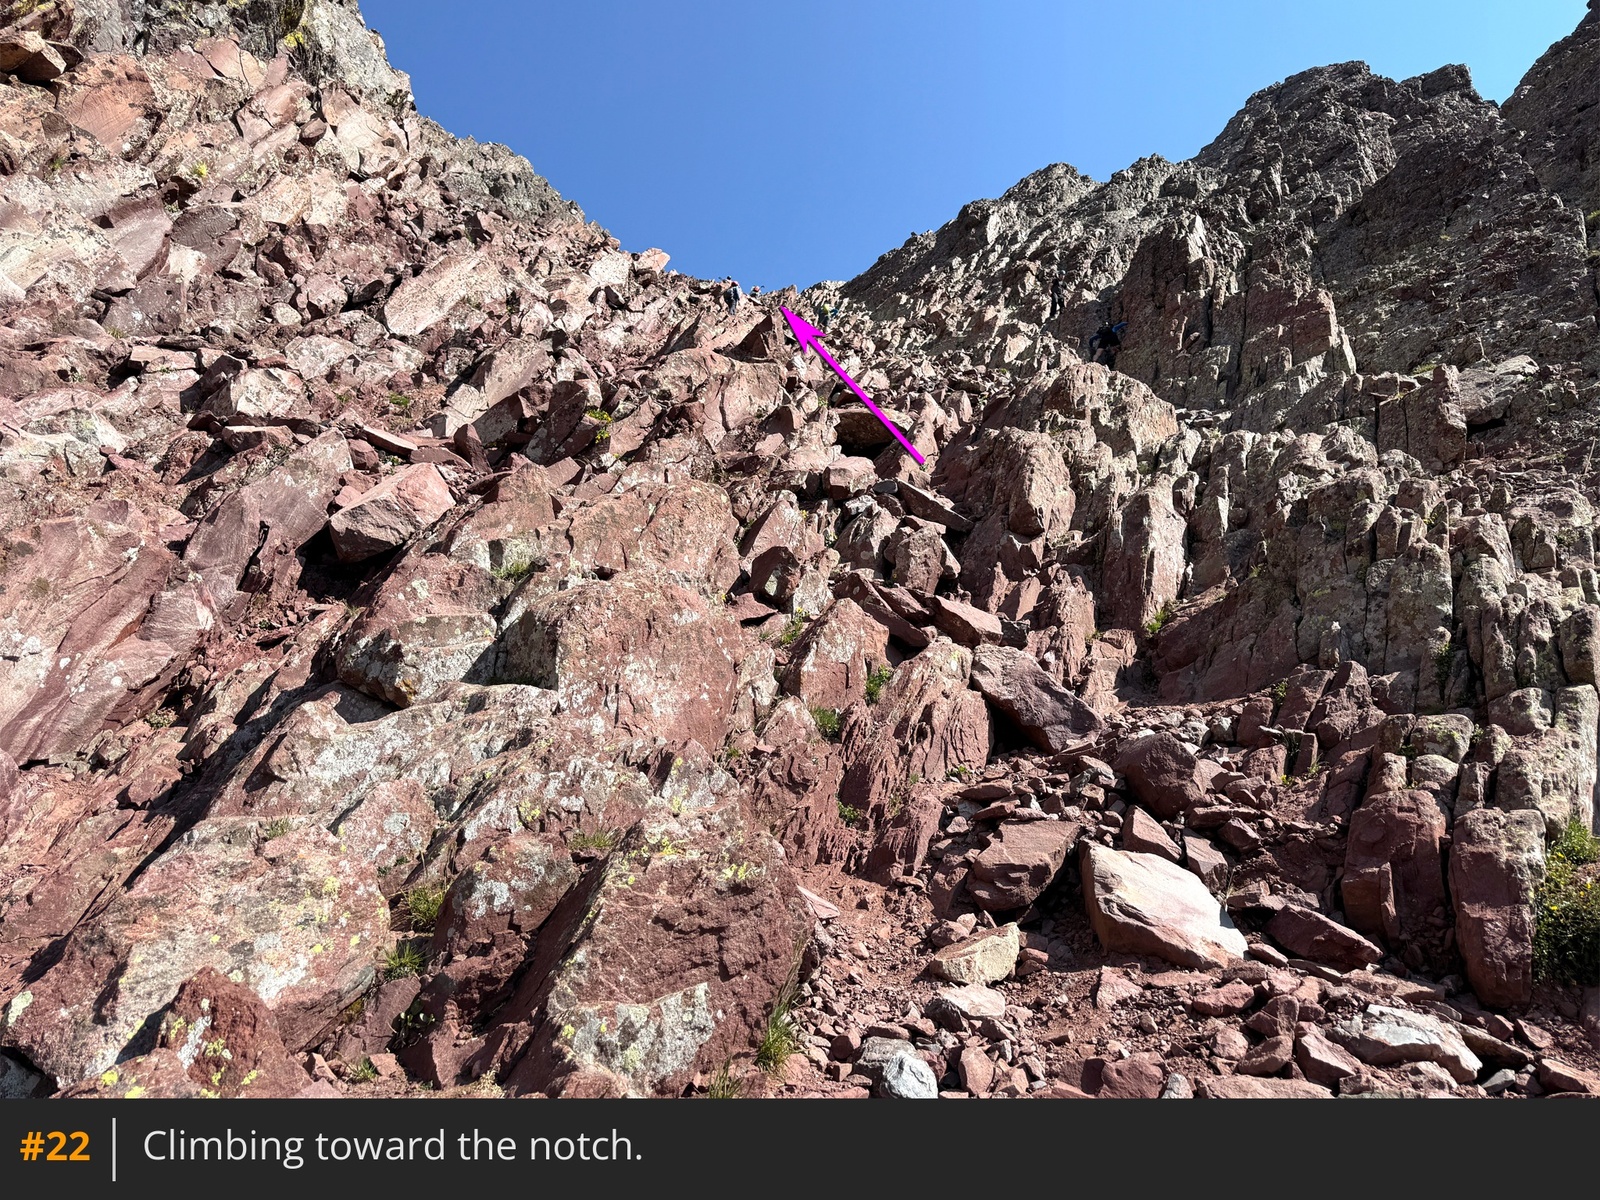
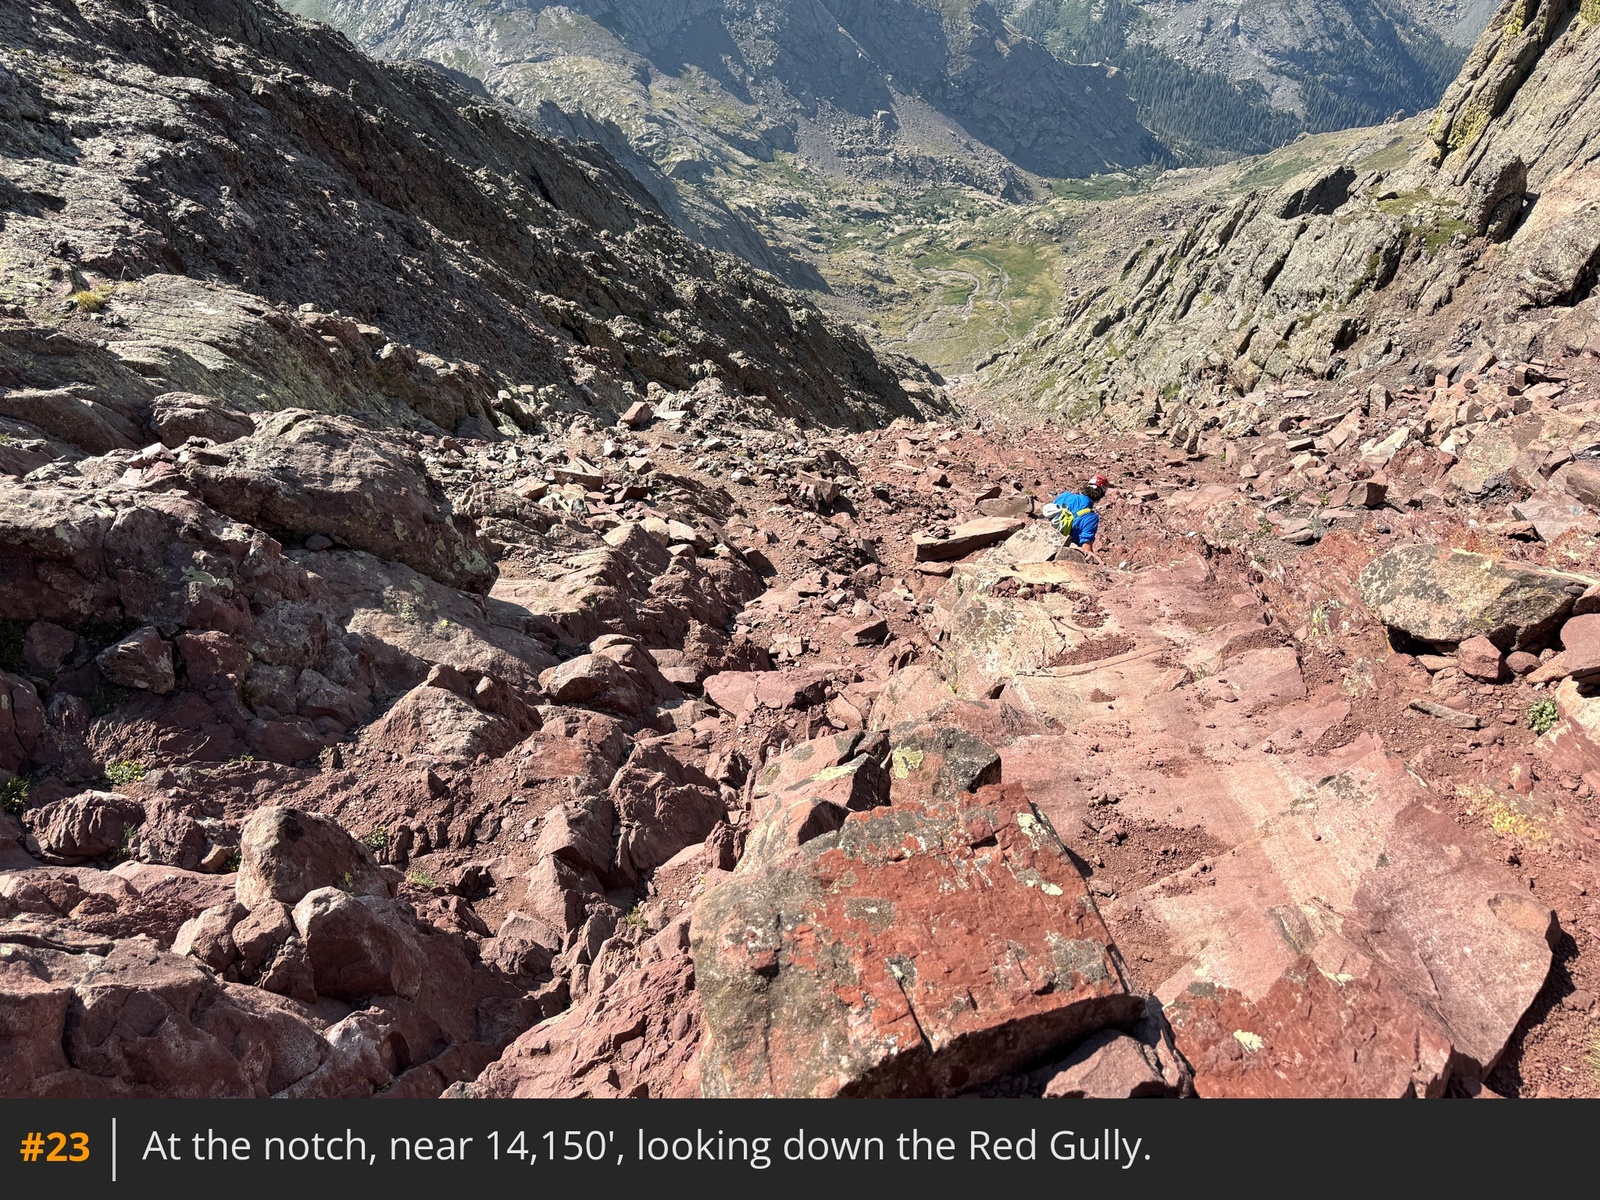
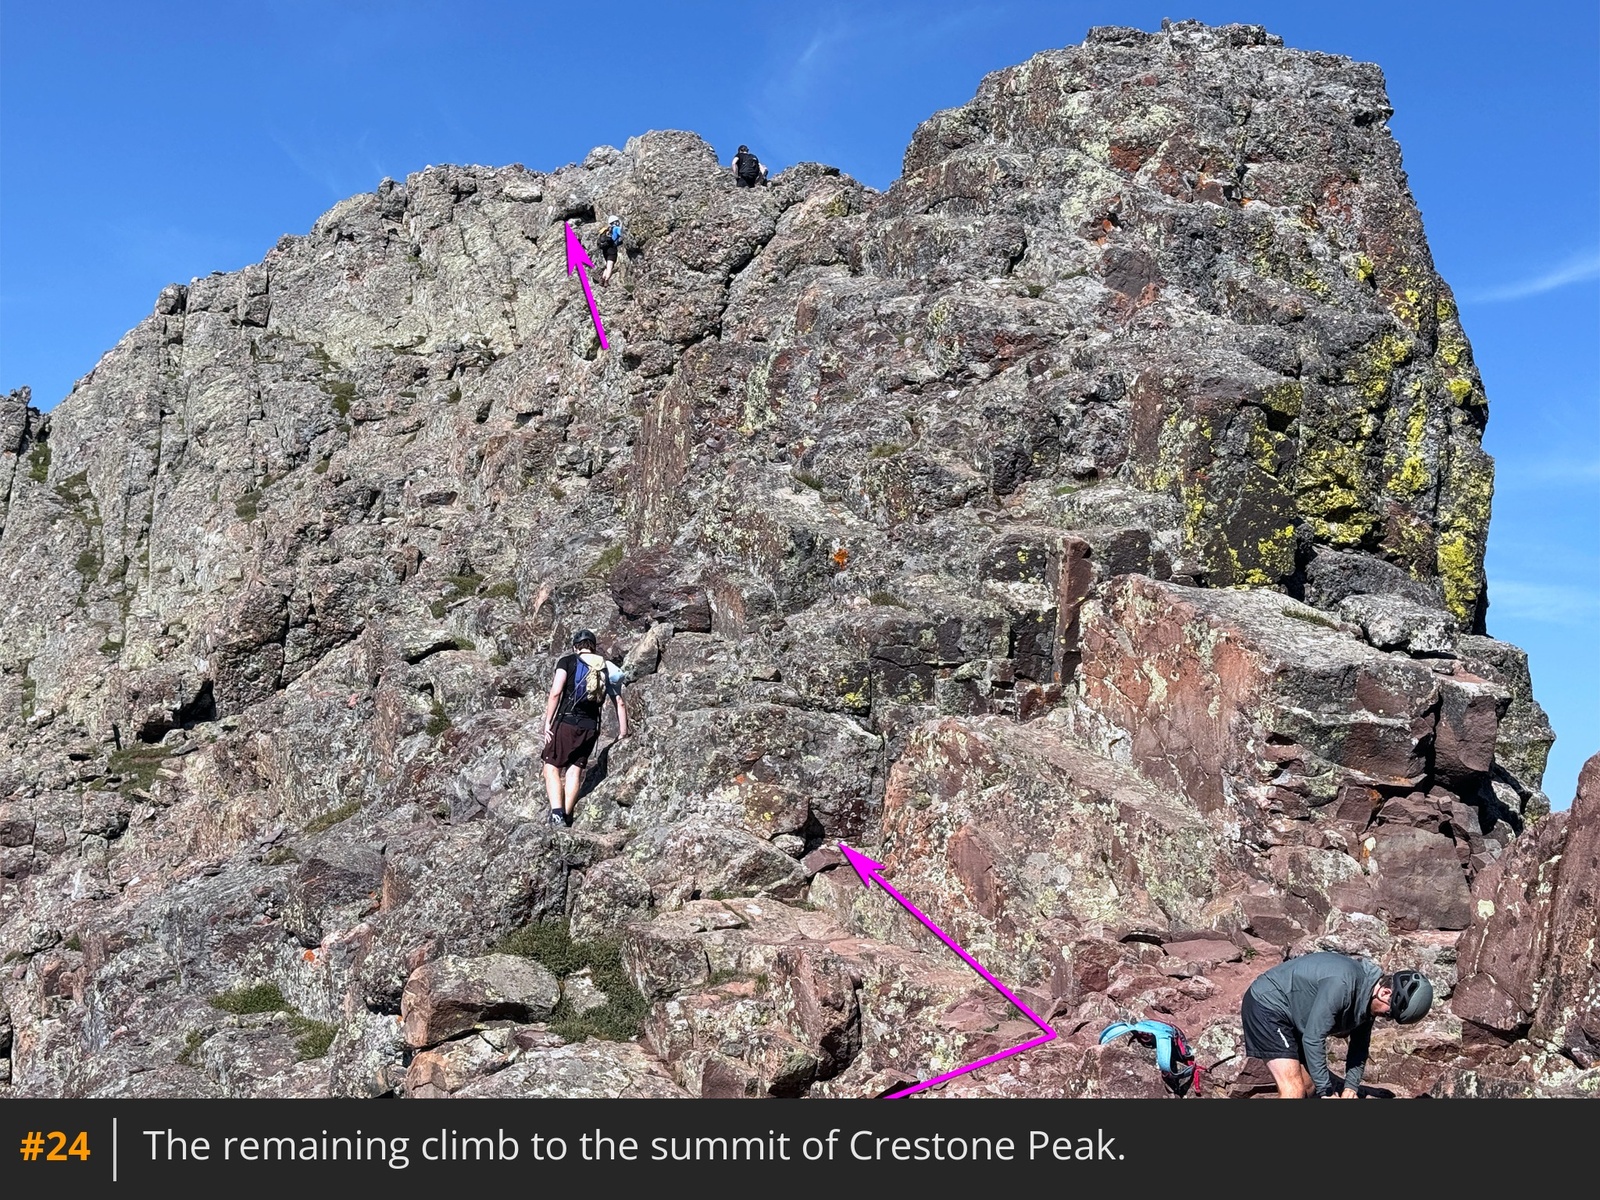
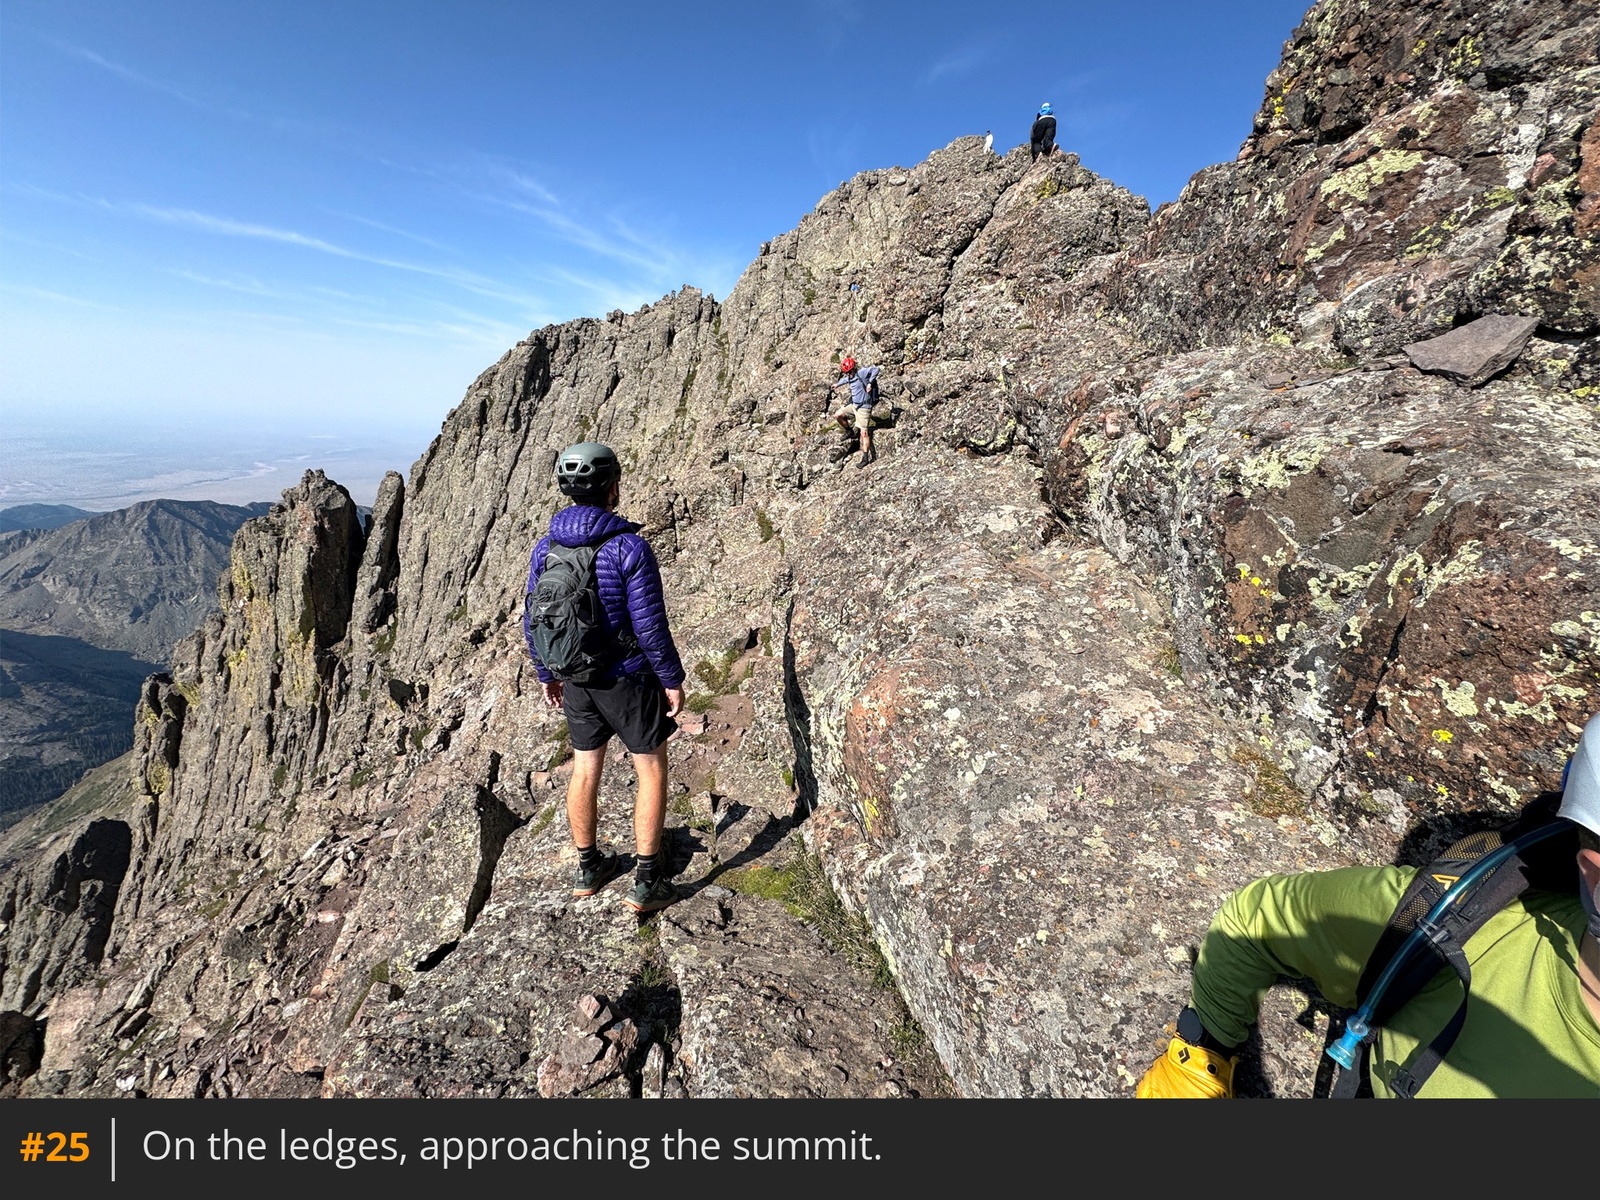
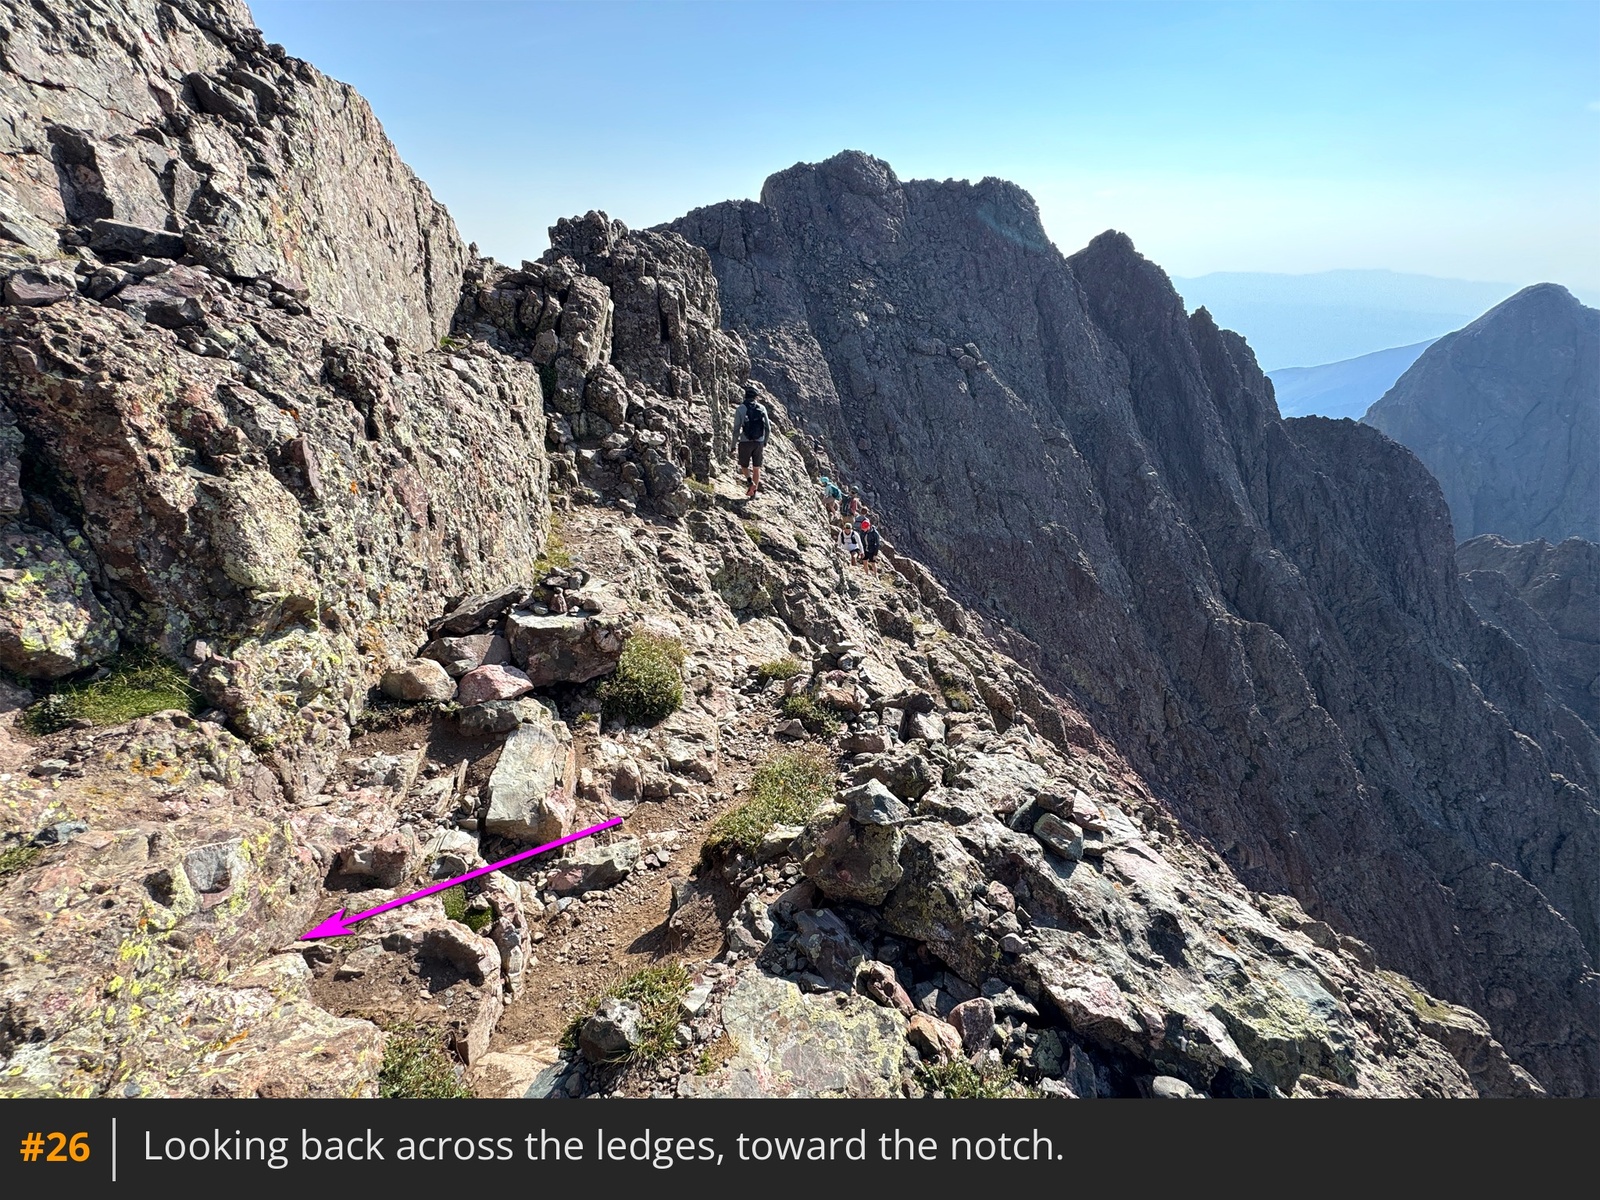
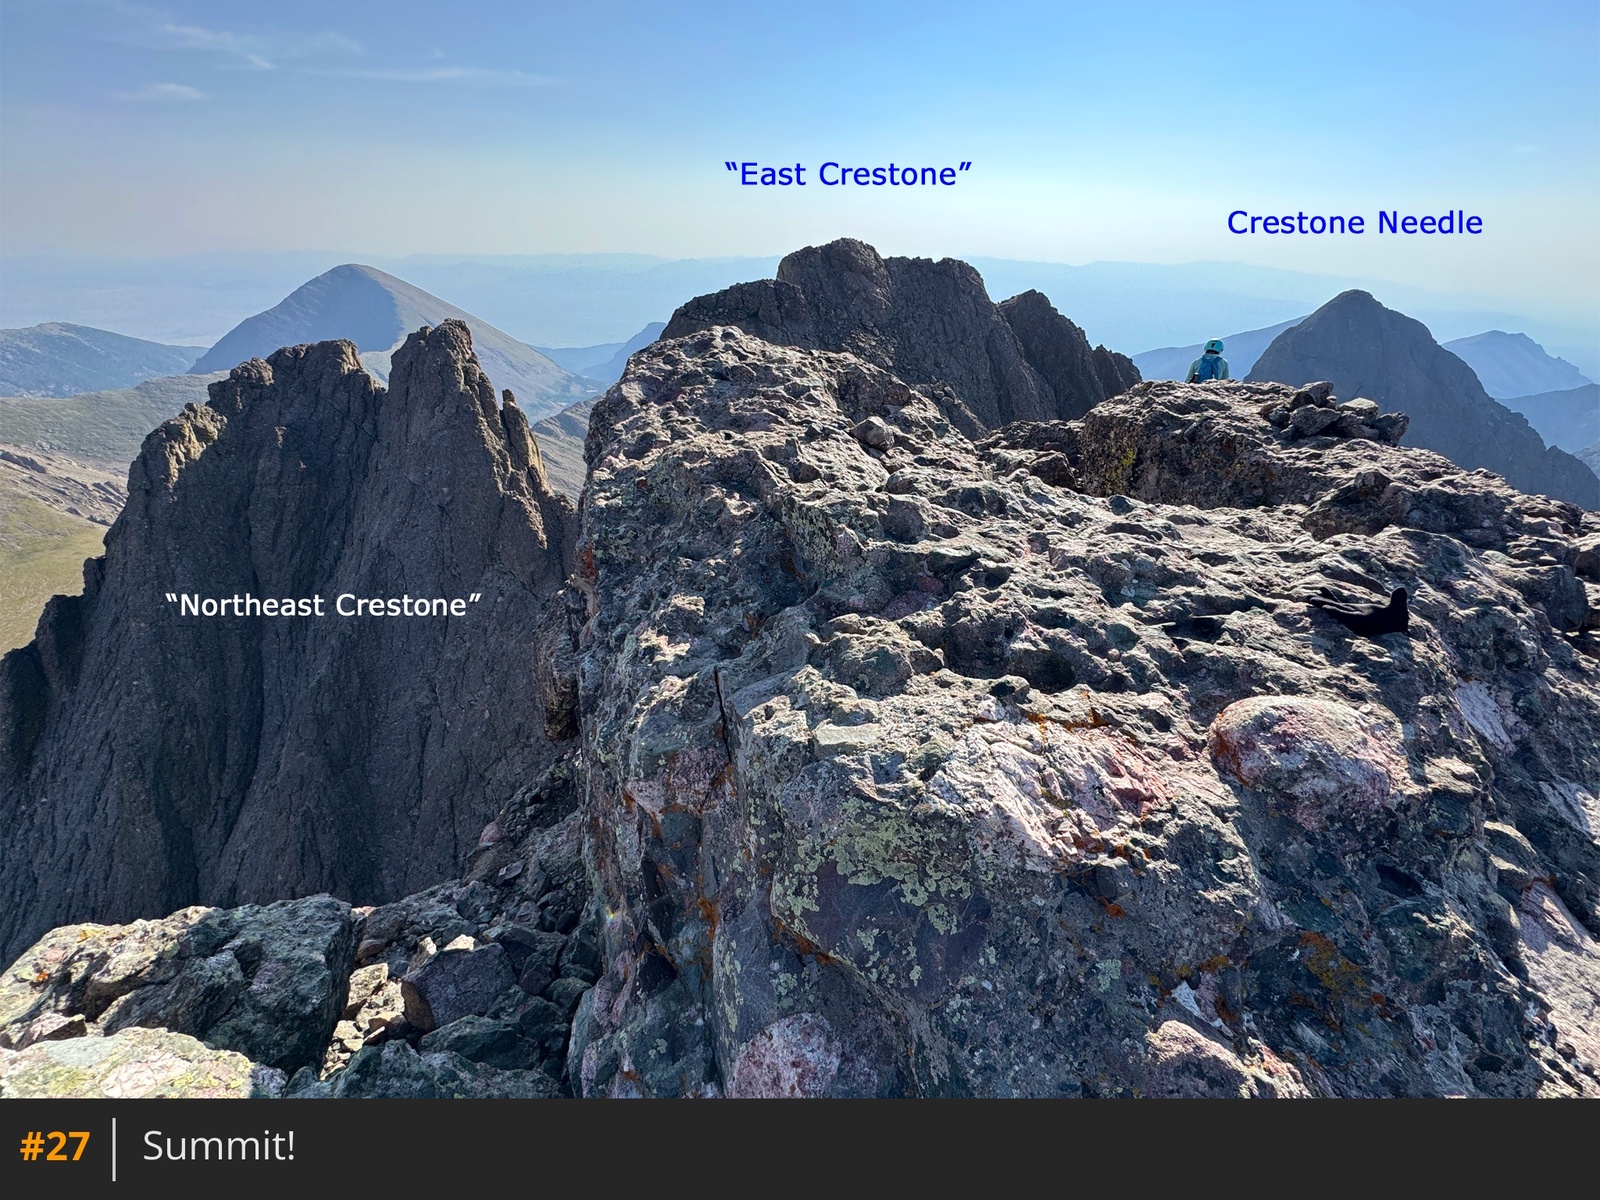
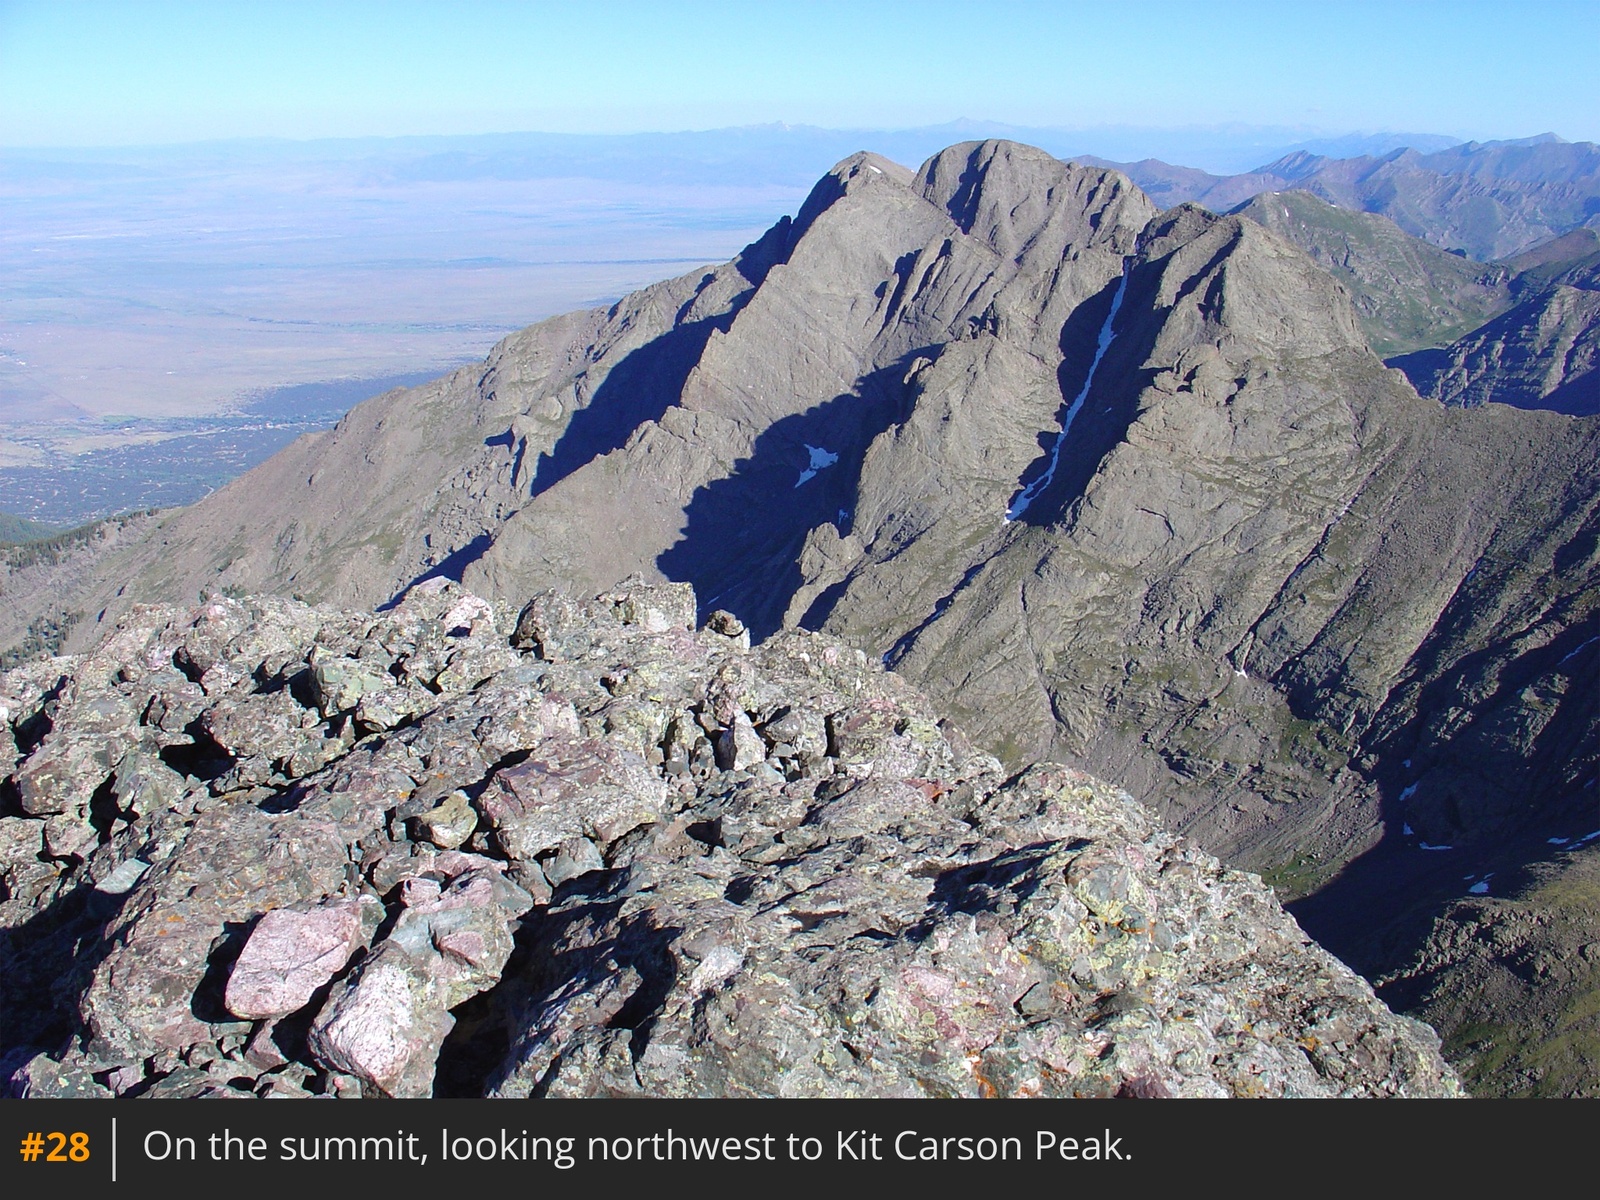
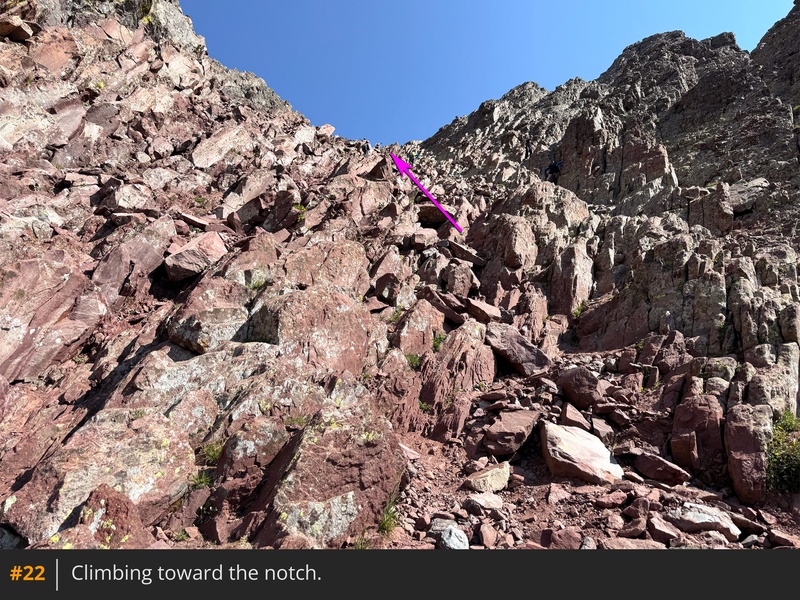
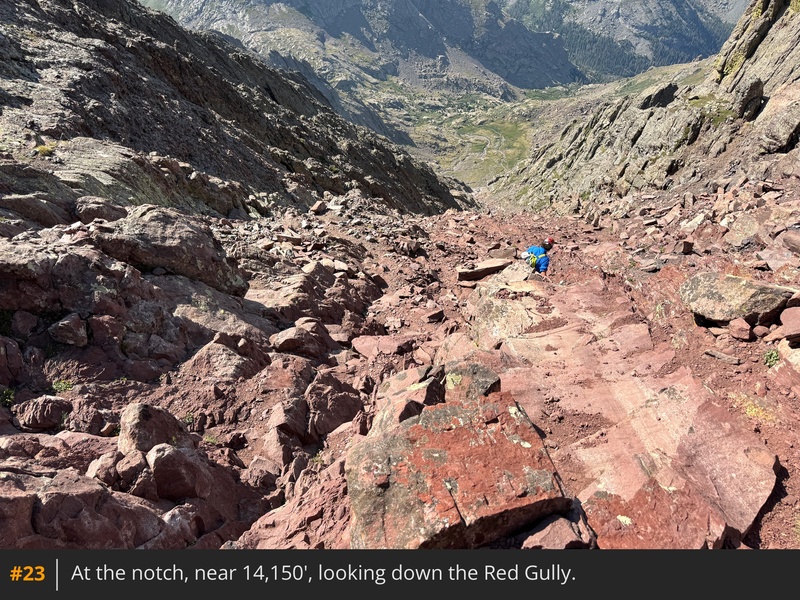
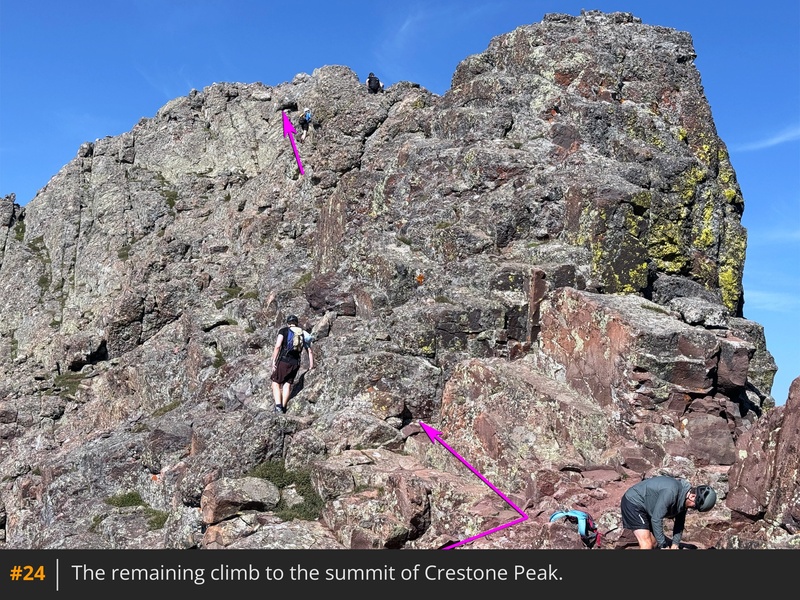
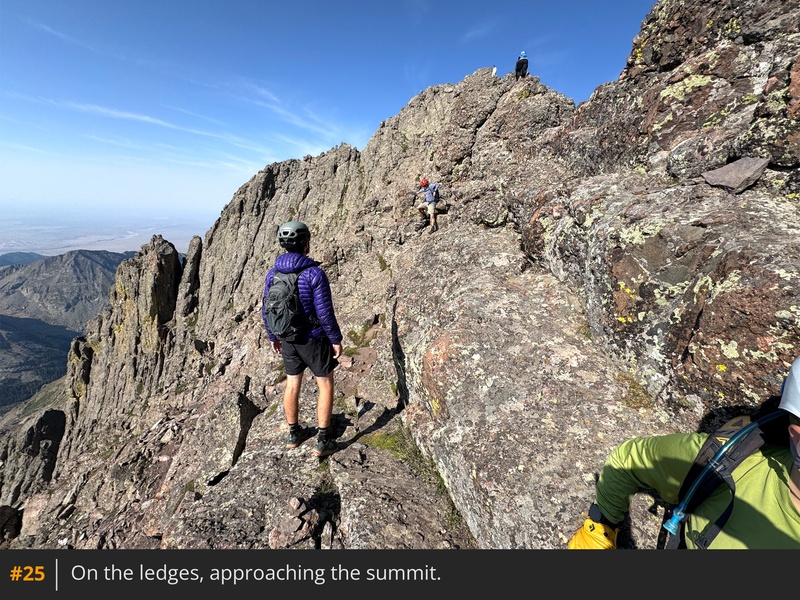
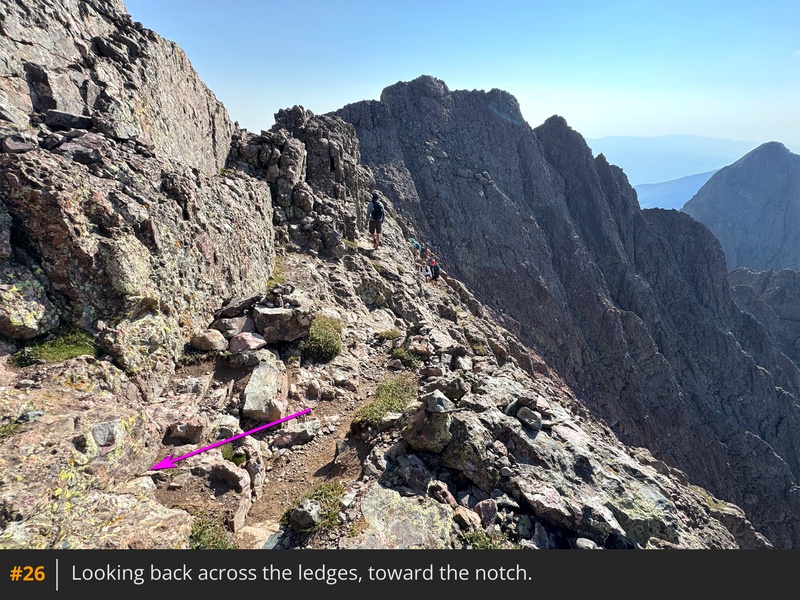
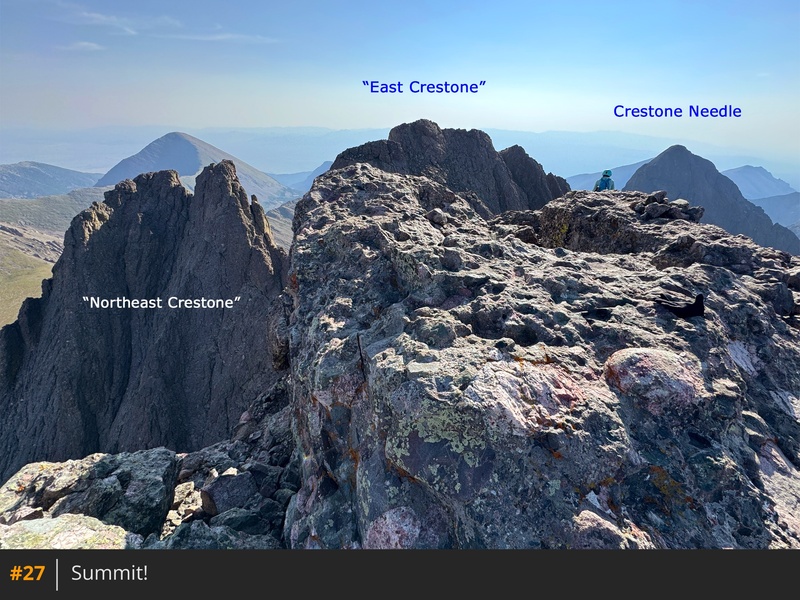
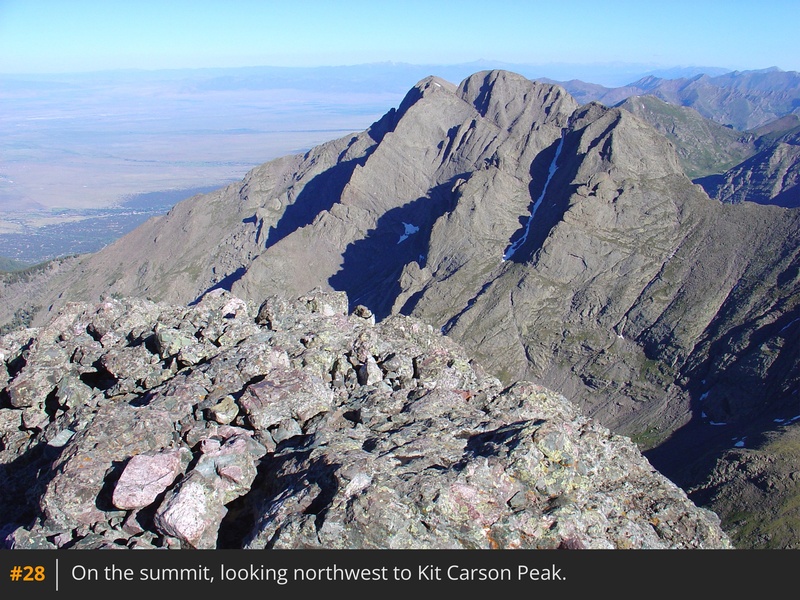
Continue to the base of the red pitch, at 13,800', and climb toward the notch  22  23. When you reach the notch at 14,150', don't forget to check out the view to the north, especially "Northeast Crestone," a 14k+ sub-summit of Crestone Peak. Turn left (west) and scramble up conglomerate-rock ledges  24  25. The summit is a short distance away, but it's good to take your time because there's some exposure along your left, to the south  26. After the short scramble from the notch, reach The Peak's rugged summit  27  28. Hang out for a bit and return to the notch.

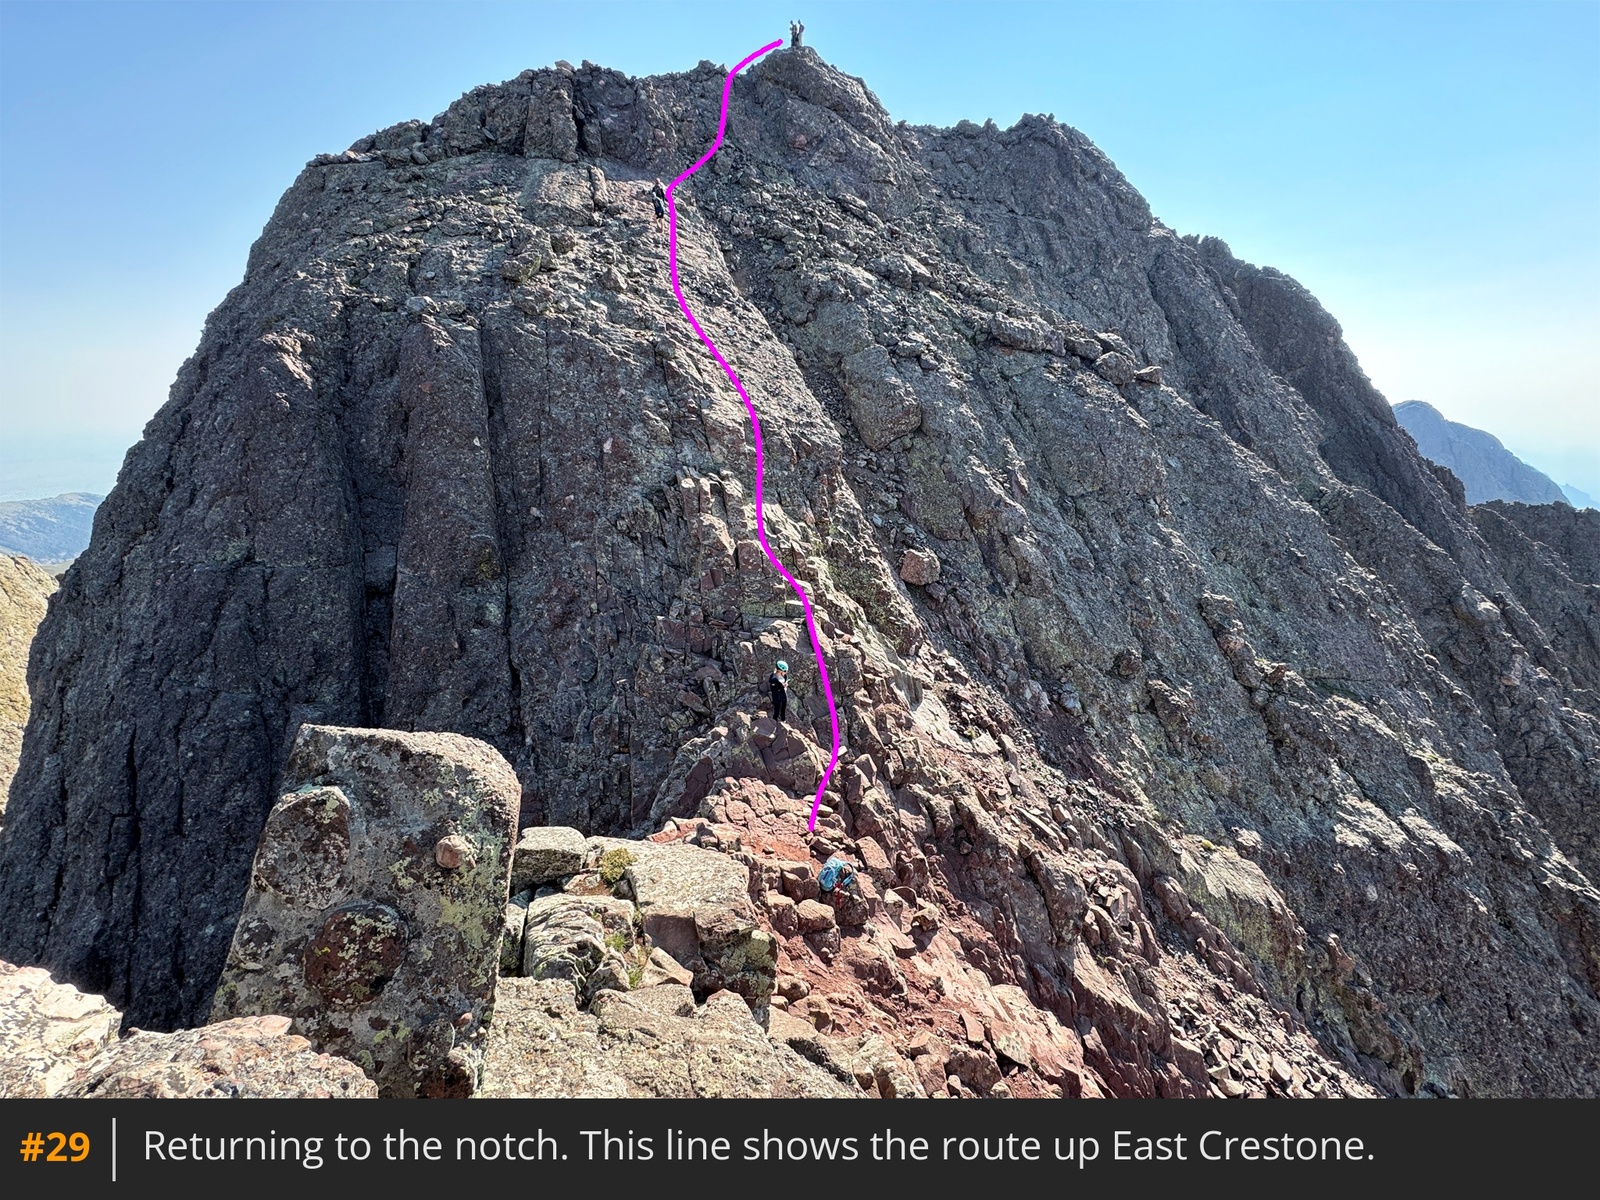
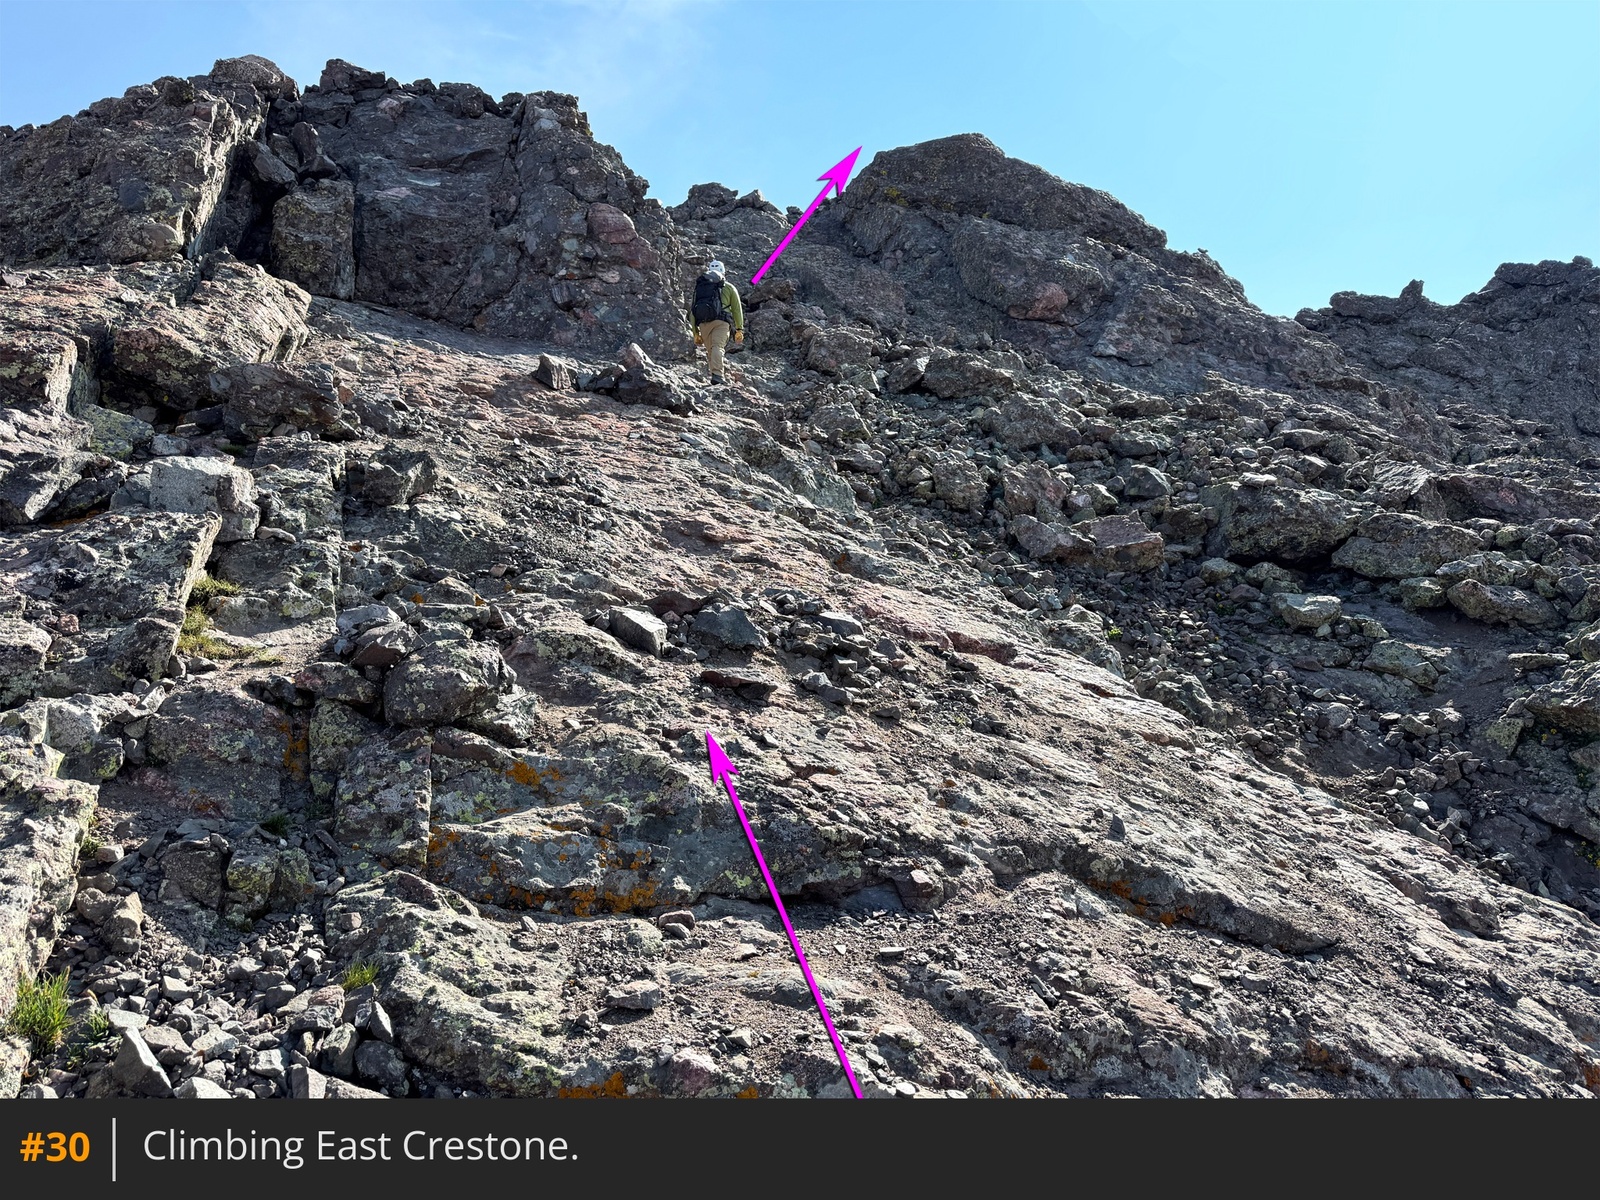
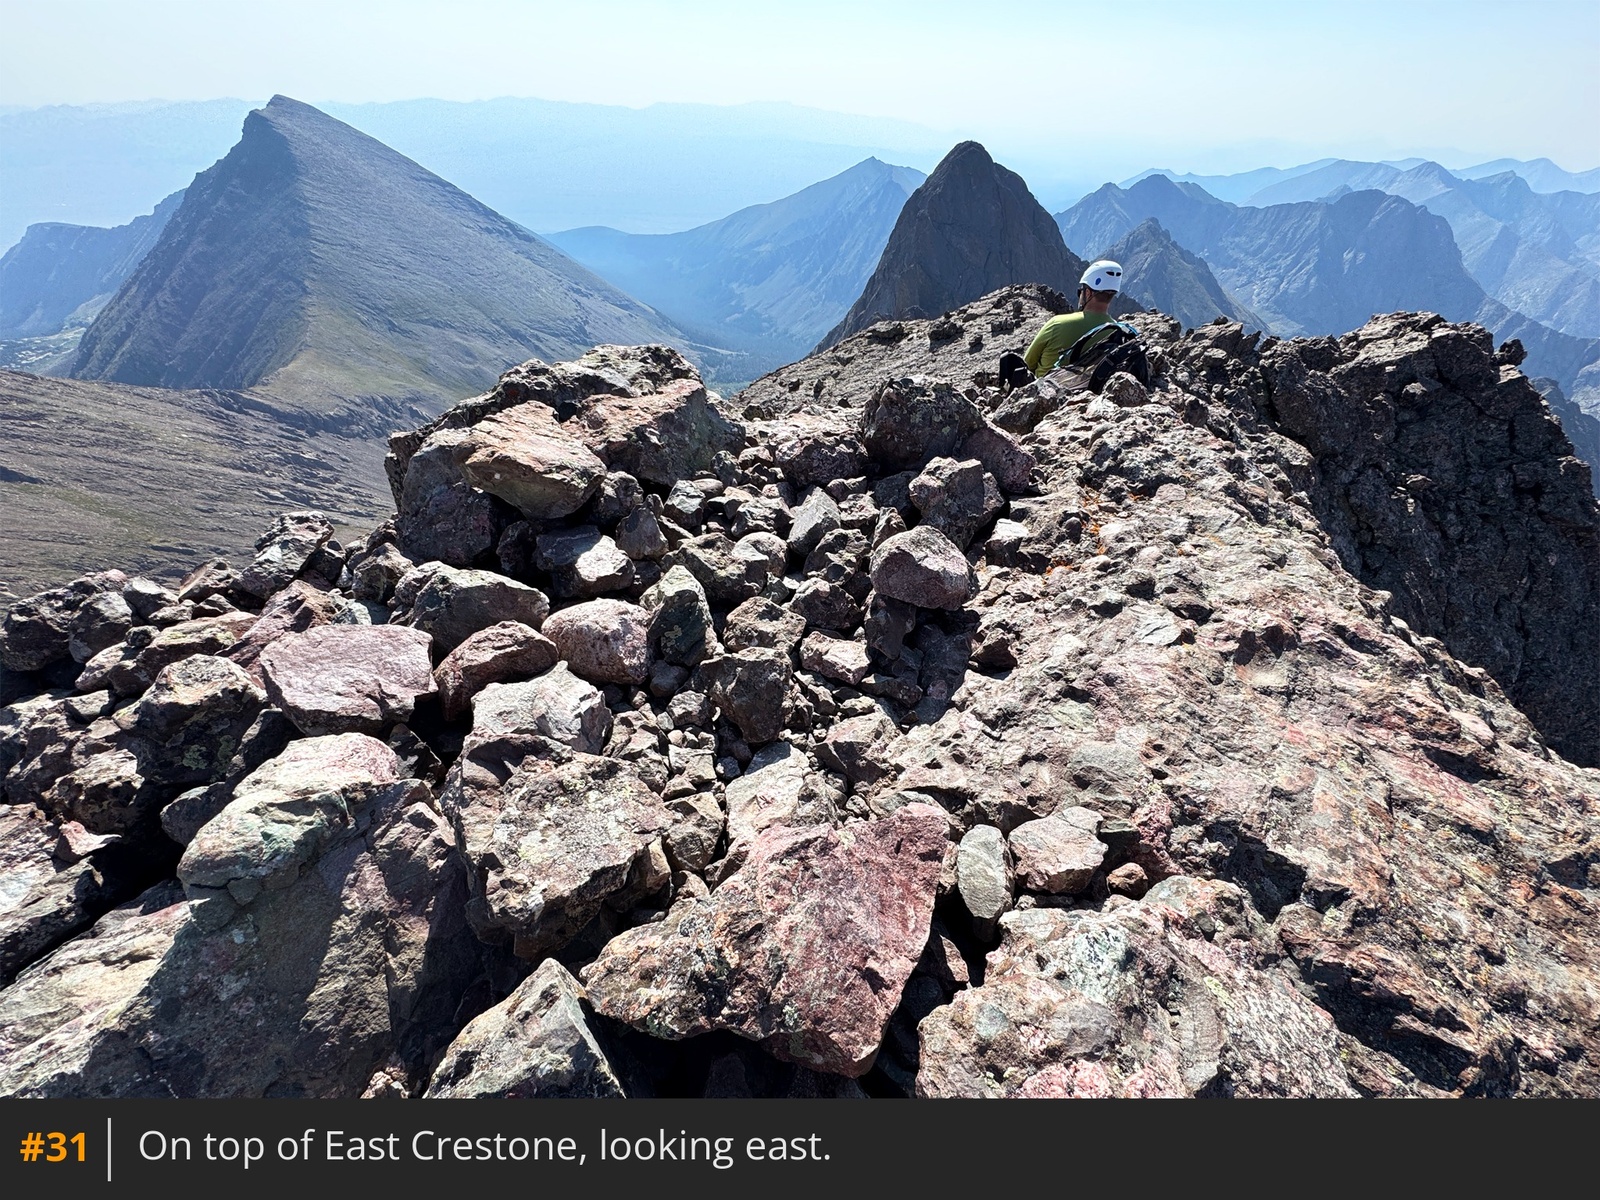
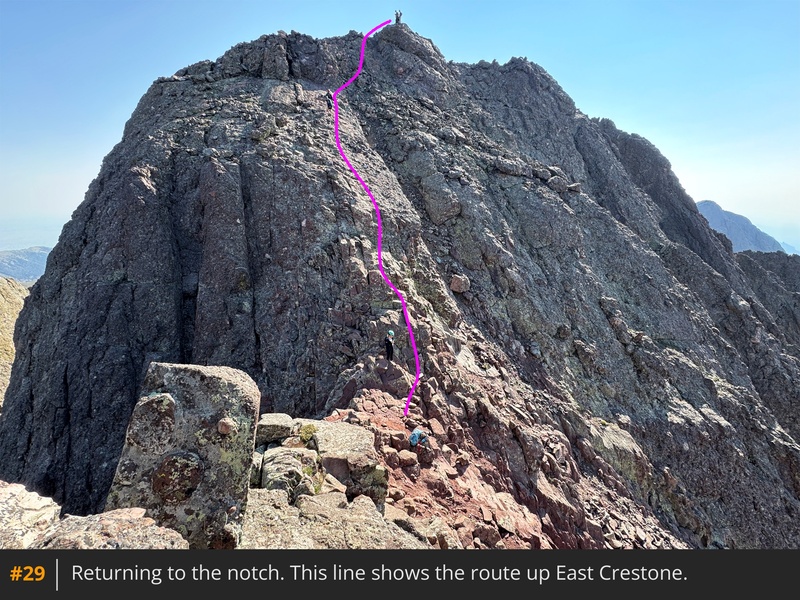
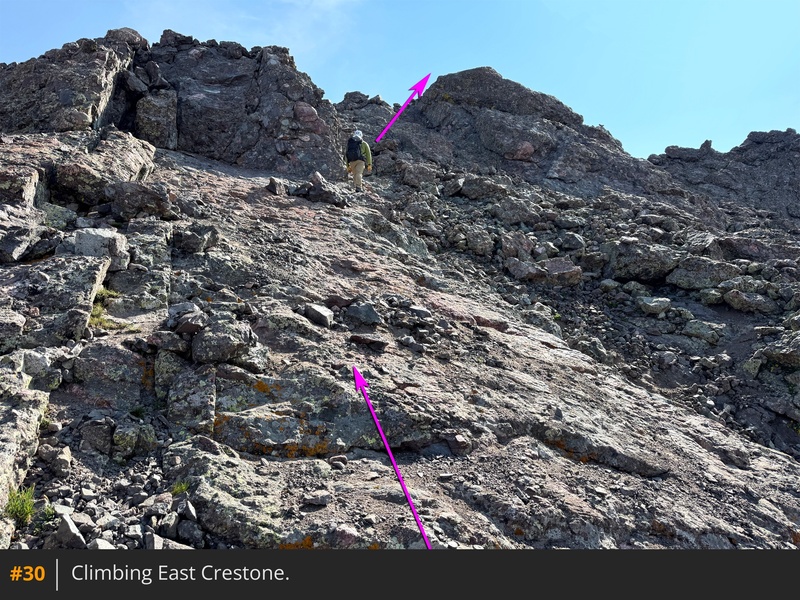
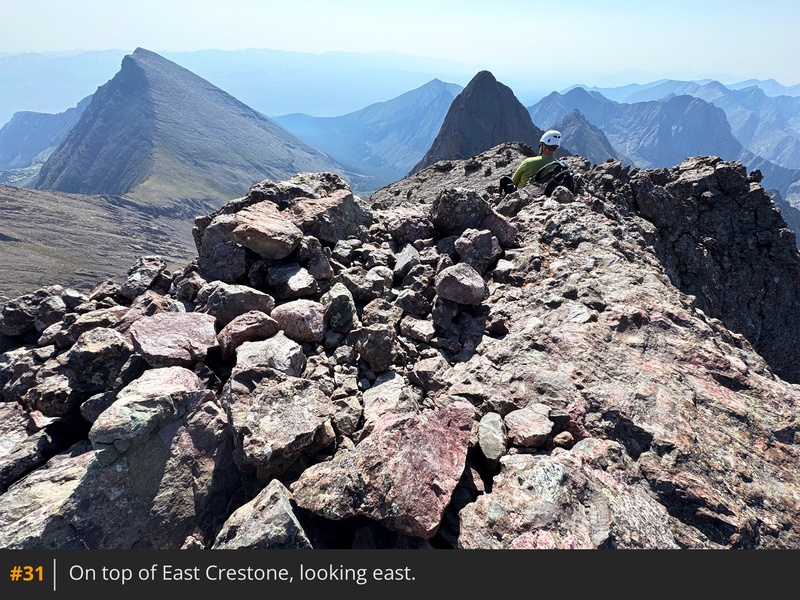
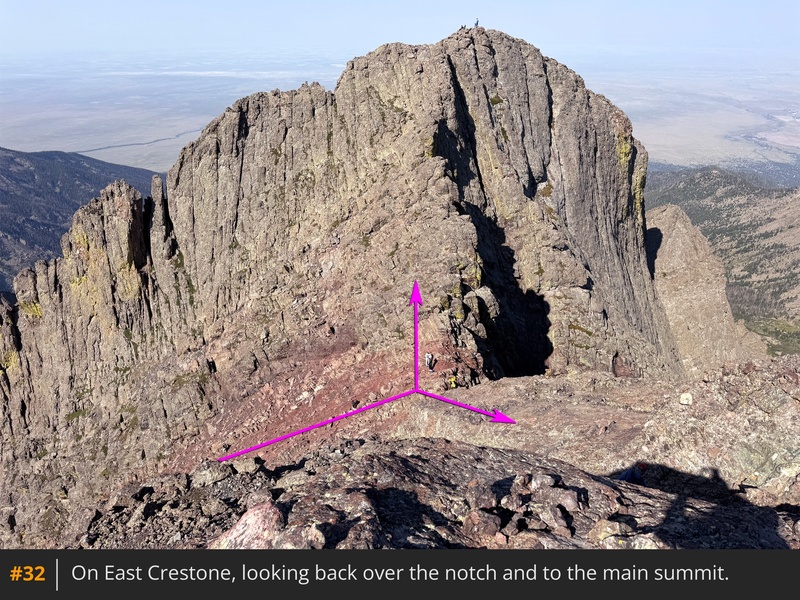
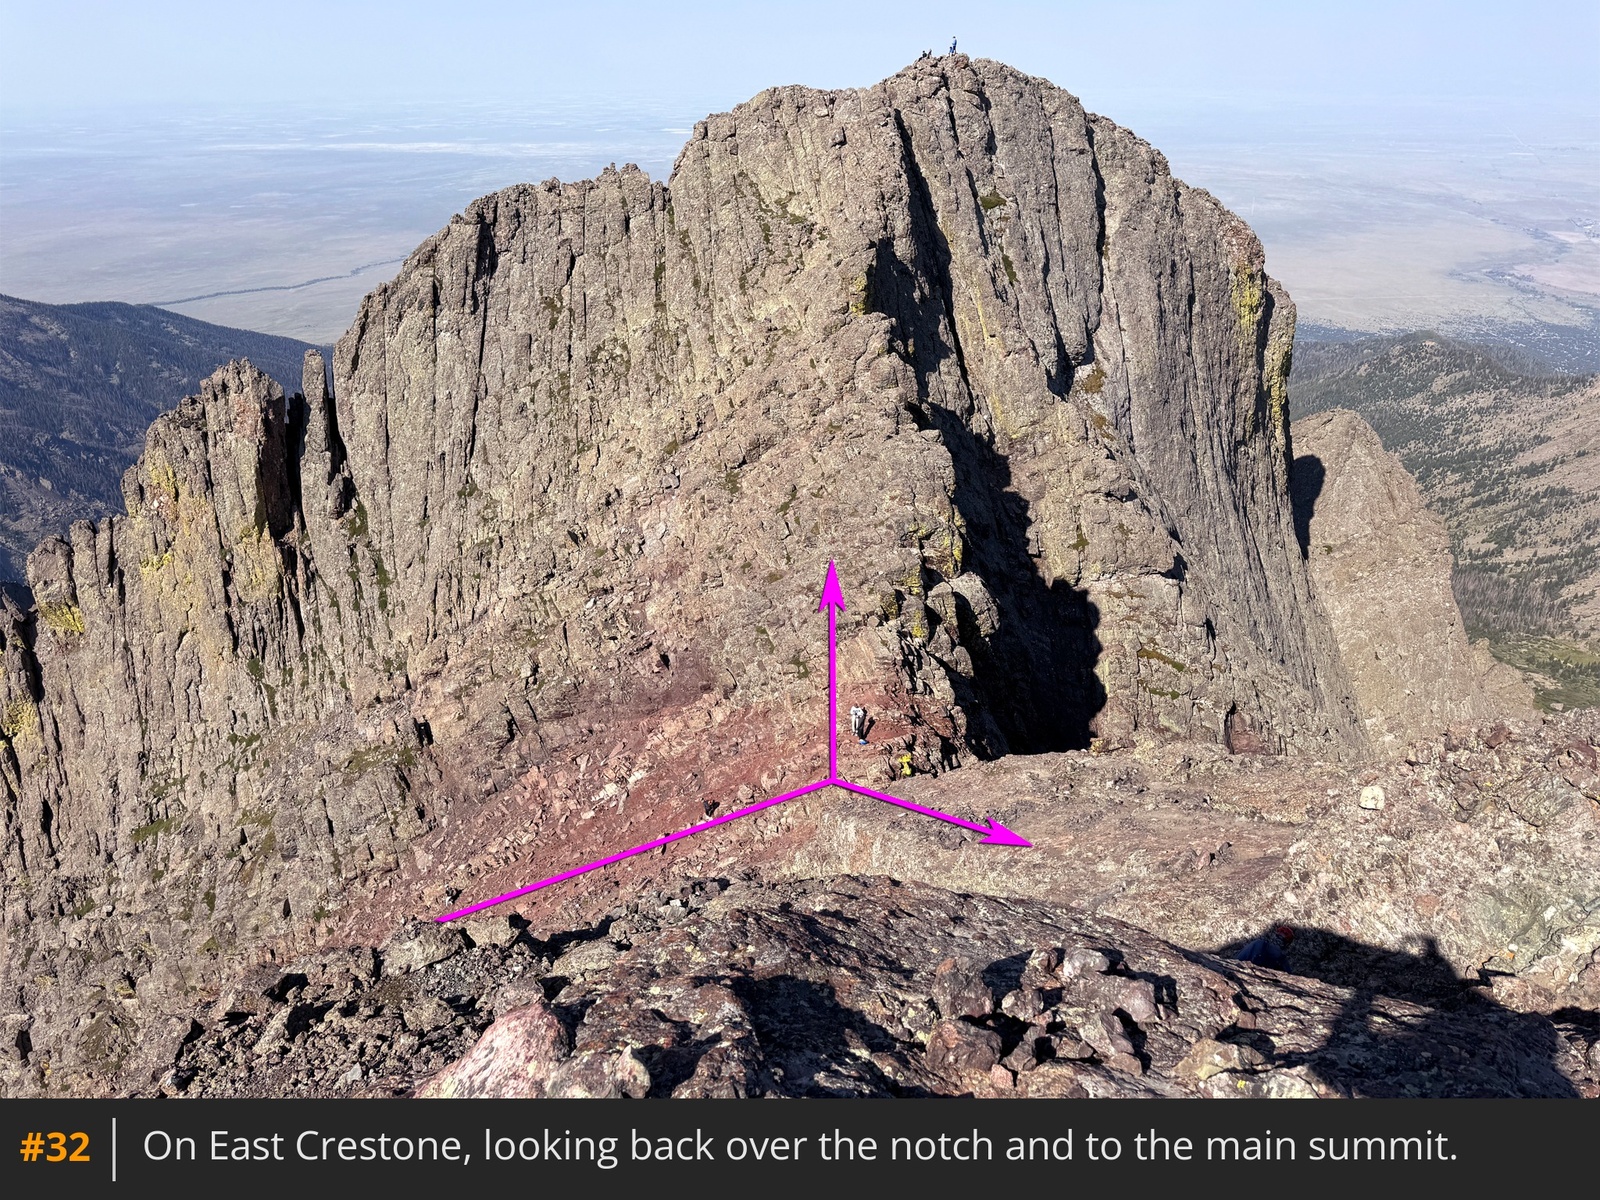
To add "East Crestone," which has the same elevation as the main summit,  29 shows the line. While it looks steep, the climbing is no more difficult than climbing the main summit and doesn't take long. From the notch, climb angled rock before turning right near the top to pass under an outcropping  30. Continue to the top of this worthy summit  31  32.

Notes

The route finding is relatively easy and the Class 3 scrambling is on mostly stable rock. Overall, this route is longer than the standard Crestone Needle route but the climbing is easier and there is less exposure. IMPORTANT: This route enters the Sangre De Cristo Wilderness area. Designated wilderness areas have special regulations and restrictions for party size, dispersed camping, campfires, etc. Also, dog owners should read the wilderness information carefully because some wilderness areas prohibit dogs to be off-leash and/or limit how close dogs can be to lakes and streams. If you have questions about the wilderness area, please contact a U.S. Forest Service office for the National Forest(s) listed above.
Maps

JPG Image
Static Map JPG
Interactive Map & 3D Flythrough
Human Verification Required

Photos

#1#2#3#4#5#6#7#8#9#10#11#12#13#14#15#16#17#18#19#20#21#22#23#24#25#26#27#28#29#30#31#32

Weather

Caution: The information contained in this route may not be accurate and should not be the only resource used in preparation for your climb. Failure to have the necessary experience, physical conditioning, supplies or equipment can result in injury or death. 14ers.com and the author(s) of this route provide no warranties, either express or implied, that the information provided is accurate or reliable. By using the information provided, you agree to indemnify and hold harmless 14ers.com and the route author(s) with respect to any claims and demands against them, including any attorney fees and expenses. Please read the 14ers.com Safety and Disclaimer pages for more information.

Copyright: Route information, text, risk factors, maps, GPX files, charts, photos, 14ers.com-created map imagery, flythroughs, and other content provided in this route description are copyrighted by 14ers.com and may not be copied, reproduced, republished, distributed, modified, or used to create derivative works without prior written permission.

Please respect private property: 14ers.com supports the rights of private landowners to determine how and by whom their land will be used. In Colorado, it is your responsibility to determine if land is private and to obtain the appropriate permission before entering the property.

Heading to a 14er soon? Don't forget the 14ers.com mobile app.
Google Play     Apple App Store