| Report Type | Full |
| Peak(s) |
El Diente Peak - 14,175 feet |
| Date Posted | 07/06/2009 |
| Modified | 05/27/2015 |
| Date Climbed | 07/04/2009 |
| Author | MountainHiker |
| El Diente - Kilpacker |
|---|
|
El Diente from Kilpacker Trailhead. MountainHiker, MountainHikerette, Lululuv, GBGuy Heading into this weekend the weather report was not good. It was really bad for the San Juans and not much better the other Colorado mountain ranges. We didn't want to let a long weekend get away from us without getting a farther away mountain. So on Friday July 3rd we drove to Kilpacker trailhead. View from the trailhead 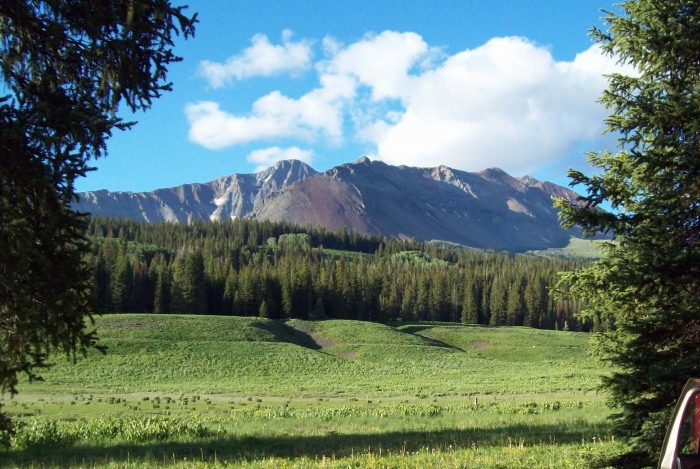 Kilpacker trailhead is basically a spur of road that separates from Dunton road. There are a couple groves of trees which make nice camping sites. If these are taken then much of the length of this spur could serve as camping spots although the spring vegetation didn't show camping wear. We got started at 5:05 am. The Kilpacker trail provides access to both Kilpacker Creek valley and Navajo Lake. The trail starts across a natural clearing before heading into the trees. The first signed trail intersection is still in the clearing with an overgrown connection to the Navajo Lake trailhead. 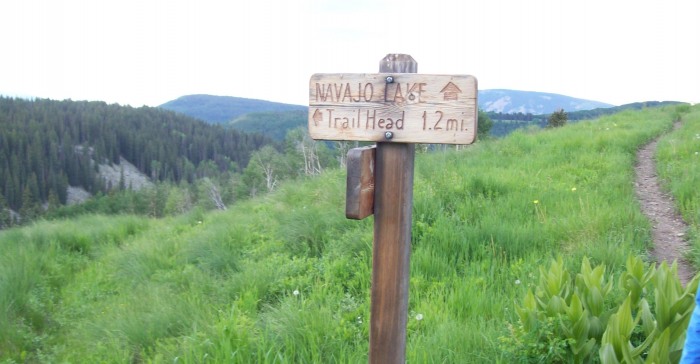 Keep right but basically straight to stay on the main trail toward Navajo Lake. After about 2 ½ miles watch for the signed intersection for the Kilpacker valley trail. For El Diente via Kilpacker you want the right fork. There are two sign posts - one on each fork. The intersection is not hard to spot. The El Diente Peak Route sign is very weathered, but still readable. The left but more straight fork has a sign indicating it is the way to Navajo Basin. UTM 760338, 4189648 el 10,392 NAD27 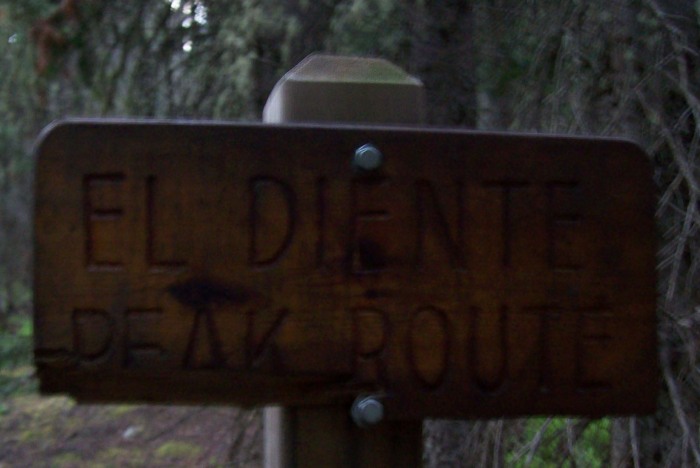 About a half mile after this intersection you will come to where you cross Kilpacker Creek. UTM 761066 4189779 el 10,492 NAD27 There were multiple down trees crossing the stream. Our group used at least three of them. After the stream crossing the trail stays on the north (left) side of the creek.  The trail remains fairly distinct while still below tree line. There is a clearing where you can see the peak and a waterfall.  The stream has multiple waterfalls, a couple which are quite large. When approaching tree line the trail climbs away from the stream for one of the waterfalls. On the return we found ourselves on a social trail that gave us a better view of this waterfall than we wanted! Be careful, there is some exposure near these waterfalls. When breaking above tree line we found ourselves looking up at another picturesque waterfall. We saw a campsite on the south side of the stream below this water fall. I saw a bit of trail crossing the stream for access to this site(s). 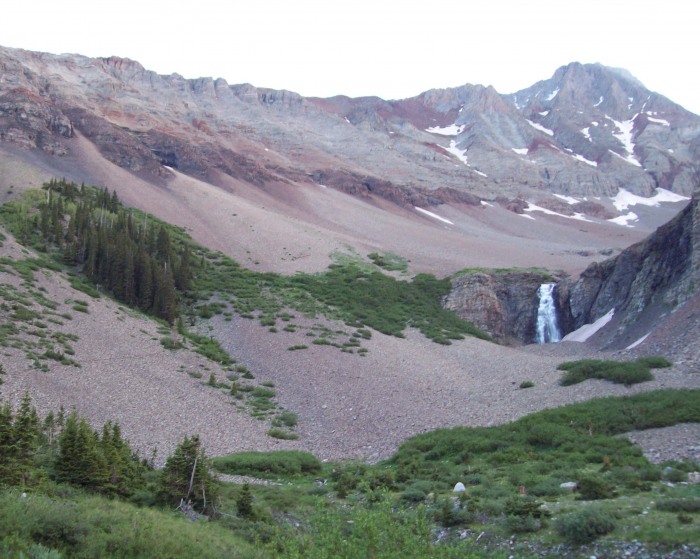 If you choose to pack in you will not gain a lot of elevation. This camp is still under 11,000', but you will cut off a lot of distance for summit day. It took us about 2 hours to get to here, although that was with some "morning stops" and in general not moving as fast as usual. The main trail now climbs away from the stream on the north (left) side to skirt this water fall. The trail is now mostly on scree. Although on scree, the trail is fairly well established. Because it is on scree, the trail will be easy to walk away from. Keep your eyes peeled for cairns. There was no rock shortage for building them! 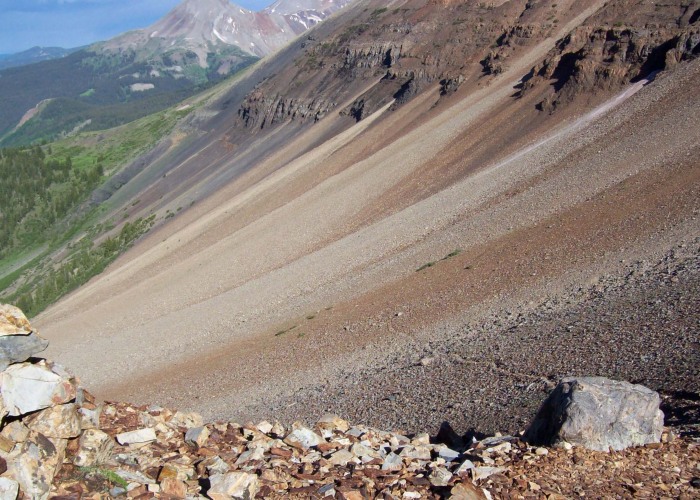 Now the elevation starts to come with each step. Roach's description says to start climbing north (left) at 12,800'. This would be about where the trail started climbing up the side of El Diente. If you try to turn north too soon you will get into some cliffs that are best avoided. These are the lighter colored rock in this photo.  I transferred the route line from the Roach book to the Dolores Peak 7.5' quad. The route line follows the valley basically to the east edge of the quad. The route then angles back to the west some as it goes north up the side of El Diente. There are some cliffs higher up at around 13,500' and above. These can be seen as the darker color higher up. In that same above photo there is a ridge line coming down just to the right of some snow. This has to be passed before climbing the rest of the way to meet the North slope and traverse routes.  We followed some snow fields up towards these cliffs. We no longer had the established trail for a guide. I saw it disappear and reappear under the snow in a few places. Since we were on snow we did what worked for us. The best line to climb will probably be different for another party. I'm also sure we strayed from the trail until picking it up again much higher on the mountain. Below the darker cliffs we angled back to the west. This is also visually towards the summit. From below you can see how you need to go around the lower cliff before turn back below the upper cliffs. Heading up  Climbing this snow wasn't easy. It was steep in places and was often hard and icy. We had YakTrax but crampons would have been better for these lower snow fields. We had both trekking poles and ice axes. Sometimes the travel was with ice axe and one pole. Looking back down  At around 13,400' Lululuv and BGGuy decided to turn back. It was now 11:00. It had taken us much longer than I expected to get this far. On another day I might have encouraged them to continue. But with some clouds in the air, on a day with a bad weather prediction, and the hardest part of the mountain still remaining, I wasn't going to try to talk them into it.  After approaching these upper cliffs we aimed for a couloir that took us up to near the Organ Pipes. In dry conditions it looked like there were multiple paths that could be used. The main thing would be to not drop too low on the descent before turning back east which would result in getting cliffed out.  Below the Organ Pipes we met up with the North Slopes route and were able to use Bill's pictures from his Route Description. The main difference of course was the snow. In addition to the using Bill's pictures there were several cairns we were able to follow.  The climbing gets more serious now. I'll leave the route description to Bill. His pictures allowed us to confirm each critical step along the way. The actual route however was covered with snow and ice in places. We met up with a couple climbers who were coming from the summit. They told us about a sketchy spot they crossed near the summit. Climbing on rock  Not all the snow was bad.  We got to the particularly sketchy place near the summit. Bill's route description Photo 29 shows the exposure in summer conditions. In this next photo you can see where the trail in the snow gets above the trail under the snow. When we got there it seemed previous climbers had descended right onto a spot where the trail was broken away with exposure and ice.  This next photo gives you a feel for the exposure you see from above. I initially tried to climb over some rock instead of dropping down to the path. This almost proved fatal when I got into some loose stuff that weighed more than I do. Fortunately the big rock that shifted down against my torso from above stayed in place instead of taking me and MountainHikerette off the mountain side. There were several moments of fear while I told MountainHikerette to get out from below me. I then backed out of the spot I was in with nothing solid to trust my weight to for the retreat. 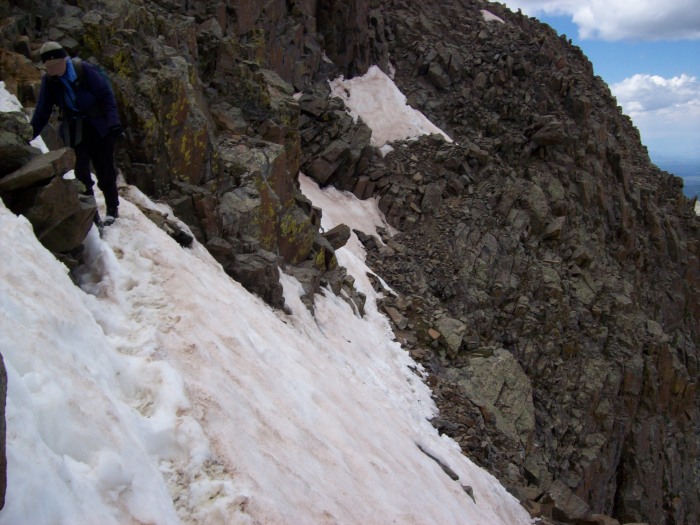 This is looking back at the section of path. We down climbed to a spot just before the most sketchy section. This way we at least separated the down climb and getting past the sketchy spot. 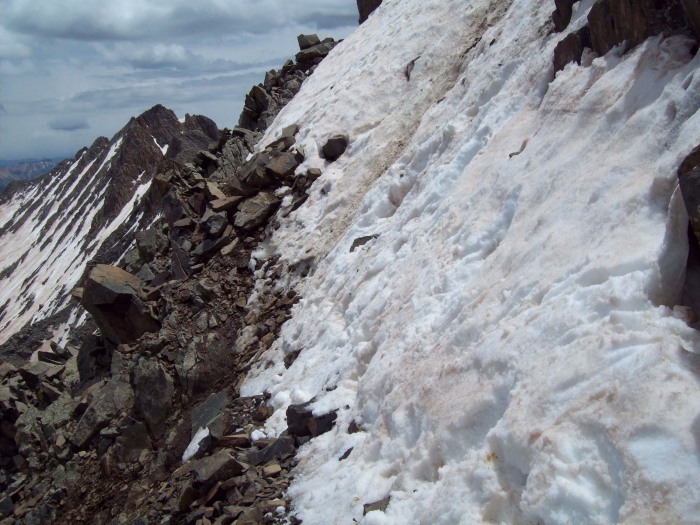 This is looking back from farther up toward the notch. You can see a brown line in the snow leading down to where the trail is broken away. To get over the bad spot in the path required a momentum move that involved trusting a rock that wasn't attached. 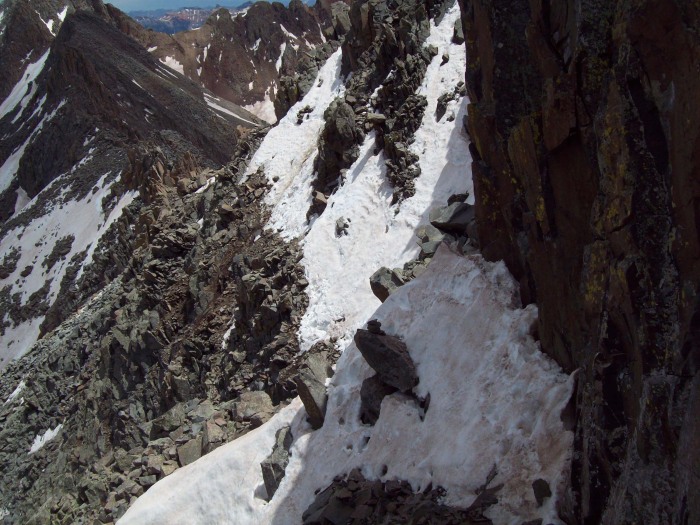 We got past that spot. I had to suck it up after my scare to finish the short stretch that remained to the summit.  It was 1:00 when we got to the summit. We didn't stay there long. It was a slow descent so we didn't get back to camp until 7:10. After the gloomy weather report we managed to get up and down the mountain with only a little bit of precipitation. There was actually sunshine at times. There was a little snow when were close to the summit and a slight sprinkle on the way down. No thunder! Most of snow was not user friendly. There were several spots where the snow was icy. The lower edges of snow patches were often solid ice. Some snow was fall-away soft with ice just underneath. Other snow was icy glazed on top with a hard layer just underneath. As you can see in these pictures some of this snow was on slopes with some exposure. The snow was not nice for glissading in places where that would have been welcome. Also next to rocks, especially on the top of snow fields it was common for there to be large cavities under the snow. We had ice axes, poles and YakTrax. There were some spots where crampons would have better, but other spots where the YakTrak worked well because we felt we could travel across some of the rock better without taking them off compared to crampons. We didn't have helmets but they would have been good to have. El Diente has a lot of loose rock looking for a new equilibrium. If you head up there be careful! |
| Comments or Questions | |||||||||
|---|---|---|---|---|---|---|---|---|---|
|
Caution: The information contained in this report may not be accurate and should not be the only resource used in preparation for your climb. Failure to have the necessary experience, physical conditioning, supplies or equipment can result in injury or death. 14ers.com and the author(s) of this report provide no warranties, either express or implied, that the information provided is accurate or reliable. By using the information provided, you agree to indemnify and hold harmless 14ers.com and the report author(s) with respect to any claims and demands against them, including any attorney fees and expenses. Please read the 14ers.com Safety and Disclaimer pages for more information.
Please respect private property: 14ers.com supports the rights of private landowners to determine how and by whom their land will be used. In Colorado, it is your responsibility to determine if land is private and to obtain the appropriate permission before entering the property.


