| Report Type | Full |
| Peak(s) |
Sunlight Peak - 14,061 feet Windom Peak - 14,089 feet Jupiter Mountain - 13,838 feet |
| Date Posted | 07/29/2025 |
| Date Climbed | 07/27/2025 |
| Author | masonzastrow |
| Beta: Sunlight West Ridge-Jupiter-Purgatory |
|---|
|
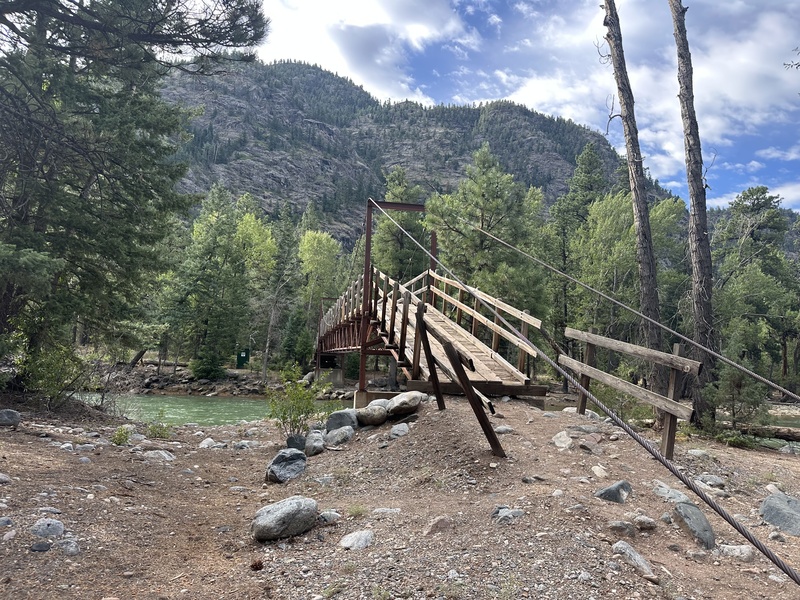
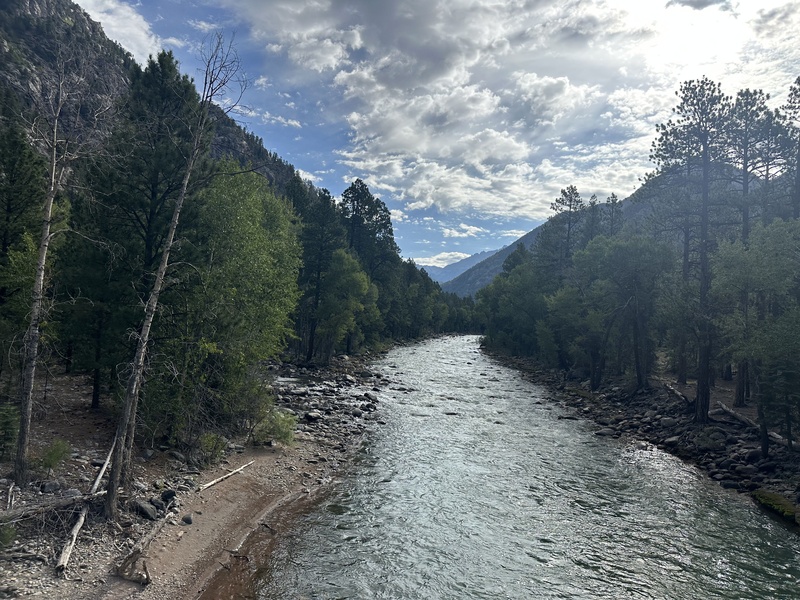
Sunlight West Ridge, Jupiter, and Purgatory This is going to be a little mini guide to three different aspects of Chicago Basin. I'll go about them in the order you'd encounter them. 1. Purgatory Approach Before I begin here, I'd like to say that I'm in good mental health. If anything happens to me in the coming weeks: IT WAS THE RAILROAD! I really think this approach should be more popular than it is, and I'll tell you why. I'm currently in law school at CU Boulder, but this summer I have the good fortune of living in Montrose with a legal internship! So if you're considering hiking in from Purgatory instead of taking the train, know that this was part of my calculus: it was very easy to pick a weekend and drive a couple of hours, knowing that I could easily reschedule if weather looked poor. Although I had to take time off work, my work schedule is flexible enough where that wasn't a big ask. If I was driving in from the front range and had a rare sliver of time off work which was immovable, the train might make more sense. But given my situation, the flexibility of hiking from Purgatory was really nice. Also, since it extends your hike by about 16 miles, but the railroad costs over $200 after a bag, you might think about it like you're getting paid $12 for each mile you hike! As a note: here's why I did a three night trip. I wanted to hit the four 14ers in the basin, plus Jupiter, from Purgatory. Some people have done this in 24 hours, which is just insane. But I know that I'd be unhappy climbing over 6k in a day, which meant I'd have to break up Chicago Basin into east and west groups, plus one day for the approach and one day to get back to my car. If you're not climbing Jupiter or if you're willing to head all the way back to your car after your second climbing day, then you could do this in three. If you're insane, like redheadontherocks, you can do it all in 24 hours. I relied on their GPX heavily throughout this trip, so thanks to them for making it available! I'll be attaching my Sunlight, Windom, and Jupiter GPX to this trip report, and I'll separately upload my Purgatory to camp GPX for anyone to use as reference for that leg. The Purgatory approach starts from just off 550. I arrived at about 7 AM on a Saturday and saw that every spot along the pond had been filled. There's room for a second row of cars for maybe 4-8 vehicles, and I had the courage to start it, which left my car sitting as a sore thumb when I returned on Tuesday with much less traffic. This is a really pretty trail. You'll start by descending about 1,000 feet from the highway down to Purgatory Flats, where there're some nice camp sites. You'll then rise above the river and traverse the wall of the gorge on a well maintained trail. After a total of four miles, you'll reach a beautiful suspension bridge to get you across Cascade Creek:
On the opposite side of this bridge is a picnic table for a nice rest! This is the low point of the route, at about 7'700 feet. From this bridge, you'll hike a few hundred feet before finding the railroad tracks. You'll hike parallel to them for a moment before crossing, and then the train takes its own bridge to the north side of the Animas, the last time you will be near the tracks. The next five miles are bomber trail, you'll be gaining elevation but very slowly. By the time you intersect the trail leading from Needleton, you'll only be at 8'300, these are some fast trail miles! From Purgatory to this point, I was averaging about 21 minutes a mile, which is scalding by my standards.
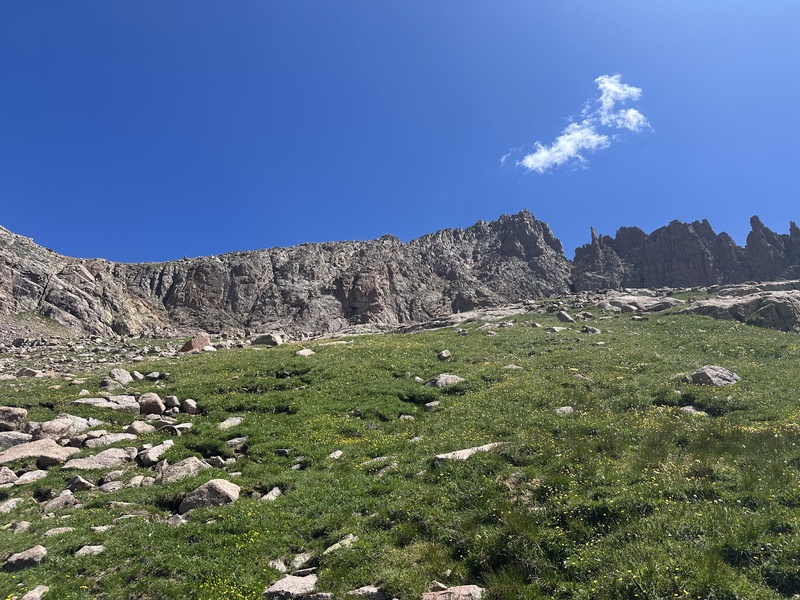
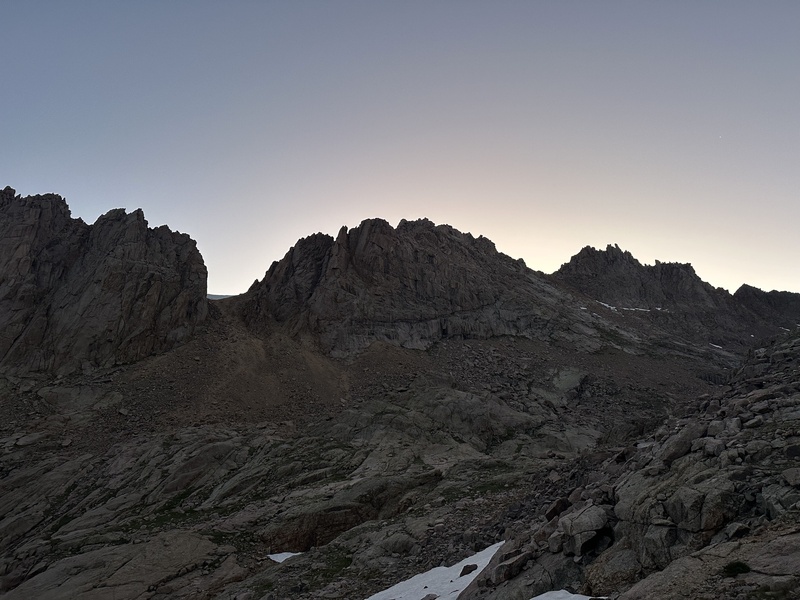
You might even be lucky enough to see the train pass by! The trail quality is excellent. It is a little overgrown here and there, but always super easy to follow and almost entirely dirt, with a few short rocky sections. There're a couple short ups and downs but generally the trail is flat along the river. There are excellent campsites everywhere, you can't go half a mile without noticing a great one. Finally, after nine miles and some change, you'll reach a bridge to get you across Needle Creek and you'll meet up with the folks who took the train, but your legs will be plenty warmed up! It's another 6 miles and 3k to get to campsites, but that climb has been well catalogued. I didn't feel like the first nine wore me out all too much. On my way out, I found a campsite about halfway through the stretch between Needle Creek and Cascade Creek, it only took me about two minutes of looking to find a spot with creek access, flat ground, and tree cover. I read for a while and had a solid night's sleep before picking up in the morning for the final seven miles. Between Cascade Creek and Purgatory, you'll have another considerable climb, about 1,400 feet total. But after having climbed to Twin Lakes from camp two days in a row, just think of it as doing it one more time but 5k lower! TLDR: If you're willing to hike 16 extra miles to save $200, coming in from Purgatory is an excellent option. The trail is good, the scenery is beautiful, and camping is abundant. 2. Sunlight West Ridge Sunlight's West Ridge is a route I had seen a trip report for when I was researching Chicago Basin, but neither reports on the .com had all too much beta to follow. So here's my contribution! Start by hiking up to 12.9k on the standard route. I started at about 4:15 and was surprised to be only the second party on the trail, despite the dozens of people camped up in the basin. Just below where the main route flattens out, turn to the left and make your way to the obvious gully where Sunlight's west ridge begins.
You'll need to angle slightly west here, as the stream is uncrossable before the outlet from the pond!
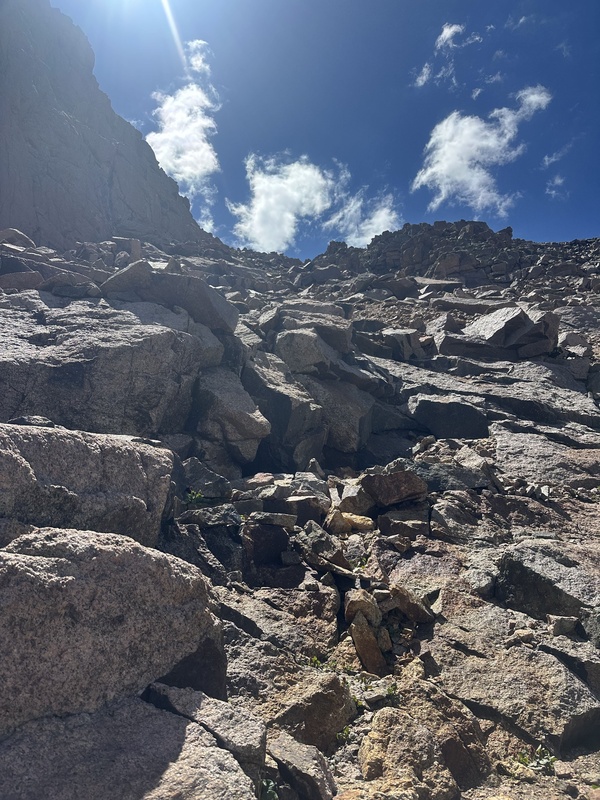
I found the gully to be pretty fine, actually. Compared to the gullies getting up Sneffels, Little Bear (from Lake Como) and North Maroon, this gully is perfectly fine. It's loose in a sandy way, not loose in an "I'm going to knock this rock into South America" kind of way.
Exit the gully and find amazing views to the north!
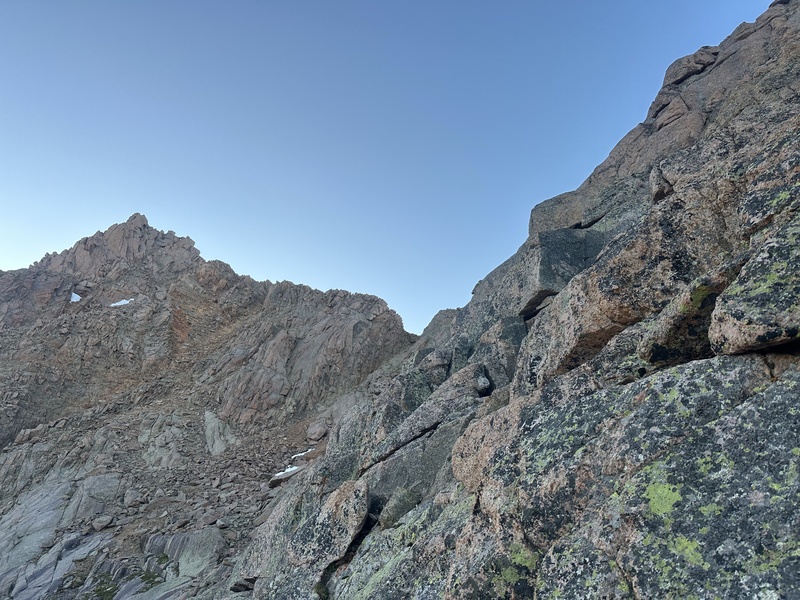
Here's where things start to get tricky. Other trip reports have indicated that gaining the ridge from here is sustained class 4, I think I might've found a different route which mostly goes at 3+. (You may notice as you approach the ridge from the south that there's a dihedral running through the ridge which might create an impassable notch up top. The notch exists but only drops like six feet and it's an easy class 3 down climb).
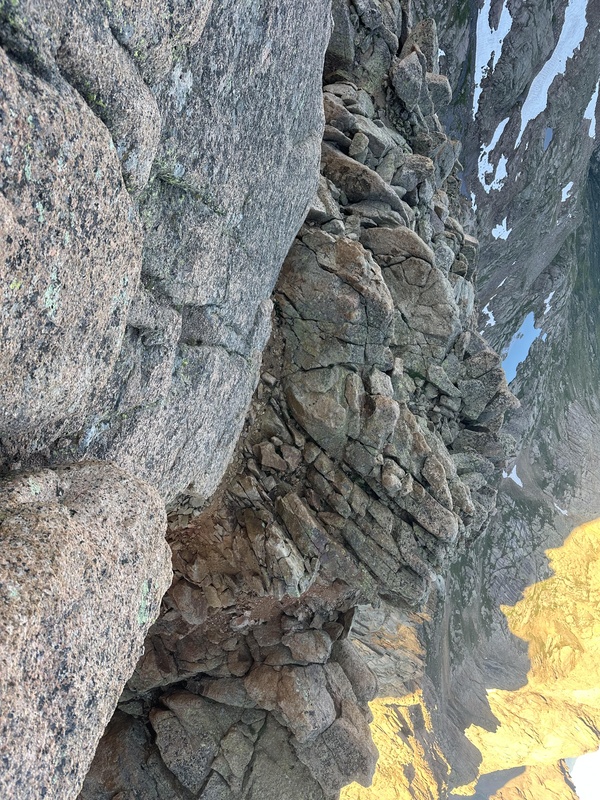
(The imposing face) The route I found is to cross up and to the left here, through the black marks in the center of the picture, wrapping around to the north side of the ridge. I was initially aiming for this crack, before realizing the chockstones in it are actually loose and couldn't be used as holds:
If you can find this crack, you're at the right elevation, now traverse to the climber's left until you're on the north side of the ridge. It'll look like this:
From here, follow a system of ledges pretty much straight up. There was one move on this section I'd call 4- but it wasn't very exposed and I didn't feel uncomfortable at all doing it. Importantly, I don't think it's any harder than the portions of the standard route which you'll have to do after reaching 13.9k.
(Near the top of the ledges, looking much scarier than it felt)
(once you've reached this view, you are past the hardest of it!) After gaining the ridge, you are on a total playground. The rock quality is generally good, although I had a couple large blocks tilt when I wasn't expecting them to.
(taken from Windom) The ridge is pretty much a straight ramp, it is never difficult to find a route to the next portion. Just have some fun on class 3!
  Eventually, your fun will run out and you'll unite with the standard route. I initially passed the next move and had trouble making progress here: be particularly observant of a carin up high on a rock to climber's left, sooner than you expect. You'll rejoin at photos 20 and 21 of the standard route. Descending the standard route is probably easier, but honestly I thought that gully was looser! Now, that should've been the end of the Sunlight portion of this report. But I do want to give my two cents on the final move of Sunlight and if you've read this far you might as well read this too.
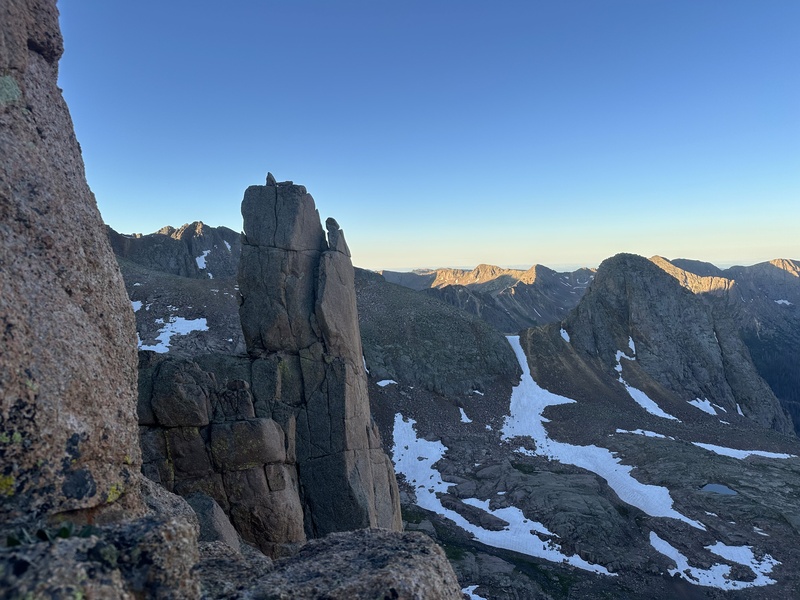
I am not normally spooked by exposure. I had no problem on Capitol's knife's edge, nor on Little Bear's west ridge, nor on Pyramid's leap of faith. In fact, I actively enjoyed all three of those obstacles. So naturally, I was going for the true summit of Sunlight, why wouldn't I? I dumped my pack at the base, stuck my sign in my waistband and headed up. No problem. And then I stepped down onto the penultimate block. And then I stared down at the third block. For sixty three minutes. I have never been so paralyzed by a move in my life. I considered versions of it sitting, standing, with one foot on each block, climbing down to an unseen fourth block, all of it looked horrible. I climbed back to the summit and tried the block on climbers left, which I halfway descended before running out of footholds and then climbed back up. I just felt like I had no way to use my hands to balance myself, it was all on my legs. The second block has close to nothing to grip off onto, which was something I should've taken closer note of while ascending. I ultimately decided that the safest thing would be to jump from the second block onto descender's left of the third, which had an upward ramp on the opposite side which I could use to steady myself as I landed. But before I'd go to make the move, my stomach would drop and I'd reset. I kept saying out loud to myself "come on, you're getting sunburned!". This had no effect.
Over an hour just staring at this. No, it is no close enough to just step down onto. I am 5'11 and couldn't reach. Landing on the third block and falling forward would likely be fatal.
Another view, summit top left, block 2 top right, block 3 bottom right, too-steep-to-climb block bottom left I really don't know what I was waiting for here. Maybe for the techtonic plates to inch these two rocks closer together. I did wonder if having my poles would help with the downward movement, but the lower rock didn't have cracks in it which would make me confident in my poles to not slip. If another climber arrived on the summit, at the very least I could get them in my hands and test if they felt secure, but I knew it wasn't a great idea. What I was actually waiting for was extrinsic motivation. This came in the form of a marmot, who was starting to eat my pack. Fair enough, after an hour, it's practically abandoned property. I yelled at him. He looked my way. And went right back to nibbling on my pack. I was hollering at this rodent, so pent up with frustration that I was on the brink of tears. I just didn't know what to do. And the marmot wouldn't even hear my pleas. He just kept scrounging around my pack. Somehow, this gave me the fire to cross. I genuinely do not know how I did it. It wasn't a jump, I was at least kind of sitting down. But I couldn't tell you if I went both feet at once, or if I was facing in or facing out, it just suddenly happened. I scampered over to shoo little buddy away and he looked at me like he was stopped moments before running out the door of the bank with a big sack of dough over his shoulder. I sat down and realized that my legs had been shaking for so long they had been worn out. After a full hour of making no horizontal or vertical progress, I took a break. I was exhausted. TLDR: Don't underestimate this move. 3: Jupiter from Windom For this section, I was relying on redheadontherocks' GPX. I didn't really know what I was getting into aside from the fact that it stayed 2+/3-, I figured I'd just follow the line. I just want to add a bit more detail on the gully, since I found it to be more intimidating than it actually is. Your first close look of the gully will likely be from Windom's summit, where it will appear to be almost vertical.
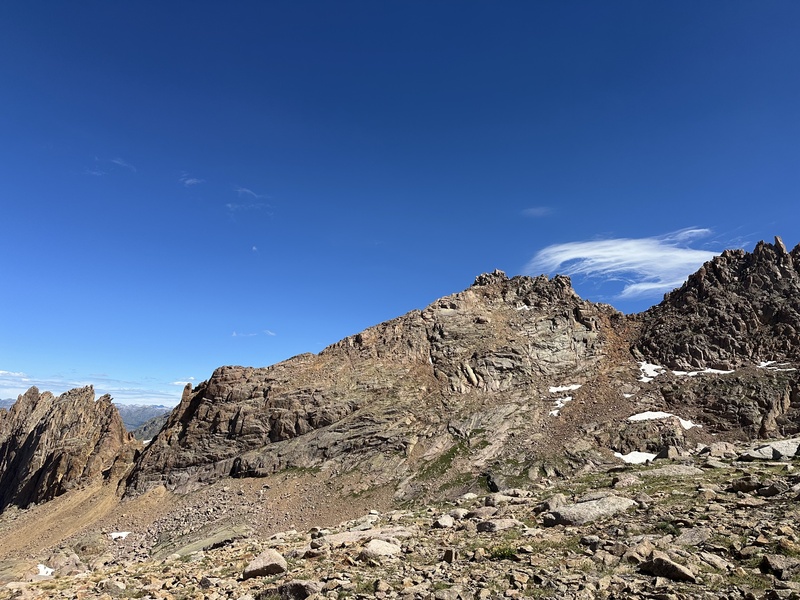
Jupiter is center here, the gully you'll climb has the grassy band in the middle You'll drop from Windom's summit down to where the standard trail continues down into the basin, but you'll keep going forward. After a small bump, you can descend to the saddle with Peak 18 and turn left. This gully is GREAT! It starts loose enough to scree ski, and immediately becomes blocky enough where you can talus hop. Nothing middle-sized and loose. From the bottom of the slope, turn left and angle towards Jupiter's gully. Stay below some very green rocks to keep on level terrain, but try not to drop much below 12'900.
Looking back up at Windom, you can see why the traverse drops below the ridge
Below the largest formation between Windom and Jupiter, there was a small stream which was flowing just enough to refill water! There's also an opportunity between Sunlight and Windom if you drop low enough. As you approach the gully, keep on the grass further to the right for as long as you can. Beyond the grass, I'm sure there are one million ways to summit. Although the route can surely be kept at class 2+, I found it way easier to stay on larger blocks and find class 3 lines which would keep me off the very loose dirt. The closer you get to the summit, the harder it is to stay on stable ground. I found a small chute exiting the gully to the summit ridge which helped me stay on firmer ground, but made it more technically challenging. It never exceeded 3+, though.
Very typical views for the last 500 feet Finally, I took my second hour-long summit break of the day, enjoying the beautiful weather and charging my phone, which was having some trouble keeping a charge this trip.
For the descent, take the well-documented path down to Columbine Pass. It is steep and not super pleasant, but very easy to follow with a GPX track. Stats: Purgatory TH to camp: 15.2 miles 3.8k gain 6:29 total time (including breaks) Sunlight, Windom, Jupiter from camp: 7.8 miles 4.7k gain 10:52 total time (including breaks) Car to car (including Eolus and N. Eolus) 44.4 miles 13.2k gain 29:36 total time (including hiking breaks, not including breaks at camp) Thumbnails for uploaded photos (click to open slideshow): ")
")
")
")
")
")
")
")
")
")
")
")
")
")
")
")
")
")
")
")
")
")
")
")
")
")
")
")
")
")
")
")
")
")
")
|
| Comments or Questions | |||
|---|---|---|---|
|
Caution: The information contained in this report may not be accurate and should not be the only resource used in preparation for your climb. Failure to have the necessary experience, physical conditioning, supplies or equipment can result in injury or death. 14ers.com and the author(s) of this report provide no warranties, either express or implied, that the information provided is accurate or reliable. By using the information provided, you agree to indemnify and hold harmless 14ers.com and the report author(s) with respect to any claims and demands against them, including any attorney fees and expenses. Please read the 14ers.com Safety and Disclaimer pages for more information.
Please respect private property: 14ers.com supports the rights of private landowners to determine how and by whom their land will be used. In Colorado, it is your responsibility to determine if land is private and to obtain the appropriate permission before entering the property.


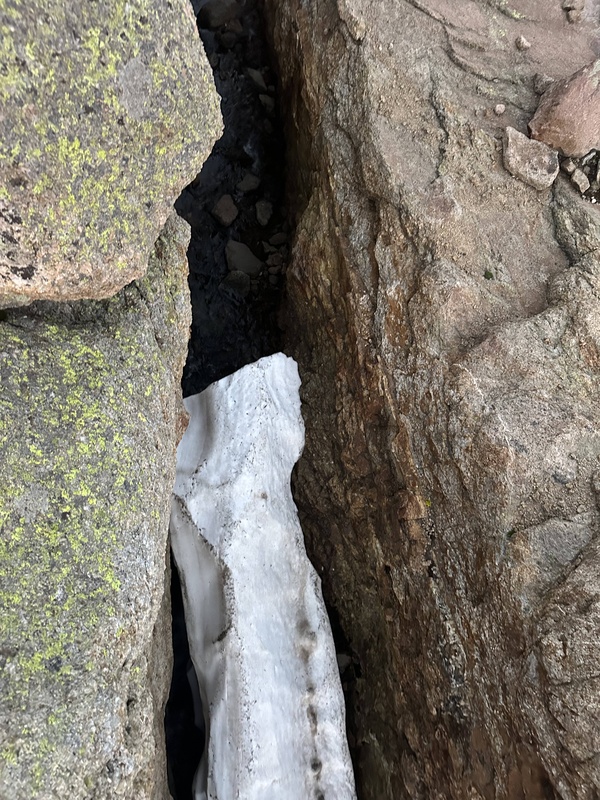 (looking down in the stream)