| Report Type | Full |
| Peak(s) |
Nishi-hotaka dake 9,544' Yarigatake 10,433' |
| Date Posted | 11/09/2024 |
| Date Climbed | 10/27/2024 |
| Author | gecko |
| Additional Members | Gubber13 |
| Traversing the Northern Japan Alps |
|---|
|
"Gendarme" and "Daikiretto" - or: how to hike just 20 miles in 4 days!
We recently spent 4 days hiking and scrambling in the Northern Japan Alps. While these are neither 14ers nor (sadly) in Colorado, I thought a trip report might be of interest to some on the site since we all share a similar obsession. I wasn’t really aware of these mountains before I started researching for our trip, so hopefully this might pique someone’s interest for a future adventure. Day -21 to Day 0: The best laid plans... Our original plan was to maximize our altitude advantage coming from Colorado and spend the first week of our trip playing in the mountains before moving on to more touristy activities and embracing deconditioning. We aren’t great planners at the best of times, and so felt very accomplished when we had booked hotels, trains, buses, and hut reservations well in advance of our trip. As you might expect, our self satisfaction amused the mountain gods, and as we approached our starting date the forecast settled decisively on heavy rain across the Japan Alps. We finally accepted that it was not going to happen, spending a few hours on our first day in Tokyo cancelling all of the plans that we had made a month prior. We decided to carry on with the rest of our trip, keep an eye on the forecast, and make a break for the mountains if a weather window appeared. After three weeks at sea level, consuming far too much sushi, sake and Japanese craft beer, a brief window of pristine weather appeared, so we headed to Matsumoto (a cool, artsy city near the base of the mountains) and finally prepared to hike! 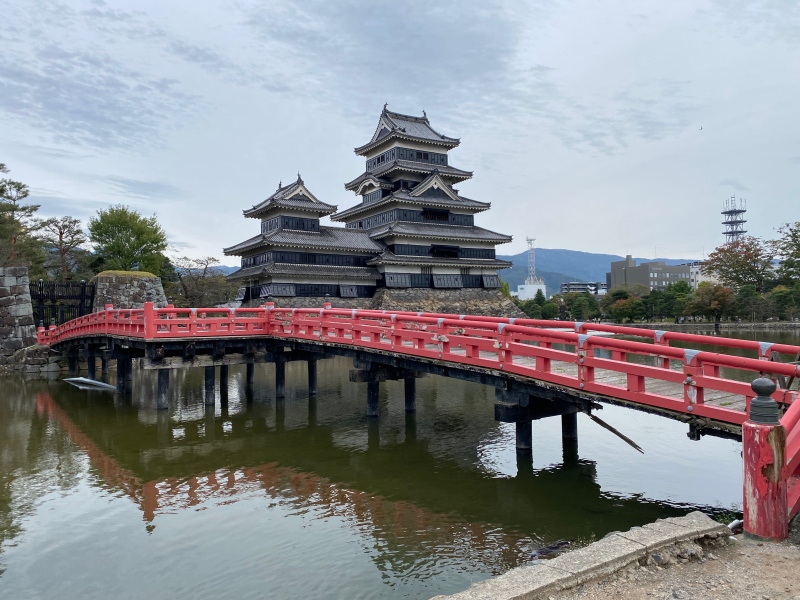

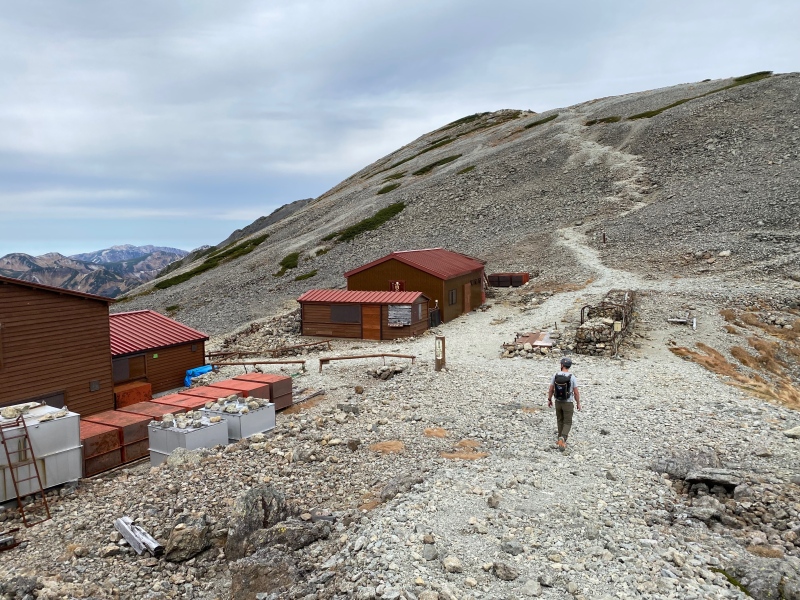
Day 1: Kamikochi to Nishiho sanso We caught a train and bus from Matsumoto to a resort area called Kamikochi. This is in a gorgeous valley, and there were lots of domestic and international tourists there to enjoy the late fall colors. Our itinerary for the day was a short but steep hike from Kamikochi to Nishiho sanso, the mountain hut at the start of our planned traverse. We ended up doing a few bonus miles because the initial route we’d planned on taking had closed for the season two days prior (not a concept I was familiar with coming from Colorado!) We got to Nishiho sanso early, and spent the rest of the afternoon eating, enjoying the scenery, and making broken conversation with other hikers. 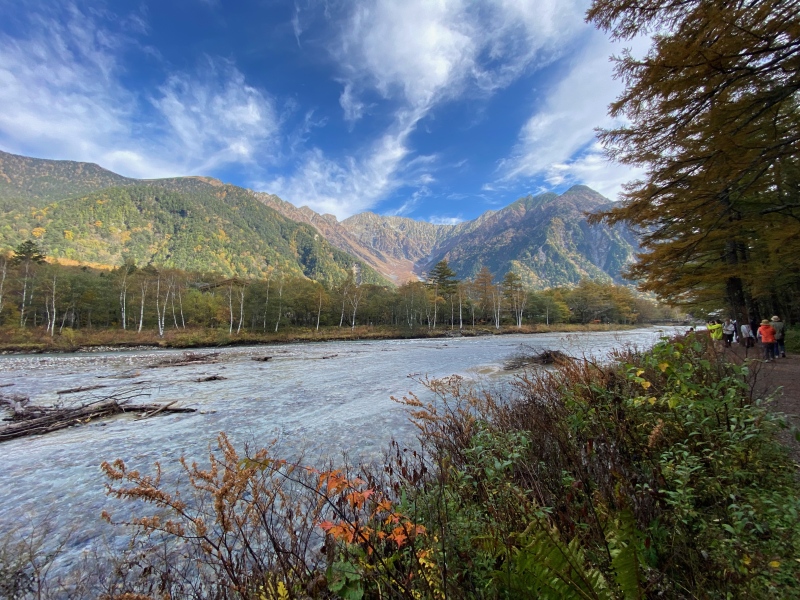

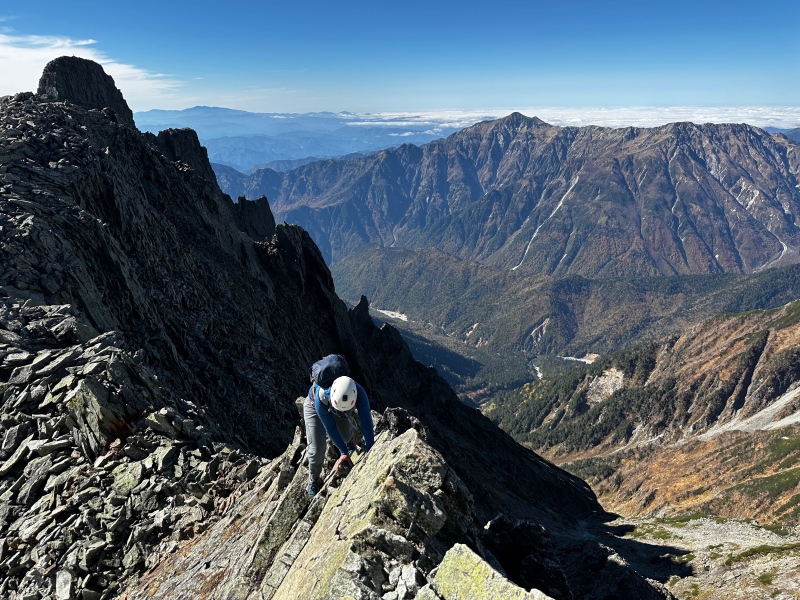
Day 2: Nishiho sanso to Hotakadake sanso Peaks: Nishi-hotaka dake (9,544’) Aino-dake (9,537’) Tengu Iwa (9,544’) Gendarme (10,377’) Oku-hotaka dake (10,466’) Us, looking at a map: “It’s 5km, it can’t possibly take 8 hours!” Us, 7.5 hours later: “Ok, yeah, fair enough.” 
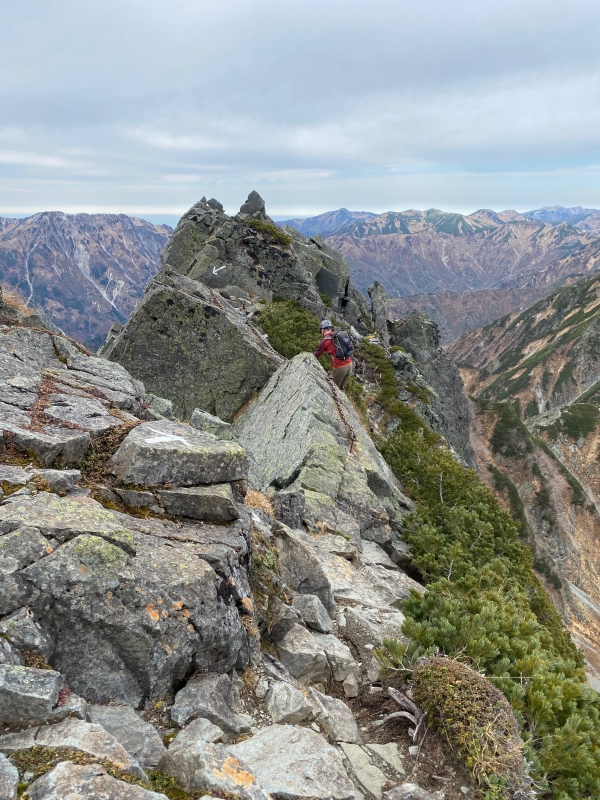
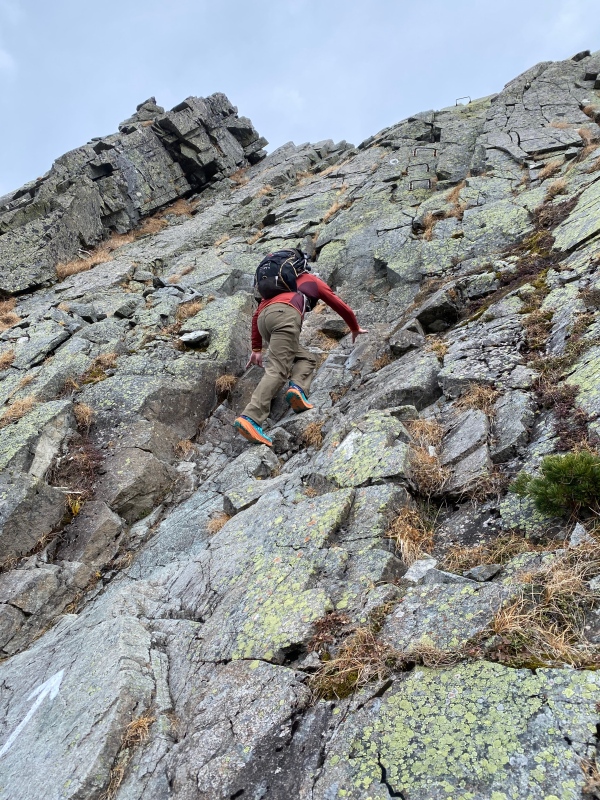
The next two days would have us completing a traverse along a ridge that links together 11 summits. The segments of this route are often referred to by their most difficult portions and are called “Gendarme” and “Daikiretto.” From talking with Japanese hikers, it seems that these routes are considered to be among the most difficult non-technical climbs in Japan. The first day would have us ascending a trail from Nishiho sanso to the summit of Nishi-hotaka dake (9,544’) and from there following the ridge over four more peaks until arriving at the next hut. (A word about naming conventions: my understanding of Japanese summit names is that they typically have an English transliteration of either -take or -dake (essentially Mount/Peak/Summit) at the end of their names, e.g. Nishi-hotaka dake, which would be Mt. Nishi-hotaka in English. Sometimes they’re listed with both, e.g. Mt. Nishi-hotaka dake on maps and signage. I'll try to keep it consistent through the report.) 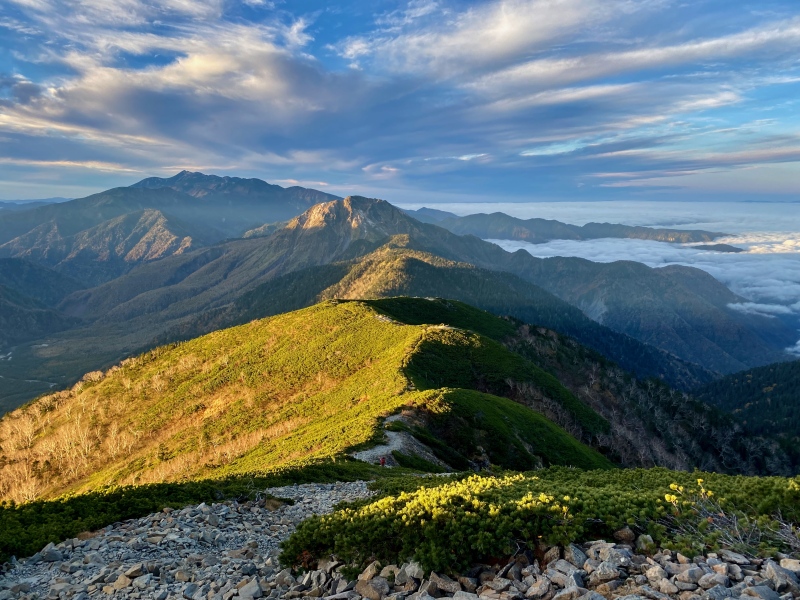
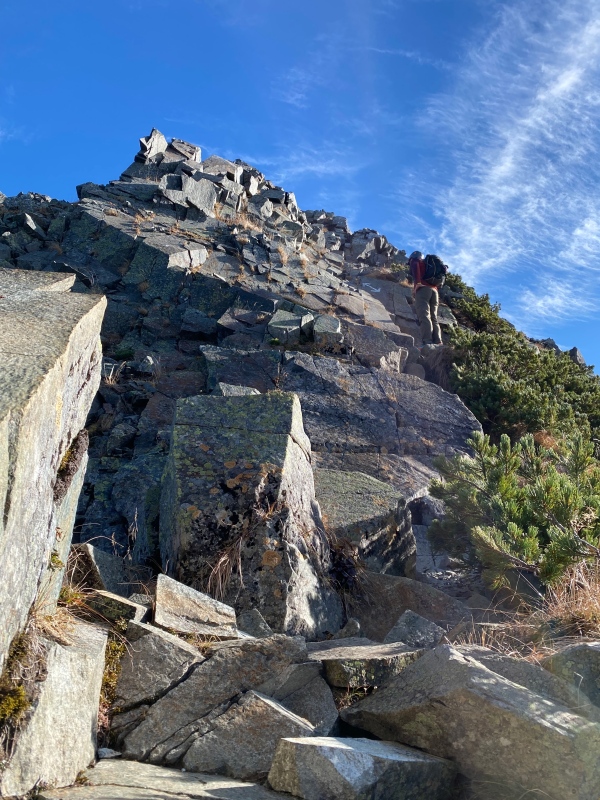
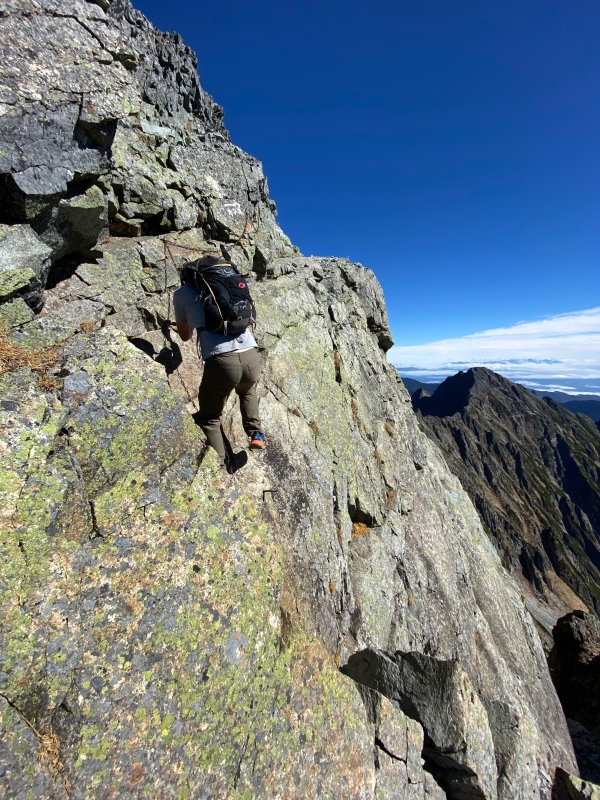
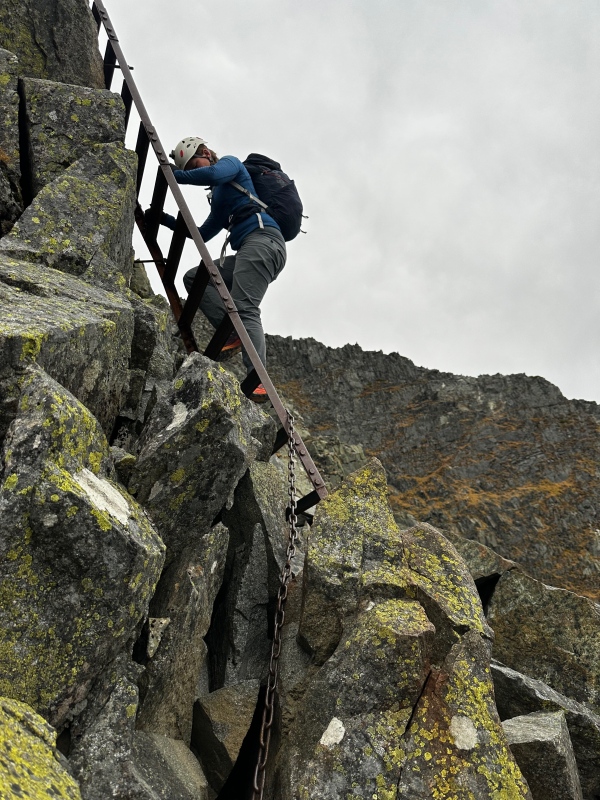
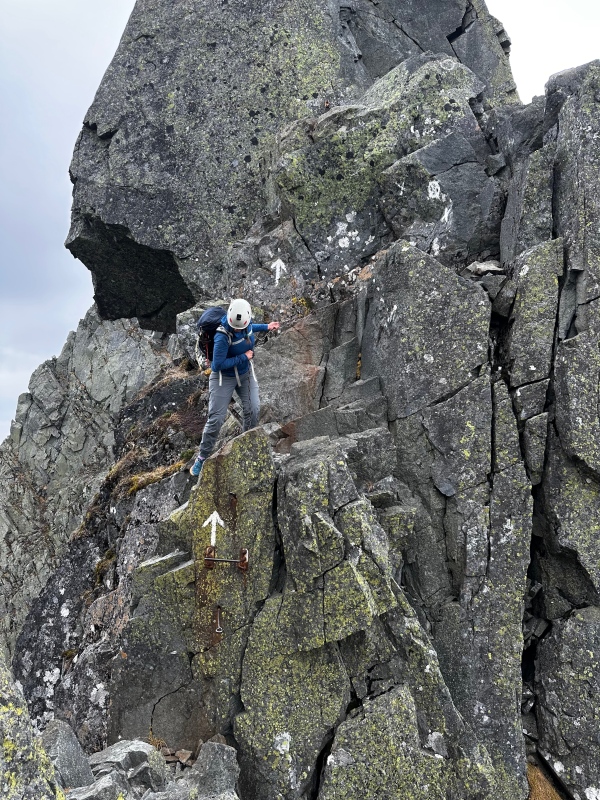
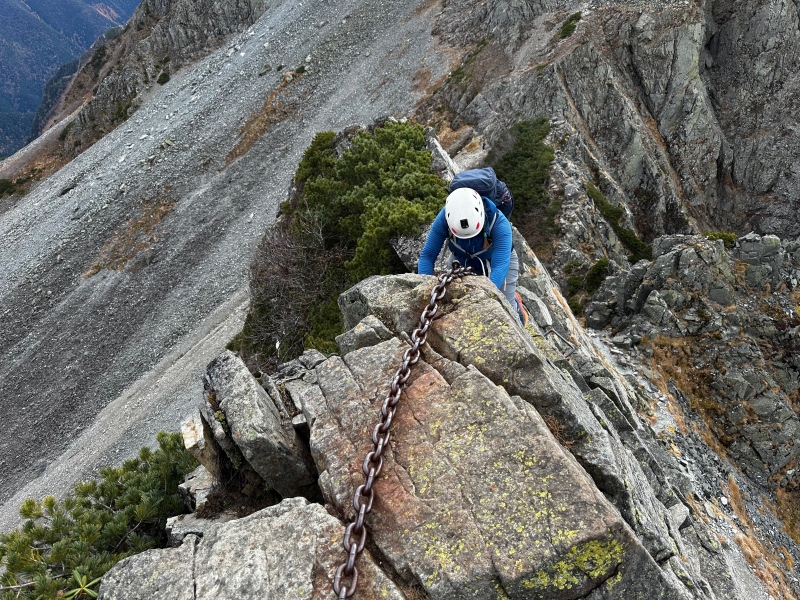
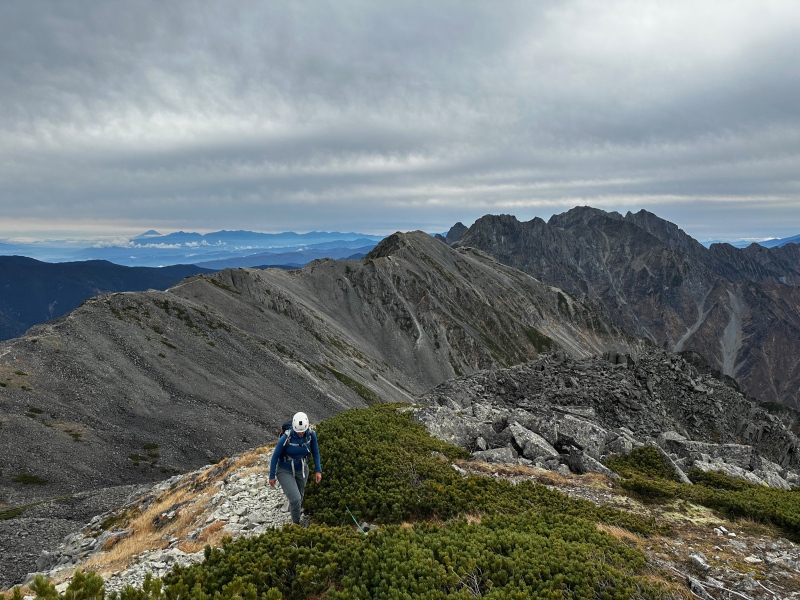
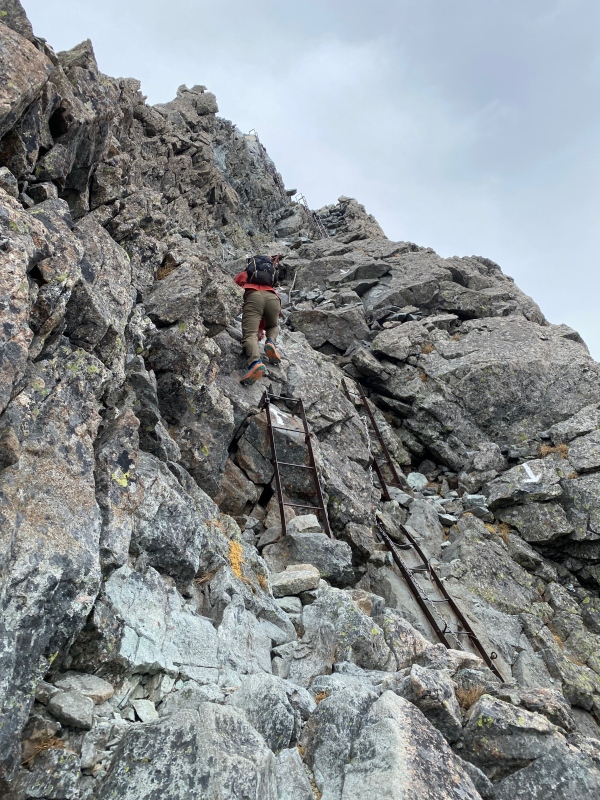
The real appeal of the route is that much of the ridge involves fun scrambling on pretty solid granite through steep climbs and descents, assisted by fixed chains and ladders of varying helpfulness bolted onto the mountain. 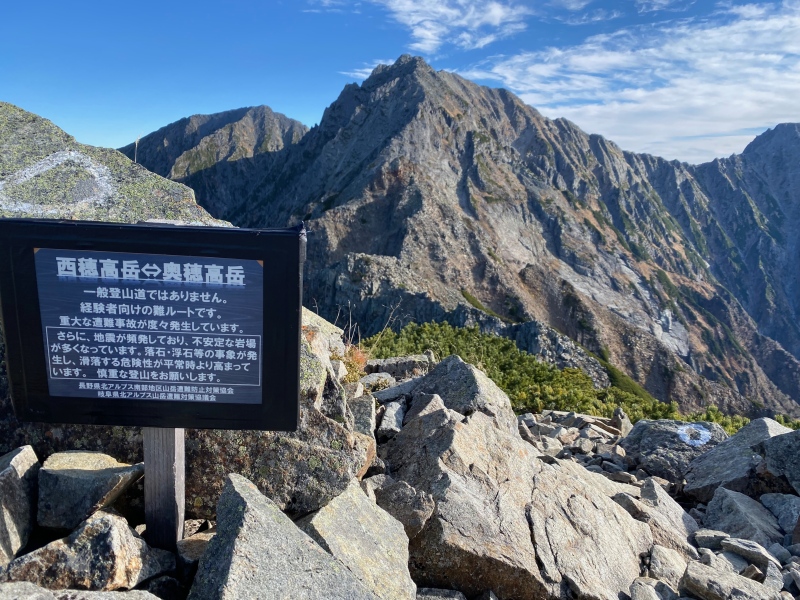

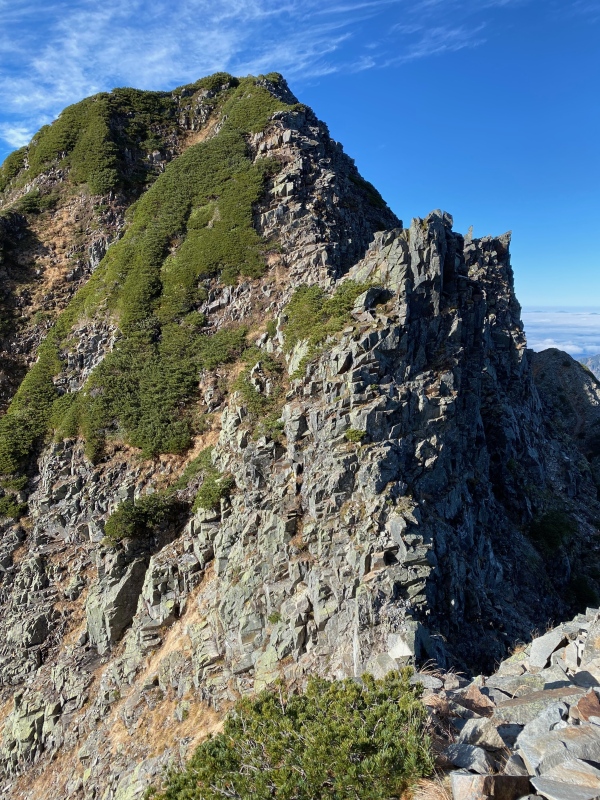
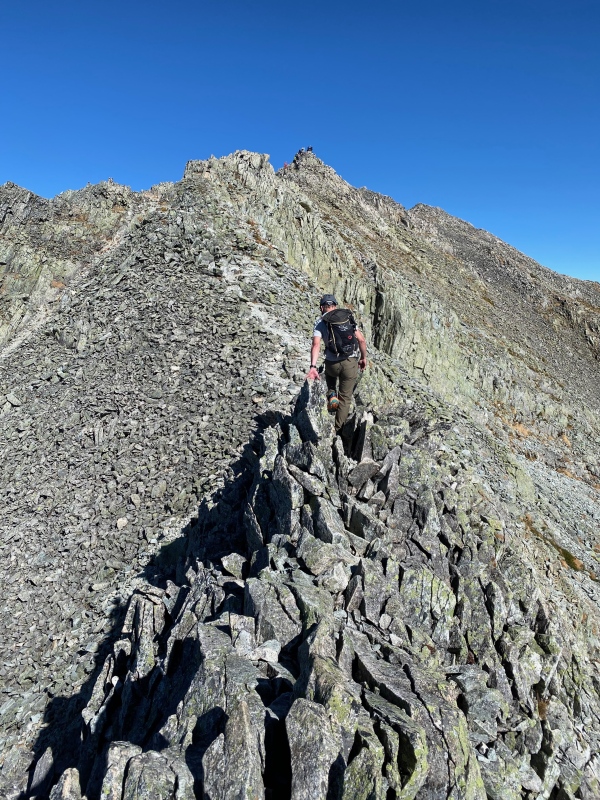
There is little to no routefinding involved in these peaks as you're really just following the ridge and a profusion of route markers. Anywhere that there might be even a question of microterrain choices, the route is indicated by a series of arrows, Xs and Os. If you're a fan of the bullseye's on Longs, you're gonna love this. 
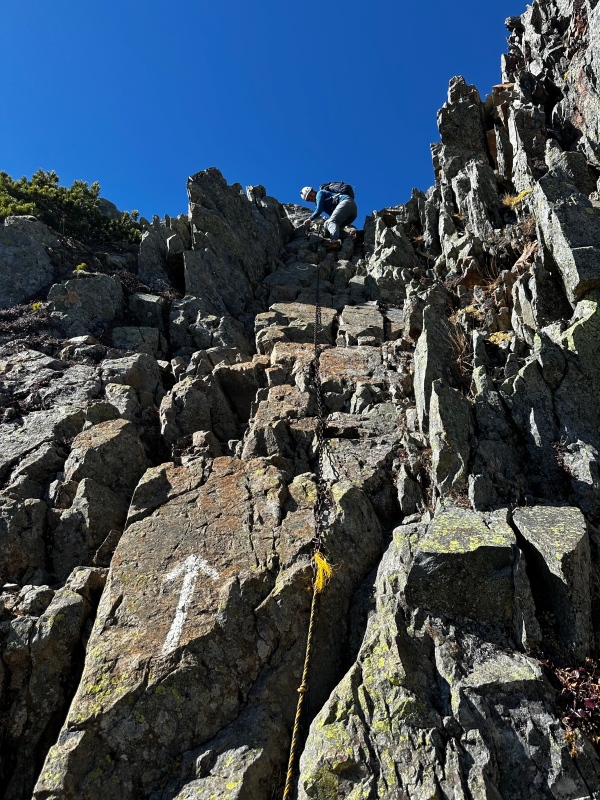
Generally, nothing that we did exceeded Colorado Class 3/4, largely because anything that might creep above that has some type of assistive gear. In a lot of places the fixed gear felt like overkill, and was sometimes a hindrance (for example when the chain is draped over the hold you want to use,) but it was useful in spots. 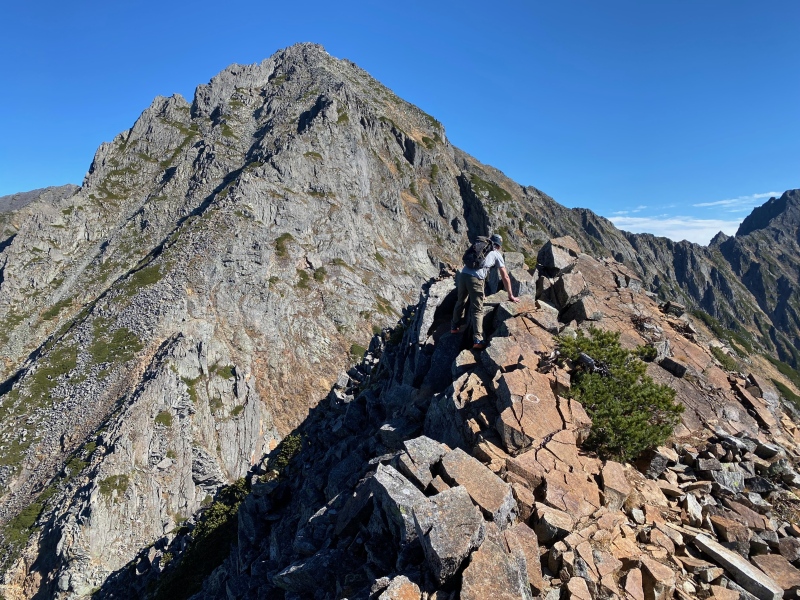
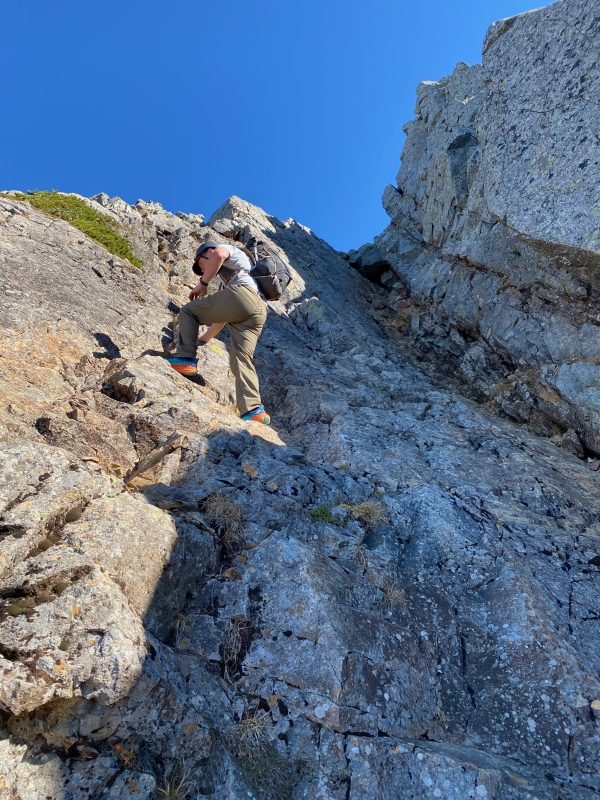
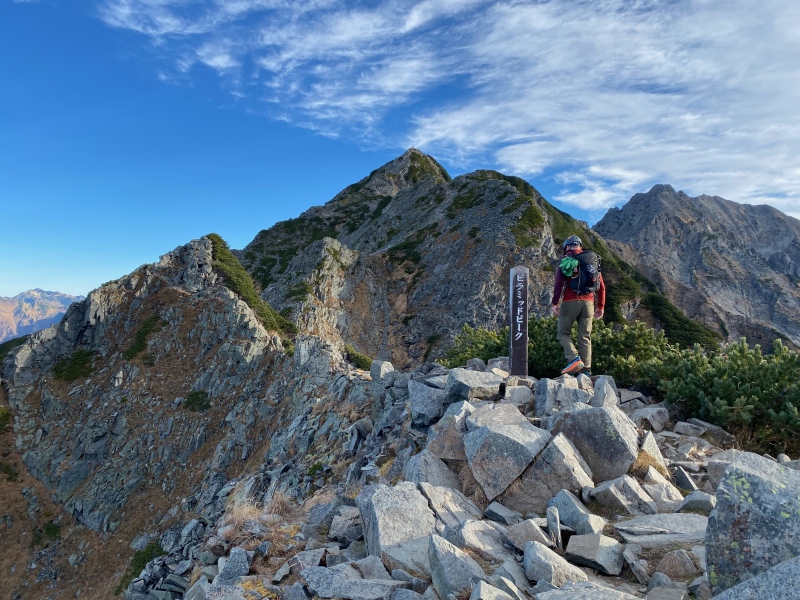
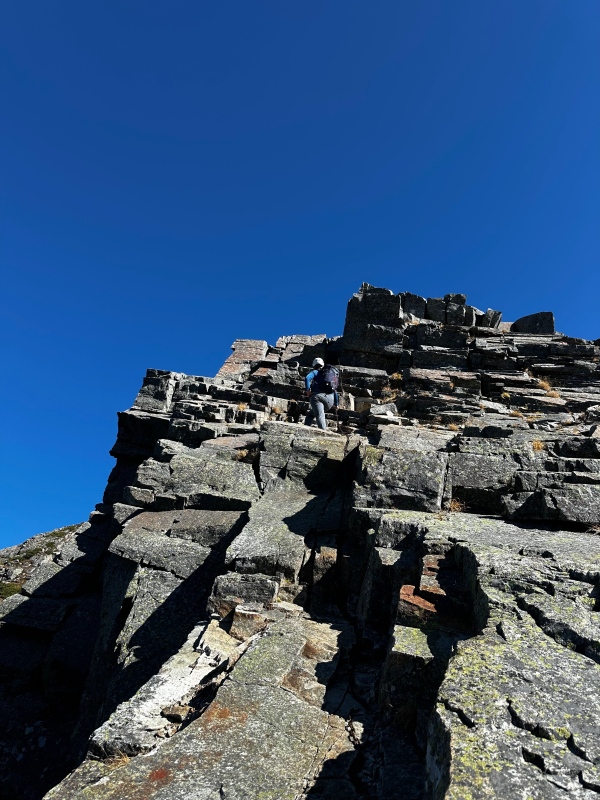
The crux of this day came just after the peak called Gendarme (10,377’.) After a scramble to the summit, you briefly backtrack the route to then climb up a face and traverse a series of thin ledges leading to a steep loss and regain of elevation. This brings you to a small saddle that plops you onto an ascending knife edge. 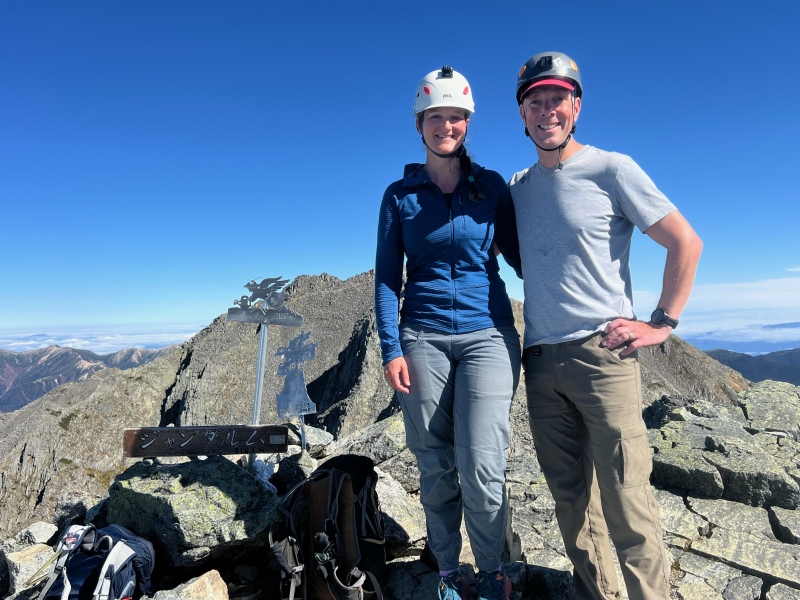
The last summit of the day was Oku-hotaka dake (10,466’,) the 3rd highest peak in Japan. From there it was a quick 30 minute hike down to Hotakadake sanso, our home for the night. 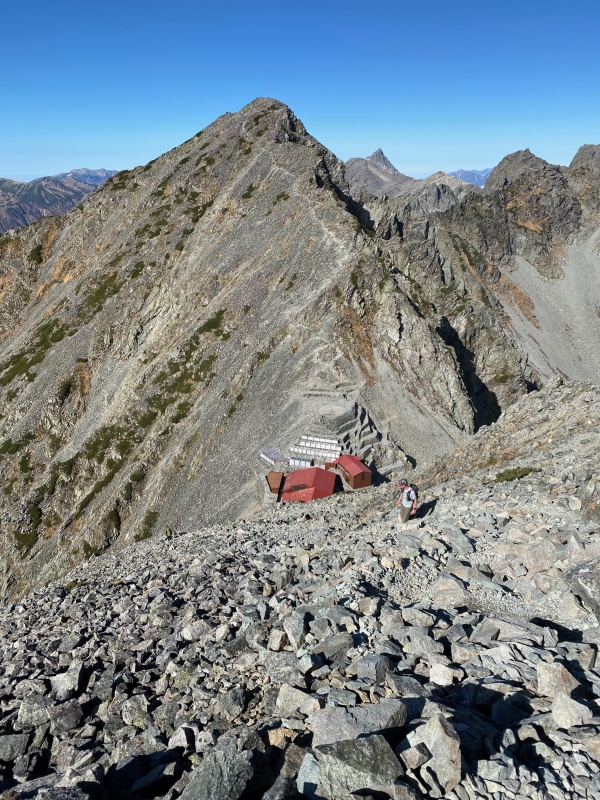
Day 3: Hotakadake sanso to Yarigatake sanso Peaks: Karasawa (10,181’) Kita-hotaka dake (10,190’) Minamidake (9,950’) Nakadake (10,118’) Ohbami dake (10,174’) Yarigatake (10,433’) There may be people who have a system dialed for sleeping in a mountain hut, but I am not one of them. The general rustling started at around 0430, and I felt lazy trying to sleep until 0530. As a perpetual night owl, and after struggling to sleep on a futon/tatami combo, this made for a rough start to the morning. This was amplified by the fact that there was no easing into the day, it was pretty much straight back to sustained scrambling. 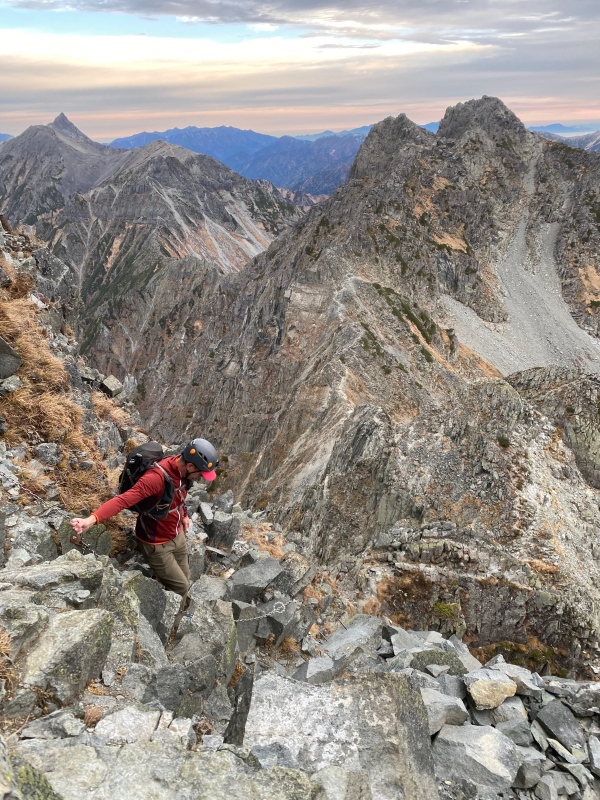
The 2nd summit of the day was Kita-hotaka dake (10,191’,) and we were delighted to find a small hut improbably perched just below its summit. So we had what felt like a very civilized break with a cup of coffee complete with porcelain saucer and cup before continuing on. 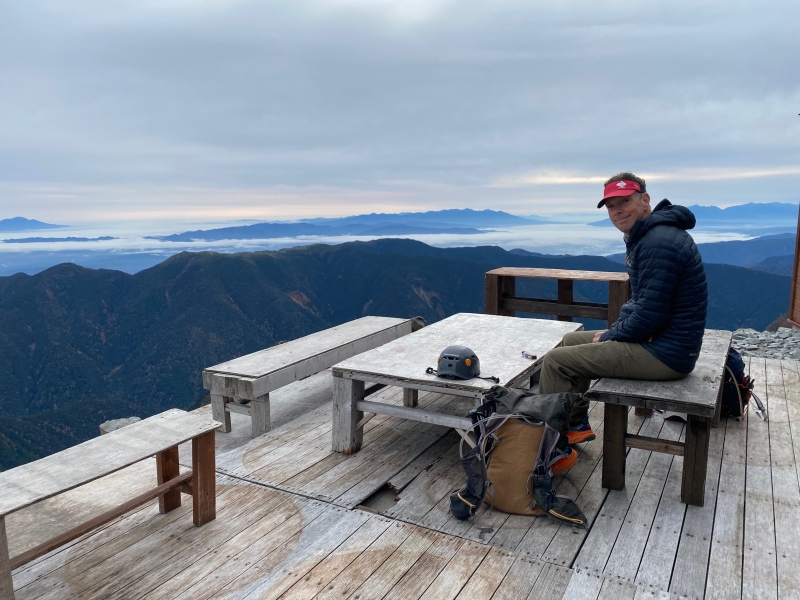
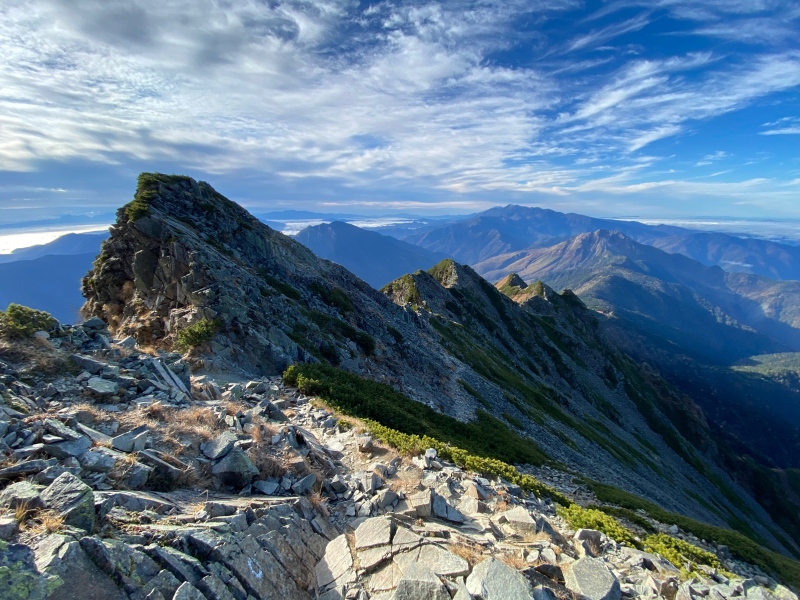
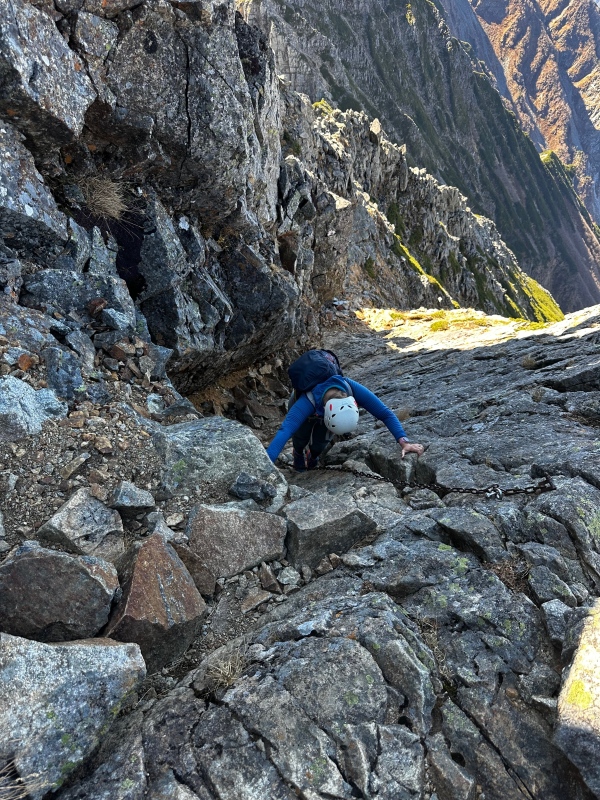
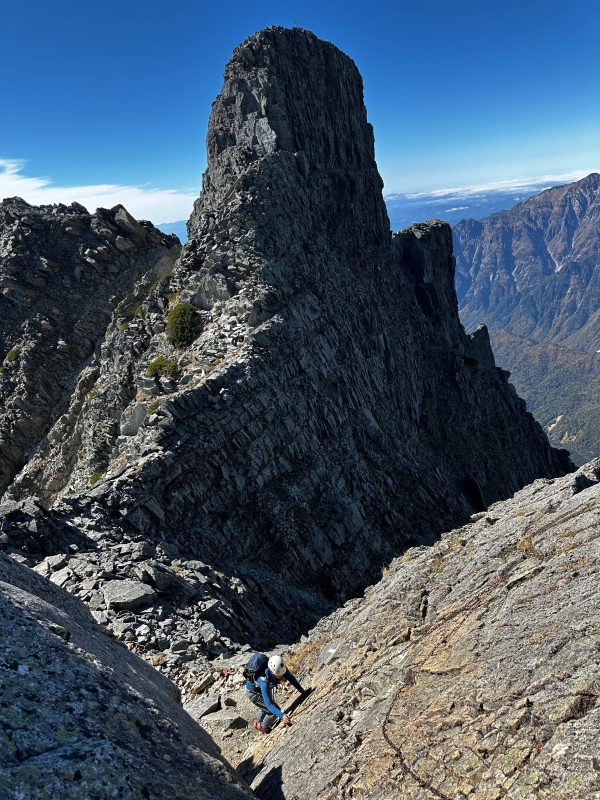
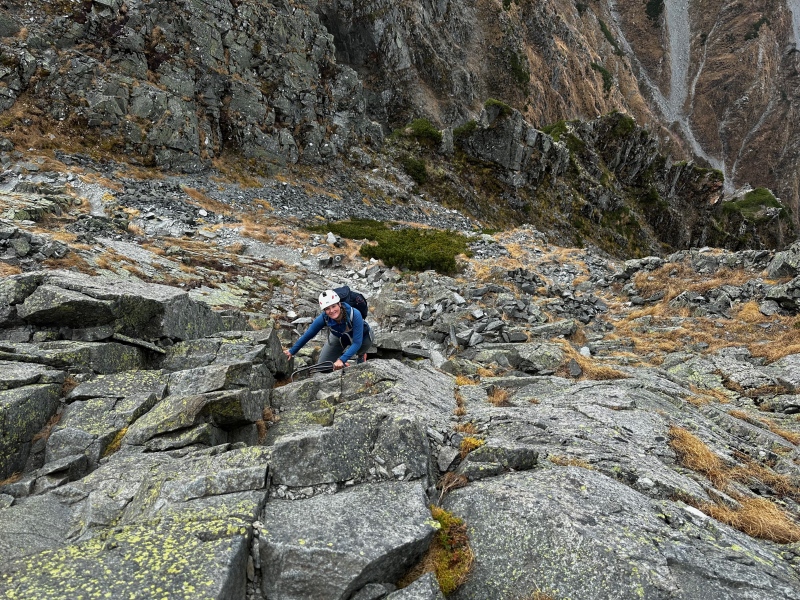
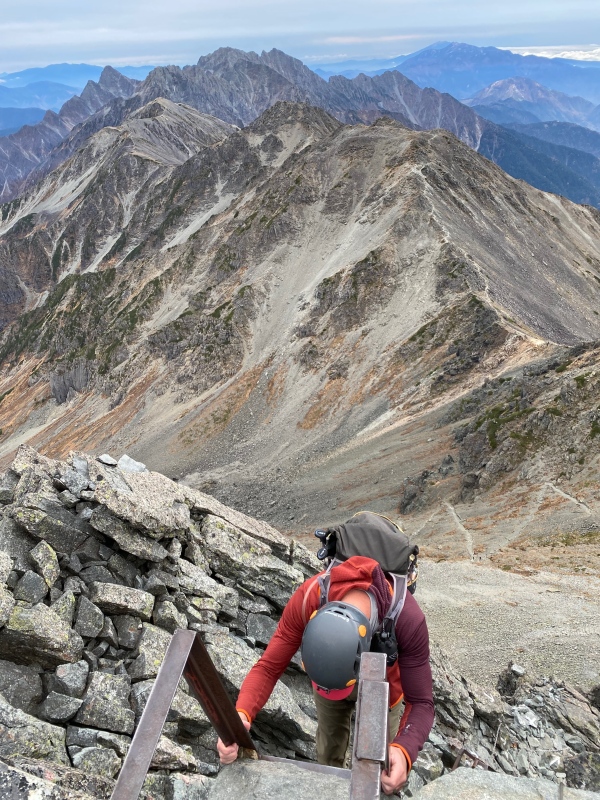
The coffee cleared my brain fog just in time as we were about to start the most in/famous part of our climb, Daikiretto. A rough translation in Japanese is “The Big Cut,” and it is essentially a steep gap in the ridge between two summits (Kita-hotaka dake and Minamidake.) In the direction we were climbing, you quickly lose about 1,000', cross an exposed catwalk, and repeat a mirror image of the climb on the opposite side. 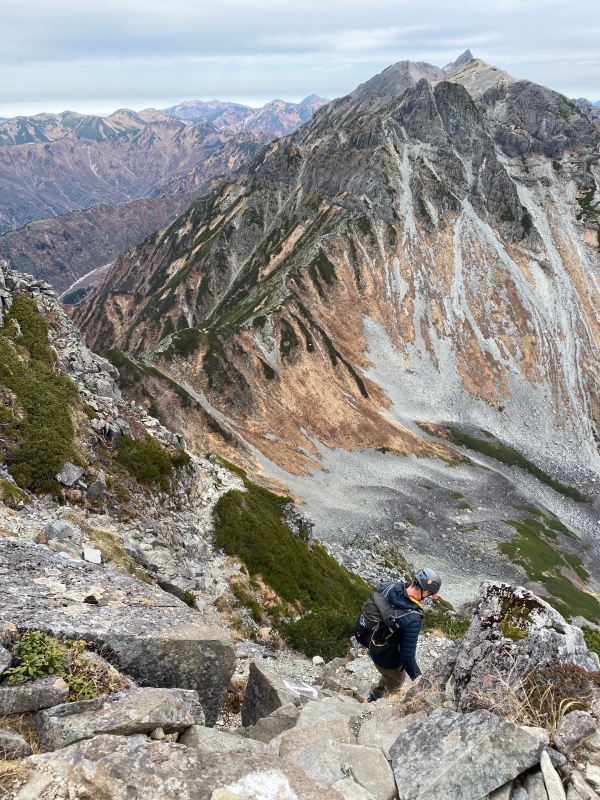
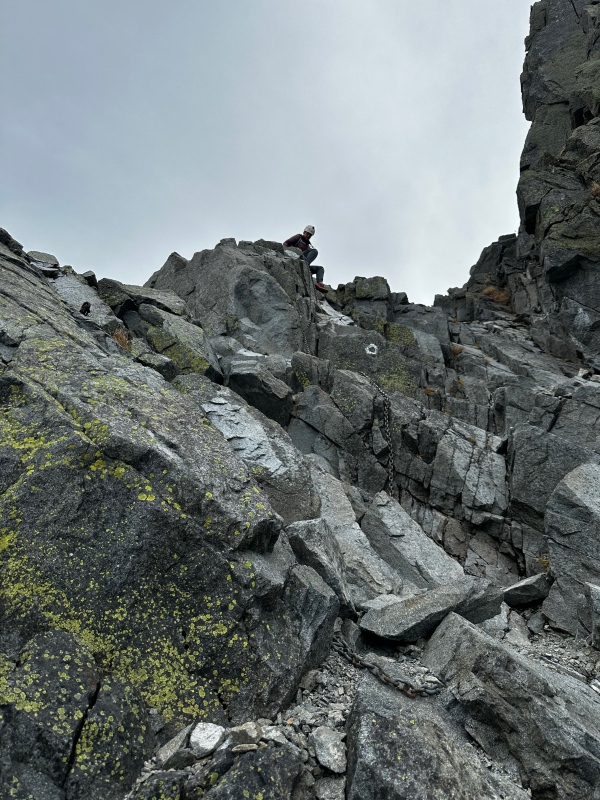
It is certainly steep and exposed, and you will need to lower your bodyweight by chains or climb down rebar drilled into the mountain at times, but I ultimately felt that what we had done the day prior on the Gendarme was more difficult in terms of scrambling (though not necessarily exposure.) For what it’s worth, we ended up downclimbing the more difficult half of the Daikiretto since we were doing the traverse from South to North, most go the opposite direction. 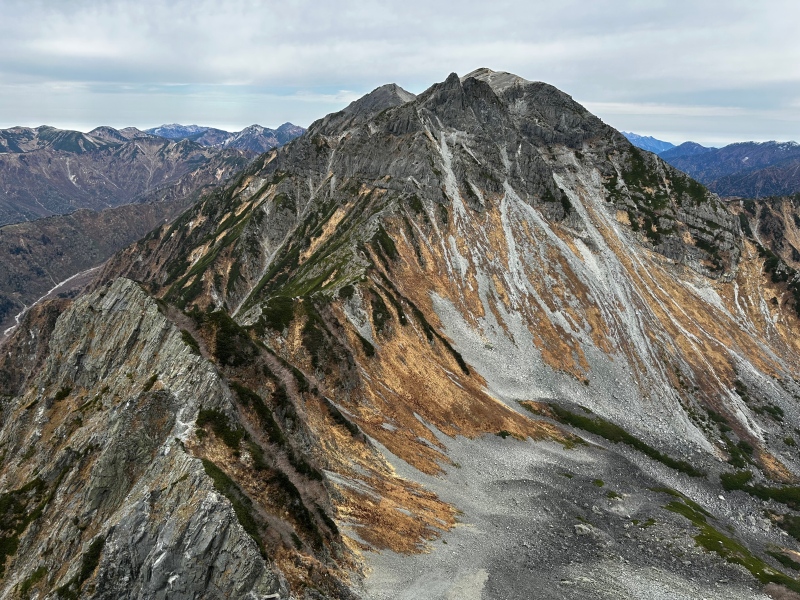
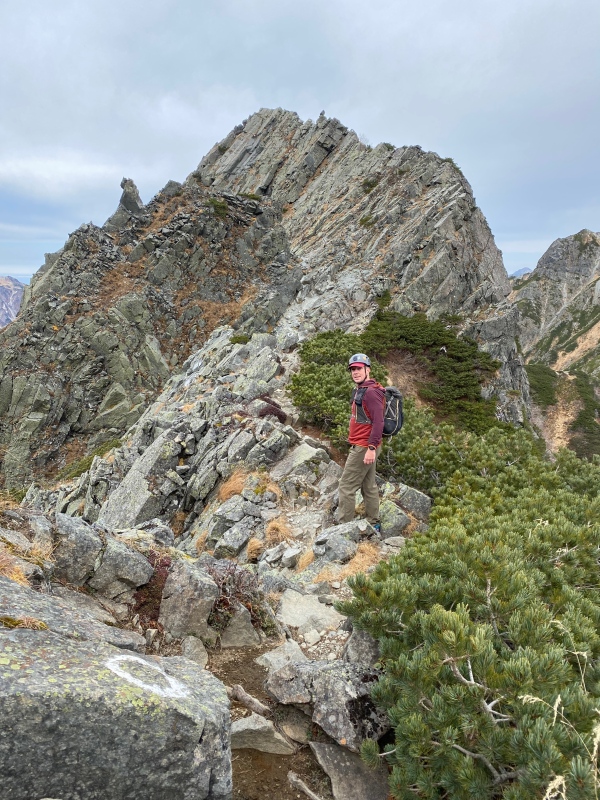
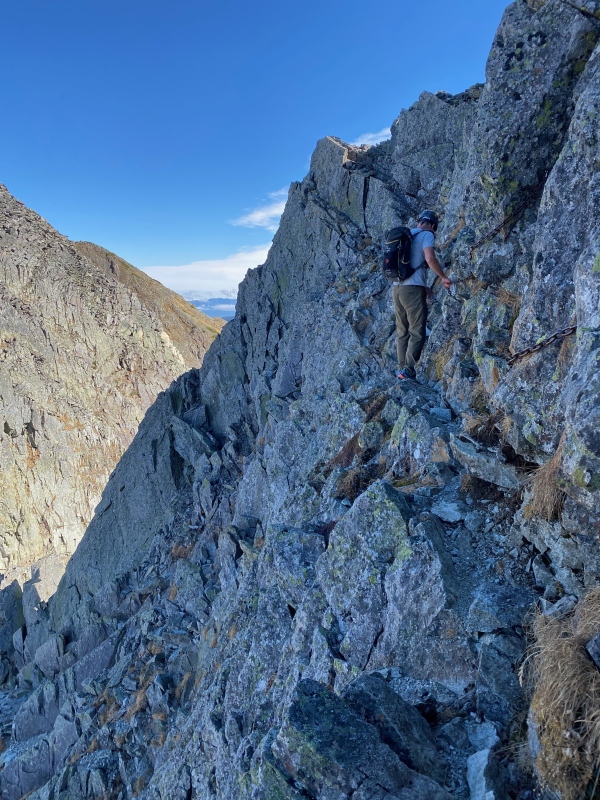
It is very clear when Daikiretto ends, as you reach a small plateau with a mountain hut. From there it was another couple of miles and a few more summits with small sections of easy scrambling. 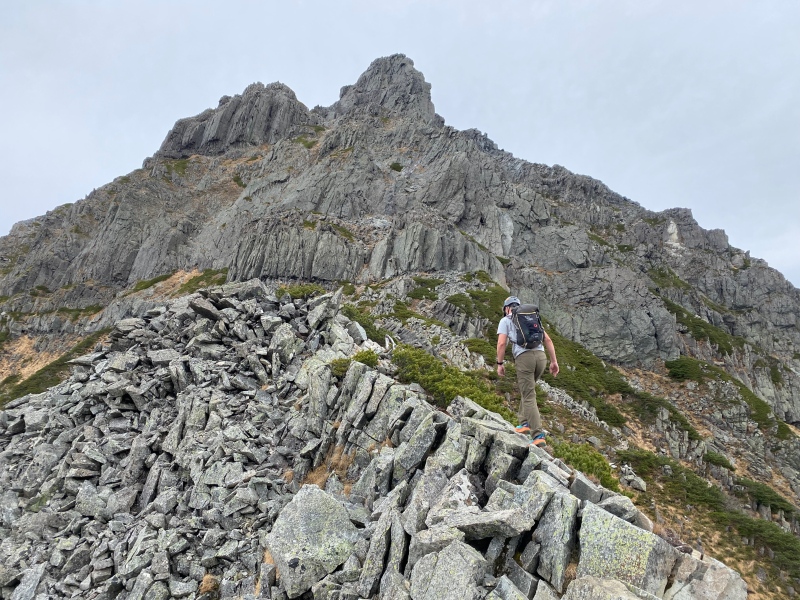
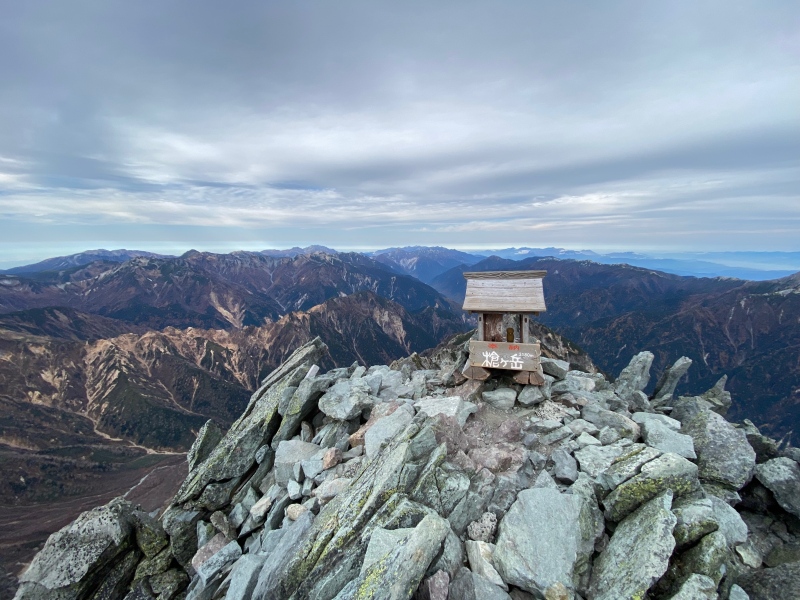
We finally reached the summit of Ohbami dake (10,174’) and had a view of our final hut of the trip, Yarigatake sanso, just below the summit of Yarigatake. "Yari" (as it is affectionately known) means “Spear” in Japanese, and is the 5th highest peak in Japan. 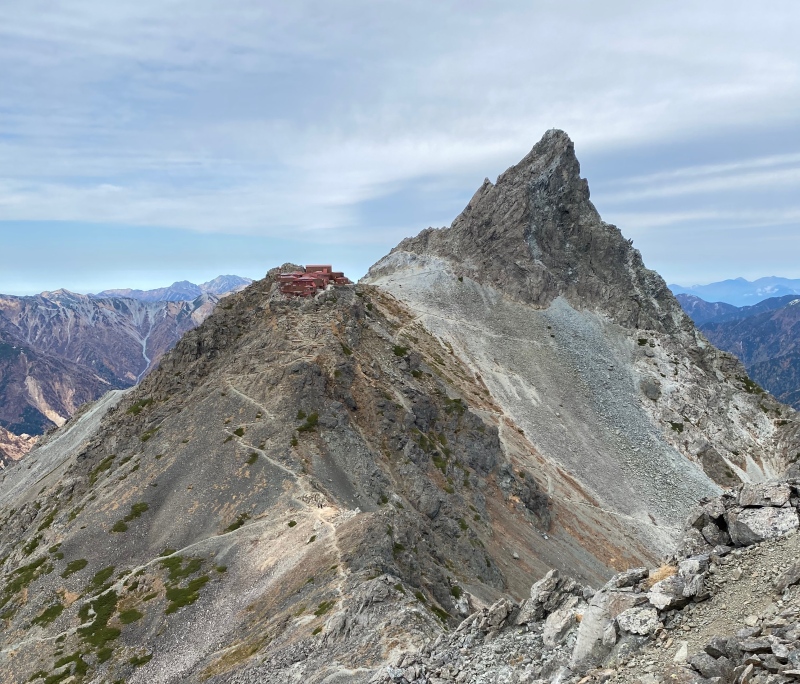
We hiked down (and up) to Yarigatake sanso, checked in, and then made a quick summit of Yarigatake (10,433'.) It’s only about 20 minutes from the hut to the summit, and gives you a great last jolt of scrambling to round out the trip. 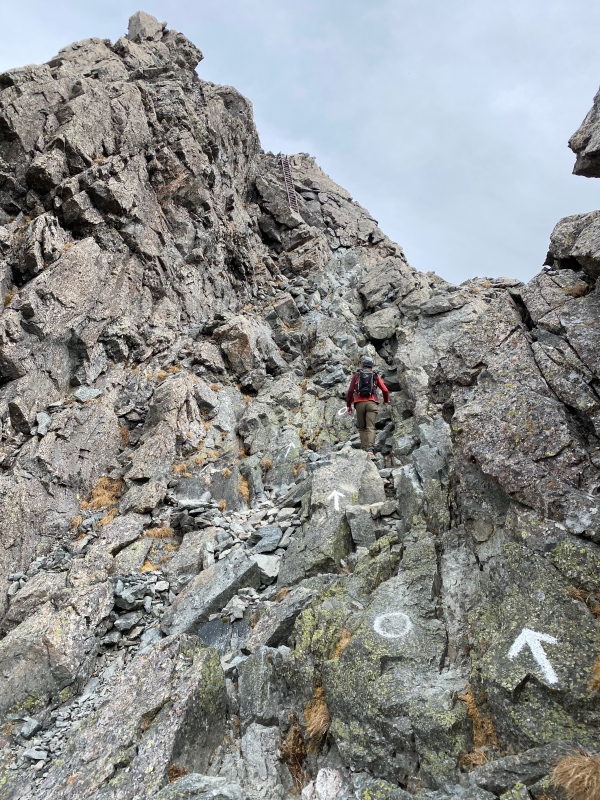
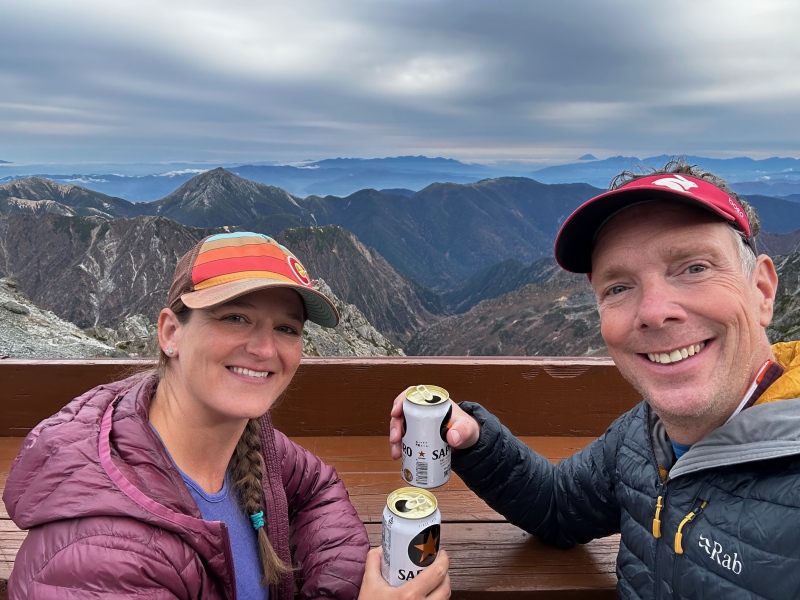
This was another day where 4(ish) miles took us about 8 hours. We headed back to the hut and spent an evening watching the sunset over Yari, enjoying a beer, and spending time in the company of other hikers. 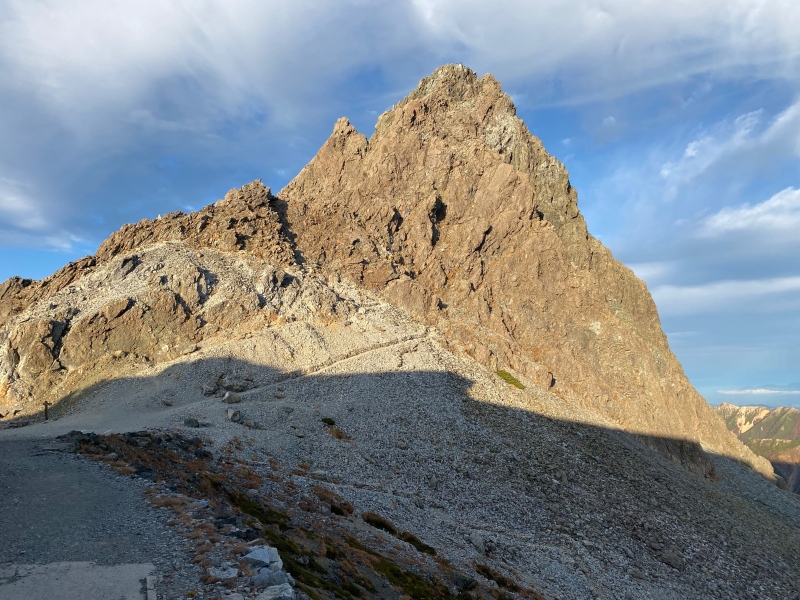
Day 4: Yarigatake sanso to Shinhotaka onsen We watched the sun rise on Yari from the hut, and then made our way out of the mountains. Our last day of the trip involved a 9 mile hike from the hut to the town of Shinhotaka onsen. Not much more to say about it, except that it was nice to be able to hike at a normal pace on an actual trail after a few days of very low, slow mileage.
All in all, this was an excellent few days in the mountains. While I wish that we had time for more, I’m grateful that we were able to do the route that we did in good weather and clear conditions. It is typical for the Japan Alps to start to get snow in early to mid-October, and we were fortunate that, despite all the rain earlier in the month, the first snow of the season fell the evening that we hiked out. 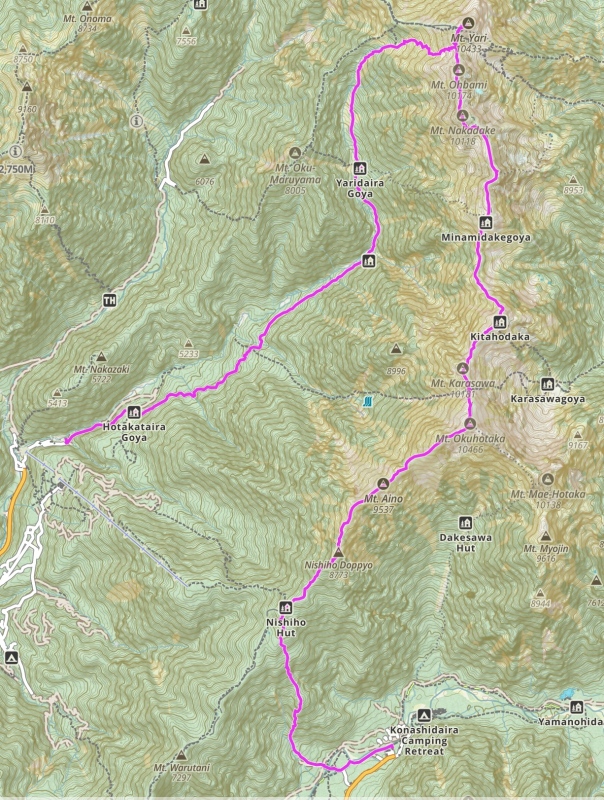
Rough stats: ~20 miles ~11,000’ of vert ~24 hours of hiking, but my watch battery died during the hike out A few thoughts/logistical considerations to wrap this up:
We had an amazing time playing in these mountains. The fun, solid and sustained scrambling put it up there with some of our favorite routes that we’ve done in Colorado, and staying in the huts put a unique stamp on the experience. If you ever have the good fortune to visit Japan, I would highly recommend checking out the Japan Alps for this traverse, to say nothing of the many other routes that we didn’t have a chance to hike ourselves. It is beautiful and inspiring, and everyone that we met along the way was extremely welcoming and excited to share their love of the peaks. Some useful resources: thejapanalps.com - helpful information about huts and different routes allthepeaks.com - great blog maintained by a German hiker and her Japanese partner. yamap.com - most popular hiking app for Japan routes, only available in Japanese Thumbnails for uploaded photos (click to open slideshow): ")
")
")
")
")
")
")
")
 Easier terrain after Daikiretto")
")
")
")
")
")
")
")
")
")
")
")
")
")
")
")
")
")
")
")
")
")
")
")
")
")
")
")
")
")
")
")
")
")
")
")
")
")
")
")
")
")
|
| Comments or Questions | ||||||||||||
|---|---|---|---|---|---|---|---|---|---|---|---|---|
|
Caution: The information contained in this report may not be accurate and should not be the only resource used in preparation for your climb. Failure to have the necessary experience, physical conditioning, supplies or equipment can result in injury or death. 14ers.com and the author(s) of this report provide no warranties, either express or implied, that the information provided is accurate or reliable. By using the information provided, you agree to indemnify and hold harmless 14ers.com and the report author(s) with respect to any claims and demands against them, including any attorney fees and expenses. Please read the 14ers.com Safety and Disclaimer pages for more information.
Please respect private property: 14ers.com supports the rights of private landowners to determine how and by whom their land will be used. In Colorado, it is your responsibility to determine if land is private and to obtain the appropriate permission before entering the property.