| Report Type | Full |
| Peak(s) |
Mt. Princeton - 14,200 feet |
| Date Posted | 09/03/2024 |
| Modified | 09/06/2024 |
| Date Climbed | 08/31/2024 |
| Author | owenalex72 |
| Princeton - Radio Towers |
|---|
|
Getting to the parking lot is fairly straightforward. The directions to both the lower parking lot by the YoungLife camp and the upper lot of the radio towers found elsewhere on this website worked very well. We got to the start of the 4wd road at about 5AM and the towers at about 5:30. Us and the 3 cars behind us found the last spots. We took an F-150 with the offroad package and some Falkland Wild Peak tires, but we saw a few Subaru Outbacks up there too. We were able to park at the radio towers (about 15 spots), and just as others said, there are a few more spots beyond the towers (I'd say about 12) along switchbacks on the rest of the road. The road is one lane so if you go up, do so early. If you decide to go up at 10 AM some people may be coming down and someone will have to back either up and down until you reach a spot where one can pass (by my calculation there are only two spots you can do this, one at the second switchback on the 4wd road, and one just below that requires someone to get up on the rock wall a bit [this is what we did when someone was coming up and we were going down]). 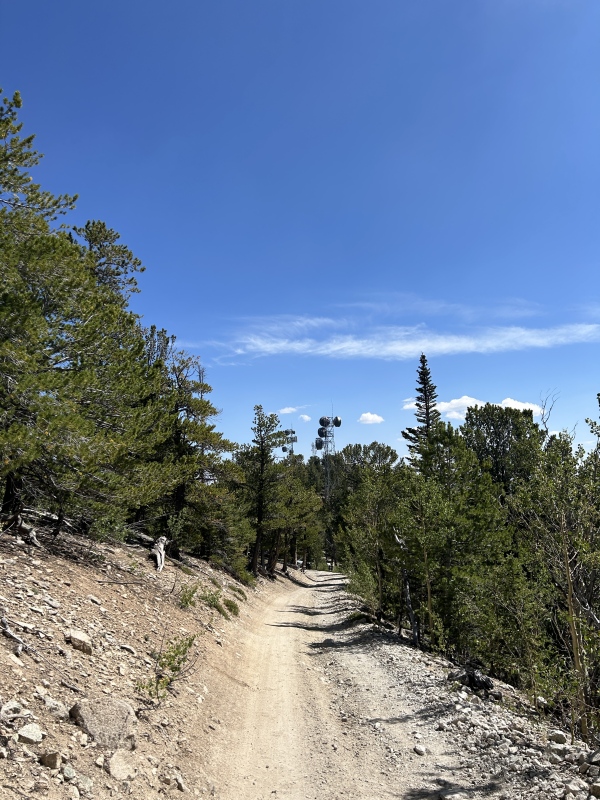
The road from the Radio Towers to the beginning of the trailhead to the above treeline is pretty simple and straightforward. For 90% of it you are on the road. Once you reach the actual beginning of the trailhead there's about a 3/4 mile of what I would consider 'normal' hiking trail before you get to the rocks. Once you're on the rocks you had better be prepared to take it slow and go carefully. If you're unfamiliar with this style of climbing you definitely need to stay aware of where you are placing your foot; you can't just trudge ahead on autopilot. If you misplace your foot you could get it stuck in a small crevasse or fall off the mountain entirely. You will need to have 3-4 points of contact in some places on your way to the set of switch backs leading up to the ridge. The switchbacks themselves are dirt, but between tundra-line and the switchbacks it will be rocks. 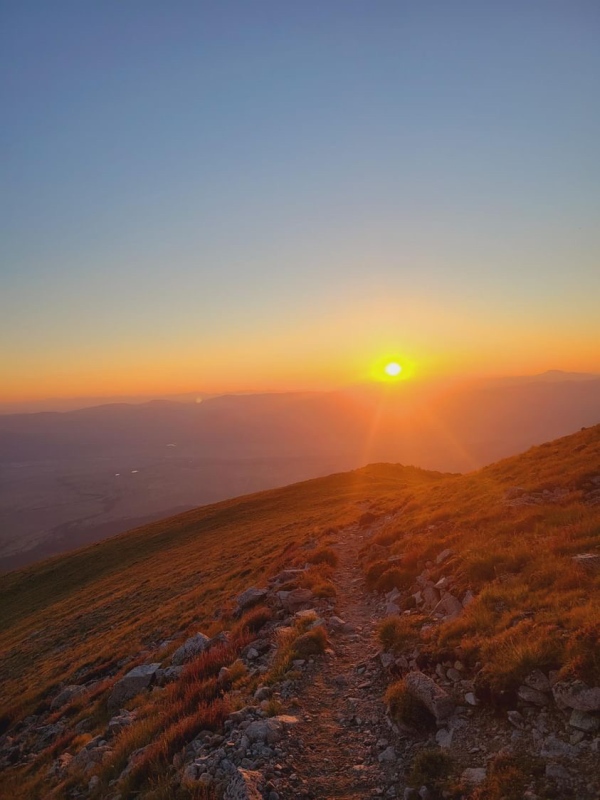
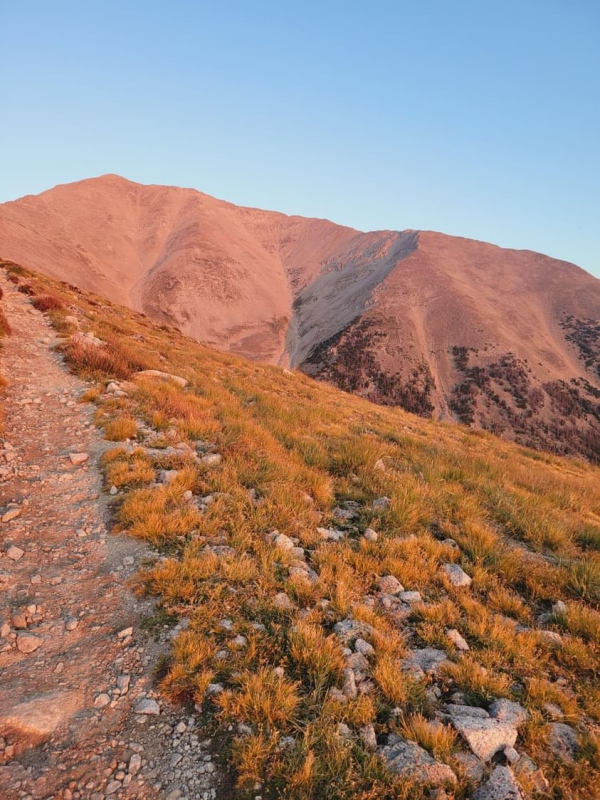
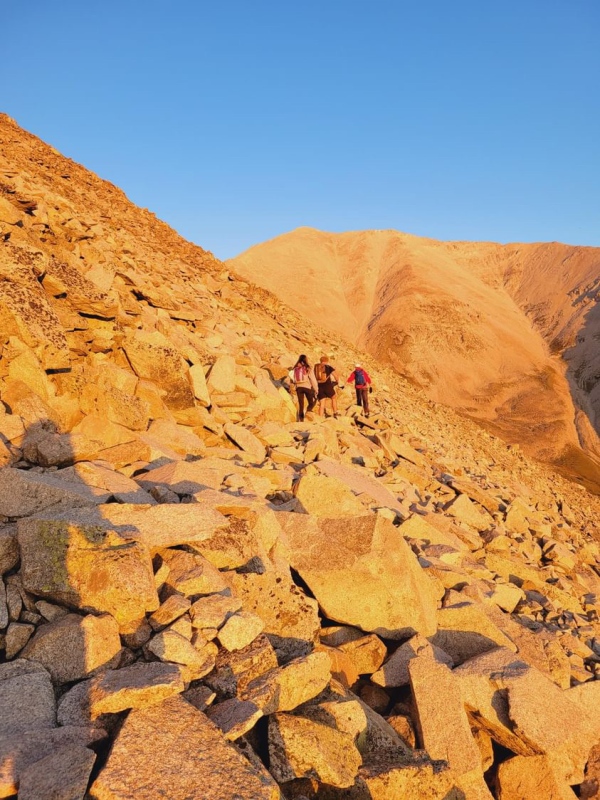
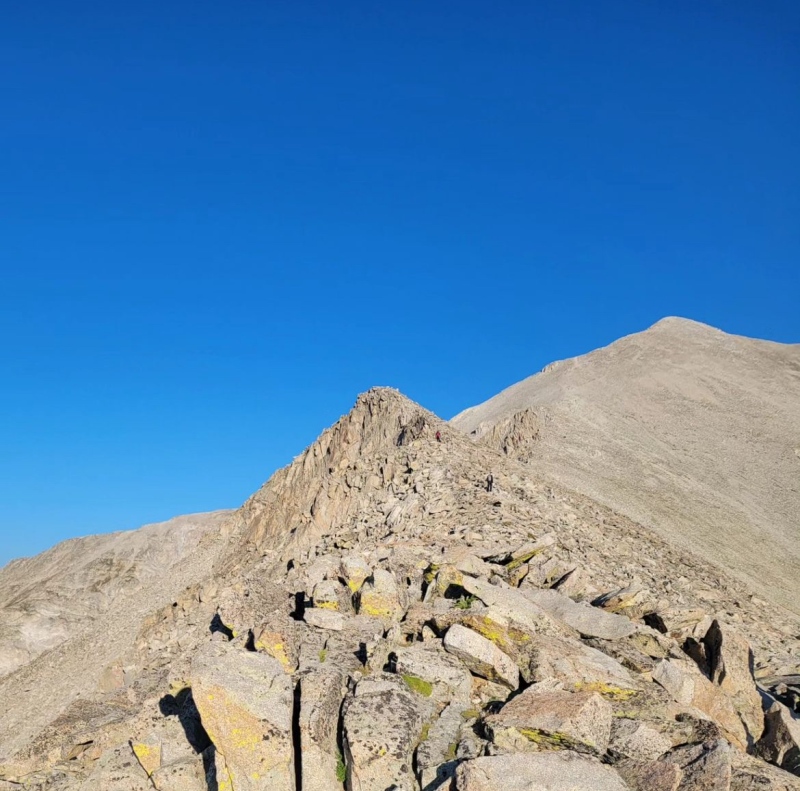
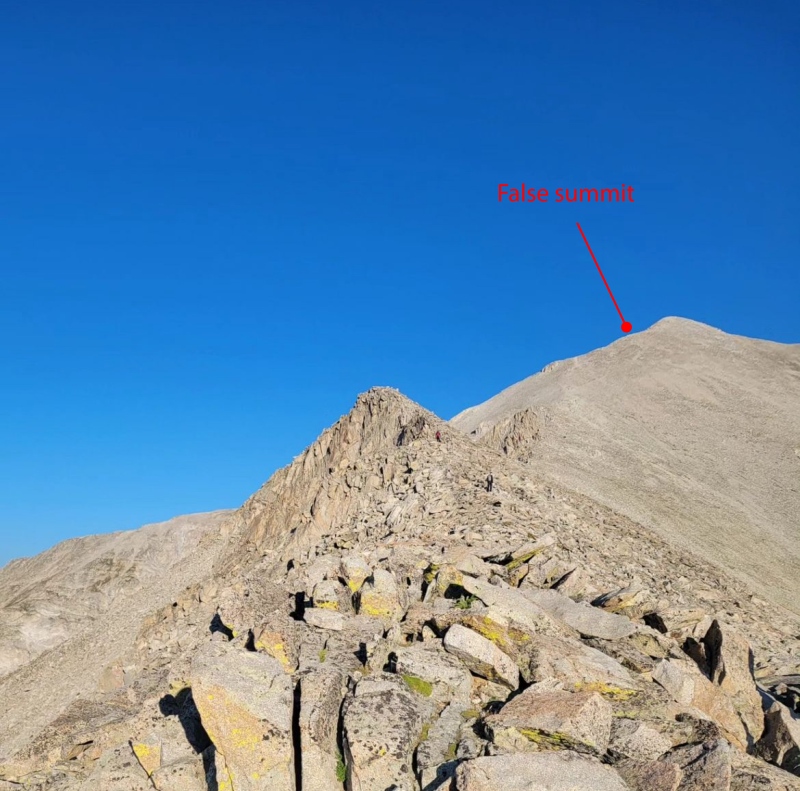
Once you've reached the ridgeline, there's an area where many people take a break before the final ascent. On my garmin, it read that at the ridge I still had 1,500 feet of elevation to go in under a mile before I reached the peak. Unsure if that's accurate or not (my garmin is several years old) but it sure felt right. (Make sure you've trained on the stairmaster before doing this hike is my point, lol). As you begin along the ridgeline to reach the peak, it will be all rocks again except for in a few areas. Where the trail is well defined it will be dirt, but it is very slick and little rocks and scree are scattered all over the dirt so it's very slick to get up. It is VERY steep from where you come up to the ridge to the peak. I strongly recommend a walking stick here or being ready to use 4 points of contact to pull yourself up if you decide to walk these dirt spots. Otherwise, you can stay rock crawling and continue using 3-4 points of contact in some places, but you will be somewhat off-trail. Once you're on the ridge it is pretty clear the route to the top. Just below the peak, there is a small 'false summit' about 200 ft. down from the actual summit where there is a remembrance placard to someone who passed after being struck by lightning. 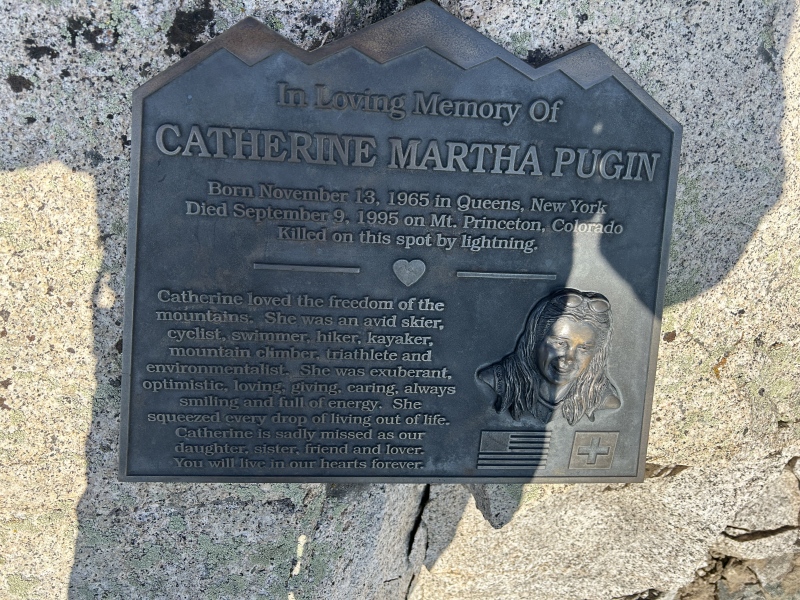
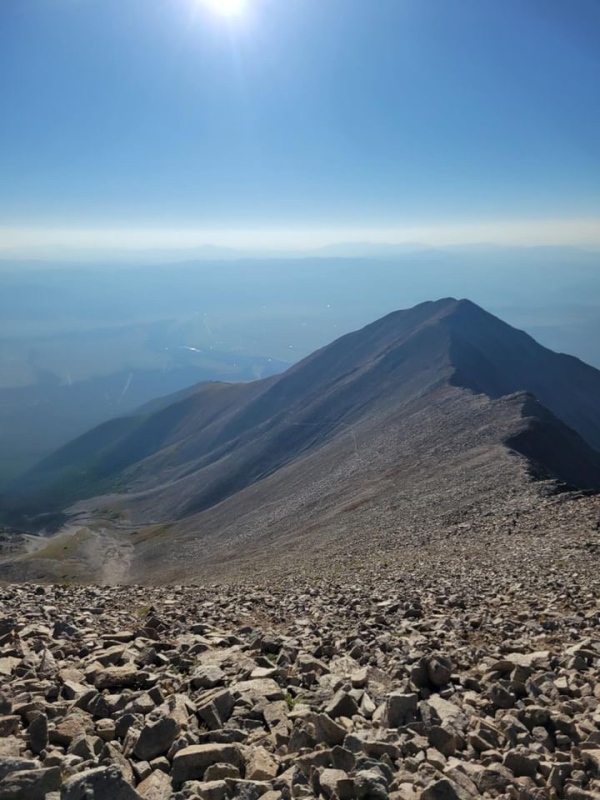
The views at the top are wonderful and you can see Antero in full view. 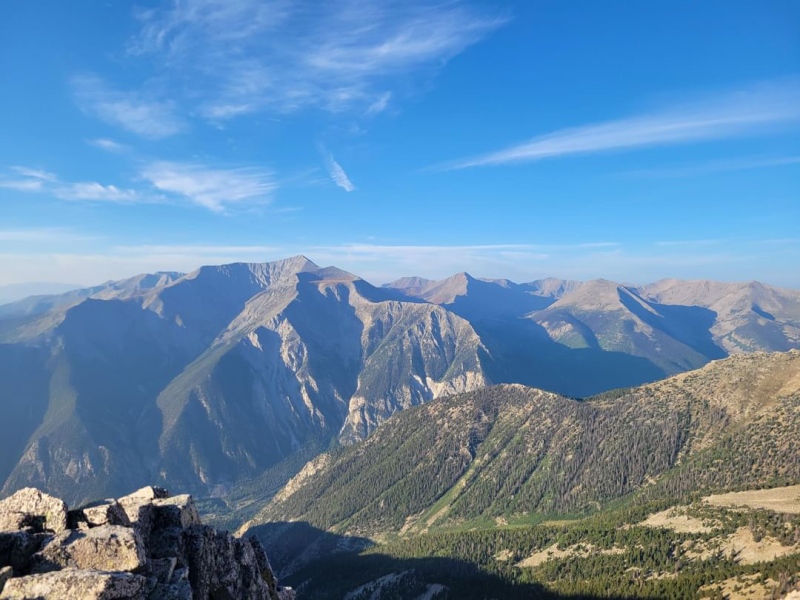
On the way back down you've got to be careful. If you thought getting up the scree and dirt spots along the ridge was tough, going down will be worse. In my group, 3 people slipped and fell (none of us had hiking sticks, and of the three who fell one person wore Solomon boots, one wore Merrill's, and one wore some sort of Adidas trail-running shoe). You will have to sit down in some spots to feel safe. Once you're back down at the switchbacks right below the ridge it gets much easier. Still be sure to watch your footing on the rocks as at this point you will be tired. Once you're back on the road you can ease off the gas a little. One my way down there were several jeeps going down from the Chalet that's past the trailhead, so you may have to share the road with some cars. 
Overall this hike was great. Views are good and it is pretty short. It took me about 3.5 hours to go the full 6.9 miles. However, I will say that if you are looking for a 'pretty hike' this probably isn't it. While the views were great, there's not much where you hike along vegetation. This is also not the easiest 14er. There are many, many that are harder, I will say this is the hardest class 2 trail I've done for a 14er, but it's not a class 3. Below I've include my trip map with some helpful locations along with some other photos that may be found helpful. 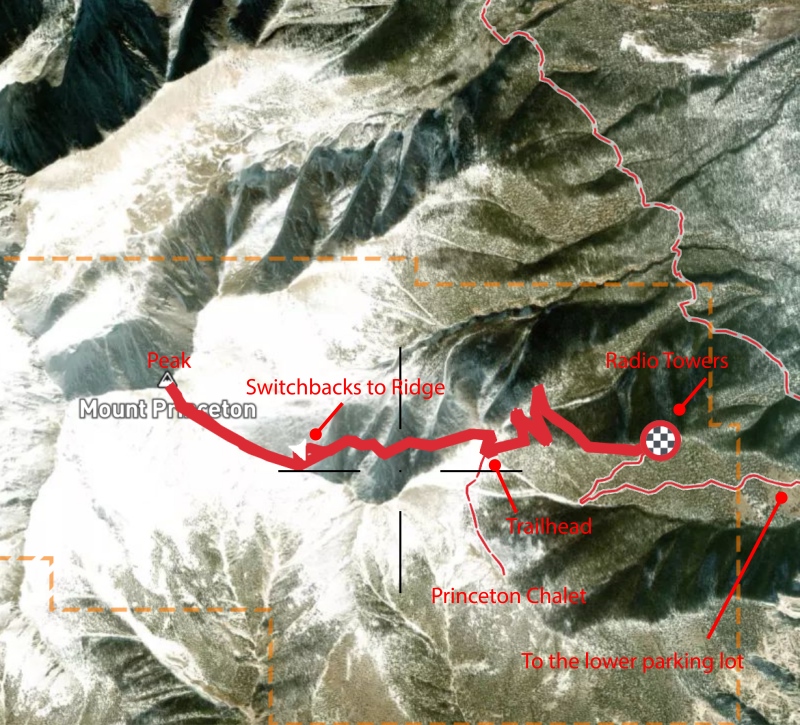

Thumbnails for uploaded photos (click to open slideshow): ")
")
")
")
")
")
")
")
")
")
")
")
|
| Comments or Questions | |||
|---|---|---|---|
|
Caution: The information contained in this report may not be accurate and should not be the only resource used in preparation for your climb. Failure to have the necessary experience, physical conditioning, supplies or equipment can result in injury or death. 14ers.com and the author(s) of this report provide no warranties, either express or implied, that the information provided is accurate or reliable. By using the information provided, you agree to indemnify and hold harmless 14ers.com and the report author(s) with respect to any claims and demands against them, including any attorney fees and expenses. Please read the 14ers.com Safety and Disclaimer pages for more information.
Please respect private property: 14ers.com supports the rights of private landowners to determine how and by whom their land will be used. In Colorado, it is your responsibility to determine if land is private and to obtain the appropriate permission before entering the property.


