| Report Type | Full |
| Peak(s) |
Spearhead, 12,575' |
| Date Posted | 09/01/2023 |
| Modified | 09/02/2023 |
| Date Climbed | 08/31/2023 |
| Author | Ericsheffey |
| Unexpected Spice on Spearhead |
|---|
|
"Unexpected Spice on Spearhead" 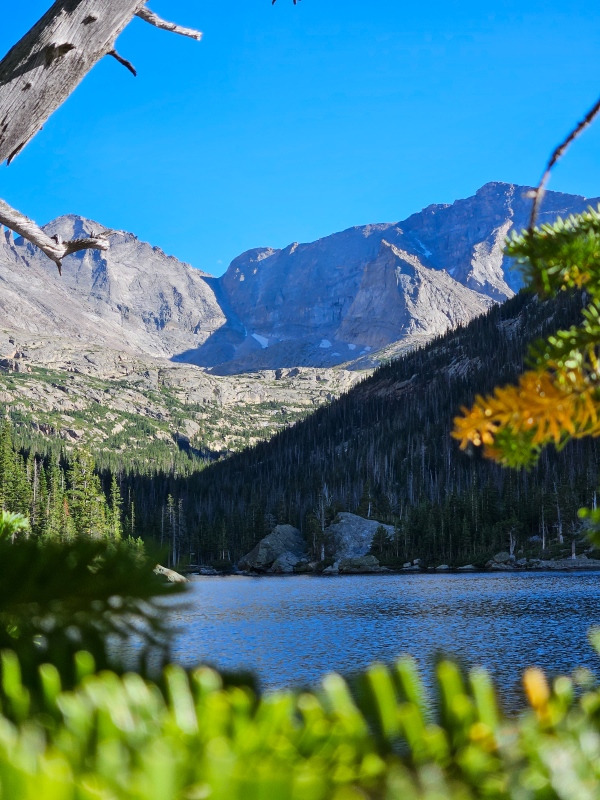
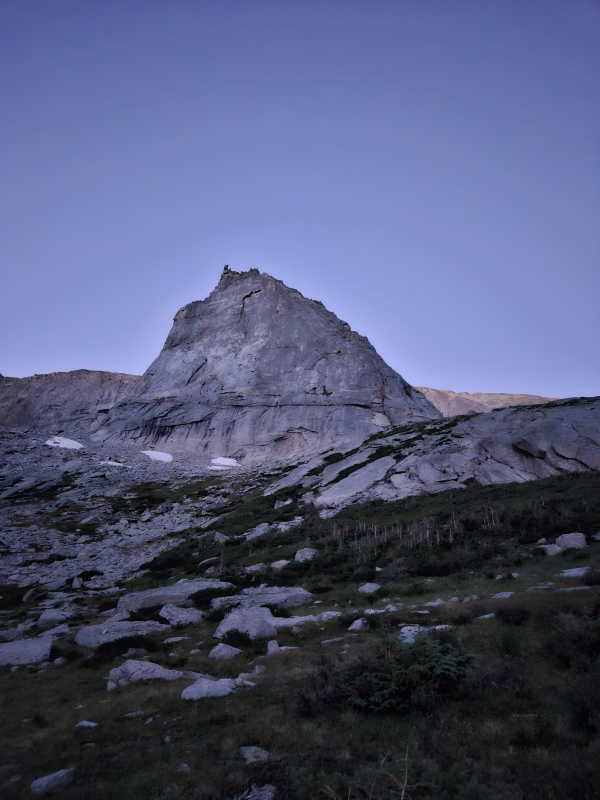
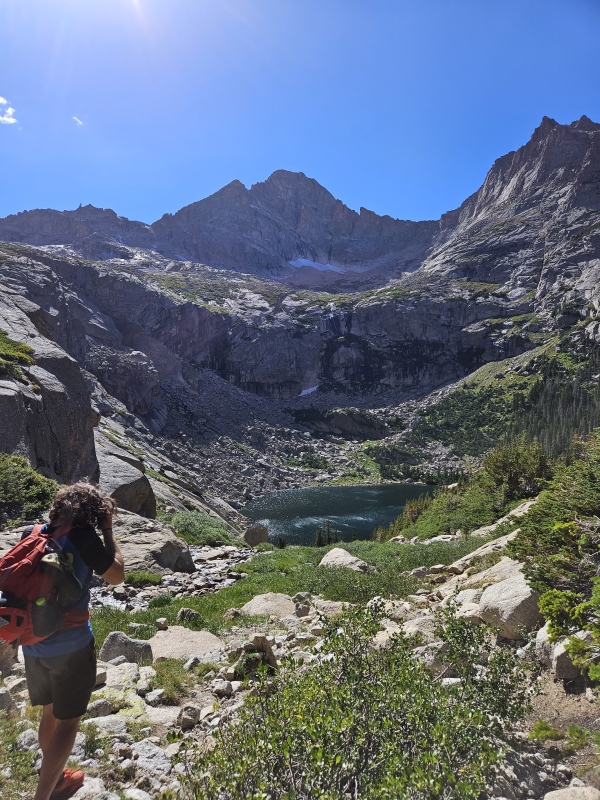
Choosing the Climb As I've been trying to push myself into becoming a more well-rounded alpine climber over the past few years, working on developing various skillsets needed to pursue more technical peaks, I've slowly been building a tic list of objectives to put those skills to the test. As documented in a few of my other TRs, I've been able to tackle some fun alpine adventures, such as Sharkstooth NE Ridge, Grand Teton via the OS and via the Upper Exum, and Mt. Rainier via the Emmons-Winthrop. Trad climbing, ice climbing, and glacier travel skills are all things I've been working on over the past few years, and luck would have it that my primary ice climbing partner and mentor, Mike, told me about the technical routes up Spearhead just a few months ago. As he has let me follow him up some incredible ice lines throughout Colorado, he asked if I would be down to lead him up the North Ridge of Spearhead in return. I happily obliged and we set aside some dates in late August as potential days that we would go climb it, planning for a two day period that would involve a bivy at the base of the climb the night before. The Approach The approach for this climb was one I was very familiar with at this point. Having ice climbed at Jewel Lake and Black Lake before, as well as having done several day hikes through the Gorge simply to visit the various lakes, I knew what most of the approach would entail, although admittedly, most of that has been during the winter when the Gorge is filled with snow and the lakes are frozen, making direct travel a little easier. I mapped out the approach on Gaia, showing that the approach would be almost 6 miles with a little more than 2,600' of vertical gain to the base of Spearhead. Not an easy hike with a rope and a rack, but manageable. 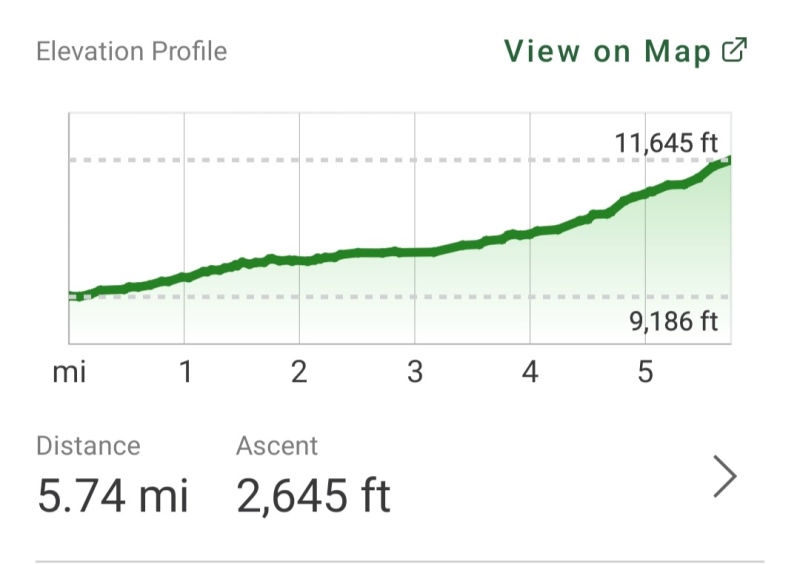
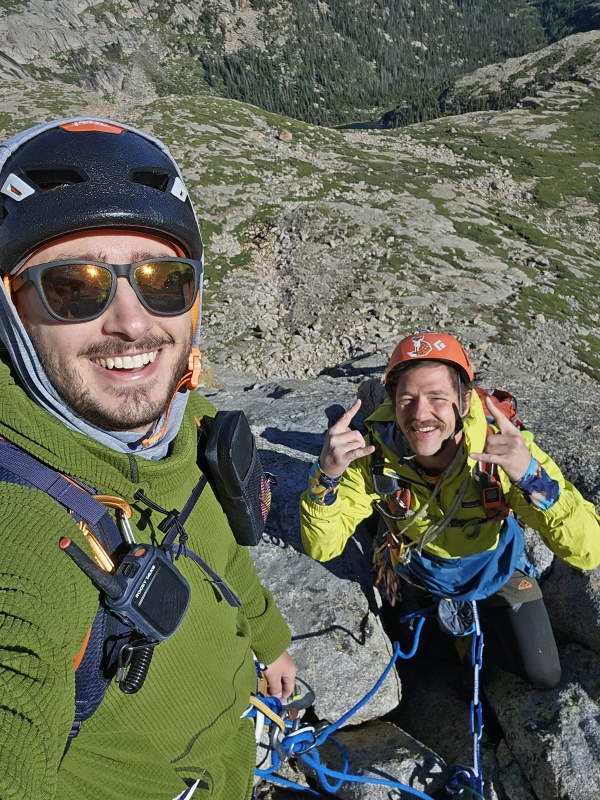
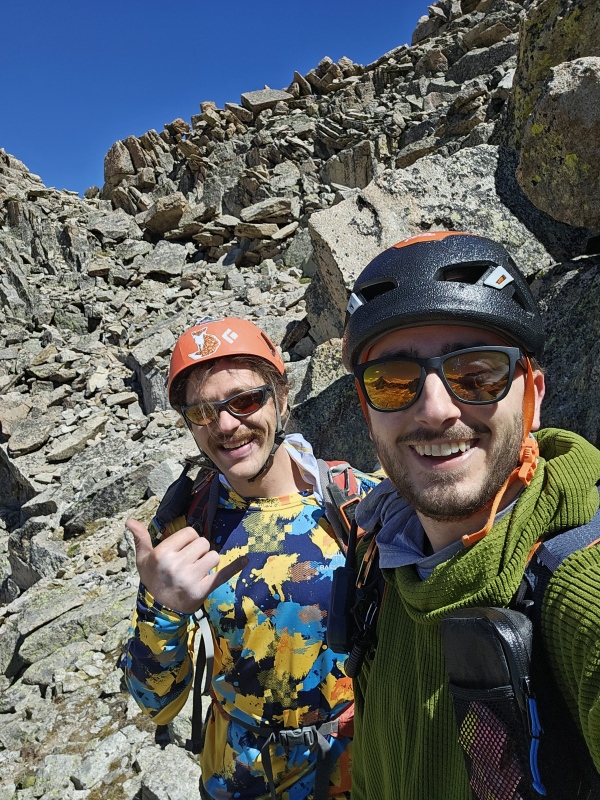
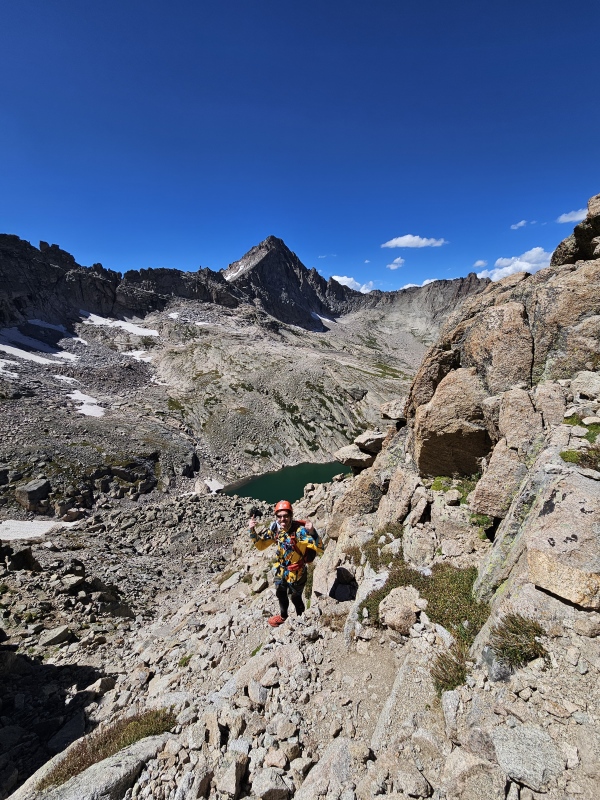
We arrived earlier than expected at Glacier Gorge Trailhead, around 2:45am. We took about 15 minutes dividing up gear and getting ourselves ready, and took off right at 3:00am feeling strong. We pushed without stopping until we reached Black Lake, just under 5 miles into the Gorge, reaching the lake in 2 hours and 12 minutes. Feeling good about our pace, and recognizing that this would be an ideal place to stock up on water, I got out my 2L hydrapak with water filter and refilled our bottles. Just prior to reaching the lake, we had seen a Pine Marten running around on some boulders, as well as a shooting star that illuminated the sky just to the west of Chiefs Head. The stoke was high, and the excitement was growing to make the final push to the base and get started on the technical portion of the day. As you leave Black Lake and start heading towards the base of Spearhead, the trail becomes less obvious, with a few sections of willows and boulder hopping. We lost the trail for a short period (as can be seen in the GPX I uploaded), but we didn't mind as we essentially began walking up some slabby rock headed straight to the base of the climb. We arrived at the base of the climb shortly after 6:30am and started gearing up right away. 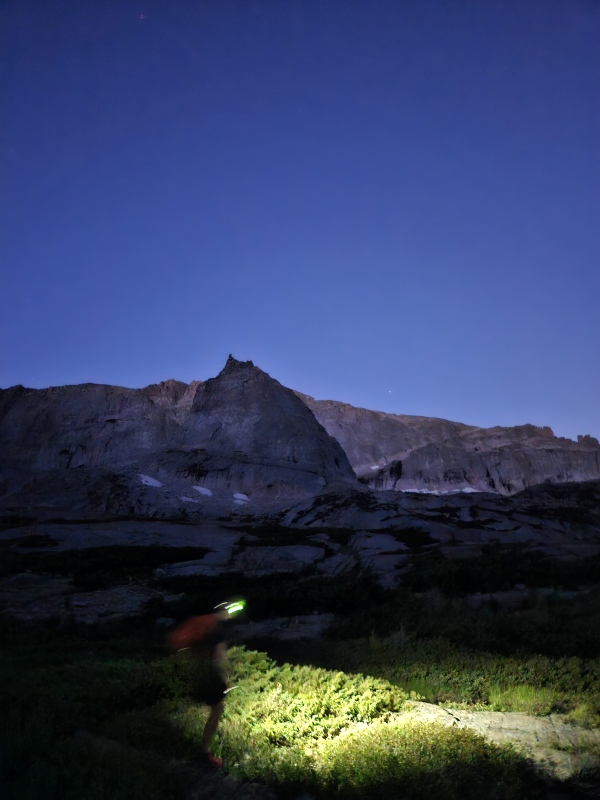

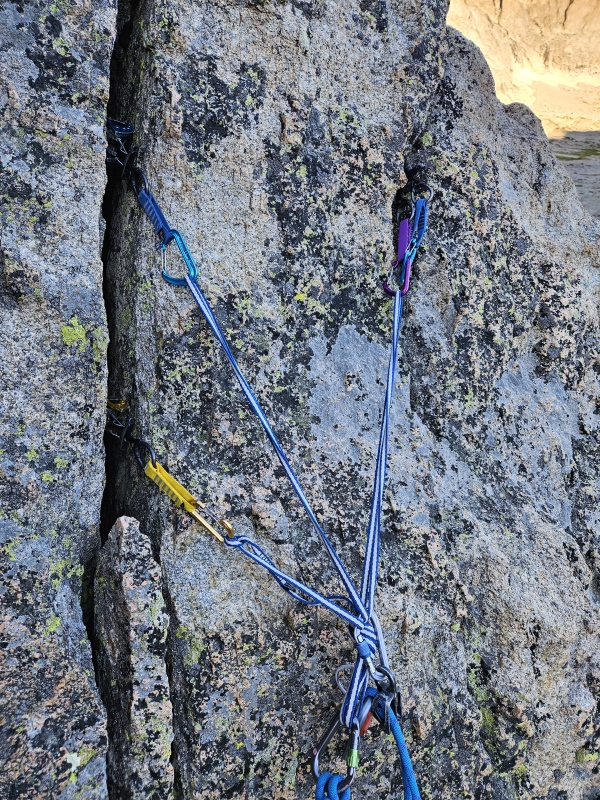
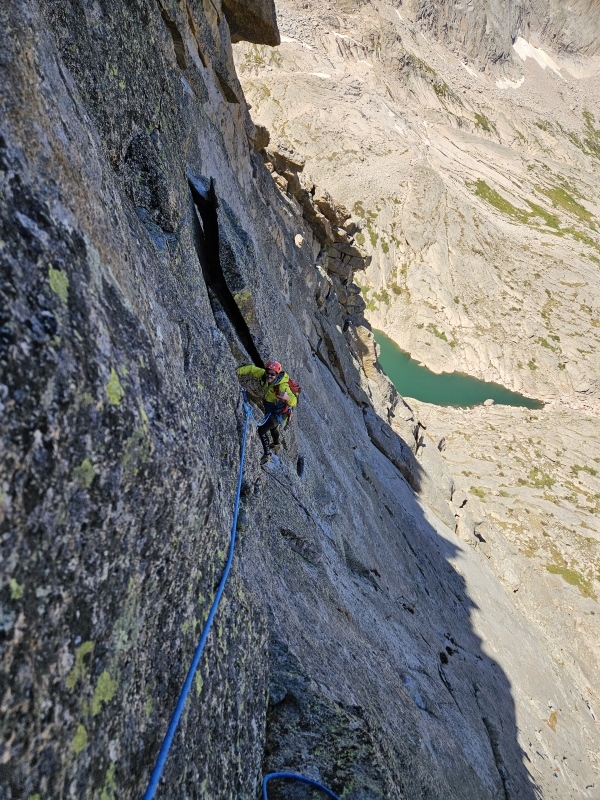
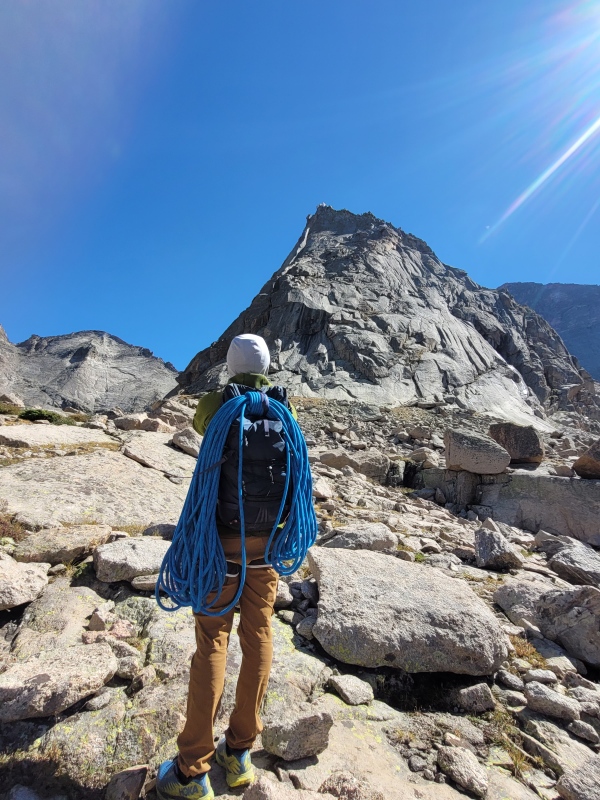
The Climb We had decided to climb the 5.6 route of the North Ridge, despite the many enticing variations that exist along the route, such as some fun looking pitches that climb at 5.8-5.9. For the most part we stayed on route, however things got a little funky towards the top, leading us to climb a pitch rated 5.7R as we found out after the climb. Nonetheless, I was excited to get the day started and agreed to climb P1. We tied into the rope, double checked that we had all the gear we would need, and I set off up the "run out slabs" of the first pitch. I went up about 10 meters before beginning to traverse across the slabs to access the 5.5 chimney on the left side. By the time I reached the base of the chimney, I had only placed two pieces of gear, climbing about 30 meters so far. I climbed up the chimney placing two cams in the chimney and one more just above the chimney before gaining a small ledge with a east facing crack where I built an anchor and brought up David. Total pitch length was ~55 meters, and although I thought about continuing further up as we still had more rope length to work with, the rope drag was already getting bad, so I decided it wasn't worth it. I built a 4 piece anchor at this ledge, pictured below. 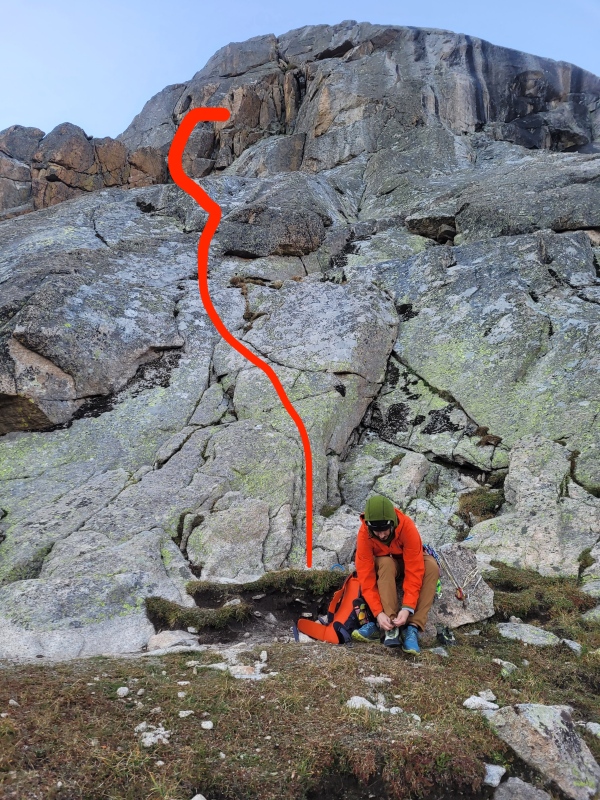
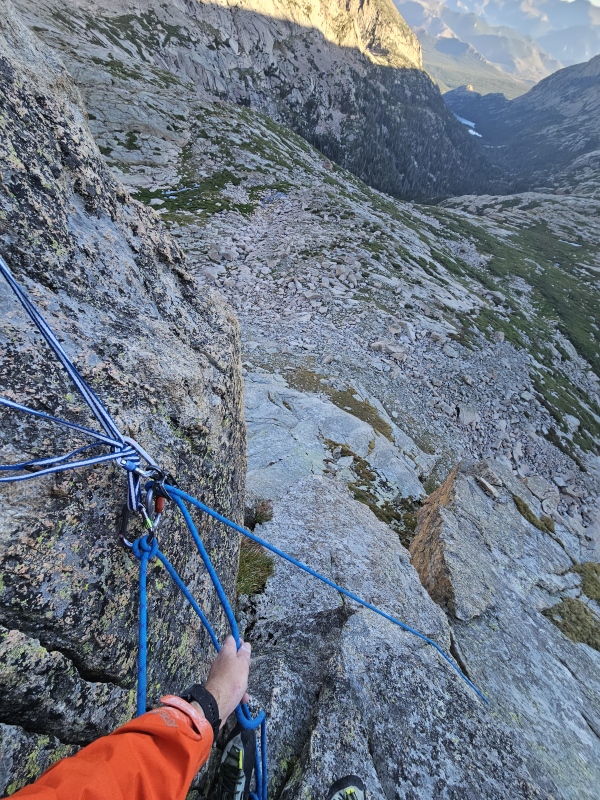
David soon joined me on the ledge and we quickly swapped gear so that he could take off on P2. This transition took 5-10 minutes, and then David started making quick work of the two obvious chimney systems above, ending his pitch after 60+ meters, just below the central slabs of the route. Here David build a 4 piece anchor with two nuts and two cams, equalized with a cordelette, and then placed me on belay to bring me up. 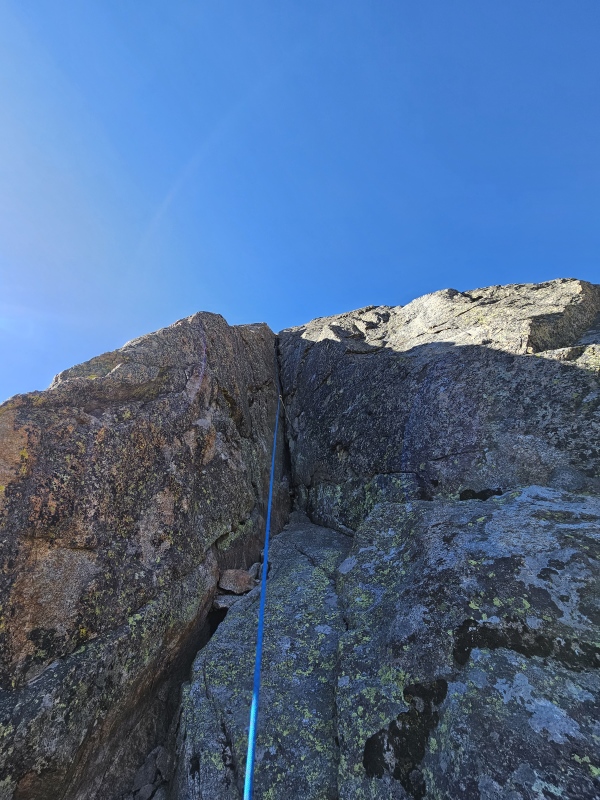
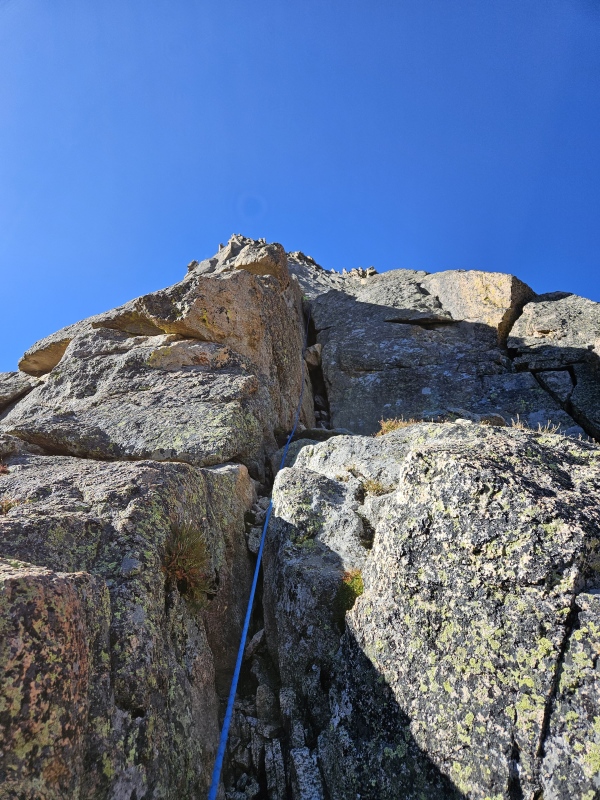
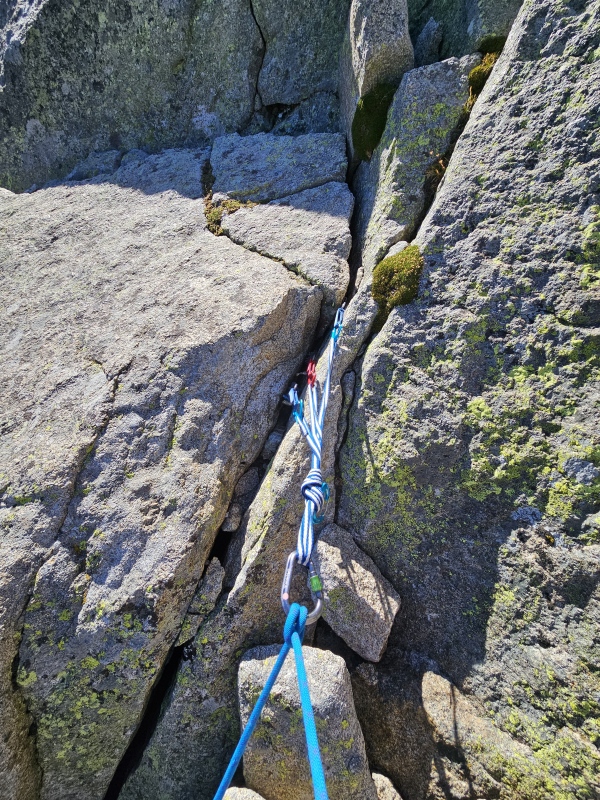
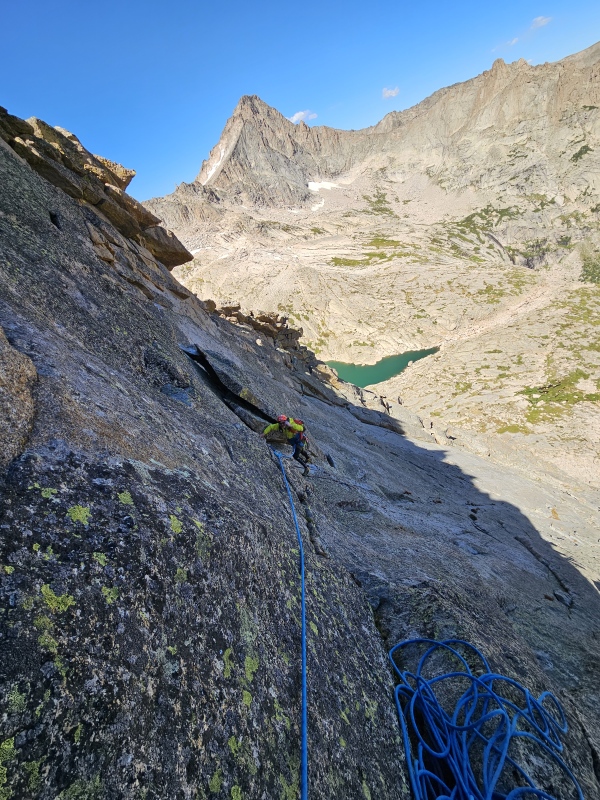
We fueled up with some snacks, exchanged gear and discussed beta, and I soon took off on P3. This pitch consisted of some easy 4th class scrambling to start, followed by some more low angle slab climbing with plenty of finger to hand sized crack systems to follow. At the top of the pitch I gained a short chimney pulling myself around a small chockstone, and built an anchor just above the chimney. This pitch was also 60+ meters, and I believe I placed 4 or 5 pieces of pro on this pitch, all medium sized cams. I built an anchor with three cams in a small crack above the short chimney, equalized with a dyneema runner, and put David on belay. 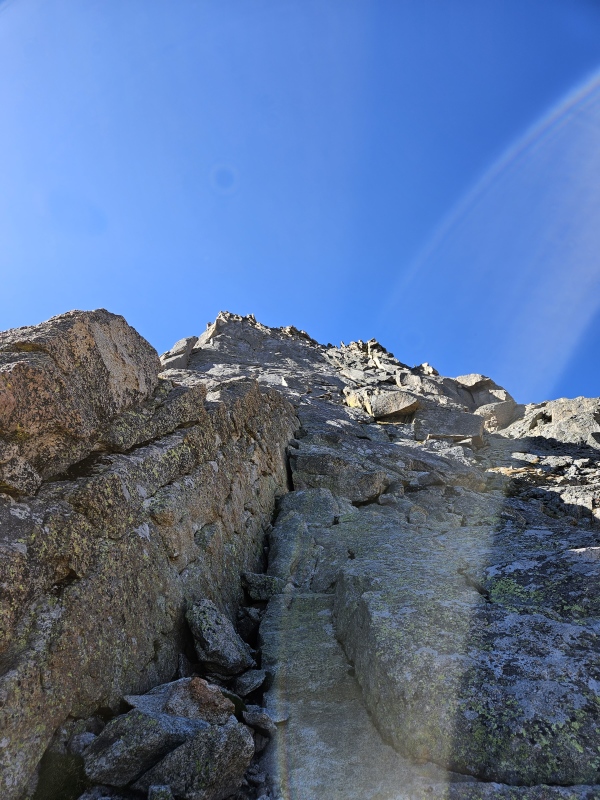
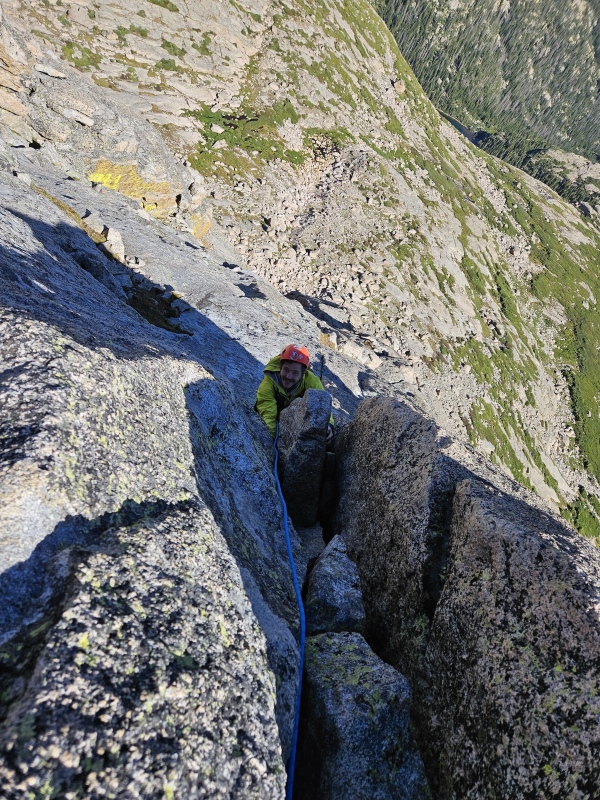
Yet again we fueled up on a few snacks, swapped gear, and began to discuss the beta a little more than before. Up until this point, it had felt fairly obvious where the route goes, or could go, to remain 5.6. Although the series of crack systems above us seemed to continue that trend for a fun and easy P4, we knew the route would cut left at some point, otherwise we would be faced with only 5.7-5.9 options on P5. We decided that David would go up the obvious crack systems until he began to approach the same elevation as the top of the Barb Flake, and see if he found any obvious options for cutting left. He went up some cruisey hand and finger cracks to continue up the central slabs and neither of us thought it was clear where he may want to start cutting left. He continued straight up and built a three piece anchor after about 60 meters. I was placed on belay and began climbing the crack systems, of which were some of the finest climbing of the route, perfect for hand jams while smearing feet on the adjacent slab. 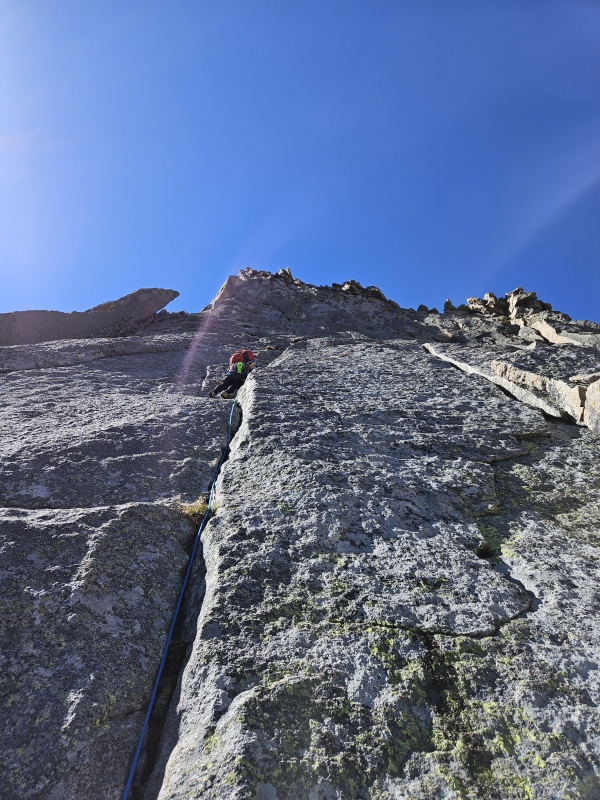
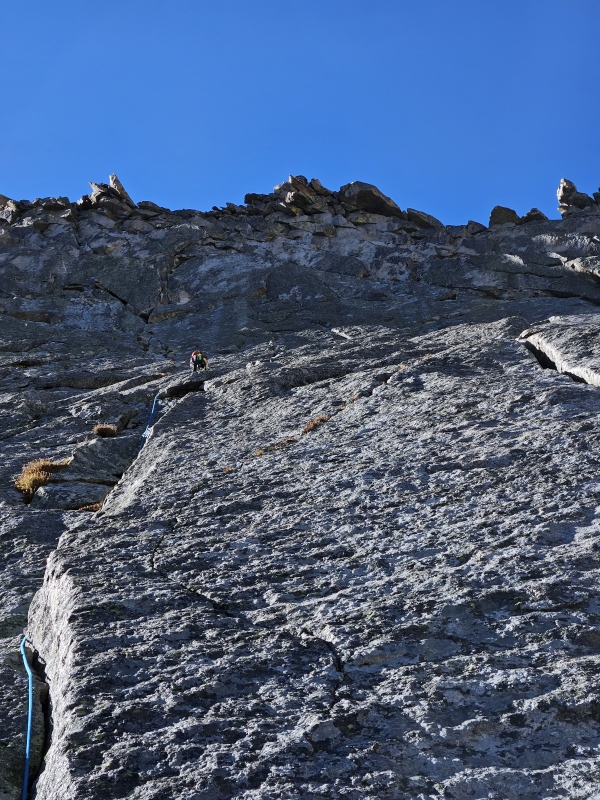

I reached David at the anchor at the top of P4, began to collect gear, and we started to discuss our remaining route choices in more depth. Having referenced more beta afterwards compared to what we saw, it appears we were already past the 5.6 choices that would have trended to the left and kept us on the 5.6 route to the top. At the time, we still were unsure though, and it appeared a crack system leading to a large left leaning crack near some large detatched blocks would offer us a path to continue upwards. We shared some fist bumps and I took off towards the line I chose from below. 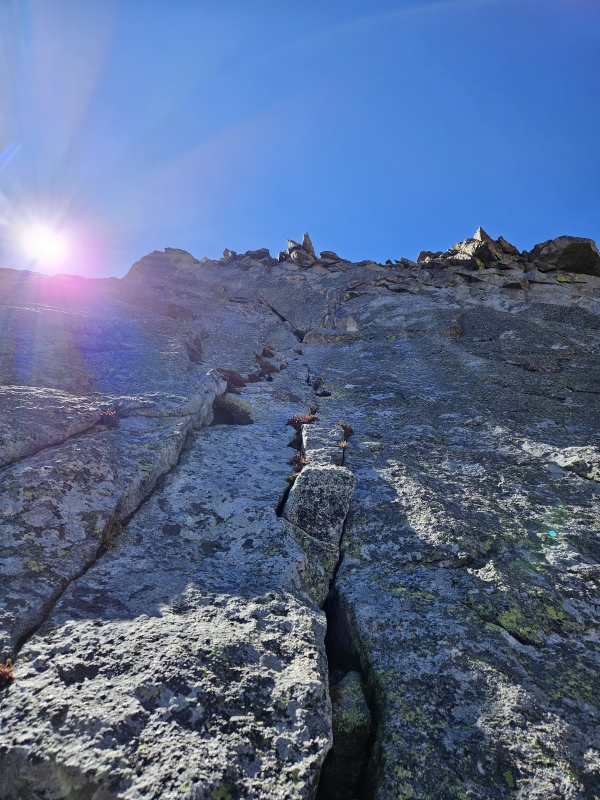
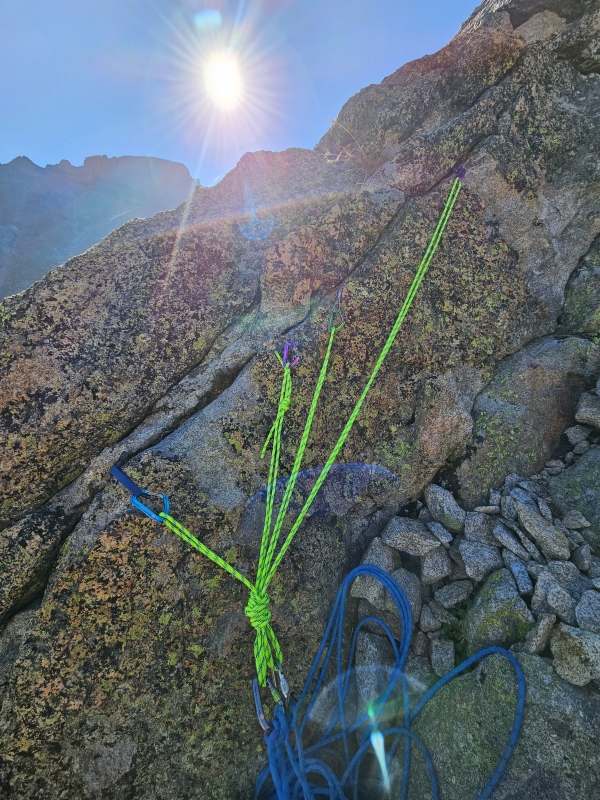
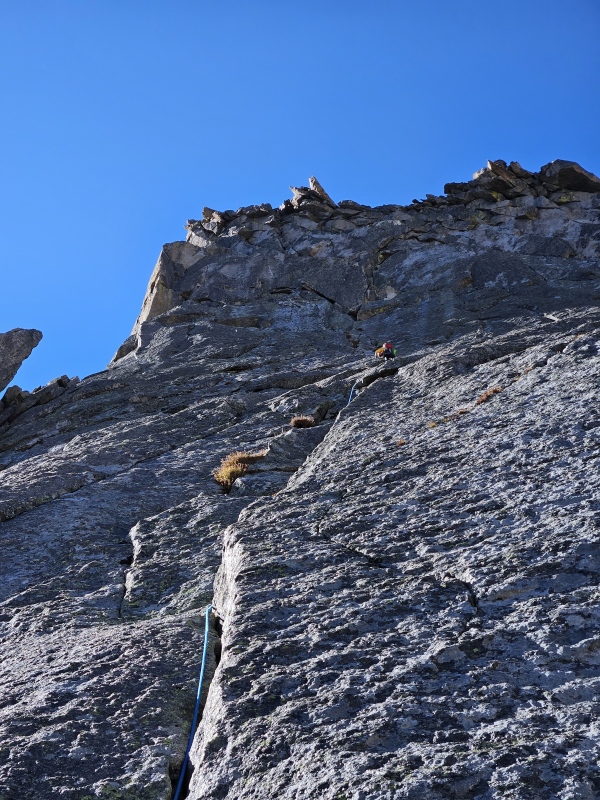
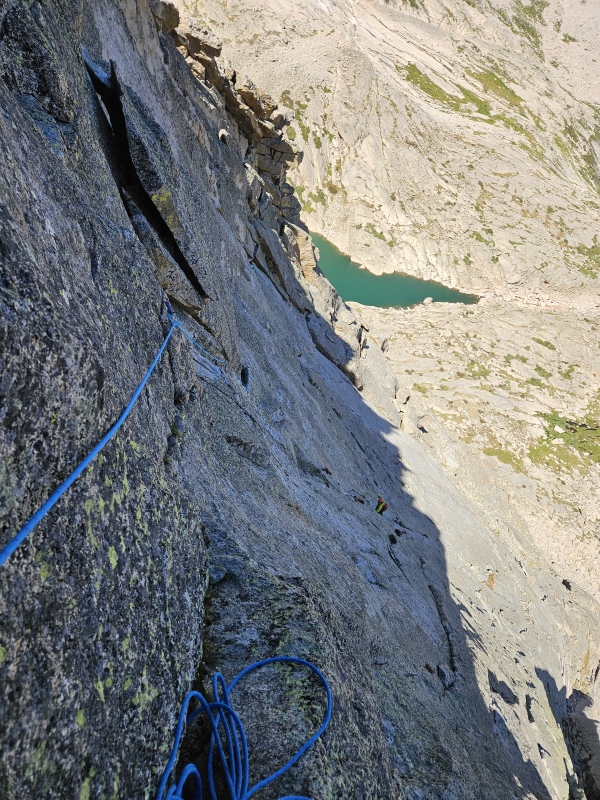
I continued up after the easy crack system above the belay, placing small cams along the way, and soon came across a large detached block. This is when I realized where we were. I had seen beta about an alternate P5 variation that navigates around a detached block known as the "piano death block" due to its size and relative lack of permanence on the mountain. I couldn't remember the grades of the variations around the block or the other detached blocks above it. I decided to stay left of the death block and follow a line that would lead to a thin finger crack higher up. Following the line to the finger crack became pretty heady real quick. Gear was slim to none as I traversed to the left, with the moves certainly feeling tougher than 5.6. I said a few expletives, told David that I'd have to pull some airy moves without proper pro, and slowly but surely worked through it. As I arrived at the finger crack, I recognized that it not only looked pretty difficult, but also that I had already used all my small cams. I recognized another small ledge about 6 feet to the left, continued traversing, and finally found a spot to rest. As I was thin on gear, I found another small crack and built an anchor so that David and I could regroup and make sure that we had the gear we would need to lead the rest of the route. I built a 4 piece anchor with one cam and three nuts, one nut of which was upward facing to hopefully provide some some additional protection for the next belay. P5 ended up being only about 35 meters for us. Looking back at the beta, I climbed a 5.7R alternative to the standard P5, as seen in the photo below from climbinglife.com, an excellent source of beta for many RMNP climbs. 
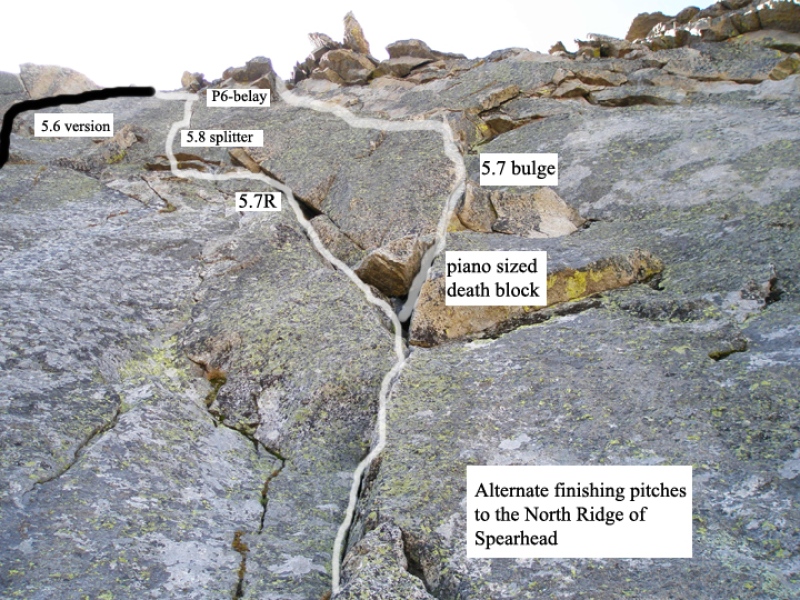

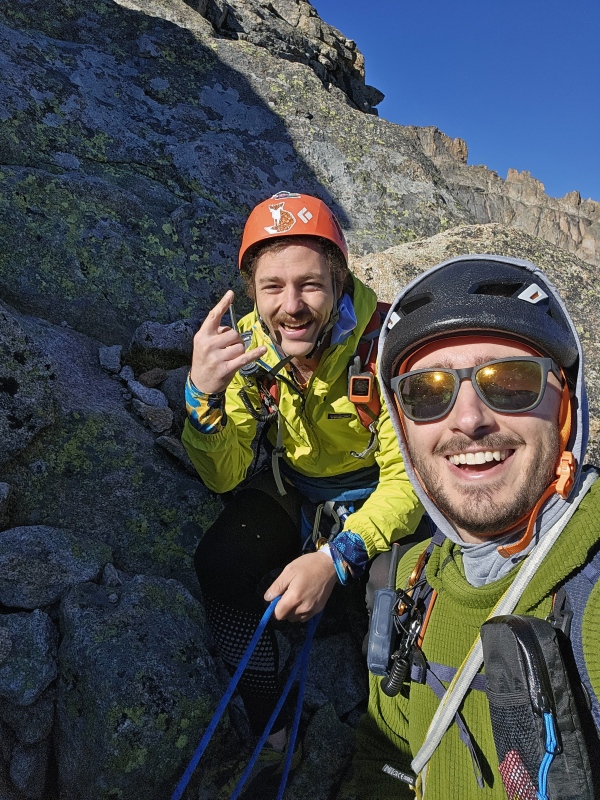
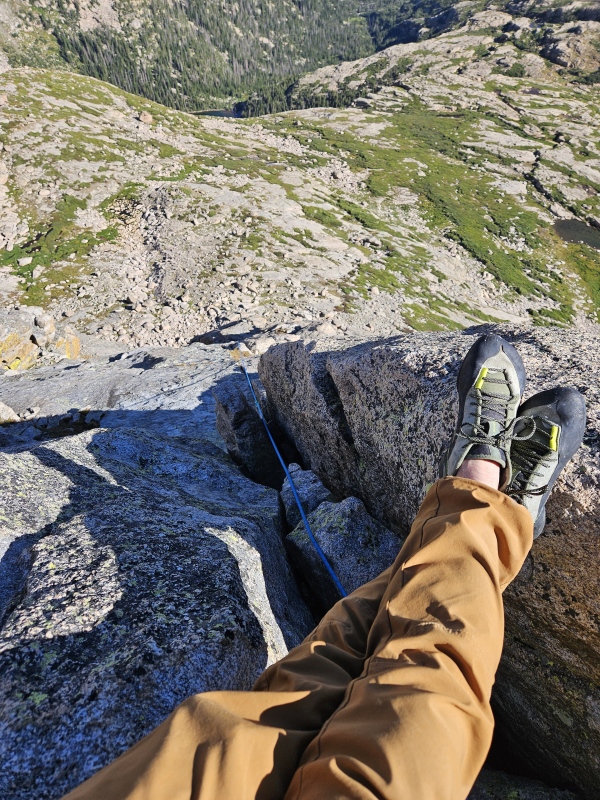
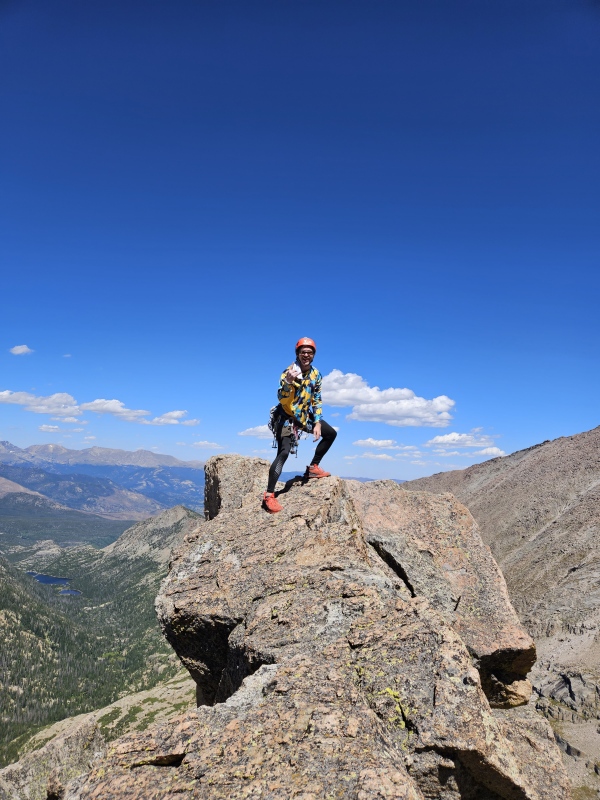
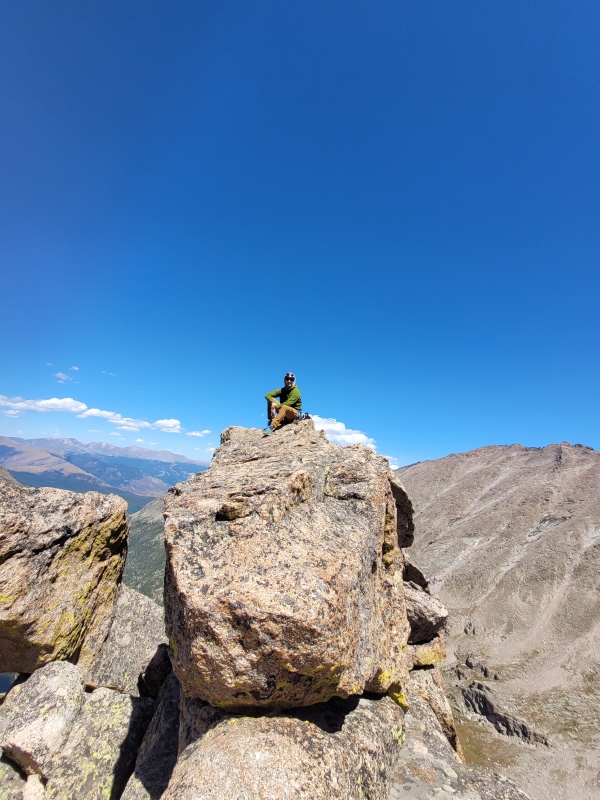
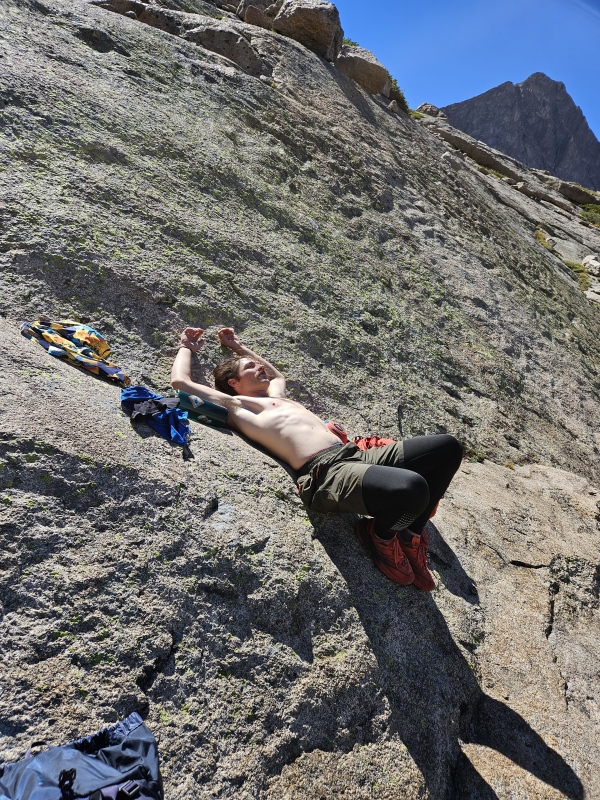
David arrived at the anchor, we quickly swapped gear, and we began formulating a plan for our final pitch, P6. He considered going back to the splitter crack that I had skipped over, but then decided to go straight up from where we were for an obvious chimney that appeared to allow us to finally pop out on top of the mountain. As seen in the picture from climbinglife.com above, we exited where the line labed "5.7 bulge" exits, in an obvious chimney above this area of many variations that stem from the piano death block. He made quick work of the pitch, built a three piece anchor above, and began to bring me up. I topped out and he kept me on belay as I climbed some third and fourth class boulders above and to the right of him. I brought him up to me on a quick terrain belay. We decided to unrope for the remainder of the scramble to the summit. We ditched our rope and packs, scrambled up to the summit and took turns taking a summit photo, and then returned to our packs for a well deserved 20 minute break as we ate some food and packed up our gear. 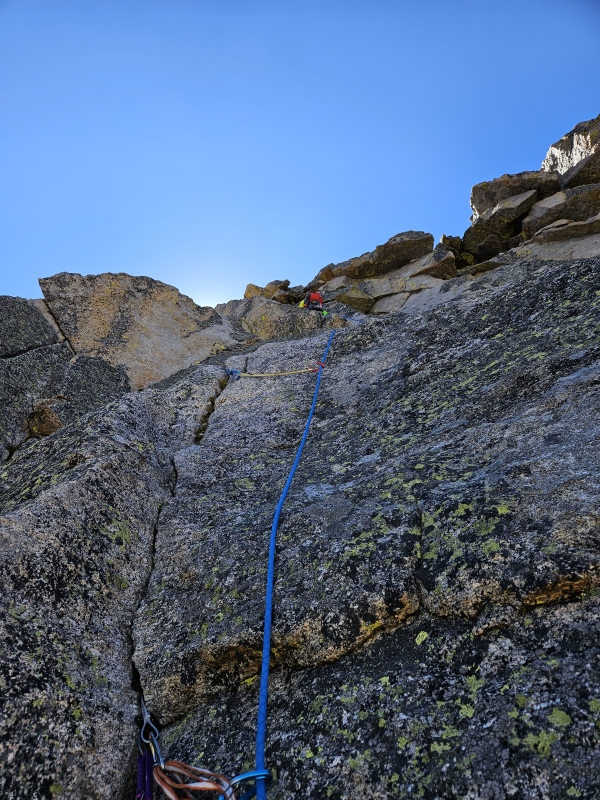
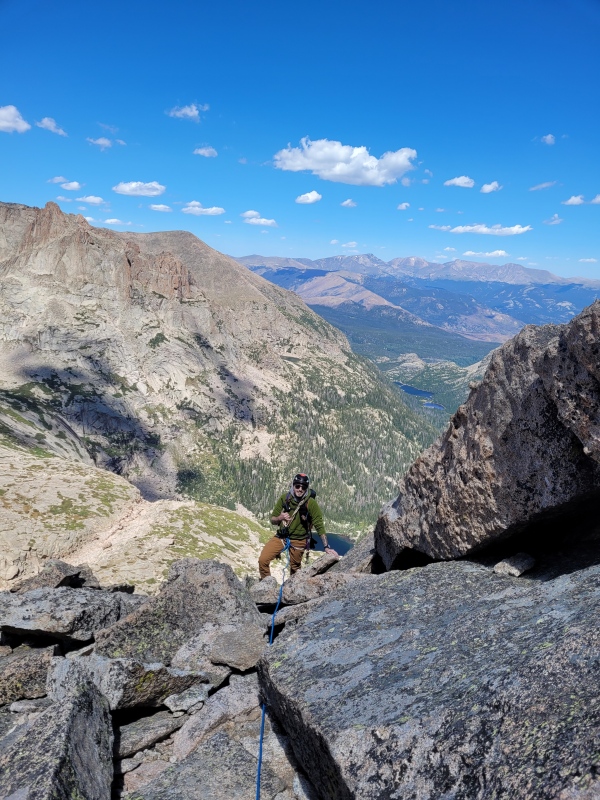
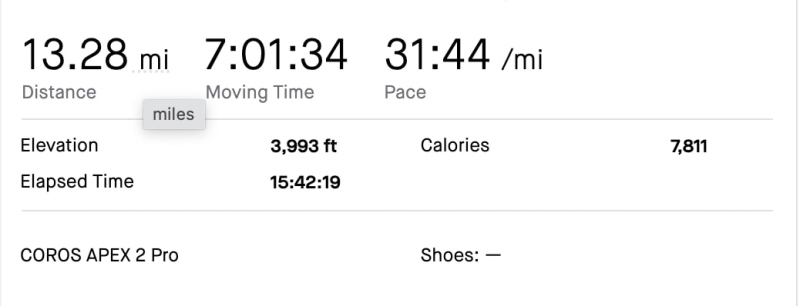
The Descent Although we had finished the technical climbing of the day, helmets definitely had to stay on as we made our way off the mountain. The descent down the west face is the standard descent, but very loose with class three and class four downclimbs. We followed a GPS track that David had on his phone, cross-referenced with a photo of the descent that I had downloaded, and we slowly made our way down to the appropriate descent gully. We exited the gully, made our way back around to the North Side of Spearhead and took in some final views of the mountain. We took one more long break as we soaked in the sun and refueled with water and snacks, and then began making our way back to the trailhead. We had one more long break at Mills Lake where we filtered more water, but other than that we made quick work of the hike out. As seen in my stats in the photo at the beginning of the report, we ended up with more than 13 miles to our day. Once back at the car we grabbed a few more snacks and began to high tail it back to Denver, with the success of our day continuing to sink in along the way. 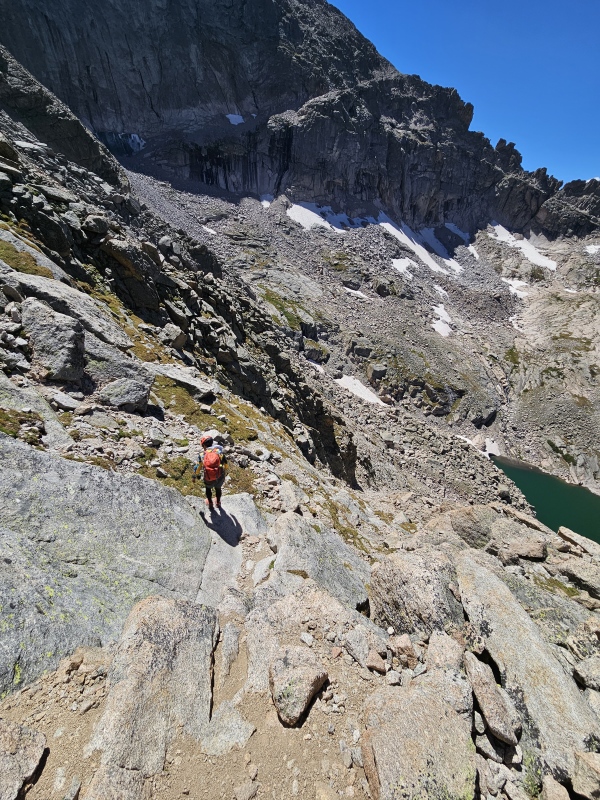


Final Thoughts I've been slowly but surely tackling more Grade II and Grade III technical climbs, and each one has presented me with it's own unique experience and learning moments. I've been intentionally choosing climbs with lower YDS grading because I feel like I'm still learning so much about what it takes to tackle a climb of this nature, and you never know when the route may force you into harder terrain anyway. This felt like another perfect test of my skillset for where I currently am in my climbing journey, and even proved that I may be capable of leading some slightly harder YDS grade climbs in the alpine in years to come. I felt like my efficiencies in building anchors and swapping leads was much better than when I climbed the Sharkstooth in June of 2022, and I was less fearful to tackle some difficulties of the route. It's extremely rewarding to see my progress, even if it isn't always visible to anyone else. I've got one more alpine climb planned this year, but I'm already feeling extremely proud of what I've tackled this year, and anything else will just be the cherry on top. Technical Gear 70m 9.8mm Sterling Xeros Rope Permit Info There are no permits to climb this route, but if you wish to bivy at the base, RMNP requires backcountry bivy permits. Beta climbinglife.com GPX I've uploaded my GPX, and although the tracking seems a bit off, the descent path we took worked well for us, and that section could be particularly useful to someone in the future. Feel free to check it out. Thanks for reading! Hopefully this information is helpful for someone considering this route in the future. Thanks for reading, stay safe out there, and I'll see you in the mountains. Thumbnails for uploaded photos (click to open slideshow): ")
")
")
")
")
")
")
")
")
")
")
")
")
")
")
")
")
")
")
")
")
")
")
")
")
")
")
")
")
")
")
")
")
")
")
")
")
")
")
")
")
")
")
")
|
| Comments or Questions | ||||||||||||
|---|---|---|---|---|---|---|---|---|---|---|---|---|
|
Caution: The information contained in this report may not be accurate and should not be the only resource used in preparation for your climb. Failure to have the necessary experience, physical conditioning, supplies or equipment can result in injury or death. 14ers.com and the author(s) of this report provide no warranties, either express or implied, that the information provided is accurate or reliable. By using the information provided, you agree to indemnify and hold harmless 14ers.com and the report author(s) with respect to any claims and demands against them, including any attorney fees and expenses. Please read the 14ers.com Safety and Disclaimer pages for more information.
Please respect private property: 14ers.com supports the rights of private landowners to determine how and by whom their land will be used. In Colorado, it is your responsibility to determine if land is private and to obtain the appropriate permission before entering the property.


