| Report Type | Full |
| Peak(s) |
Vestal Peak - 13,867 feet "The Kurzhorn" - 13,199 feet "West Trinity" - 13,765 feet Trinity Peak - 13,816 feet "East Trinity" - 13,752 feet Arrow Peak - 13,817 feet |
| Date Posted | 08/23/2023 |
| Modified | 08/24/2023 |
| Date Climbed | 08/20/2023 |
| Author | Danger_D |
| Weminuche Cent Cleanup - Vestal/Trinity Traverse, Arrow |
|---|
|
Peaks: 5 (1/2); Vestal Peak, West Trinity, Trinity Peak, East Trinity, Arrow Peak, and 'The Kurzhorn' On my journey to climb all of the Cents, the Vestal Basin peaks have stood out in my mind for a long time. They are so iconic looking, so remote, and have so much scrambling that I had built up this trip in my mind. I was able to find a good weather window this last week so I decided to pull the trigger and venture deep in to the Weminuche. After a lot of bugs, scrapes, rain, animals, and about 10,000 pictures, I was able to nab Cent # 98,99 and 100! Only Longs Peak to come in a few weeks. I hadn't seen a trip report that linked Vestal and the Trinities, so I thought I could add something to future climbers wanting to go this route. 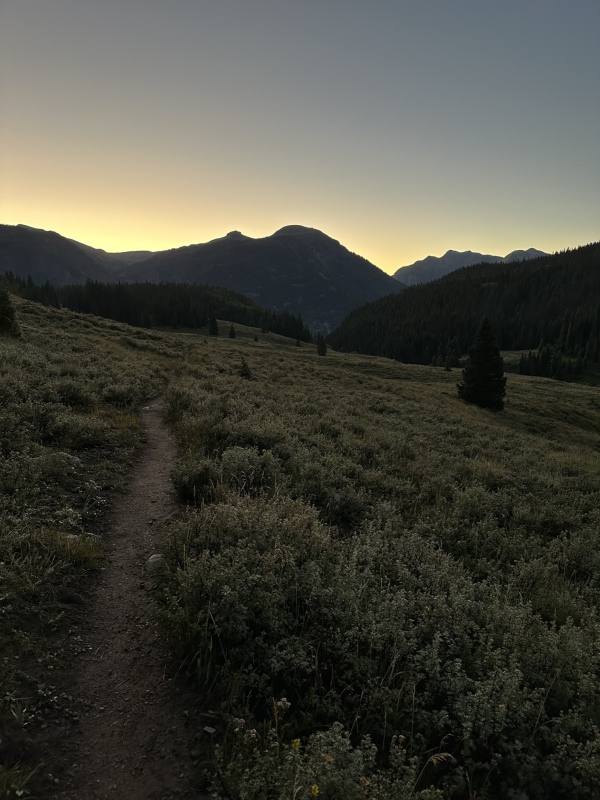
Day 1: Molas Lakes TH up to Vestal Basin 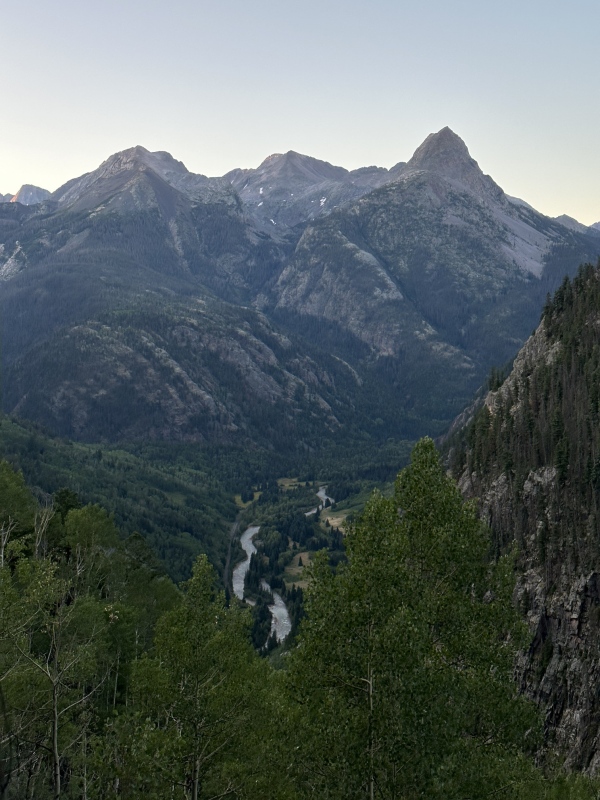
The switchbacks down to the river are on the Colorado Trail so they are very well maintained. I was able to make good time and it took me 1:25 to get from the car to the River. You'll cross over a nice bridge to get to the other side of the Animas and turn right to follow the train tracks for a hundred yards or so. On the left side of the tracks you'll see a Colorado Trail post and the trail starting a rising traverse up the left slope. The trail up Elk Creek is very mellow with a few steeper sections, but in general it is a really easy to just crank through the miles up to the Beaver Pond. There are several good campsites on the trail and I dropped GPS pins in some of them to possibly use on the way out. 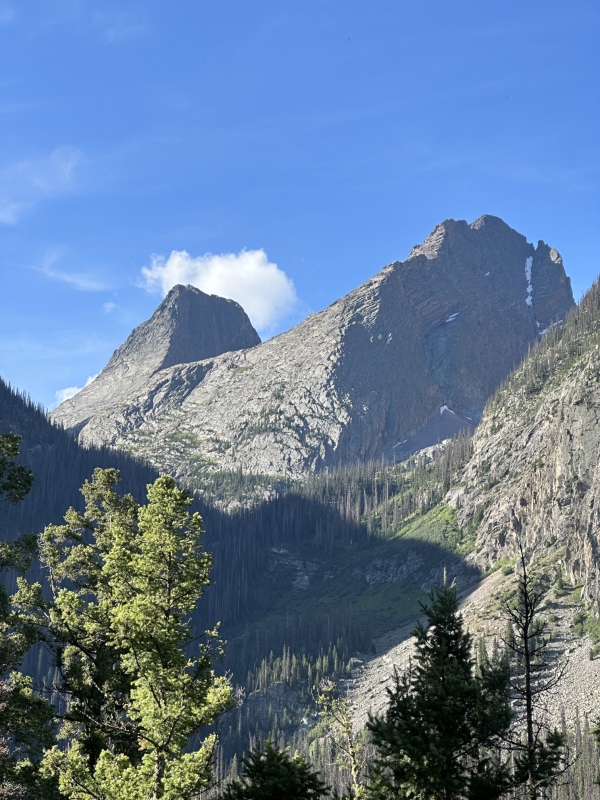
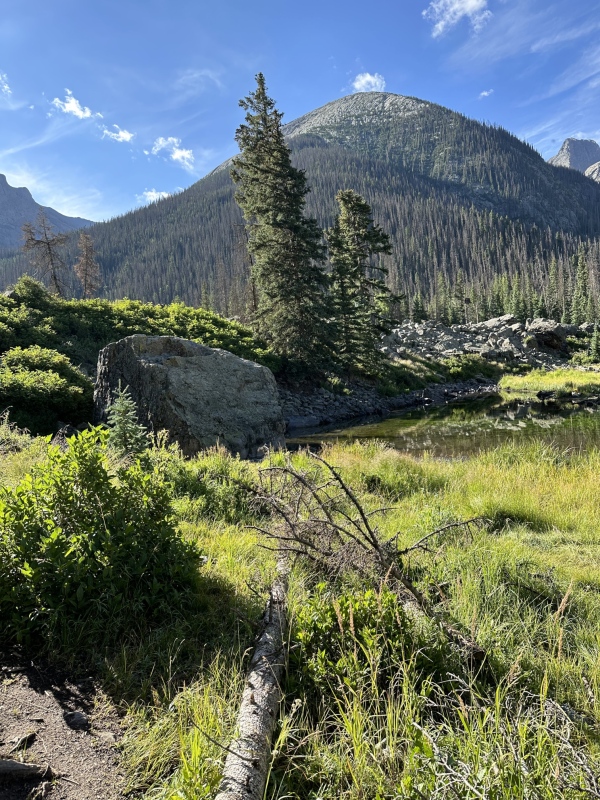
The trail mellows around 10,000' as you approach the Beaver Ponds. The views here of Arrow and Vestal rising above the tranquil ponds is pretty amazing. There are also several good campsites here. There is a large boulder at the end of the pond which is where you turn off the trail. Turn right just after the boulder and walk right along the shore of the pond until the trail reappears after the pond. The trail up to Vestal Basin gets much steeper and after the manicured Colorado Trail it is much rougher. There is some deadfall on the trail and it meanders through some dense forest, but compared to some other Weminuche approaches I've done it the last few years it wasn't really that bad. 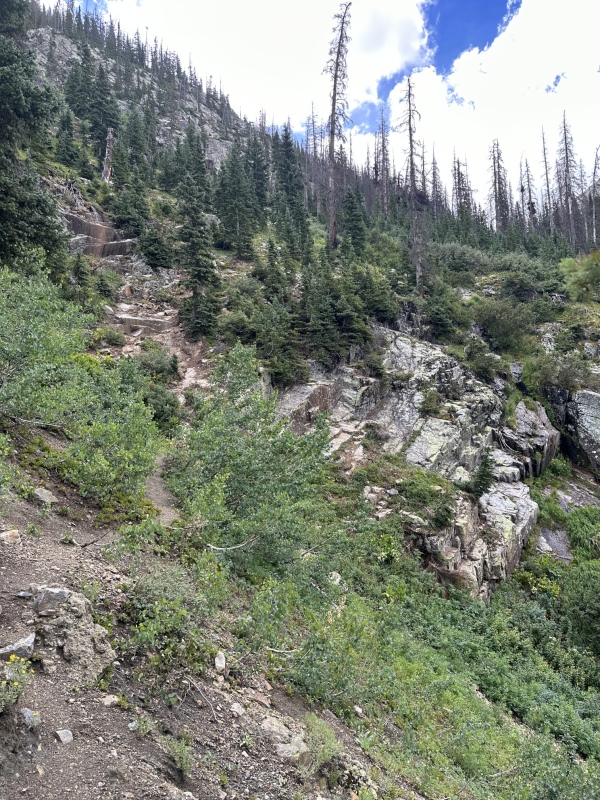
Around 11,200' the trail mellows out a little and you start to see why this is such a famous basin. You walk through the trees until they finally open up until you see... 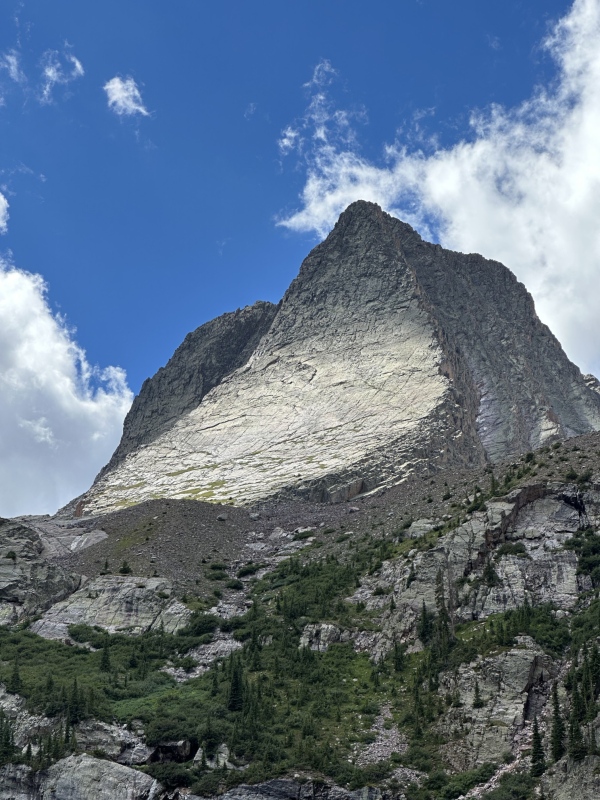
This is a truly stunning basin, and I got great views of all 5 peaks that were on my list. I got up to the basin at 11:30 on a Saturday and there was only one other tent, but by the end of the day there were 6 other groups in the basin. I got by far the best camp spot which is on on a rocky outcropping on the left side of the trail. It had stunning views of Vestal and I spent hours in camp just looking up at its imposing face. Day 2: Vestal Peak to Trinity Traverse 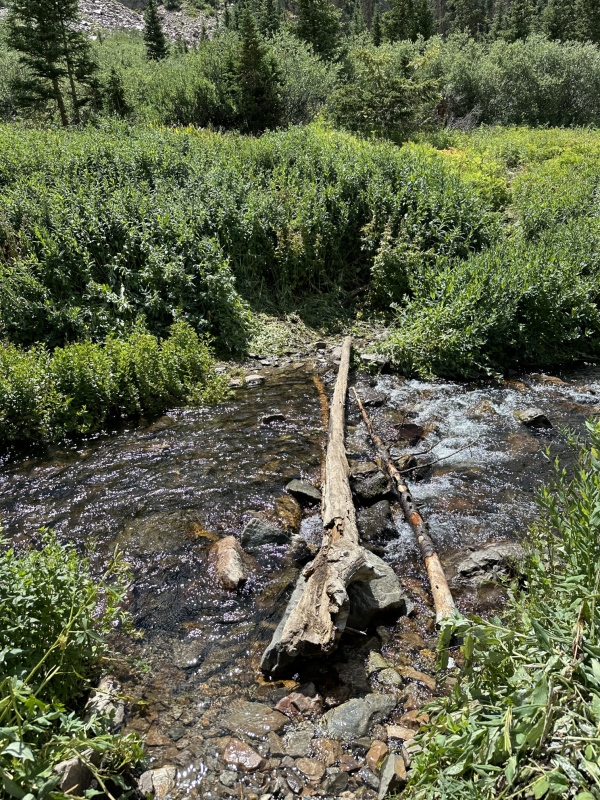
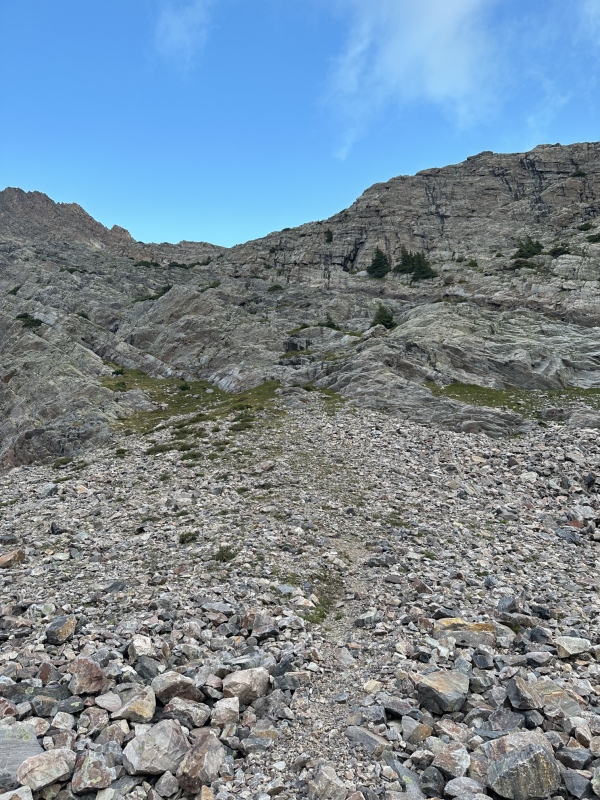
The trail going to the upper basin we very clearly defined, but it was steep. You gain around 600' vertical very quickly and it was very easy to do via headlamp. At 12k' the trail really mellows and turns into a rock moraine where you can pick any path you want. The ground is definitely more rocky, but its consolidated and really easy hiking 
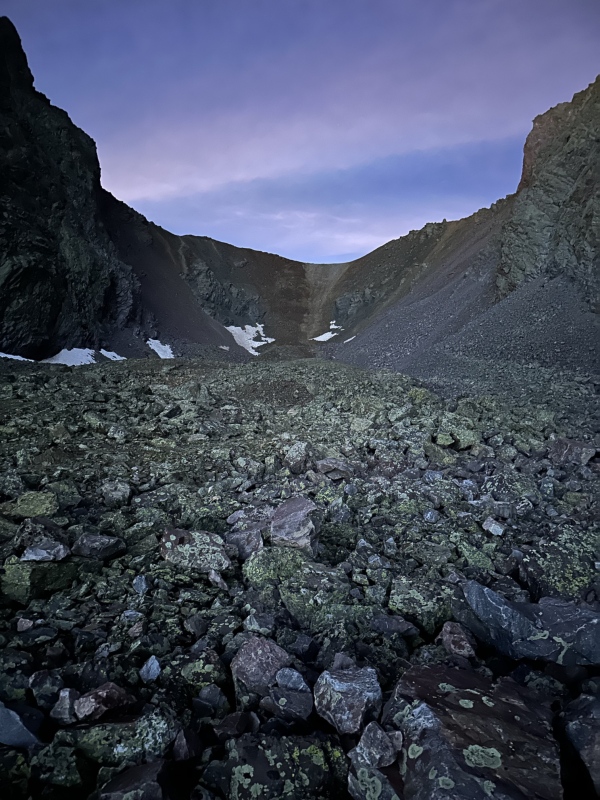
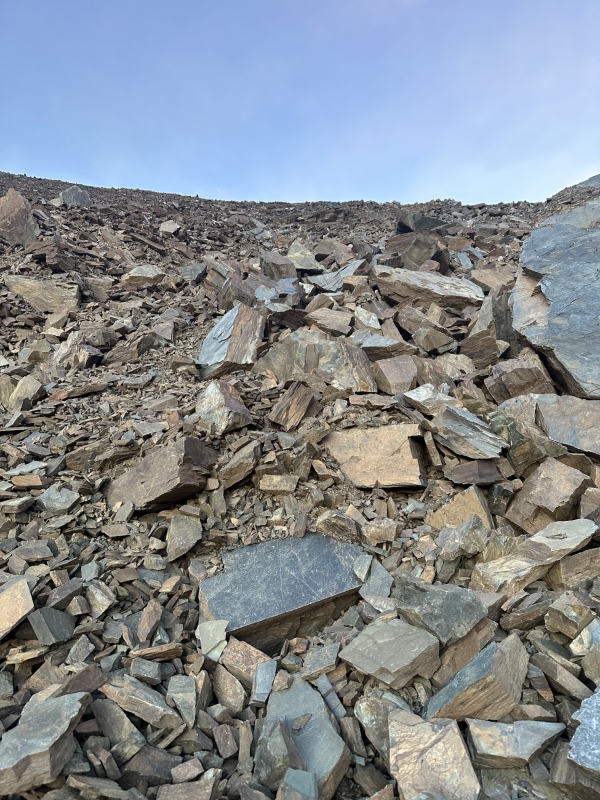
As you hike between the imposing Vestal and Arrow peaks you will see the saddle rise up steeply from the basin. There is probably only 300' of vertical on this last section to the saddle, but it is a horribly loose scree that really sapped my energy. Even Gerry Roach talked about it with dread so you know that is must be unpleasant. After trudging up the loose slopes I made it to the saddle 90 minutes after leaving the tent. Once on the saddle you turn left and do a rising traverse along a small bench on the south side of Vestal until you go around a ridge. Its easy C2 hiking and there are a few cairns including one on the far ridge that is easy to spot 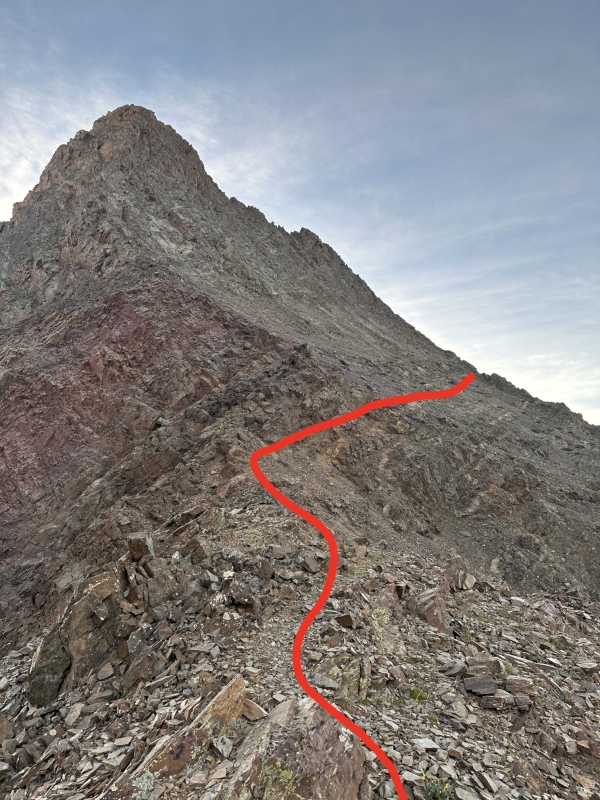
After I got to the ridge I kept traversing for maybe 20 or 30 yards until I got into the obvious gully which will take you to the summit. Supposedly you can take other routes up but they are much steeper and more technical, so finding the right gully will be extremely helpful 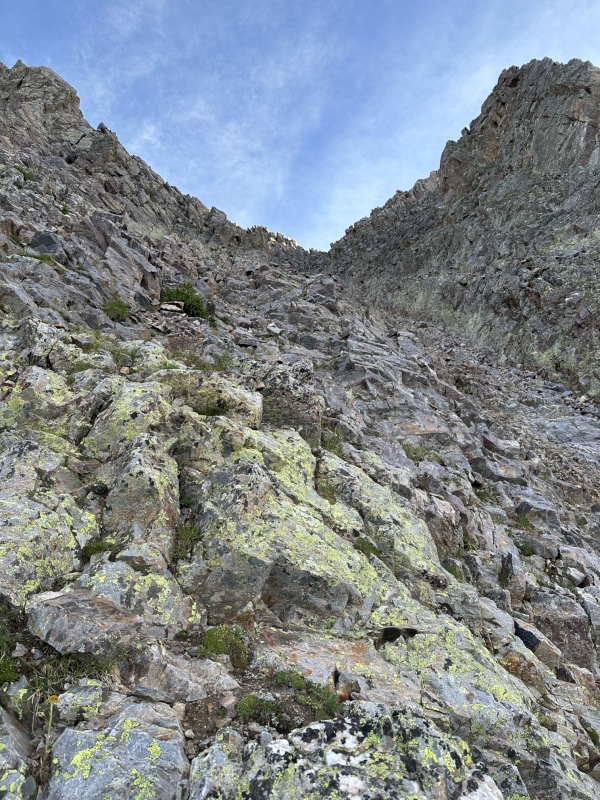
The gully itself is pretty tame and I found that sticking to the left side of the climb had much better rock. There is the possibility of rockfall here so be careful about your step and watch out for people above you. I found most of the climb to be Class 2 with some Class 3 mixed in there occasionally. I aimed a little left at the top to reach the summit ridge and the the summit is a short hop away. I couldn't see down Wham Ridge from the summit, but the views are still something amazing 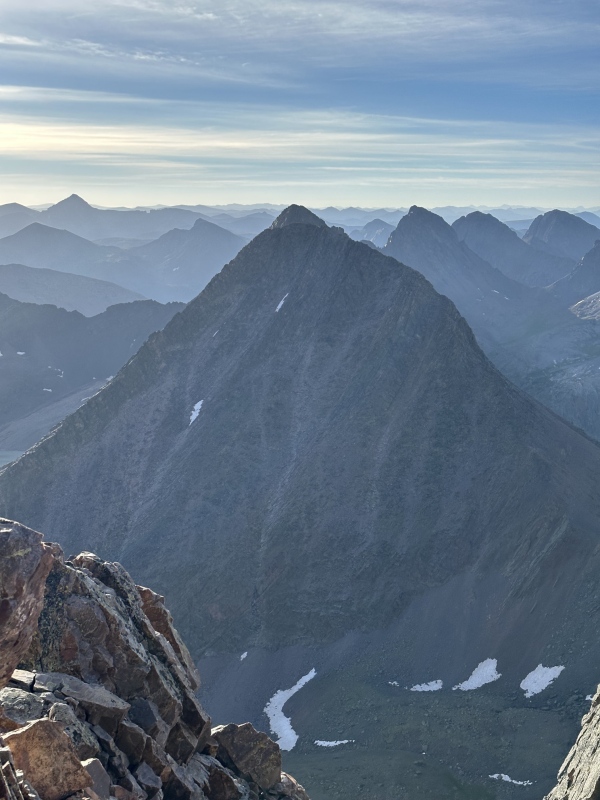
The way down the gully is pretty self explanatory and I retraced my steps until right around when I entered the gully. If you are continuing on the the Trinity traverse you will cross over to the east side of the gully around 13,200' and drop down below of a few small gendarmes. There is a notch in the ridge with a cairn which indicates where to cross over, but it should be very obvious just by looking through any gaps in the ridge 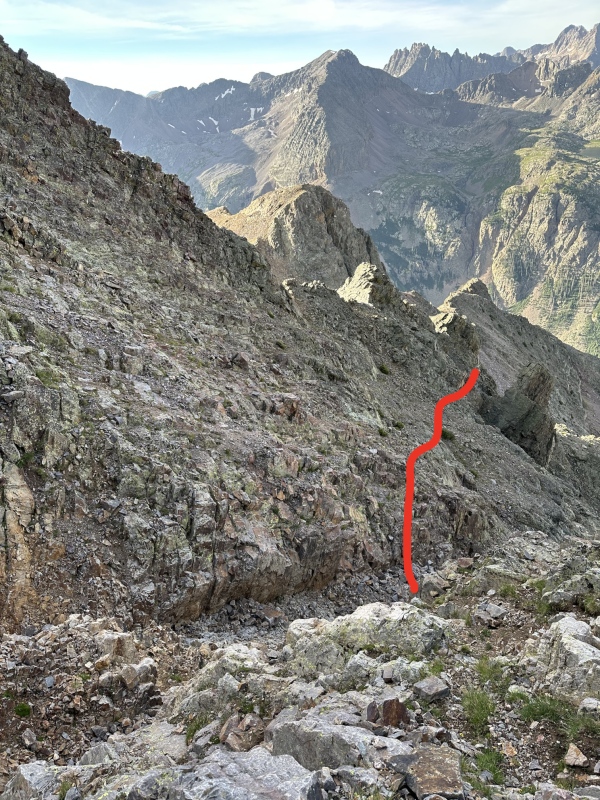
After I crossed the ridge I saw the "The Kurzhorn" which is a glorified bump on a ridge, but you can tick it off on the site. I'm only the 20th member to tick it, but that might because most people didn't even think it would count. From the Kurzhorn the ridge over to West Trinity is an easy if uninspiring C2 hike. It took me an hour and a half to get from the summit of Vestal to the start of the West Trinity climb. 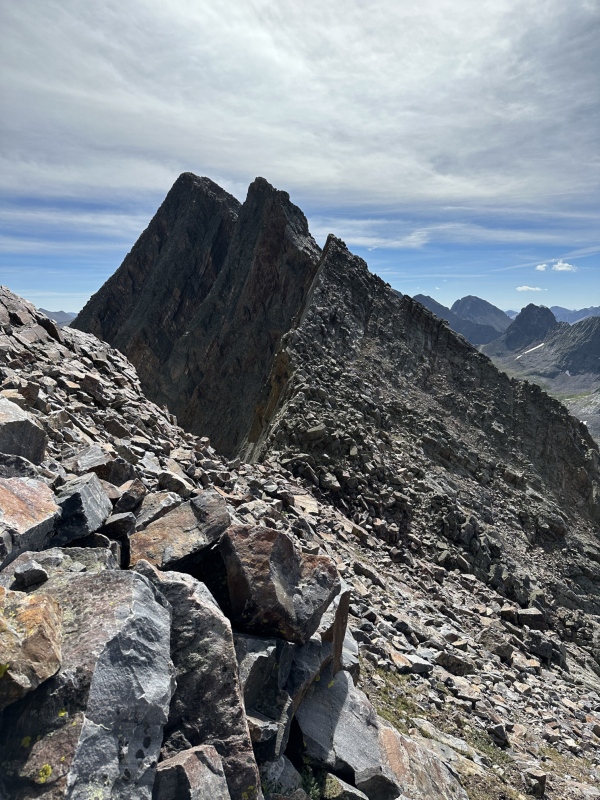

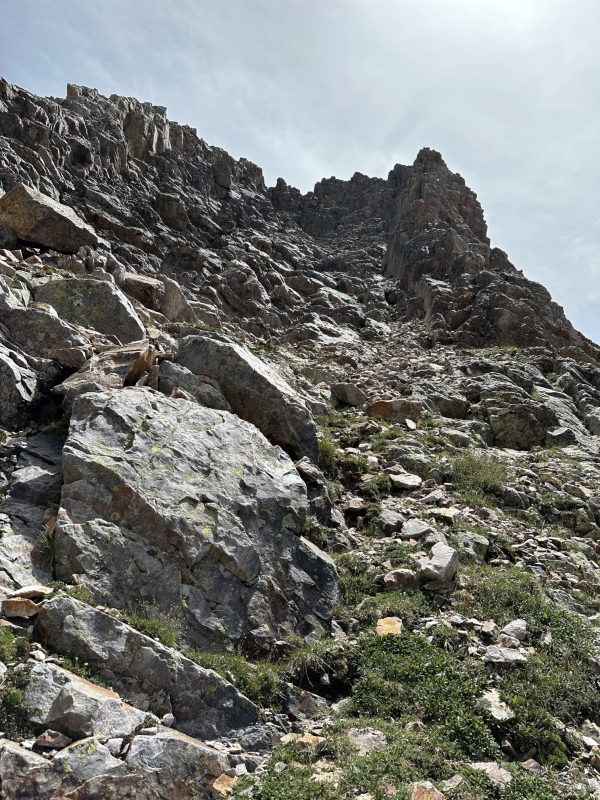
I passed over a few ribs on this traverse, but soon the benches seem to end. I looked uphill and saw that there were several cairns leading up the broken, blocky terrain taking me in the direction of the summit 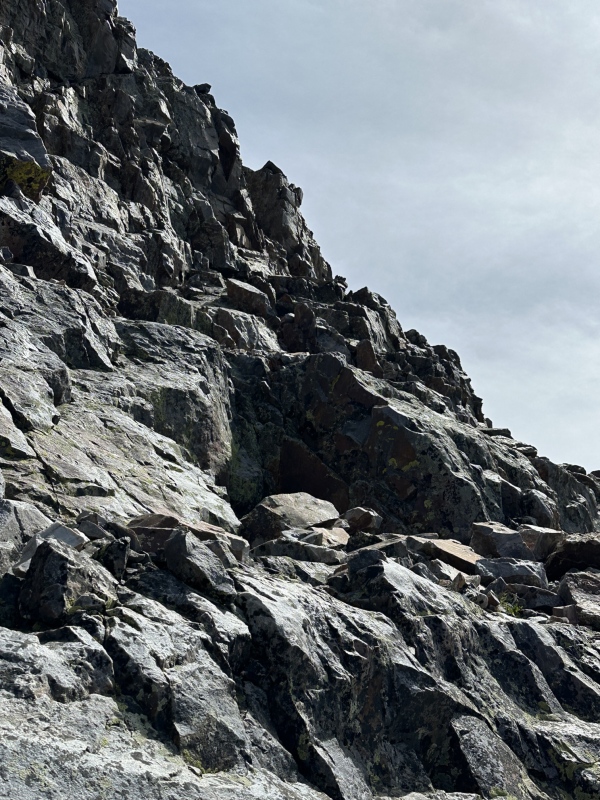
After following the cairns up I came to the bottom of the 4th Class chimney which I think is the crux of the climb, but is very secure. There were 4 or 5 cairns at the base of the chimney but not any above it. The holds are all really positive and the rock is bomber, so its just a matter of climbing up the ladder. For what its worth I thought that this was easier than the chimney on North Maroon. 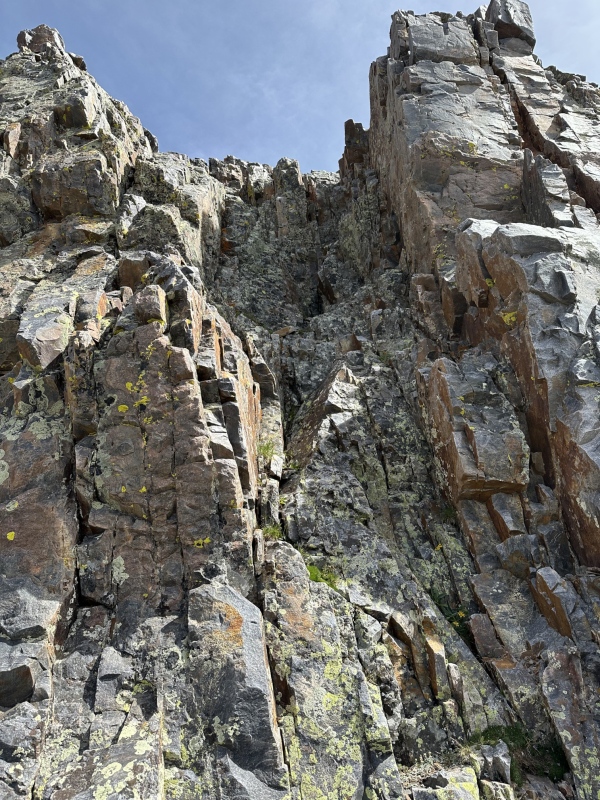
At the top of the chimney there is a big ledge. It looks tempting to go to the right, but that leads to a cliffed out section. Instead, you can either go straight forward from the chimney on some more C4 moves, or a little left to work back up closer to the ridge. I ended up going all the way up to the ridge, but this turned out to be a little gendarme and I had to downclimb a little after moving closer to the summit. I think that there is probably a route that stays under the ridge proper but moves right (east) towards the summit. There were a few Class 4 moves after the chimney, but nothing sustained 
After basking in the views, I found the descent gully which is basically heading straight for East Trinity. This gully looked daunting from the top and is definitely the loosest climbing on the Trinities, but it was easier than I was expecting and you can scout the route up East Trinity as you descend 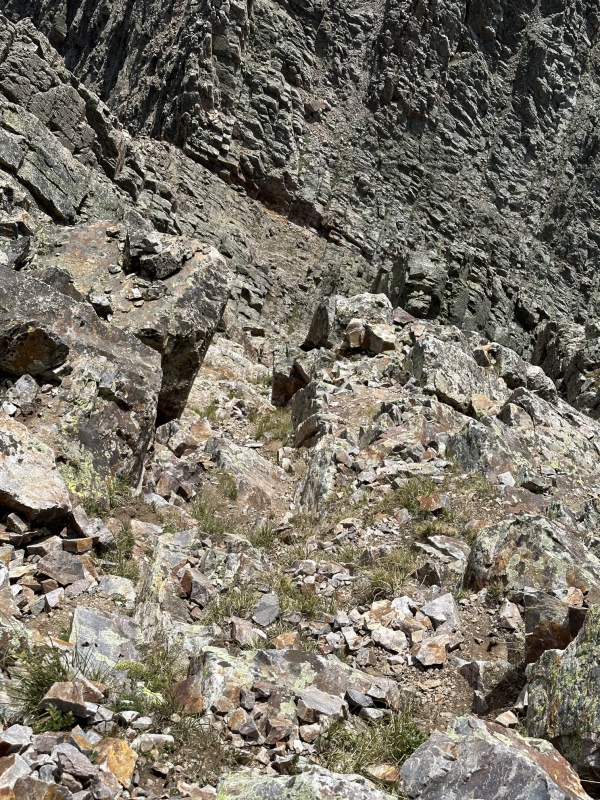
After I descended to the saddle, I crossed the gully a little downhill of the saddle itself. Once on the other side I was able to cruise up the sustained, but easy Class 3 gully 
The bottom half of E Trinty was easy climbing, but you could see where things steepened up higher. There was another party in front of me who stuck on more the left side of the gully (other trip reports have done this as well), but I though that going right at the top of the gully seemed a little easier. Either way, the climbing gets steeper and gets into some occasional Class 4 moves, but there wasn't anything harder than other sections of the climb. Once I got to the summit ridge I had to do a slightly airy traverse to get over to the summit itself (this could have been avoided if you go the more left option on the climb) 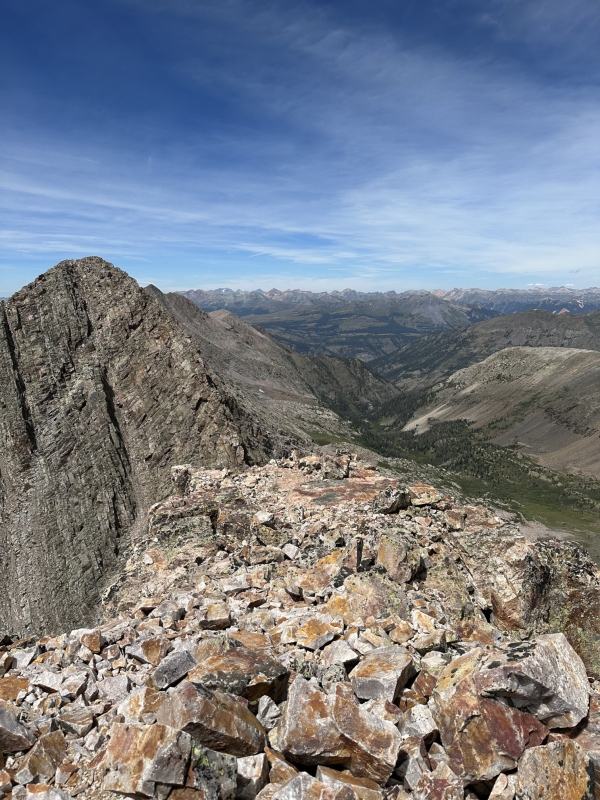
The technical part is over, a slightly tedious descent and trek back to the tent remained. The hike down the backside of East Trinity isn't super technical, but its loose enough to be a real pain. It was slow-going at a part of the day I just wanted to be done. I descended on the east face but mostly followed the ridge down down to the saddle. 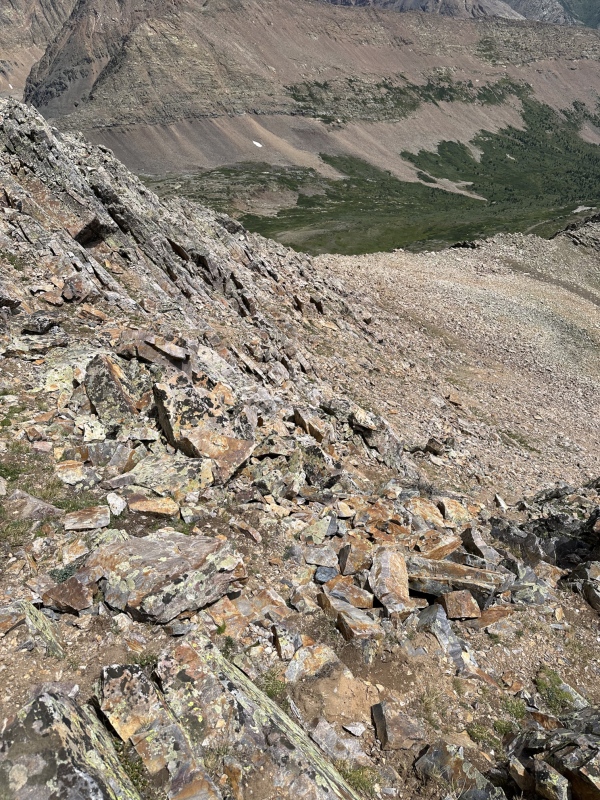
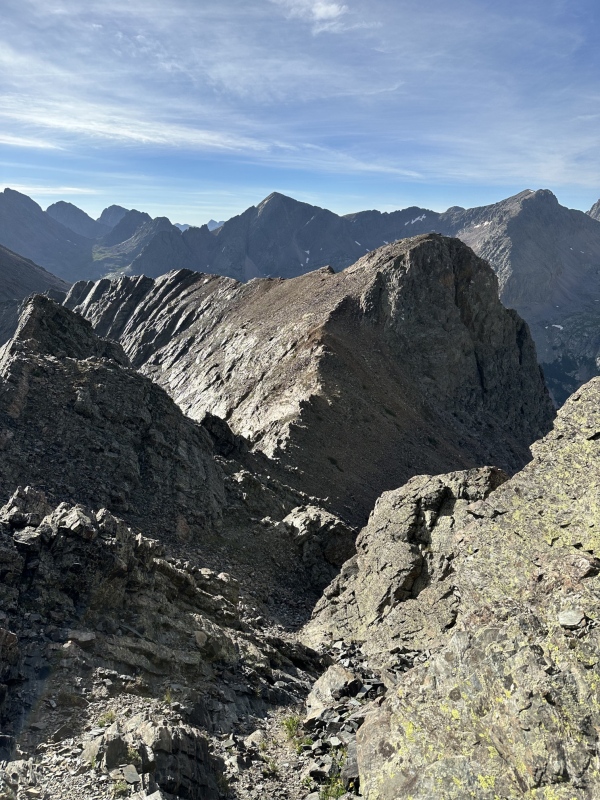
After dropping 400ish feet I aimed for the ridge and crossed it to get a great view of Trinity Lake and the saddle that I would descend from back into Vestal Basin. This final descent to the saddle was slightly more technical but nothing crazy. Looking at other trip report some people (like myself) went down to the saddle, then turned left and descended into the basin, but others turned left and descended before reaching the saddle proper. Either way its some loose scree that will take you down to the Upper Vestal Lake 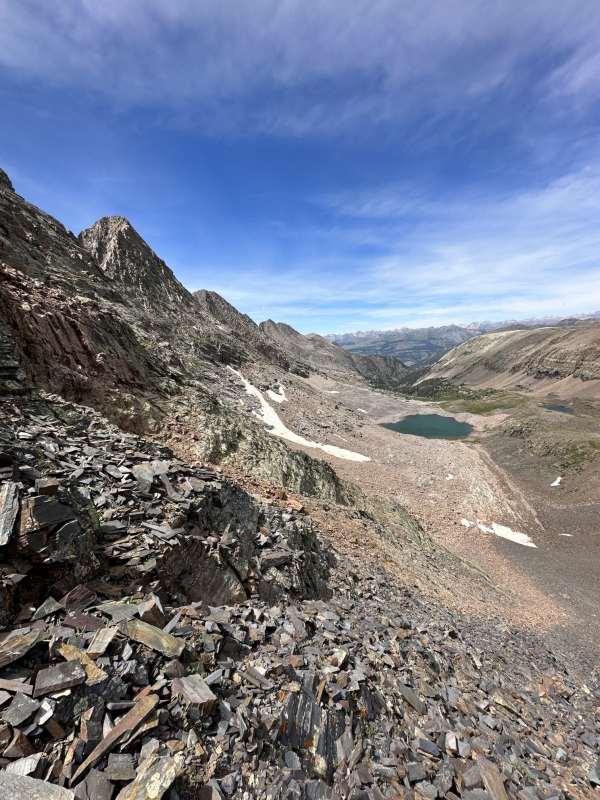
After descending I stayed to the right side of the lake. After a lot of talus hopping the ground turns more lush and you are able to walk on the grass down the valley 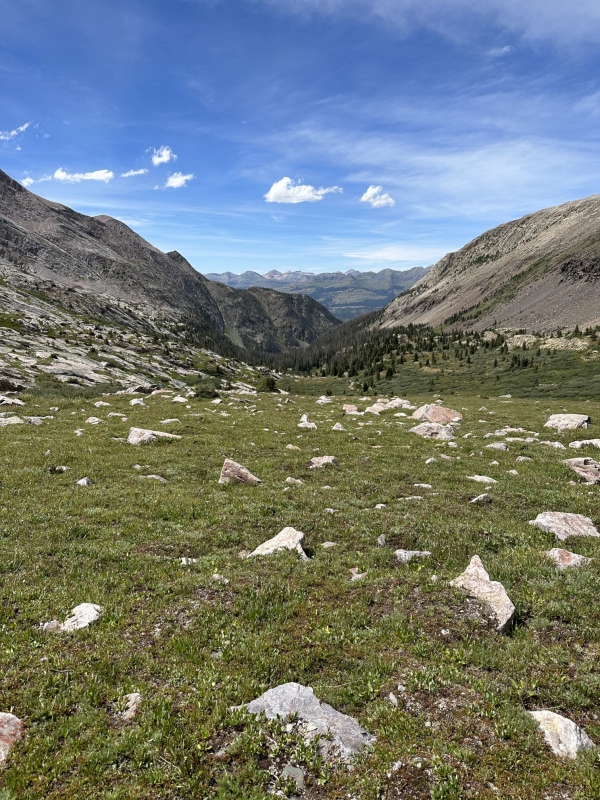
I was expecting more of a trail on this section but never found one. I followed the GPS route I had saved (attached to this report) and it worked pretty well. There are some willow sections I had to bash through, but in the grand scheme of things it wasn't too bad, just longer than I had anticipated 
After dropping into a few basins, I finally found a trail that took me back to camp. The hike after dropping form the final saddle wasn't hard, but it took longer than I expected. The weather was still excellent so I took my sweet time getting back to the tent on this enjoyable terrain Day 3: Arrow and moving camp 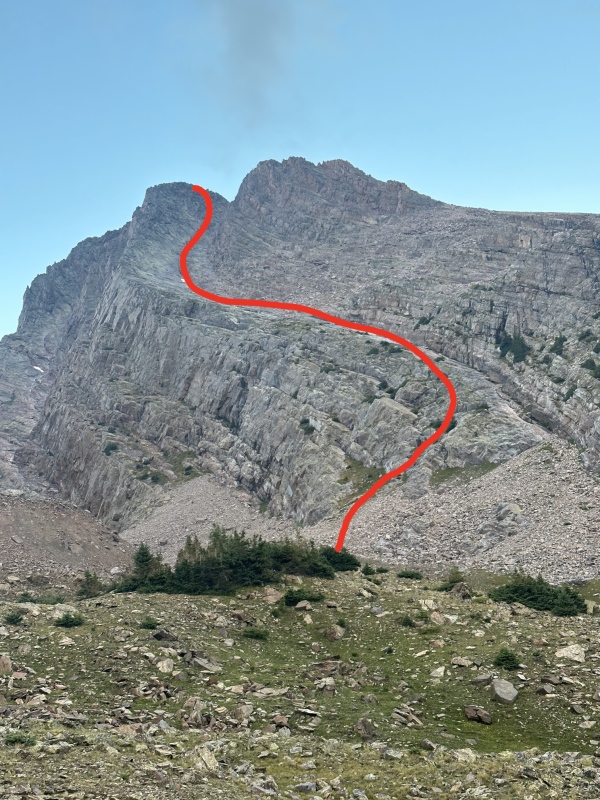
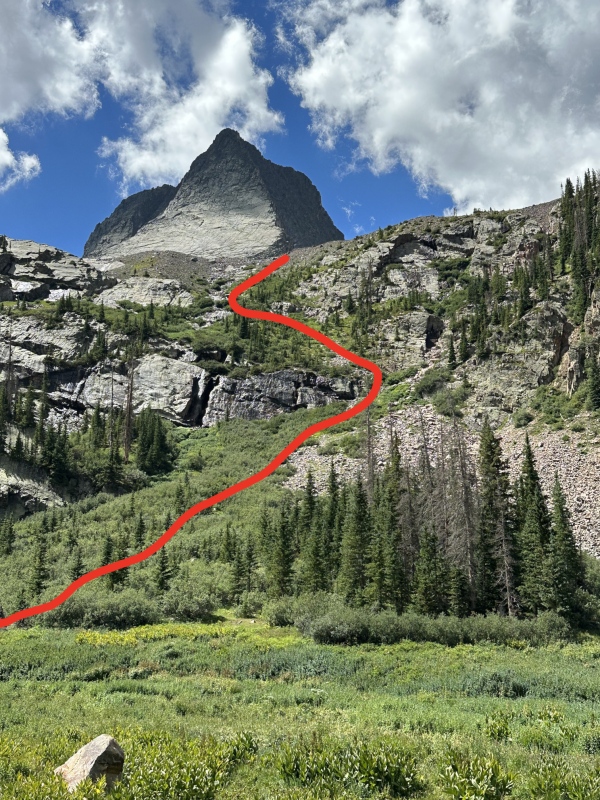
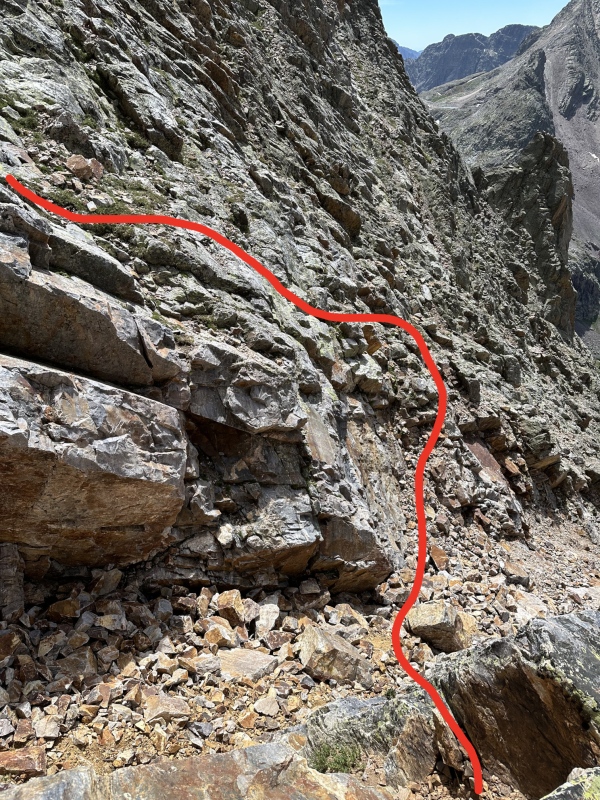
The very start of the giant ramp the route takes is relatively steep, so Roach suggests climbing the grassy, broken benches to the left of the ramp's start. The climber's trail will take you right to the base of these and a few cairns showed where to go. Its pretty obvious and I just picked the path that seemed easiest. Once I got to the main ramp I followed it up on the climber's left side of things staying out of the corner near the vertical cliffs. The views of Vestal are pretty amazing and I saw a couple people climbing up Wham Ridge 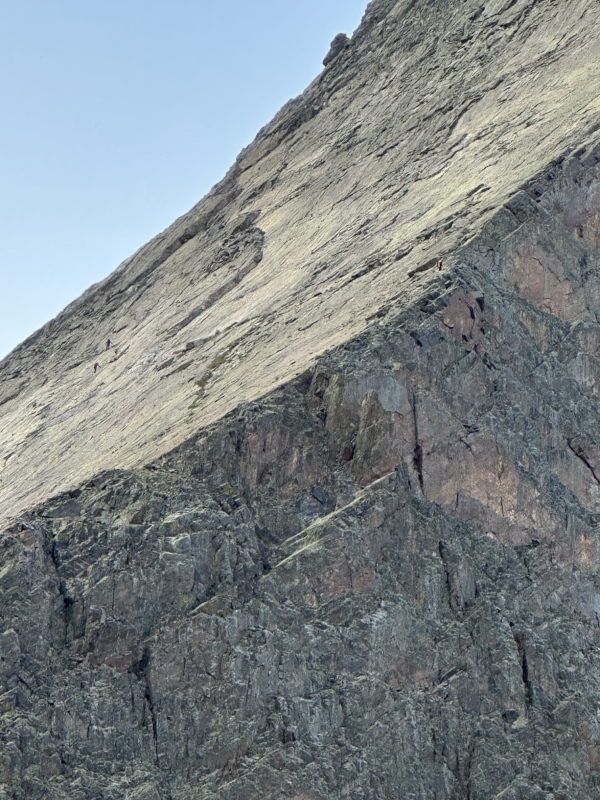
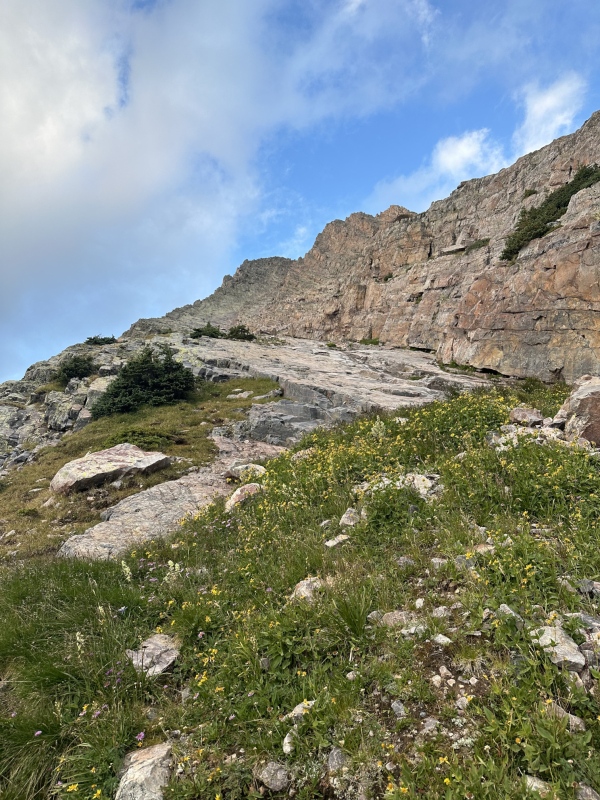
The ramp is quite easy and you can choose to stay on the actual rock itself, or stick to the left side where there is grass and scree with occasional social trails. I followed this up for several hundred yards and it was a really pleasant hike. As you get about half way up the main ramp you will see a 2nd ramp appear on the climber's right side. Gaining this ramp this ramp will be key to keeping things at Class 3. As soon as I was able to I headed for this new ramp, but on the way down I realized it would have been easier to stay on the main ramp a little longer, and only cut over on the loose scree when the 2nd ramp starts to get harder to access. 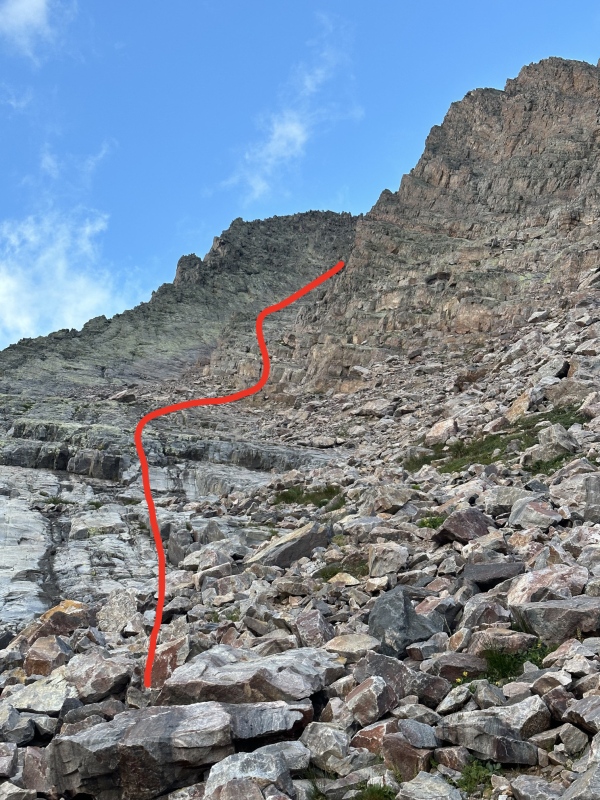
This 2nd ramp is a little steeper and it started to get into Class 3 climbing. I again stuck to the left side of the ramp and it soon started to tilt a little and it became more of a rock rib. I stuck to this rib (more or less) until there was a headwall on the rib that blocked easy access. 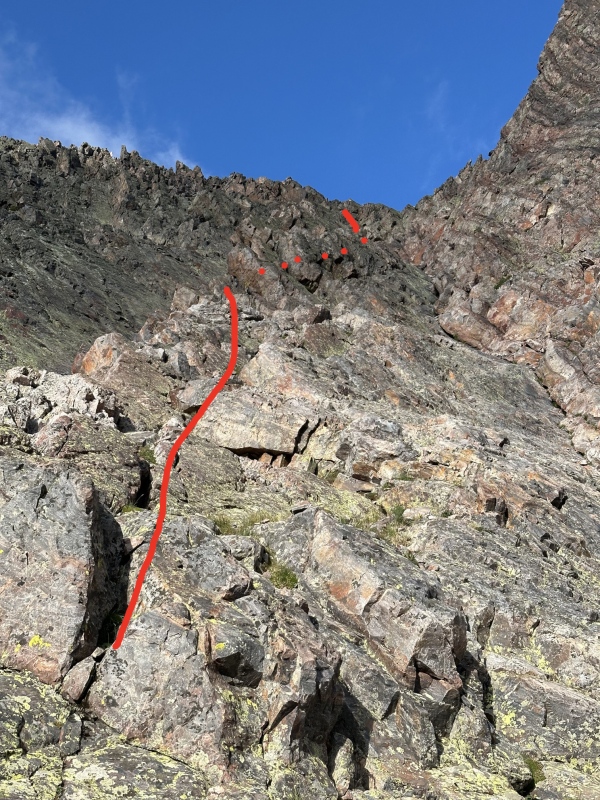
Once I got to this headwall difficulty I cut back and forth across the rock rib following the easiest path. This is more sustained Class 3 climbing but there is always a cairn to mark the way and good rock. I think there are dozens of different ways you could get up this section and a lot of them seem to be about the same difficulty. If things get too hard, keep looking. 
The rock rib will fade out as you get closer to the ridge. I kept hiking straight to the ridge and it was really fun Class 4 climbing with some exposure, but if you turn left sooner you can keep things easier with Class 3 climbing 
From here it was just a little bit of fun Class 3 scrambling to get to the summit. Arrow was a really, really fun climb and it is worth a trip just for it. The descent went very quickly. On the rock slabs I just learned to trust my rubber and point my toes downhill to cruise down that vert. The rock was clean and really grippy, so if you trust your step you can move fast. I got back to camp around 11 and didn't feel like sitting around for 9 hours at camp. Even though my legs were destroyed I thought it would be better to move camp down to the Colorado Trail and get a little closer to the trailhead. Backpacking down the vestal basin approach was a tedious pain, but once I got down to the CT it felt like I was walking on air in comparison. I had pinned a couple camp spots on my way up so I chose something about halfway down to the Animas River and promptly passed out Day 4: Back to Molas Lakes TH Thumbnails for uploaded photos (click to open slideshow): ")
")
")
")
")
")
")
")
")
")
")
")
")
")
")
")
")
")
")
")
")
")
")
")
")
")
")
")
")
")
")
")
")
")
")
")
")
")
")
|
| Comments or Questions | |||||||||||||||
|---|---|---|---|---|---|---|---|---|---|---|---|---|---|---|---|
|
Caution: The information contained in this report may not be accurate and should not be the only resource used in preparation for your climb. Failure to have the necessary experience, physical conditioning, supplies or equipment can result in injury or death. 14ers.com and the author(s) of this report provide no warranties, either express or implied, that the information provided is accurate or reliable. By using the information provided, you agree to indemnify and hold harmless 14ers.com and the report author(s) with respect to any claims and demands against them, including any attorney fees and expenses. Please read the 14ers.com Safety and Disclaimer pages for more information.
Please respect private property: 14ers.com supports the rights of private landowners to determine how and by whom their land will be used. In Colorado, it is your responsibility to determine if land is private and to obtain the appropriate permission before entering the property.


