Download Agreement, Release, and Acknowledgement of Risk:
You (the person requesting this file download) fully understand mountain climbing ("Activity") involves risks and dangers of serious bodily injury, including permanent disability, paralysis, and death ("Risks") and you fully accept and assume all such risks and all responsibility for losses, costs, and damages you incur as a result of your participation in this Activity.
You acknowledge that information in the file you have chosen to download may not be accurate and may contain errors. You agree to assume all risks when using this information and agree to release and discharge 14ers.com, 14ers Inc. and the author(s) of such information (collectively, the "Released Parties").
You hereby discharge the Released Parties from all damages, actions, claims and liabilities of any nature, specifically including, but not limited to, damages, actions, claims and liabilities arising from or related to the negligence of the Released Parties. You further agree to indemnify, hold harmless and defend 14ers.com, 14ers Inc. and each of the other Released Parties from and against any loss, damage, liability and expense, including costs and attorney fees, incurred by 14ers.com, 14ers Inc. or any of the other Released Parties as a result of you using information provided on the 14ers.com or 14ers Inc. websites.
You have read this agreement, fully understand its terms and intend it to be a complete and unconditional release of all liability to the greatest extent allowed by law and agree that if any portion of this agreement is held to be invalid the balance, notwithstanding, shall continue in full force and effect.
By clicking "OK" you agree to these terms. If you DO NOT agree, click "Cancel"...
From Brainard Lake Winter Parking Lot (Gateway Trailhead) to Navajo Peak:
17.0 miles roundtrip, 4800ft vert
7 hrs from car to car (6am to 1pm)
I decided to do this peak fairly last minute because the access road for the traverse I was planning for the weekend closed for the season, but I'm really happy that I was able to get up into the Indian Peaks Wilderness. It's always been one of my favorite places along the Front Range.
Parking in the Brainard Lake Recreation Area requires a reservation that you can get on recreation.gov and is $14 if done online. I opted to park in the lower lot right before the gate for the recreation area because I couldn't get a reservation and the lower lot doesn't require one (it's also free). I planned to set up a camp near the parking lot but got in late, so I just slept in my car and prepped all of my gear the night before. I woke up around 5:30, made a quick breakfast and got started.
Because the approach to this climb is relatively flat and the terrain is clear, I decided to trail run until I couldn't, and it turned out to be a really pleasant morning. The biggest challenge of the run was securing my helmet to my vest in a way that kept it from bouncing too much. I had a few early stops to adjust it but figured it out eventually. After starting, some clouds above the peak made me a little nervous that the weather would turn and I wouldn't be able to summit, but they cleared off before I had even made it to the Long Lake trailhead.
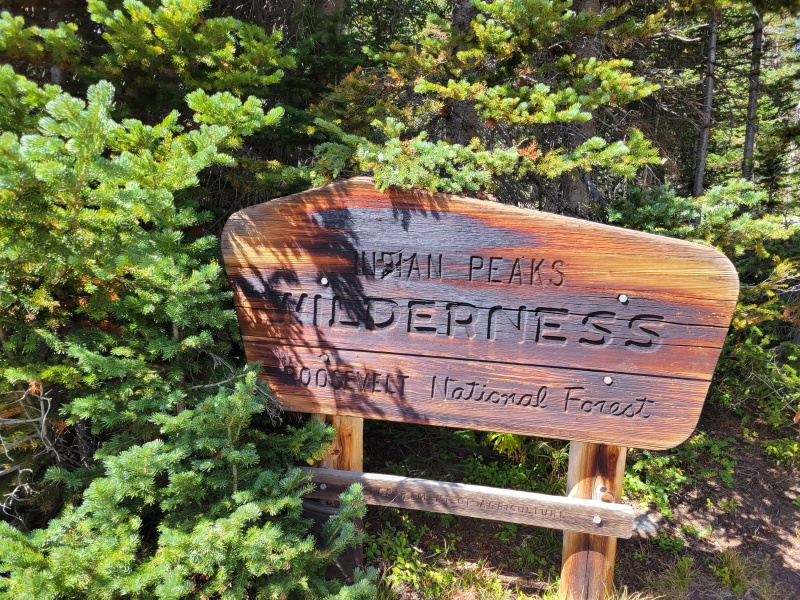
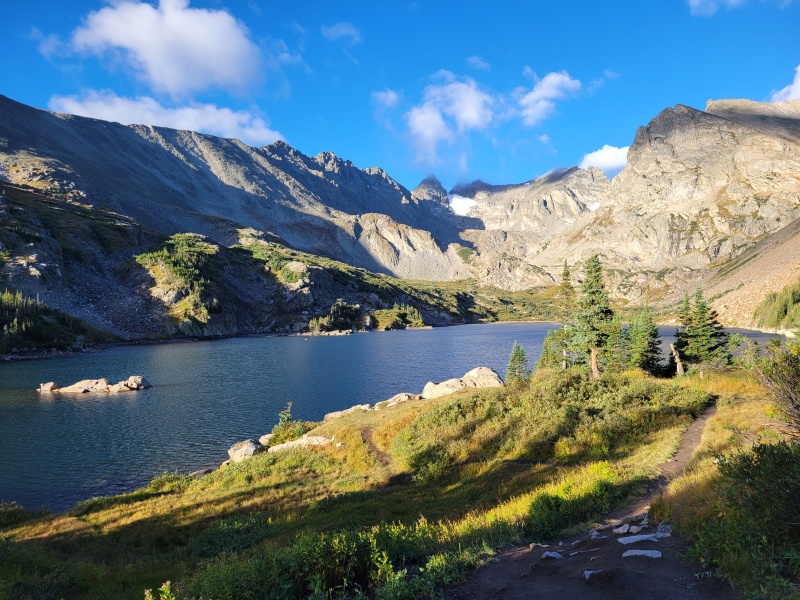
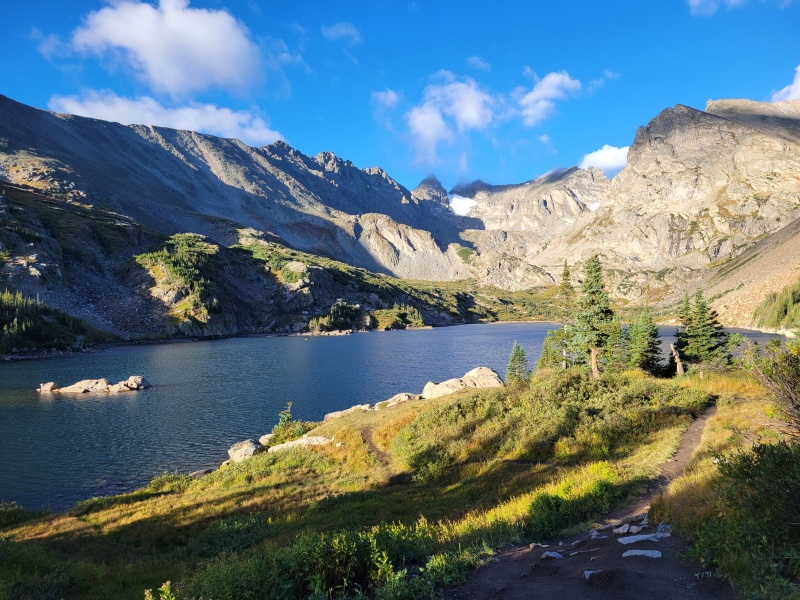
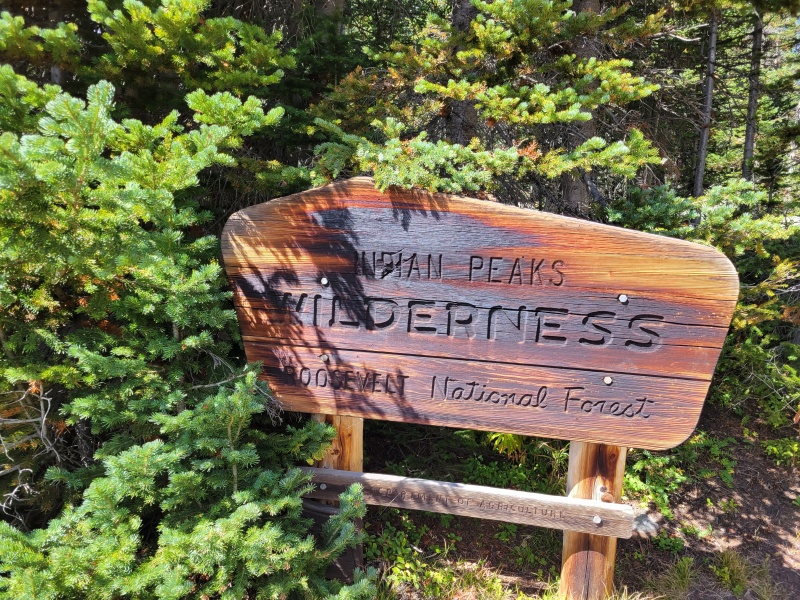
Entering Indian Peaks WildernessView of Navajo Peak from the northeast side of Lake Isabelle.
From the trailhead, I was comfortably able to run to the west end of Lake Isabelle where I met another hiker going for the summit. He was stopped and watching a moose hanging out a little off trail. We hiked off trail a bit to give the big guy some room then continued on towards the scramble.
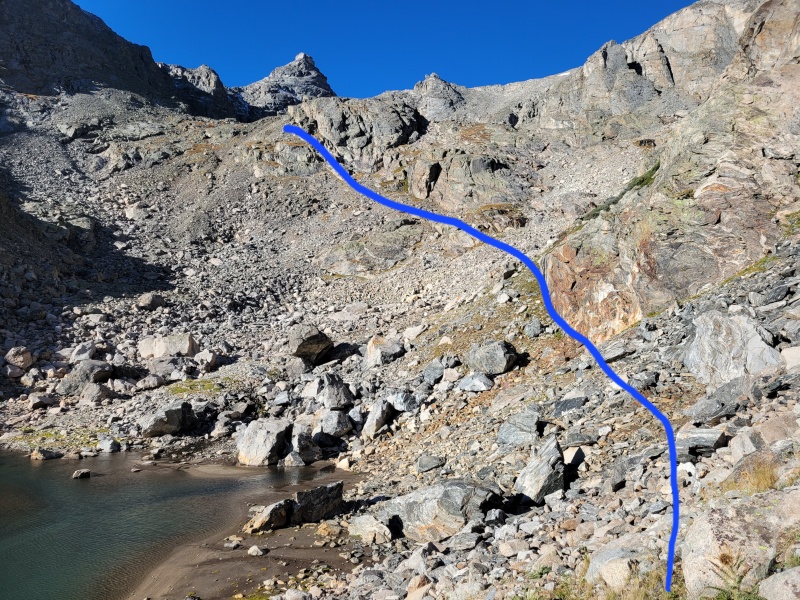
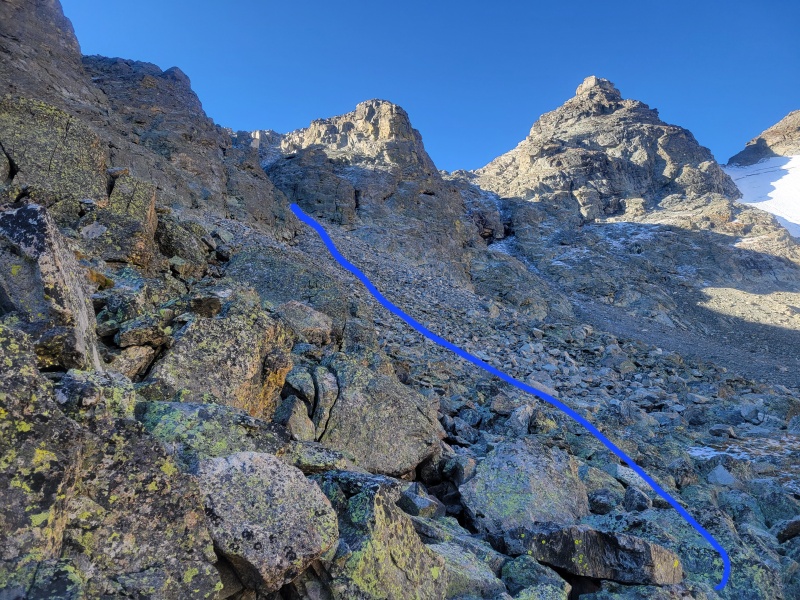
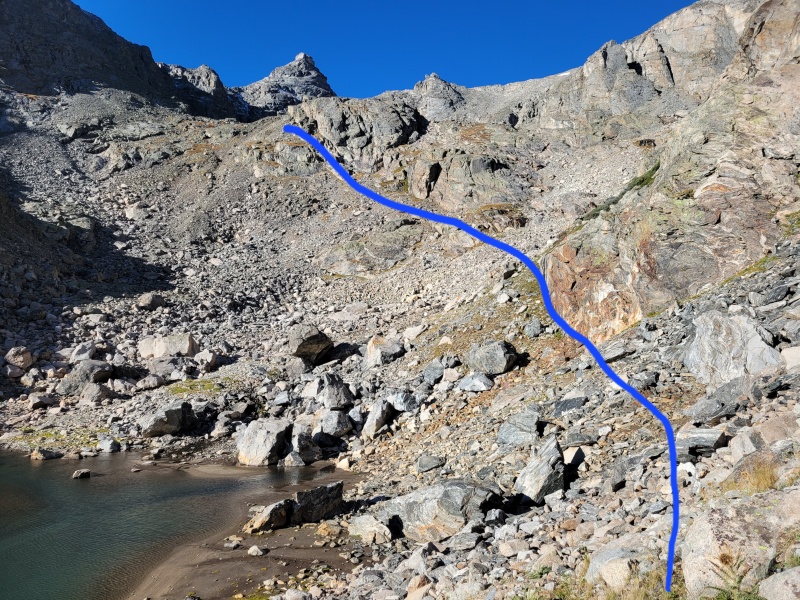
Upon reaching the small lake above Lake Isabelle, I strapped on my helmet and began the climb up towards the peak. This section was relatively straightforward scrambling. I've included a picture with the line I followed, but I'm sure plenty of other lines would work out pretty well, too. Not many hazards through here, but watch out for loose rocks. Even some of the really big ones wobbled under me a bit.
View from the west end of the small lake above Lake Isabelle. This is where the approach ends and the scrambling begins. I followed the blue line toward the bottom of airplane gully. This part of the ascent was fairly straightforward, but watch out for loose rocks.
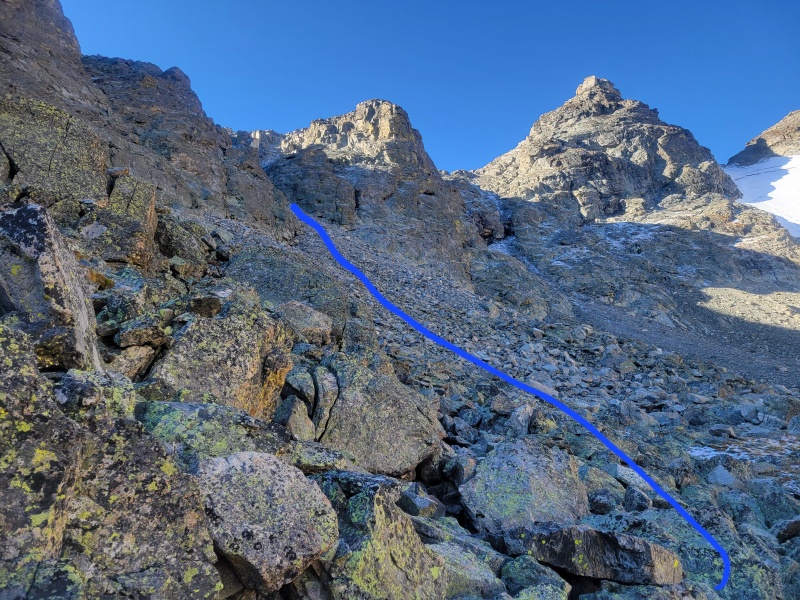
When you reach the base of Airplane Gully, the rock starts to get very loose. This section was the most difficult part of the climb for me. Being here in mid-September meant there was some ice and snow starting to build up on the rocks, which meant I had to be very careful with every step to avoid slipping. Luckily the exposure through here is relatively low, so a slip just means a couple of bruises (to your body and ego), but still best to take care and avoid them. Following the line in the picture below takes you into the gully and up towards the ridge.
Follow the gully to the left of the center rock formation. The rock is very loose so be ready to move slowly and be careful.
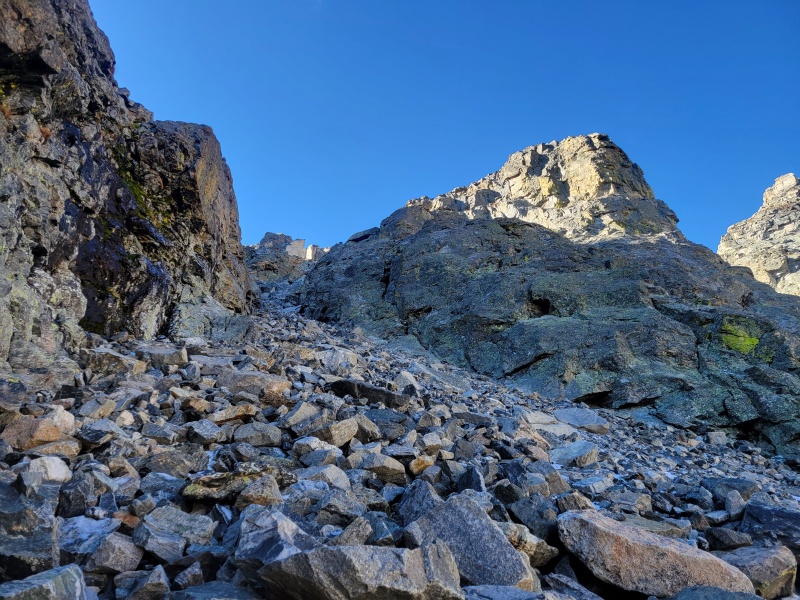
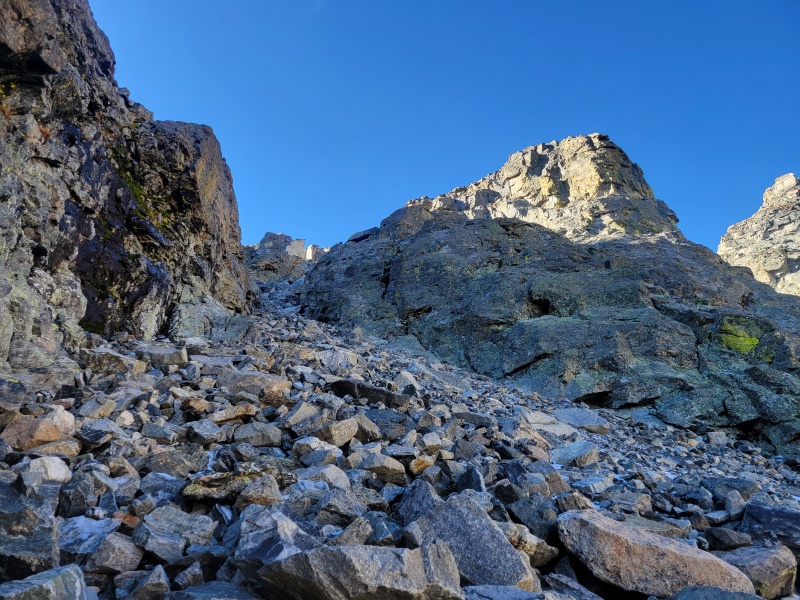
Climbing up through Airplane Gully took me more time than I would have liked, and it was challenging due to the rocks constantly sliding under my feet. If only for going through this section, I would recommend bringing a helmet. I went through the gully on my own, but if any other climbers had been present, there definitely would be danger of accidentally kicking rocks down on each other. I sent a couple of rocks that were relatively large down below me, so thankfully no one was down there while I climbed.
The base of Airplane Gully. Get ready for lots of loose rock!
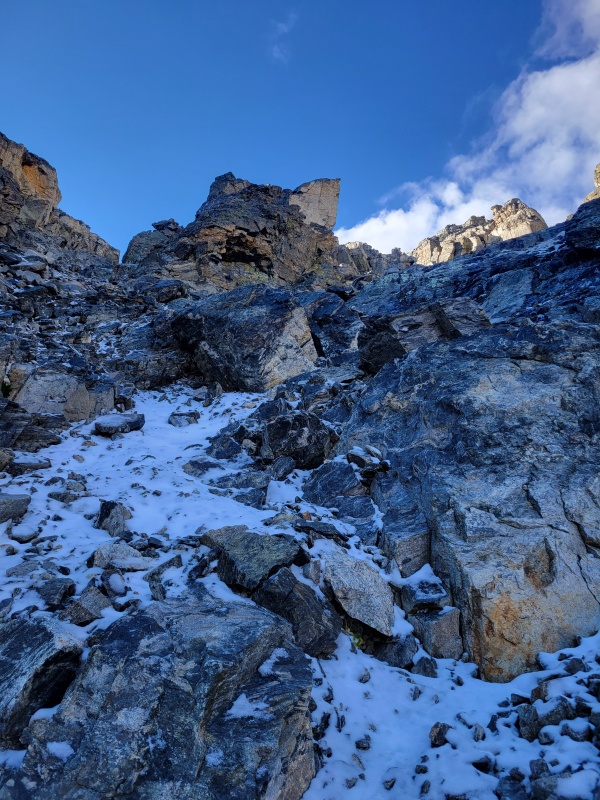
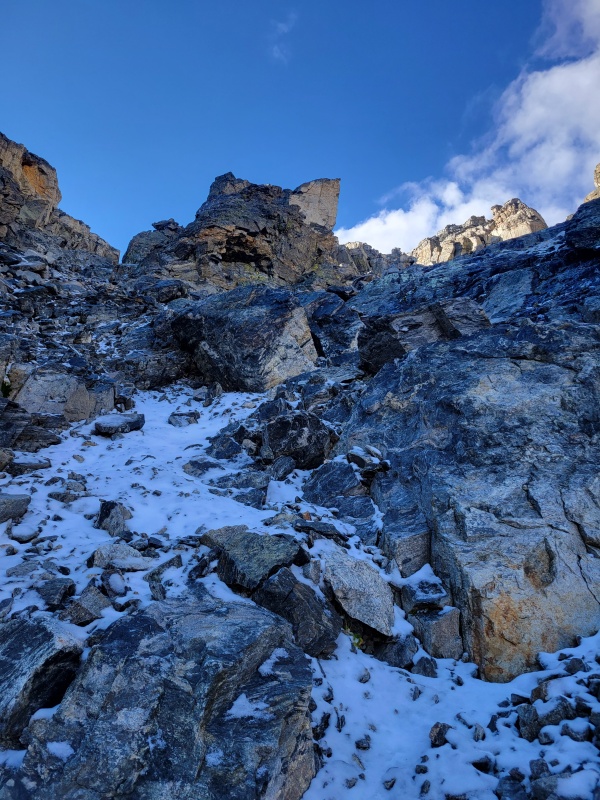
The final section of the gully remains just as loose, but after passing the large white rock in the picture below, I was able to use the more solid rock on the right side to help keep my balance and make steady progress up to the ridgeline. The airplane debris that the gully is named for is in this section, and I thought it was pretty cool to see. Definitely something nice after dealing with the awful loose rock all the way up the gully.
Close to the top of the gully. The airplane debris and the route are to the right of the white, pointy rock in the center. There was some ice and snow in the gully for me, but it wasn't difficult to navigate. I only slipped a couple of times.
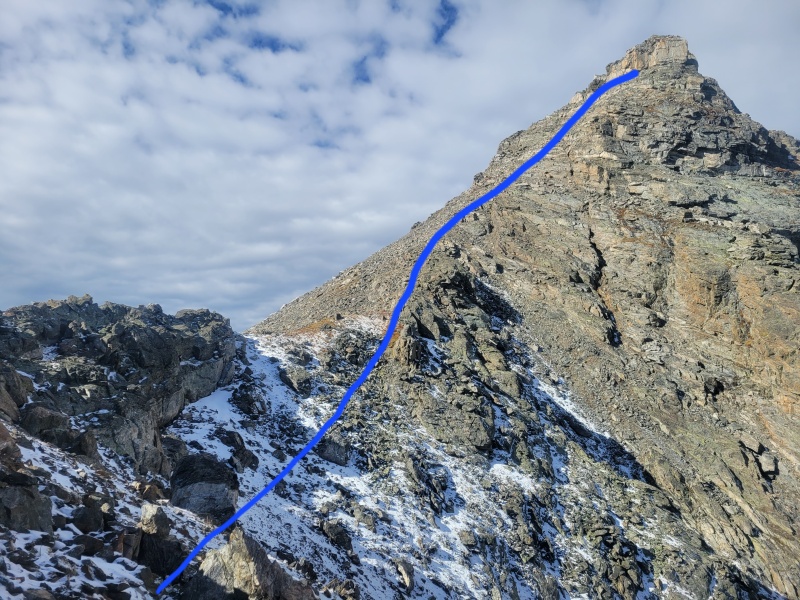
Upon reaching the ridgeline, the climbing gets better, in my opinion. The rock is way more solid and there is a semi-decent climber's trail that goes most of the way to the peak. Crossing the small ridge to the base of the peak wasn't too complicated. I took the right side of the ridge at first then crossed to the left to reach the base of the peak. From the base, I stayed on the climber's trail a bit, but mostly just angled up toward the peak whichever way looked best to me at the time, taking a fairly straight line approach.
Finally out of the gully! The rock is much more solid the rest of the way. Follow the obvious ridgeline. I stayed largely to the left of the ridge. Once you get to the base of the peak, there is a slight climbers trail that is relatively easy to follow.
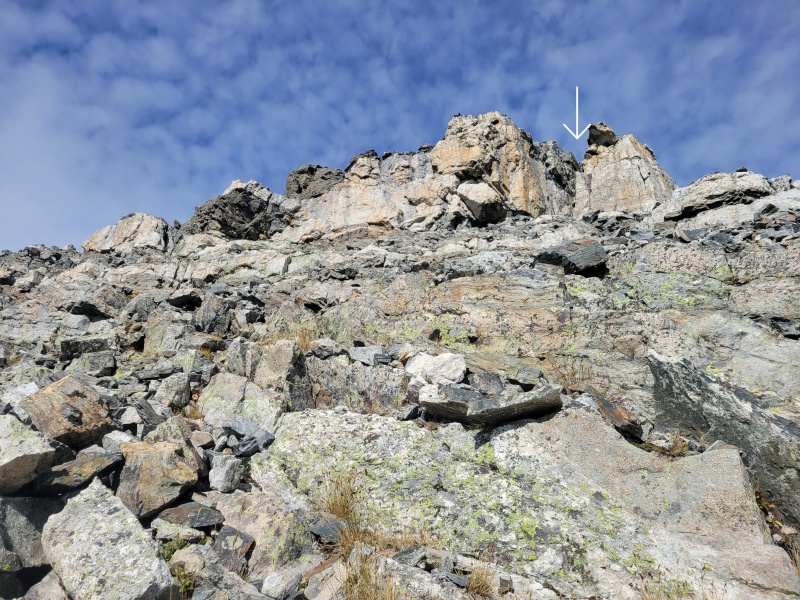
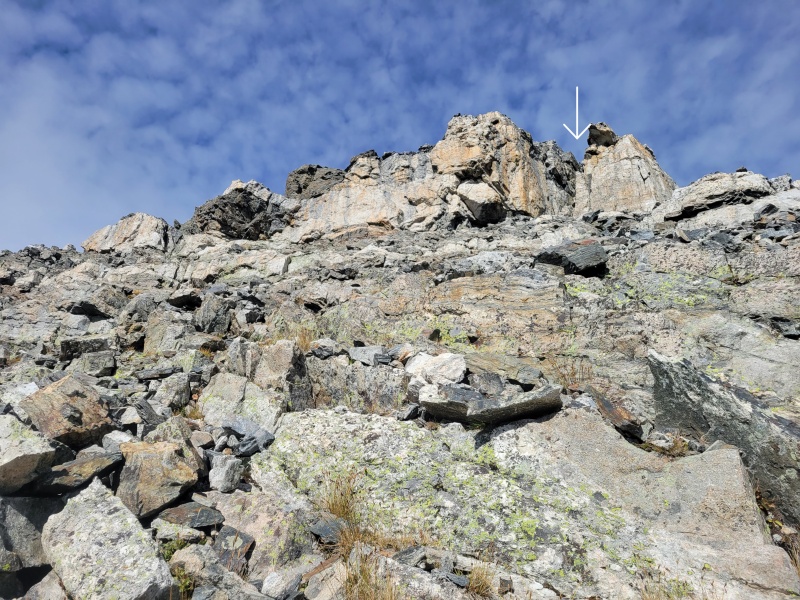
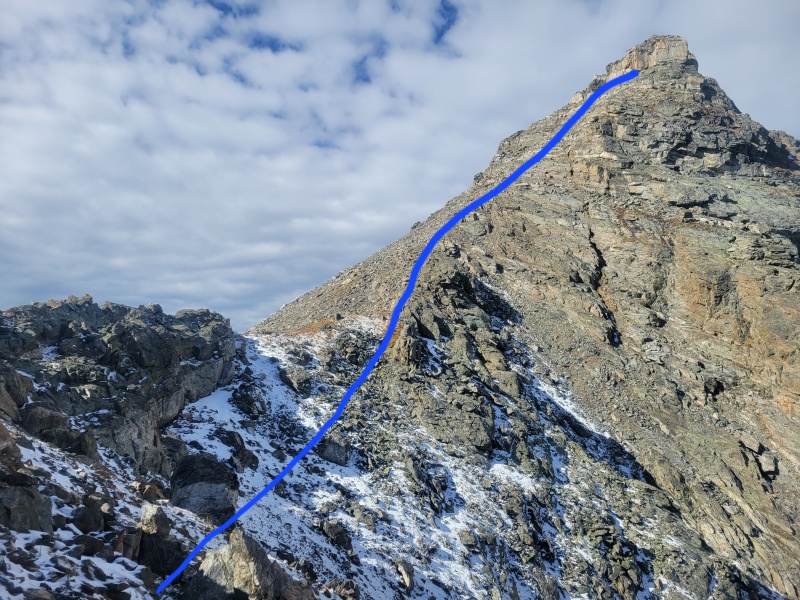
Close to the top of the climb, I opted to take the chimney indicated in the picture below for what looked like a fun challenge to make the summit. There is another route to the left that I took on my descent. It seemed like an easier option to reach the summit, too, and I'm sure it is just as fun!
I took this chimney to the peak, but I descended on the left side because it wasn't quite as vertical. Take your pick, but I thought the chimney was a fun challenge right before summitting.
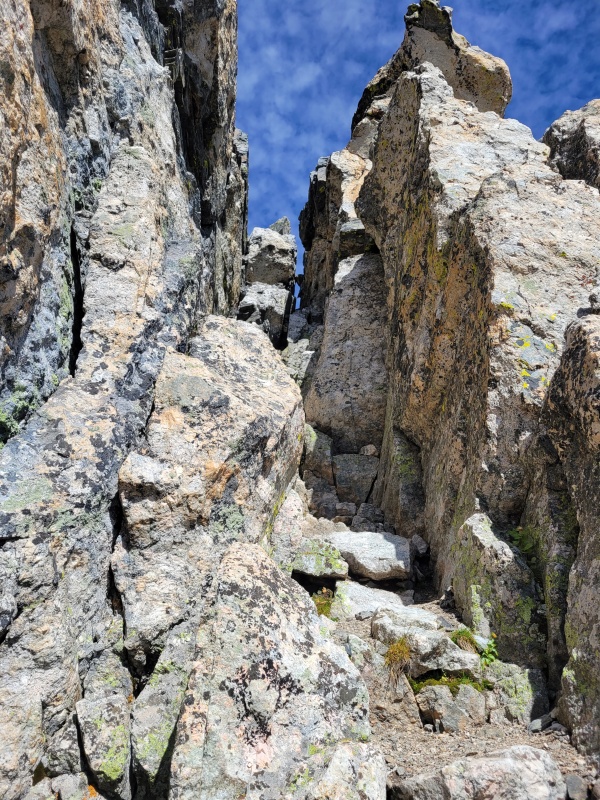
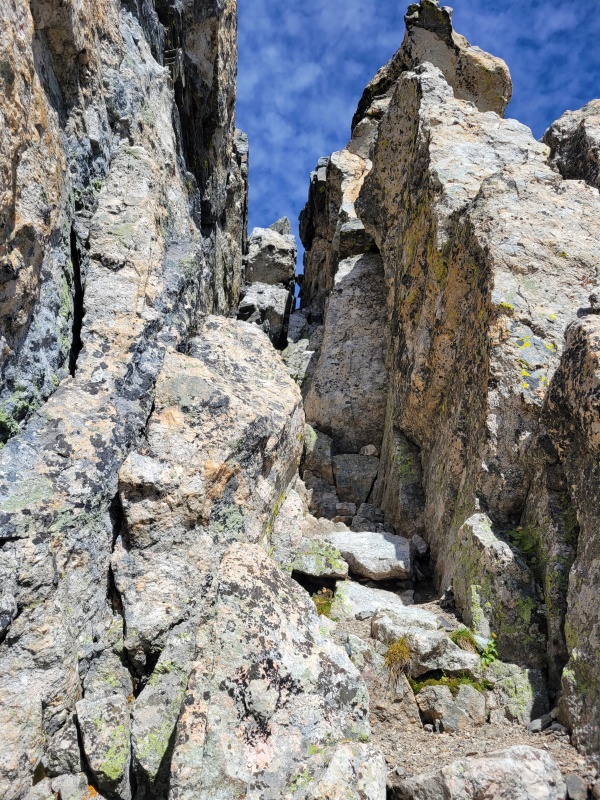
The chimney felt a little exposed and involved some vertical climbing. I had to take my gloves off so I could really get my hands into some good holds to pull on. The rock is really solid, and it was fun, easy climbing, but it definitely increases the risk of falling before the summit, so do at your own risk as always.
A closer view of the chimney. The peak is a few steps to the left at the top of the chimney.
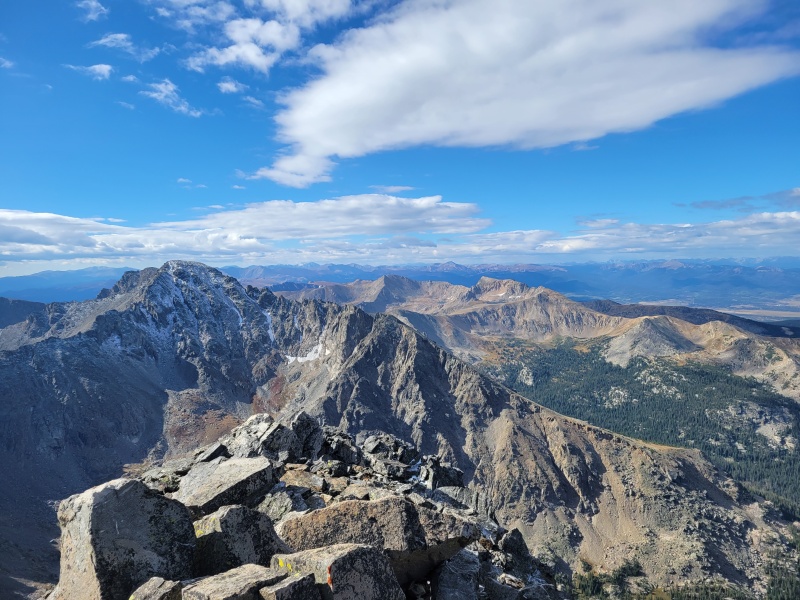
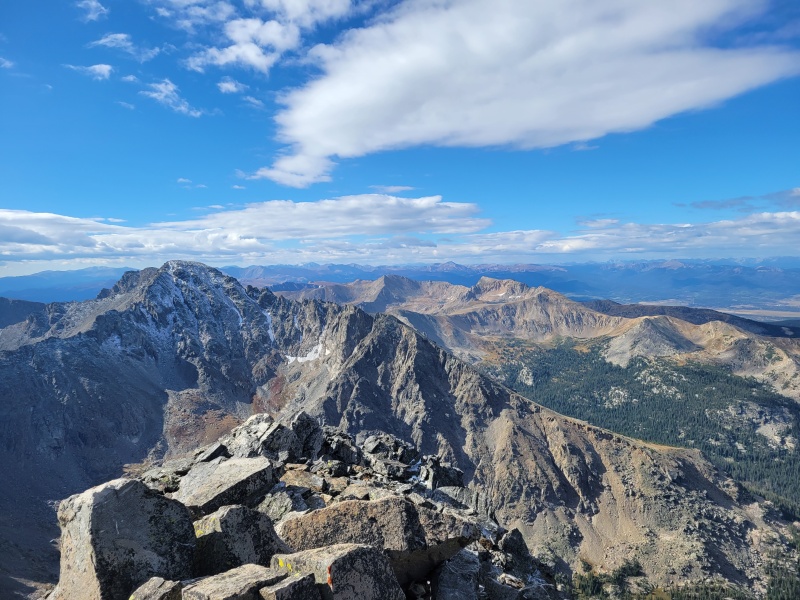
The peak is just a few steps from the top of the chimney and the views are incredible! I was super happy to summit such a cool peak and have pretty nice weather at the top. There was a small jar with a notepad for a peak register, but no pen/pencil, so bring your own if you want to sign it. I stayed up here for just a little to eat a snack and take in the view before starting my way down to get out of the wind.
Spectacular views from the top!
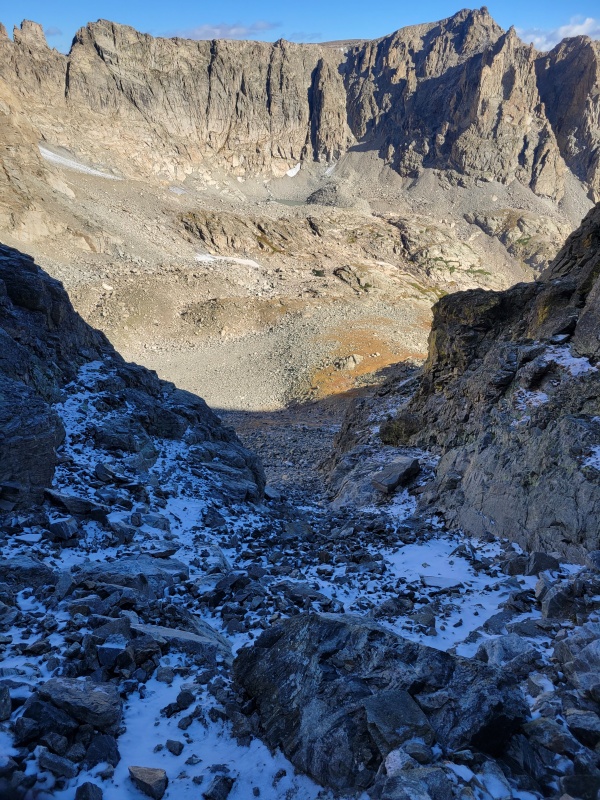
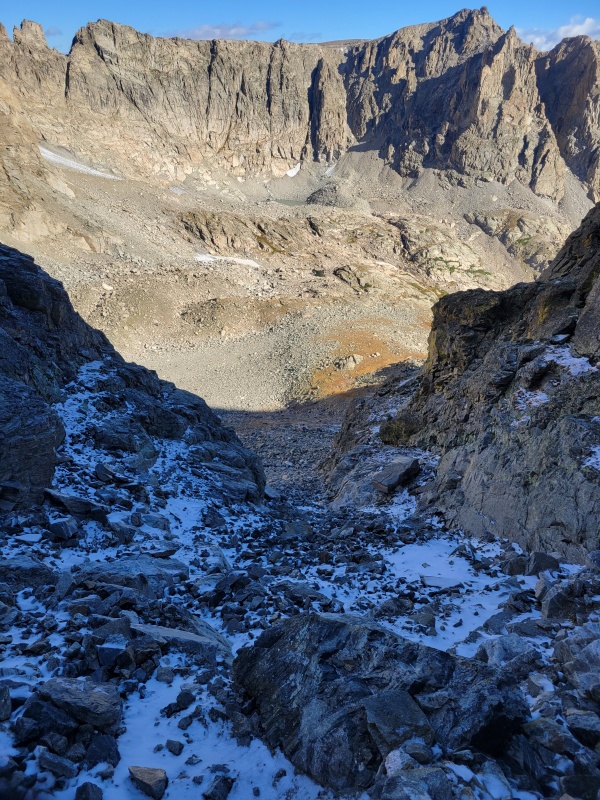
I descended the same way I came up, minus the peak. I took the alternate route I mentioned above instead of going back down the chimney because I didn't feel like downclimbing was a particularly safe option for me through there. The descent wasn't too bad, but I definitely took my time going back through the gully. The ice and snow were even more difficult to navigate on the way down, but I made it through eventually.
Descending Airplane Gully. This was the only part of the descent that was more challenging than the way up. Be careful on the loose rock and take it slow.
On the way out I saw a bunch more day hikers and a couple of moose (probably the same one from this morning plus a friend). I stopped for a few pictures, but once I got back to terrain I could run on, I got back to trail running my way out. I took the road back to my car to avoid mountain bikers that would inevitably be on the trail I had run in on and celebrated a successful day with a package of ramen and a PBR for lunch before a quick nap and drive home.
I definitely recommend this route, but be wary of conditions and ready to reassess when things change. I didn't feel like the exposure was too bad, but have read other reports that disagree, so just do what's right for you if you attempt it. Just remember to have fun out there!
GPS Track(s) on Google Maps (made from a .GPX file upload):
Navajo is a fun peak indeed. Airplane gully as far as gullies go is pretty standard, but seeing the airplane wreckage is a cool, if somber experience. The chimney you went up is an enjoyable scramble as well!
Caution: The information contained in this report may not be accurate and should not be the only resource used in preparation for your climb. Failure to have the necessary experience, physical conditioning, supplies or equipment can result in injury or death. 14ers.com and the author(s) of this report provide no warranties, either express or implied, that the information provided is accurate or reliable. By using the information provided, you agree to indemnify and hold harmless 14ers.com and the report author(s) with respect to any claims and demands against them, including any attorney fees and expenses. Please read the 14ers.com Safety and Disclaimer pages for more information.
Copyright: Route information, text, risk factors, maps, GPX files, charts, photos, 14ers.com-created map imagery, flythroughs, and other content provided in this route description are copyrighted by 14ers.com and may not be copied, reproduced, republished, distributed, modified, or used to create derivative works without prior written permission.
Please respect private property: 14ers.com supports the rights of private landowners to determine how and by whom their land will be used. In Colorado, it is your responsibility to determine if land is private and to obtain the appropriate permission before entering the property.