| Report Type | Full |
| Peak(s) |
Father Dyer Peak - 13,642 feet Crystal Peak - 13,860 feet |
| Date Posted | 09/13/2021 |
| Modified | 04/01/2025 |
| Date Climbed | 09/08/2021 |
| Author | Ed_Groves |
| Father Dyer and Crystal Peak Loop |
|---|
|
Introduction I just returned from my second trip to hike some Colorado peaks in the last three weeks. The first trip was for me and I knocked off a few Sawatch 14ers. On this trip I picked some easier 13er peaks and Mt Sherman for my wife who was with me. However, on her rest day, I went out solo to gain some class 3 experience on Father Dyer and intended to tack on Crystal Peak A if the weather cooperated. I left Breckenridge at 5:30 AM and drove up the Spruce Creek road past the lower trailhead to the intersection with the Aqueduct Road. I turned right and parked by the gate 100 yards or so up the road. In my opinion, the road above the lower trailhead is absolutely a four wheel drive only road. However, if you have an AWD vehicle with excellent ground clearance I suppose it may be doable. Wheeler Trail and Crystal Creek Basin When I arrived it was still dark outside. I grabbed my essentials, strapped on a headlamp, and started to hike at approximately 6:00 AM. I was concerned about finding the Wheeler Trail 50 yards up the road but it was quite obvious to the left of the road. I was also able to detect a "Wheeler Trail" sign to the right of the Wheeler path about 20 feet off the road. The Wheeler Trail immediately begins to lead moderately upward through the forest which was nice to get the blood flowing. Within about a half mile the path dips down to a beautiful creek which has two places to cross. I chose the one on the left with one initial big log accompanied by a few smaller logs across the creek. (Photo of creek taken on return leg of hike.) By this time first light was approaching and I was soon able to turn off my headlamp. In just another quarter of a mile I reached the intersection with the Crystal Creek road and turned left. 

Within less than 1/8th of a mile, I saw a truck and tent to the left with a fire ring in a gorgeous setting for a campsite. Looking behind me I could see Bald Mountain's massif looming to the east. The sun was just beginning to peak over the mountain and I couldn't pass up a few pics of its beauty. 

The hike up the road is a gentle grade and provides wonderful views of the Crystal Creek Basin and the mountains around its perimeter: Mt Helen, Father Dyer Peak, Crystal Peak, and Peak 10. I highly recommend hiking this section at sunrise. 


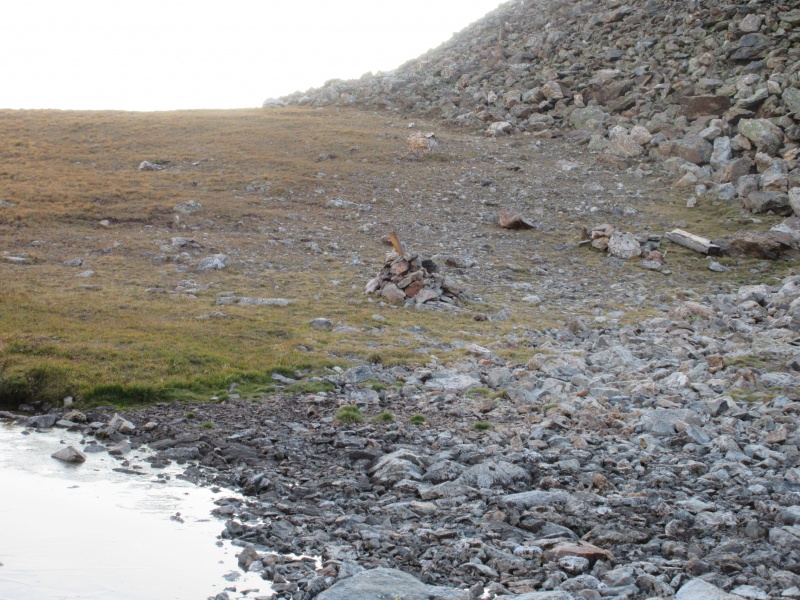
As one reaches the lower lake, the road splits with the right fork leading to the Crystal Peak trail and the left leading to the talus piles between Mt Helen and Father Dyer Peak. I took the left fork and after approximately a quarter mile I had almost arrived at the talus piles. Here, one takes a right to head over to the east ridge where the real fun begins. There was a large cairn near the bottom of the valley leading over to the east ridge. 
Climbing Father Dyer's East Ridge I believe I started up a little too soon and took a slightly more difficult path on the first portion of the ridge. However, for the most part this section is a mix of rocks, grass, and bushes that is easily navigated. After climbing up the first 400 feet of elevation gain on the ridge I reached a relatively flat spot before proceeding to more substantial maneuvers ahead. 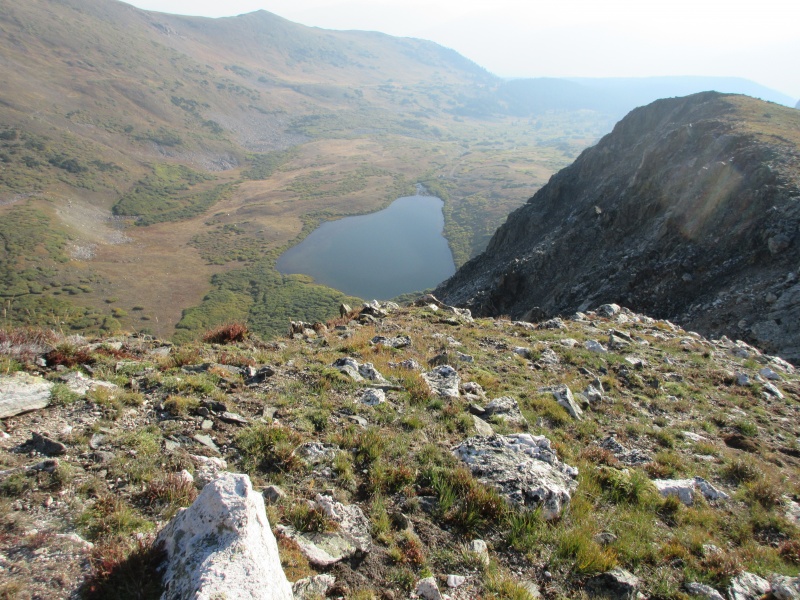
The next obstacle lies hidden behind the first hump of rock in the first photo below. I carried a lighter, less capable camera and my cellphone for this hike and it shows in the pic as it almost appears it is a part of the higher climbs to come later. This was another simple climb and once I reached the top of that hump some more serious scrambling ensued across the rocky ridge to another flat spot. 


It was at this point that I encountered a "knife's edge" of a sort. It wasn't really a knife's edge as one could climb across it and those with experience and no fear might conceivably walk across some parts of the top. Upon my approach to this section, I found a small ledge below and to the right which allowed me to avoid much of the narrow ridge above. After crossing the ledge and avoiding maybe 60 to 70 percent of the upper ridge, the ledge narrowed and the ridge above seemed to be a better path. There were footholds and handholds available so I climbed up to the ridge and finished the section. 

I was feeling really good about the climb so far but there were still more obstacles, and the worst of the elevation gain was ahead. Looking up to the next section I could see the white rock at the top that is mentioned in the route description on 14ers.com. For this section I moved around to the south side and began my climb. It was here I discovered that while the ridge is composed of mostly solid rock there were loose ones to be found. A few of my checks for footholds and handholds revealed rock that was somewhat loose, though for the most part it was still pretty solid. It wasn't long before I reached the white rock and another relatively flat spot. 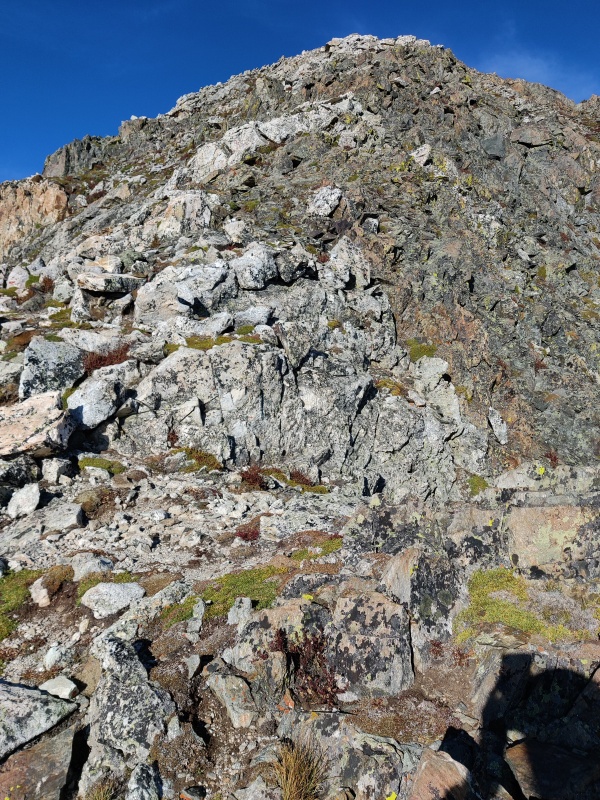


One last long climb to the false summit remained at this point. I began the climb and was soon near the top. I had to navigate a final section before reaching the top and it was here that I think I chose the wrong route. In photo 18 of the route description on 14ers.com, the hiker is shown ascending to the left of the false summit. However, there appeared to be a path along a ledge to the right which ascended through the brown colored rock just to the right of the false summit in photo 18. I took this path, and upon reaching a point below the brown rock for my ascent, I discovered that it was extremely loose and solid footholds or handholds were difficult to find. This was not a spot where I wanted to slide because there was nothing but steep loose rock and scree below it. A fall would not have been a good thing. I carefully scanned around me for holds to move upward and was about to turn back to find a more solid path when I spotted a handhold within a long arms reach above me. I reached up and was relieved to find it was extremely solid so I pulled myself up and found a few more solid holds from there. I ascended the loose gully and was at the top of the false summit. This path I took appeared to have been used before, but if loose stuff makes you uneasy I would recommend finding a route to the left as shown in this site's photo 18. Unfortunately, I did not take a good photo of this area because once I discovered what it was like, I was already in the middle of it and I wasn't about to take a photo from a precarious position. I provide a couple of photos below to try to show this section but they do not do it justice. 
The lovely pointer shows approximately where I ascended to the false summit 

I was energized after completing the east ridge and took a short ridge walk over to the actual summit. There are so many great views all around from this vantage point. The pics below show just a few. 


Hiking From Father Dyer to Crystal Peak At this point I was ready to move on as the worst was behind me, or so I thought. I headed down the ridge toward Crystal Peak and crossed the boulders and towers on the ridge. I tried contouring around the side of one of these, but that was not the best way to go for me. Sticking close to the top of the ridge is the quickest way across this section. After traversing about six or seven of these humps I was at the base of Crystal. The hike up Crystal Peak was a class 2 walk up a somewhat steep vague path that disappears quite often. It wasn't difficult to rediscover the trail when it was lost. Once I reached the summit I took a big water break, partook of some sustenance, and took a few more pics. 


The Final Descent I proceeded down from Crystal Peak toward the saddle with Peak 10. The descent is nothing but boulders and scree and it is fairly long. Climbing Father Dyer's east ridge was fun, but a boulder and scree descent is one of the few things that suck for me when hiking. There are all kinds of vague paths through this stuff so you just have to choose the one that works for you. I looked ahead to the path on the side of Peak 10 and tried to make a beeline for it to eliminate distance, but if I were to do it again I would find the quickest path down to the trail by Upper Crystal Lake which leads to the path on the side of Peak 10. This might add a little elevation gain but it gets you out of the boulders and scree much quicker. Once I was through this stuff, the rest of the trail along the side of Peak 10 was easy and I was able to make good time back down to Lower Crystal Lake, the basin, and the Wheeler Trail. 


Summary I love this route and am surprised I don't hear more about it with it being this close to Breckenridge. The climb to Father Dyer is an awesome, fun introduction to class 3 scrambling and there are eye-catching views all along the route as one can see from all the photos I took. Not to mention, there is 1300 - 1400 feet of elevation gain in the last .8 to .9 of a mile up Father Dyer. I also enjoyed the hike from Father Dyer to Crystal Peak but the descent off of Crystal was not the most fun thing to do. However, the descent is over before you know it and the views are great from there as well. This also seems like a great route to spend time alone in the outdoors if that is your thing. (It is mine.) I was alone on this route from the beginning until I came down from Crystal Peak and reached Lower Crystal Lake. I ran into a hiker at that point who was going up the Crystal Peak trail. There were also a couple of people setting up tents by the lake. Other than that, I was alone the entire time. As for statistics, my watch seemed to be off on the elevation gain by a great deal, but from looking at other reports this loop is approximately 3200 feet of elevation gain and a little over 8 miles. Thumbnails for uploaded photos (click to open slideshow): ")
")
")
")
")
")
")
")
")
")
")
")
")
")
")
")
")
")
")
")
")
")
")
")
")
")
")
")
")
")
")
")
")
")
")
")
")
")
")
")
|
| Comments or Questions |
|---|
|
|
Caution: The information contained in this report may not be accurate and should not be the only resource used in preparation for your climb. Failure to have the necessary experience, physical conditioning, supplies or equipment can result in injury or death. 14ers.com and the author(s) of this report provide no warranties, either express or implied, that the information provided is accurate or reliable. By using the information provided, you agree to indemnify and hold harmless 14ers.com and the report author(s) with respect to any claims and demands against them, including any attorney fees and expenses. Please read the 14ers.com Safety and Disclaimer pages for more information.
Please respect private property: 14ers.com supports the rights of private landowners to determine how and by whom their land will be used. In Colorado, it is your responsibility to determine if land is private and to obtain the appropriate permission before entering the property.


