Download Agreement, Release, and Acknowledgement of Risk:
You (the person requesting this file download) fully understand mountain climbing ("Activity") involves risks and dangers of serious bodily injury, including permanent disability, paralysis, and death ("Risks") and you fully accept and assume all such risks and all responsibility for losses, costs, and damages you incur as a result of your participation in this Activity.
You acknowledge that information in the file you have chosen to download may not be accurate and may contain errors. You agree to assume all risks when using this information and agree to release and discharge 14ers.com, 14ers Inc. and the author(s) of such information (collectively, the "Released Parties").
You hereby discharge the Released Parties from all damages, actions, claims and liabilities of any nature, specifically including, but not limited to, damages, actions, claims and liabilities arising from or related to the negligence of the Released Parties. You further agree to indemnify, hold harmless and defend 14ers.com, 14ers Inc. and each of the other Released Parties from and against any loss, damage, liability and expense, including costs and attorney fees, incurred by 14ers.com, 14ers Inc. or any of the other Released Parties as a result of you using information provided on the 14ers.com or 14ers Inc. websites.
You have read this agreement, fully understand its terms and intend it to be a complete and unconditional release of all liability to the greatest extent allowed by law and agree that if any portion of this agreement is held to be invalid the balance, notwithstanding, shall continue in full force and effect.
By clicking "OK" you agree to these terms. If you DO NOT agree, click "Cancel"...
I was pleasantly surprised by this winter route up Humboldt – it was a very beautiful setting with a fun little scramble up the final ridge with just enough ruggedness to give it a dramatic look while still making for a fairly easy climb.
Route: Humboldt East Ridge
Trailhead: Rainbow Trail 2WD Trailhead
Stats: ~13mi; 5,346ft gain; 11 hours 15min (my GPS glitched a few times so the numbers might be off slightly).
This is a well documented route so I won’t be as thorough as some reports but instead will highlight:
A caution about Google Maps directions to the trailhead
Some of the beauty of this route
The fun little scramble up the last ridge to the summit
And a few assorted notes/photos
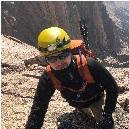
I did this trip with two new partners - Carl and Ian (Carl_Healy and iainwint). I've been banging out a lot more 13ers/14ers this season so our groups pace was slightly slower than when I've gone solo but that allowed me to take in more of the scenery.
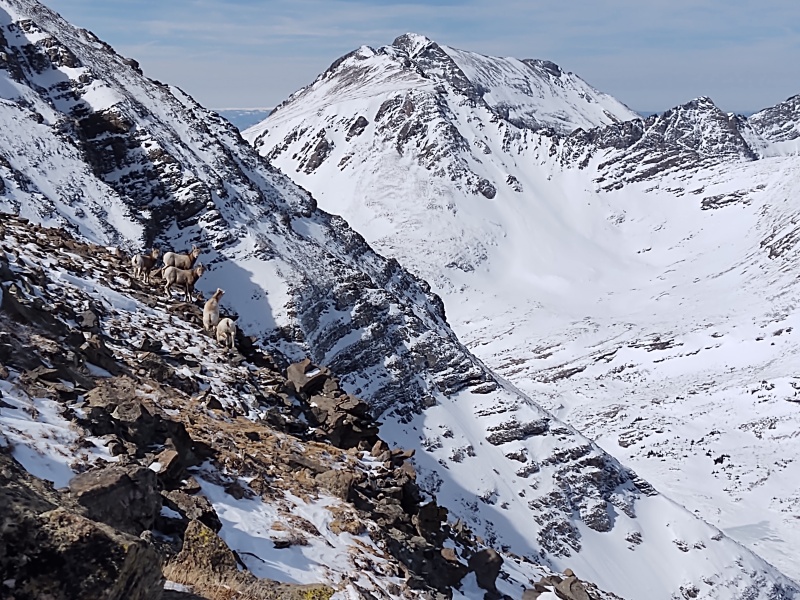
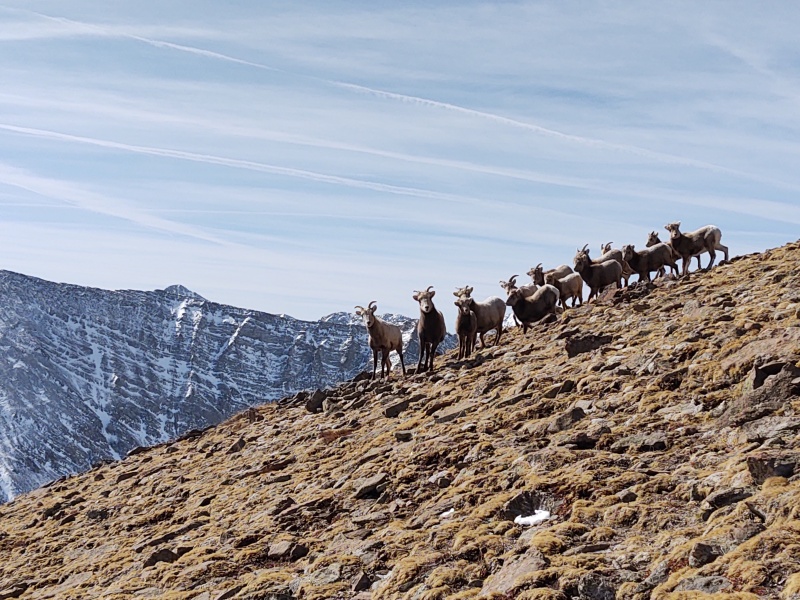
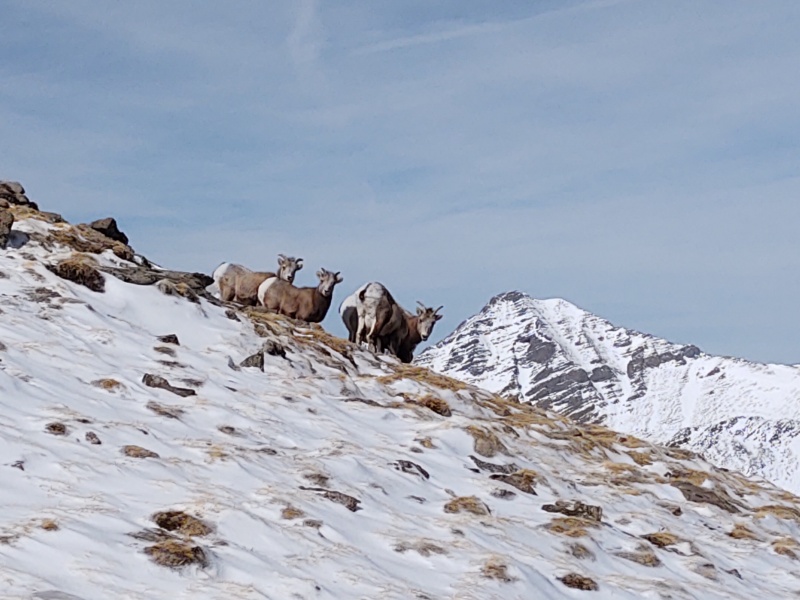
Some bighorn sheep (near center) with the final ridge to Humboldt at left.Closer view of the bighorns.
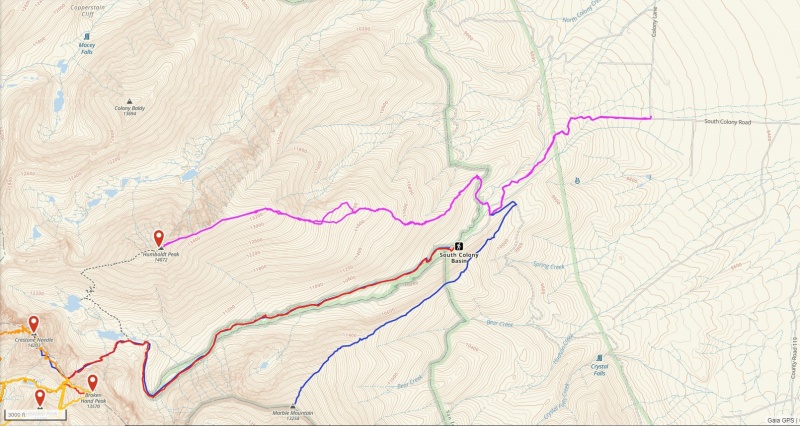
Trailhead
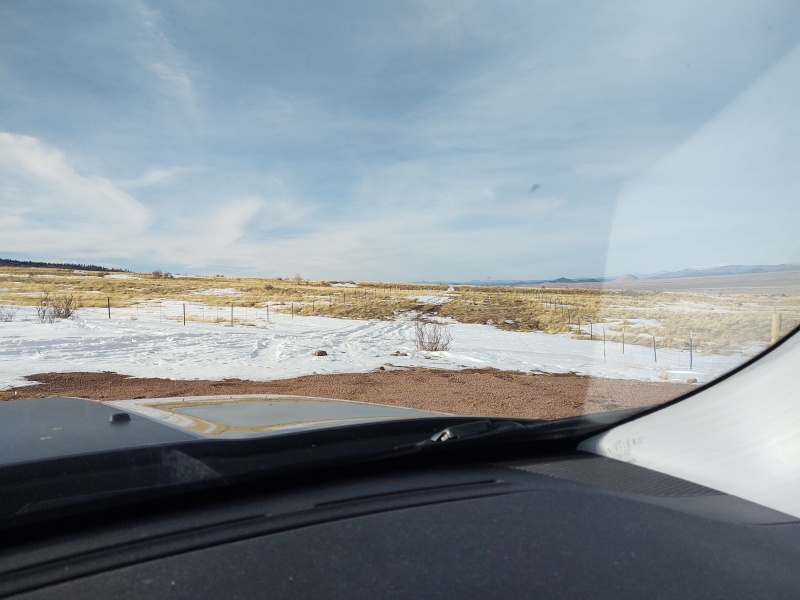
Luckily one of my partners scouted out the trailhead in advance and warned us that Google Maps tries to take you down Colony Lane (N-S) which isn't really a road - just some tire tracks through a field. Instead it's easier in winter to come along South Colony Road (E-W) which is an actual road until the last few hundred yards or so to the 2WD lot which was mud and snow.
Light purple is our track from the 2WD parking at the corner of South Colony Road (an actual road) and Colony Lane (just tire tracks in a field).
The tire tracks shown are the so called Colony Lane. South Colony Road is a better approach in winter, though still a little sloppy near the end.
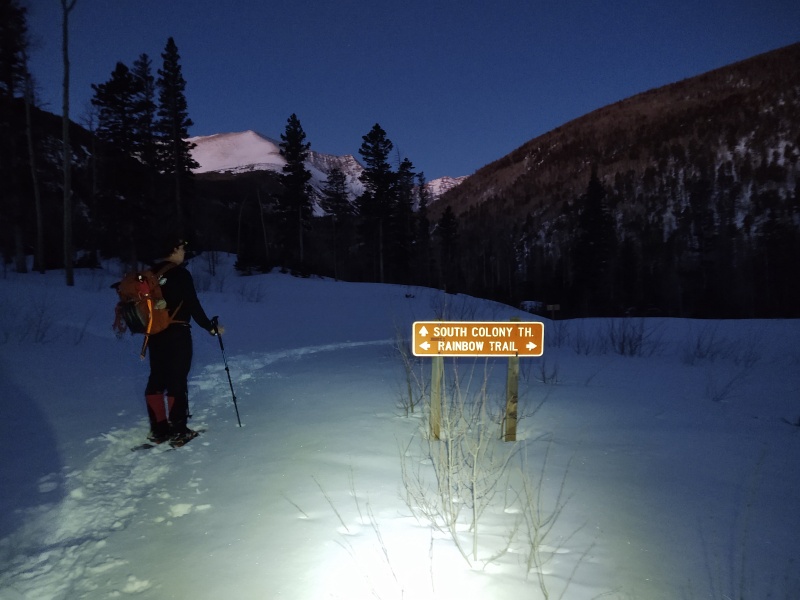
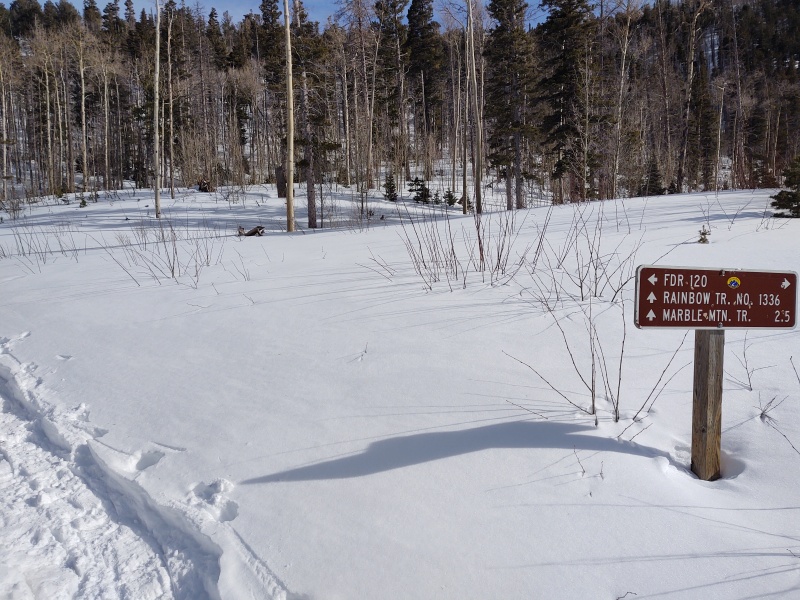
Rainbow Trail
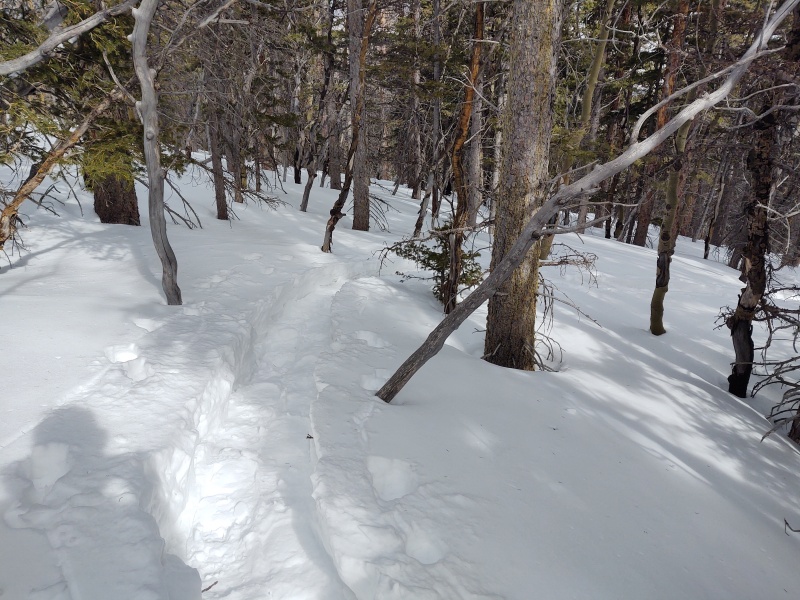
This route goes up the road and then along Rainbow Trail so the beginning is super trivial to follow but once in the trees it quickly becomes more of a choose your own adventure if there aren't tracks in yet. Fortunately one guy went out ahead of us and put tracks in to about 11k before giving up and turning back. Our trio picked it up from there and set in the rest of the trench. The trenching wasn't terrible but it was certainly nice to have a couple extra folks to trade trenching duty with.
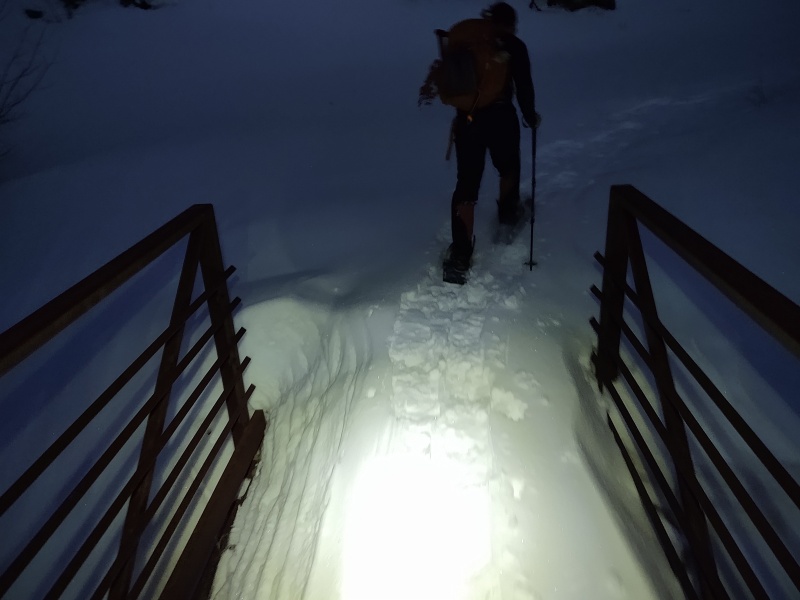
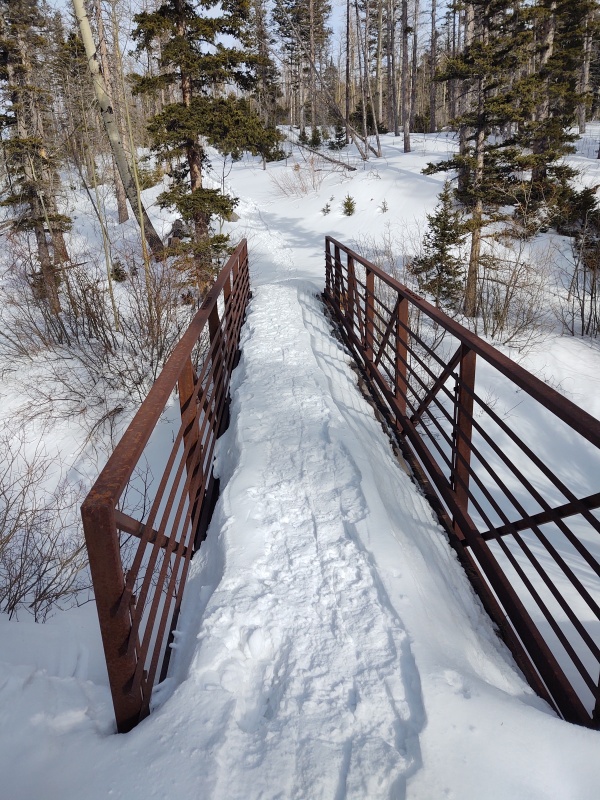
Rainbow trail even has signs at the start.The bridge mentioned in the route description.
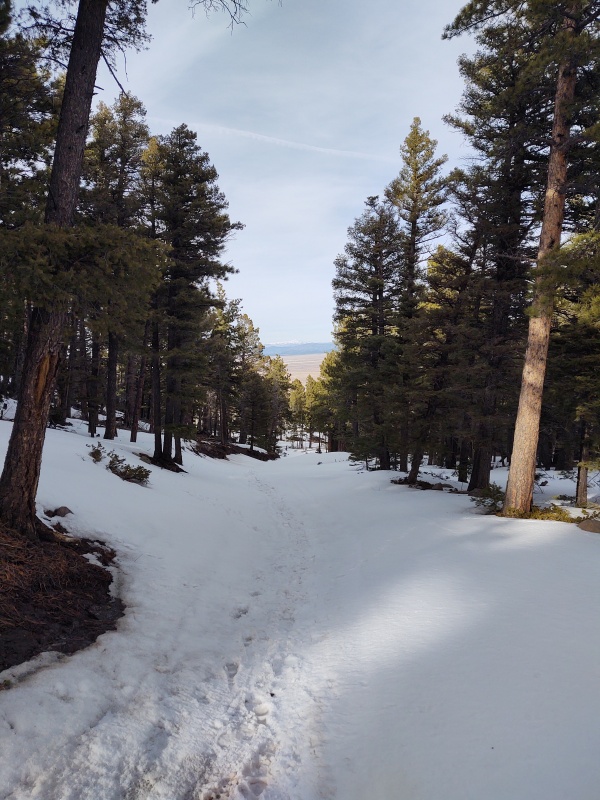
Mellow start
Above Treeline
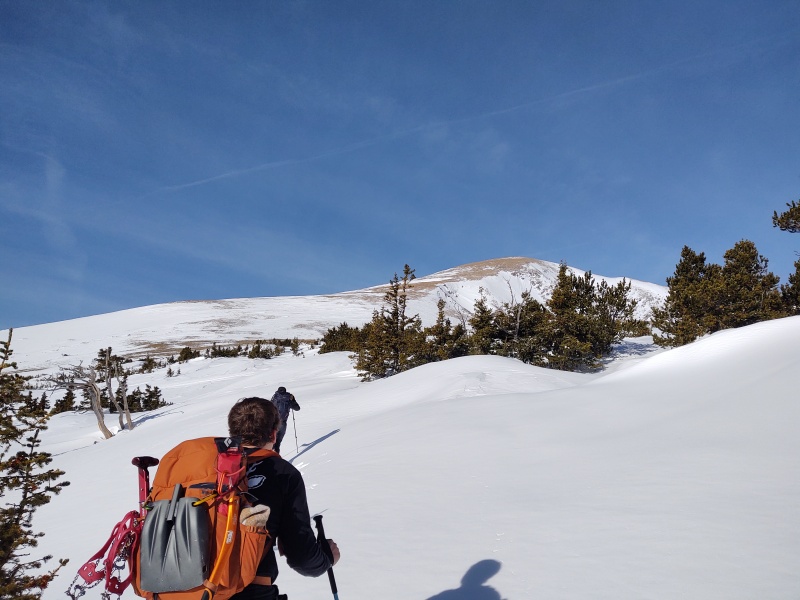
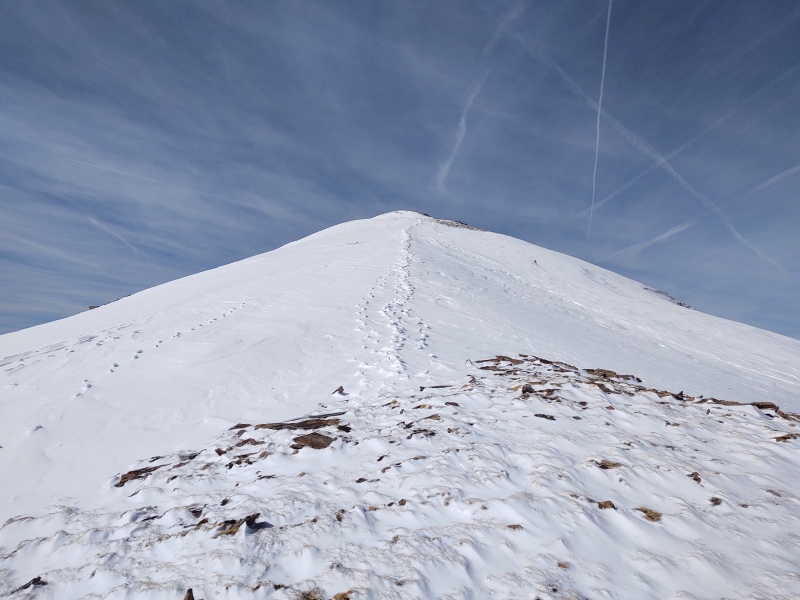
You'll notice I skipped quickly over a good chunk of the ridge - gain the ridge, trench your way up the ridge - that's the ho-hum part (see a few more photos near the end in the Assorted Descent Photos section). Then comes the good stuff.
Breaking out above treeline - no that's not the summit...There were multiple groups of bighorn sheep all over the place the day we went up.
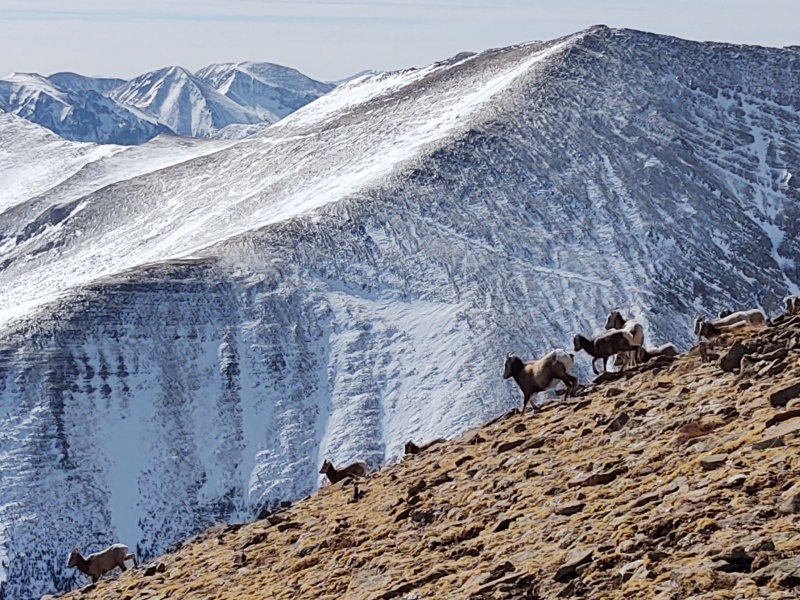
One of the real treats of the day was all the bighorn sheep - not just a couple but large groups of them in several places at various altitudes from a little above treeline to close to the summit.
They sat for the longest time as we came up the ridge but then eventually ran off as we got near.A group of bighorn sheep running down the slopes
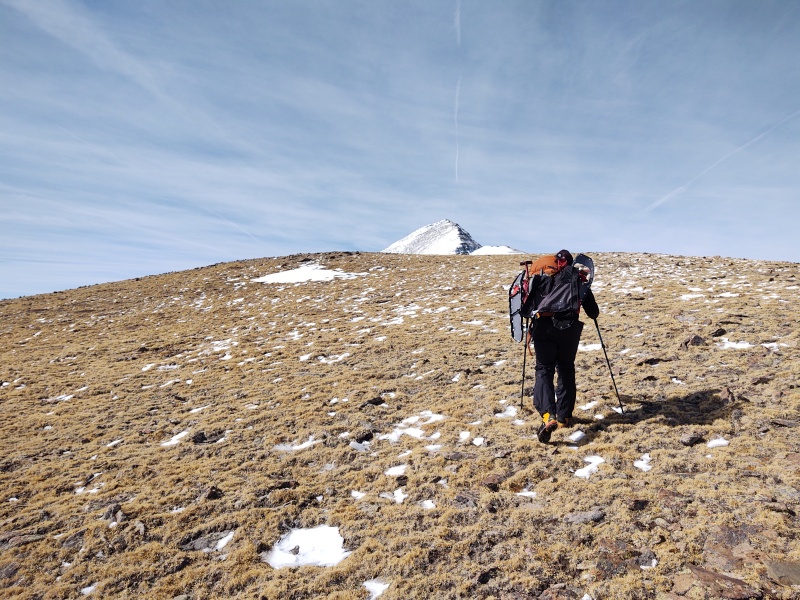
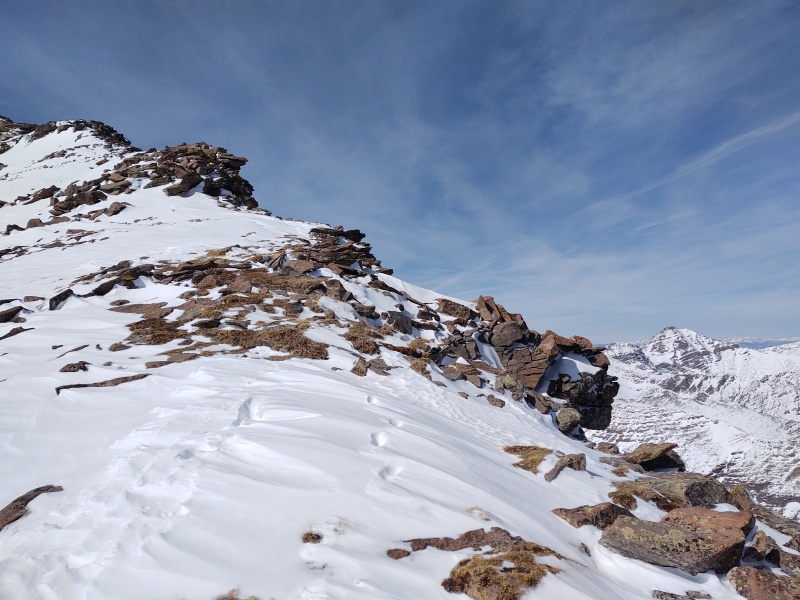
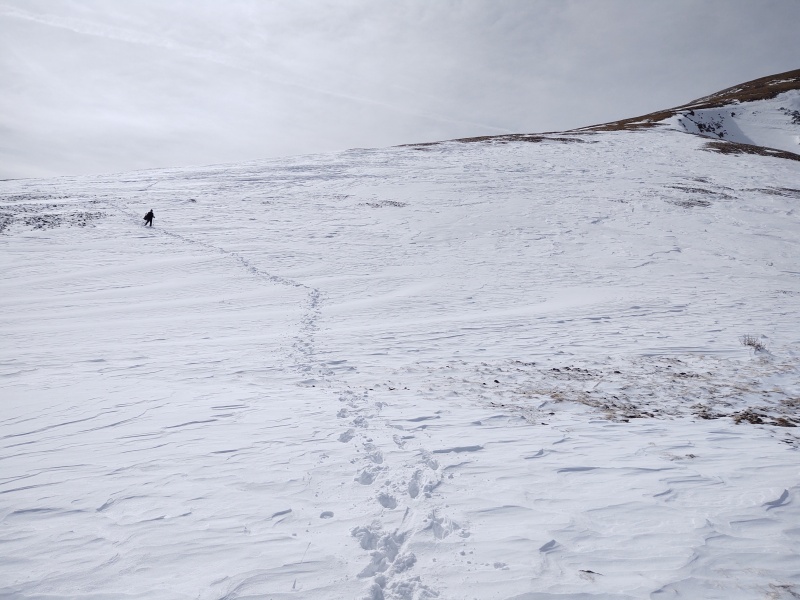
The slopes going up to the summit ridge are long but easy with a growing number of good views as you go up.
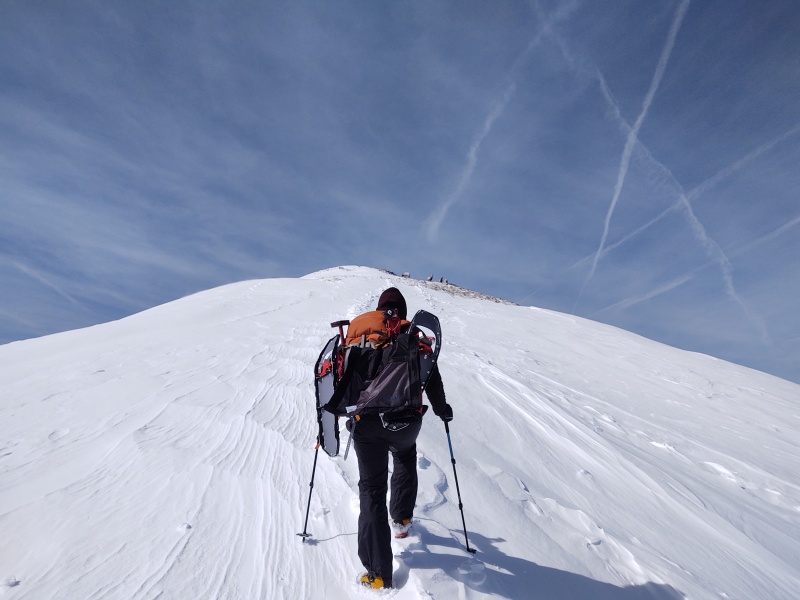
Carl heading up.This little rise to the ridge was the largest unavoidable snow field above treeline that day.
Carl going up the snow with yet more bighorn sheep above.So many neat backdrops to catch the bighorns against.
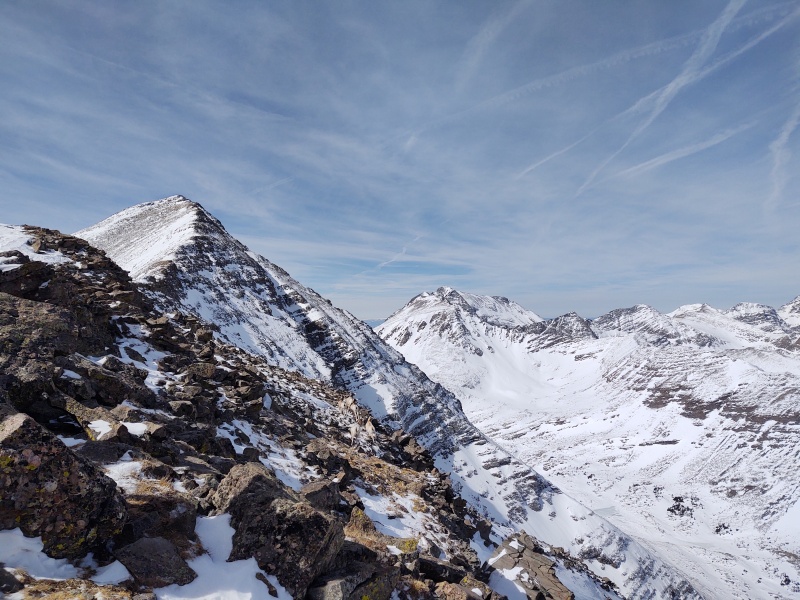
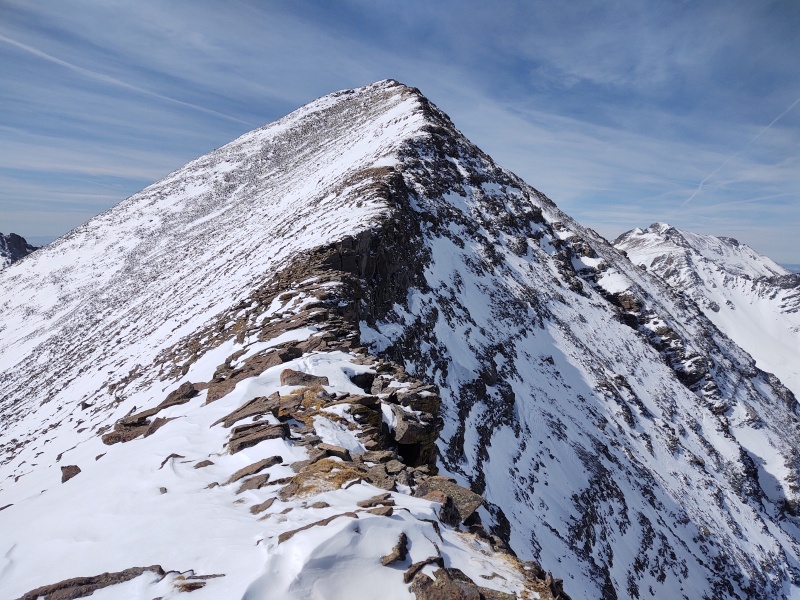
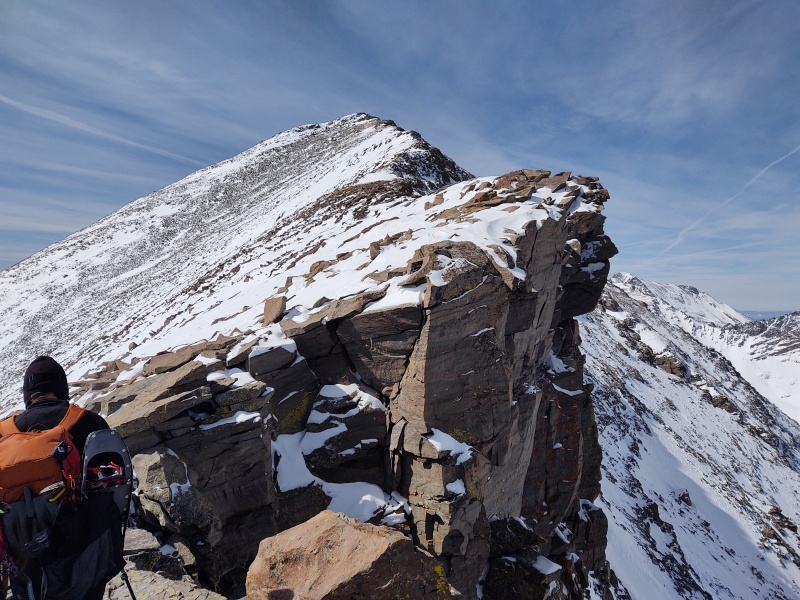
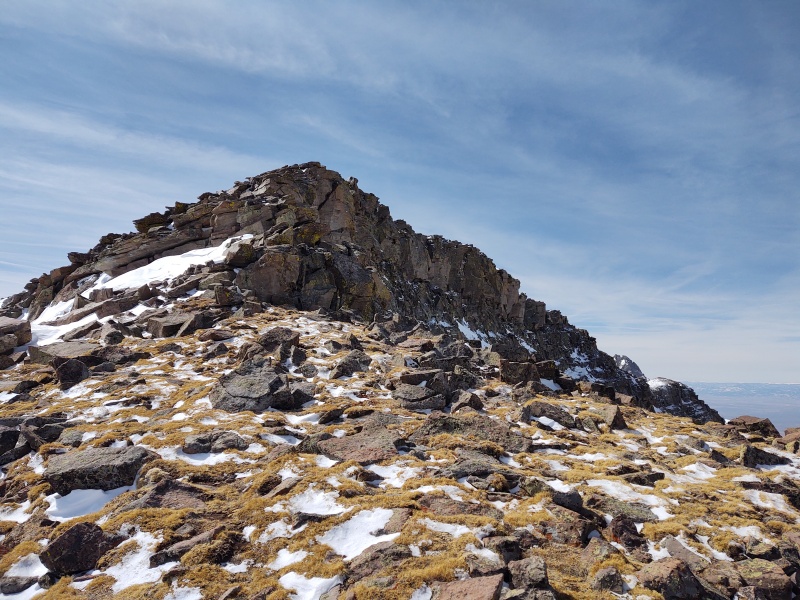
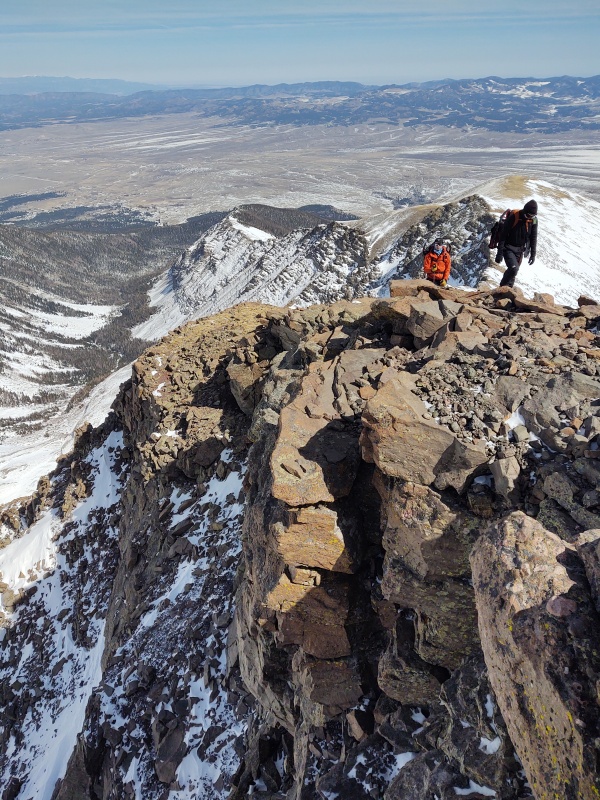
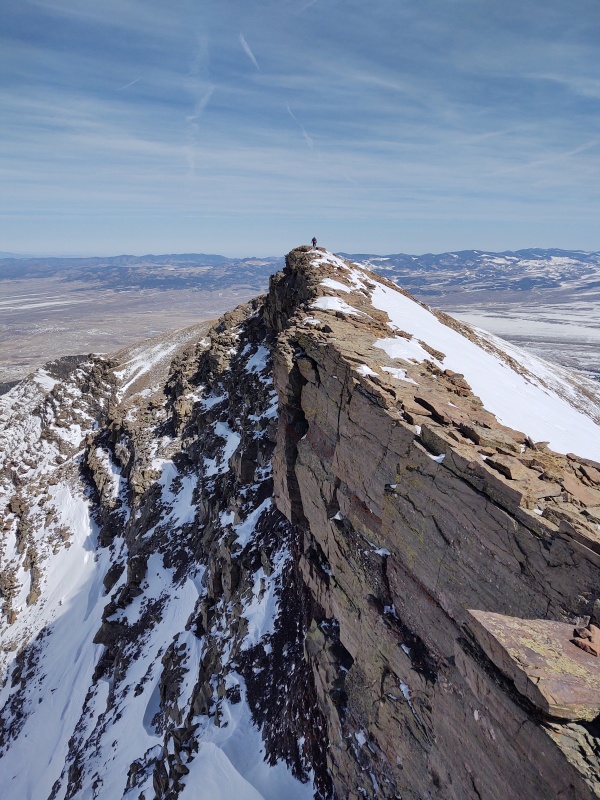
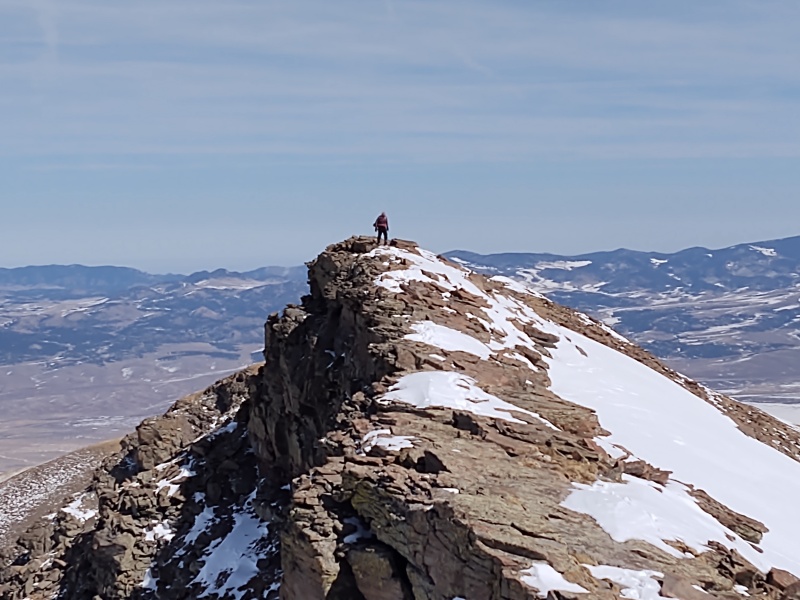
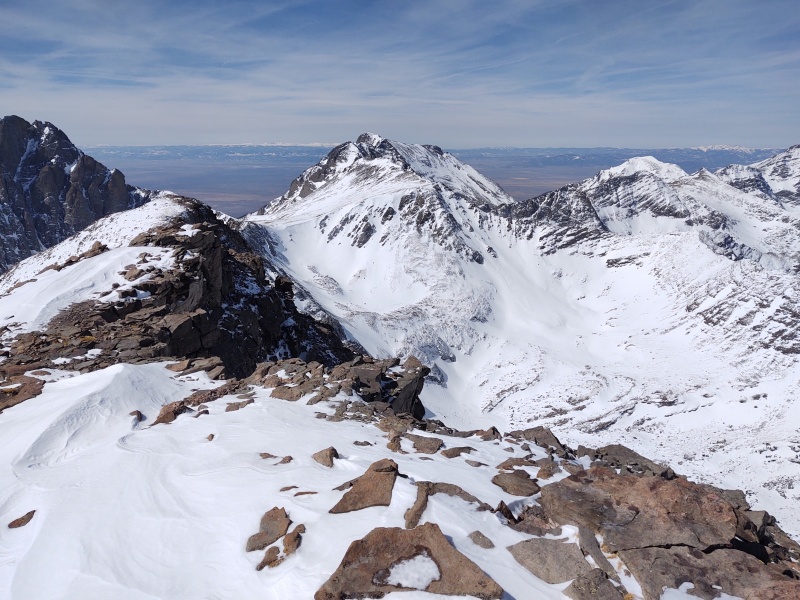
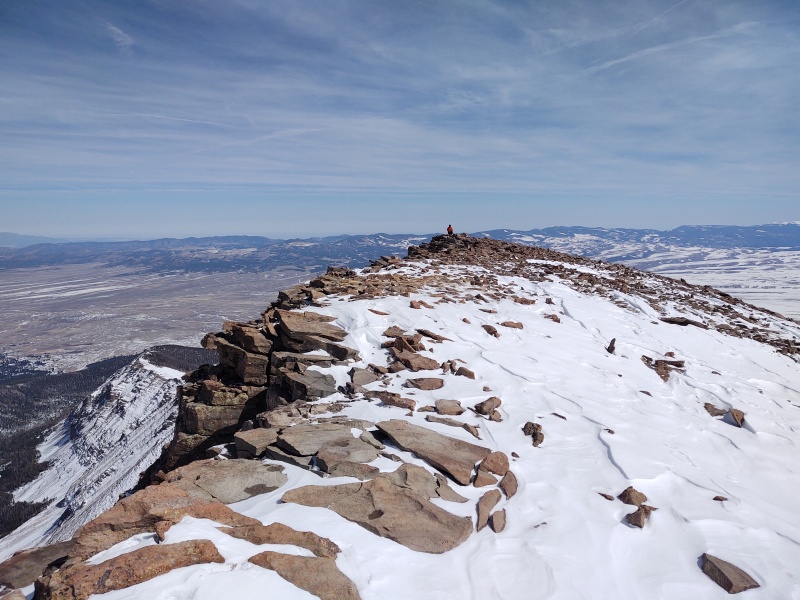
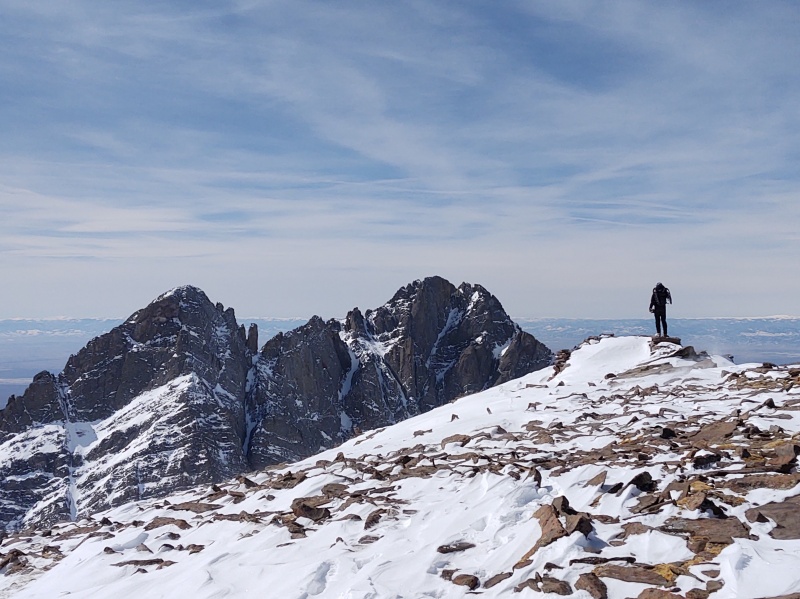
The Summit Ridge Scramble
Besides all the bighorn sheep and great views the other main treat of the day was the final ridge scramble to the summit. Easy but with the rugged look a mountain should have. It's a simple class 2 stroll but with a few scattered, optional class 3 moves and a choose-your-own-exposure-level with dramatic drops off to climber's right with often broad ridge top and a gentle-ish slope off to climber's left.
Thus you can make it pretty easy and non-exposed or you can milk it for enjoyment like I did by hitting any class 3 move I could find and walking as close to the cliffs on the right side as I could.
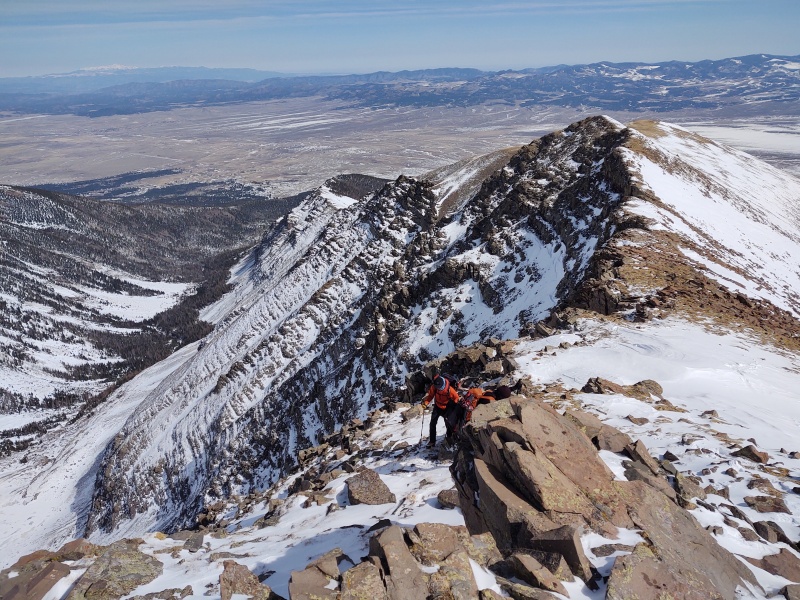
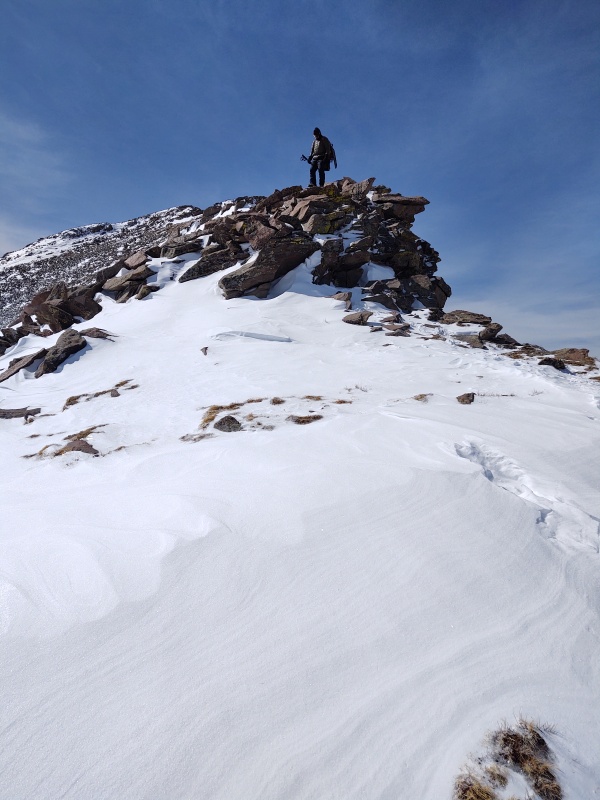
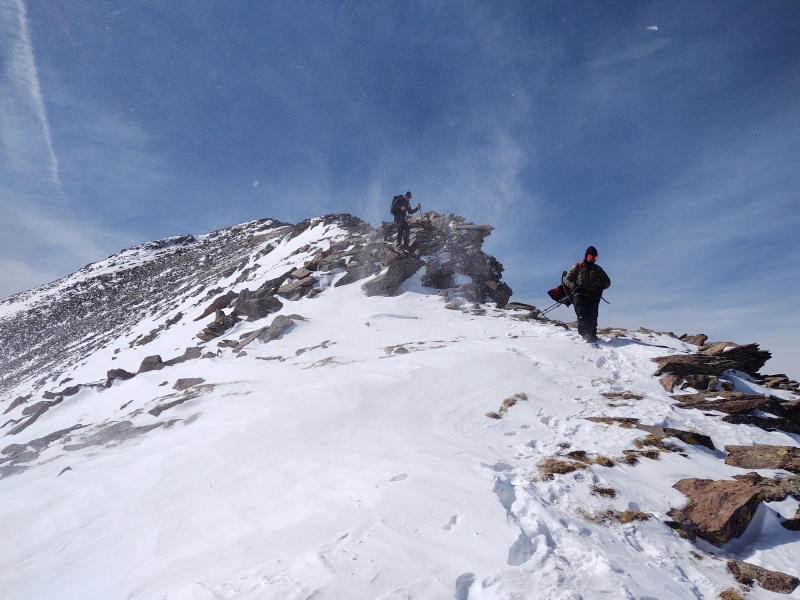
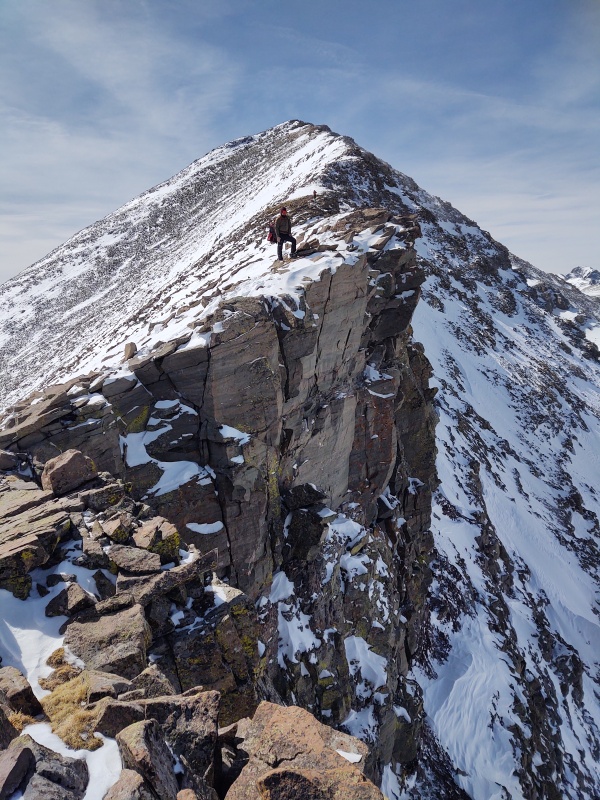
Coming up on the final ridge scramble.Now this feels more like a mountain than the rolling slopes below...Fun little cliffs you can choose to stay well away from or walk right up to.The ridge can easily be done as class 2 but you can pick up a few little class 3 spots if you want to.
More of the ridge.I scrambled up ahead to get some good scale photos.
Almost to the summit.Ian and Carl coming up.
Now I'll switch to a few photos from the way down.
Carl on top of one of the optional class 3 bits.Ian coming down amid some snow swirls.
The cliffs off the north side, though easy to stay away from if you want, can make for some dramatic images if you spread out enough to take advantage of the setting.
Dramatic cliff top pose.
On the way down we came across an old mountain man on his way up. Didn't catch his name/age but he was your classic rugged looking old mountain man and yet he was bounding up those slopes as easy as any of us who were probably decades younger than him.
The old mountain man making a dramatic appearance in the distance.Coming closer to the old mountain man.
Coming back down off the ridge.
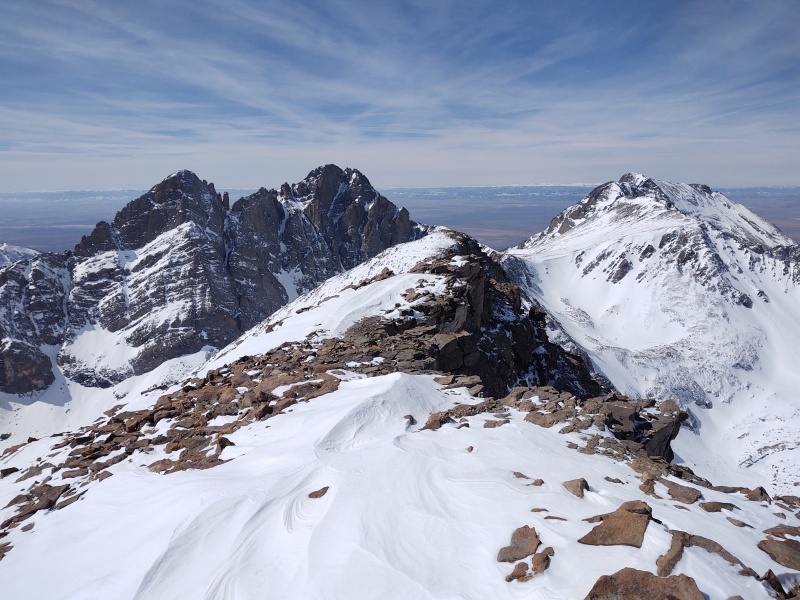
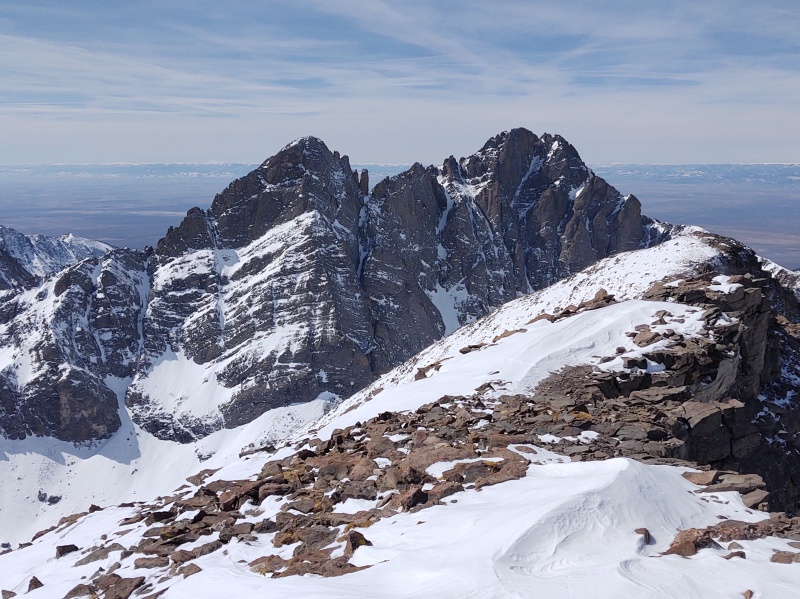
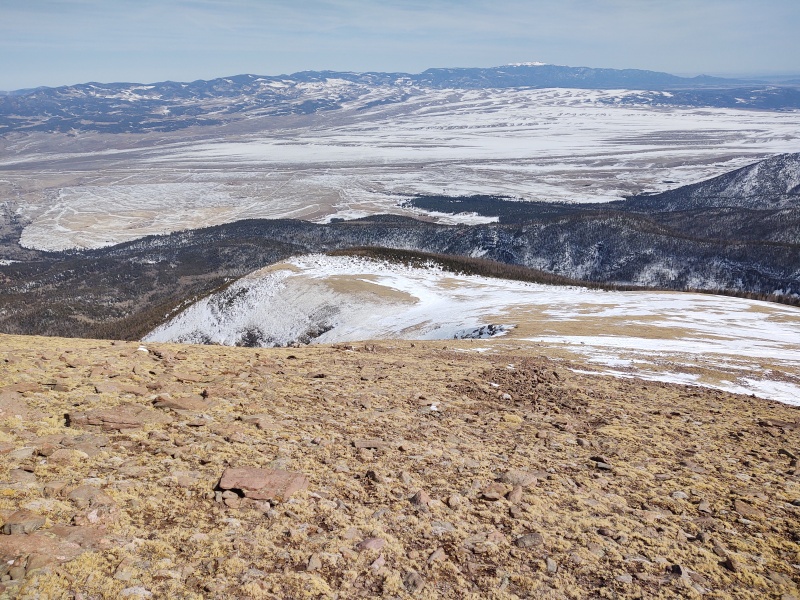
The Summit
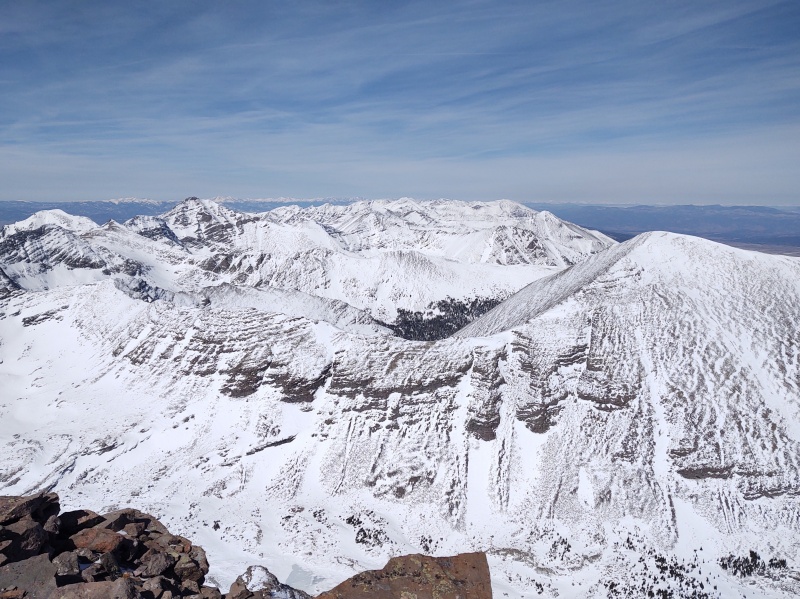
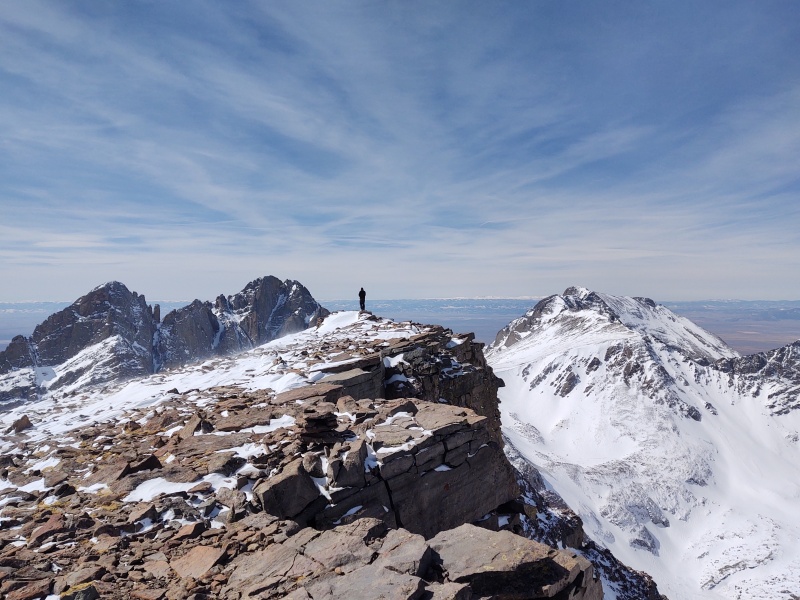
There are fantastic views of the Crestones and various other peaks from Humboldt's summit - these great views are another point of appeal for this mountain.
The Crestones at left with Kit Carson and Challenger Point to the right.
Centered view of the Crestones.Centered view of Kit Carson and Challenger Point.Hiking partners give a sense of scale to these mountains.View to the north.Carl giving scale to the nearby peaks.Ian with the dramatic setting.
Assorted Descent Photos
A few odds and ends from the way down since I didn't get many photos on the way up.
Dry section above treeline.There was one large snow patch that we took a shortcut down.
The trenching was variable depth - sometimes sinking only a little with our snowshoes, sometimes more like knee deep.
Shallow section of snow through the trees.Deeper snow.
Daytime view of the bridge.There are a couple signs in the early part of the trail for the Rainbow Trail that you start with.
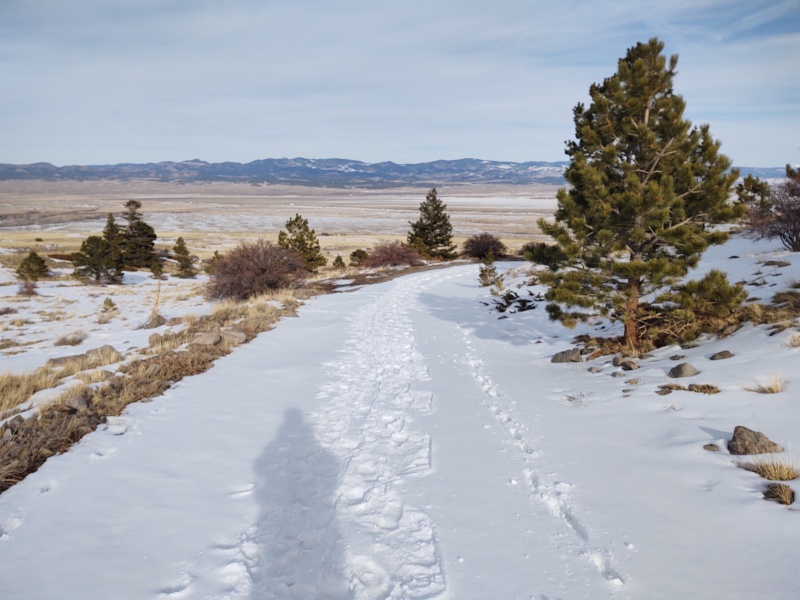
Once back on the Rainbow Trail it's a long easy trudge back to the 2WD with a few small spots that roll uphill a little bit but mostly downhill.
Down the trail......back along the 4WD road.
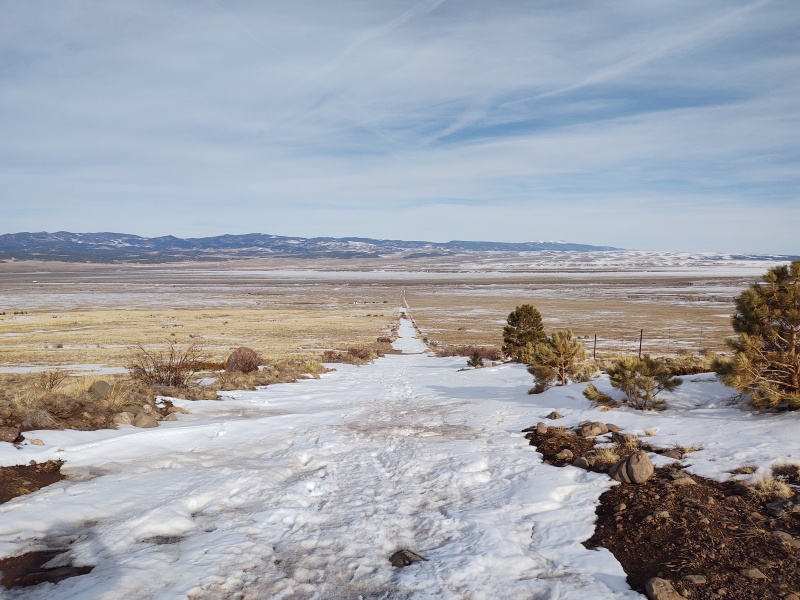
2WD parking seen as specks off to the left of the road about center image.
My GPS Tracks on Google Maps (made from a .GPX file upload):
Lol, I certainly wasn't at my best pace on this hike. I definitely think I was holding y'all back. What I get for not getting in a real winter hike since January!
Nevertheless appreciated the summit with y'all and thanks for all the great pictures!
Well if you don't mind sinking in some mud there's plenty of room to pitch a tent - might have some chance, depending on the day/weather to find a small dry-ish spot. I "pitched my tent" in the Westcliffe Inn, lol.
Thanks! I'd never seen so many bighorns in so many different spots on one mountain before and to be able to frame them against the surrounding mountains was really neat!
I went up yesterday and found a glove on the way down. Not chewed up by the critters yet, so not there too long. If any of you guys lost one, let me know.
Caution: The information contained in this report may not be accurate and should not be the only resource used in preparation for your climb. Failure to have the necessary experience, physical conditioning, supplies or equipment can result in injury or death. 14ers.com and the author(s) of this report provide no warranties, either express or implied, that the information provided is accurate or reliable. By using the information provided, you agree to indemnify and hold harmless 14ers.com and the report author(s) with respect to any claims and demands against them, including any attorney fees and expenses. Please read the 14ers.com Safety and Disclaimer pages for more information.
Please respect private property: 14ers.com supports the rights of private landowners to determine how and by whom their land will be used. In Colorado, it is your responsibility to determine if land is private and to obtain the appropriate permission before entering the property.


")
")
")
")
")
")
")
")
")
")
")
")
")
")
")
")
")
")
")
")
")
")
")
")
")
")
")
")
")
")
")
")
")
")
")
")
")
")
")
")
")
")
")
")
")