Download Agreement, Release, and Acknowledgement of Risk:
You (the person requesting this file download) fully understand mountain climbing ("Activity") involves risks and dangers of serious bodily injury, including permanent disability, paralysis, and death ("Risks") and you fully accept and assume all such risks and all responsibility for losses, costs, and damages you incur as a result of your participation in this Activity.
You acknowledge that information in the file you have chosen to download may not be accurate and may contain errors. You agree to assume all risks when using this information and agree to release and discharge 14ers.com, 14ers Inc. and the author(s) of such information (collectively, the "Released Parties").
You hereby discharge the Released Parties from all damages, actions, claims and liabilities of any nature, specifically including, but not limited to, damages, actions, claims and liabilities arising from or related to the negligence of the Released Parties. You further agree to indemnify, hold harmless and defend 14ers.com, 14ers Inc. and each of the other Released Parties from and against any loss, damage, liability and expense, including costs and attorney fees, incurred by 14ers.com, 14ers Inc. or any of the other Released Parties as a result of you using information provided on the 14ers.com or 14ers Inc. websites.
You have read this agreement, fully understand its terms and intend it to be a complete and unconditional release of all liability to the greatest extent allowed by law and agree that if any portion of this agreement is held to be invalid the balance, notwithstanding, shall continue in full force and effect.
By clicking "OK" you agree to these terms. If you DO NOT agree, click "Cancel"...
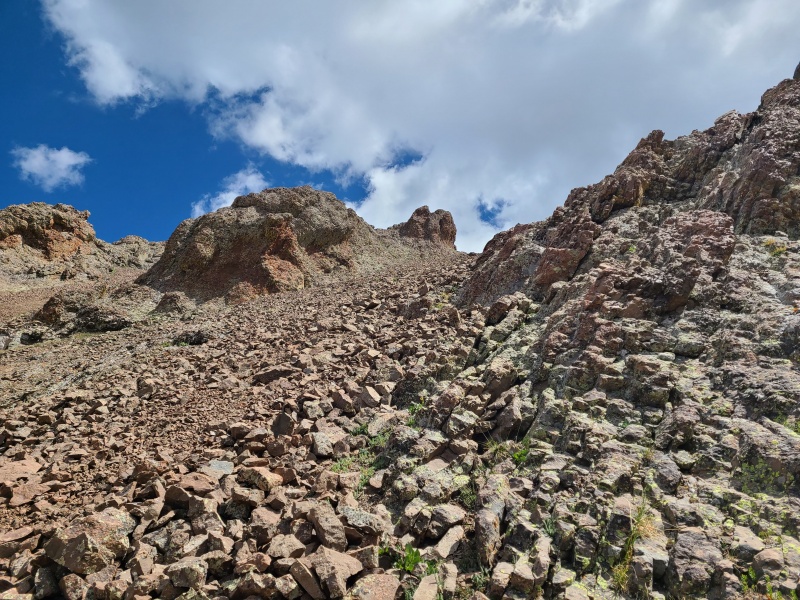
Ten days prior Whiley, Garrett and I had tried Mears Peak from Deep Creek Trailhead. Whiley and I were slow that day, so Garrett went ahead. By the time we had gotten to the bottom of Mears' south face he had already reached the ridge crest some 2,000 feet above. Whiley and I found the south face absolutely awful. We made a couple of attacks from different parts of the face and found scary, rotting slabs, ankle deep scree at high angles overlaying hardpan, rock that shattered at the touch, and altogether dangerous and slow climbing. We turned around, frustrated, and went back to Telluride. Meanwhile Garrett had done the full traverse from Mears Peak to "S 10" and met us in town. He reported that the ridge between Mears and "S 7" was much nicer, so Whiley and I planned on doing that as an out-and-back from "S 7" instead.
Some of the slabs and scrambling, all of which was poor quality.Don't mind me, I'll just be gagging over in the corner.Thousands of vertical feet of this, and it's steep!Mears' south face from afar. People do climb that, but it's rough. Photo: Heather R.
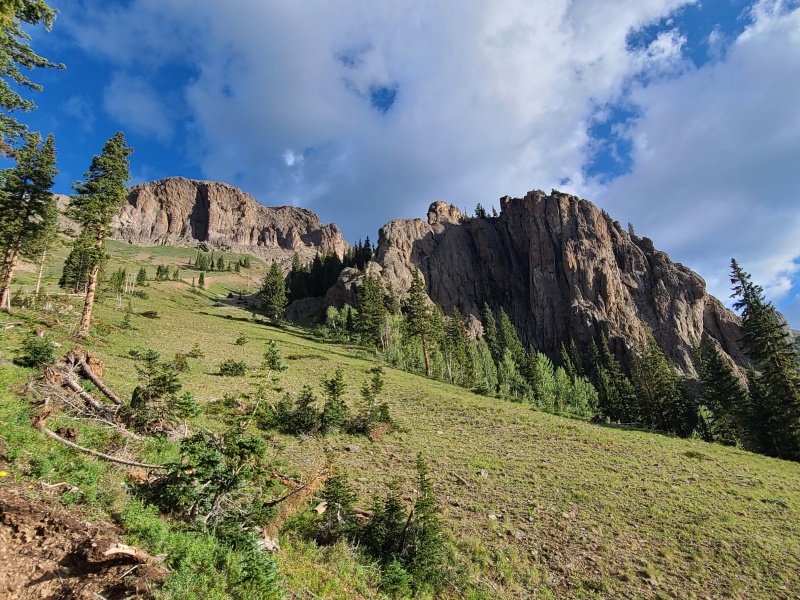
When we went back we decided to tackle the peaks from a different trailhead, the Whipple Mountain Trailhead. We'd done a couple of easy peaks from the trailhead and knew it connected to the Deep Creek Trail, which would give us access to the peaks. From the trailhead there's a good trail directly east between Point 12,311 (called "S 10" on Lists of John; "S 10" on 14ers.com refers to Point 13,020, and I will use "S 10" to refer to the thirteener) and Whipple Mountain. This trail ascends approximately 1,000 feet to the pass between these peaks, then switchbacks steeply 1,600 feet down to Deep Creek. Along the way to the trail junction we passed spectacular towers and rock formations that the Sneffels Range is known for.
Self-explanatory.Giant cliffs and buttresses below Point 12,311.
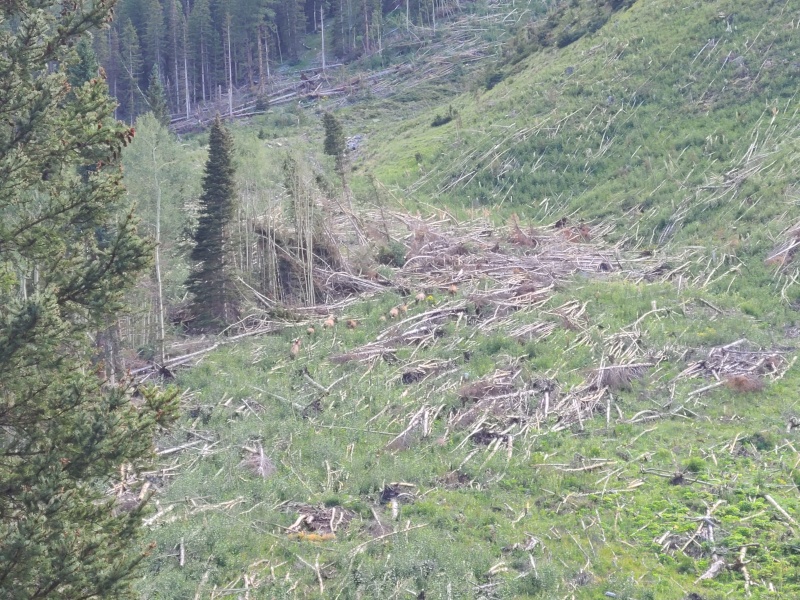
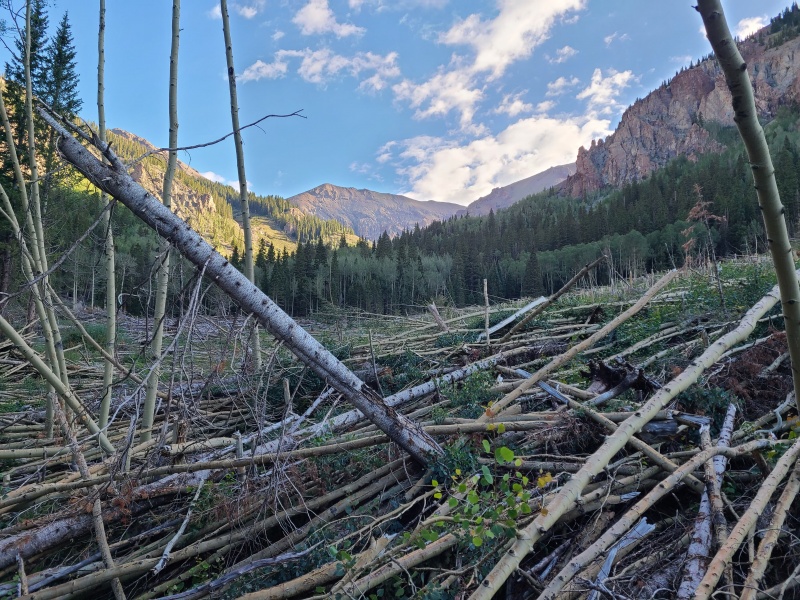
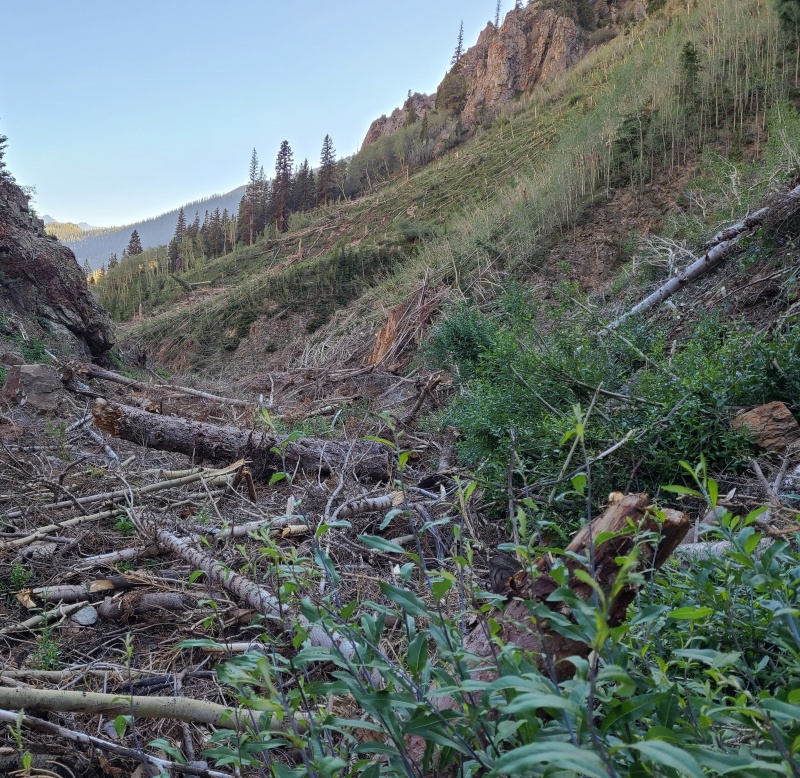
As we descended into Deep Creek we got a preview of what was to come - a massive labyrinth of avalanche debris. The trail was completely lost under all the debris, and our progress slowed as we scrambled up and over and through the giant mess. We had to be extra careful since the debris pile was so thick that there were open holes and loose, rocking trees, plus sharp, snapped branches to avoid.
Just some of the devastation. There was probably half a mile of this stuff and it's painstakingly slow to fight through.Not even the slightest bit of fun.Endless debris.
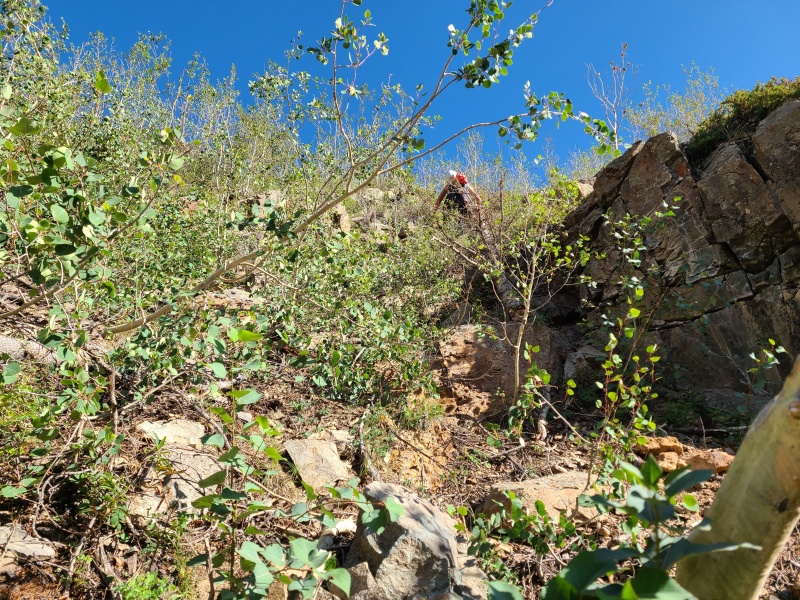
Eventually Whiley and I got so tired of battling the mess that we simply scrambled up a steep, eroded, Class 3 gully (which itself was full of smashed up trees) to escape.
Bushwhacking up a very steep (steeper than it looks) gully to get away from the avalanche.
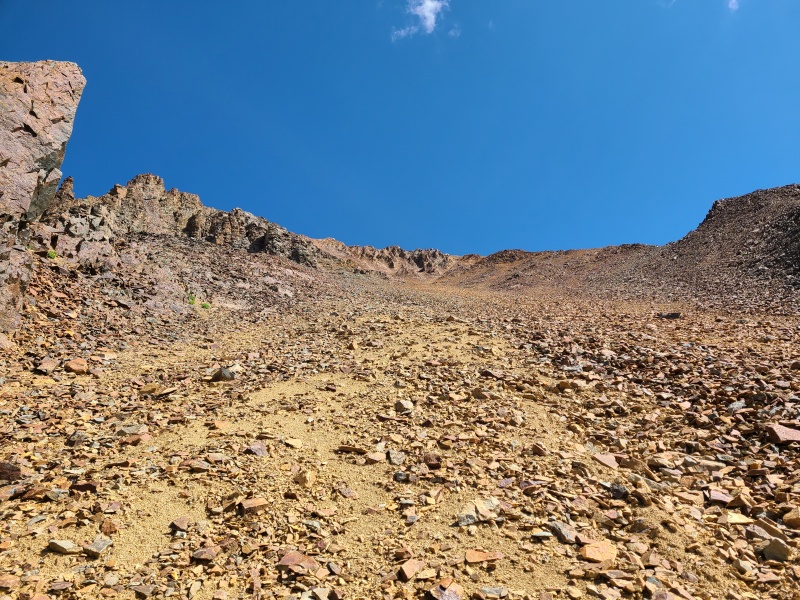
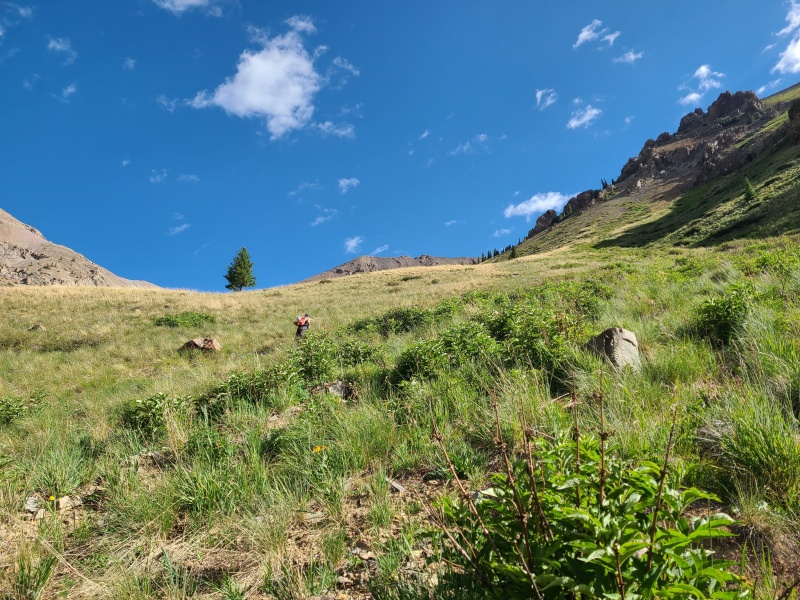
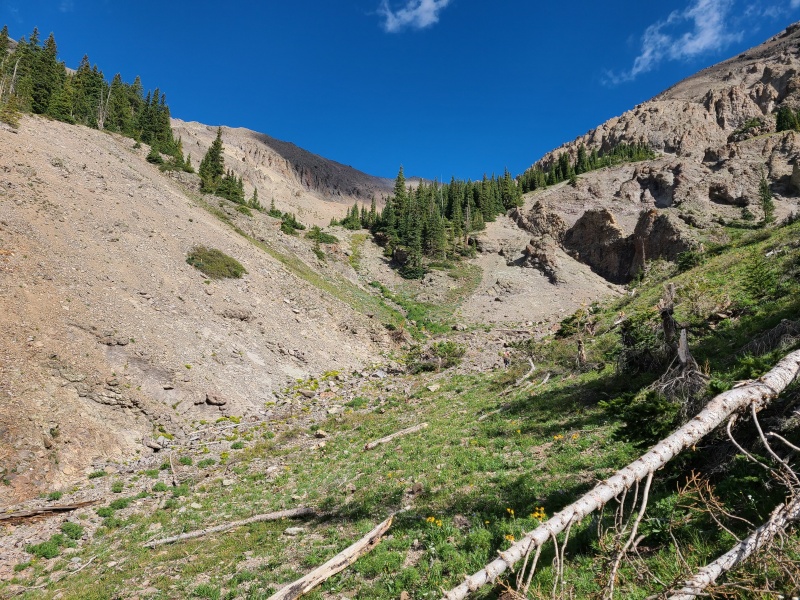
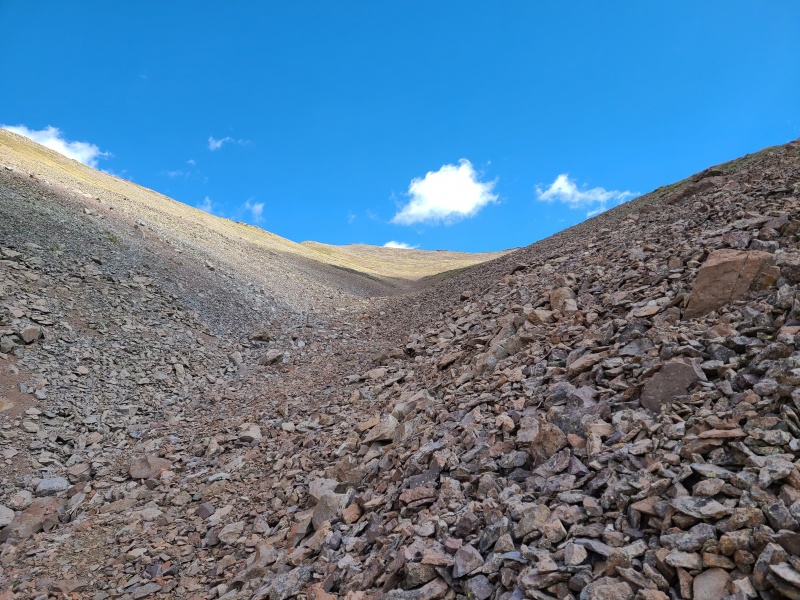
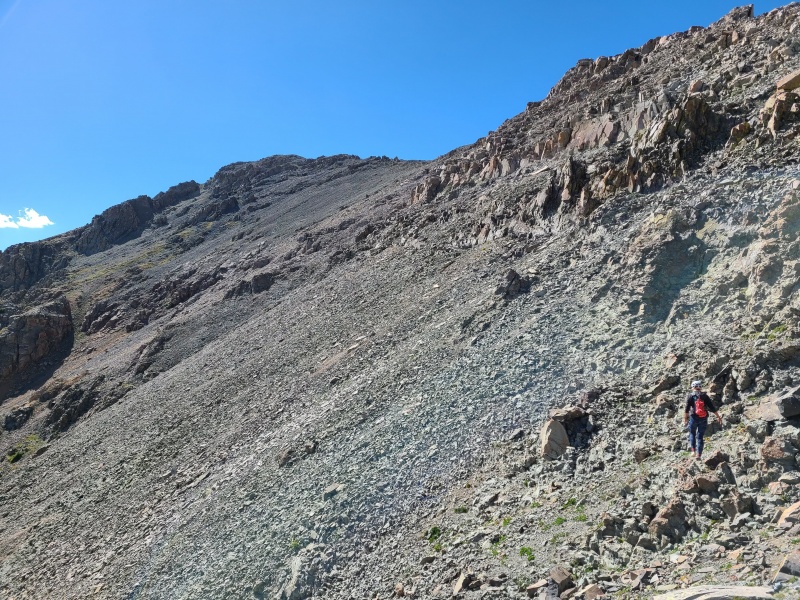
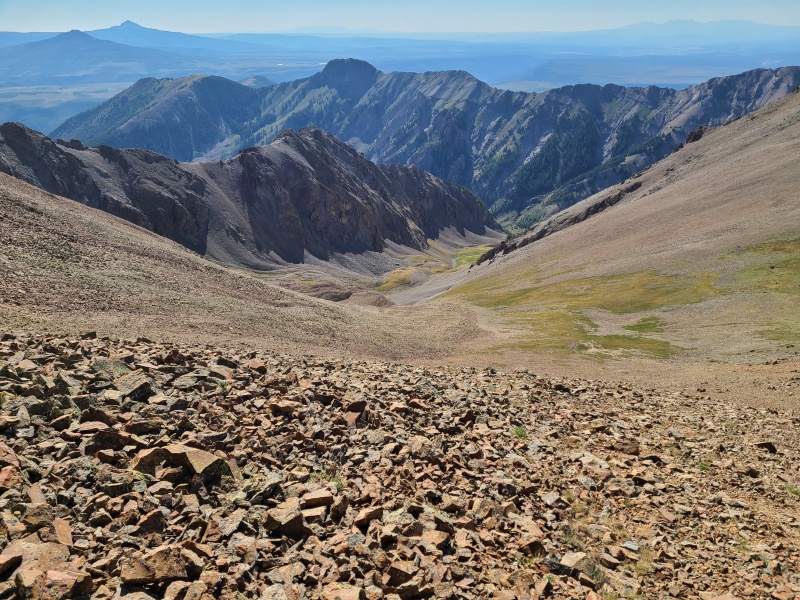
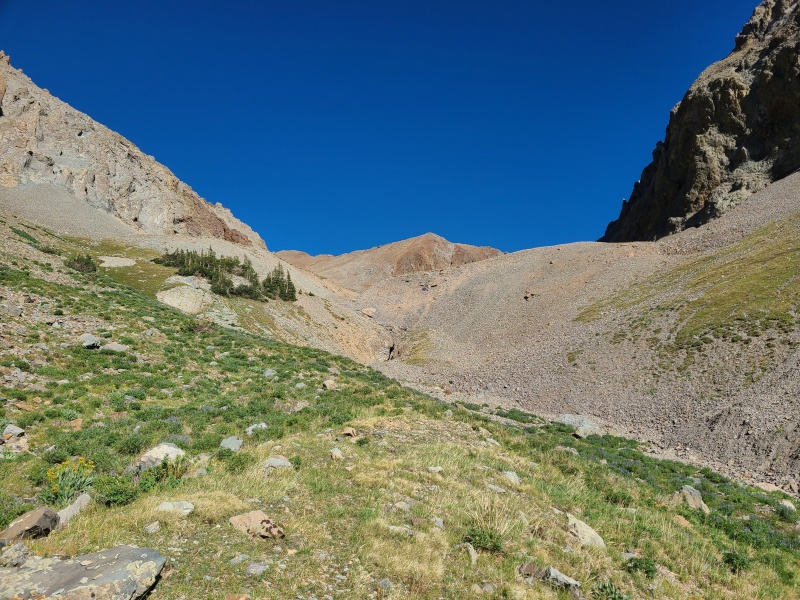
Above the debris we discovered we had crossed the majority of it, and we traversed on the steep hillside through the forest to stay above the remainder. Eventually we were able to get back on the trail, which was great after all of that, and we slowly gained elevation heading north until we hit the base of a scree slope. We ascended the scree on what little grass there was, exited through a small stand of trees, and from that point we were on scree and talus for the next six or seven hours.
No more field of trees to be impaled on.Easy grass slopes en route to the drainage below Hayden Peak.The scree slope and grass we ascended. It's all rock past these trees.And this is the good stuff. Hayden Peak is pretty indistinguishable, but it's basically dead ahead.
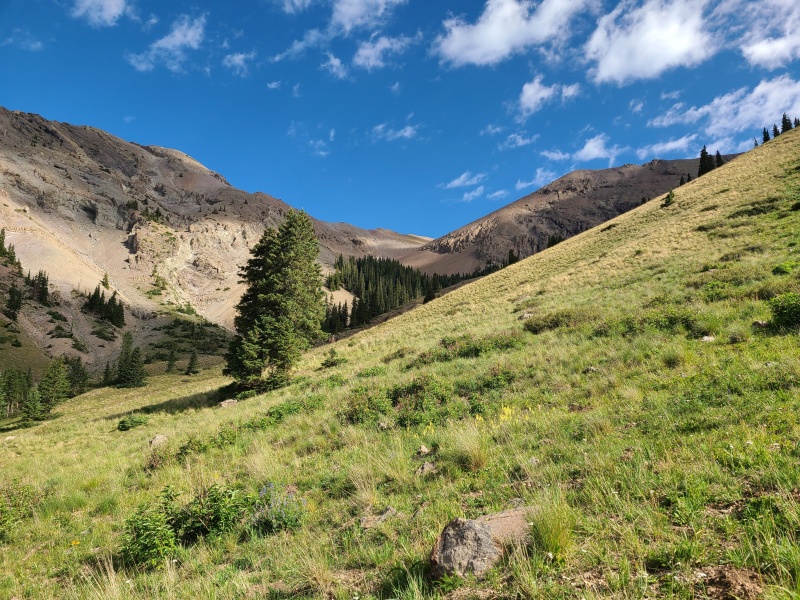
The hike up the drainage to unranked twelver Hayden Peak was tedious but uneventful.
Looking down towards Deep Creek from near the summit of Hayden Peak. Photo: Whiley H.I choose to believe that magic is the only thing holding this up.
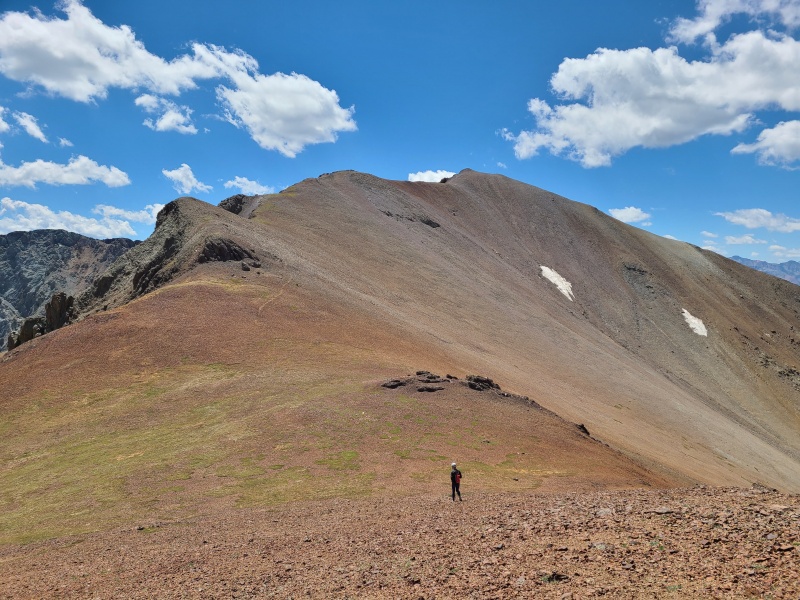
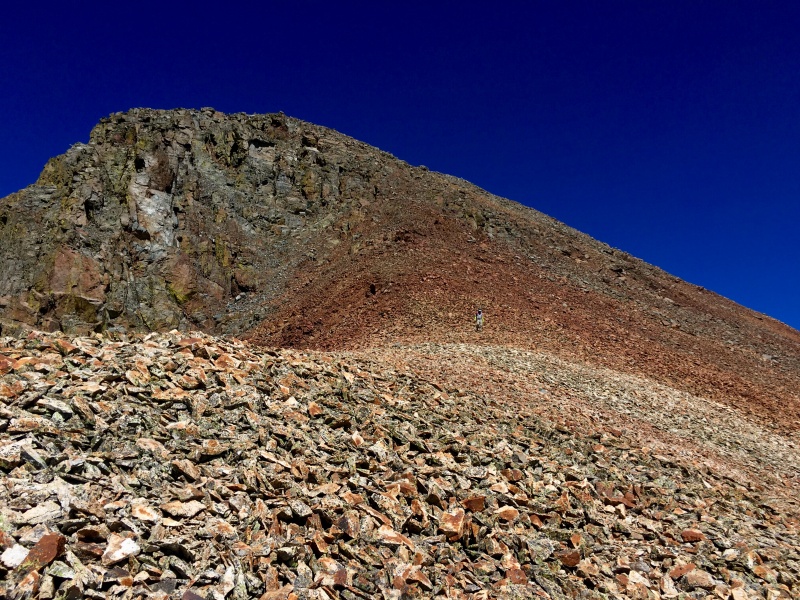
We topped out and quickly traversed to "S 10", our first ranked thirteener for the day. The ridge top, which we were happy to have actually attained this time, was basically just a giant heap of talus. All of these peaks were, really, from top to bottom.
Are these peaks or piles? Why not both?! "S 9" and "S 8", respectively, on the left and right of the cloudy saddle, as seen from "S 10". Mears Peak is in center, with Mount Sneffels to the left.Heading towards "S 9".
The entire traverse from "S 10" to "S 9" was easy, though once again tedious, as it was all on the junky rock of the Sneffels Range.
"S 9"'s bulbous summit block.
We traversed past and under the summit, then made our way up to the ridge crest and backtracked slightly, as "S 9"'s summit block was a sheer wall to the west and south but had easy Class 2 access from the east.
Choss en route to "S 9". The summit is up and to the left but we had to circle around.Weird stuff on "S 9"'s south side.Talus gully we climbed to the ridge.Looking back on "S 10" and Hayden Peak.
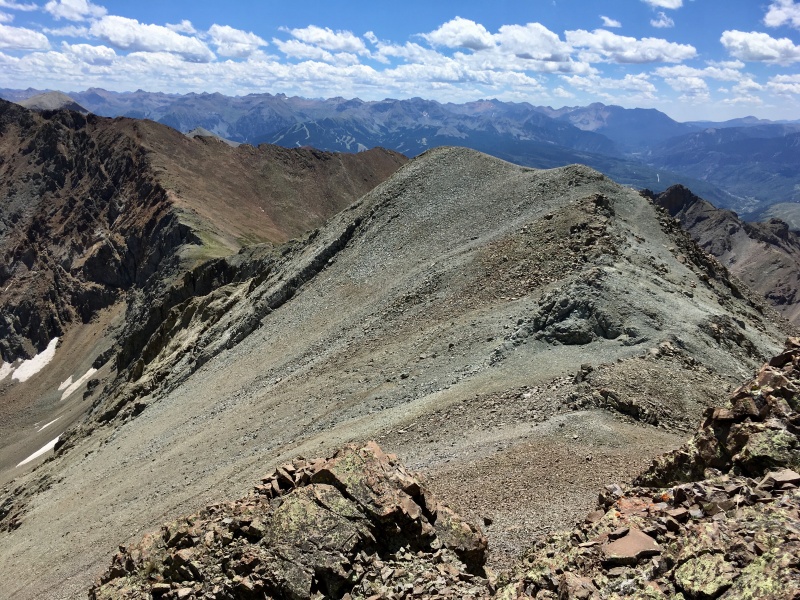
We dropped back down off "S 9" and began the long Class 2 traverse to "S 8". Though the peak was far away there were trail segments through the scree and talus almost the entire way.
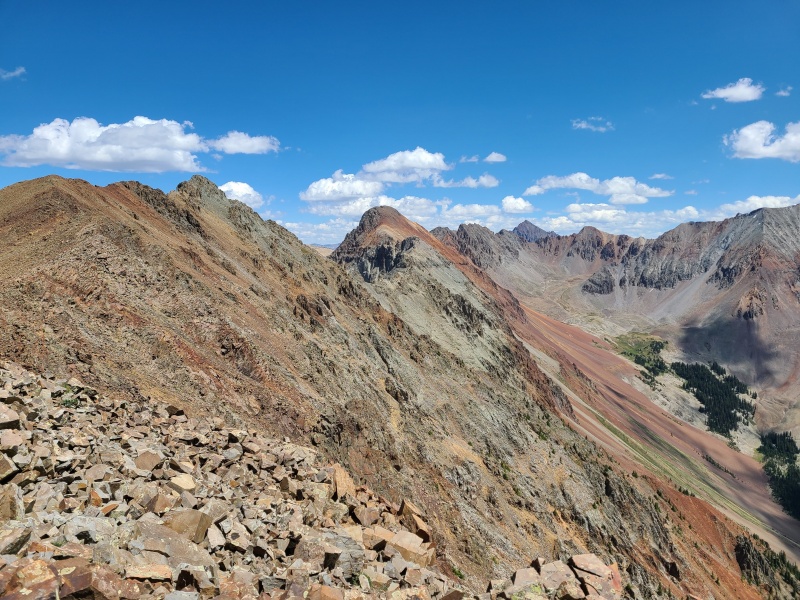
Our route ahead: Mears on the left with the long ridge traverse we'd have to make, "S 7" in the middle, and "S 8" on the right."S 8" looming large.
To get off "S 8" we encountered the first real scrambling of the day, 25 or so feet of very loose Class 3 down a gully. Past this it was a return to the normal loose hiking terrain. It was simply unescapable on this route.
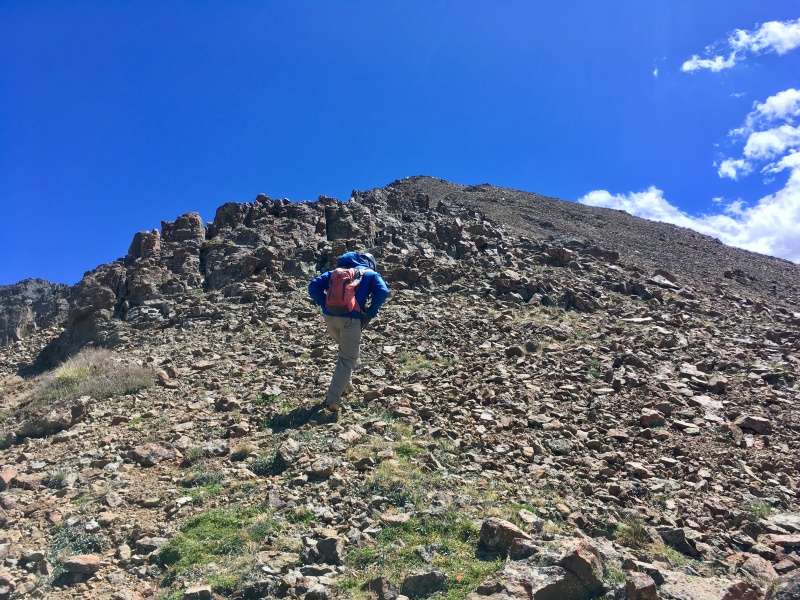
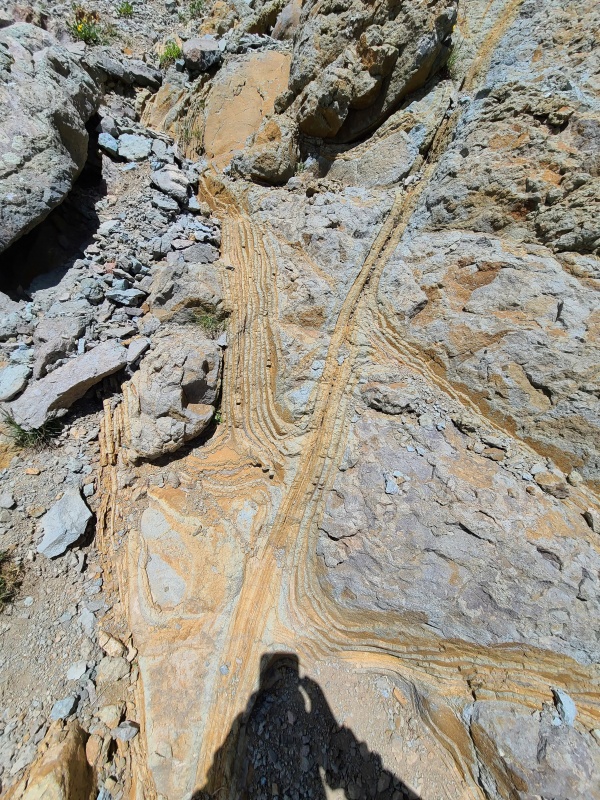
From the top of the scramble down to more basic terrain. The ridge split to the left goes to "S 7" and Ruffner Mountain, left and right, respectively. Photo: Whiley H.Wider shot of "S 7" and unranked Ruffner Mountain. There's some minor Class 2+ scrambling in the middle of the ridge to Ruffner.Ascending to the ridge. This was the last grass we'd be on for hours. Photo: Whiley H.Cool injected rock along the way.
The ridge out-and-back to Ruffner was quick and easy. As a peak it's barely there, but it's officially named so climb it we must.
Mighty Ruffner Mountain, hear it meow!
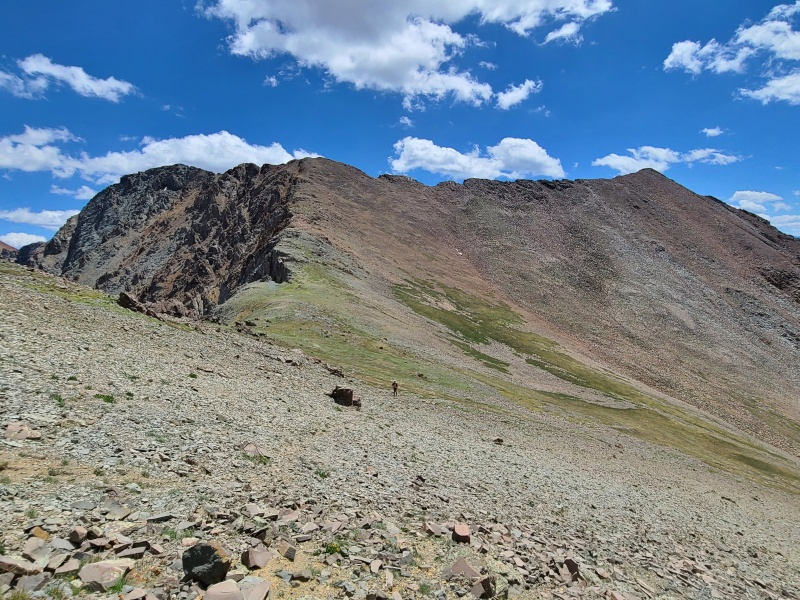
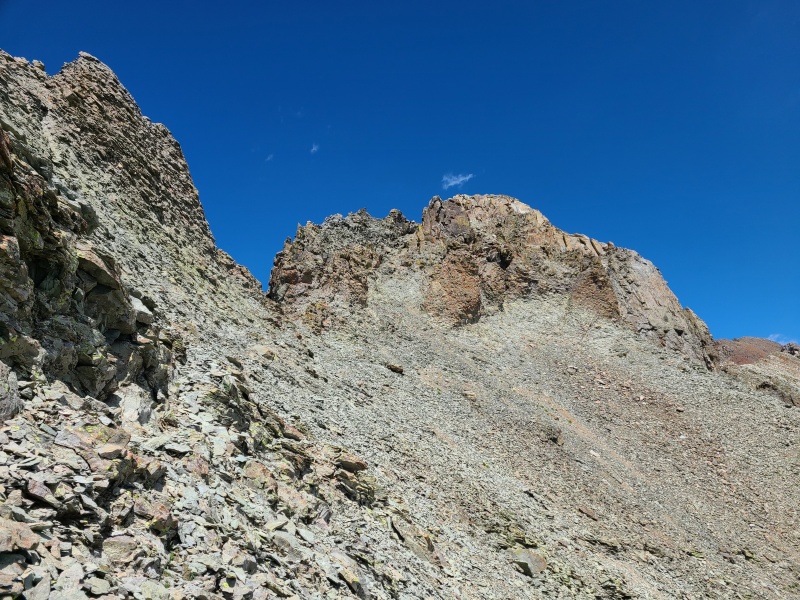
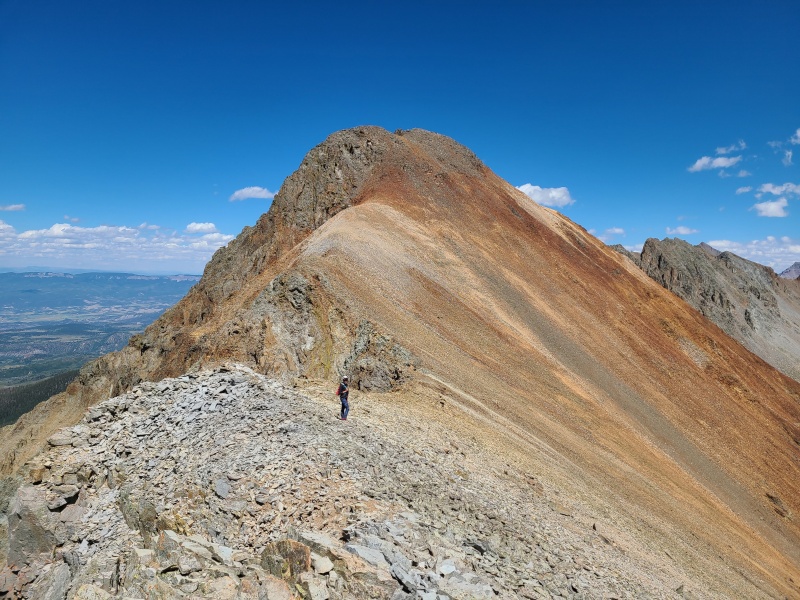
The ridge from "S 7" to Mears, on the other hand, looked like it would be quite challenging, and we couldn't even see all of it!
"S 7" and start of ridge to Mears.
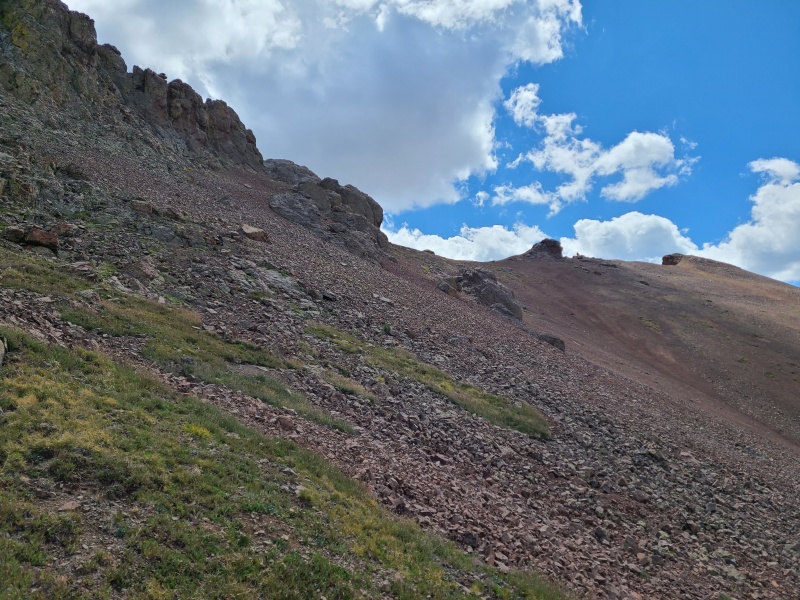
After returning from Ruffner to the tripoint between "S 8", "S 7", and Ruffner, we traversed on steep, loose slopes and scrambled up to "S 7"'s long summit ridge.
Some minor scrambling to the summit ridge of "S 7". Easier than it looks.More rough rock on "S 7".
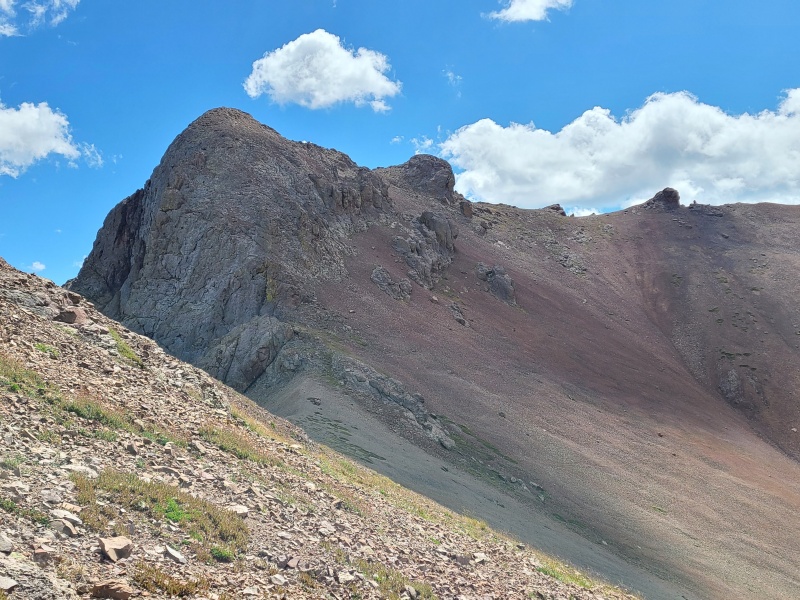
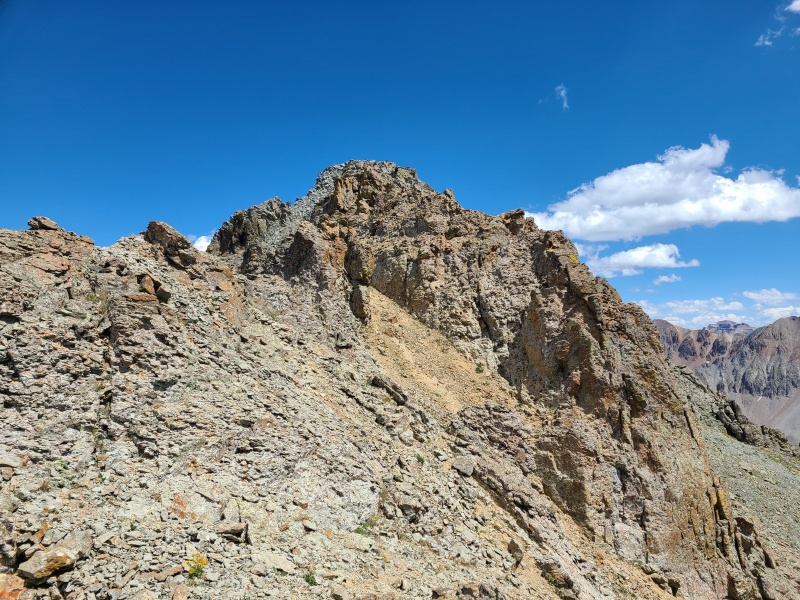
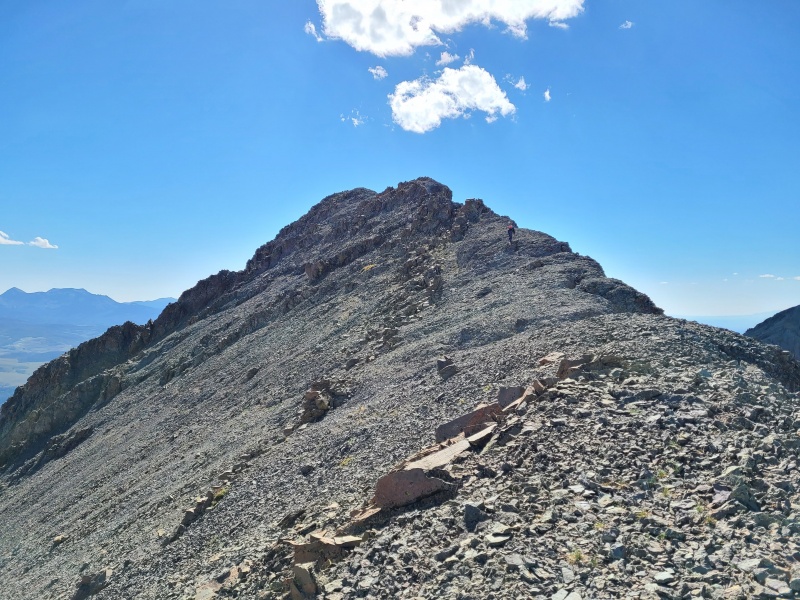
While "S 7" had some fun scrambling, it was still easier than the descent off "S 8". However, ahead of us lay the crux of the day. The ridge to Mears looked quite intimidating from "S 7".
Well that looks... interesting.
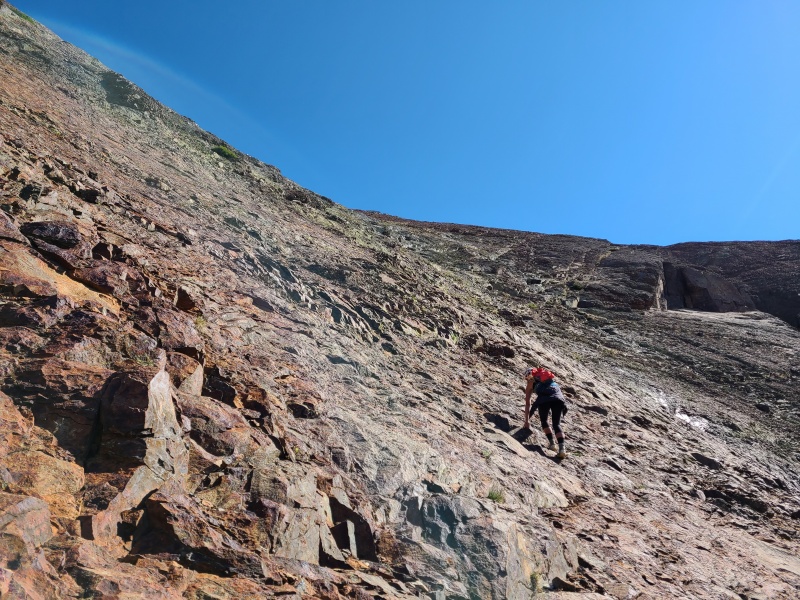
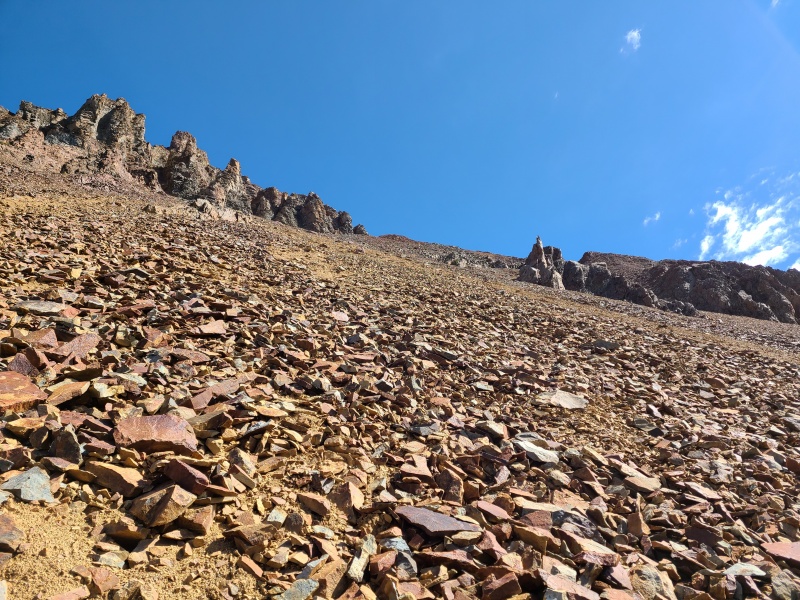
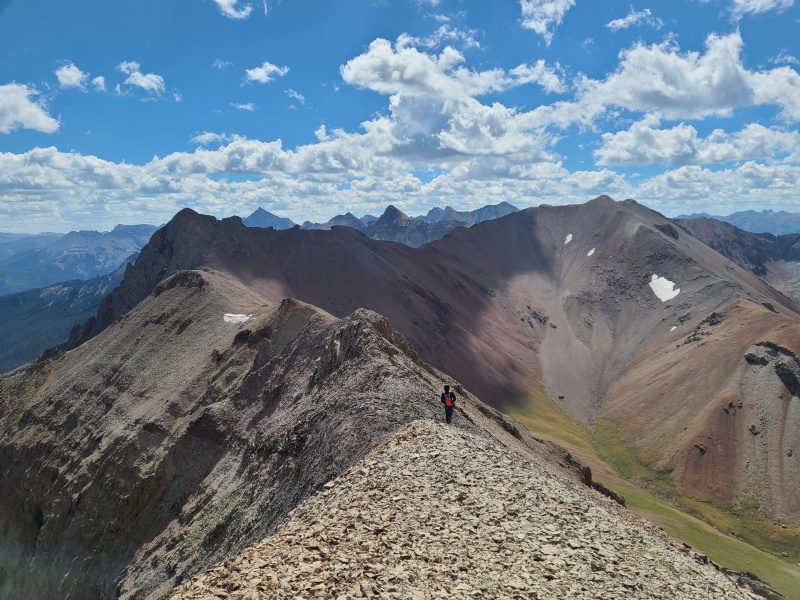
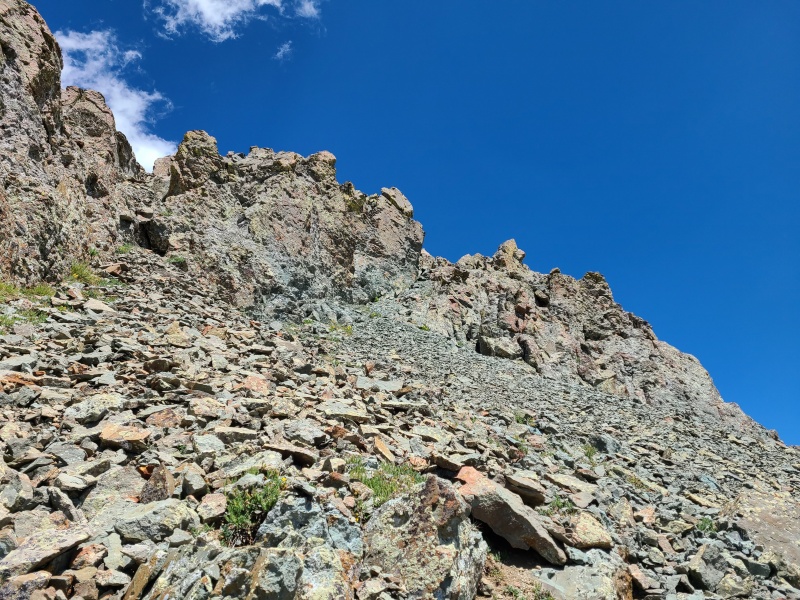
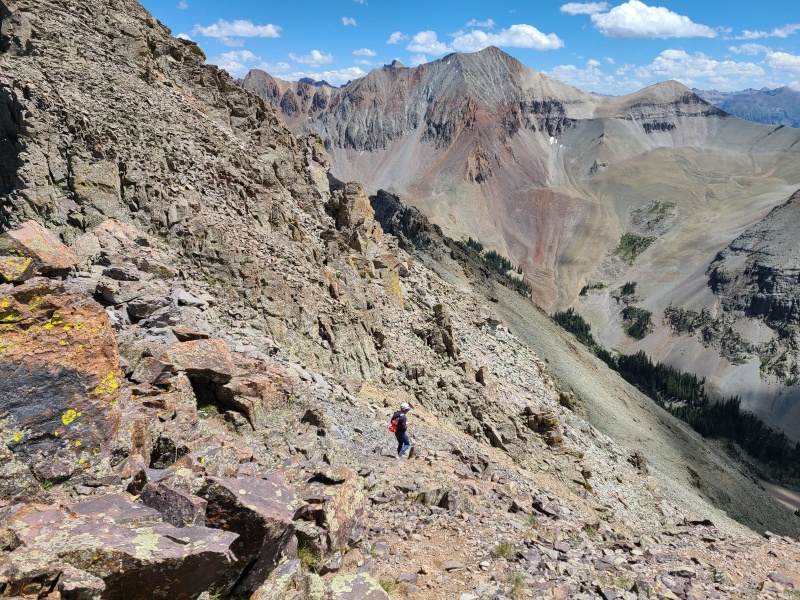
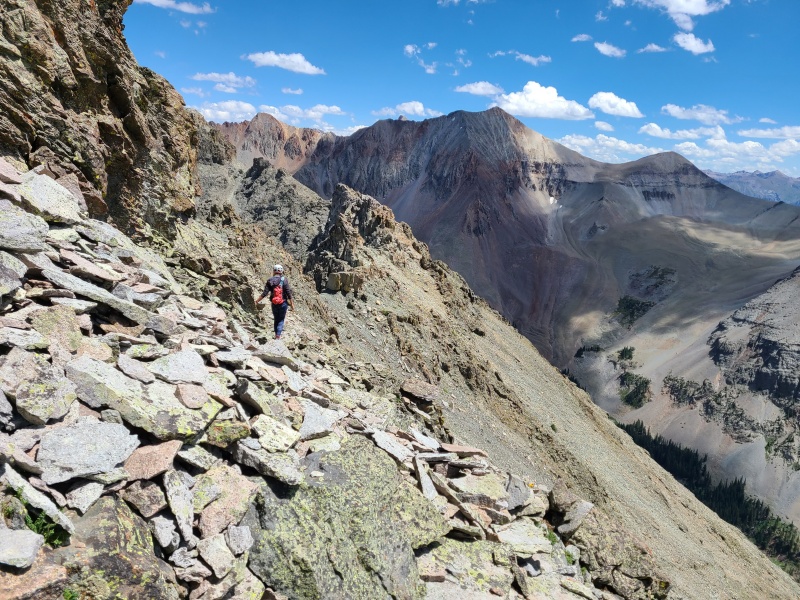
It was time to test our mettle. We left "S 7" and immediately were faced with the prospect of staying on the ridge crest or dropping below it to the south. At no point on the entire traverse did we cross to the north side of the ridge, it was just dead vertical with no safe options. Most of the time the ridge crest was too loose and exposed to stay on, so we spent much of our time on the south face. The ridge started off relatively benign on scree and talus, but this lasted only a few minutes before the first crux of the traverse arrived. We dropped down and did a low traverse on a mix of Class 2+ scree and talus, Class 2+ to Class 3 ribs, and Class 3 micro-plated slabs. Everything was exposed, and everything was loose. I can probably stop saying that now, I've only said it fifty times already. This first section took us across the face and ended near the set of small, sharp gendarmes on the right in the photo above.
Steep and hideously loose. Watch your step!Traversing under the ridge crest to the gendarmes.
I felt that this first part was the mental crux, as well as the physical crux of the day. It wasn't the hardest climbing we would encounter on the traverse, but going from very easy to sustained, exposed, and exceptionally loose with no warmup at all was jarring and took some time to get into the groove of. Fortunately the small gendarmes were easier than they looked, and we scrambled over them and down them at Class 3.
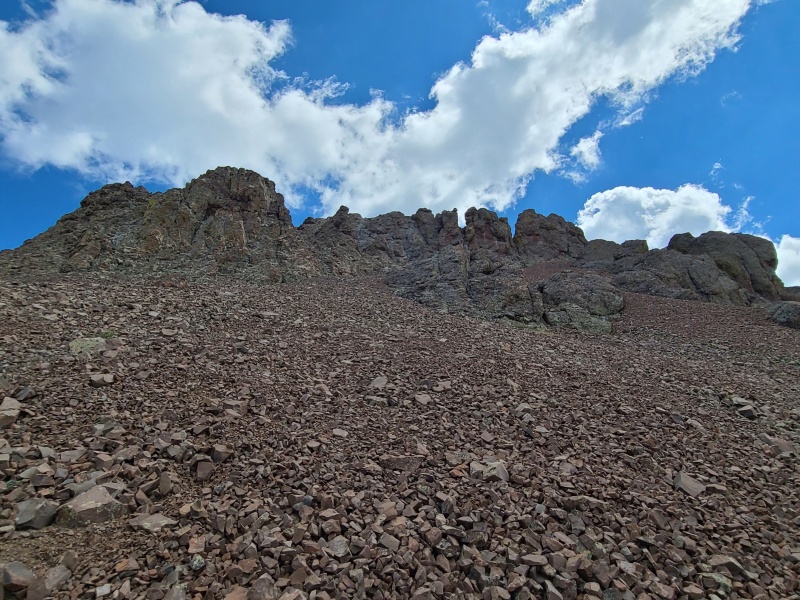
Heaps of dinner plates ready to slide.
Large parts of the middle of the ridge were actually pretty mellow, and the gendarmes of little consequence. It wasn't until we got to the last and largest gendarme that the difficulty once again rose.
Looking across the north face of the ridge. The big, rounded bump on the ridge is the second crux.
To get past this gendarme there was really only one option: go straight up a rotting gully to the top of the block, then down the other side. Much of the rock in the first half of the gully was the kind of crap that crumbles in your hands and under your feet, and the second half of the gully was just literal dirt, but at least one could claw up using the gully's rock walls as help. The scrambling was a rather ugly Class 3, but it went.
We climbed the obvious gully at stupid loose Class 3.
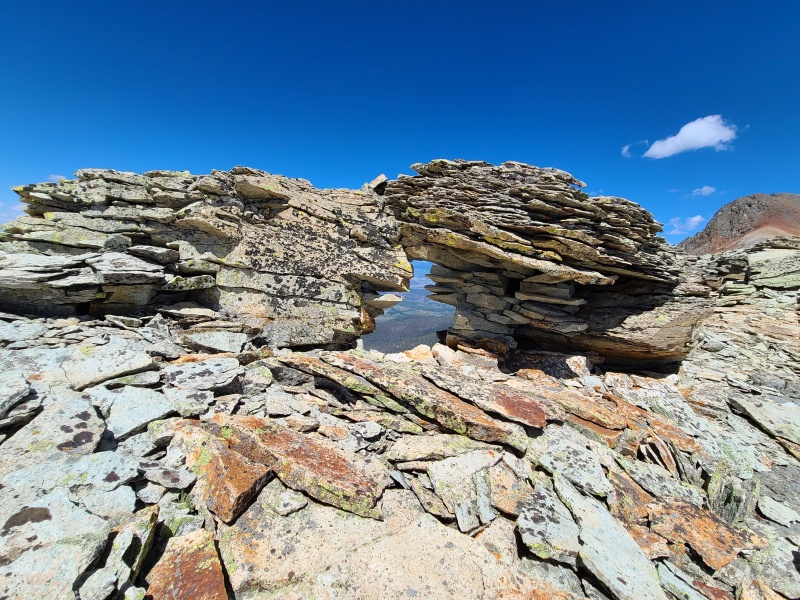
On top of the block we encountered a short catwalk and then a boulder perched precariously in our way. We dropped a few feet below it, not wanting to test its stability, before reascending to the catwalk. Aside from this short Class 2+ section around the boulder, the catwalk was an airy Class 2.
Neat little arch along the way.
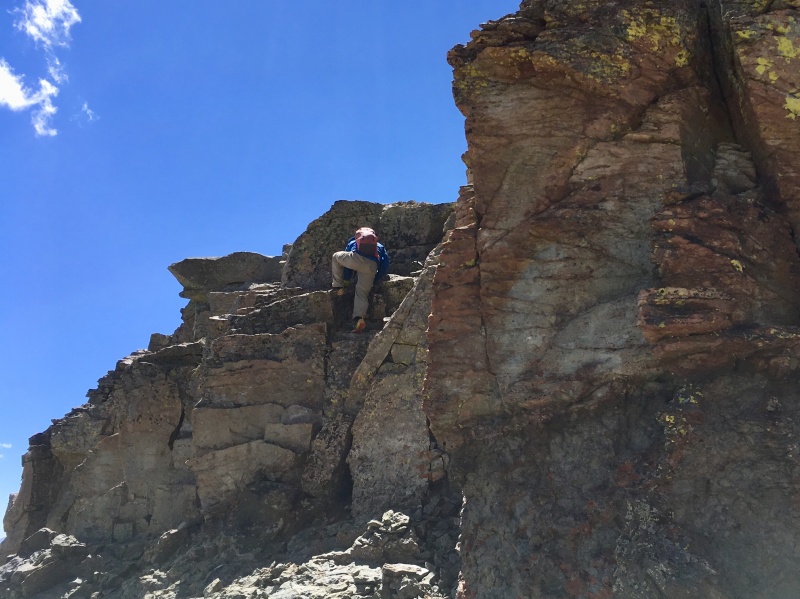
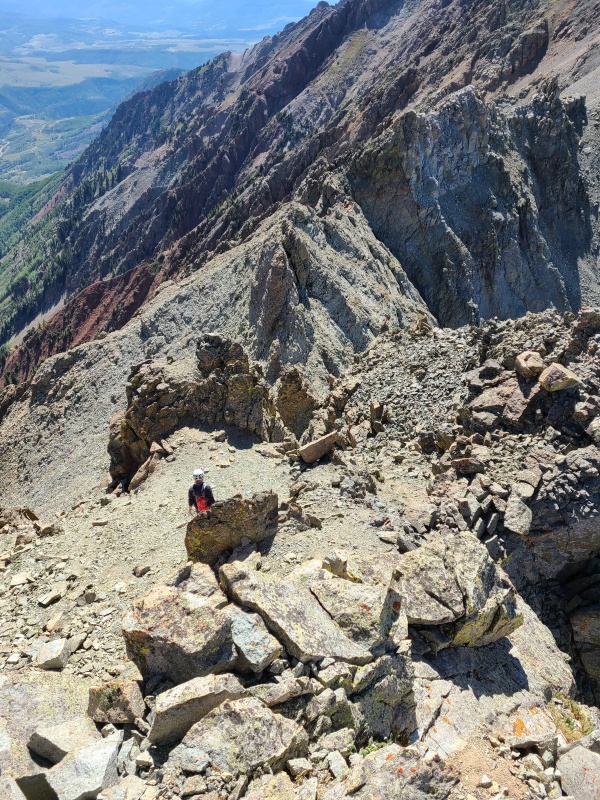
The catwalk ended abruptly at a small, overhanging cleft on the backside of the block, and we couldn't find a better way down, so we tackled it straight on. Holds here were positive, and the rock uncharacteristically solid, but the overhung Class 4 climbing took some trial and error, especially for the hard to see feet.
Looking down the Class 4 slot.Short but stiff Class 4 down climb. This was harder than it appears. Photo: Whiley H.
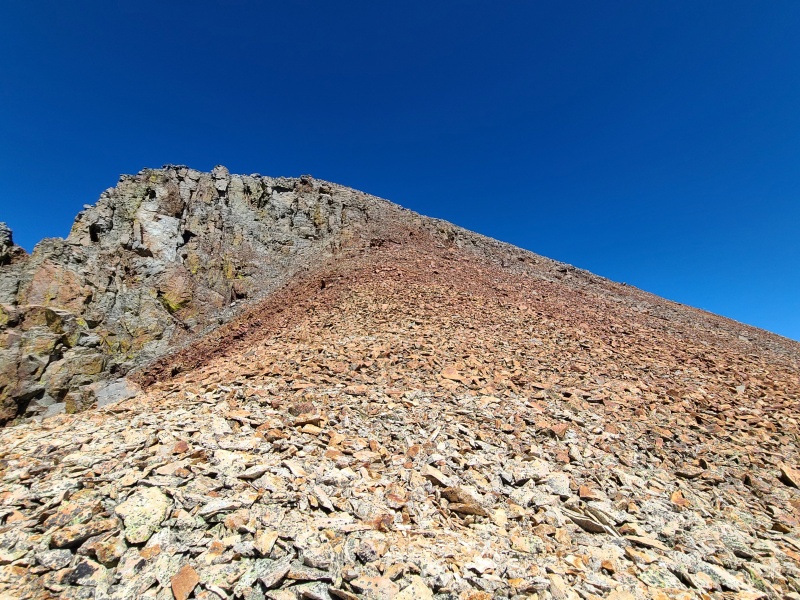
Once off this down climb the difficulty dropped back to basic Class 2. A few more small, crumbling towers remained along the ridge but all could be easily bypassed to the south without any additional scrambling. As we neared the saddle with Mears the red rock returned, and with it an increase in tedium.
Only vertical swimming to go from here."S 7" and "S 8" from Mears' lower slopes. Photo: Whiley H.
The summit pitch up Mears, while generally pretty easy, did contain some Class 2+ scrambling and a whole lot of very steep, backsliding rock. We took our time with it yet raced up it, hoping to just get it over with as quickly as possible.
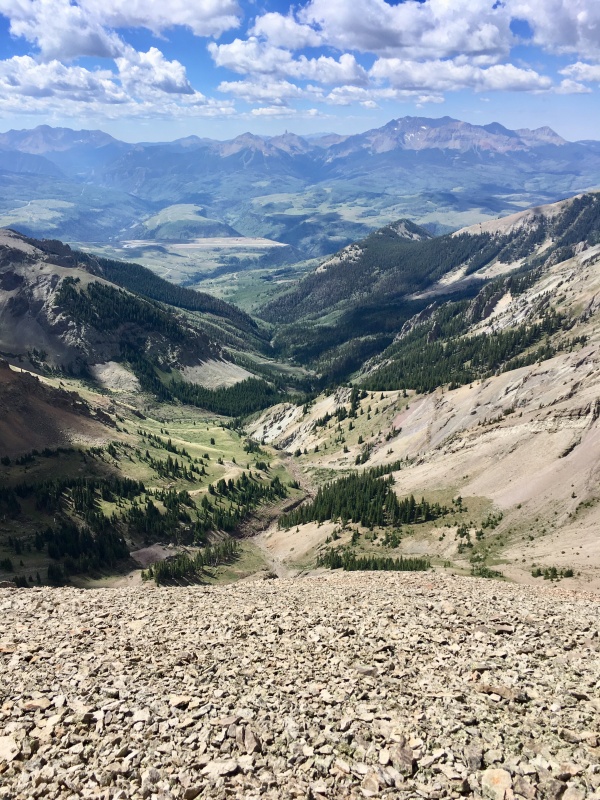
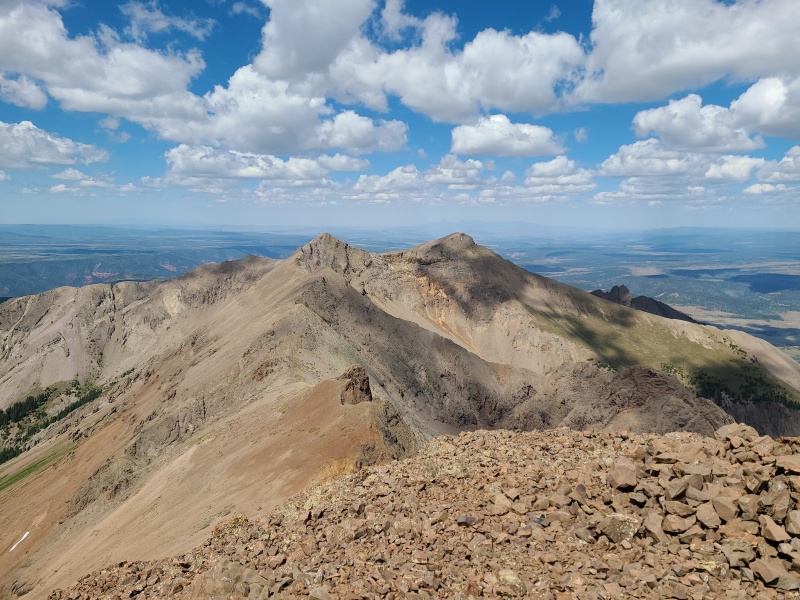
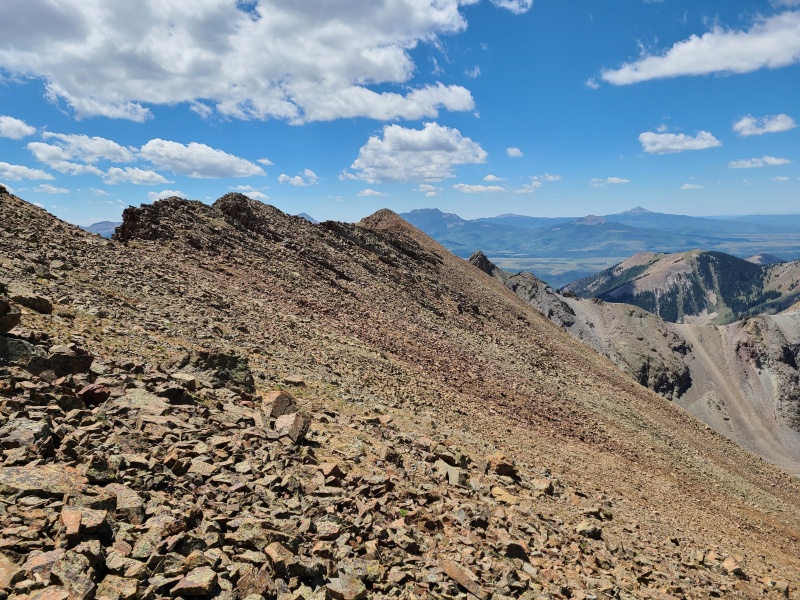
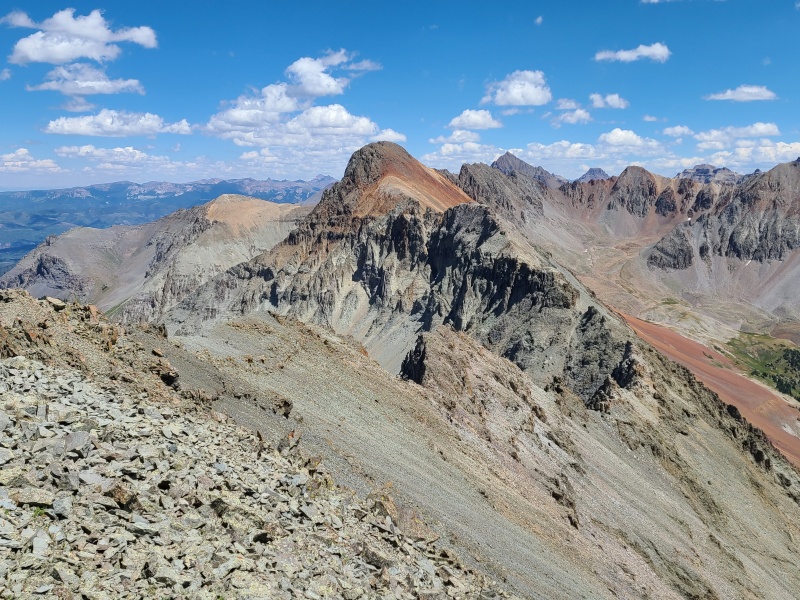
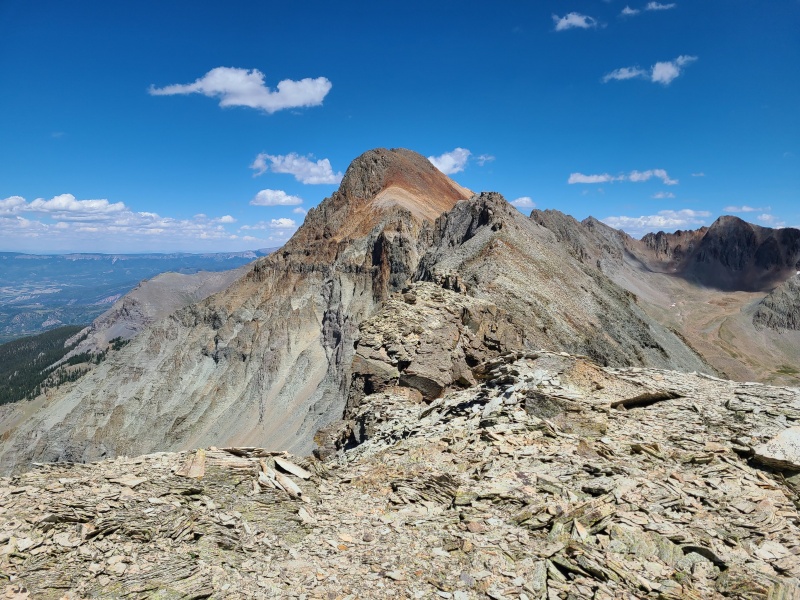
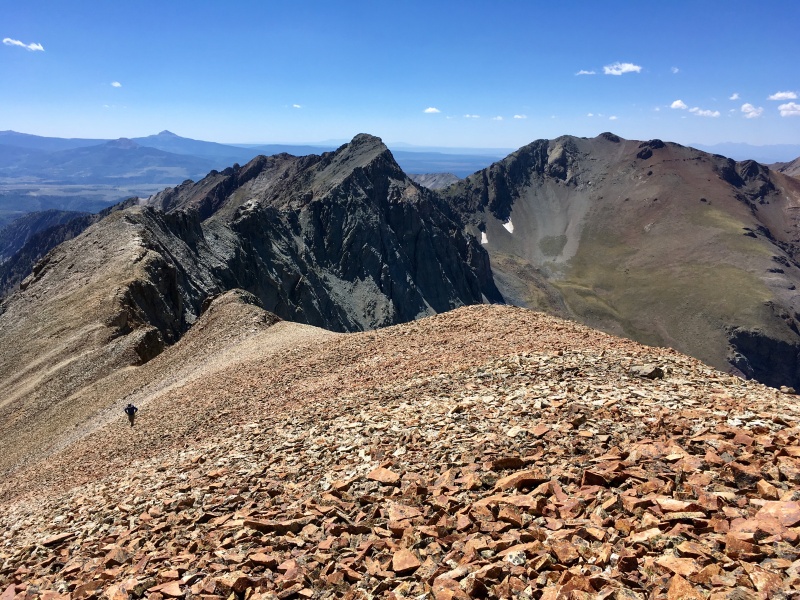
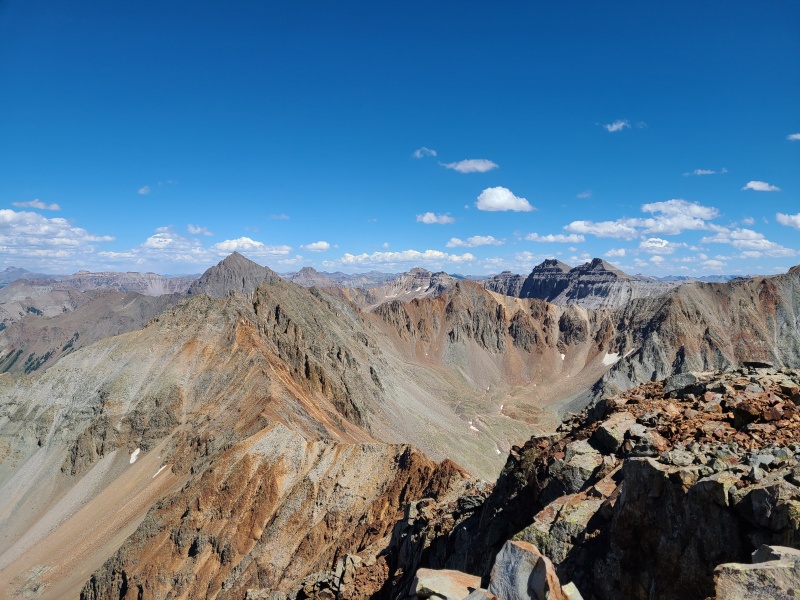
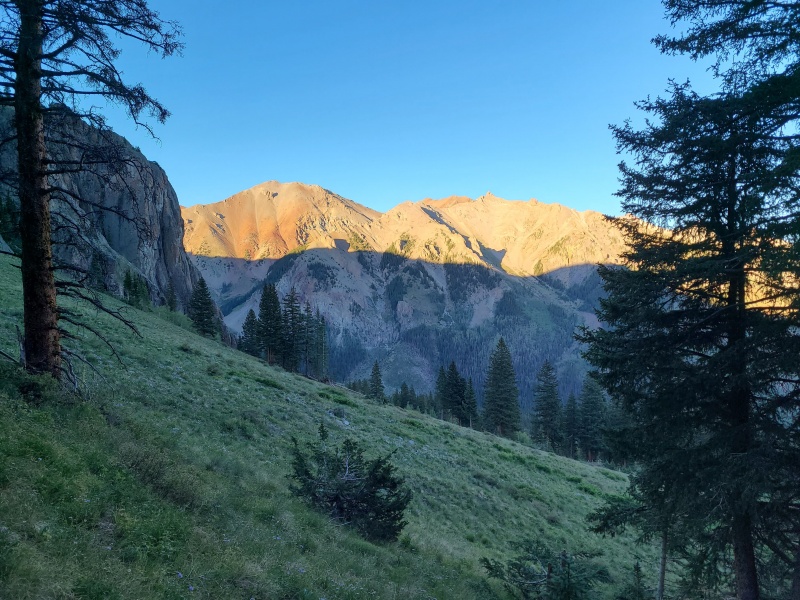
There's some light scrambling in the indistinct skyline rock band. It could probably be avoided, but we just went as direct as we could.Looking east towards "S 6", "S 5", and "S 3" in the foreground cirque, with Mount Sneffels, Potosi Peak (flat top right of Sneffels), Gilpin Peak, Mount Emma, Dallas Peak, and "West Dallas" in the middle to background. Far back on the left is Wetterhorn and Uncompahgre.The long ridge to "S 7", "S 8", and "S 9". Lone Cone is the peak far back on the left. Photo: Whiley H.
What a traverse that had been! It took us just over an hour and a half to traverse from "S 7" to Mears, and I had somehow had fun doing it! Something must be wrong with me. In any case it was a vastly better route than trying to climb up the south face proper. We took our only rest of a few minutes on Mears to gather the energy to do the ridge in reverse. Since we knew the route now we knew it would be much better on the way back. When we'd had enough rest we began our traverse back to "S 7".
Rough, red, rocky, rotten... and respected. Photo: Whiley H.Down climbing the Class 3 gully on the big gendarme.Towers made easier on the return.Sea of scree leading up to "S 7".Bullseye rock.Last easy bit up "S 7". We stayed on the ridge crest this time instead of dropping below on the nasty slabs under the ridge cliffs.
The return trip to "S 7" was faster by about fifteen minutes, and we avoided the sketchy slabs on the summit pitch by staying closer to the ridge crest. We walked back along "S 7"'s summit ridge, then began descending into the basin rounding out Ruffner Mountain, "S 7", and "S 8". There was some grass to assist our descent, but for the most part it was the usual trash rock. There was a significant rock glacier at the bottom as well.
Down to freedom.Ruffner Mountain from the basin.
After navigating the lobes and channels of the rock glacier, we were thankful to be back on grass. We had the massive avalanche path to deal with still, but this time instead of wading through the depths of it we stayed above it and sidehilled as best we could, which saved us the frustration of plowing through.
Back to the Avalanche Zone™.Attacking at all angles. We stayed above the avalanche to its right as best we could, which worked pretty well.
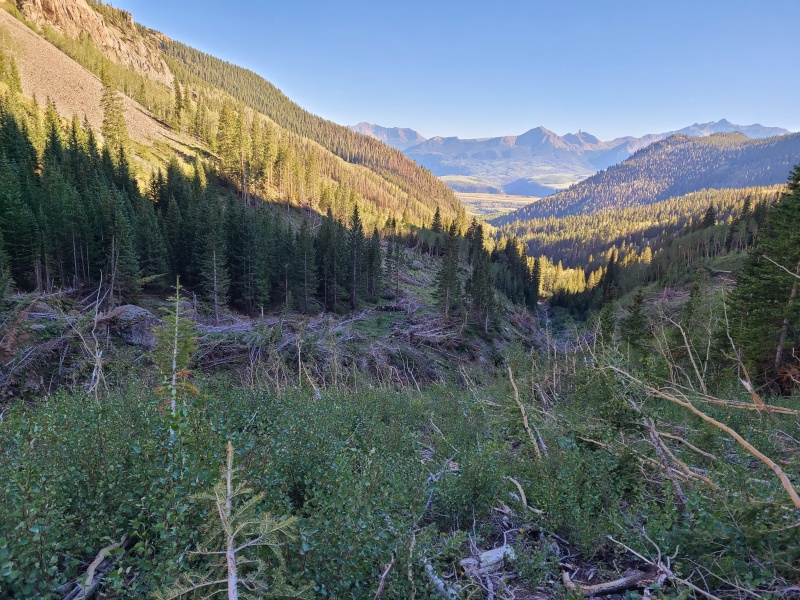
When we were able to relocate the trail we knew our adventure was almost over. There was still the matter of the big ascent up to Whipple Mountain, and the big drop to the trailhead, but there were no real difficulties save exhaustion.
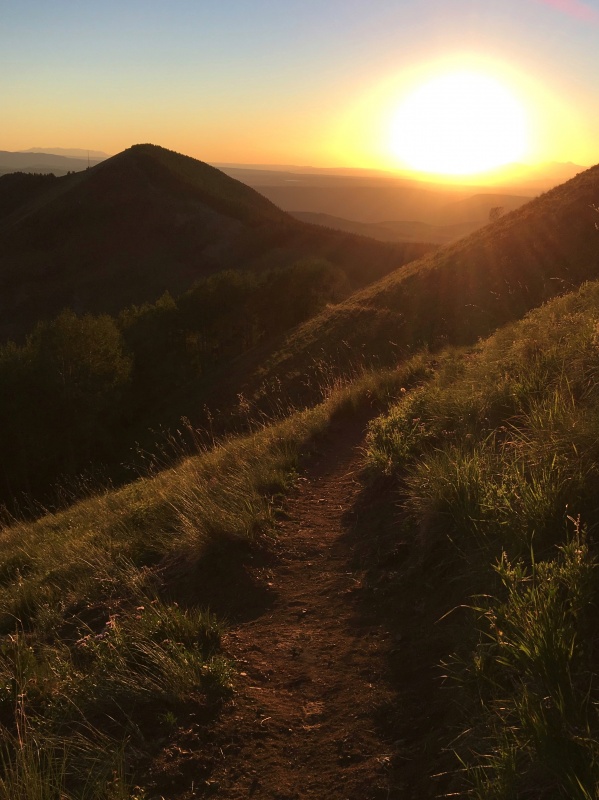
Fading light in a great range.
Whiley and I were both feeling absolutely dead as we crawled up to the pass. Days this long and strenuous are rare, even for us.
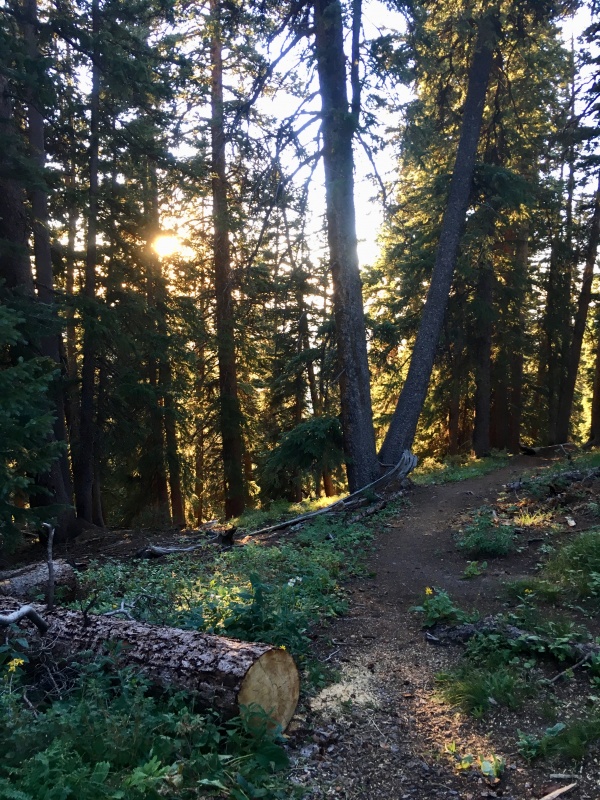
Wonderful trail through the forest. Photo: Whiley H.Nearly reaching dark? That's a full day!
We were both pretty quiet as we descended to the trailhead, both because we were totally exhausted but also because we'd said what we needed to the mountains themselves. We reached our vehicles tired but satisfied at the end of the day. Whereas Mears had utterly shut us down on our first attempt, this time it was an enjoyable ass kicking. It seems no matter how one does Mears it's quite the beast. This was a fun day, and one I'm glad Whiley and I did, for the workout, for the peaks, for the redemption, and for us.
Statistics
Climbers: Ben Feinstein (myself), Whiley H. Trailhead: Whipple Mountain Total distance: 20.49 miles Total elevation gain: 8,789 feet¹ Total time: 13:06:41 Peaks: Five ranked thirteeners, one unranked thirteener, one unranked twelver
¹My watch read 11,080 feet which Whiley and I agreed was too high. I used her more accurate number instead.
Hayden Peak, 12,978 (unranked)
"S 10"/Point 13,020
"S 9", 13,134'
"S 8", 13,252'
Ruffner Mountain, 13,003' (unranked)
"S 7", 13,220'
Mears Peak, 13,496'
Splits:
Starting Location
Ending Location
Via Time (h:mm:ss)
Cumulative Time (h:mm:ss)
Rest Time (m:ss)
Whipple Mountain Trailhead
Hayden Peak
3:53:34
3:53:34
0:00
Hayden Peak
"S 10"
0:15:00
4:08:34
0:00
"S 10"
"S 9"
0:41:54
4:50:28
0:00
"S 9"
"S 8"
0:39:37
5:30:05
0:00
"S 8"
Ruffner Mountain
0:45:17
6:15:23
0:00
Ruffner Mountain
"S 7"
0:26:22
6:41:45
0:00
"S 7"
Mears Peak
1:32:50
8:14:35
8:48
Mears Peak
"S 7"
1:15:18
9:38:41
0:00
"S 7"
Whipple Mountain Trailhead
3:28:00
13:06:41
Trip End
My GPS Tracks on Google Maps (made from a .GPX file upload):
Reversing the ridge is a lot of work 3/10/2021 7:03pm
Furthermore's TR describes a way to do these peaks without retraversing the ridge; not only is this a less taxing way to go than the route supranihilist describes, it would also be a lot safer on a day when afternoon thunderstorms are in play. (Note: a car shuttle is advised). From the summit of Mears, Furthermore descended SW then S, on terrain that he describes as death-defying. No doubt his description of that passage has discouraged people from repeating his otherwise sensible route. It almost prevented me from doing so. However, with that TR on my mind, I happened to do T0, whence I had a good view of Mears' south face which seemed to offer easier passage two or three hundred yards east of the summit. With this beta in mind, I repeated Furthermore's TR to the summit of Mears. From there, I continued to the line I'd scoped which went with no issue. As I recall, my variation entailed a lot of loose scree which was fine on the descent but might be objectionable going the other direction.
@Eddie: If you haven't yet, read Sarah T's report on the ridge between "S 6" and Mears. You didn't miss anything except an utter house of cards death trap!
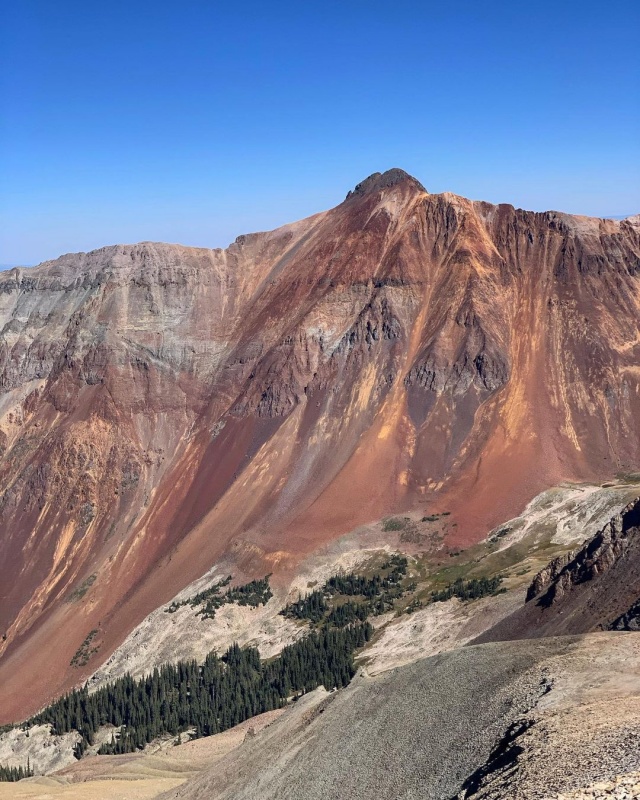
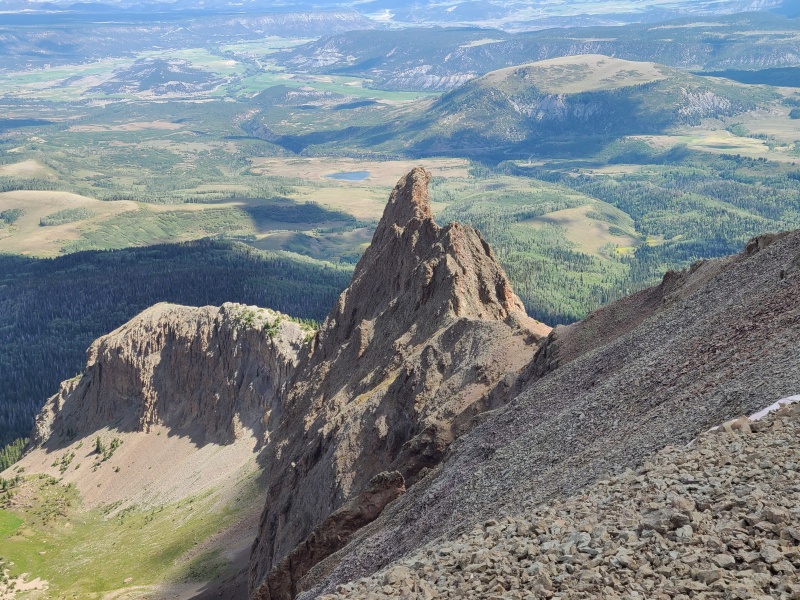
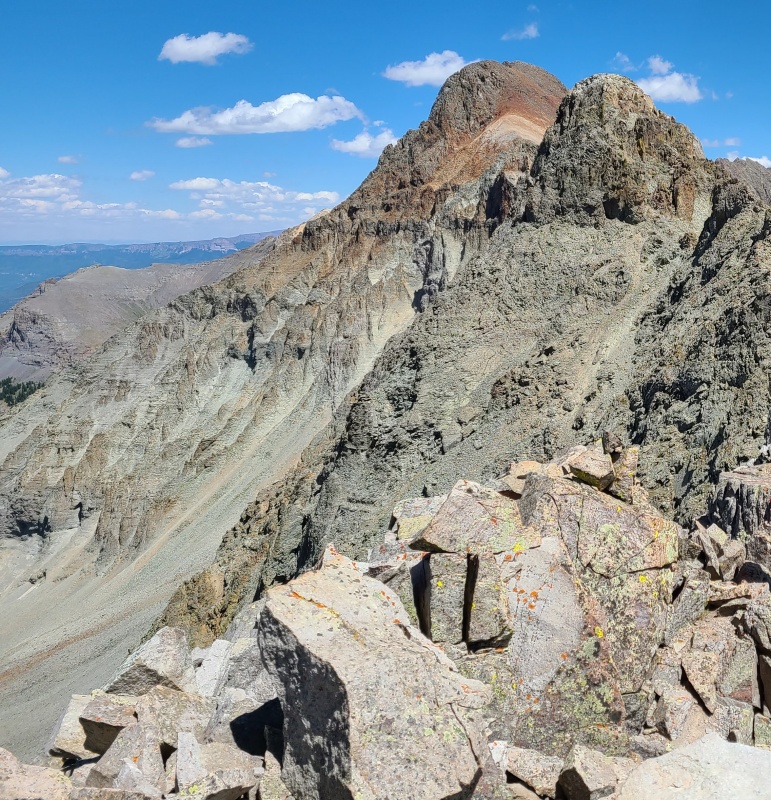
@Steve: Mears is especially impressive driving east on State Highway 62 from Placerville to Ridgway. It's a huge, rugged, and seemingly wildly overhanging peak along the Sneffels Range ridge (to the right of Sneffels) that just seems so out of place. I actually didn't notice it the first few times I drove that road, and it took me a while to figure out what it was once I did. Next time you're down in that area check it out from the highway, it's as jaw dropping as Sneffels is in my opinion.
@dhgold: I have to disagree pretty strongly with your comment. I personally consider the south face of Mears to be a very unsafe place even in good conditions. It's so vast and loose and there are so many gullies, cliffs, slabs, ribs, towers, you name it, it's an easy place to get lost in and end up on dangerous terrain, especially onsight. Add a storm and potential panic to the mix and I think it irresponsible to suggest that the face is safer than returning over the ridge, which, assuming one came over the ridge in the first place, is a known quantity. Frankly, if there's a storm approaching and you're high on Mears there are NO safe options. You're either going to ride out the storm in place or you're going to be climbing dangerous, wet choss to escape. It's great that you and others have navigated the face with ease, but others haven't, like myself, Whiley, and Derek himself, so I just can't get behind your suggestion.
@Yusuf: Haha, great comparison between Mears and a boss level. Kevin Baker called Mears the "Choss 401 graduation class", which I think is another great comparison! This thing is absolutely not to be trifled with.
@Whiley: It was actually the Body Armor drink afterwards, let's be honest. Or maybe the realization that we never have the climb this ugly POS ever again. The Mears/"S 7" ridge was pretty dope though, I must agree.
Great title for your trip report! Mears is close to the top of the list for my least favorite 13er. I also went down the SW face because I hated my ascent route so much, but I don't recommend it. There were comments in the summit register from people who had done snow climbs in north face couloirs and they liked those routes a lot better
@Dave: I might have to check out the north face couloirs when I finish the 13ers and have more desire to do repeats. Boggy's report on them sounds like a good time! And I asked my editor and climbing partner extraordinare, Whiley, what I should name this report, and she said "NightMears" after having had nightmares about "drowning in an endless sea of orange talus..." after our first attempt on this group. That's how intense our first experience was with this one.
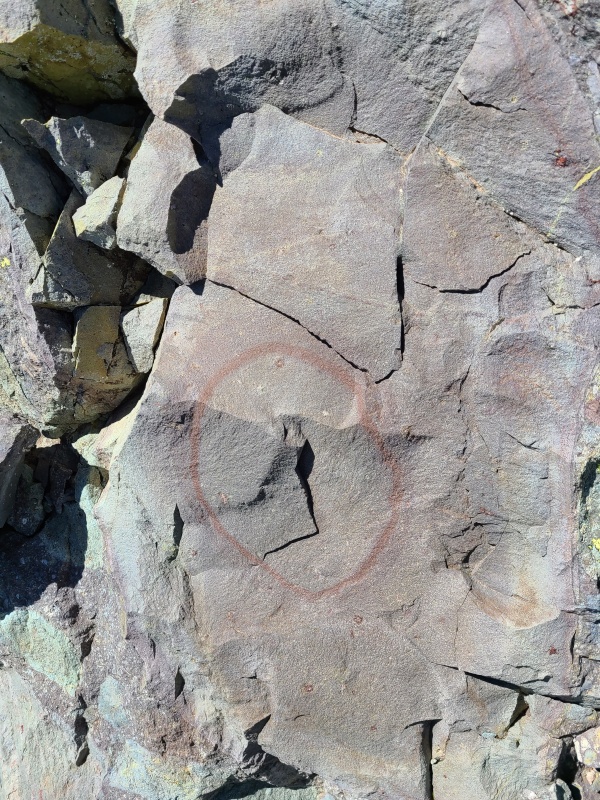
@Andrew: It looks beyond hideous up close, but from afar I think Mears is quite a striking peak (see Heather's pic, #4). I'm sure with a good coat of snow one could prance up quite a bit of this. I'd imagine finding a continuous layer of snow all the way up such an enormous face would be pretty rare, but based on comments here and other TRs it sounds like a lot of the difficult stuff can be avoided. I can't say with confidence what the best route on Mears is, but the ridge from "S 7" is certainly not a bad one.
Amy, thanks for the reminder that the San Juan can be a dangerous place, and that I have a responsibility as an author to say as such. To be clear, I 100% think Mears in particular (and to some extent the surrounding peaks, at least the ones I have done to date, all of which are in this report) are among the scariest and most dangerous peaks I've climbed. Full stop. They are not for amateurs and not to be climbed with anything but the utmost care and respect. If I have been irresponsible in my duty to be realistic about the level of danger and commitment on Mears, or in any of my trip reports, I welcome you (or others!) to point that out so that I can change the irresponsible passage(s) and avoid doing so in the future, because I take that that responsibility seriously.
In regards to dhgold's comment (I'm sorry, I don't actually know his name! Someone please enlighten me.), he is indeed an extremely experienced climber, much more than I am. My disagreement was based on my own experience with the south face, one I personally found among the worst of any climb I've attempted, if not the worst. He could certainly be right - there might be a good, "safe" (I use quotes because I don't think Mears is safe by any route) way down the face, but it's a gamble in my opinion, especially onsight. Both his and my comments are based on personal anecdotes. Again, to be clear, in my opinion there are no safe routes on Mears and being caught in a storm on this peak, regardless of where and regardless of ascent route or descent route, is dangerous.
I appreciate your comment as well as dhgold's, they are warranted on such a peak.
A couple of my friends did this earlier in the year and also reported the avalanche debris still being awful. My guess is the debris will never be cleaned up and hikers will just have to deal with it.
1. There's a man-made path cut through the 2 avy debris fields, so there's no bushwhack if staying on trail.
2. @dhgold is 100% correct and south slopes descent off Mears is preferable to a ridge reversal. Moreover, a few accomplished hikers climbed up Mears, so it's definitely doable.
3. The loop that Furthemore and Bombay2Boulder suggested gets the same 5 peaks with 3k feet less elevation gain.
If you spent more time looking into lifting others up, you might just find it lifts you up as well. Positivity begets positivity. Try it sometime Natalie.
There is no ONE right way to do things. Routes should depend on goals, risk tolerance, point of reference, ones strengths with certain types of terrain, and conditions that are constantly changing (both for the individual and the mountain), among other things.
Less vert or miles does not always mean a better route or that its more efficient. I tend to go for the vertiest options when choosing my routes because it goes in my training bank for the mountain races I pursue. I similarly tend to default on longer routes for training reasons. A lot of times routes with more vert/miles can be more enjoyable and scenic.
I always appreciate TRs such as the ones Supra puts out. Not for being most efficient or impressive, but simply for putting detailed beta out there and allowing those that seek info on alternative routes to weigh the risks and benefits for themselves.
Caution: The information contained in this report may not be accurate and should not be the only resource used in preparation for your climb. Failure to have the necessary experience, physical conditioning, supplies or equipment can result in injury or death. 14ers.com and the author(s) of this report provide no warranties, either express or implied, that the information provided is accurate or reliable. By using the information provided, you agree to indemnify and hold harmless 14ers.com and the report author(s) with respect to any claims and demands against them, including any attorney fees and expenses. Please read the 14ers.com Safety and Disclaimer pages for more information.
Please respect private property: 14ers.com supports the rights of private landowners to determine how and by whom their land will be used. In Colorado, it is your responsibility to determine if land is private and to obtain the appropriate permission before entering the property.


")
")
")
")
")
")
")
")
")
")
")
")
")
")
")
")
")
")
")
")
")
")
")
")
")
")
")
")
")
")
")
")
")
")
")
")
")
")
")
")
")
")
")
")
")
")
")
")
")
")
")
")
")
")
")
")
")
")
")
")