| Report Type | Full |
| Peak(s) |
El Diente Peak - 14,175 feet Mt. Wilson - 14,256 feet Wilson Peak - 14,021 feet Mt. Sneffels - 14,155 feet Mt. Eolus - 14,087 feet North Eolus - 14,042 feet Sunlight Peak - 14,061 feet Windom Peak - 14,089 feet |
| Date Posted | 08/09/2020 |
| Modified | 08/19/2020 |
| Date Climbed | 07/30/2020 |
| Author | SpeedWalker |
| Additional Members | MounTimo |
| San Juan 14ers in a Week (Part 1) |
|---|
|
San Juan 14ers in a Week (Part 1) Alex "SpeedWalker" Walker Introduction Within the first month of the summer of 2020, I had completed 37 out of my goal of all 58 Colorado 14ers; just 2 mountain ranges and 21 peaks remained. This week, I planned to knock out one of those remaining ranges, and finish two-thirds of the peaks I had left. That's right, I was heading down to the San Juan for a week, to complete its 14 14ers. My 7-day schedule was as follows:
It was an aggressive plan, especially packing so many hard combinations and lots of miles in the first few days. But based on my experience so far this summer, I knew I would have a good chance to make it. My usual hiking partner Tim would be joining me, although he ultimately would stay behind on many of the peaks to allow me to hike faster. This trip report covers only the first half of the week, and the first 8 peaks; another report will follow to discuss the remainder of the trip. Day 0 - July 29, 2020 We had originally planned to leave home on Sunday, July 26 for the 7+ hour drive to Kilpacker Basin TH. However, the weather forecast for Monday and Tuesday called for rain practically all day, with a high chance of morning thunderstorms. Obviously, these conditions aren't exactly conducive to success on long 14er combinations, so we pushed the trip back by two days. After that, the weather actually looked amazing, with at most a 10% chance of rain on each day for the coming week. Some other complications actually cost us one more day, but we were finally able to leave by 11:00 AM on Wednesday morning. It was quite the long drive to the trailhead, admittedly to the group of 14ers furthest from home. Although the time estimates were similar, we made the mistake of taking I-70 through Grand Junction, rather than the more direct route on 285. There was a lot of traffic due to construction on the interstate, and at one point we were completely stopped for 20 minutes behind a work zone for no apparent reason. However, we eventually made it through and down to Montrose, where we stopped and got a pizza for dinner, before finally arriving 8 hours later, past 7:00 PM. We set up the car for the night and fell asleep within the hour. Day 1 - June 30, 2020 El Diente Peak/Mount Wilson/Wilson Peak - Combination Class 4 | Distance: 18.17 mi | Gain: 6,601 ft
We awoke at our standard time of 4:00 AM, ate breakfast, got our gear on, and were soon hiking down the trail towards Kilpacker Basin. Now, many people decide to complete the El Diente/Mount Wilson traverse from this trailhead, but it's not exactly the obvious choice if you add on Wilson Peak. The shortest loop to complete these three would be from the Silver Pick TH, although this has a few downsides. First, you have to reascend the Rock of Ages saddle to return to the trailhead, adding unnecessary elevation gain to what's already a 7,000 ft day. And second, you have to ascend El Diente by the long, loose North Slopes, or the difficult, exposed North Buttress. Coming from Navajo Basin is longer with a similar amount of gain, and it still makes sense to approach El Diente from the north. However, coming from Kilpacker Basin not only involves the least elevation gain of all three approaches, but also allows easier access to El Diente by the standard South Slopes route. From there, you can traverse over to Mount Wilson, go down the standard North Slopes, complete Wilson Peak, then return through the connecting trail from Navajo to Kilpacker Basin. It's just over 2 miles from the trailhead to the first junction, where you choose between the standard Kilpacker Basin approach to the right, or the connecting trail to Navajo Basin to the left. I of course started out on the former, but would later return on the latter. This also marks the shift from mostly flat to uphill hiking. About 2 more miles later, you emerge from the trees and onto rather unpleasant rocks up through the Basin. At about 12,600 ft, you can continue straight towards Mount Wilson, or begin up the slope to the left towards El Diente. 
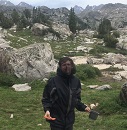
Tim and I headed up what started out as a slope steep and loose enough to be annoying, but not enough to cause any real risk of rockfall. Having memorized each section of the route description, and following a GPS track on my watch, navigation wasn't too difficult on this peak. As I sat waiting for Tim on one section, a little pika ran up to me repeatedly and started nibbling on my shoe, which I found very amusing. 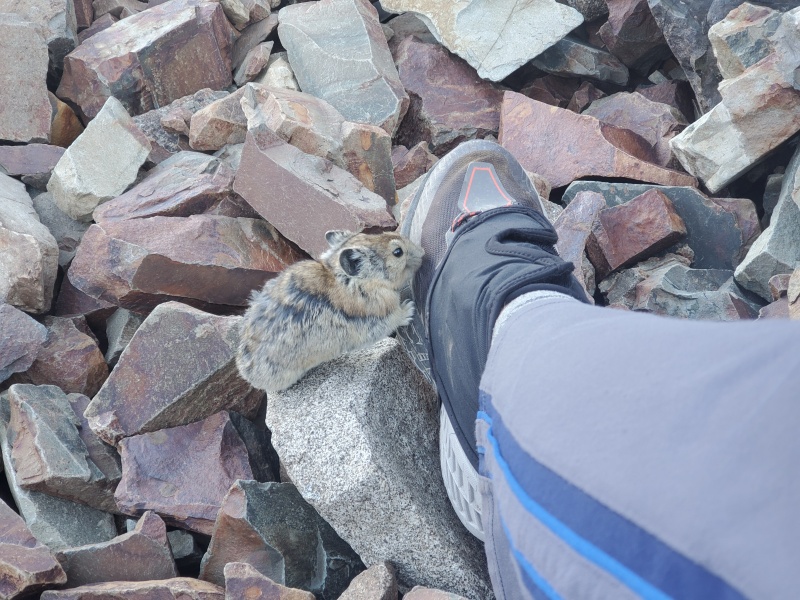
Approaching the section in front of the cliffs, the route description makes it seem like you climb most of the way up to them, before traversing left. Upon doing this, however, I realized there was a much easier route that ascended the slope while moving left, which I guided Tim along. Once you reach the "Red Rock Rib," the slope becomes much steeper and requires much more care until you reach the gray gully. 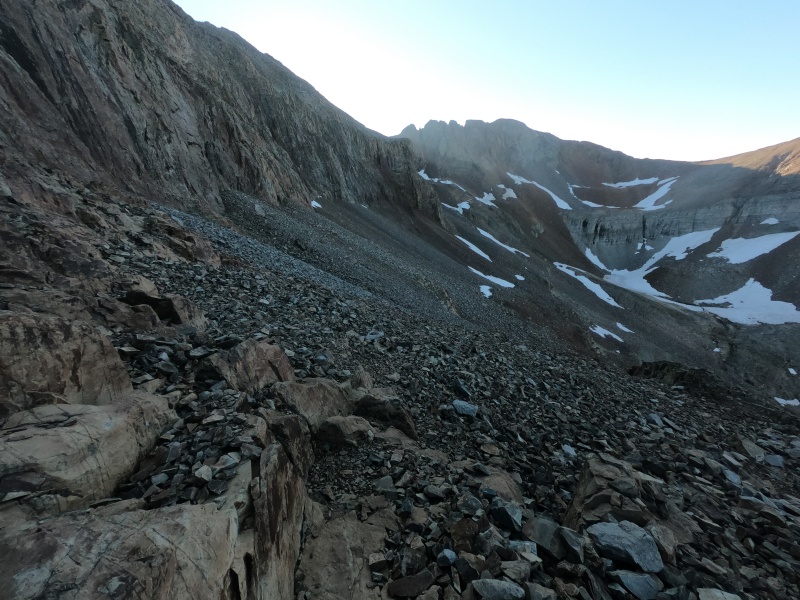
At the base of the gray gully, Tim decided that he wouldn't continue on to the traverse, so he left his trekking poles here to retrieve later. It's a fun Class 3 scramble up the gully and along the base of the "Organ Pipes." Just make sure you remember where the gully ends, as it wasn't super obvious where to descend later. 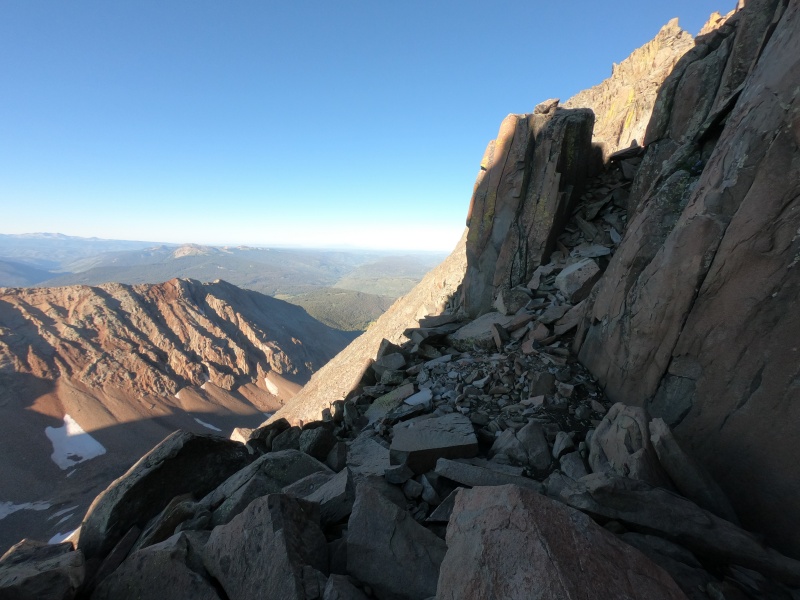
There's lots of cool rock structures under the ridge here, with an abundance of cairns showing the easiest route across. This traverse is probably the crux of the route up El Diente, although it's nothing too crazy in terms of Class 3 moves. You then ascend a small gully up to the ridge, which is a little loose and requires some caution. 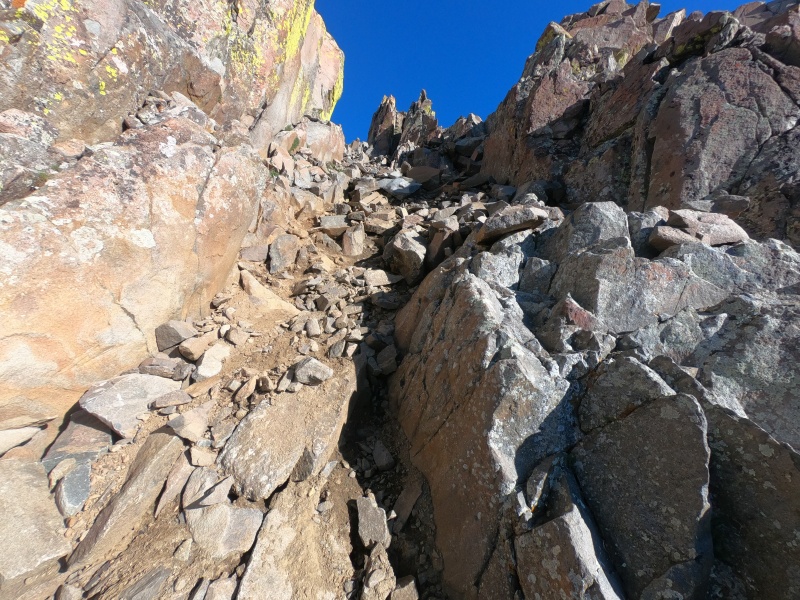
At the top, there's a well-marked crossover to the other side of the ridge, where you walk across easier terrain up to a notch. From here, the top is right up the slope in front of you, although the route to get there isn't exactly obvious. There was still a small snow gully all the way up to the left that seemed impassable, so rather than taking a direct route, I scrambled up along the snow then over to the summit. Tim arrived soon afterwards, followed by another man coming up the North Buttress route, who I would later see many times throughout the day. This was my 38th 14er summit of the summer. 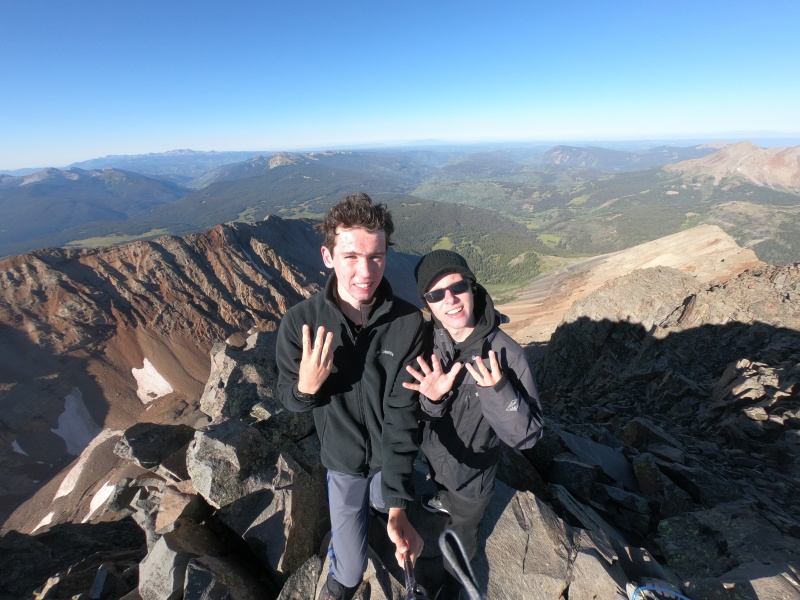
We enjoyed the views at the top for a while, but soon wanted to get out of the cold morning wind. We made our way back to the crossover, down the gully, and under the Organ Pipes to the top of the gray gully. At this point, I reminded Tim of the tricky parts of the route, and he descended without incident back to the car (it did sound like he went the wrong way though). I double-checked the route description for the traverse, then continued along under the ridge, still following cairns. I ascended a loose but reasonable rocky slope to the ridge, where I went a little too far before hitting the top, then towards the right side of a large gendarme which holds some fun scrambling. 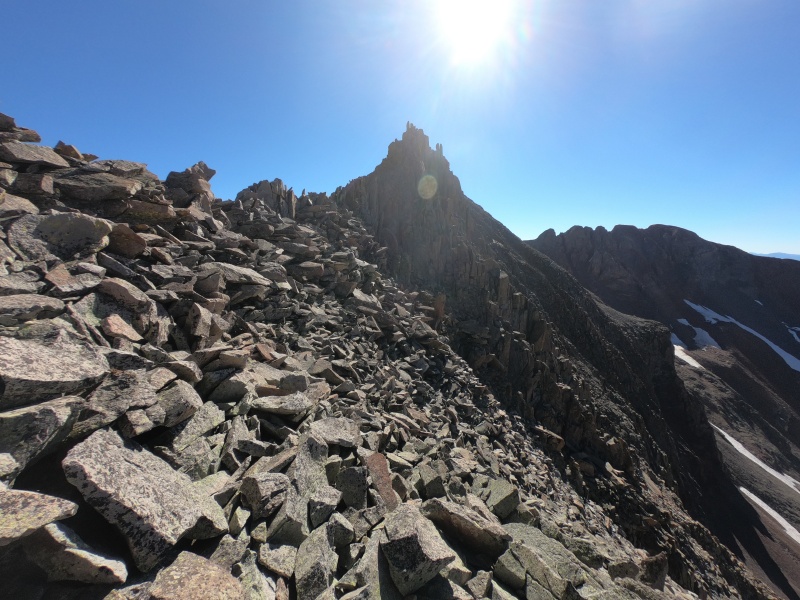
There are still cairns to follow through this area, but they become more sparse as you go along. Finding the best Class 3 route is a little tricky, but nothing is too much harder than the route so far, as long as you don't mind a bit of exposure. After making your way back up to the ridge, it's an easy walk along the top to the summit of "West Wilson," which I didn't really realize was there at the time. Here comes the most annoying section of the route, followed by the hardest part. You must first descend around 100 feet down a steep slope with tons of loose rock. I headed down before hitting the end of the ridge, on the left side, which gave me some occasional solid holds while I negotiated the loose downward slope. I believe the more popular route is to descend directly off the end of the ridge, which looked steeper but perhaps a bit more solid. 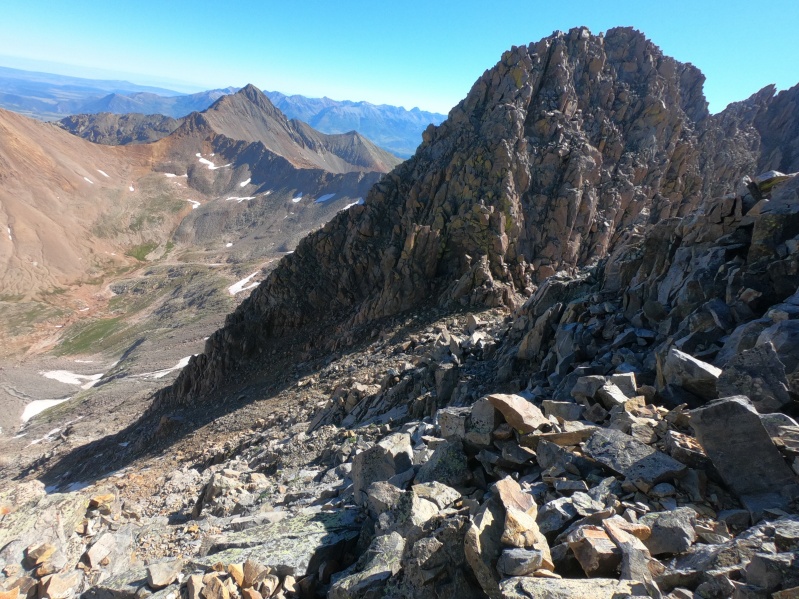
Finally, I arrived at the crux wall. I was a bit confused about the easiest way up from all the different reports I had read, so I decided to follow the line exactly as shown in the picture in the route description. It's definitely steep, which naturally creates some exposure beneath you, and is certainly the hardest part of the entire route. However, there were only a few moves that were particularly tricky, which would probably still be considered Difficult Class 3. All of the rock was very solid, and the moves felt fairly secure. I didn't really have any trouble, and actually found it a pretty fun challenge. After this comes a scary-looking section across a narrow ridge, which eventually heads downwards towards the final summit ridge of Mount Wilson. It's mostly easy Class 3 scrambling, but with a lot of exposure. I've learned recently that I'm personally not nearly as freaked out by these exposed sections as other people seem to be. I've still never really been bothered by the exposure on any route, and I find that I have to remind myself to be more careful on such sections, where others would be clinging to each rock for dear life. 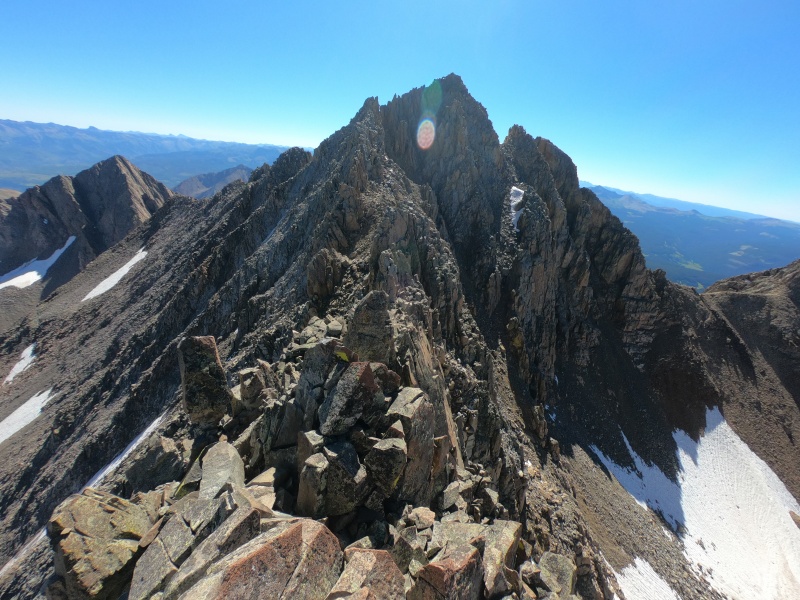
I made it to across and down the exposed section, then followed a small gully up to the summit ridge of Mount Wilson. This is another part with intense exposure, and now you're climbing upwards rather than across. There are some fairly challenging Class 3 moves to maneuver through, although it didn't feel any technically harder than the crux wall before. On the one big "Class 4" boulder everyone talks about, I simply downclimbed a few feet to the left and scrambled up around it, which looked way easier and less exposed than trying to climb over it. There was nothing that seemed definitively harder than Class 3, as long as you pick the best route. 
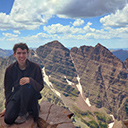
Before I knew it, I was at the top. It took me just over an hour from the top of El Diente, which surprised me after reading Roach's description of "2-4 hours." This was definitely one of my favorite routes on a 14er so far, and was a little easier than I expected. The route-finding wasn't too hard, the loose rock was only bad on the easier sections, and I really didn't mind the exposure. The crux wall and summit ridge were were definitely challenging, but manageable if you have good experience on Class 3 terrain. The summit itself was very cool too, with great views of the surrounding peaks. I had to borrow some extra fingers while taking my summit picture. 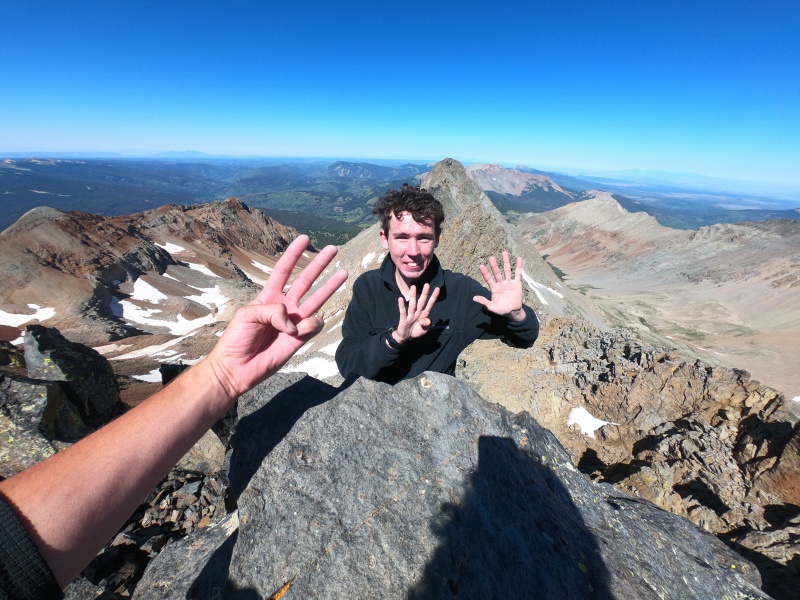
When I eventually decided to leave, I started down the North Slopes, this time towards Navajo Basin. I descended the same summit ridge and began down the opposite side of the gully from which I had came. I knew I needed to head right towards the ridge at some point, but I saw someone further below, so I kept descending. However, I soon realized that I was off-route, going down what now looked like a well-traveled yet incredibly loose and annoying gully. 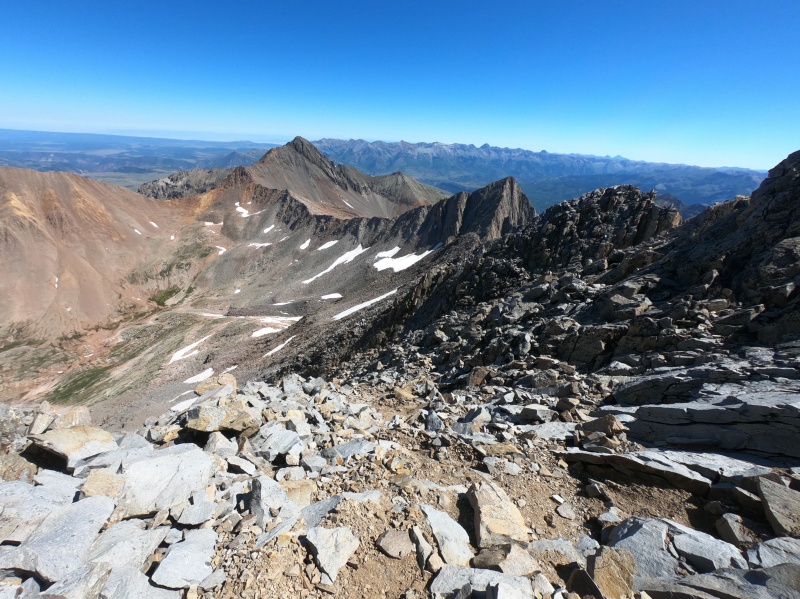
I wanted to cut across onto the correct route rather than reascend, but it looked like a long, icy snowfield blocked passage all the way up, until the correct route on the ridge. So instead, I carefully continued downwards before finding a spot where I could cross (although it was still pretty precarious), then carefully contoured around a rib to rejoin the proper route. It was a dumb route-finding mistake; seeing the off-course climber in a gully with signs of travel tricked me into going the wrong way. Once I was back on route, the slope became a bit gentler and not quite as loose. 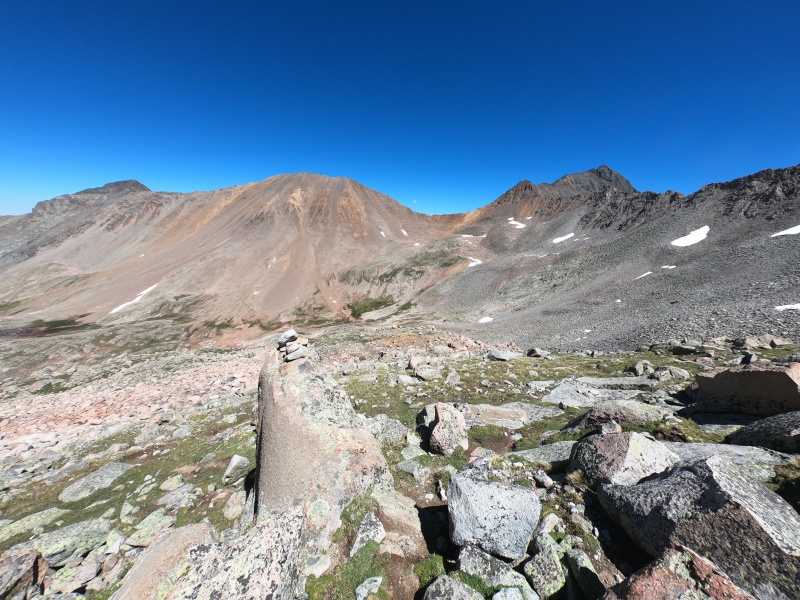
However, it was still a long way to go, with over 1,500 ft of careful rock hopping before reaching the start of the trail up to the Rock of Ages saddle. I lost the loosely-defined "trail" plenty of times, having to check my GPS track to get back to it. But eventually, I made it to the low point and started to head up towards Wilson Peak. Reaching the saddle was fairly trivial, and the following ridge walk on the start of the route was nothing more than rocky Class 2. You soon reach a smaller saddle from which you take a hard left and begin traversing some Class 3 ledges. Make sure you remember where this saddle is, as it's surprisingly easy to miss the turn on the way back down. 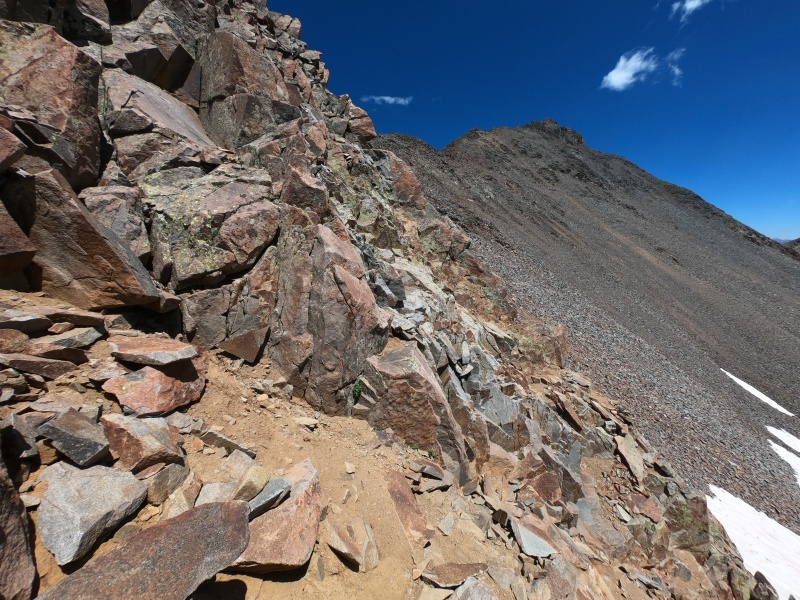
The terrain soon eases up a bit, and it's just more rocky Class 2 most of the way to the summit. There's an abundance of cairns here, perhaps an overabundance, as they led me away from the easiest route a few times. The rock is fairly loose, but it's very manageable if you stay on the proper path. It eventually turns into a steep Class 2/3 scramble straight up to the top... of the false summit. I didn't exactly remember this detail, and was inwardly laughing about how easy the final pitch was, until I realized how far I actually had to go. 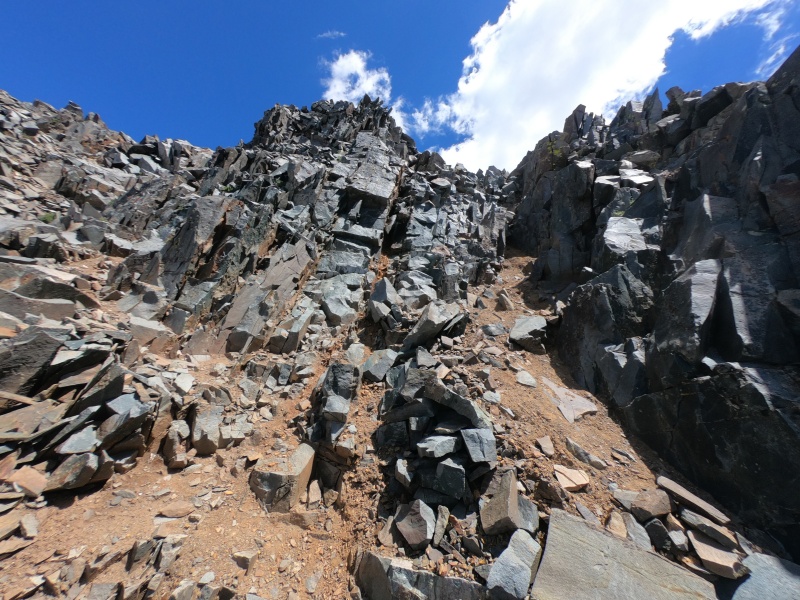
You traverse along the left side of the ridge on a tricky, exposed Class 3 section, then head up a couple steep Class 3 slopes to the true summit. 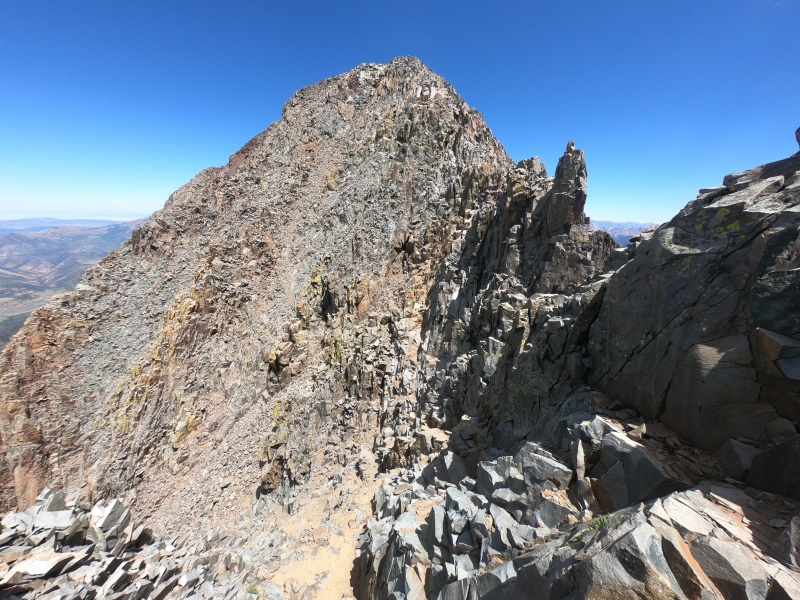
The scrambling here was all pretty fun and not all that hard: definitely easier than that on Mount Wilson. I reached the top of my third 14er of the day, and again enjoyed the views and great early-afternoon weather. 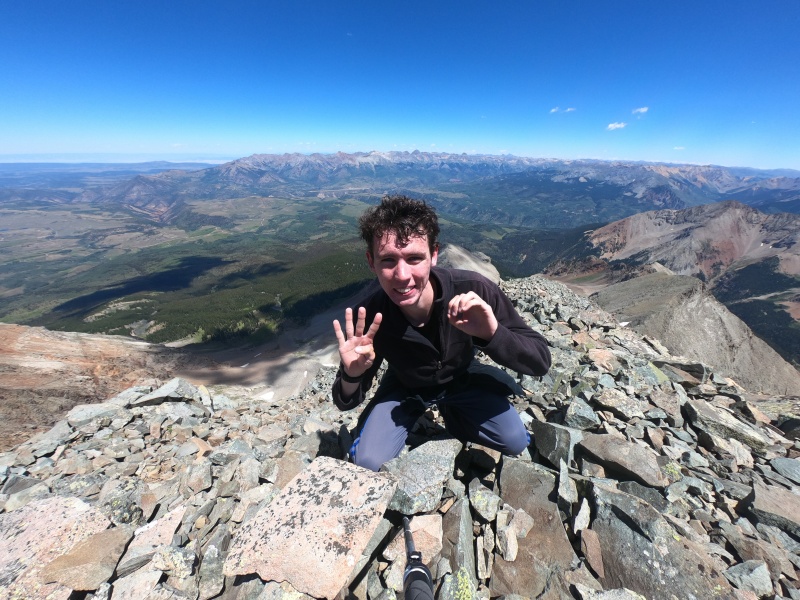
I eventually started heading down, first to the false summit, then across the ridge to the tricky ledges, around the corner and down to the saddle, and back into the basin. I still had 8 miles to go from here, and it was the start of unfamiliar terrain, as I would be heading most of the way down Navajo Basin before connecting back over to Kilpacker. The trail was surpsingly nice up high, with some cool campsites and lots of water nearby. It soon turns incredibly rocky though, as you descend towards the beautiful-looking Navajo Lake. 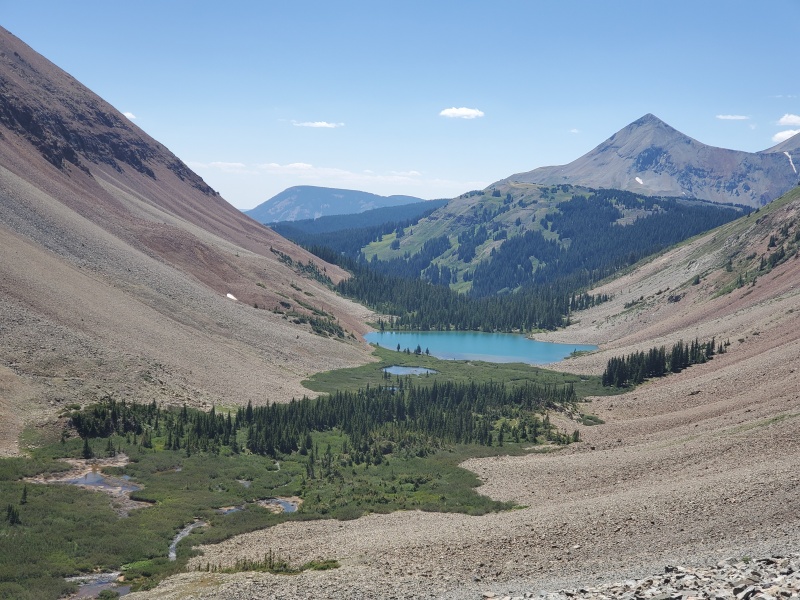
I could immediately tell that this Basin would be much more scenic than Kilpacker, which remained true all the way down. If you want to backpack in to split up these peaks and minimize your distance on each day, then starting at Navajo Basin TH is probably the best choice. If you want to break them up like most people do, then it's easiest to do the traverse from Kilpacker Basin TH, then Wilson Peak from Silver Pick TH. And if you're crazy enough to do them all at once, it's shortest from Silver Pick TH, but easiest from Kilpacker Basin TH, like I did. 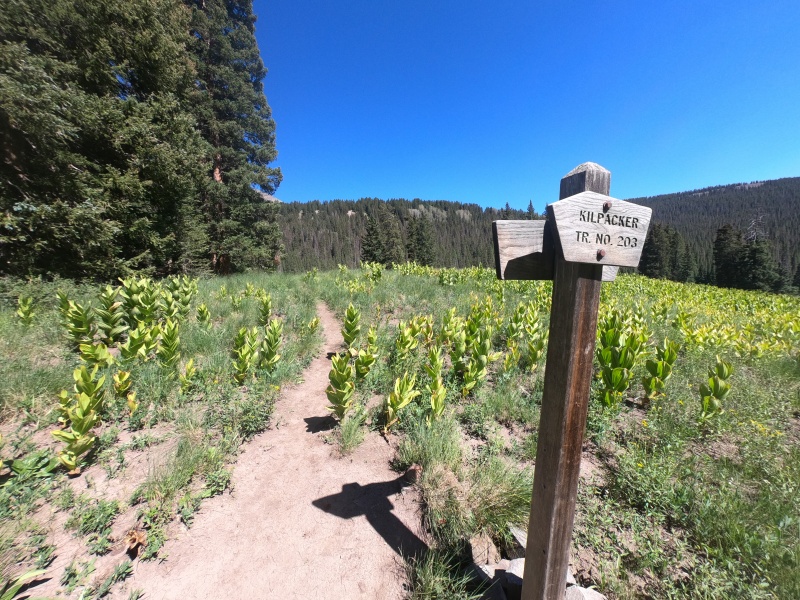
I descended for miles upon miles before eventually reaching the turnoff towards Kilpacker Basin. I turned left, crossed a creek, then started painfully heading a mile upwards before hitting the junction from earlier today. There was one particularly tricky creek crossing just before this point; I found a good spot to cross, but still slipped on a rock and got my foot wet. 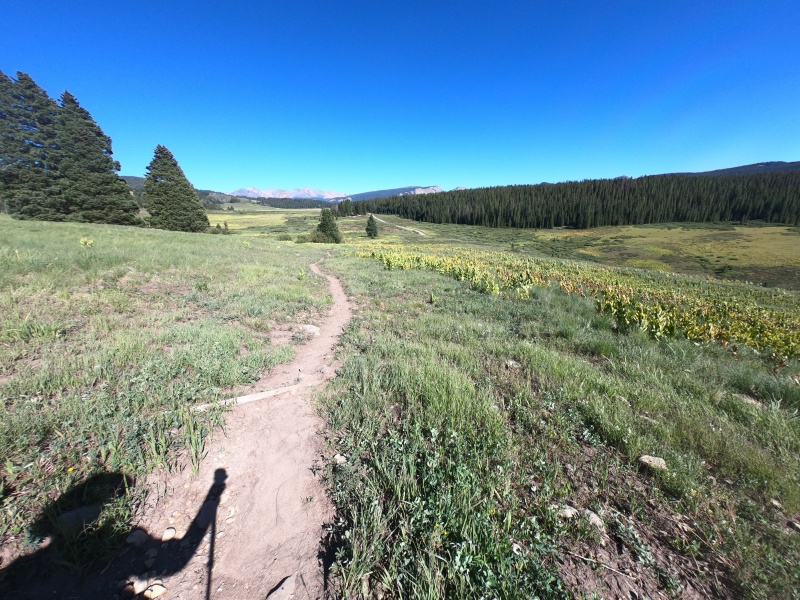
Once I was back on the initial trail, it was a quick couple of miles back to the car. Tim had been waiting there for hours, presumably watching shows on his phone or something. I had told him I would arrive around "3 to 5," and since it was now 4:57 PM, so I joked that I had predicted my arrival time down to the minute, since it was now "0:03 to 5:00." We packed up the car fairly quickly and set out on the 2 hour drive towards our next destination: Yankee Boy Basin TH for Mount Sneffels. A massive chunk of mountains turns this from a short straight drive into a long circular detour. We eventually made it around to Ouray and up the road, which was remarkably well-maintained up to the 2WD pulloff around 11,000 ft. This road literally cuts through the side of a mountain, with rocks hanging off over your head, yet they manage to keep it as smooth as a dirt road can get. I couldn't imagine a car that you couldn't get this far up the road. 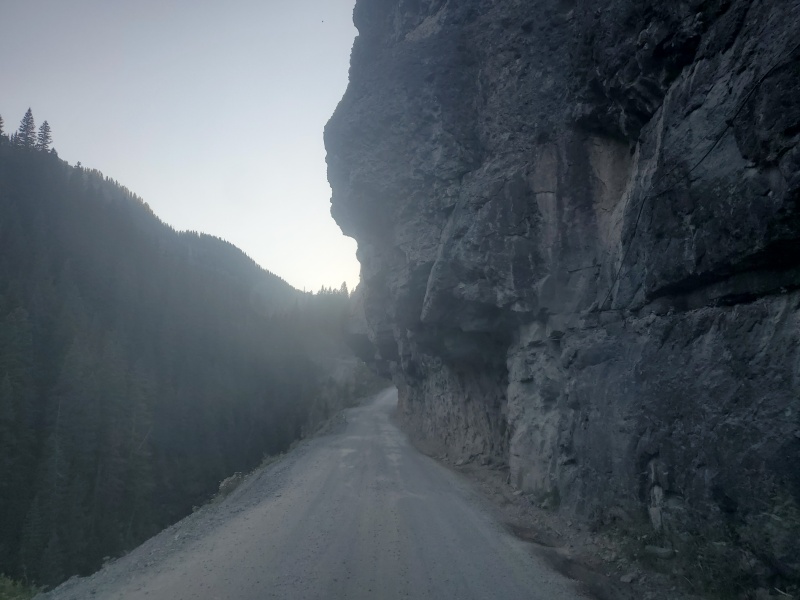
Now, since I'm a crazy person who likes to follow the "3,000 ft rule," it meant I could start hiking no higher than 3,000 ft below the summit, which means 11,158 ft. This equates to about a half mile from this junction, so we started up the quite rough 4WD section of road. It was very rocky, bumpy, and surprisingly curvy for a road that appears to go straight on a map. We pulled off onto the side of the road to stay the night at around 11,100 ft, but I would've been comfortable making it up another quarter mile to the first lower 4WD trailhead. We set the car up again, ate some dinner, and I fell asleep around 9:00 PM. Day 2 - June 31, 2020 Mount Sneffels - South Ridge Class 3 | Distance: 6.00 mi | Gain: 2,661 ft
I'm not quite sure how I managed to ascend a peak 3,000 ft above the car while only gaining 2,661 ft of elevation (according to my watch), but apparently it happened. Nonetheless, I awoke at 4:00 AM again and began the walk up the rough dirt road. Again, it looked manageable with good clearance up to the lower 4WD parking lot, but I wouldn't dare bring my car past that. It gets quite a bit rockier with lots of water crossings that just didn't look like fun. Although I was in the dark, I took some pictures later in the day to demonstrate. 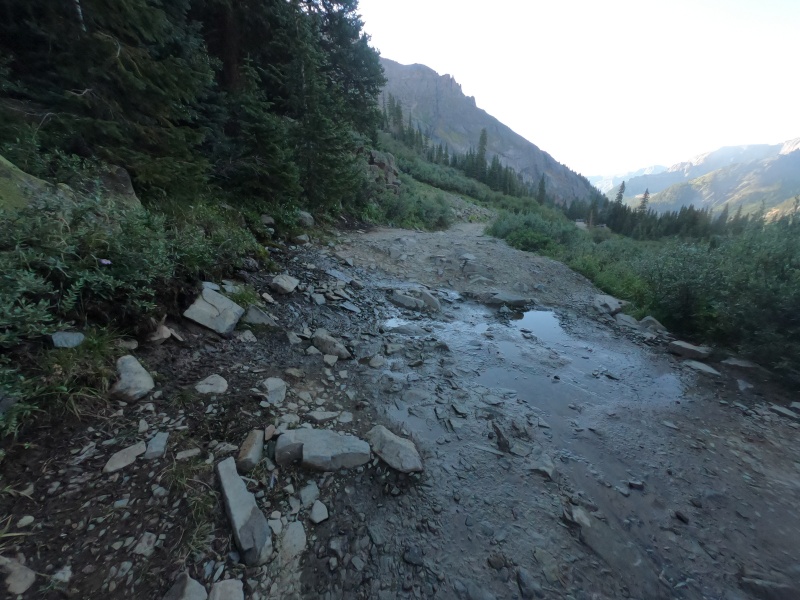
The water crossings were many, but they're all easy enough to pass on foot. Approaches like this always make me wish they would either maintain the road better, so most people could drive up, or have it just be a single trail to make hiking more enjoyable. Out of the 3 miles from my starting point to the summit, the boring road went 2 miles up; it just seems pointless to have the road go that high if it's too rough for most hikers to drive. Before the very rocky switchbacks start, there's a middle 4WD parking lot, where to my surprise, I saw a Subaru parked. After this, you'll need a crazy Jeep and/or lots of extreme 4WD experience to make it up. There were some ridiculous rock sections that I would never think of attempting in any vehicle. Still, I later saw what looked like a normal truck at the highest trailhead parking lot, where the information signs are located. A single trail emerges from this point and continues mostly straight for a while, going gently uphill, until you reach the base of the first scree slope. 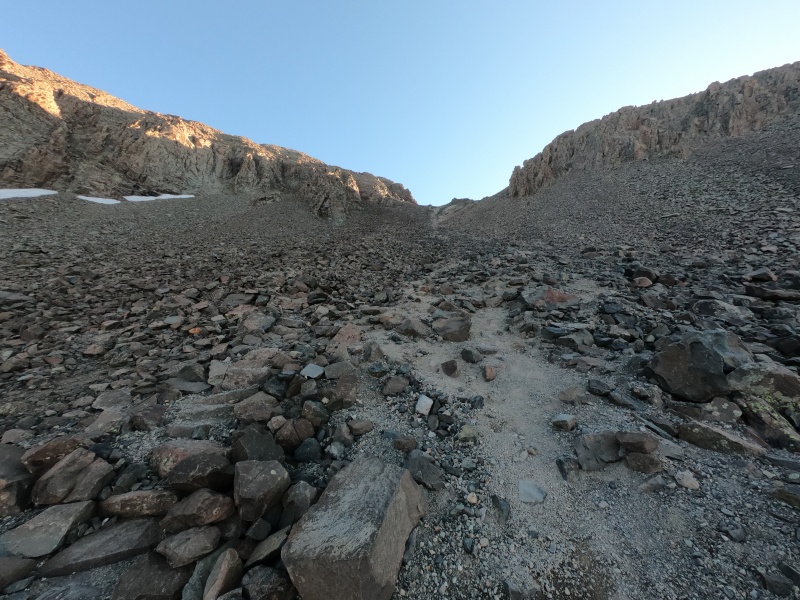
This is your typical loose 14er slope, plenty steep to be annoying to ascend, but not quite enough to be particularly dangerous. Still, you want to stay just to the left of the central gully, where there's larger, more solid rocks to plant your feet on. There's tons of loosely-established switchbacks near the bottom, but it turns into more of a free-for-all as you reach the steeper top half. Using trekking poles helped me a lot on this section, although they were less useful near the summit. Once you get to the saddle, you're almost there, although the most difficult section is still above you. You turn left up a narrower gully with larger rocks and harder Class 2 hiking. 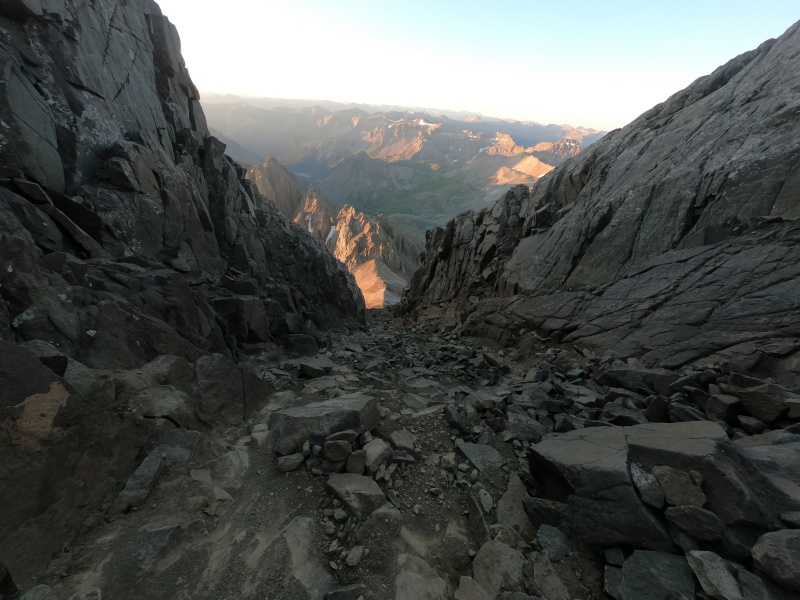
There's still some loose stuff, and unsure of how bad it would be, I brought my helmet to put on here. Although this is a reasonable safety measure, I would personally leave it behind next time. There are certainly more dangerous routes where I'd much rather have a helmet (like Longs Peak), yet still most people don't bring one on that mountain. At the top of the gully, there's a small notch that requires some scrambling to crawl through, to reach the short remainder of the route. 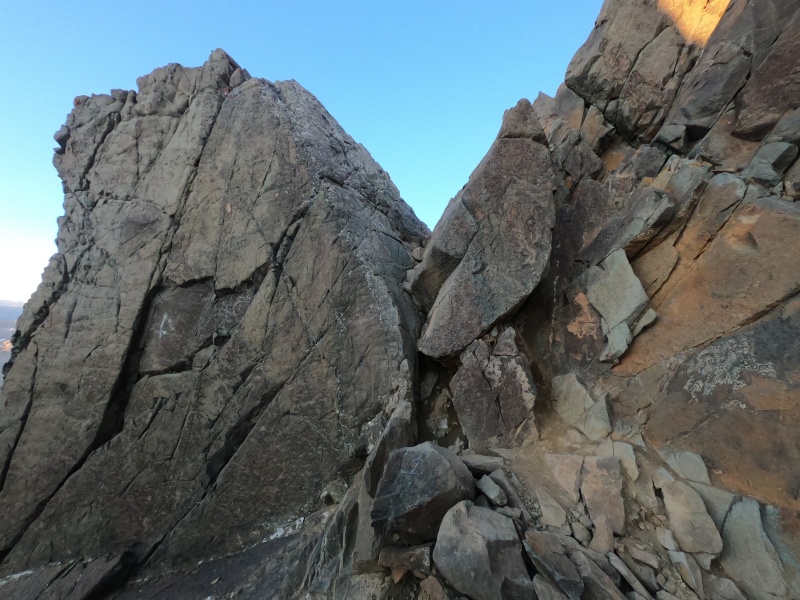
This is why the entire hike is rated "Easy Class 3." I didn't have any trouble getting over it, although it wasn't particularly easy for a Class 3 move; you may have a bit of trouble if you're new to scrambling. From there, it's just a quick hop up some rocks to reach the summit. I was hoping to be the first one on top for the day after passing so many people on the way up, but to my surprise, there was actually someone sleeping up there. It sounded like he had come up the Southwest Ridge route and stayed the night. I was early enough to watch the sun rise over the distant mountains. 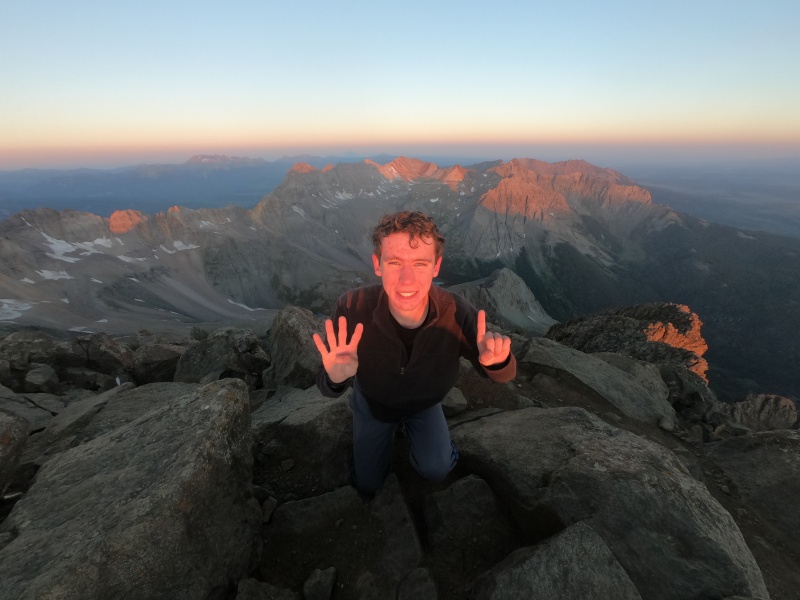
I headed back down pretty soon, knowing I had much bigger goals to accomplish this afternoon. Our main objective for the day was to backpack the 15-mile approach to Chicago Basin from Purgatory TH, then set up camp to climb the 14ers the next morning. This would normally be a fun train ride and much shorter 6-mile approach, although the railroad hasn't been operating this summer for various reasons. Sneffels was just a bonus peak for the day; I soon headed down in order to have as much time for our backpacking trip as possible. 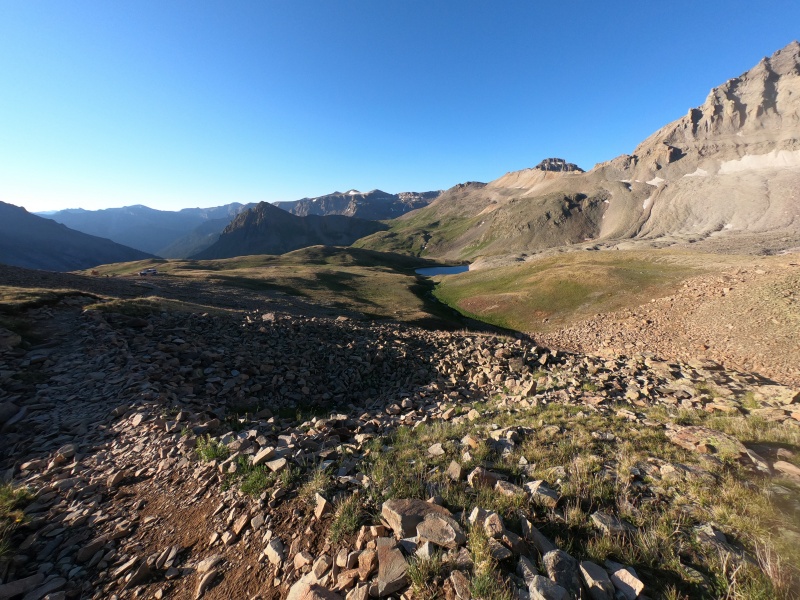
I made it back down the trail quickly, passing dozens of people along the way, and surprising Tim at the car with my early arrival. I got there before 8:00 AM, for a total of less than 3 hours of hiking round trip. We packed up the car, made it down the short 4WD section and back to Ouray, then proceeded past Silverton to the Purgatory TH. The road between these towns is amazing: a highway carved into the side of a rugged mountain, with great views all around. Upon arriving at the trailhead, the parking lot was absolutely packed full, which I found funny since it led to the most difficult-to-access 14ers. We drove around for a while until a spot at the end finally opened up. When we would later return, all of the cars would be at a drastically different angle, making our parking job look stupid. We squeezed in and spend a solid hour packing up everything we could possibly need for two nights of backpacking, including much more food than on our last similar trip. We were finally ready around 12:30 PM, and set off (literally) down the trail. Chicago Basin - Approach Class 1 | Distance: 15.30 mi | Gain: 4,052
Yes, the start of this approach literally heads downhill for about the first mile or so. This leads into Purgatory Flats, an appropriately-named area, given how it's going to feel when you're heading back up to the parking lot 2 days later. 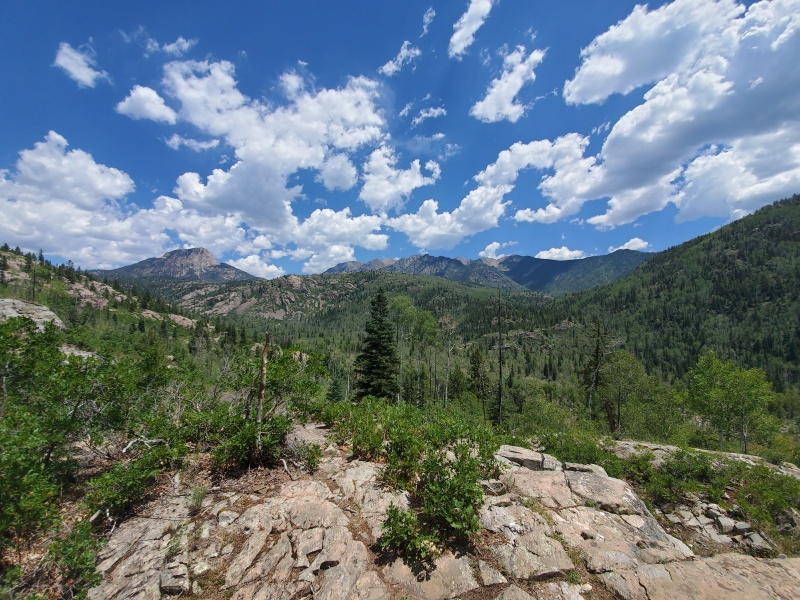
The trail makes its way to the side of Cascade Creek, which flows down the valley ahead of you, although you instead climb slowly upwards along the slope. This is a pretty cool area, despite the counterintuitive elevation gain. Suddenly, around 4 miles in, you go rapidly downhill until you reach the Animas River. This is the main waterway that the railway follows to Needleton, from which you would normally just follow Needle Creek up to Chicago Basin. Instead, the extended route goes into Purgatory Flats, down Cascade Creek, along the Animas, then finally up Needle Creek. This is the low point of the entire route: 1,000 ft below your starting point, from which you must regain nearly 3,500 ft to reach camp in Chicago Basin. Also, the Animas is a huge river, so there's an appropriately huge bridge to cross it. 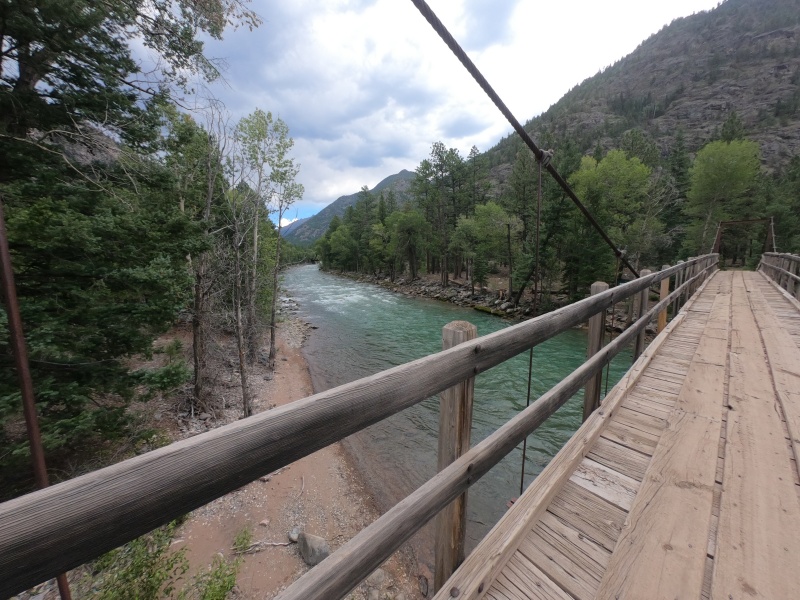
I waited for Tim to catch up, as I usually hike much faster than him, then set off down this middle stretch. From here, it's about 5 miles until you merge onto the standard route near Needleton About halfway through, we started hearing distant but increasingly-louder thunder, and a light rain soon turned to a downpour. I quickly took shelter under some trees and pulled out the rain fly for our tent, hastily tying it around some trees to take shelter under. The rain calmed down shortly after, and we continued onward into blue skies. 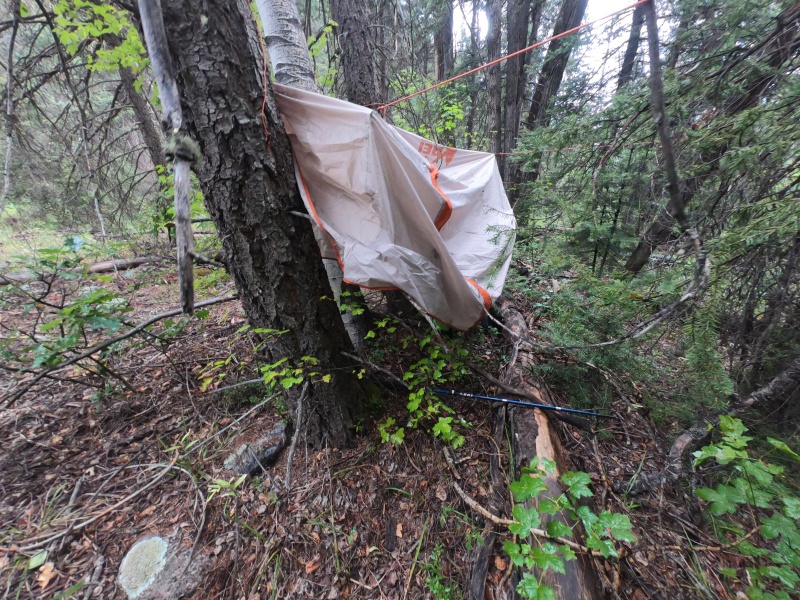
I reached the bridge to cross Needle Creek, right before the junction onto the main trail, and again waited for Tim while having a snack. He arrived fairly quickly, having gained a lot of time while I waited under my rain shelter, and I set off up the final 6 miles of trail. This is by far the most difficult section, as you're still lower than where you started, and now must gain all the elevation up to over 11,000 ft. We stopped by the Weminuche Wilderness sign to register our trip in the book, then started the long hike up. 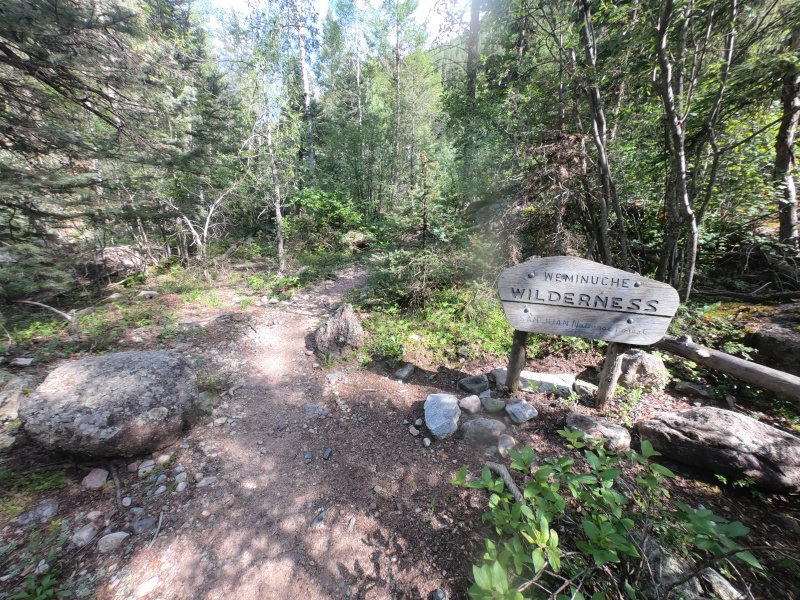
Again, it was a very pretty area, especially looking out at the huge forested mountains off in the distance. I made pretty good time, although Tim was really starting to struggle. I know he's in decent shape and is incredibly persistent, so I didn't worry about him too much, but this did really seem to wear him out. I took the tent poles from him with a couple miles to go, then sped ahead to find a campsite and set up the tent. I stopped right at the turnoff from Needle Creek Trail towards Chicago Basin Trail (to the 14ers), and found a nice spot just to the west, in some trees. It was around 7:30 PM by the time we both got there. I had also just ran out of water, so I went to the creek to try out my new filter. It worked great to get some water to drink immediately, but would've taken forever to fill all of our bottles. So instead, I just quickly filled up our hydration bladders with creek water, and used some chlorine dioxide tablets to purify it. I got the rest of my backpack ready for the morning, talked to Tim about our plan, and went to sleep a little past 9:00 PM. Day 3 - August 1, 2020 Mount Eolus/North Eolus/Sunlight Peak/Windom Peak - Combination Class 3 | Distance: 8.28 mi | Gain: 5,023 ft
I woke up at 5:00 AM, a little later than usual, and completed my normal routine before setting out up the trail from the turnoff. Despite hiking all the way up here with me, Tim would not be joining me for any peaks today, as he was just exhausted from the backpacking. He said he would've wanted a rest day before heading up any peaks, but unfortunately neither of us had time for that. The trail gets steep right away, with a tiny bit of route-finding as you walk across some flat rocks. As you approach Twin Lakes, there are a bunch of large switchbacks, until it finally flattens out. This is about 1 mile in, and it's where I turned left, crossing Needle Creek towards Mount Eolus. 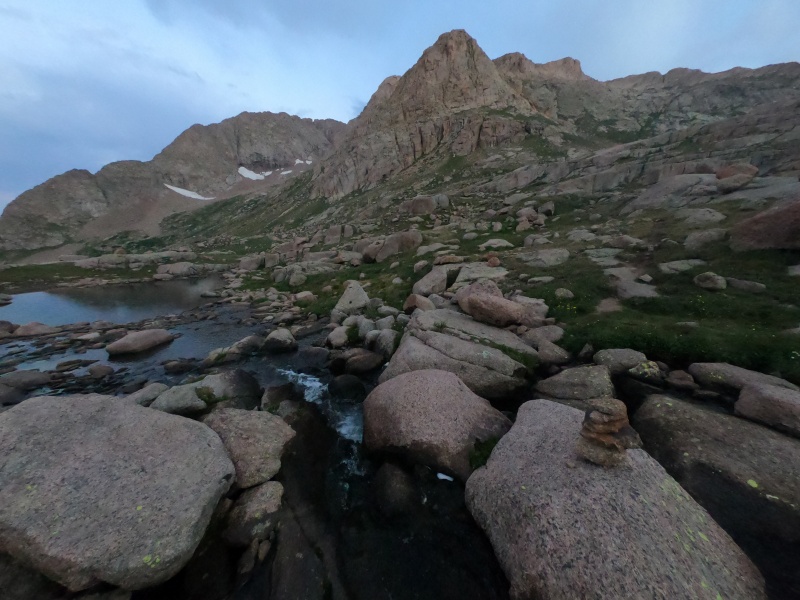
The next mile is just as steep, but a little more straightforward. You then end up walking on rocks onto some large ledges, where more route-finding is required. The hike remains reasonable Class 2 until around 13,800 ft, where you take a sharp left turn and head towards the ridge. There's a few moderate Class 3 moves in the narrow notch that you use to gain the ridge. This is about the hardest level of scrambling on the whole hike, and you could probably even avoid this part by detouring to the right on solid rock that's not as steep. 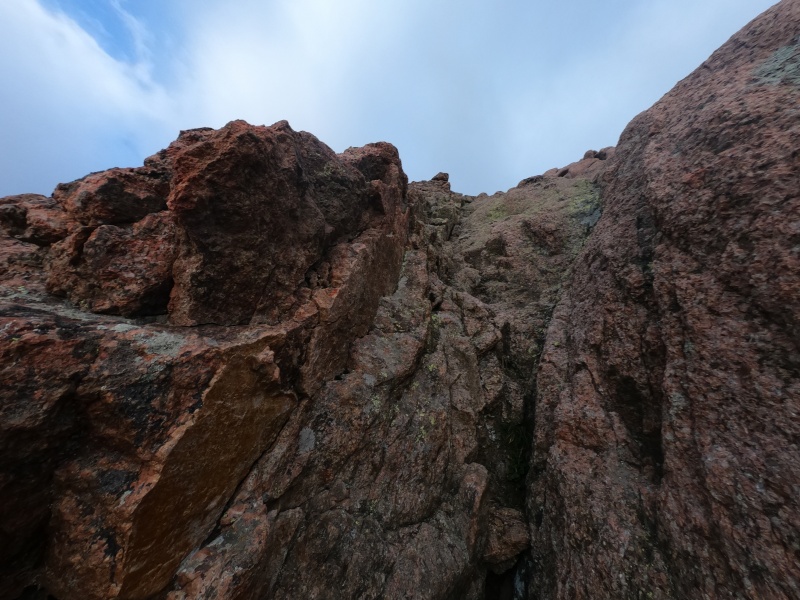
Just past this notch, the "Catwalk" begins: a narrow, exposed ridge to traverse towards the summit area. Once again, I found this not nearly as scary as it was made out to be online, although your thoughts may differ based on your comfort around heights. It's mostly easy Class 2 walking, with a few tiny Class 3 moves along the way. Still, I put away my trekking poles and put on my helmet here, which is a good idea for the remainder of the route. 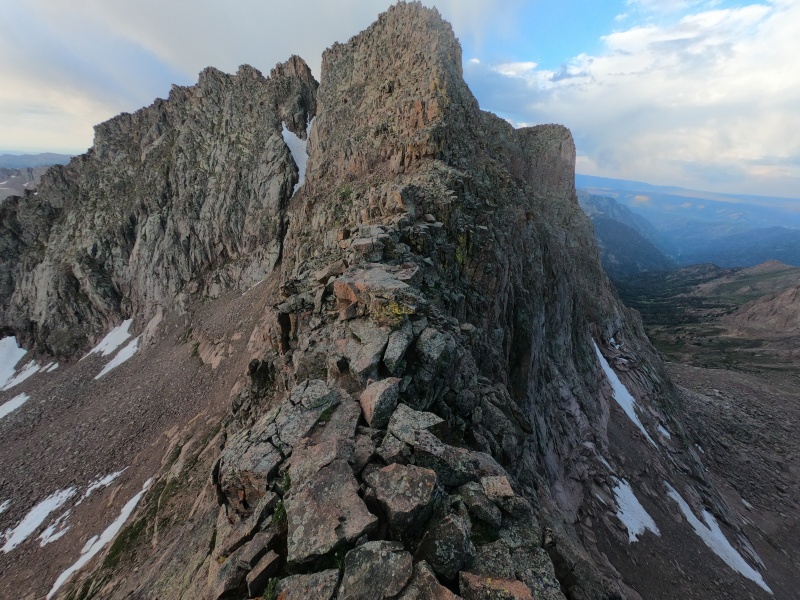
Instead of heading straight up the ridge, you first follow some cairns around the left of the mountain, onto an extensive series of ledges. You follow the first one straight for a while, gaining elevation gradually, before the trail fades out and you make a sharp switchback. You repeat the process in the opposite direction to a final large switchback, then go up some more ledges to the summit ridge, where it was fairly obvious how to get to the top. This whole section contained a lot of easy Class 3, with maybe a few harder moves near the top. The rock was mostly solid, but the trail was rather narrow, on the side of a steep slope. 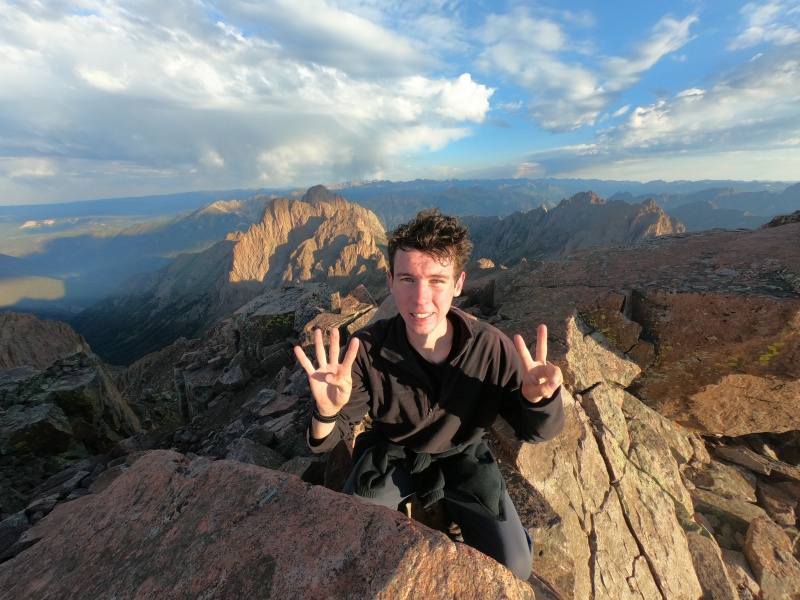
I made it to the top just past 7:00 AM, took some pictures, and headed back down the ledges. I got a little confused when it came to route-finding, as GPS isn't precise enough to tell if you're exactly in the right spot, but I think I went down about the same way I came up. I went back across the Catwalk, then continued up along the ridge to unranked 14er North Eolus. 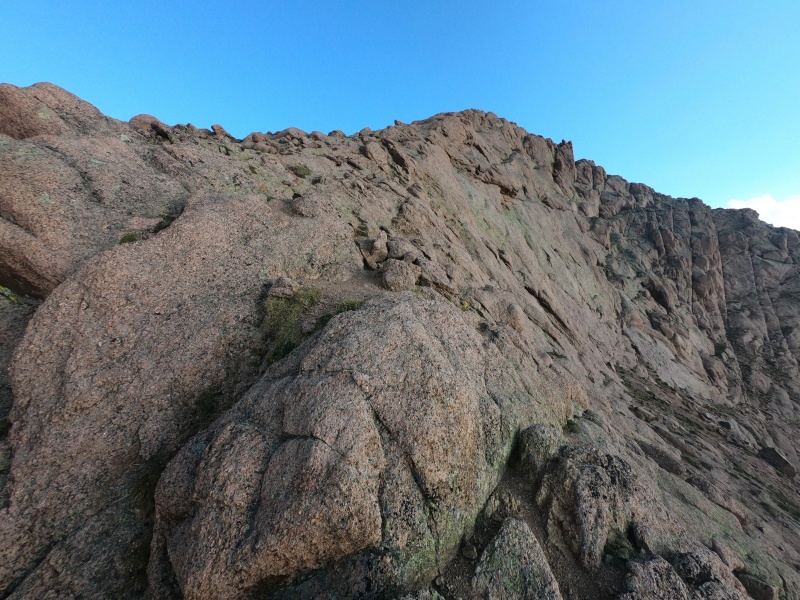
If you count it, this is certainly the easiest of all 4 Chicago Basin 14ers, as you're just walking up flat, grippy rock all the way to the summit. Like I said, you could even avoid the Class 3 notch to the ridge on similar rock just by walking around it to the right. There's no way that the easiest route to this summit could be anything beyond Class 2. 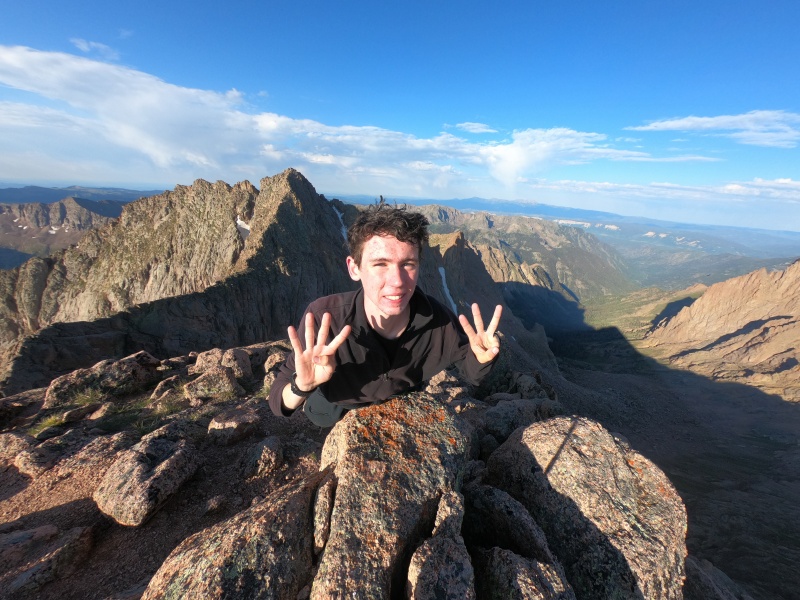
I was heading back down my second peak of the day soon after the first, all the way back down to Twin Lakes. These two peaks were about 3 miles round trip from here. I was amazed at how many people I saw all around, probably a couple dozen hikers before even hitting halfway. It was definitely more popular than the Wilson group, despite being over 16 miles from the nearest road. Heading toward the next two peaks, the route isn't quite as straightforward. There's a few large switchbacks up to a long flat section, where the turnoff is between Sunlight and Windom. Still, the trail is well-maintained and pretty easy to follow up to this point. 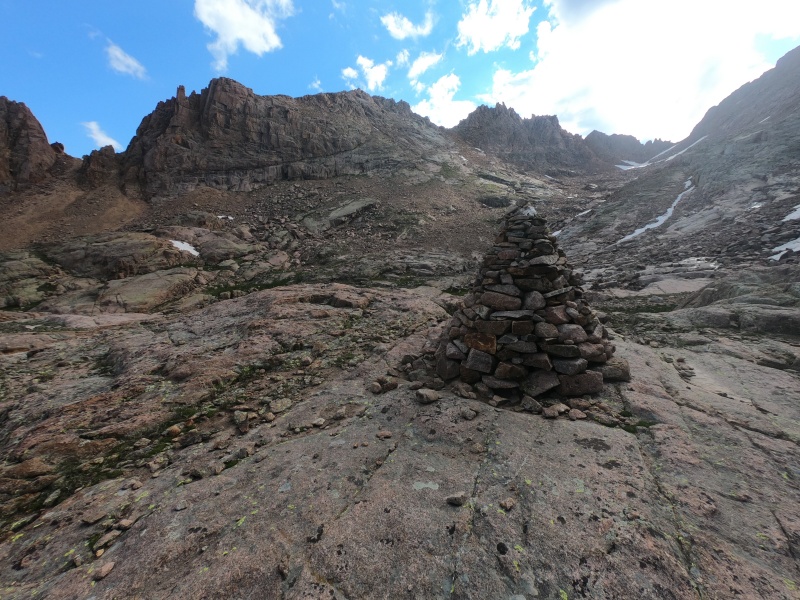
As you continue past the junction, things start to get more difficult. Going first towards Sunlight, you start heading uphill on a rocky trail that soon turns into a long, loose gully without much of a defined path. It's still clear where your goal is, but there are a number of ways to get through this mess of trails. It was definitely one of my least favorite parts of the day. 
At the top of the gully, you take a left through a notch, which is where the fun begins. The rest of the route involves relatively difficult Class 3 scrambling, some exposure, and careful route-finding, all on very solid rock. You begin by going up and over some some gentler sections, then up some tricky steep rocks. You continue slightly right to a chimney, where you climb under an overhead rock. This was the point on a 14er route where I've been most glad to have a helmet on; I bumped my head hard on the ceiling multiple times in both directions. 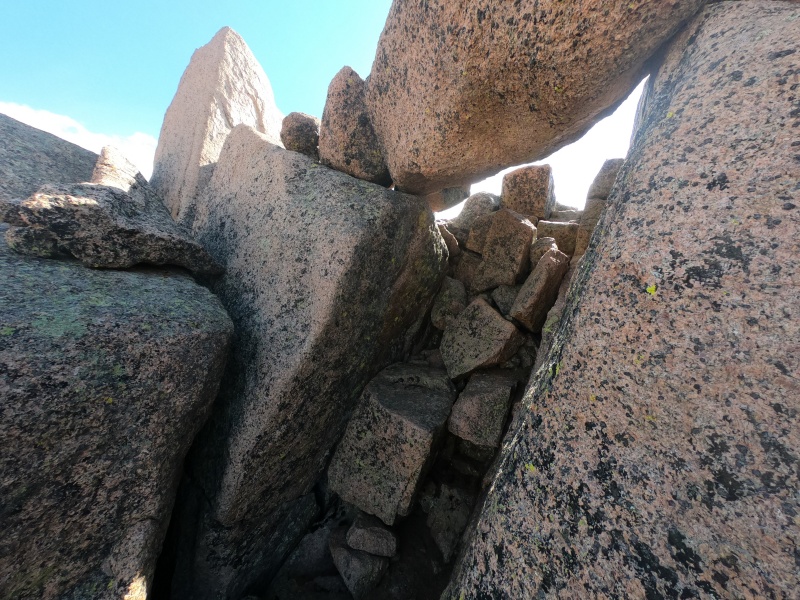
After the chimney, you walk along a bit more easy terrain to the base of the summit block. This is a large vertical rock with some other large boulders offering a few possible paths to the true summit. The easiest route, which I took, is to walk up the rocks around the right side, hop across a short but extremely exposed gap to a middle rock, then do a similar jump to the summit. There is a ton of exposure up here, but I found the climbing fairly easy, especially if you have grippy shoes and long legs. Some people call it Class 4, which may be accurate, but the difficulty largely depends on the person. The rock itself has a lot of texture, so you're mostly trusting the friction rather than using actual handholds. There is a less exposed alternative on a steep rock to the left, but it looked harder and easier to fall than on the normal route. 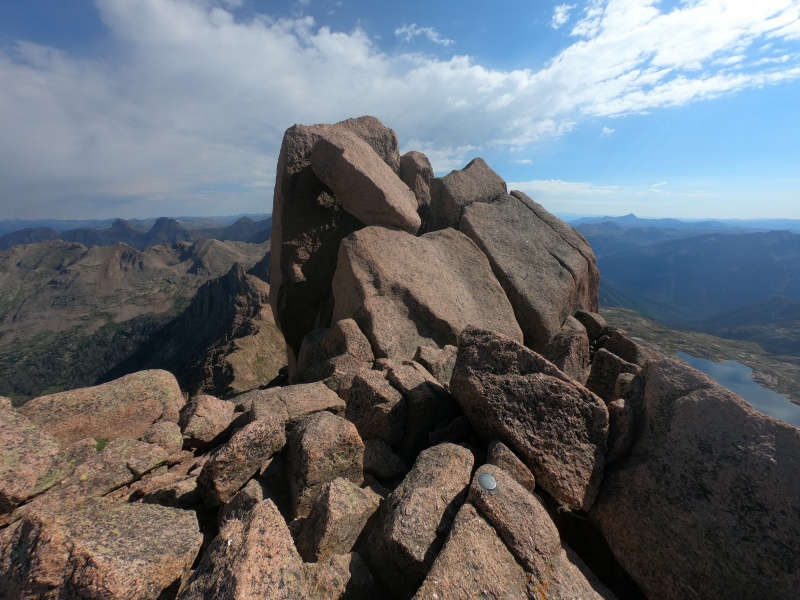
I stayed up here for a long time, not just near the summit area, but on top of the block itself. It was easily more than 30 minutes of scrambling around up here, taking pictures, watching others attempt the climb, and enjoying the great view below. There seemed to be a wide range of responses to the summit block, from people jumping right up it like myself, to others who were extremely slow and cautious. It was actually one person's 14er finisher, although she decided not to get to the very top, after a long time trying. 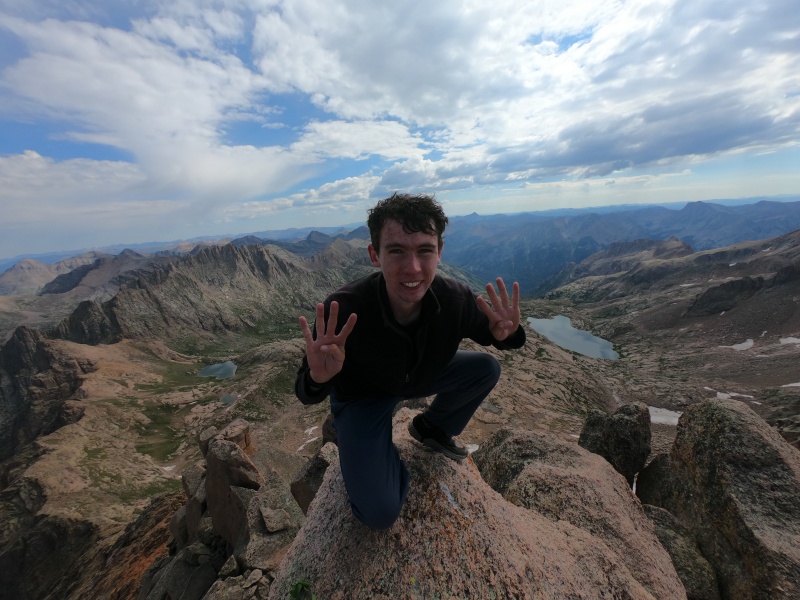
Yes, the picture above was taken while I sat on the true summit, and no, I didn't have anyone else to take the picture for me. I actually had to throw together a makeshift tripod with my trekking poles, a bit of paracord, and my helmet to get this angle. 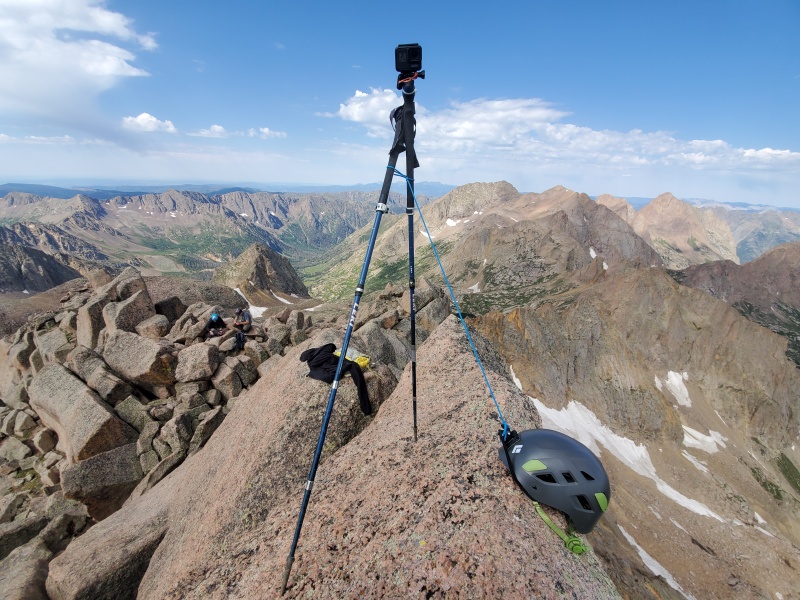
I of course tried out a picture while standing on top, but I didn't like the angle as much. Even I was a bit freaked out with only 2 points of contact on this highest point. Anyway, I eventually decided to move along to my 4th 14er of the day before the weather moved in again. I scrambled down the summit block, the chimney, the steep rock, the initial section back to the notch, then slowly hiked down the gully. Right as you reach the bottom of this section, you can take a left at a large cairn instead of continuing straight, then you contour around the slope towards Windom. This saves some mileage and a bit of elevation gain, although the route itself can get pretty confusing if you don't have an exact GPS track. I ran into a snowfield near the ridge of Windom, so I decided to head up over it, leading me off-course for a while. I would recommend staying lower here and trying to stick to the route better than I did. 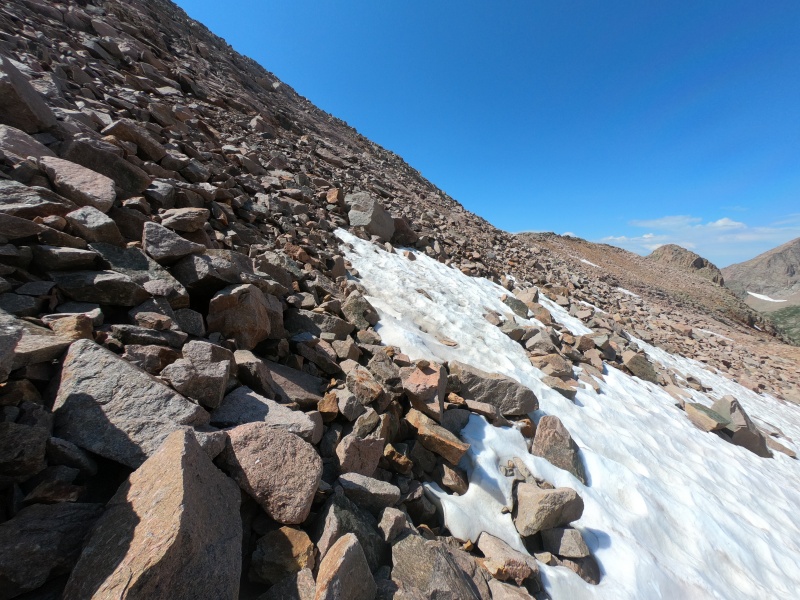
The remainder of the hike up Windom is supposed to be "Difficult Class 2," although I ended up doing some easy Class 3 moves near the top. It's definitely a good introductory peak for those used to easier Class 2 routes, as the rock is mostly solid and the "trail" is fairly straightforward. Still, I found myself getting off-route and having to correct at a few points. The summit area is pretty unique, being made of a bunch of large blocky rocks. It probably has the best views of the other peaks in the area; you can see all 3 other 14ers and a bunch of nearby centennials. 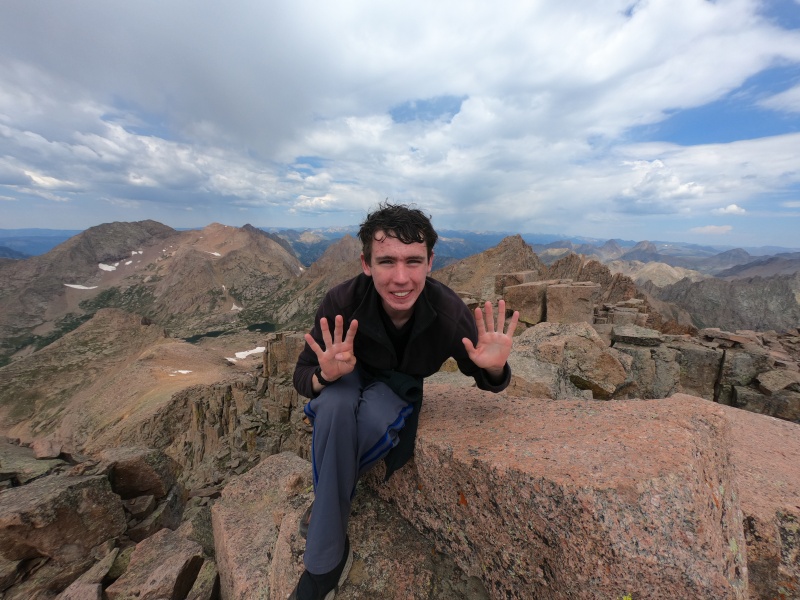
I began the descent a little past 11:00 AM, with the weather starting to look a little more intimidating. In a rush near the top, I wasn't paying enough attention to find the easiest moves to descend, and was trying to quickly walk down places where I should've stopped and used my hands instead. Because of this, my foot slipped off the side of a rock a few feet above the ground, making for a pretty rough, unexpected landing. Luckily, the worst of personal injuries was a slight scrape on my elbow, although the newly-replaced trekking pole in my hand wasn't as lucky. Taking some of the weight of my falling body, it snapped right in half as it touched the ground. Well, let's hope the warranty replacement process at Leki is nice to me for the second time in a few weeks. 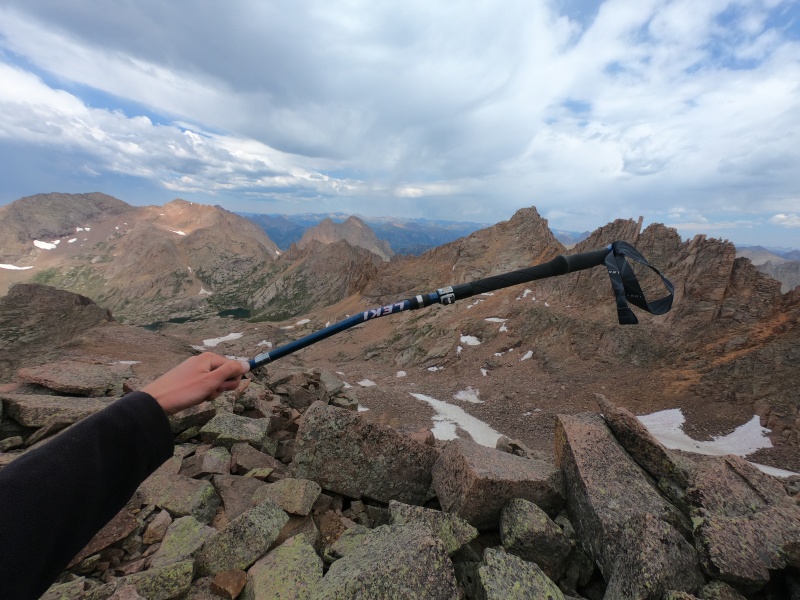
I continued on down the slope, frustrated at breaking my 3rd trekking pole of the summer, and got even more annoyed at the slopes below Windom. The route was not at all obvious, with tons of cairns leading you down suboptimal routes with loads of loose rock. This was my other least favorite part of the hike. Eventually, I made it back down to the junction with Sunlight (although I definitely went the wrong way), continued past Twin Lakes, and headed back down into Chicago Basin. Tim was doing well back at camp, just worn out physically from the day before. I ate a quick lunch, filtered some water, then prepared for my bonus peak of the day: Jupiter Mountain. I borrowed one of Tim's trekking poles and set out on the trail from the same junction, but this time headed up the Needle Creek Trail towards Vallecito Basin. This peak is a centennial 13er, with very easy access from where we had camped. I know I'll want to finish this list someday soon, and I'm not planning to hike another 35 miles just to bag this peak alone. You break off the main trail on a loose path, move along some switchbacks, head straight up a steep but pleasant grassy slope, which eases into decent solid rock, then reach a kind of false summit. I traversed to the left along some tricky Class 2 terrain, then hit the top. There was a group of hikers heading down as I got here, which I believe were the first people I had ever seen on top of a centennial 13er. There were some questionable dark clouds nearby, so I had been racing all the way to the top, gaining nearly 3,000 ft over 2 miles in just under 70 minutes, on less than ideal terrain. Still, it was amazingly sunny on top of Jupiter when I got there. Not wanting to test my luck any further though, I quickly took some pictures, signed the summit register, and headed back down. 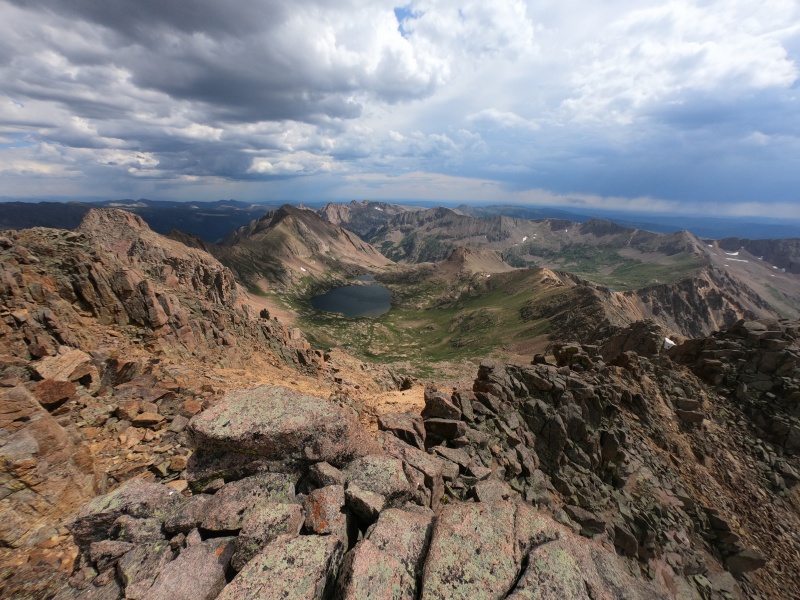
I made it back to the tent before 5:00 PM, and hung around outside for a while. I purified another few liters of water to make it through the 15 miles of backpacking the next day, and packed up everything I could that night. As we were sitting there, some horses from a nearby group of campers came up and started eating the grass around our tent. One of them stood there and posed for us as well. 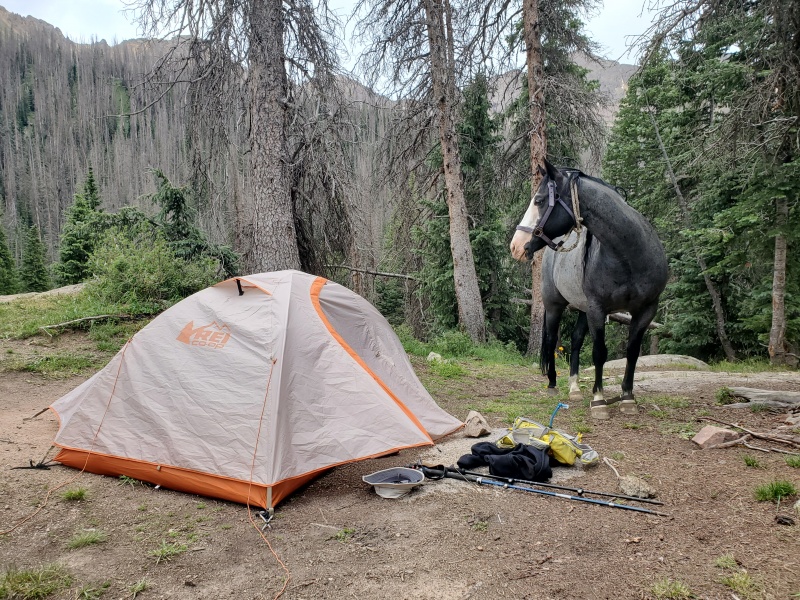
Horses aside, there was an amazing amount of wildlife in this area, particularly deer, marmots, and so many mountain goats. I've heard stories of them devouring anything that has sweat on it, so we were always very careful to leave our gear inside the tent. After getting everything ready and eating a quick dinner, I went ahead and fell asleep around 7:00 PM. Day 4 (Part 1) - August 2, 2020 Chicago Basin - Approach Class 1 | Distance: 15.29 mi | Gain: 1,703 ft
We awoke again at 5:00 AM, and spent about an hour packing up our gear and taking down the tent. With our large backpacking backpacks on around sunrise, we set off down the initial section of downhill trail. This was the worst part on the way up, but it's just the perfect angle to make for a quick descent, without being too steep. I felt like I was back at the 6 mile junction in no time, where I stopped to take a break and have some snacks. Once Tim arrived soon after, I set off on the very slightly downhill trail. These flatter sections are always the easiest, but in a way, they're also the most agonizing, because the the terrain is all so boring. A steep uphill or downhill will at least give you something to think about, but following the gentle slope of a huge river is just about the least exciting thing possible. Nonetheless, the views were nice as the sun made its way into the valley, and I arrived at the low point of the trail at the big bridge soon enough. 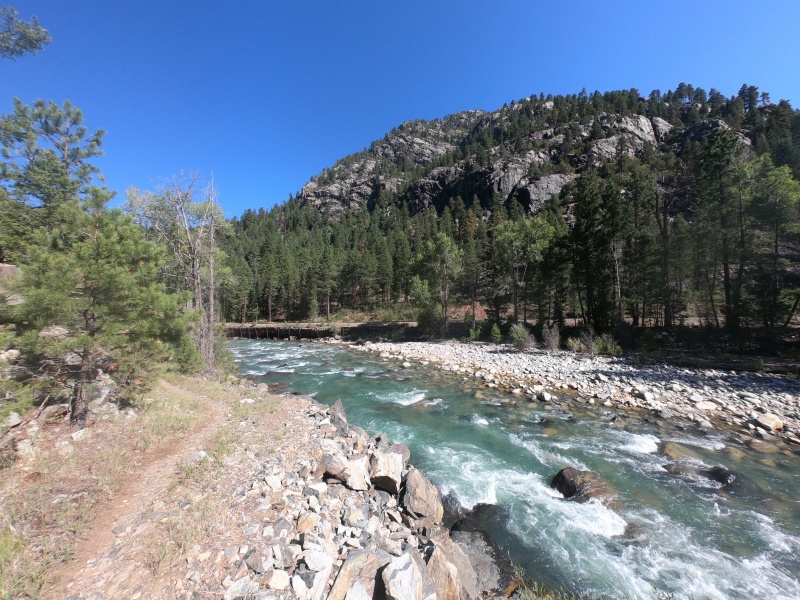
After again waiting for Tim's arrival (he was still a little tired, and I can't stand hiking long stretches behind people), I began the uphill journey towards Purgatory Flats. With only 4 miles back to the trailhead, all of the 2,000 ft of elevation gain remains ahead of you. It's a steep uphill which gradually flattens out, before the final mile, where you have one last huge upward push. We finally made it back to the car around noon, just under 48 hours from our departure. We unpacked and ate lunch, then contemplated the journey ahead. The standard road to the next trailhead takes nearly 5 hours, and looks on a map like one of the most ridiculous detours imaginable. The alternative is Cinnamon Pass, a segment along the (as we would soon find out) extremely popular Alpine Loop, a collection of high dirt roads varying from easy and flat to extreme 4WD. This is practically as straight of a line as you could make between where we were and where we wanted to be, although it was unclear exactly how bad the road was along this section. Though, what became clear as we approached is that we were drastically less equipped with off-roading capabilities in our Honda Pilot than the average driver in the area. The road was littered in Jeeps and other specialized 4-wheelers, with the occasional large truck passing by. If you knew nothing else, you might call us stupid looking at our lone SUV in a sea of off-roaders. Still, we continued forward towards the pass. 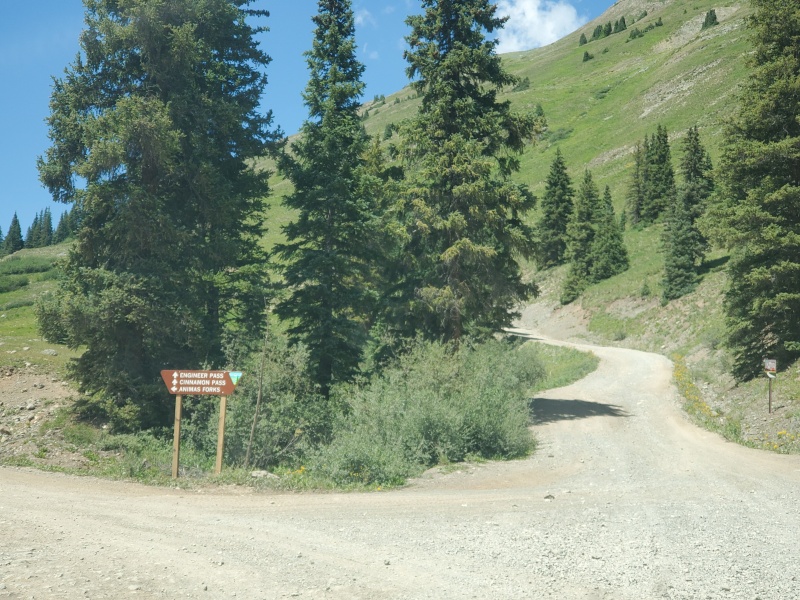
But that's a story for next time, in Part 2 of this trip report. Thumbnails for uploaded photos (click to open slideshow): ")
")
")
")
")
")
")
")
")
")
")
")
")
")
")
")
")
")
")
")
")
")
")
")
")
")
")
")
")
")
")
")
")
")
")
")
")
")
")
")
")
")
")
")
")
")
")
")
")
")
|
| Comments or Questions | ||||||
|---|---|---|---|---|---|---|
|
Caution: The information contained in this report may not be accurate and should not be the only resource used in preparation for your climb. Failure to have the necessary experience, physical conditioning, supplies or equipment can result in injury or death. 14ers.com and the author(s) of this report provide no warranties, either express or implied, that the information provided is accurate or reliable. By using the information provided, you agree to indemnify and hold harmless 14ers.com and the report author(s) with respect to any claims and demands against them, including any attorney fees and expenses. Please read the 14ers.com Safety and Disclaimer pages for more information.
Please respect private property: 14ers.com supports the rights of private landowners to determine how and by whom their land will be used. In Colorado, it is your responsibility to determine if land is private and to obtain the appropriate permission before entering the property.