| Report Type | Full |
| Peak(s) |
"Cupid" - 13,126 feet Grizzly Peak - 13,435 feet Torreys Peak - 14,272 feet Grays Peak - 14,275 feet |
| Date Posted | 03/01/2020 |
| Date Climbed | 02/29/2020 |
| Author | daway8 |
| Additional Members | HikesInGeologicTime |
| Carpool Grays and Torreys from Loveland Pass w/ avy analysis |
|---|
|
I wasn't planning to be back on this route this winter but when another user contacted me about wanting to do a carpool to knock out the two 13ers and two 14ers on this route while it was still calendar winter I decided to team up and do it. I recently wrote a trip report covering Loveland Pass to Grizzly Peak (see Winter 13er Trio: Sniktau, Cupid, Grizzly) so I'll try to minimize the rehash. Here's an overview of what I intend to cover here:
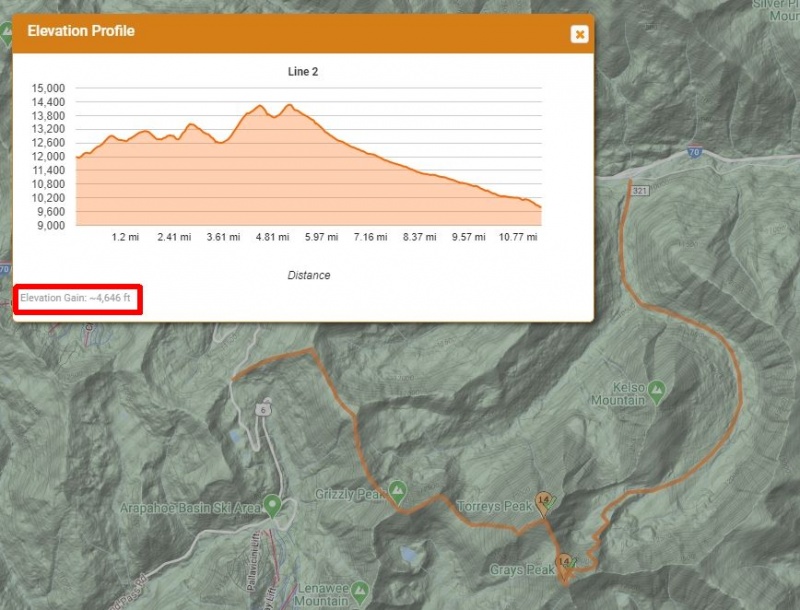
Route Directions/Options As we started talking about the possibility of doing this route, one of my first thoughts was 'I've already done Cupid and Grizzly so why don't we start from the Grays and Torreys side so we can be sure we get those peaks.' Then I looked at the map. Upon seeing that to start from the winter Grays Peak trailhead in Bakerville and hike over to Loveland Pass would involve almost 6,800ft of elevation gain whereas doing it the other way is only about 4,600ft of gain, it was an easy decision as to where we wanted to start (note: most of the elevation numbers in this section are from mapping tools - I didn't bother to count topo lines to verify them exactly but they should be in the ballpark). What if I don't want to carpool? Well, if you just want to start from Loveland Pass, hike to Torreys and Grays and go back to Loveland Pass you'll encounter the following: The one way elevation all the way back to Grays is about 4,600ft so you'll have to do that PLUS over 900ft of gain to get back to Grizzly (assuming you bypass Torreys on the return), PLUS around 600ft of gain over the hump and back up to Cupid, PLUS roughly 200ft gain back up to the top of the pass. So that means a round trip from Loveland Pass to Grays and then back to Loveland Pass would be on the order of roughly 6,300ft of elevation gain, with roughly 1,700ft encountered on your way back!! Certainly it's very doable (two guys and a dog were doing just that and having started later than we did) but if you can partner up it makes this route MUCH easier while still being far from trivial. 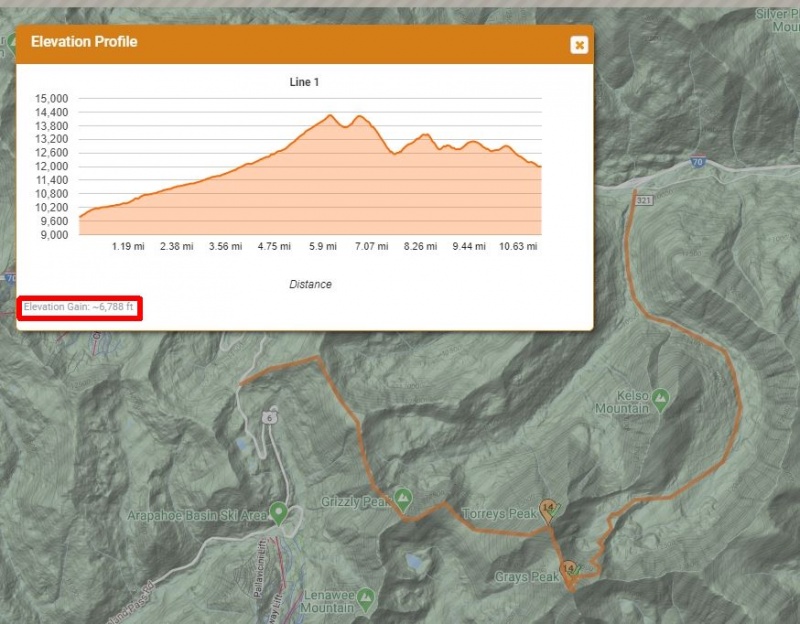
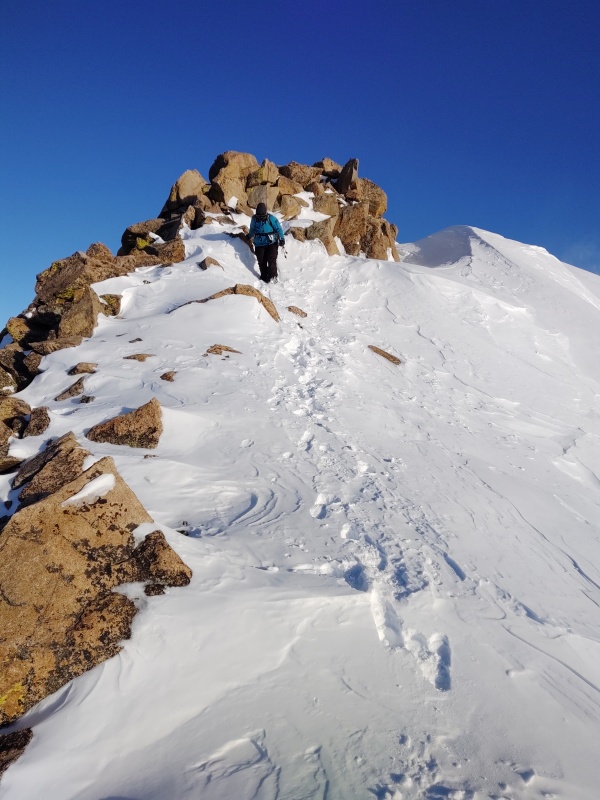
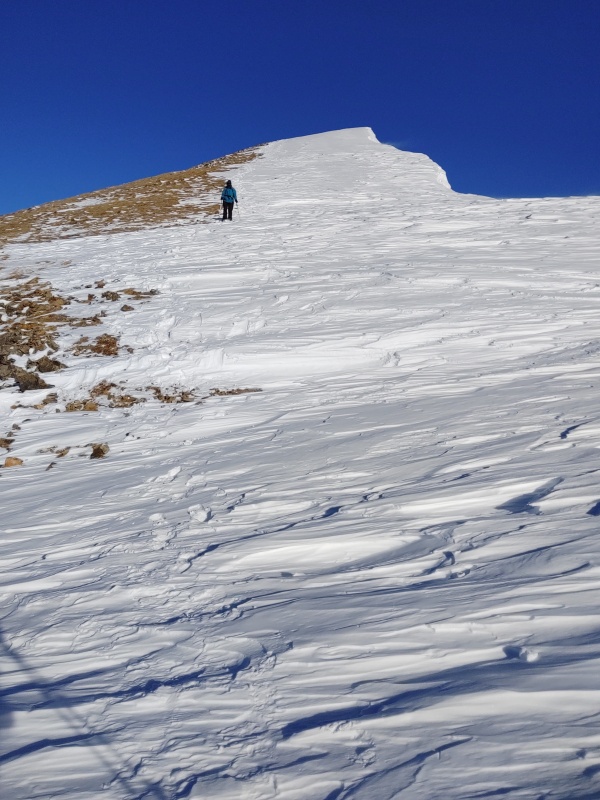
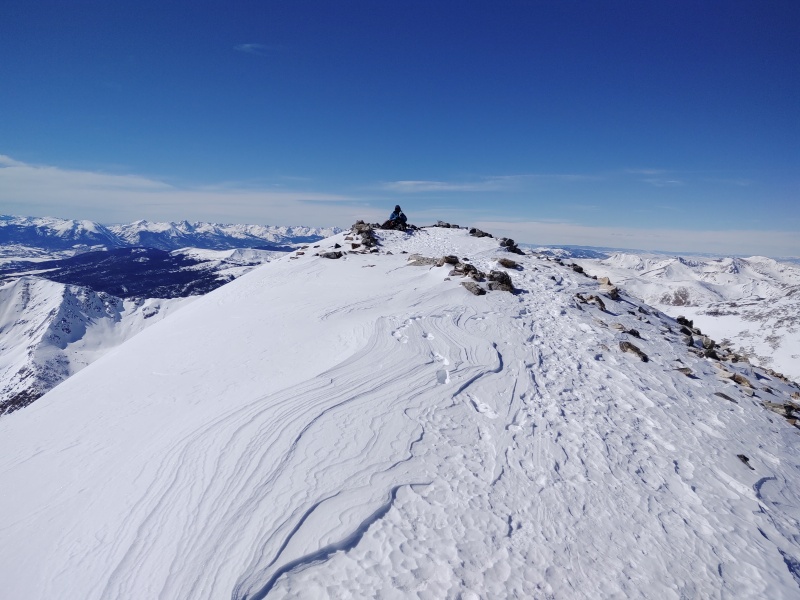
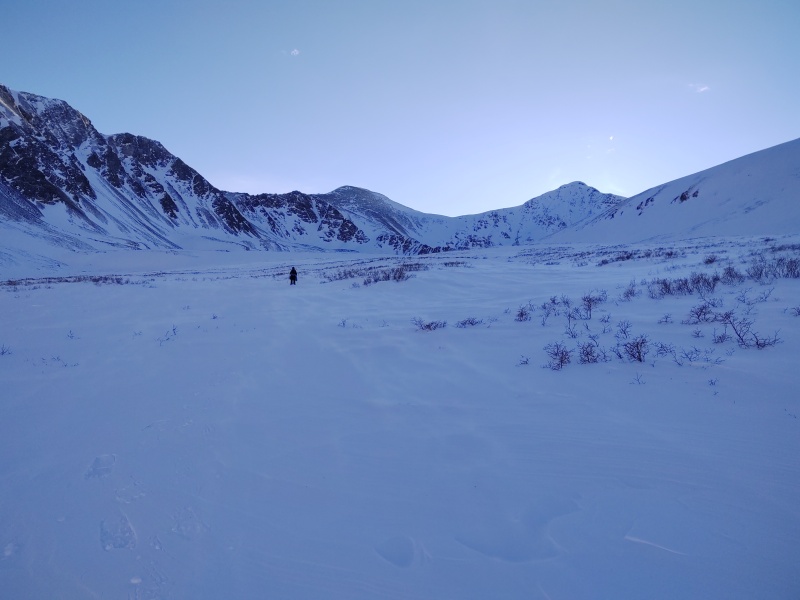
Loveland Pass to Grizzly Having already put notes about Loveland Pass and the first half of this trek in my last report I'll just add a few notes plus several photos with a person in them (HikesInGeologicTime) to add scale to my previous report. 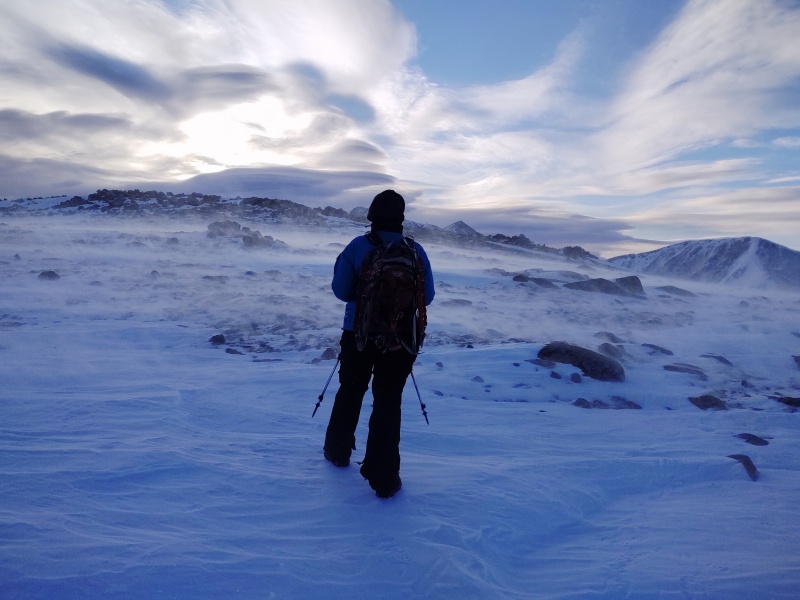
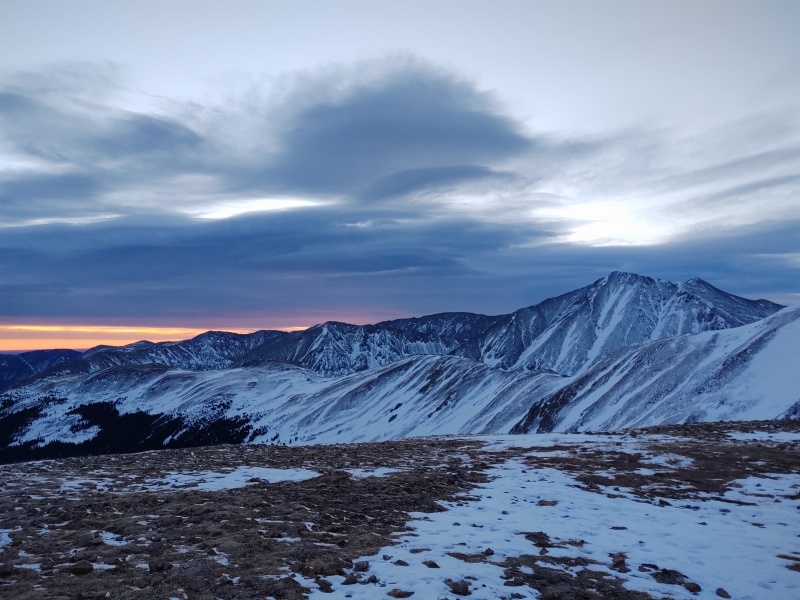
The hike up to the ridgeline felt longer without the amazing sunrise I had to distract me last time. We slowly plodded up in 10 minutes shy of an hour. There was surprisingly little wind at Loveland Pass this time but once we made it up to the ridgeline it was ripping pretty good, enough to occasionally stagger us. But after hiking a little ways it reduced in intensity and remained a more or less steady drone the rest of the day, without the annoying intensity of my previous trek. 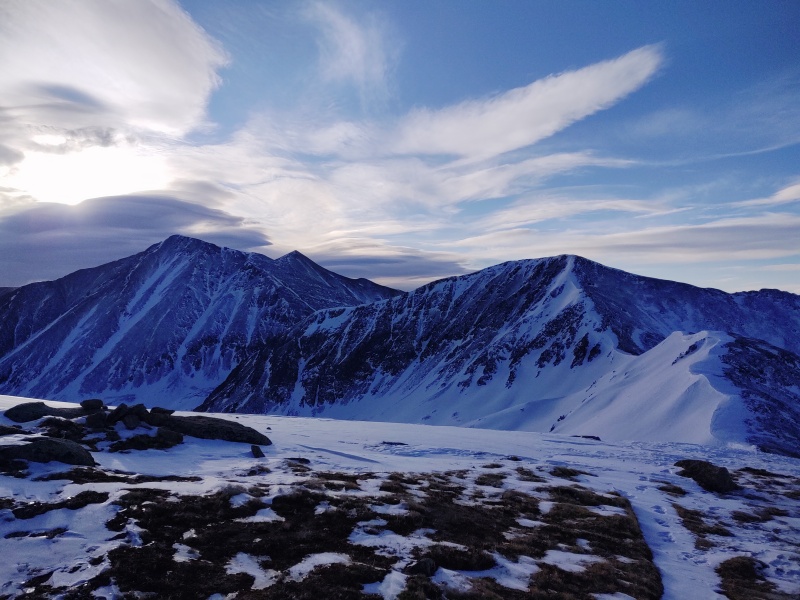
Per my last report, there are a couple fairly trivial "rock obstacles" along the way to Grizzly but they are very easy to either just go over or around. 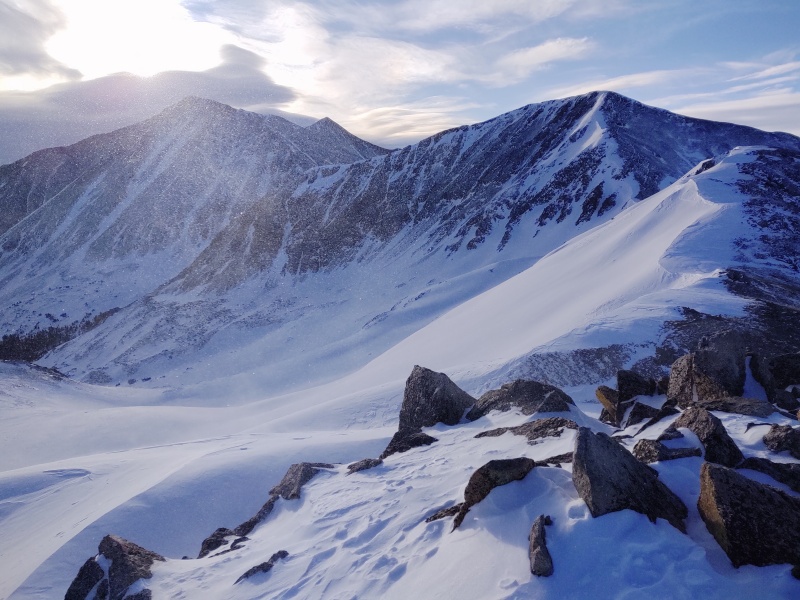
I'll also throw in a couple photos of the big dip along the way to Grizzly. 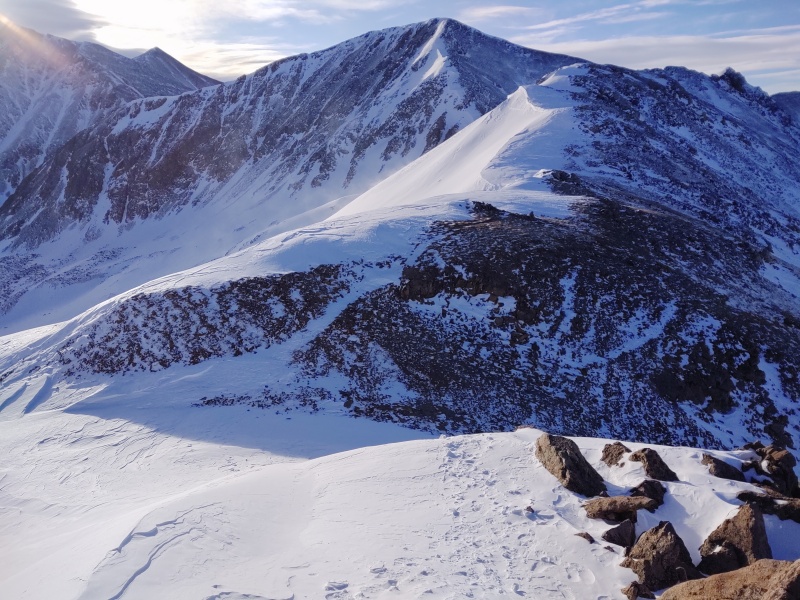
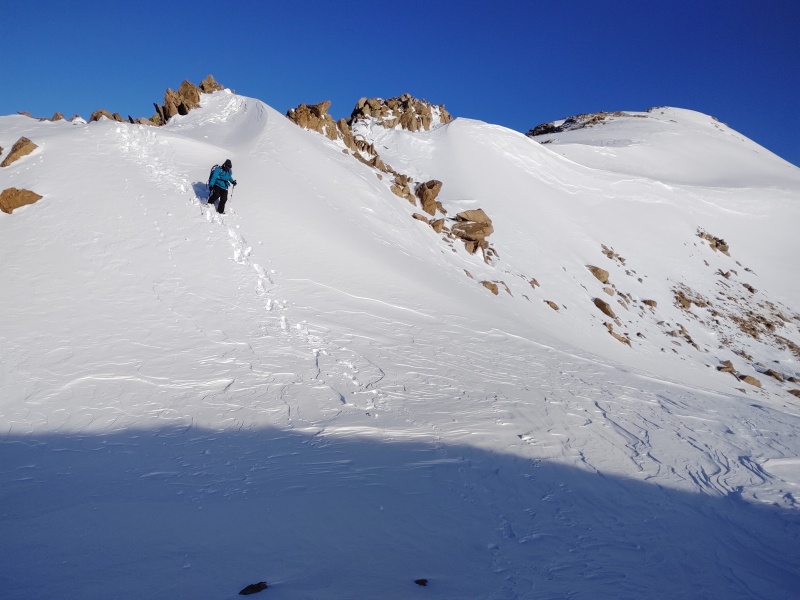
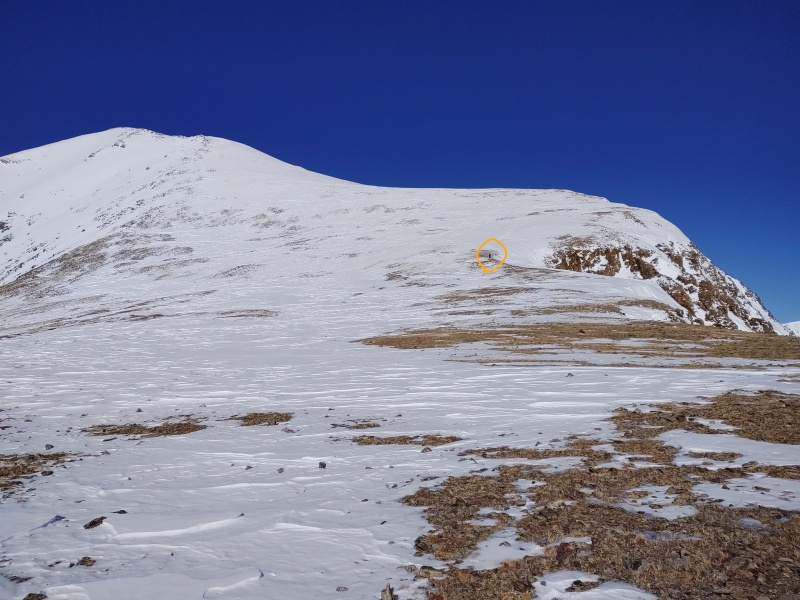
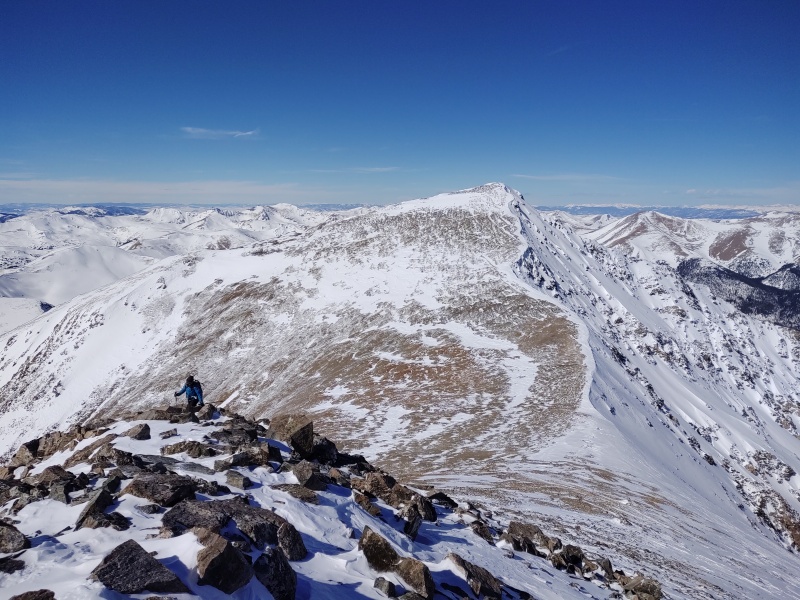
As you go over to Grizzly you have to pass over a hump on the middle of the ridge before an intimidating amount of elevation gain to reach Grizzly. If you're viewing this trip report on a PC you'll note a lot of these photos are paired up side by side to show you before and after views (on your phone you'll have to scroll up/down to get the same effect). If you plan to do this route as a there and back loop take a good look at the below photos (and ones later on) and ask yourself 'do I really want to deal with this during the second half of the day on my way back?' Note that the first photo below shows what you face on the way there, the second photo (mostly snow) shows what you have to deal with on the way back (after having already dealt with ~4,600ft gain on the way to Grays). Granted the route is relatively short (~10mi) but don't overlook the fact that it's a rollarcoaster which has you gaining elevation on and off from the very first step almost to the very last if you do it as a there and back loop. 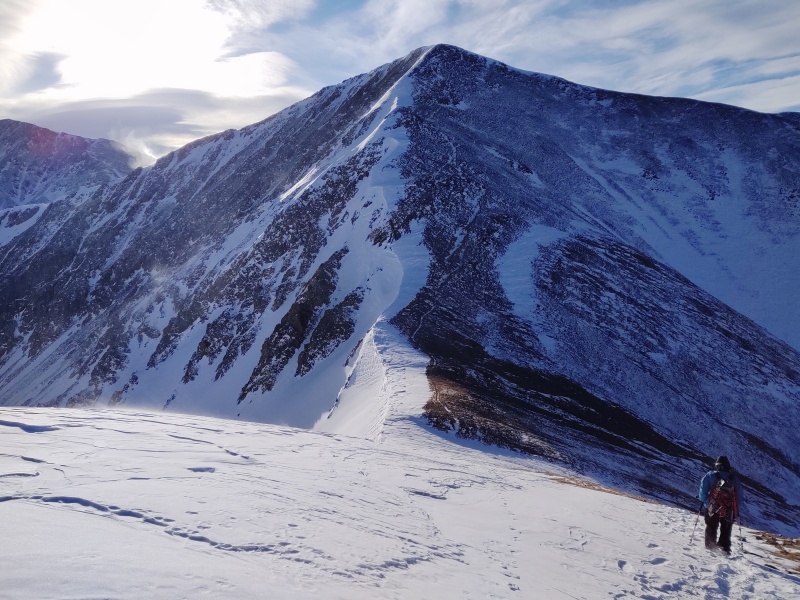
Grizzly to Torreys/Grays Now to pick up where the last trip report left off. Having just encountered a sizeable elevation gain to get up to Grizzly Peak, you then find yourself having to throw away darn close to almost 1,000ft of that elevation gain (some maps disagree on the elevation of Grizzly) only to have to then regain over 1,600ft to reach the summit of Torreys! Obviously you expect to gain lots of elevation when hiking 14ers, but most of the time the majority of the way there is more or less a continual gain in elevation. Having to "throw away" huge amounts of elevation only to then regain them immediately after is what makes routes like this painful, yet at the same time a tantalizing challenge. 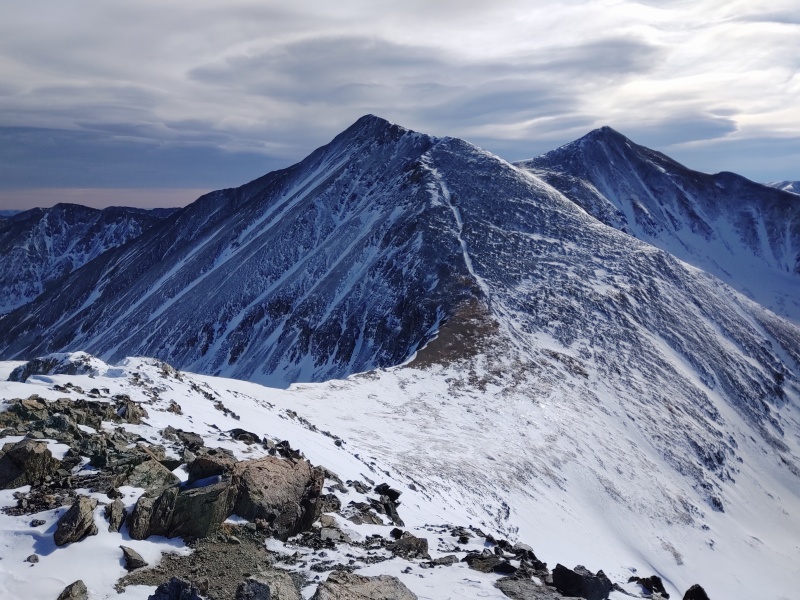
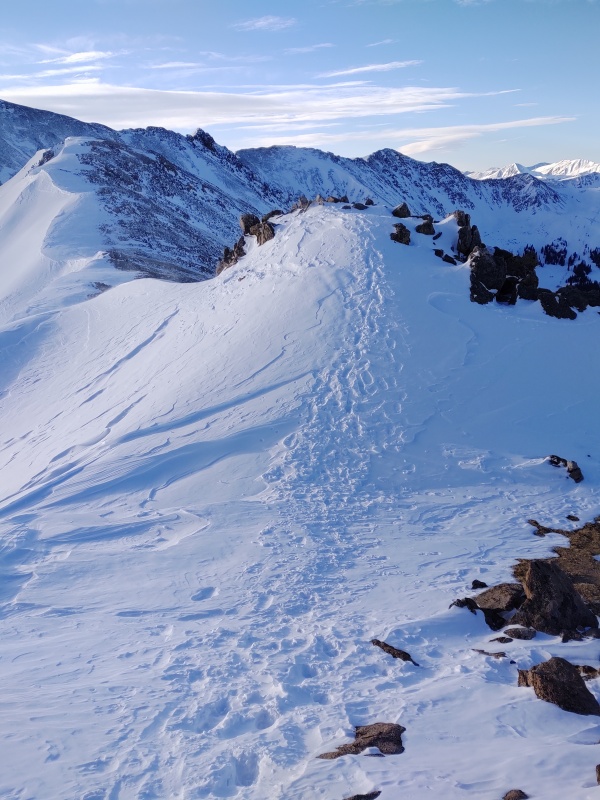
Note in the photo above the snow slide just to the right of the ridge going up to Torreys. Depending on conditions this could be either a very bad or very good route up Torreys (we ended up deciding it was a good route on this particular day - more on that later...). If ever this slope were to be fully covered in snow, be sure you're aware this little slide is lurking under there... As you start to head over to the next big drop you must first pass along a somewhat narrow section of ridge. I say narrow because the right side is a very steep section that was loaded with enough snow over enough of a drop that I didn't want to set foot on that type of slope and the left side was covered with snow cornices suspended over very steep drops. That left a sometimes slightly uncomfortable little path just to the right of the cornices and just at the top of the steep slopes for us to pick our way along. It would probably be overkill to call it a knife edge but it was close enough to being one in these winter conditions that I was feeling slightly uncomfortable going across it (this coming from someone who found Capitol's Knife Edge to be delightfully fun - albeit done in summer). 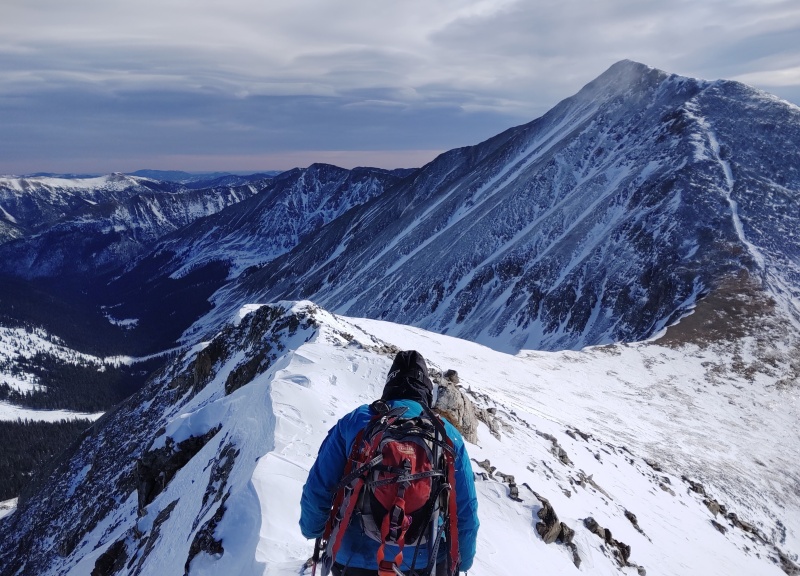

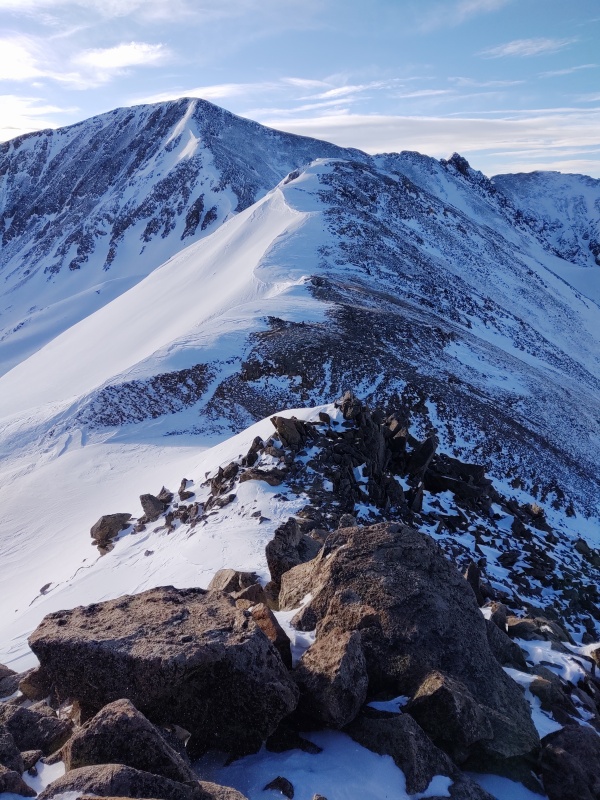
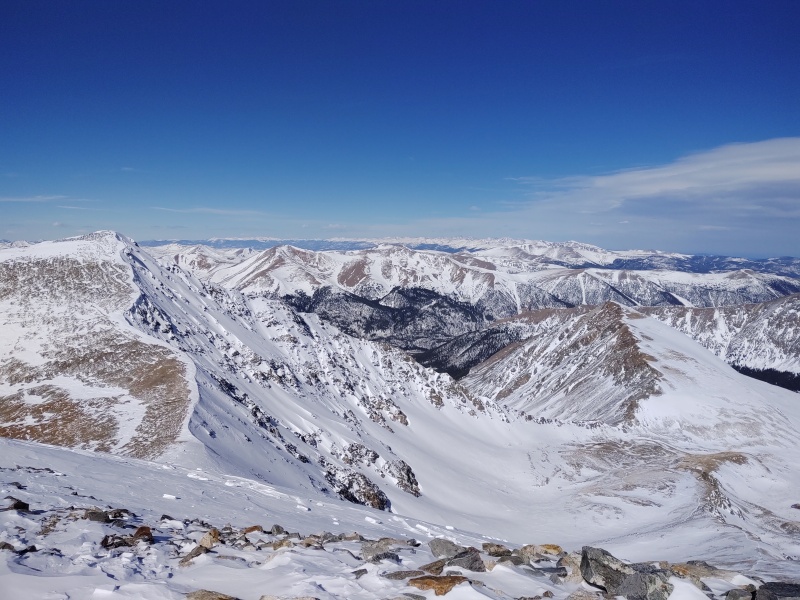
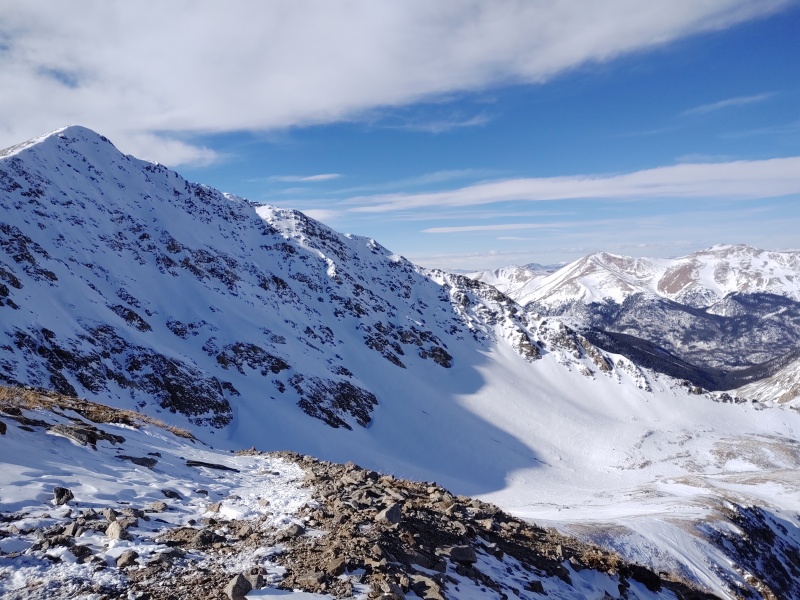
So how much of a drop is there between Grizzly and Torreys? Is it really that much of an issue? For anyone who might be researching doing a Grays/Torreys loop from Loveland Pass, the below 2 photos are another set you'll want to take a good look at before deciding on your route. I was SO glad at the end of the day that I wasn't going to have to go back up these sections! If you make it all the ways to Grays and back in winter you can stick "bad ass" on your profile as far as I'm concerned. 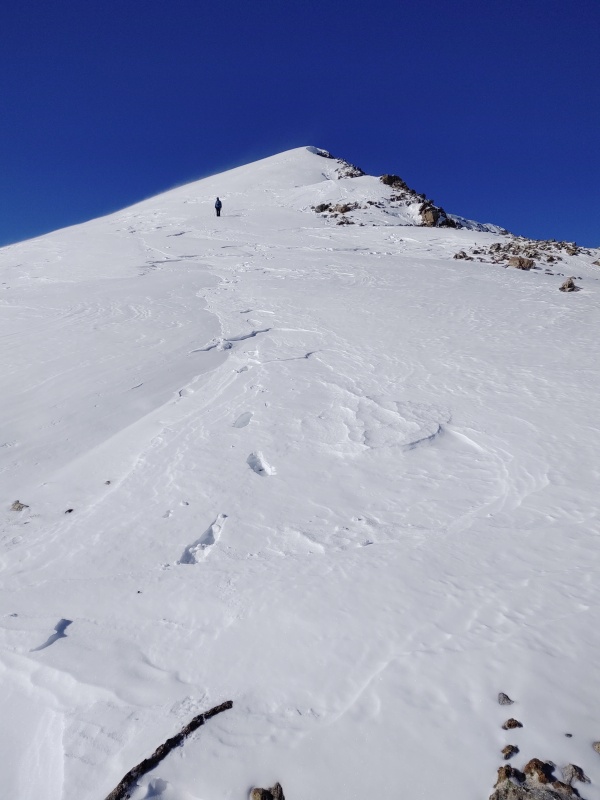
A quick sidenote: Here's another view (looking back towards the ridge coming off the SW of Grizzly) at that ridgeline I remarked in the last report looked like it might be fun to try some summer. This angle confirms that it looks interesting. Haven't yet researched enough to find out if this is named/described out there somewhere... 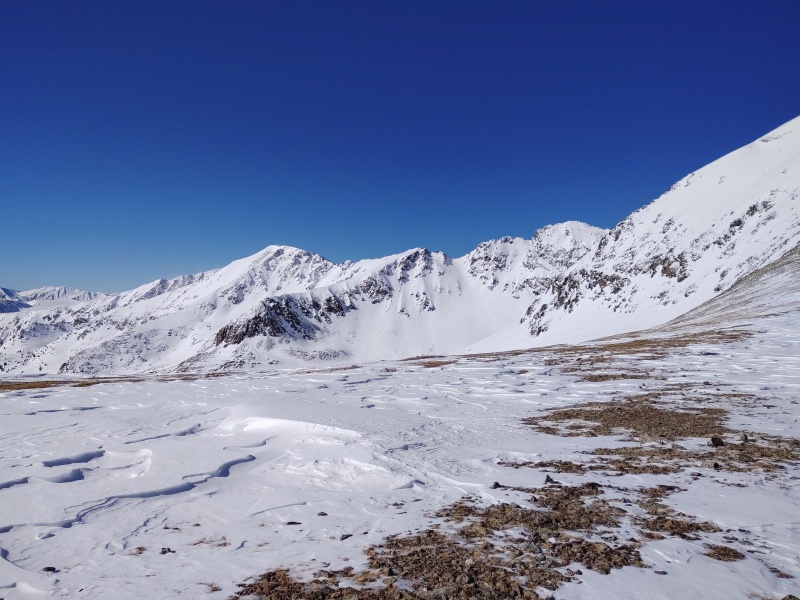
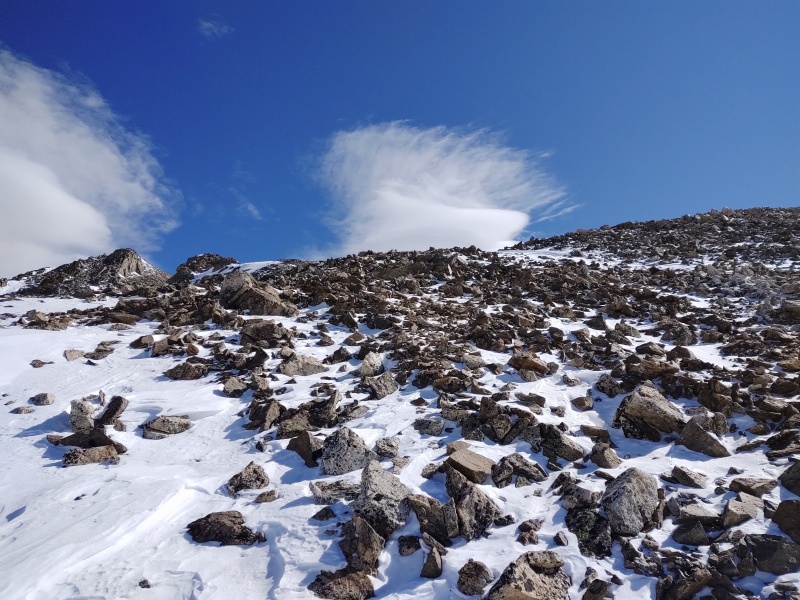
Now back to the route. Having just discarded nearly 1k of elevation it's time for - yep, you guessed it - it's time to regain... EVERY... SINGLE... LAST... FOOT of elevation you just lost PLUS, just for fun, add another 600ft or so of additional elevation gain on top of that. There are some sections of 14er hikes that are legitimately fun or interesting or dynamic in various ways (Capitol's Knife Edge, Kit Carson Avenue, the Sunlight summit block, the catwalk to Eolus, etc, etc). Then there are other sections that you simply must endure to get to the parts that you really enjoy. The trudge up the backside of Torreys is definitely in the "endure" category. Bland, boring, and relentless - although if you pause and look back you can get some pretty sweet views (especially in winter) which help to mitigate the never ending ascent. 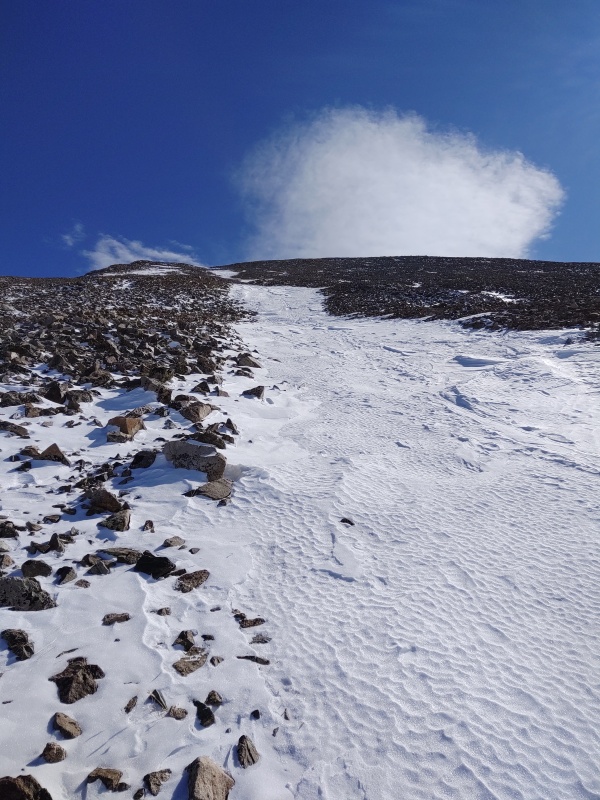
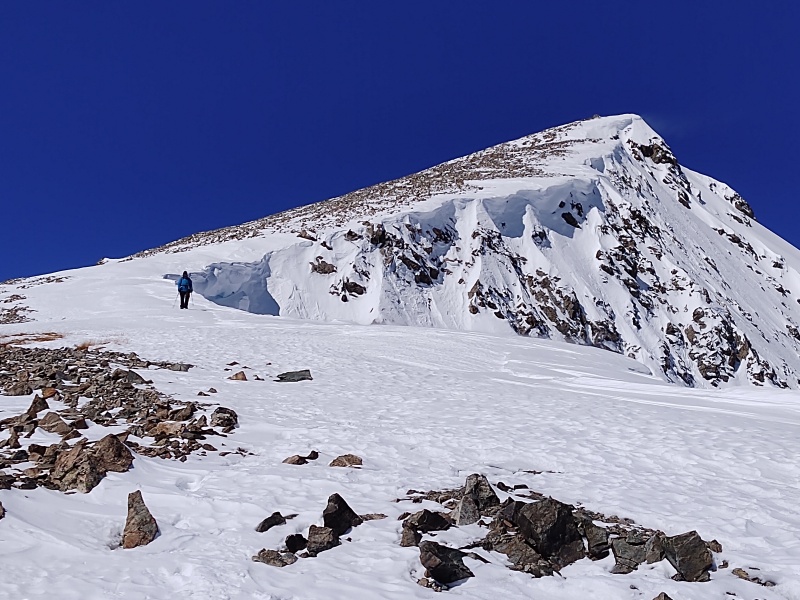
As noted in some of the earlier photos from further back, there is a long skinny snow slide on the back of Torreys (more properly called the ridgeline coming off the west side of the slopes leading up to Torreys but since Torreys is most commonly approached from I-70 I'm unofficially dubbing this the backside of Torreys). Anyways, this snow slide is something that, depending on conditions, could potentially, well... slide. But after some careful inspection/testing we deemed it to be solid and preferable to going up the rocky snow filled rubble on either side. I was comfortable going up it in microspikes (though pushing the limits in terms of steepness they're good on) but then again I'm not known for my excellent judgement on miscrospike suitability, lol. Others were using crampons which is for sure the safer bet when dealing with something as steep as this. You could always deal with the rocks if you preferred (assuming everything isn't covered in snow). 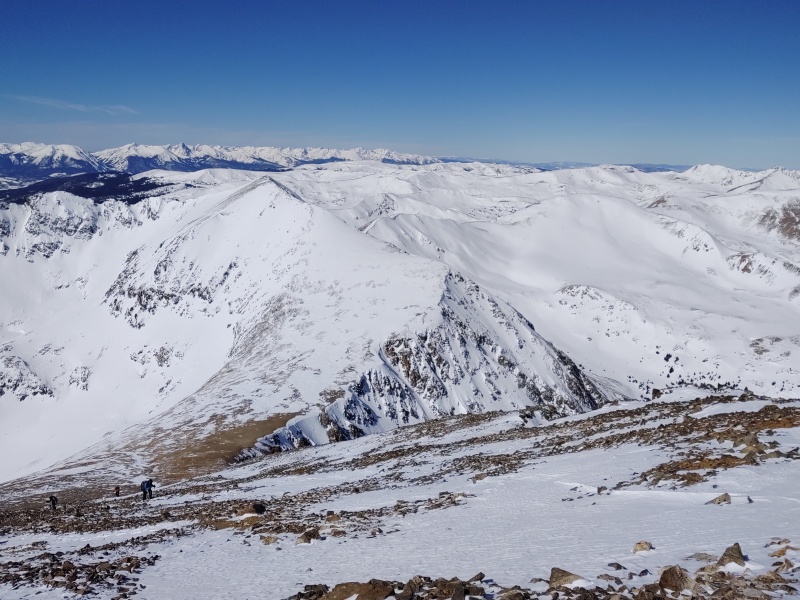
Once you gain the ridgeline the party ins't over yet. You still have to go over and up a little bit to get to the flat-ish nub at the base of the SW ridge of Torreys and from there it's still on the order of about 400ft or so to the summit. 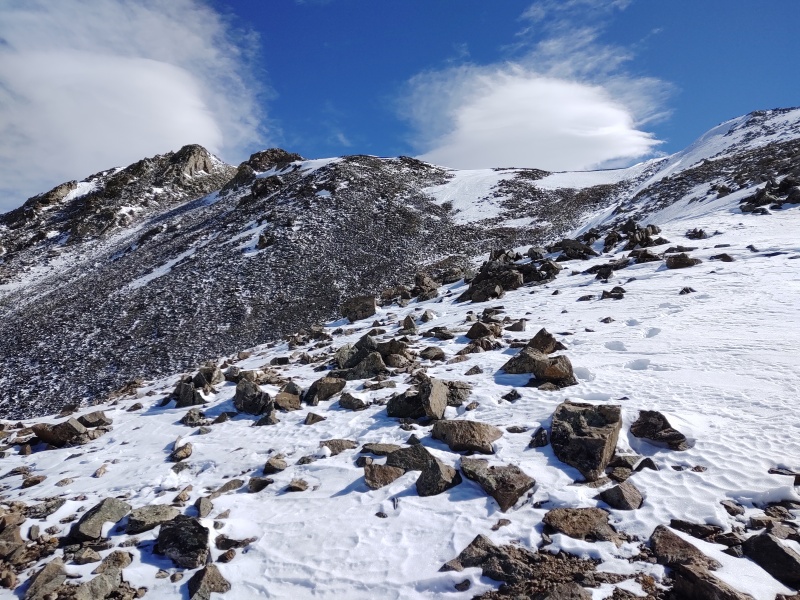
Once getting to the nub below Torreys you could easily bypass it if you wanted (at least under conditions like it was this day) to go direct to Grays (possibly a strategic advantage if you're trying to do the bad ass loop from Loveland Pass as you could claim Grays first them feel perhaps more compelled to pick up Torreys on the way back as opposed to debating if you really want to continue on to Grays...). 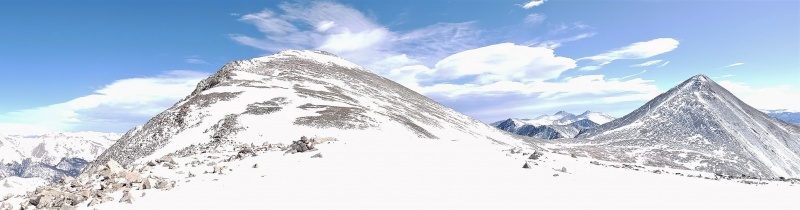
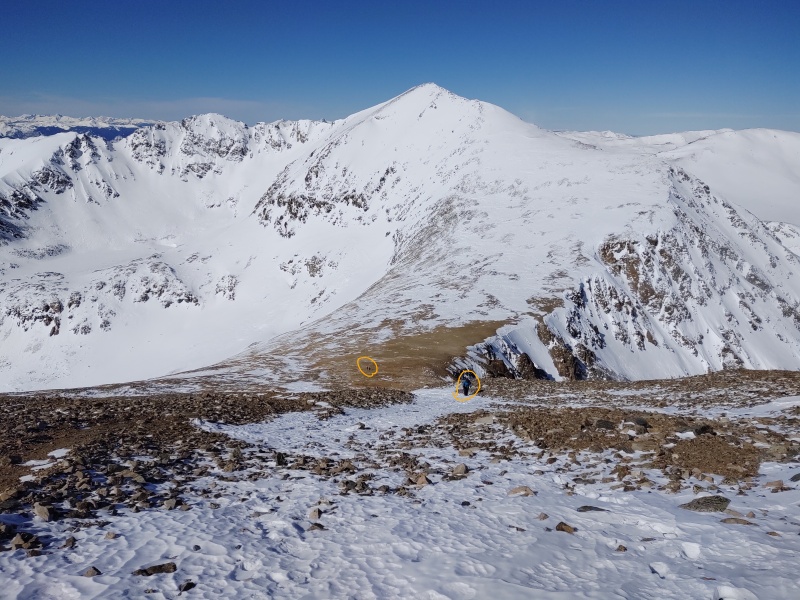
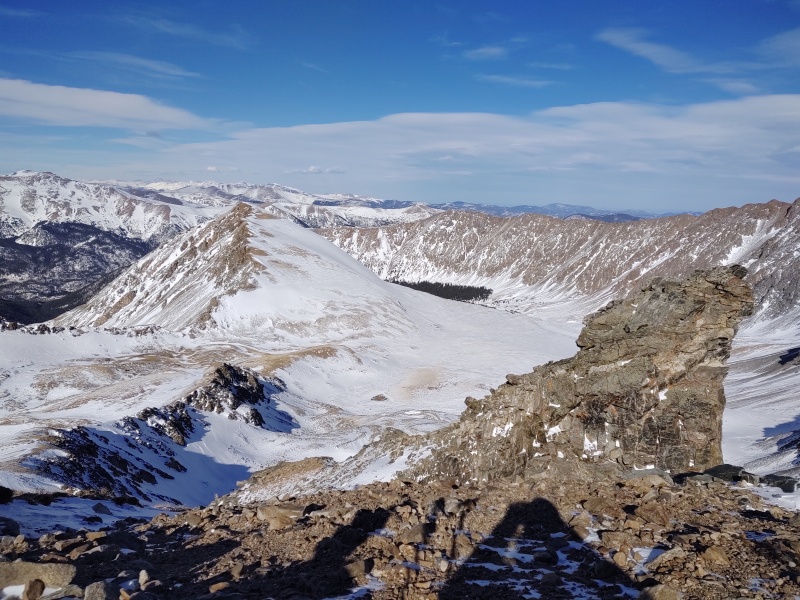
From Torreys you can see where you've been and where you're going (or not going). 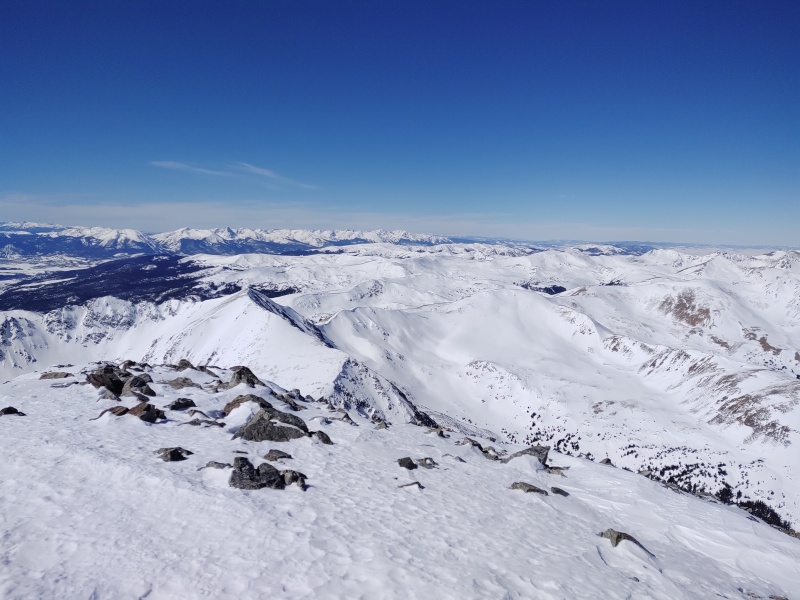
There are some significant cornices forming at the top of the saddle between Torreys and Grays which is one of the reasons the summer route is prone to avalanche danger. 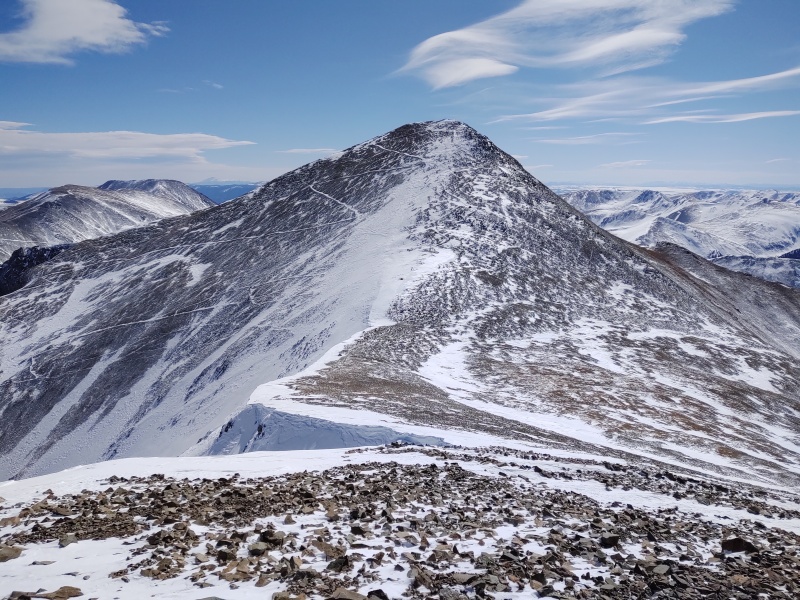

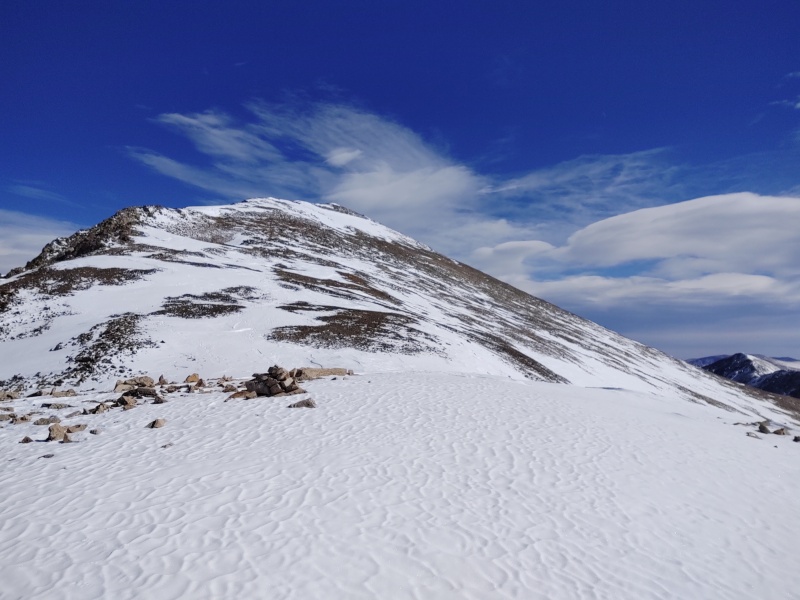
We ended up sort of losing the summer trail and just sticking pretty much to the ridge proper all the way up to Grays. 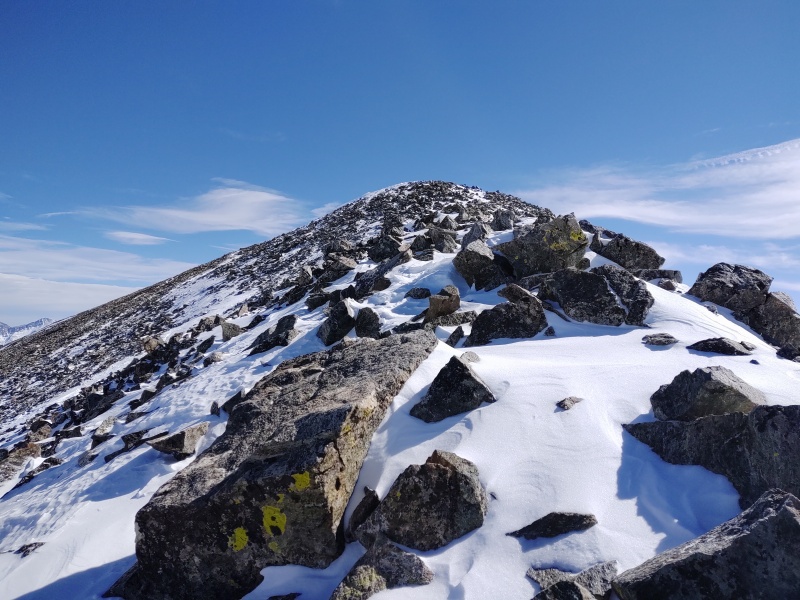
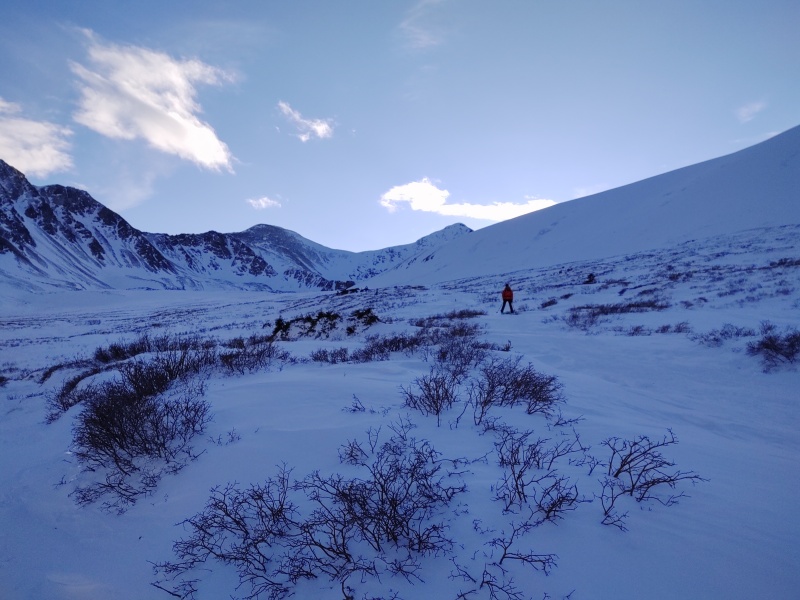
Contrary to what it may seem in the photos, I did actually hike portions of this trek WITH my climbing partner and we occasionally chatted along the way but with a screen name of HikesInGeologicTime I didn't feel overly bad about occasionally advancing ahead enough to get some photos that provide a good reference for scale. 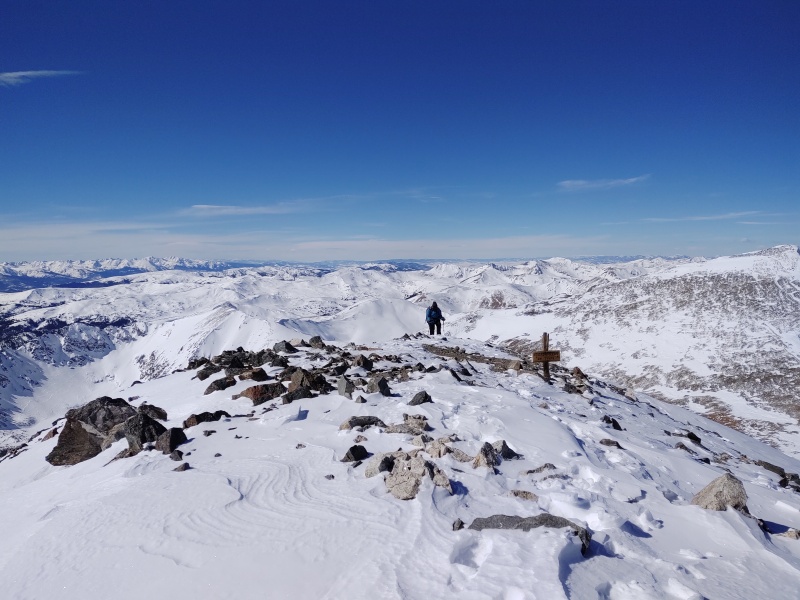
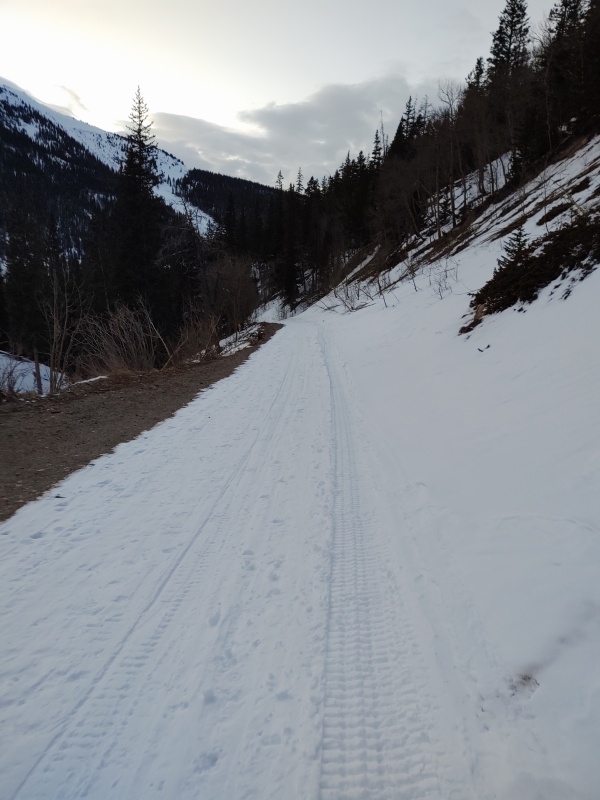
The Descent Nothing much to say about the straightforward descent beyond some slight modifications for avy concerns but I'll throw in some photos for reference before moving on to avy analysis. 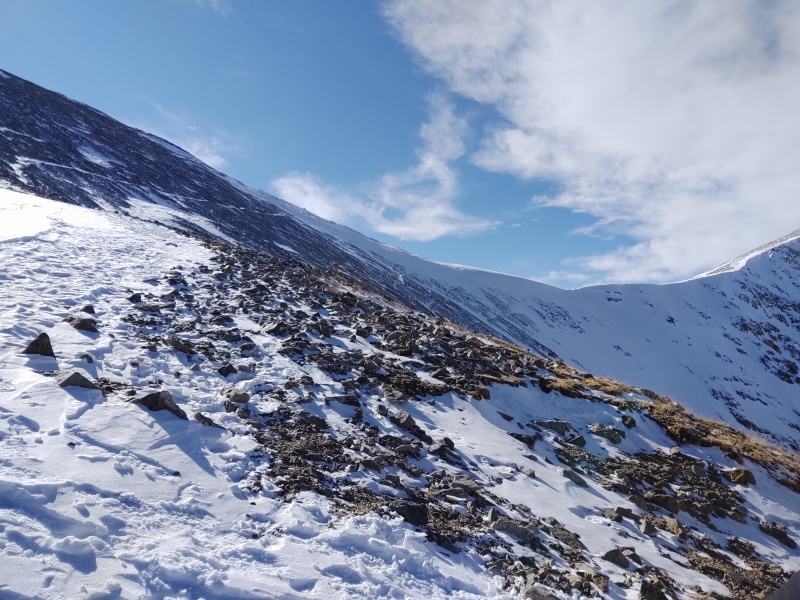


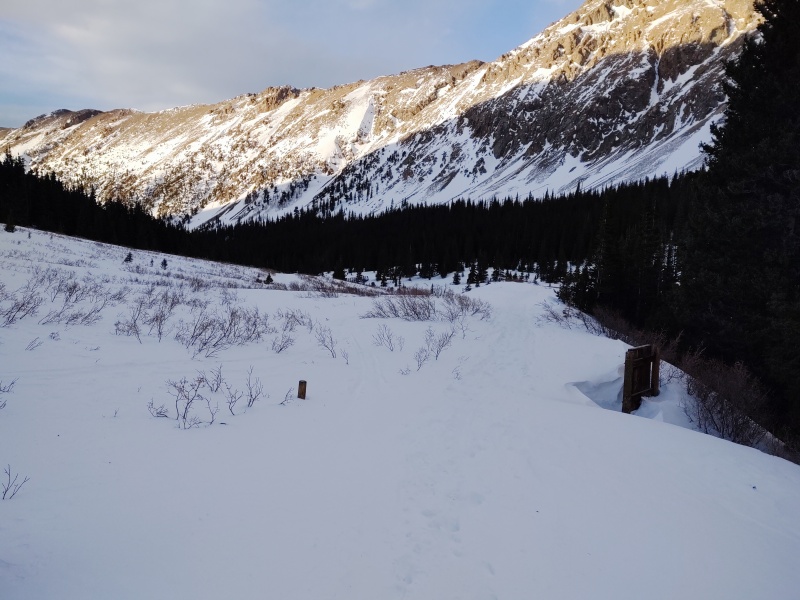
We ended up deciding, just to be abundantly safe, to take the winter variation route that swings out into the willows even though a number of people seemed to be fine with sticking to the summer trail for now. Based on what we saw as we passed it probably was still ok to be on the summer route but being towards the end of a long strenuous day we just didn't feel like needing to stay on high alert for possible dangers. Instead we chose to posthole for a good long ways into the willows before finally resigning ourselves to unstrapping our snowshoes to use for the rest of the way back. 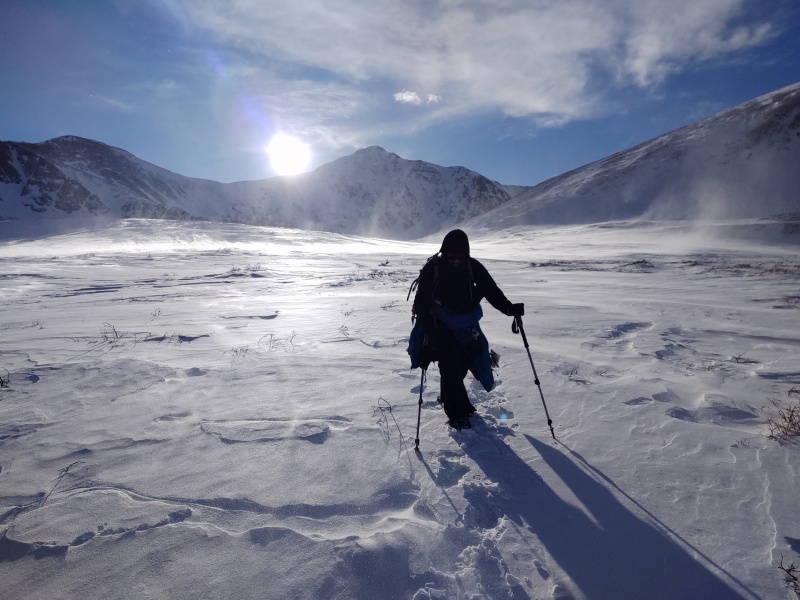
It's pretty easy to see as you're coming up the valley where there are some slopes that might be steep enough to slide under certain conditions. When in doubt just swing out into the willows once you get out of the trees (I'm describing this as if you were starting from the Grays Peak trailhead). 
Avalanche Analysis Being only my 2nd winter of doing snow covered 14ers I'm still obsessing a bit on analyzing avy dangers and since I'm doing all this research I figured I might as well share it with others as well as have it documented for my own reference in case I go back to any of the these (maybe Kelso ridge someday? But in summer first...). 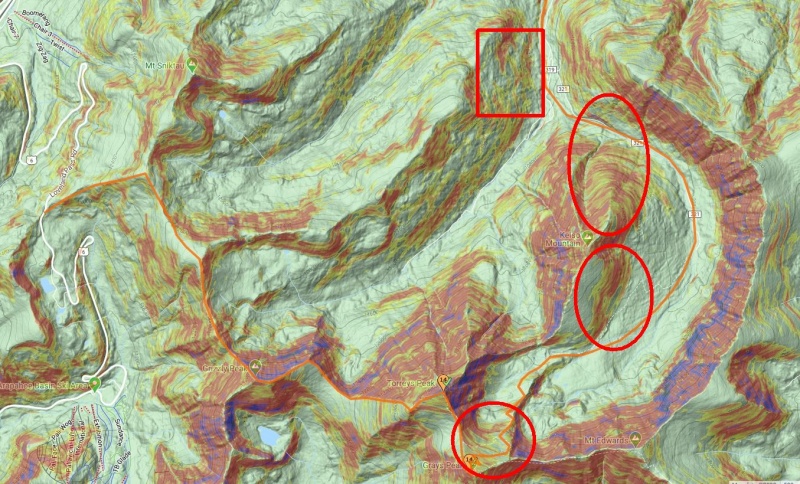
Broadly speaking there are roughly 4 main zones of heightened avalanche danger on this route. From Loveland Pass over to Grays you're basically on a ridgeline the entire way and so generally have minimal danger (provided you stay away from cornices). The first zone is probably the least significant. It occurs about 1 mile up from the Bakerville winter parking and will be on your right if coming up from there. I say least significant because, although it clearly slides on a regular basis, it would take an exceptionally loaded year for that spot to slide all the way down then back up the gully through mature trees and onto the road. But if a historic avalanche season comes along keep your eyes open here. 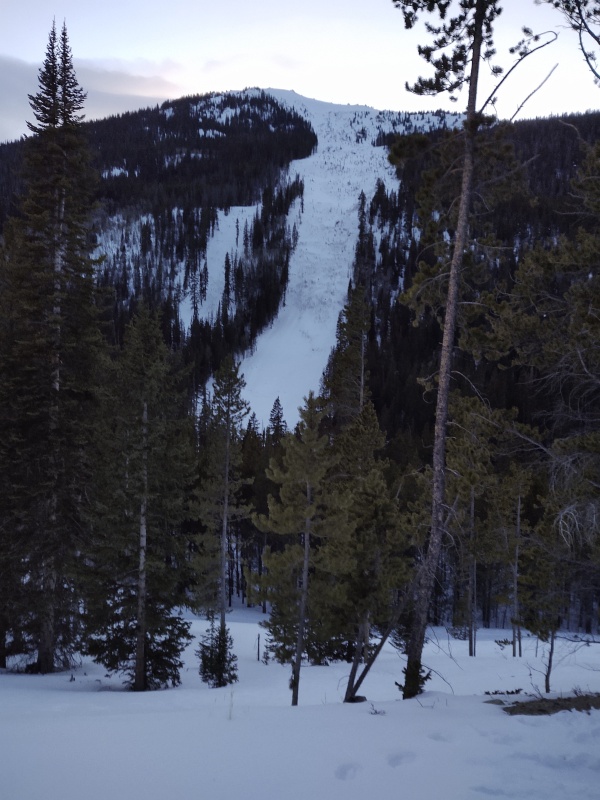
The next zone to worry about (first large circle in photo above) is a much bigger threat as it much more commonly reaches the road and sometimes in 2 spots - the first at about 1.8mi from the winter parking in Bakerville and the next at about 2.1 miles up. Unfortunately I was too zoned out at that point of the hike to notice and photograph those but they are easy to see even in satellite views (see below). After that, there have been slides known to come off the W/SW side of Kelso Mountain. You can easily avoid this danger by swinging out into the willows once the summer trail comes out of the trees (see GPX tracks below). Lastly, the slopes off the Grays and Torrey saddle are also known to frequently slide. The amount of loading will determine to what extent you can use the summer trail up vs needing to stick to the ridge on climbers left. On this particular Leap Day of 2020 we were able to use the summer trail to Grays but not the shortcut section over to Torreys. 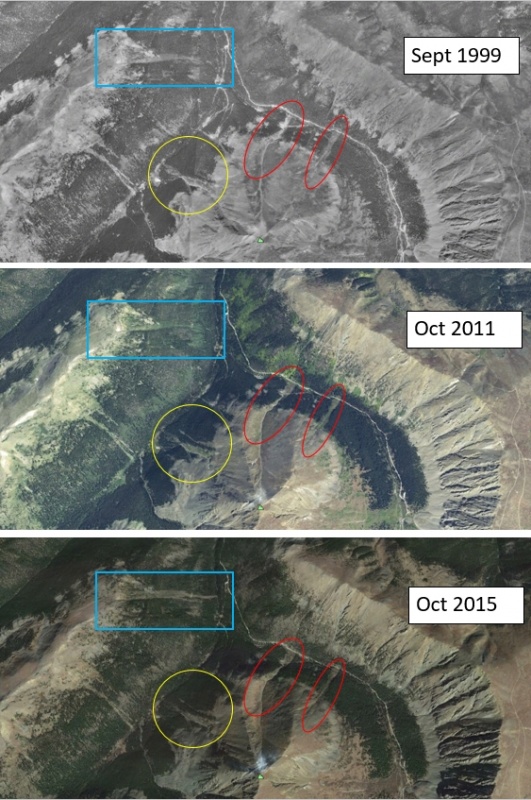
One more thing worth saying is to again plug the power of the historic satellite images on Google Earth. Sometimes people say 'aww, that slope never slides.' Well look for instance at the first zone that was in the red box on the slope shaded image and in the blue box in the Google Earth images above. The 2015 photo shows a major slide had ripped through there but had you looked in 2011 you might have thought that spot never has a significant slide. But back up to 1999 and you'll see it's had big slides before as evidenced by the scars in the forest. The red ovals show how the 2 main slide zones on the road (~1.8 and 2.1 miles up from the winter parking) vary in size from year to year. Lastly the yellow circle, while note on the route being discussed, shows how sometimes routes with very little hint of sliding can suddenly go big (see the upper, smaller path in the yellow circle). As always, this is not an exhaustive analysis of every possible danger that could be faced on any given year but these are key areas where you need to be doubly vigilant. My Times As has been mentioned before, since I was hiking with someone who uses the screen name of HikesInGeologicTime it shouldn't be too surprising that these times are perhaps a bit slow, though honestly - other than that I typically move much faster on the downhill when I'm solo, I don't know that I ended up being really all that much slower for the rest of it. Total distance ~13 miles Total time ~13 hours Total elevation gain ~4,650ft 5:45am start from Loveland Pass 6:35am gained the windy ridgeline 7:20 summit Cupid 7:55am top of hump between Cupid and Grizzly 8:02am base of saddle before Grizzly 8:45am summit of Grizzly 9:10am start descent of Grizzly 9:42am base of saddle before Torreys 11:30am top of ridge before Torreys 11:37am at nub at the SW end of the ridge off of Torreys 12:10pm summit of Torreys 12:27pm descend Torreys 12:46pm G/T saddle 1:40pm Grays summit 2:15pm descend Grays after chatting with cloudkicker 2:51pm pause by the famous portrait rock (see waypoint labeled Rock) to shed layers 4:41pm finally gave up and put on snowshoes about 1/3 of the way through the willow bypass region 5:15pm bridge at the summer trailhead 5:34pm on the move after a break 6:40pm at the Jeep at Bakerville - thank goodness we arranged this as a carpool route! Thumbnails for uploaded photos (click to open slideshow): ")
")
")
")
")
")
")
")
")
")
")
")
")
")
")
")
")
")
")
")
")
")
")
")
")
")
")
")
")
")
")
")
")
")
")
")
")
")
")
")
")
")
")
")
")
")
")
")
")
")
|
| Comments or Questions | ||||||||||||
|---|---|---|---|---|---|---|---|---|---|---|---|---|
|
Caution: The information contained in this report may not be accurate and should not be the only resource used in preparation for your climb. Failure to have the necessary experience, physical conditioning, supplies or equipment can result in injury or death. 14ers.com and the author(s) of this report provide no warranties, either express or implied, that the information provided is accurate or reliable. By using the information provided, you agree to indemnify and hold harmless 14ers.com and the report author(s) with respect to any claims and demands against them, including any attorney fees and expenses. Please read the 14ers.com Safety and Disclaimer pages for more information.
Please respect private property: 14ers.com supports the rights of private landowners to determine how and by whom their land will be used. In Colorado, it is your responsibility to determine if land is private and to obtain the appropriate permission before entering the property.


