| Report Type | Full |
| Peak(s) |
Mt. Elbert - 14,438 feet "South Elbert" - 14,129 feet Mt. Cosgriff - 13,588 feet |
| Date Posted | 06/30/2019 |
| Date Climbed | 06/29/2019 |
| Author | daway8 |
| Cosgriff & Company w/ avalanche analysis |
|---|
|
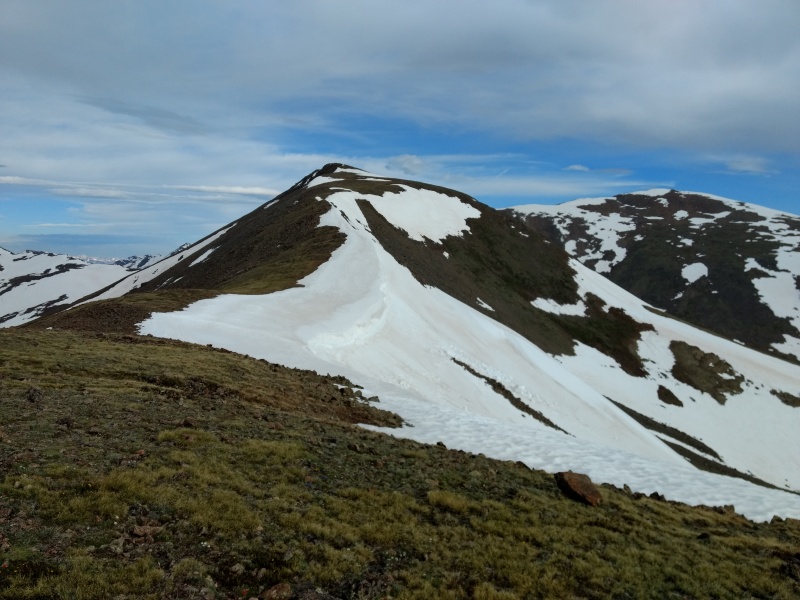
I want to highlight a neglected little peak on what some might call the backside of Elbert: Mount Cosgriff just a touch off the Southeast Ridge route coming up from the Black Cloud trailhead and will also highlight (in the second half of the report) a good example of understanding/interpreting avalanche dangers. At a mere 13,588 ft (some maps say 13,566 ft) and without much prominence, it is tossed in with a big group of unranked 13ers, and from a look at it, one would hardly be inclined to even call it a peak. But someone, somewhere once decided to grace it with the name Mount Cosgriff and stick it on the map. Being so close to the route that I was using as a warm-up for my remaining 7 summits (which I'm letting thaw out a little before I try to tackle them) I couldn't resist strolling over to see what could be seen from this curious little unranked 13er. Adding in a detour of maybe a tenth of a mile, with minimal elevation gain was not a big deal on the way up and I was quite happy to have done so as it was totally secluded from the masses and quite beautiful, as you can get some feel for in the panoramic below. 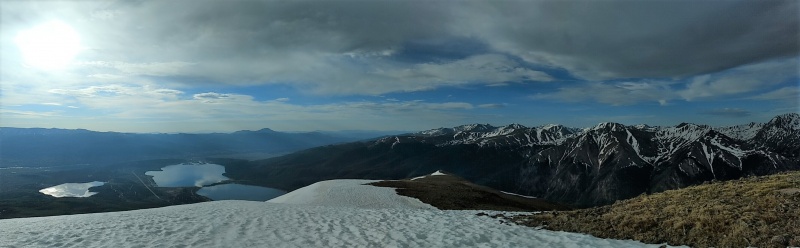
Speaking of the Southeast Ridge route for Mount Elbert - I also thought it would be fitting to add a little detail on this lesser used route that crosses over the sub-summit of South Elbert (which you'll see in your checklist if you include both the named and unnamed peaks). The Black Cloud trailhead for this route can easily fit half a dozen vehicles (or a dozen or more if you park carefully - it's just dispersed clearings in the dirt/rocks between trees) plus there are multiple old fire rings at and near the trailhead where people have obviously camped. If you don't want to put up your tent right at the trailhead, the next viable option (given how steep the terrain gets very quickly) isn't until a little over a mile in, by which time you'll have gained over 1,300ft in the quest to find a flat spot for a tent. 
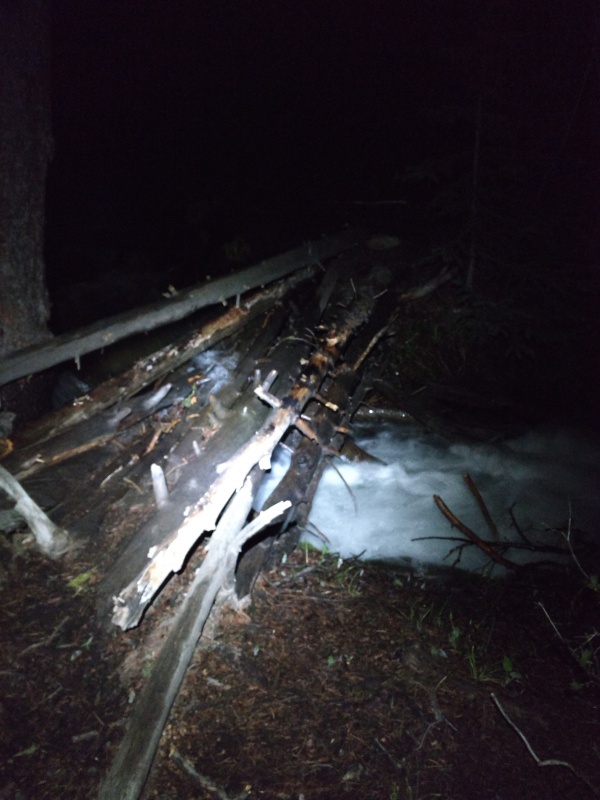
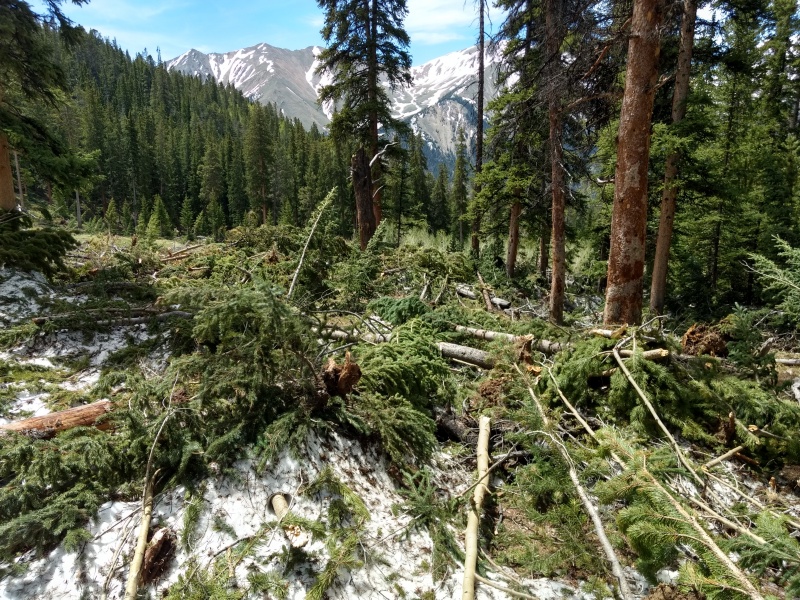
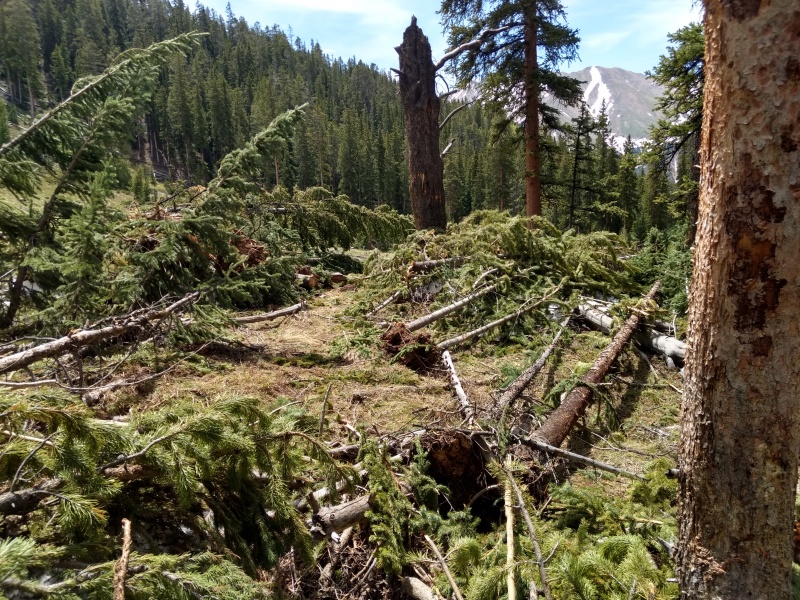
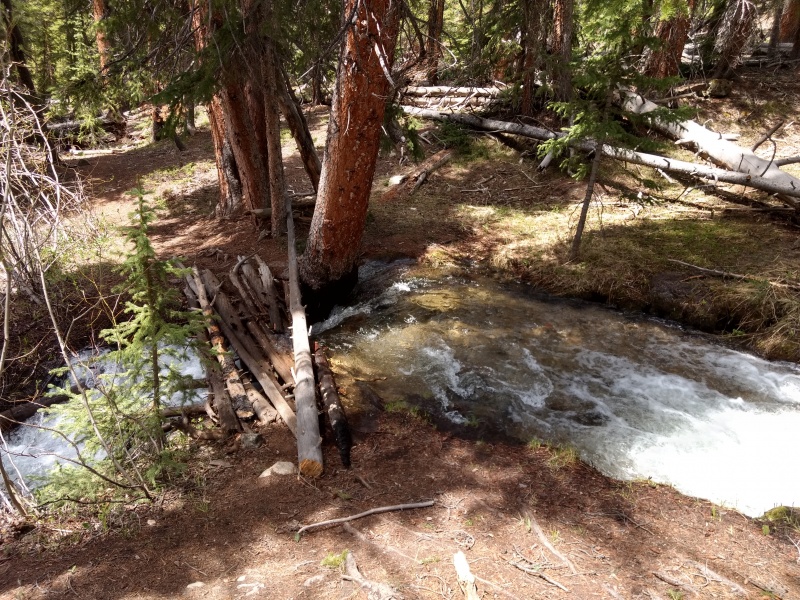
You can see remnants of several old campsites between the first and second stream crossings. In between these crossings are about the only optimal camping spots you'll find other than the trailhead. Note that the bridges are a bit primitive, and also wet with the high runoff at the moment. Shortly after the second stream crossing you start to see some of the avalanche damage - more on that in the second half of the report. This trail was trivial to follow even in the dark except for some slight confusion going through the avalanche zone by headlamp. It started getting light as I went through the avalanche zone and that did help out but it's not a bad idea to have either a GPS or a map to help make sure you get pointed in the right direction since the trail does make a turn as you go through the debris. Some of the pictures make it look bad but it's really not all that hard to step over/around the debris. 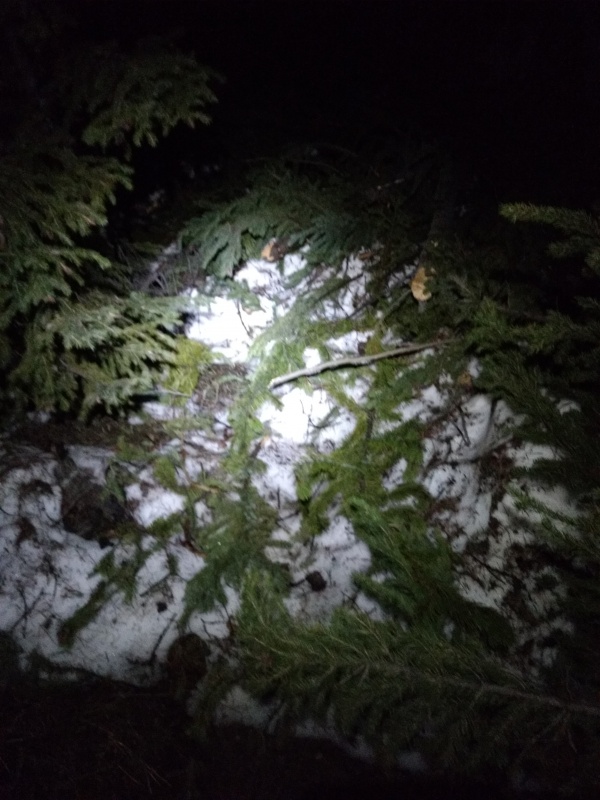
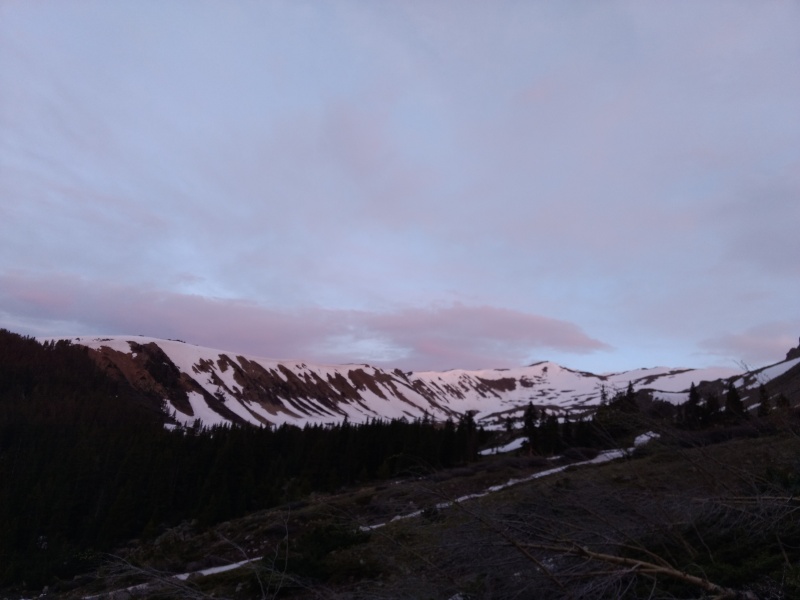
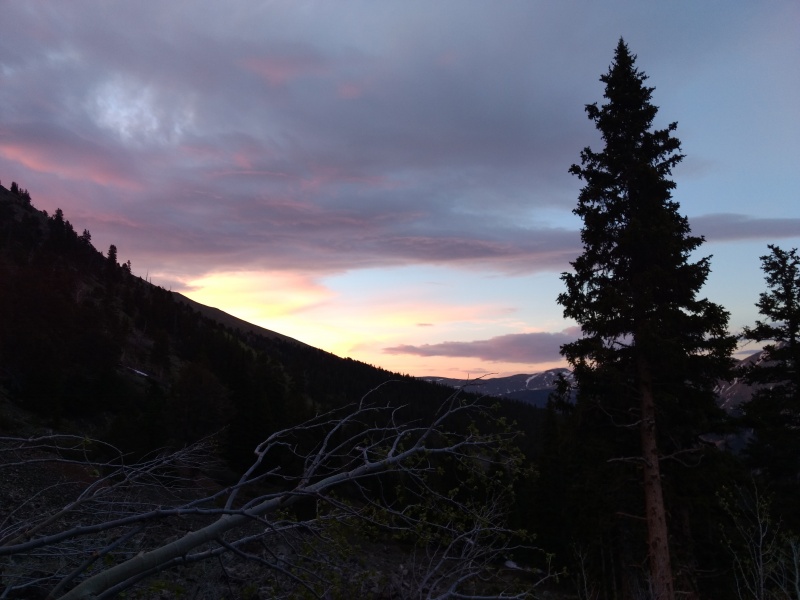
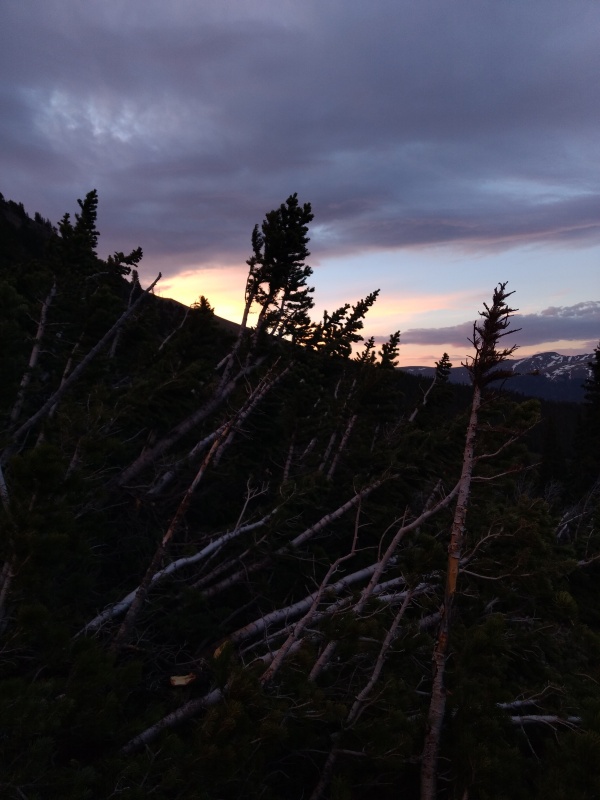
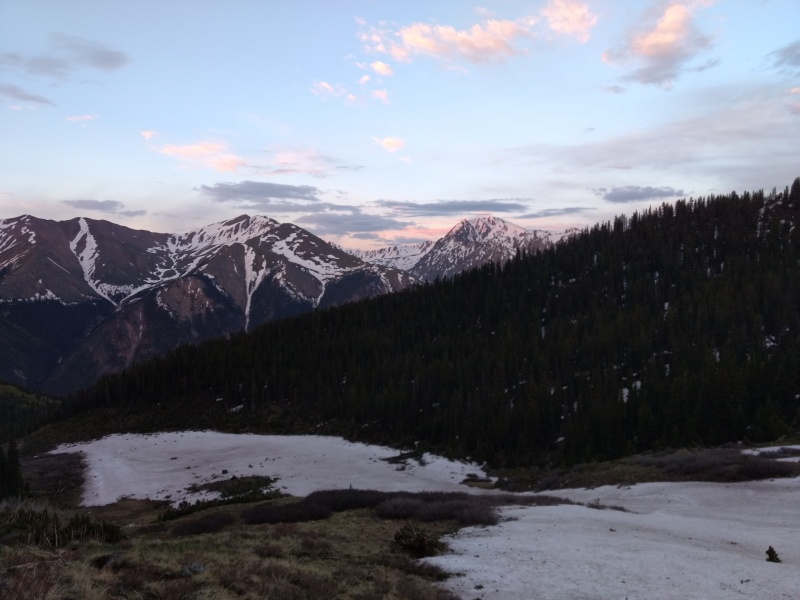
One of the benefits of doing an alpine start (I hit the trail at 3:39am), besides being less people and less danger of getting caught in an early afternoon thunderstorm, is that you get to to see neat things like a crescent moon sitting on top of the mountains, alpenglow lighting up the peaks just before sunrise and, of course, sunrise itself. 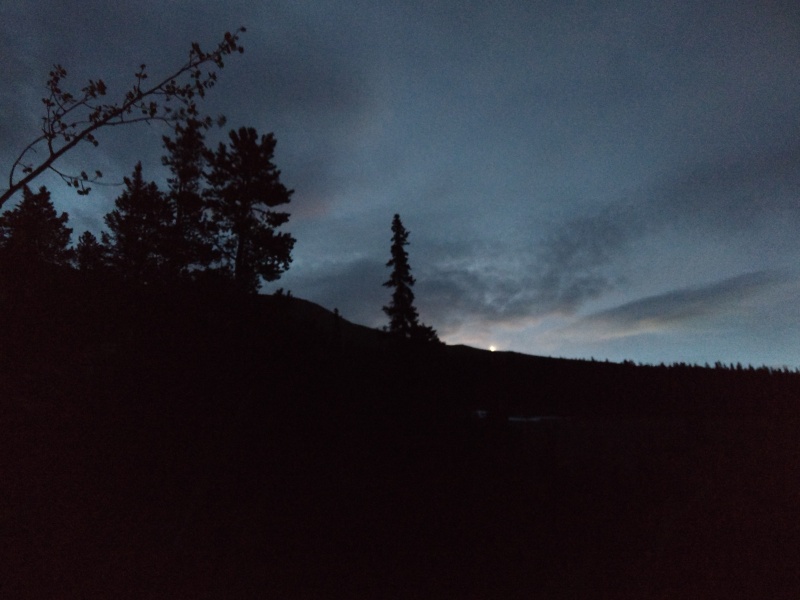
The trail is mostly melted off at this point but due to the heavy snow this past winter there were a couple spots where there were some minor snow fields to cross even now at the end of June. Some of it was hard, some you sank a little bit into but there was really nothing worth bothering with snowshoes for and while it may have been borderline for wanting traction, I got by fine with an occasional kick step. 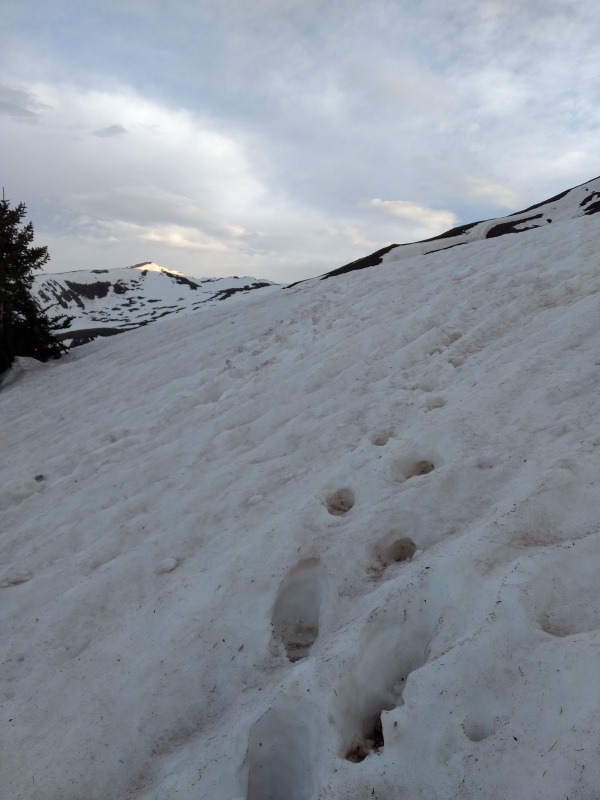
I made it up to the ridge just about the same time that direct sunlight was finally starting to hit it. 
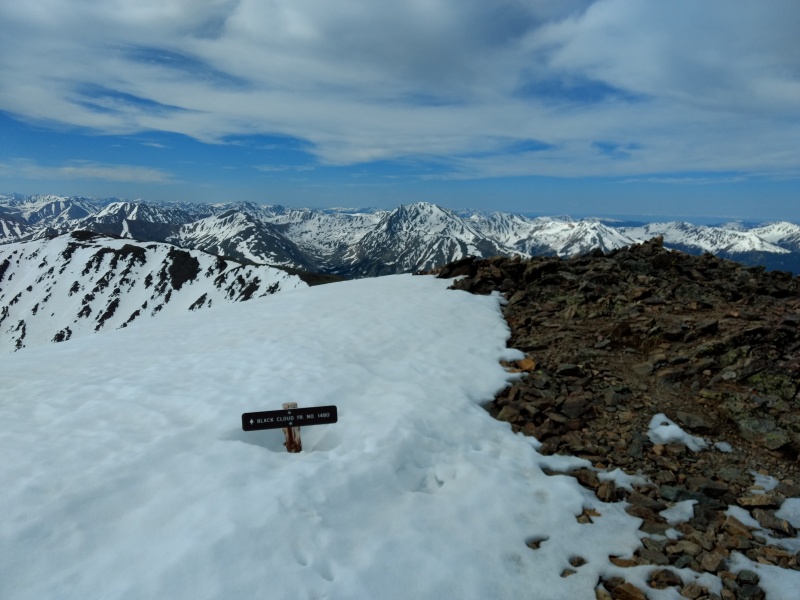
Once on the ridge you'll be right next to wonderful little Mount Cosgriff. Now granted, the peak itself isn't much to look at but it's a perfect little spot to look over both the valley below and the mountains beyond. And since it's an unranked 13er on a non-standard route for an otherwise busy 14er, there's a good chance you'll have this scenic little spot all to yourself while the peak baggers stroll on by without even casting a glance at it. 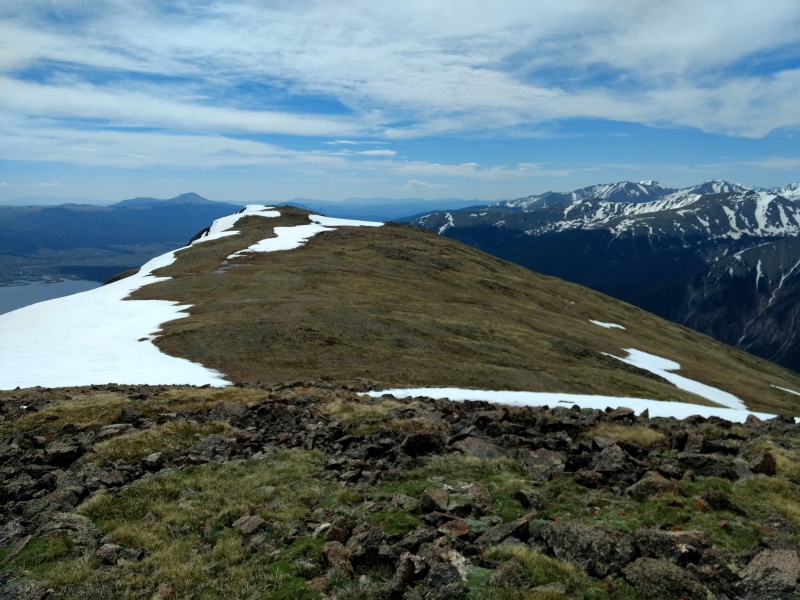
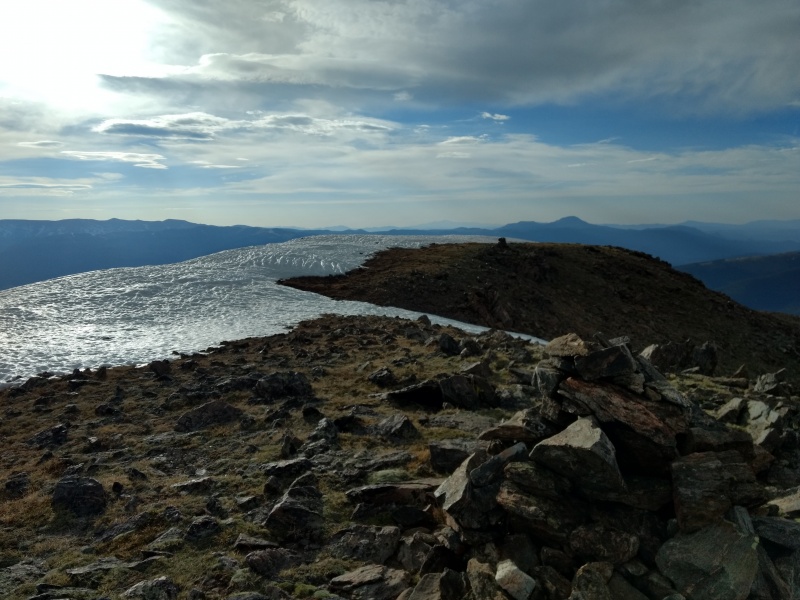
Getting to Mount Cosgriff is a very short walk with only a little elevation gain from where the main trail comes up onto the ridge. The exact number is a little obscure since different maps seem to list different elevations for this peak (Gaia vs. 14ers.com, etc) but it's a very pleasant little spot worth a few extra minutes if you're not racing a storm or the clock. A couple of cairns can be seen if you're observant when coming back down from South Elbert and might entice the curious to go inspect if the'ye not too tired yet (I recommend you hit it on the way up when you can better enjoy it - or if you have a spare day, just go hike to this little peak itself and spend an afternoon there - I might just come back someday and do that once I finish my main goals...) 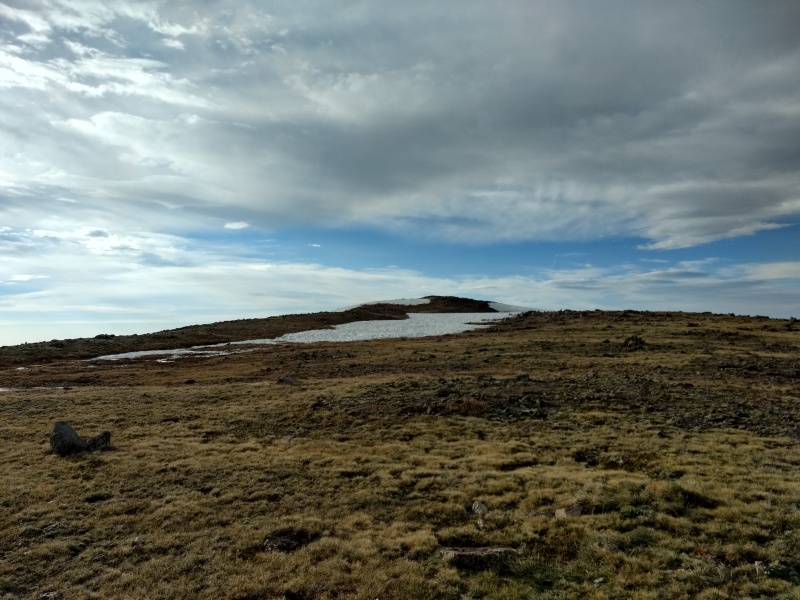
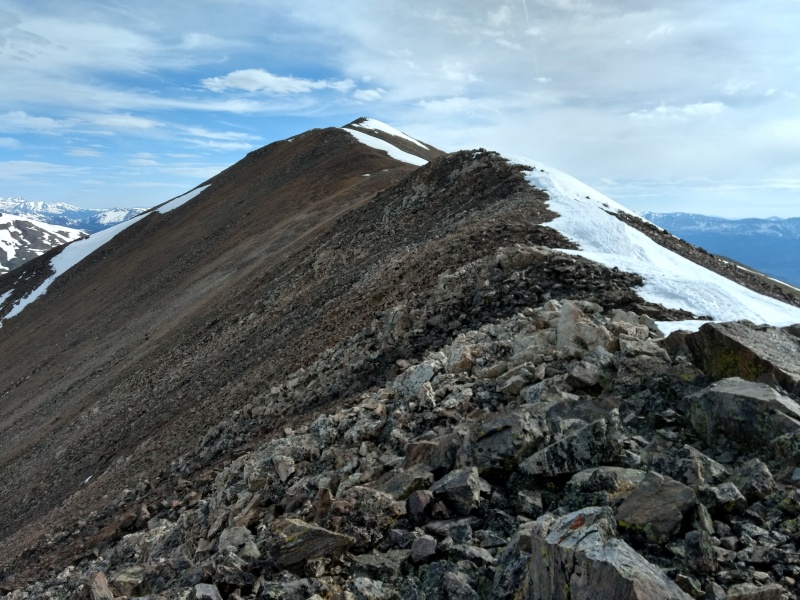
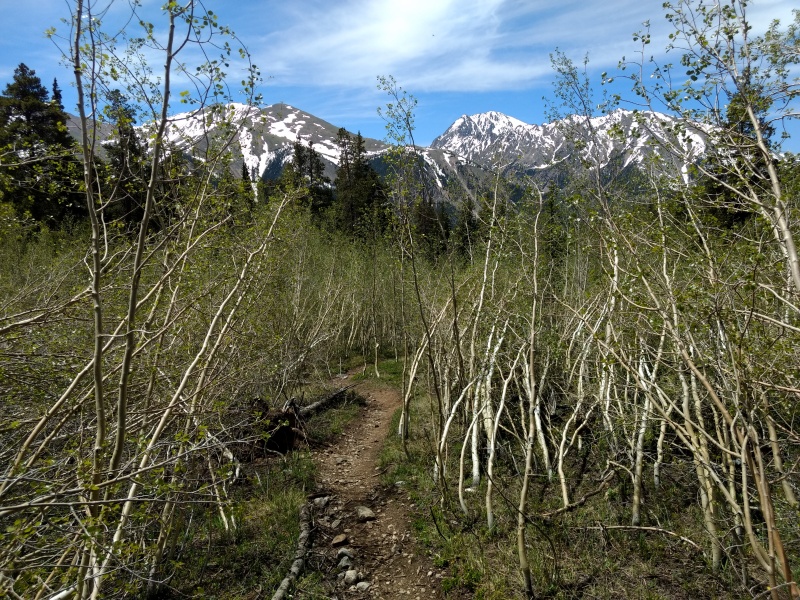
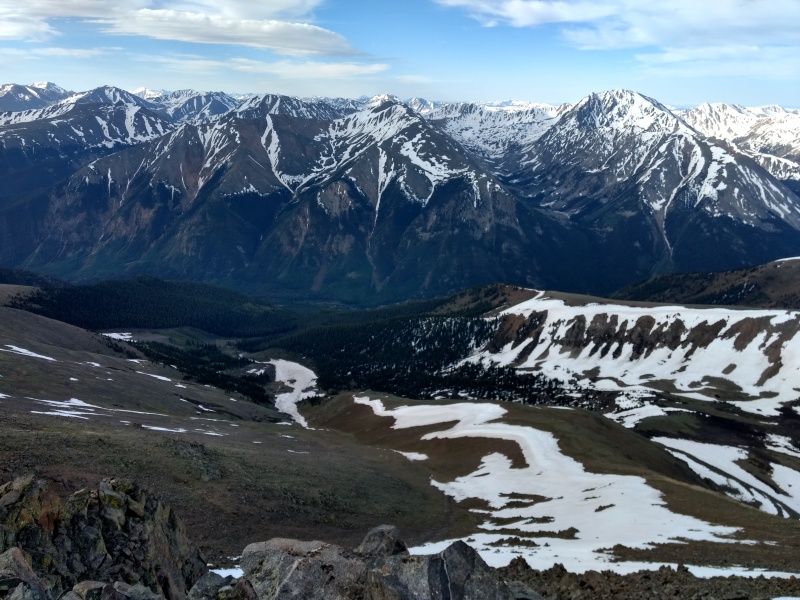
After that it's time to turn to the northwest and head to South Elbert, which is south and slightly east of Mount Elbert (are you getting dizzy yet?). This is a rather long trek (about a mile to South Elbert and another mile and a quarter if you go on to Mount Elbert) and it is totally exposed (as in exposed to lightning - exposure in terms of taking a fall is pretty negligible, unless you go out of your way to seek it out). Fortunately you have a very long and unobstructed view of the sky in basically any direction at this point so you can fairly easily evaluate the likelihood of getting caught in a storm. 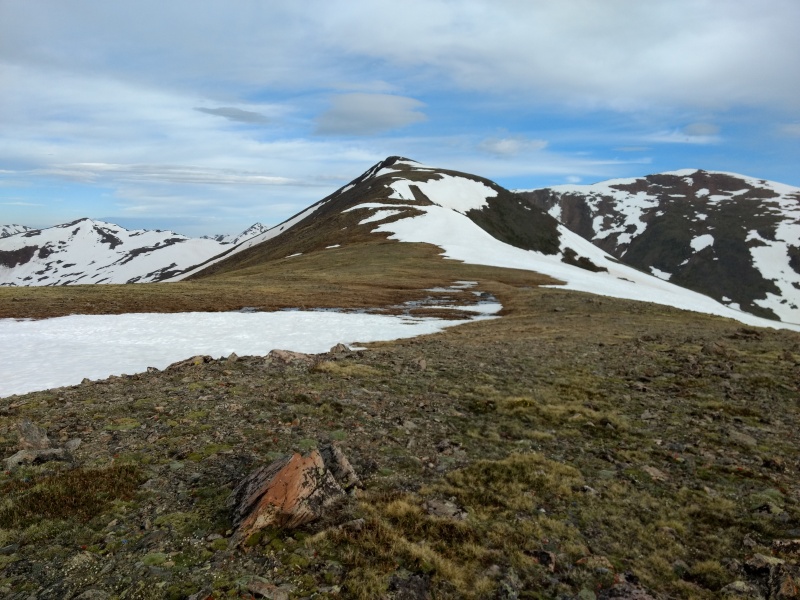
Before heading over from South Elbert to Mount Elbert be sure to note two things: 1) Check the weather again - it's over a mile with no cover and no decent bail out options if a storm comes. 2) Note all the little dips and humps along the way - don't let false peak fatigue batter you on this stretch. 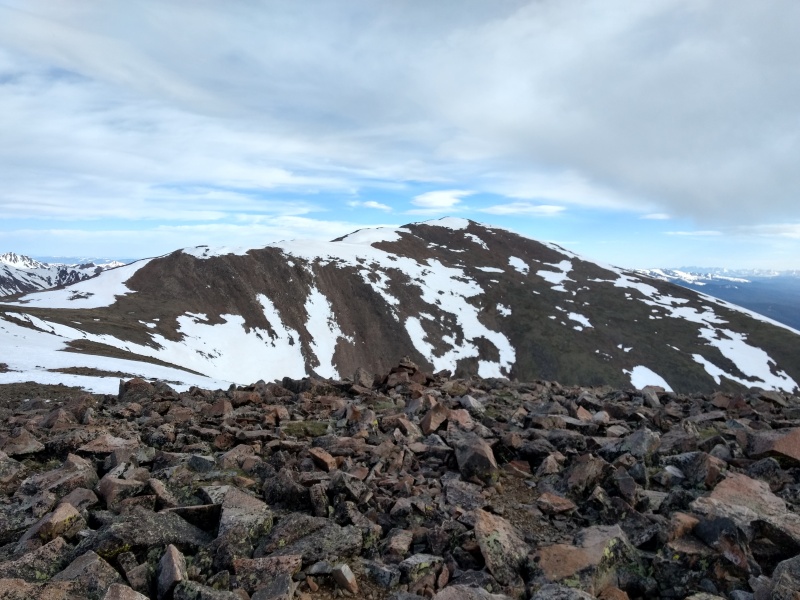
It was possible for the most part to get over to the summit of Mount Elbert without going over snow except maybe a small patch or two. But once on the summit when people tried to swing out around the crowd they sometimes sank up to their waist in snow (though portions of the summit were totally dry). 
The two views below give an idea of the difference between the standard route (Northeast Ridge) and the "back" route (Southeast Ridge). The masses were ascending the standard route but there had only been a couple people up the Southeast Ridge route before me that day. I did end up passing another 8 or so on the way back but that's nothing compared to the hordes coming up the standard route (I think it was getting close to 30 people on the summit by the time I left - not as bad as say Bierstadt, but still feels rather crowded). 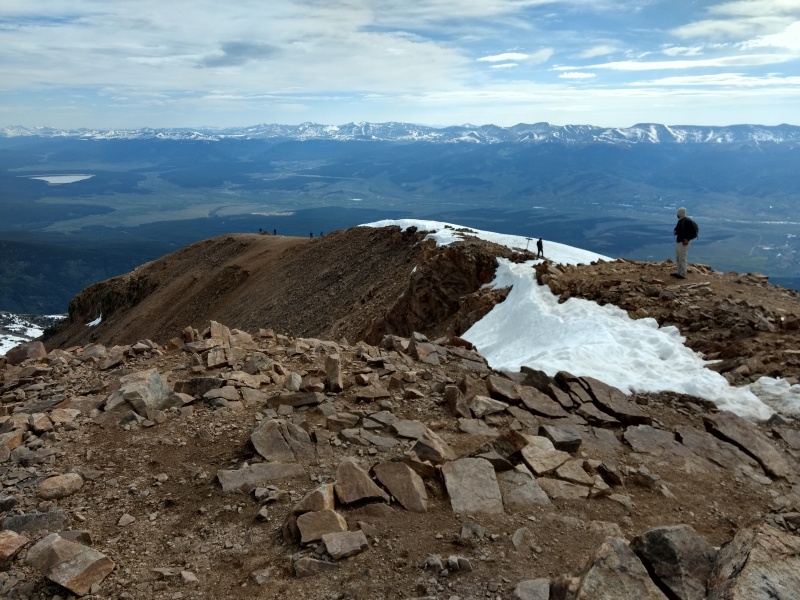
Second half: Understanding/interpreting avalanche dangers I did my basic homework before doing this route - read the route description, downloaded the photos in the app, checked trailhead and peak conditions reports, looked at a couple recent trip reports, including an informative one by redheadontherocks who reported some avalanche debris on the route earlier this year. The reports all led me to believe there wasn't enough snow left to worry about at this point so I didn't bother with a more detailed analysis of the region. As such, when I come upon the main portion of avalanche damage covering the trail I was quite shocked to see that degree of damage in a place that looked like it was fairly flat and seemed well away from any significant slopes (based on looking around with my headlamp and the very faint light beginning to glow behind the peaks). Just strolling through the area in the pre-dawn light, I would have never thought that such a spot would ever get hit by an avalanche - it was just too far from the big peaks, too flat of terrain and had too many trees around, including many that were fairly large. 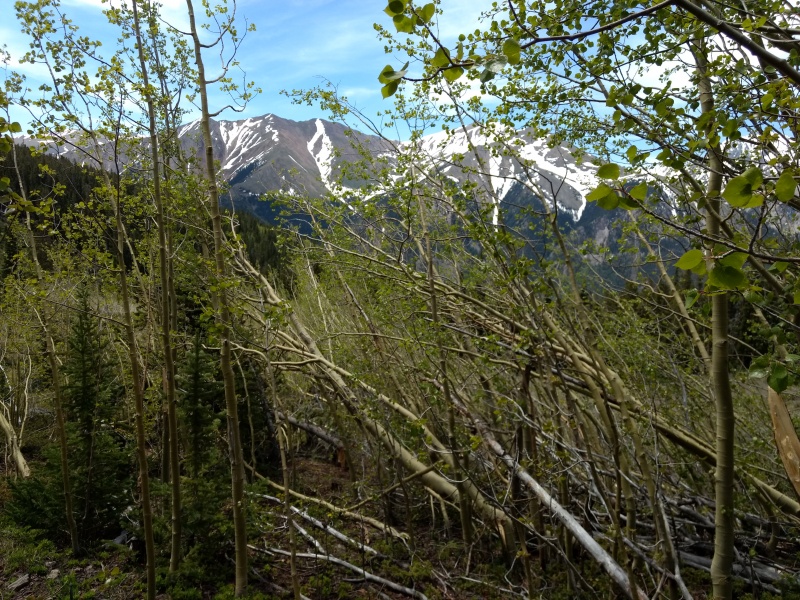
But after taking some more pictures on the way back down and then studying the maps upon returning home it was really an exceedingly obvious fact that this was in fact prime avalanche territory. I've only got a couple winter 14ers under my belt - having prior to this past winter preferred hiking in spots well away from significant avalanche danger - and while I did take the time for some very basic avalanche training before doing those winter summits, I decided after this hike that I'll need to get a little more serious about studying avalanche danger before hopefully getting some more snowflakes next winter. I'm writing this second half of the report to highlight some rookie oversights that hopefully others can learn from and show some examples of how to better spot trouble zones in advance (a skill I will be working on prior to next winter). My first thought in the pre-dawn light was how on earth did an avalanche get all the way over here and travel across such relatively level and wooded territory?!? The picture below, of the slope coming of South Elbert (where one of the avalanche paths came from) is more what I think of when considering an area where the avalanche danger is high - not a flat wooded area well away from the peaks. 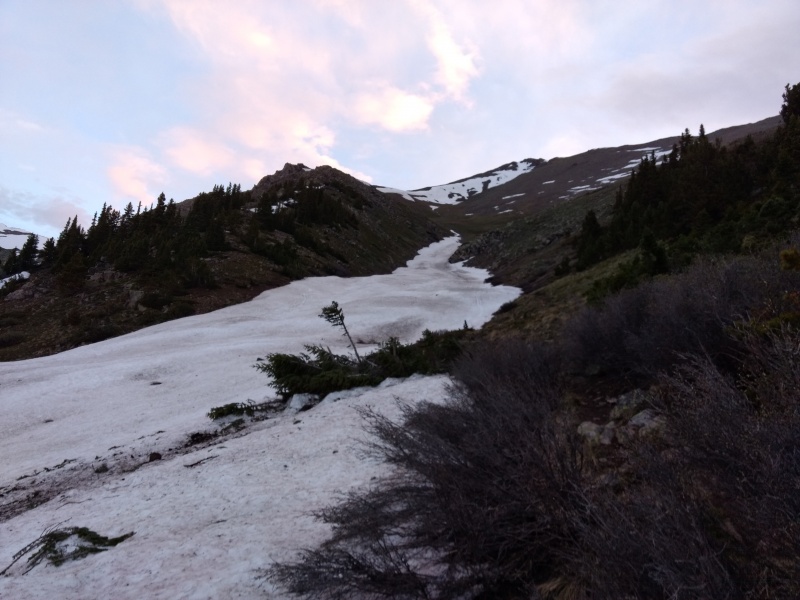
But once I got a better look at the area in daylight and started analyzing the surroundings more carefully there were plenty of clues shouting out "avalanche territory!" For example, note the large patch of small pine trees in the one photo and young aspen trees in another - an obvious sign that the area got wiped out not too many years ago. Also note the direction the surviving trees are bent over - I hadn't paid close attention at the time but looking at the photos later I realized that there was more than one avalanche at play here based on the directions the trees were leaning - something which would also be obvious once I started to take a detailed look at the topo map and other resources (see below). 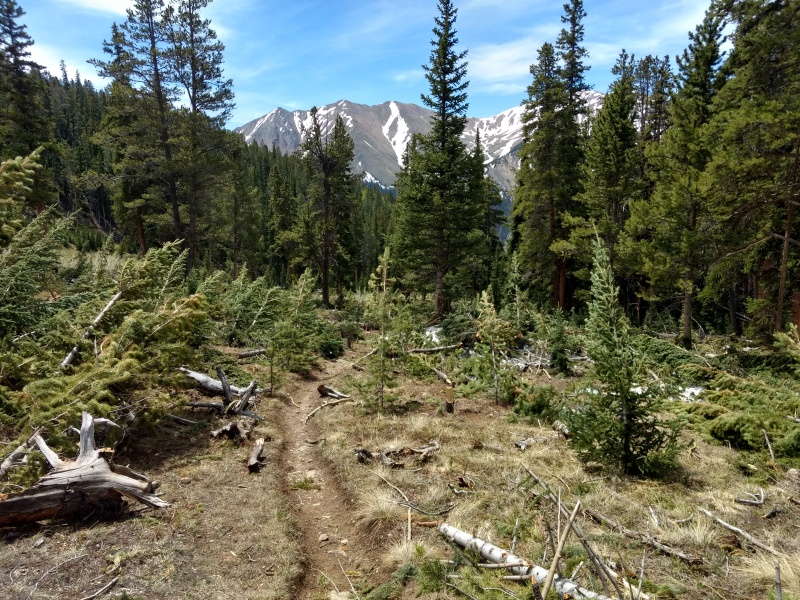
Now let's take a look at some of the terrain from which the slides came - these shots make the avalanche danger even more obvious. 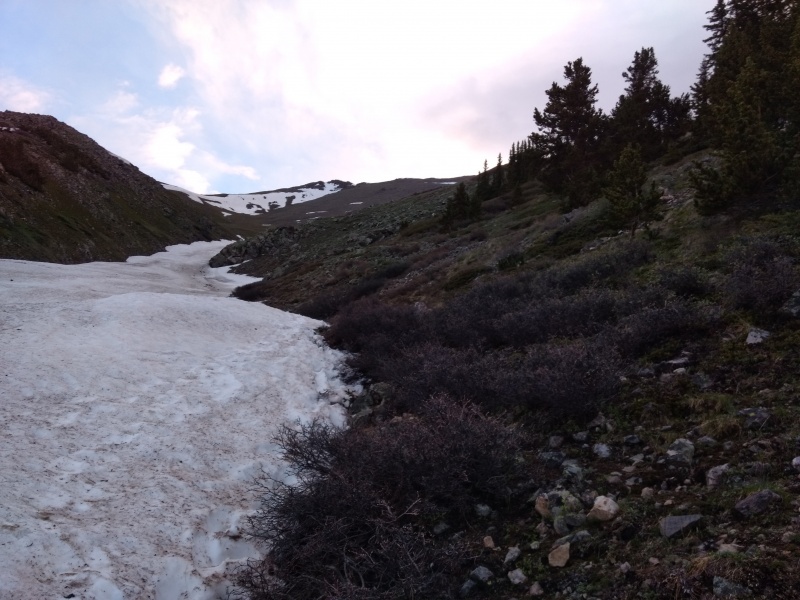

As you get higher up and look down it becomes increasingly obvious how and where the snow can slide right down into the zones which, from an initial hasty glance down below, seemed like they would be safe areas. 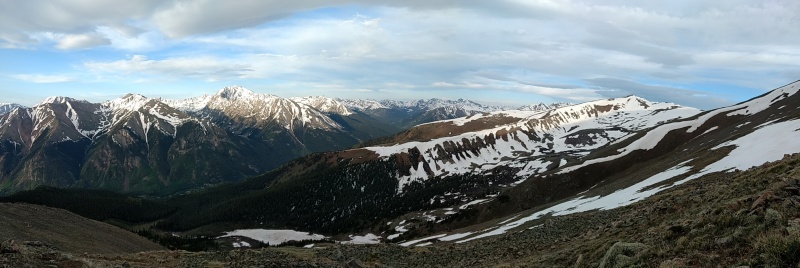
Finally, I want to highlight some of the excellent resources available online that allow you to determine dangers like this prior to ever going out on the trail. 
One very useful tool that not everyone may know about is the Slope Angle overlay on the 14ers.com map. Below is an example of what it looks like in this region. This view starts to make it more obvious how the spot that at first glance seemed like a safe little field was actually in a position to get pummeled from multiple directions. 
Now look below at the Google Earth satellite view of this region and you'll see that it's quite obvious this region gets periodically pummeled by avalanches as evidenced by the nice clean haircuts the forest has received in a couple directions coming down from the slopes highlighted above. These ultra clean edges to the forest at the bottom of steep slopes are another classic sign of an avalanche zone. If you piece together the data from all these sources you come to realize that if you're standing just about anywhere on the trail from Black Cloud to South Elbert below treeline then you're standing in potential avalanche territory, or at least not too far from it. This was further evidenced by the bent over trees across the stream from the main trail down a good ways into the valley below the main peaks. 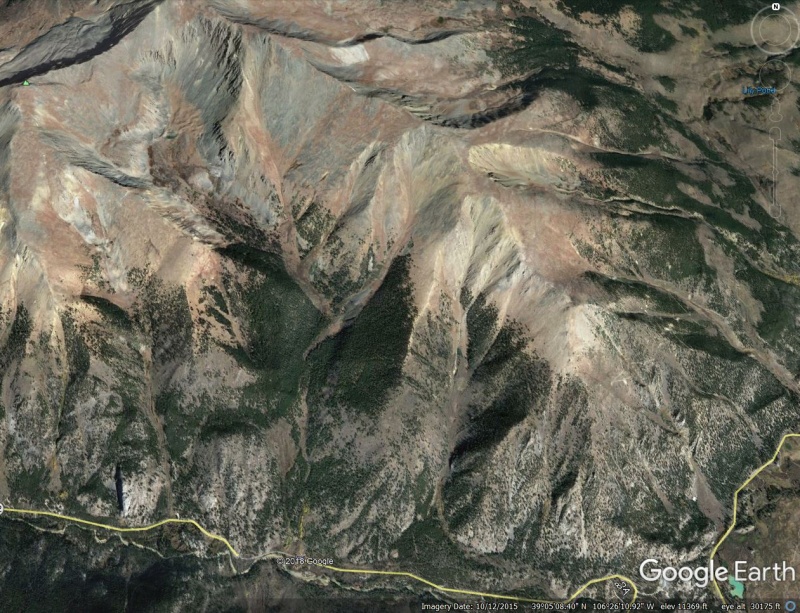
Navigational tip: on the way back down I followed the trail right into a not so easily crossed portion of the creek, despite not having to cross such an area on the way up. A quick check of my GPS showed I needed to follow the stream up to the right just a little ways to find the bridge I had crossed on the way up (the second stream crossing). 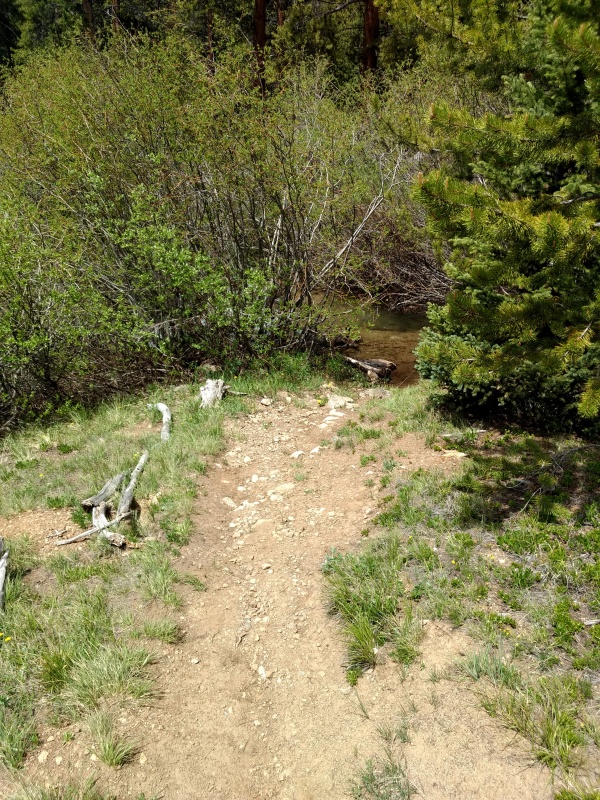
As I was hiking back to the trailhead and now paying more attention to the avalanche danger all over the place I for a moment thought "how on earth did an avalanche go all this way and twist and turn around so many corners?" Of course a quick look at the map (as shown in the example above) shows there are actually multiple avalanche paths in this region that line up in such a way as to create the illusion of one massively long, twisting and turning avalanche that never stops. 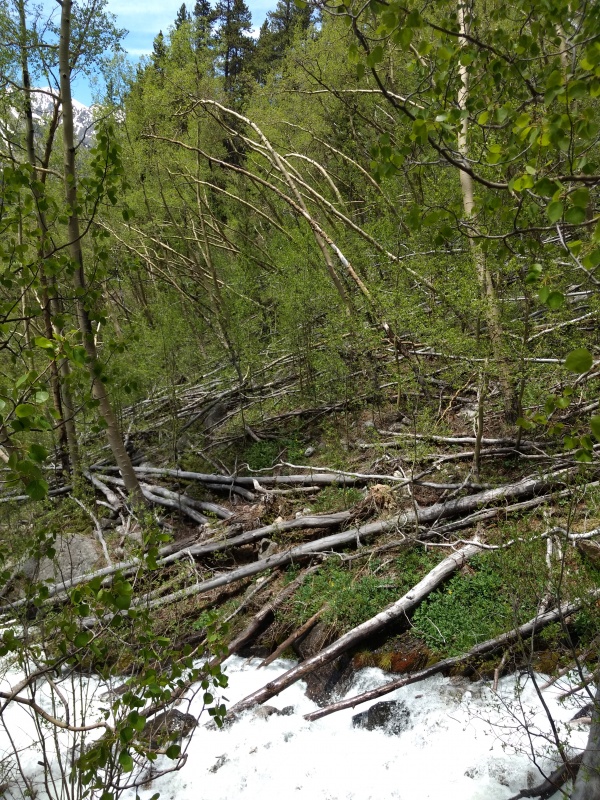
So really, although my first unobservant glances had me wondering how an avalanche got to some of the spots it did, after just a little bit of study everything become exceedingly obvious. This just goes to show why it's important to do that little bit of extra research if you're hiking on snow covered peaks - it could help save your life! Here are my stats: Total mileage ~11.3 mi Total time: 8hr 45min Total gain ~5,400ft 3:39am start from Black Cloud trailhead 4:35am reach first stream crossing ~1.17miles in. 4:41am ~1.37mi. Reach second stream crossing (having paused to take some pictures/check out the terrain) 4:48am ~1.5mi trail being obscured in the dark by avalanche damage. 7:08am reach top of the ridge 7:21am leaving Mount Cosgriff after hanging out for a while taking photos and enjoying the view. 8:10am Summit of South Elbert. About 4.62 miles in. Didn't stay long since there were some iffy clouds around. 8:25am at base of final set of humps up to Mount Elbert. 9am sharp: on summit of Mount Elbert (my second time this year and 3rd time overall) 9:27am descend from the rather crowed summit. 9:50am back at the base of the humps between summit and sub-summit. 10:14am back on top of South Elbert (after lots of false peaks going up to it). 10:50am back to top of the ridge near Mount Cosgriff. 11:53am back at second stream crossing. 11:59am 1st stream crossing 12:24pm back at the trailhead. Thumbnails for uploaded photos (click to open slideshow): ")
")
")
")
")
")
")
")
")
")
")
")
")
")
")
")
")
")
")
")
")
")
")
")
")
")
")
")
")
")
")
")
")
")
")
")
")
|
| Comments or Questions |
|---|
|
|
Caution: The information contained in this report may not be accurate and should not be the only resource used in preparation for your climb. Failure to have the necessary experience, physical conditioning, supplies or equipment can result in injury or death. 14ers.com and the author(s) of this report provide no warranties, either express or implied, that the information provided is accurate or reliable. By using the information provided, you agree to indemnify and hold harmless 14ers.com and the report author(s) with respect to any claims and demands against them, including any attorney fees and expenses. Please read the 14ers.com Safety and Disclaimer pages for more information.
Please respect private property: 14ers.com supports the rights of private landowners to determine how and by whom their land will be used. In Colorado, it is your responsibility to determine if land is private and to obtain the appropriate permission before entering the property.

