| Report Type | Full |
| Peak(s) |
Mount St.Helens - 8,365' |
| Date Posted | 05/07/2019 |
| Modified | 05/19/2019 |
| Date Climbed | 04/24/2019 |
| Author | nyker |
| Mount St. Helens Trip Report |
|---|
|
Mount Saint Helens Cascade Range, Washington Worm Flows Winter Climbing Route Ever since I heard of the eruption of Mount Saint Helens in 1980 I’ve been fascinated by this mountain. I don’t remember its pre-eruption Fuji-esque conical shape and had never seen the mountain in person, but had memorized the photos I saw in books and magazines and the footage from the documentaries over the years . When I was a kid, my uncle had given me a glass vile of ash from the day it erupted and I still have it. For the folks living in close proximity to this mighty peak, I can only imagine what the reaction was and how the landscape, transformed by the eruption looked in the days after the mountain blew apart. Another event in our recent history provided an image of what I imagined would be a close approximation to the devastation at least in an urban setting. The scene in downtown Manhattan on that Tuesday morning on September 11th 2001 drew an eerie similarity to a volcanic eruption. Time stood still as I stood witnessing the terrorist attacks and hearing the sounds of destruction happening in real time. The cloud of soot and smoke funneling down the narrow streets resembled a pyroclastic flow racing down a mountain. The toll taken on life and anything near ground zero, the ash-like grey dust that coated everything and the still-smoldering ground gave me an image of what it must have been like to be in the blast zone of Mount Saint Helens some 21 years earlier, though the latter was magnitudes larger than NYC. The landscape around Mount Saint Helens has seen a regrowth and rebirth of a land born anew, rising from the seemingly lifeless ashen ground. Like downtown the terrain and the people impacted will never be the same, but it will move on and evolve as nature finds a way. 
The Climb There is some red tape to be able to climb this mountain now, that being the required climbing permit. For years I tried getting a permit but was never lucky enough to get one at the initial sale and never found one on the secondary market that worked when I was available. This year I’d try to plan to be there earlier, and coupled with the government shutdown and moving the process to a new website, I was finally able to secure a permit! It’s a shame the process has to be so alienating for someone to simply hike up a mountain. If you’re attempting this before April, a parking permit is also required. Given the time of year, the standard route from the summer trailhead (Monitor Ridge Route from Climbers Bivouac.) was not yet open so climbers now need to start from the winter trailhead, which starts from Marble Mountain Snow Park at an elevation of about 2,645ft. This route climbs up the south side of the mountain, which is sort of necessary since the north side of the mountain was essentially blown off, disintegrated and doesn’t exist anymore. According to the USGS, the elevation of the high point on Mt St Helens now is in the range of 8,330ft to 8,365ft, some 1,300ft lower than prior to its famous eruption. While it lost its summit in that eruption, it’s still a great climb and you’re gaining about 6,000ft in elevation from the winter trailhead in a climb that will test your cardio training. I always feel a certain amount of excitement when attempting a mountain I’ve never been on before particularly in an area I’ve never hiked in before. Such was the case today. I didn’t know what to expect, other than being excited about finally being on the mountain I’ve read about, the geological history of which I’ve studied for so many years. I heard stories about how crowded the mountain gets, though there only a half dozen vehicles at the trailhead at 4:30am. Perhaps the crowds wait until summer, which was fine with me. It was cloudy and had rained for the past two days and this morning driving here was in a soup-like fog/low lying cloud, not very encouraging. I took this shot on the return since it was dark when I passed here...  By 5:00am I was on the trail, which starts off nicely marked by a bootpack from the parking lot. You follow the #244 ski route to timber line, after which the route up gets more vague. The morning was cold enough and bootpack good such that snowshoes were not needed at all on the ascent. The snow was melting fast so in a few weeks I assume this could make things mushier and move the snowline further up the route. The route through the forest was on mild terrain and made for a good warm up. If you’re doing this in the dark, pay attention to the signs, while its pretty straightforward where you need to turn there are a couple of well-placed signs you’d be advised to watch out for pointing the way until treeline. It was evident how much snow had fallen over winter, with some pockets around trees ten feet deep even lower down. Don’t venture off the trail around here especially as the snow warms otherwise you might sink. 
As you hike up, the terrain will start to open up more and timberline is soon reached. The trees are smaller here, coupled with the fact you are hiking on several feet of snow, you feel very tall hiking up eye level with the tops of the trees. The entire morning I was walking in a whiteout a cloud/fog floor at around 5,000ft and I was getting pretty bummed out that it would stay the way it stayed cloudy at Mount Hood for days at a time earlier in the week. After these shots below I hiked up some more into the cloud which then became thicker. 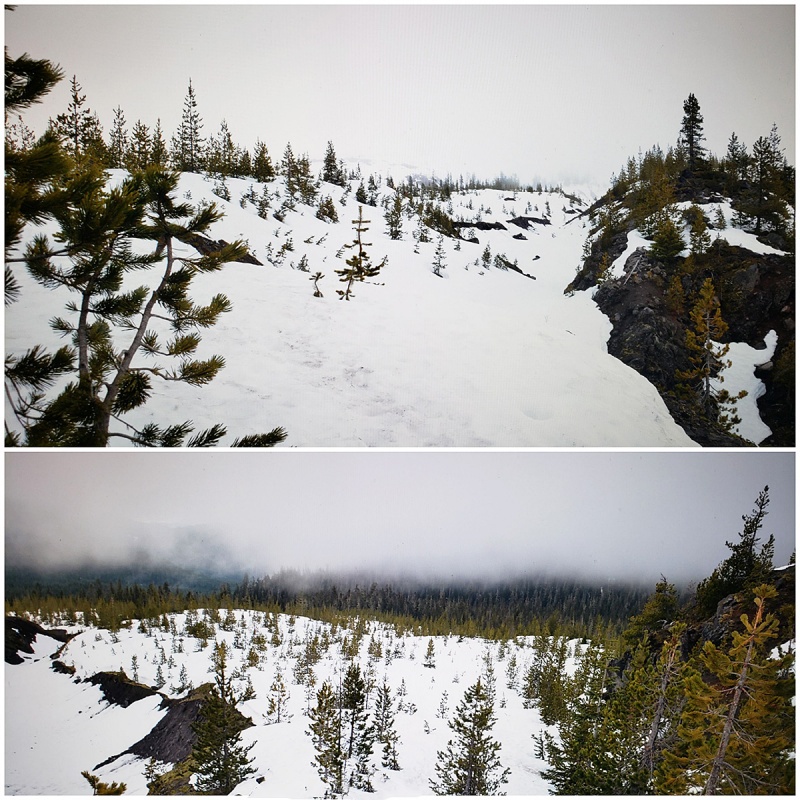
It was also a bit disconcerting to be moving higher in little visibility on a semi-active volcano without seeing much of anything and not being sure where the route was not having been here before. Since this trip was all about actually seeing what I was hiking up and experiencing the grandeur of the views, the crater, etc. I wanted to make sure there’d be clear skies, so I stopped and waited a bit to see if the clouds would lift. I seriously considered turning around to come back another day when it was clear. After waiting about 30min, the sky did clear and then later became completely clear! It’s amazing how the weather can invigorate you when it clears up. I was full of energy now restarted my ascent. As there were ski tracks and boot prints leading in every direction, I wasn’t sure which way the actual route was, but it didn’t matter as much now with the better visibility, navigation up was easier. 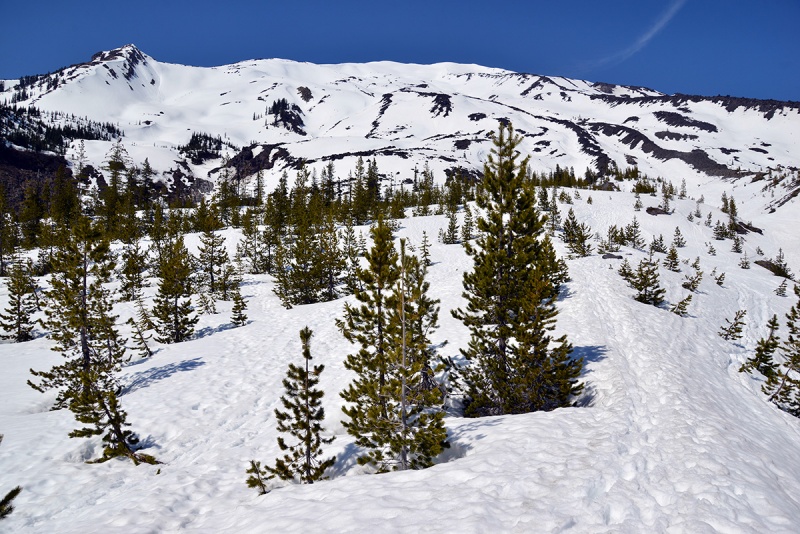
Above treeline. Pretty empty mountain at this point  Once above treeline, at about 4,300ft in elevation a rock rib appears, curving along the line that moves up the mountain moving in a northwest direction. You can climb to the left (west) or right (east) of this rib. In the morning, the left side was more sheltered from the morning sun so the snow was more firm allowing better more secure movement with crampons, though you are doing an ascending traverse across a steeper slope than you would on the right where you are moving more direct up the hill parallel to the rock rib. Sort of a six of one, half dozen of the other. 
Some volcanic rock becomes visible here, though most of what you’re walking on is effectively volcanic rock, since this IS a volcano. Once on the rock, you can see the route options up. This is also the last dry terra firma you’ll see that’s not on snow, so if you want to rest or sit, do it here. It’s a good spot to put on crampons as you make your ascent. 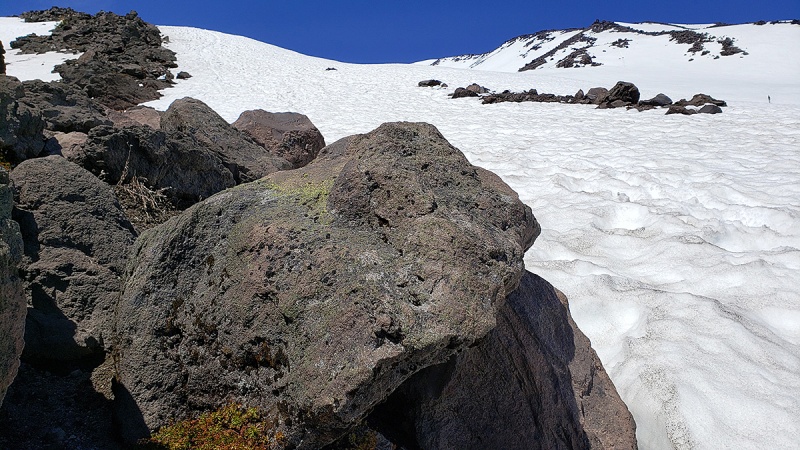
The "route" to the right of the rock rib:  Standing on the rock rib, you can see some evidence of some recent slides on the slope opposite the small valley/depression underneath, an area that’s located closer to the summer climbing route further west. You could climb up that also, but given the seemingly unstable snow, that might not be the best option currently. I kept on my track west of the rib but steered clear of these slides. Route I took is 90 degrees right of here in photo.  Looking back with Mount Hood, Wy’east towering above the northern Oregon and southern Washington landscape in the background. 
Making my way up to the west of the rock rib. My line moved parallel the rock rib for most of the length of it until a breakpoint where I crossed over on snow to the other side (east) then follow a more direct line up rather than continue further west. I was able to stay on snow the whole way. The one downside to climbing in the snow is that you don’t get to see the actual volcanic terrain, the moon-like barren landscape that sits beneath the snowy white blanket in the Spring but you can see some of it around the rock rib. A benefit of doing it in the snow though is you don’t have the dust this route is apparently known for in dry summer conditions. 
The route becomes less clear here and you’ll likely see footprints all over the place, which makes it more confusing, but assuming you have a compass/map/GPS and keep following a north/northwest bearing you should generally be ok and wind up at the same place, navigating around certain obstacles where necessary. There are a few lines that work getting up this mountain. Before reaching the crater rim, there are really no spots where you lose elevation, so when in doubt go up! Topping out along the main rock rib and looking northwest up the mountain. The route bears climbers right here up the steepening slope towards the top right in pic. 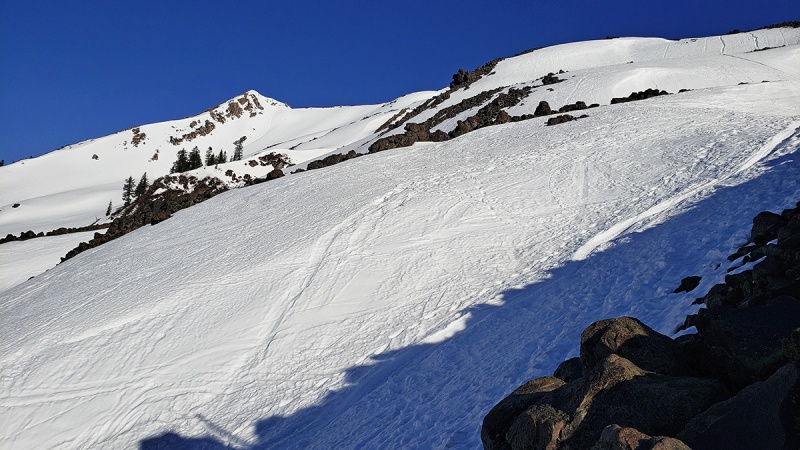 The lower flanks of the mountain where the slope angle starts to increase. 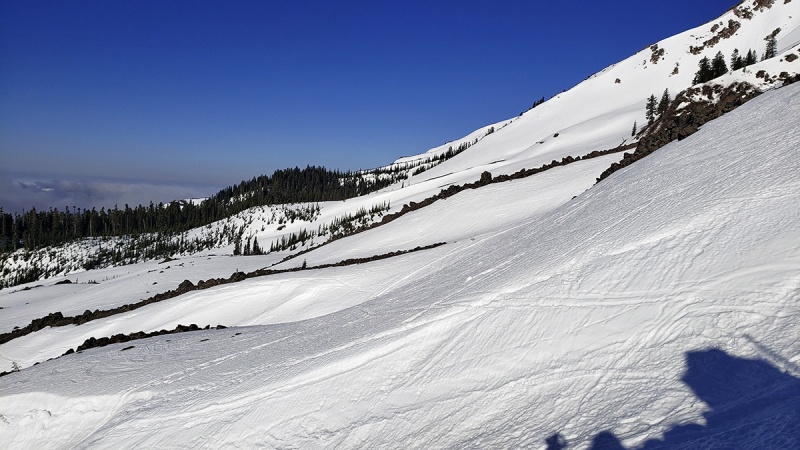 Looking back at the terrain below with clouds finally lifting. This is at about 5,000ft in elevation. The rock rib is on the left in the first photo, which helps define the edge of the route coming out of the forest below. It would have been nice to know this climbing up to help with orientation, but nonetheless after some trial and error you can find your way up. 
The rock rib to the left lower part of pic 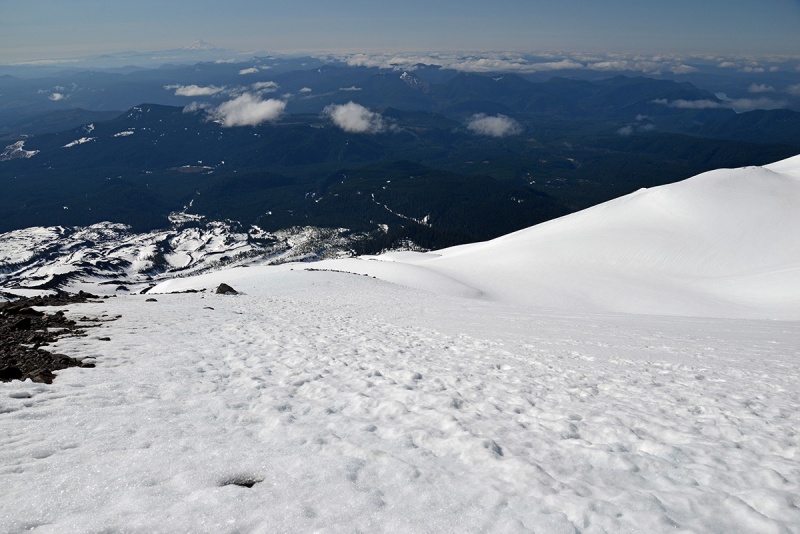 Another view of mighty Mount Hood, Wy’east watching over Loowit covered in her white coat. 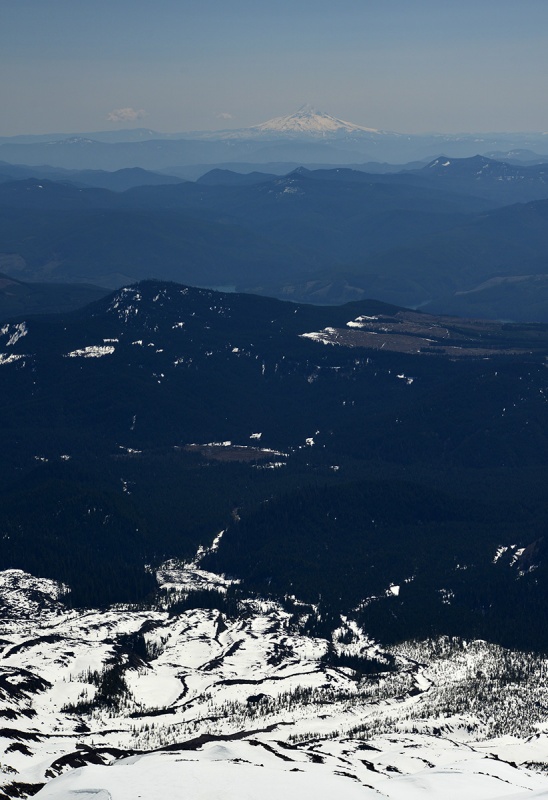 A stunning view of Mount Adams in early morning light with the flanks of Mount Saint Helens in the foreground, as you continue to climb higher. 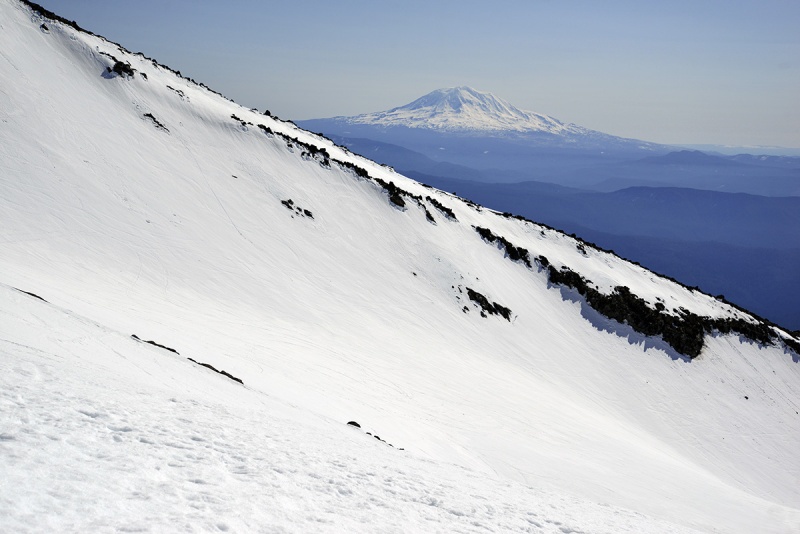 Two other climbers shown for scale further up, sky darker blue now. This is an amazing place. The wind was picking up here and I was waffling about taking off my softshell, but the wind pretty effectively cut through anything fleece or down so I left the softshell on, despite getting a bit warm underneath with the constant climbing up as the sun rose higher, it was too cold without it. 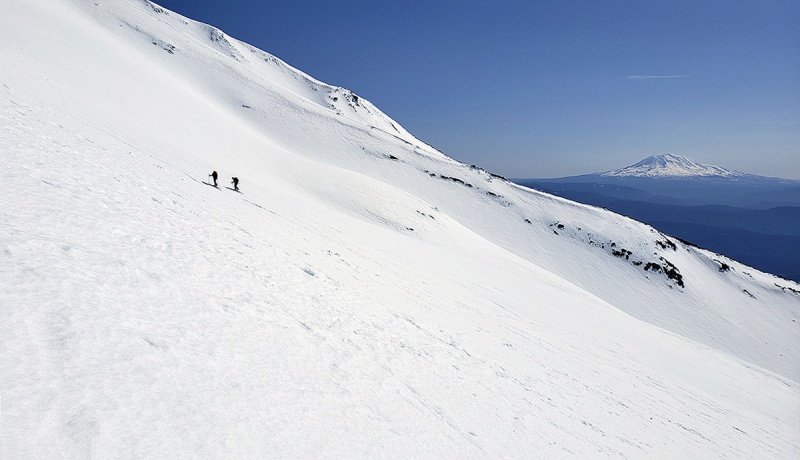 A stunning white winter (Spring) wonderland landscape unfolds as you climb higher. This is where your cardio you’ve been doing starts to pay off. I did see some cracks in the snow, but depending on where they are, you probably cannot characterize them as crevasses since this route really doesn’t cross a glacier except possibly near the last 1,000 vertical feet.. 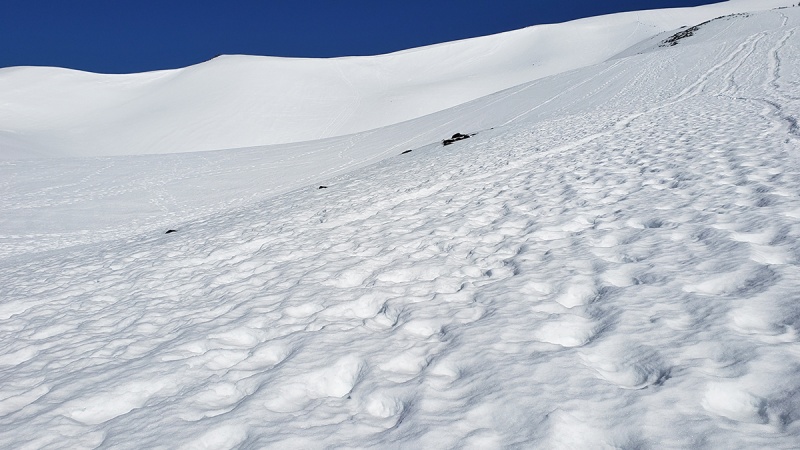 In the shot above you can see some glissade tracks. Some of these veer off too far west, so just remember that on the descent. Skies were bluebird now, though windy. 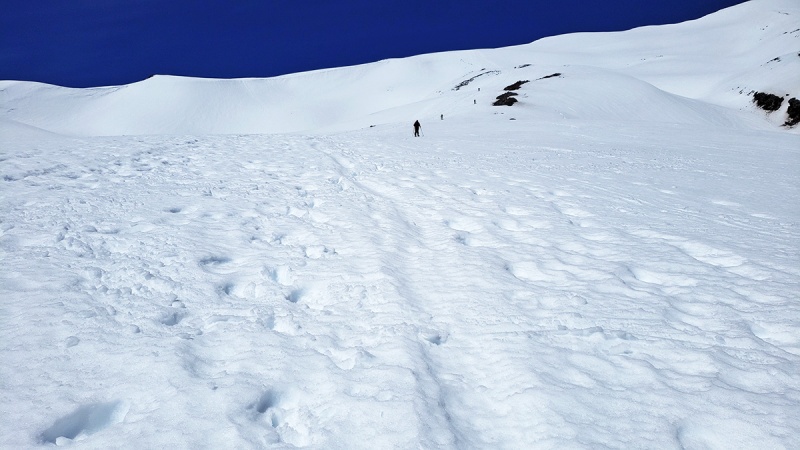
The climb up the marshmallow white flanks of the mountain felt pure, one of those rare days when everything felt good, temperature was brisk but skies now clear, there is no trail so you make your own way. The nice thing about climbing in the snow is that you’re not contributing to any trail deterioration nor erosion on the route. 
Remote... 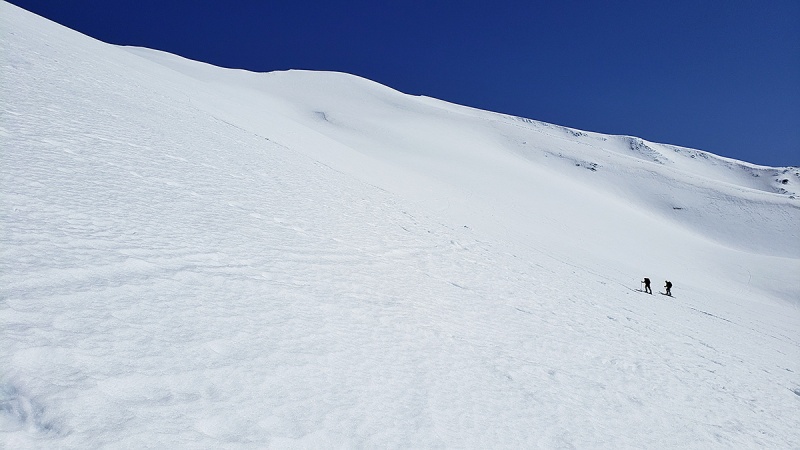 Axe in hand, footing was stable and secure in the early morning still-firm snow, the snow was perfect for crampons to bite into. It was like a steady six hour workout on a snowy stairmaster surrounded by awesome scenery, a walking meditation of rest stepping and French technique as I made my way up the steep flanks of the famous volcano I've read about since I was in grade school. I really loved the contrast of pure white and pure blue.  The slope was clean and pure, as white as, well, the driven snow. Moderately steep, 30 to 35 degrees higher up, smooth and continuous. You feel freedom when climbing on snow, no trail, no defined route, just make your way up the best way you feel is right. As scenic as this was, it was a bit of an endless slog getting up, but then again it’s not supposed to be easy. The last slope before reaching the summit crater rim, a team of five climbers comes into view now. This is around where the winter route joins the summer route, though its not clear where, maybe there is a marker under the snow that melts out later  The slope here gets to about 35+ degrees and when the snow was firm, an ice axe comes in handy for security. The climb up across various snow fields does seem to last forever. As the morning progressed, the snow was softening but not yet to the point I was slipping. The below shot shows about the only people I saw on the climb up all in one pic. On the descent there were many more coming up. 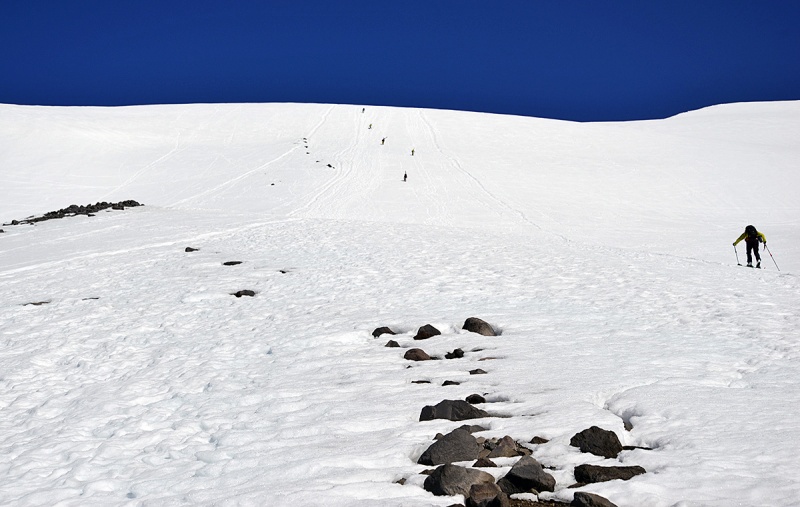 Getting closer, though still seems far away… 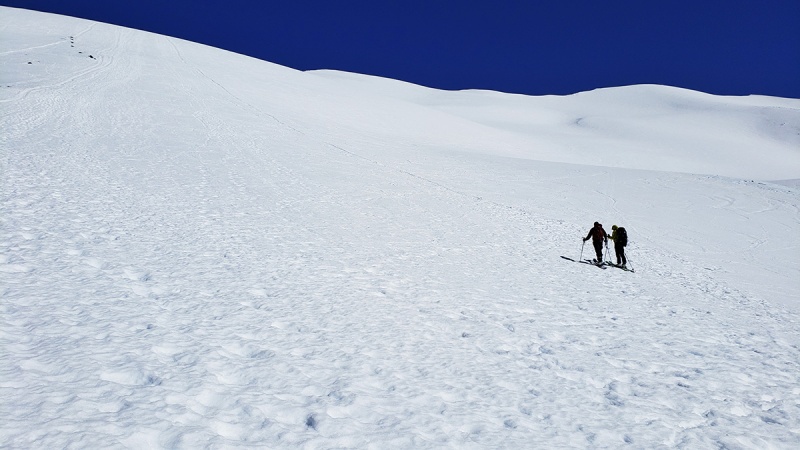 That penultimate slope before the summit is steeper than the last few hundred yards After reaching the end of that steep section, you turn more east and up the final portion to the crater rim, where at least today I followed a glissade track up. I wasn’t sure this was the last part, but when I saw in the distance a couple of people lingering on what appeared to be the top, assumed it was the top, and it was. Note climbers near the top, right in pic below.  After that last slope and about 20 minutes, the summit crater comes into view, although you cannot tell it’s the summit until literally you are on top due to the sloping of the snow/crater rim. Topping out on the summit crater rim! 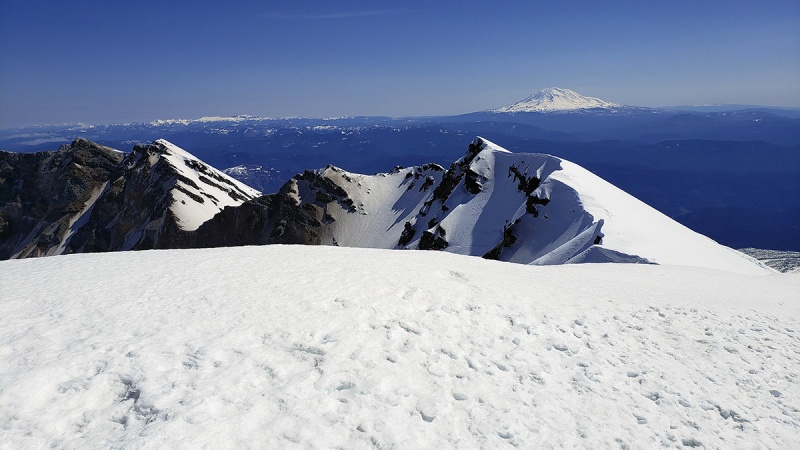 The views from the summit are amazing with a volcano wonderland opening up in front of you similar to the view from Mount Hood, with views Hood itself, Rainier, Adams and a couple of mirror like lakes below the north crater of the mountain. Amazing view of Mount Rainer, Windy Ridge and Spirit Lake.
Sounds corny, but it was a long awaited dream come true to be here.
Close ups of the snow capped crater rim, note cornices and cracks around the edge. It’s a good idea to stay back from the edge here. Mount Adams rising in the distance.
Before you get too complacent, this isn’t the high point. To reach the high point, you need to make a 90 degree turn left to navigate around the crater for another quarter mile or so up and down a false summit to the true “summit”. Inside the crater edge
As I walk to the true highpoint, I walked about 20 feet from the edge, didn’t want to move too much closer given the unstable snow. In a stunning moment, the true high point comes into view with its corniced ridgeline and jagged edges. To think about where I am standing and what the scene was like 39 years ago when this erupted is mind boggling.
As you reach the second point, false summit of sorts on the crater rim, you unfortunately need to drop down and lose at least a 100-150 feet then traverse a fairly steep slope before getting to the top of the high point. The snow was still firm this morning though there was some foot prints there along the lower left of the image above. I took these two shots on the return.
The slope is maybe 35 degrees and beneath this section, ranout a ways down so a slip here would mean a long slide and while there were no cliffs or rocks underneath, a fall here wouldn’t be fun. You’d also wind up pretty far west of the route back. Looking back at the “false summit” on the rim, for scale, look closely you will see a climber in orange jacket on top. What a cool place.
Almost there, a little more...
Ice, snow and rime covered crater rocks that line the crater’s edge
Taken from the “summit” high point on the crater rim, looking back towards Mount Adams Looking back towards the top out point you can see a couple of people on that point for scale; this is really a huge place and the crater is enormous.
Given the cornice and unstable edge, sadly I was not able to safely peer into the crater to check out the lava dome, whaleback and new glacier inside the crater. I was thinking of bringing a rope and setting an anchor well back of the cornice and then do it that way, but figured that wasn’t a great idea…. so will have to wait and see if I can ever come back here and climb this when there is no snow. This glacier inside the crater is called the Tulutson Glacier or simply just the Crater Glacier is very young having only formed after 1980 and is considered one of the youngest glaciers on the planet. The glacier has grown quickly thanks to the prodigious snowfall the mountain receives, its being sheltered from sunlight much of the day and the avalanching snow from the rim walls adding to its volume. On the return, regaining that hard fought lost elevation back to the false summit. Take care here walking back as it’s a bit exposed and stay back from the edge towards the crater itself. You can see another climber on the top in the second pic below for scale of this place. This section was pretty icy and my axe didn't really bite in well.
Back near the dramatic top out point of the crater rim, showing the steep snowy corniced rim, high point in the distance, right center of photo.
Taking a break for a few minutes to take it all, I gathered my stuff took some pics and headed back down. The descent back down was now on much softer snow and once off the upper reaches of the mountain which were a bit firmer and steeper, crampons were probably not needed as a good plunge step would get you down. Glissading seems to be the preferred descent on the longer sections which worked well! A cool ravine revealing volcanic terrain underneath the snow.
Glissading down was fun. The snow coming down was mostly softer and the speed wasn’t too fast, though I did not glissade down the two or three steeper slopes as I felt I might pick up too much speed to be able to control myself as the snow in those spots was more firm. One word of caution if you opt to follow the glissade tracks down; they all seem to veer off too much to the right (west) on the descent, so pay attention as you're sliding down otherwise you're likely to careen past the right exit spot and wind up too far west and too low down and will have to re- climb up what you just glissaded down and then determine the best spot to turn back east to ensure you're on the right track to get back to the winter trailhead. Nice view looking back at Mount Saint Helens and near full snow coverage on south face. Note ski tracks.
In lower sections the snow was definitely soft. As in certain parts on the ascent, there were boot prints in many directions and even with the prints you’ll posthole a bit here and there. Snowshoes probably would help here if you don’t mind carrying them up or stashing them someplace. Parting shot of Mount Saint Helens as viewed from afar from Route 504, showing the entire north side of the mountain now gone and the valley that the eruption, the massive landslide and lahars transformed into its current state.
While its 1,300 feet shorter than 1980, it still gives you 6,000 vertical feet of gain from the winter route and makes a fine ascent. For what it’s worth, at the crater high point, my altimeter read closer to the lower reading of 8,330ft that the more recent USGS survey recorded. I highly recommend this mountain to climb. Mt Saint Helens often gets overlooked in favor of its nearby taller volcanic brethren Rainier, Adams, Hood and Baker all of which have more technical routes. However, this is really a wonderful snow climb with minimal if any crevasse risk and if timed right, minimal avalanche risk. Thumbnails for uploaded photos (click to open slideshow): ")
")
")
")
")
")
")
")
")
")
")
")
")
")
")
")
")
")
")
")
")
")
")
")
")
")
")
")
")
")
")
")
")
")
")
")
")
")
")
")
")
")
")
")
")
")
|
| Comments or Questions | ||||||||||||||||||
|---|---|---|---|---|---|---|---|---|---|---|---|---|---|---|---|---|---|---|
|
Caution: The information contained in this report may not be accurate and should not be the only resource used in preparation for your climb. Failure to have the necessary experience, physical conditioning, supplies or equipment can result in injury or death. 14ers.com and the author(s) of this report provide no warranties, either express or implied, that the information provided is accurate or reliable. By using the information provided, you agree to indemnify and hold harmless 14ers.com and the report author(s) with respect to any claims and demands against them, including any attorney fees and expenses. Please read the 14ers.com Safety and Disclaimer pages for more information.
Please respect private property: 14ers.com supports the rights of private landowners to determine how and by whom their land will be used. In Colorado, it is your responsibility to determine if land is private and to obtain the appropriate permission before entering the property.


