| Report Type | Full |
| Peak(s) |
Babcock Peak - 13,161 feet |
| Date Posted | 09/26/2018 |
| Modified | 09/28/2018 |
| Date Climbed | 09/20/2018 |
| Author | Chicago Transplant |
| Gully Slot Machine |
|---|
|
Gully Slot Machine: Finding the Jackpot on Babcock Peak Babcock Peak (13,180'): 499th Highest - 9/20/18 6.25 miles RT; 4000' elevation gain Introduction We first found ourselves in the La Plata's outside of Durango last September, climbing Lavender and Moss from Tomahawk Basin. We had hoped to climb Babcock that day as well but I guess it was a good snow year because the couloir used to access the peak from that side still had snow. We, however, did not have snow gear. From the drive in the south facing couloir used from Boren Creek looked snowed in too. We really enjoyed our Lavender day, but from a driving standpoint Babcock was a sting of an orphan. At least we had future Weminuche plans that would bring us through Durango, and planned to tack on a Babcock day trip next time we found ourselves down that way. Having packed out of Moon Lake and taken a rest day in Durango, last Thursday was time to give Babcock another round. (Note: Annotated route photos at the end if you want that level of detail, I kept them out of the body as some people like a little more exploration) The Trailhead From Durango this is an easy drive, you follow US 160 west out of town and turn north on La Plata 124 just past the Hesperus (town not peak) turn-off onto a paved road signed for La Plata River Road. As you near the end of the pavement you start to see your objective, from here it is a good idea to take a moment to pull over and study the peak. There are 3 major summits and multiple gullies going in between them. Finding the right summit and gully are a challenge up close, so this distant "lay of the land" is a big help on summit day. The middle summit is highest, and there is a narrow slot feature on the west summit that is a good landmark for orientation later when counting gullies. Of note, there is also a fourth summit, a much lower sharkstooth in the saddle. We found a dispersed site at La Plata City camping area (free, there are also paid campgrounds on the road. Camping in designated areas only) and settled in for the night. In the morning we made the short drive to the base of the Boren Creek road, the bridge over Boren Creek is signed for the creek, the road is just after but I don't remember the FS # for the road. Just past it is a small parking area with no camping signs. Day parking seems okay, we had no issues. This is the trailhead. If you really wanted to drive up the road you need 4x4, high clearance, good tires (the rocks looked sharp) and a panache for really narrow steep roads with very limited pullouts. The hike from the bottom is only 6.25 miles round trip, so there is not really much of a reason to drive the road to shorten your hike, in my opinion. Just seems more trouble and you can walk almost as fast. The Approach Hike up the rocky road past some private property where it will steepen after a switchback. There were a lot of cows and cow pies on this road when we hiked it. Cross Shaw Gulch, the water was low when we hiked so it was an easy crossing but may be more complicated in spring run-off? The road begins to switchback and the grade is not as severe. About halfway up the road you will have to go through a wired gate. You will get a few glimpses of the peak along the way, again pay attention to the summit area for orientation. 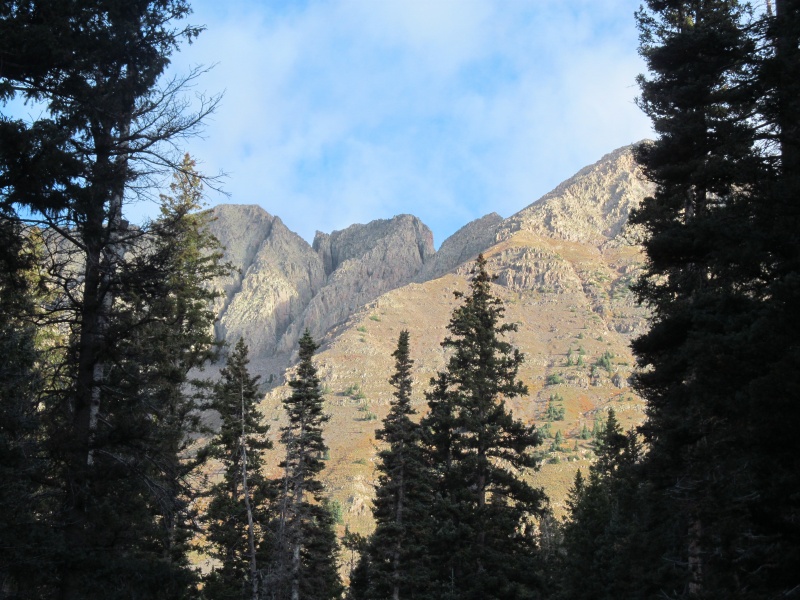 Near 10,800' the last couple of switchbacks lead to a more open forest and some great views of the upper basin and the road ends in a washout near 11,200'. Continue on the old road grade past this to a former mine site at just over 11,200'. As Gerry Roach might say, the introduction is over. 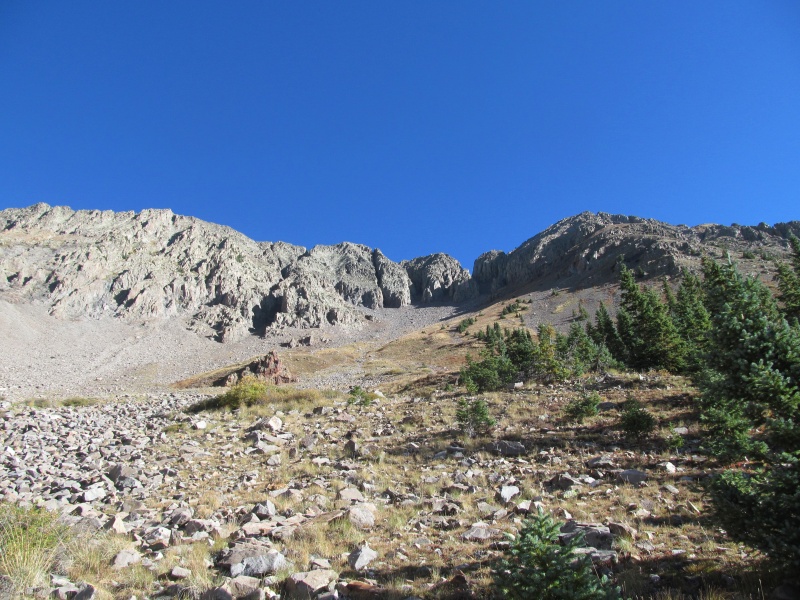 The Climb The summit is only about a half mile away line of site, but it is 2000' above you. Yes, its steep. This is a good place to take a break, soak in the views, have a snack, and study the upper mountain's couloirs and strategize your route. As I said earlier, finding the correct summit is the first task, its the middle summit. Remember the thin slot couloir from the road? It leads to the western false summit and is quite obvious from this point. The first major couloir to its right is the one most people use, its the one in Cooper's book and the one in some of the trip reports I have read. This is the couloir to the LEFT of the main summit, there is a dogleg in this couloir and you cannot see the top of it from below. We aimed for that one on our ascent. However, we found a secret exit from the ridge on our descent that went to the couloir to the RIGHT of the middle summit. We think this is the better route. We did not go up this way, however, so the description here is about our experience in the LEFT couloir on our ascent. I will get the other couloir later, but to help you orient see the color coded photos at the end of this report. From the end of the road our recommended (and our descent) couloir is the one with the deepest notch and the most sky visible from below. It has more than one branch at the bottom (AND top), so pay attention to your entry! As you get closer to it you might end up on the wrong side of a large rocky mass in the bottom of the couloir, this mass creates an extra couloir that you don't see from the road. Confused yet? Welcome to the Babcock Slot Machine. So now that we cleared all that up (or not?), start up the steep slopes using the grass to your greatest advantage possible to minimize time on talus. Where the talus begins in earnest, it was surprisingly stable but that doesn't mean its not going to move or settle. In general the apron talus is good, but ankle rollers await if you get complacent.  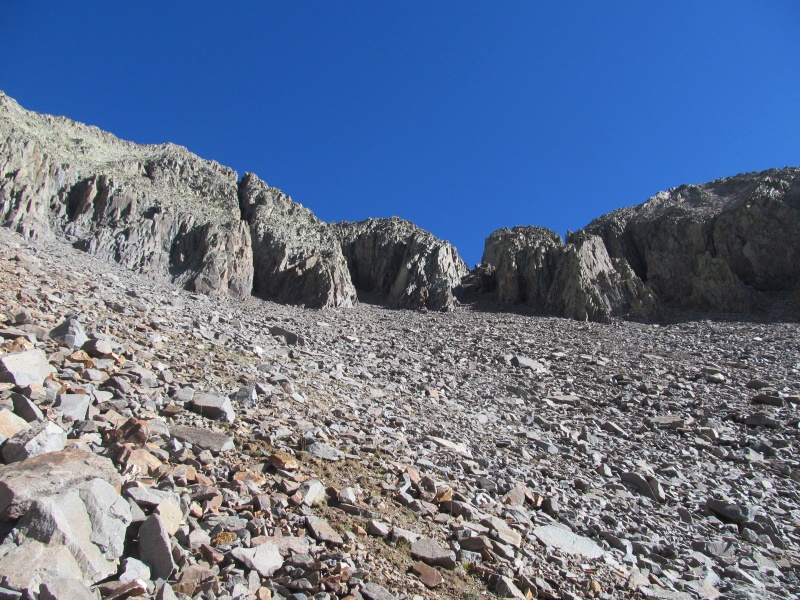 As we were aiming for the left couloir, we trended to the left side and ended up aiming almost for the slot couloir and a small rocky outcrop below it off to the side of the talus field. We then traversed the base of the cliffs from the slot couloir into our chosen ascent and ditched our poles against the cliff at the base. Keep in mind, this couloir is the one previously called "correct", but we think we found a better route so our approach to this couloir is more for Trip Report experience at this point than an actual route suggestion. You will most likely want to follow our descent in reverse. 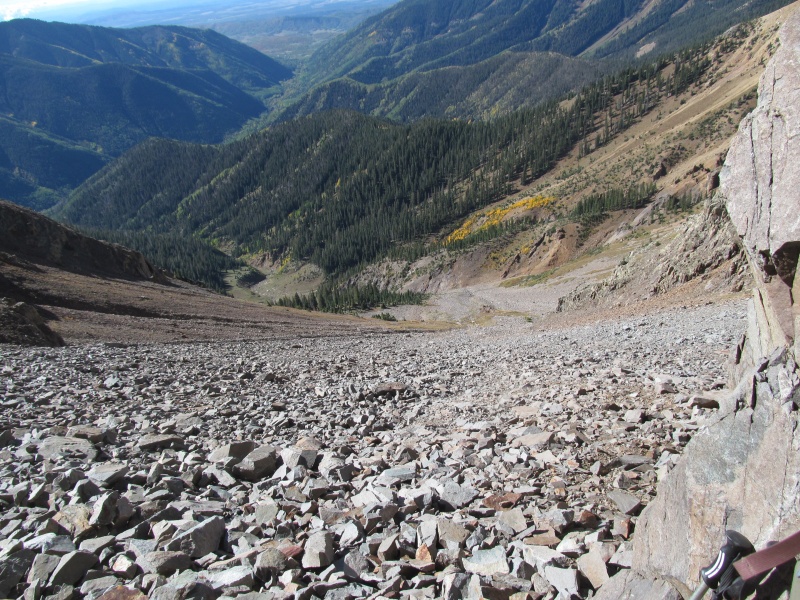 The couloir is not much steeper than the apron, and was reasonable quality but a little more loose. To mitigate loose rock we hugged the cliffs to use the ledges and edges for solid holds when possible while walking on the rubble. The couloir is really cool, the steep walls on either side are like a cathedral, this would be a fun snow climb. 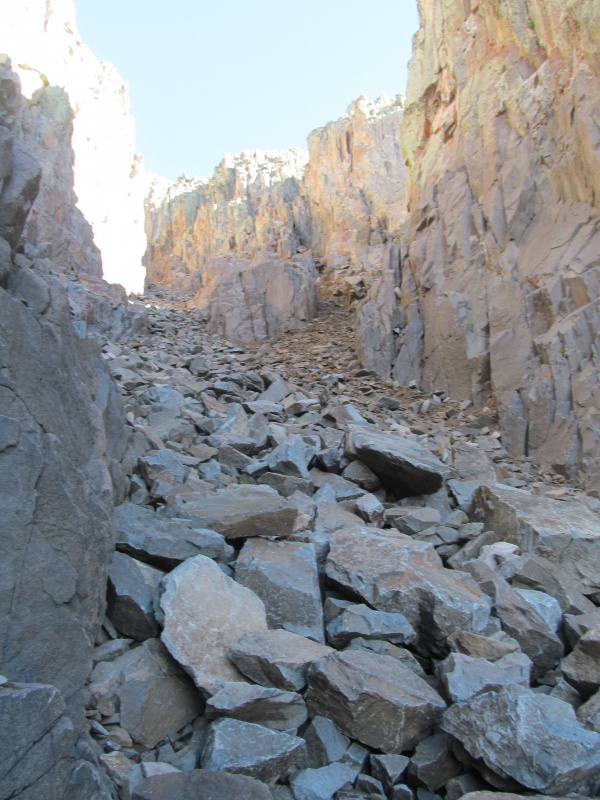 Where to exit to the summit tower is the next challenge. Cooper has the exit near the dogleg, others come over from Tomahawk and have the route descending from the top and finding the exit gully that way. From below, its not so obvious where to exit. The first few slots are too steep and definitely not options, then a rock starts to split the middle of the couloir with a possible exit forming to the right near its top. We go right, but its steep mud (soft from Wednesday's rain, but don't go up this way). If we would have went left we would have been on the usual talus, and had a fairly flat traverse across the top of the rock. You kind of have to be there to orient, but keep in mind, this is not our recommended route so you may never have to deal with this couloir! From here the exit couloir we found was narrow with a chockstone near the top. Some lose rock and mud ensued and we moved in 10-15 foot stages to protect each other from sliding mountain. 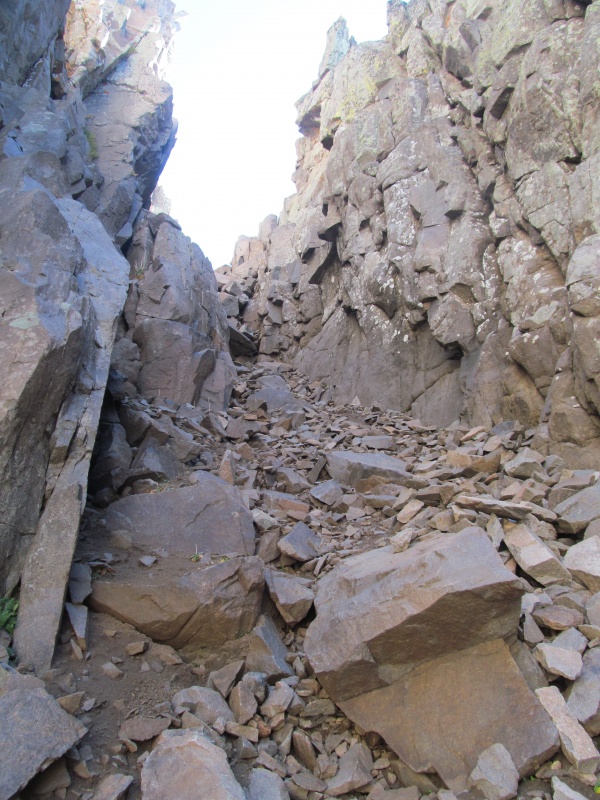 At the chockstone, the direct move over it looked too loose so we went up a 4th or even low 5th wall on the left side of the chockstone with good holds to surmount it. Would have been a tough downclimb with some blind holds, but we felt confident we would be able to downclimb if needed. There may be another exit couloir slightly higher, but we took first available from below. 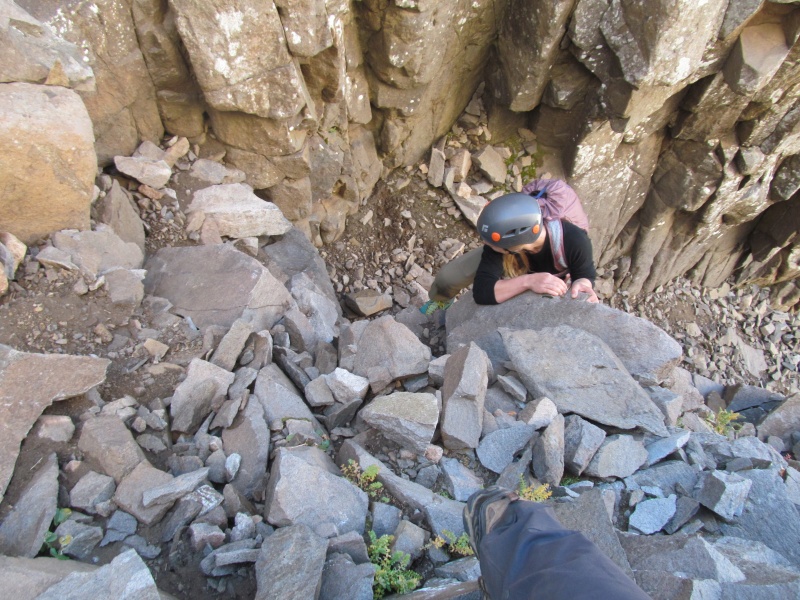 Above this is more loose class 2+ to deposit you on the upper mountain where you get a really cool view of the sharkstooth and eastern summit. 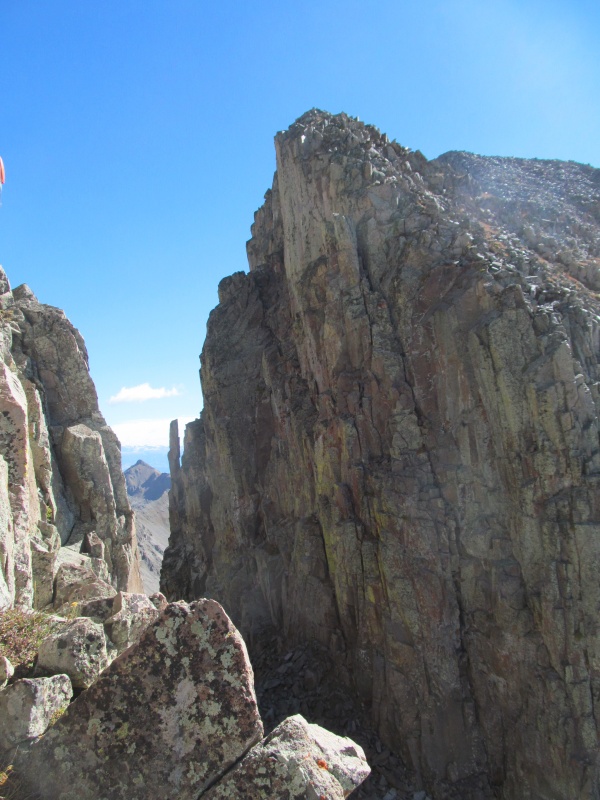 On our descent before we got back to this point is where we found our secret exit, if you climb the RIGHT couloir, our recommended route, you will top out nearly in the same spot we did so the scrambling description that follows is back "on route". Now the fun begins, and I am not being sarcastic. The upper mountain is actually a really enjoyable scramble on good rock, its the payout from the slot machine down lower. Rachael did all the routefinding, I was the "lucky" one who got to lead the gully. She did a great job finding a fun, solid and very aesthetic route. A lot of sustained class 3 and not much rubble with some steep grass mixed in. Just keep going up and having fun!  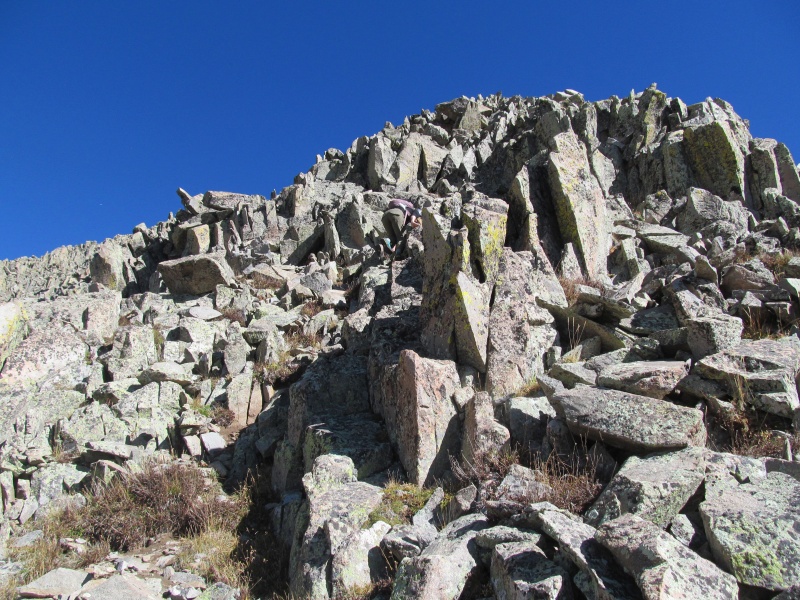 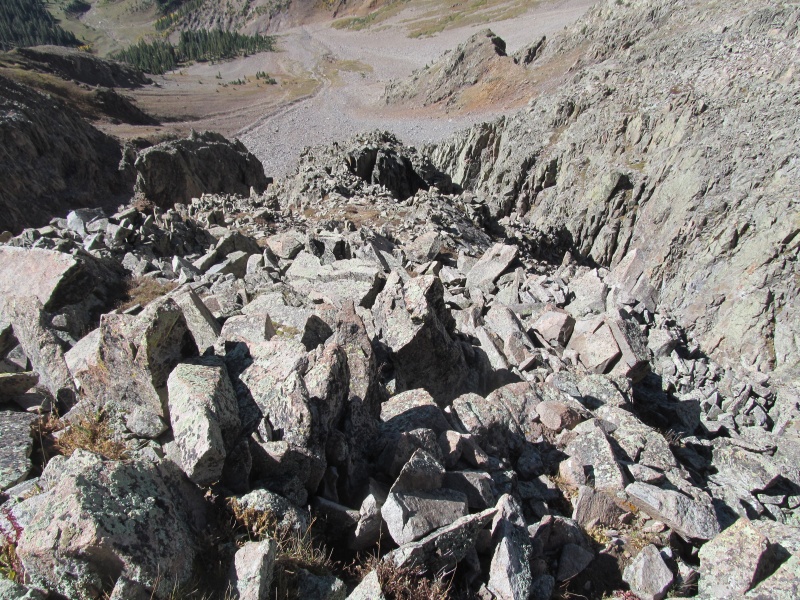 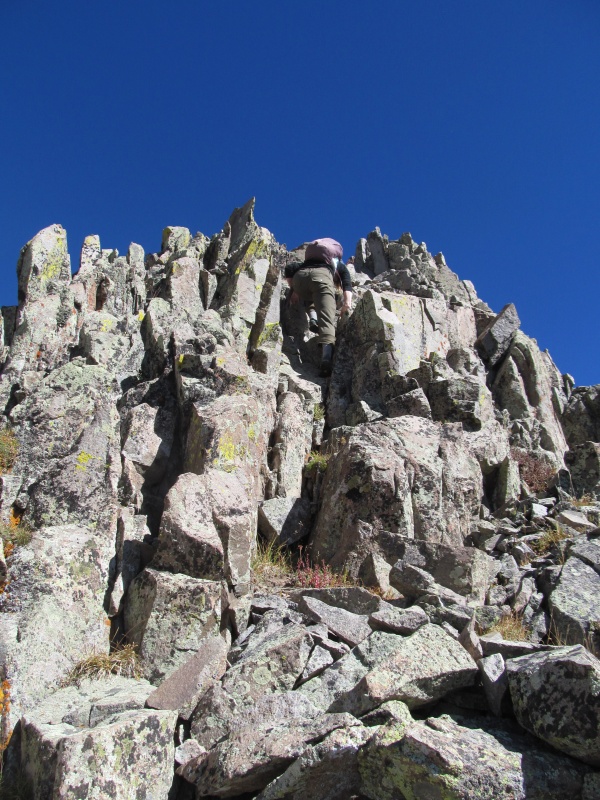 Eventually we crested a false summit onto a narrower summit ridge and turned west. Here a short exposed section was bypassed on the right (north) before rejoining the crest and topping out on some fun class 3 moves. 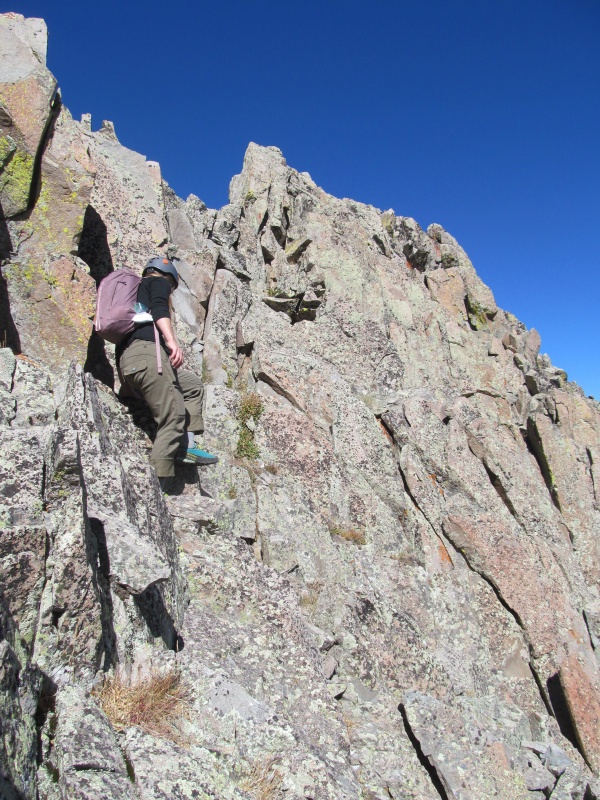 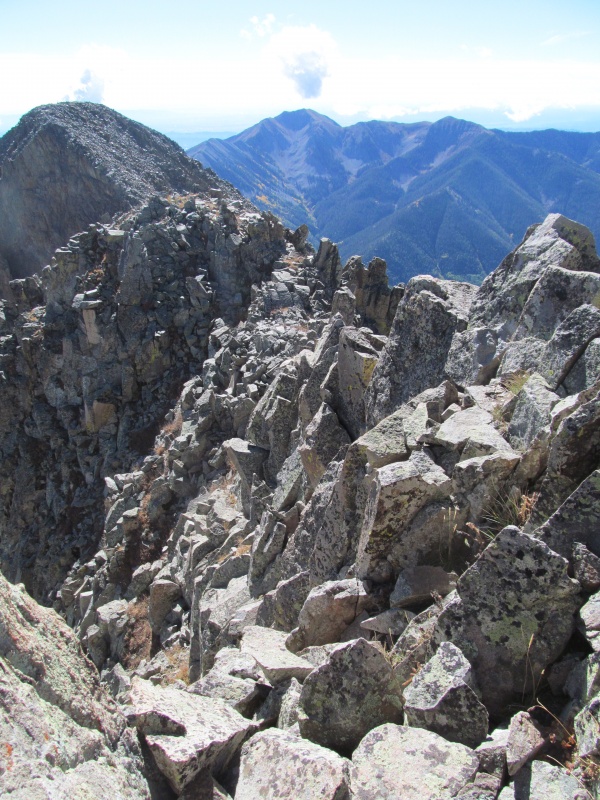 The maps have the eastern summit (13,149) as the summit, but it is clearly a good bit lower, the middle is definitely the top! Great views abound, and we spied snow on the peaks of the Weminuche. From the summit, its pretty clear that you are on the highest one. What a great little peak! 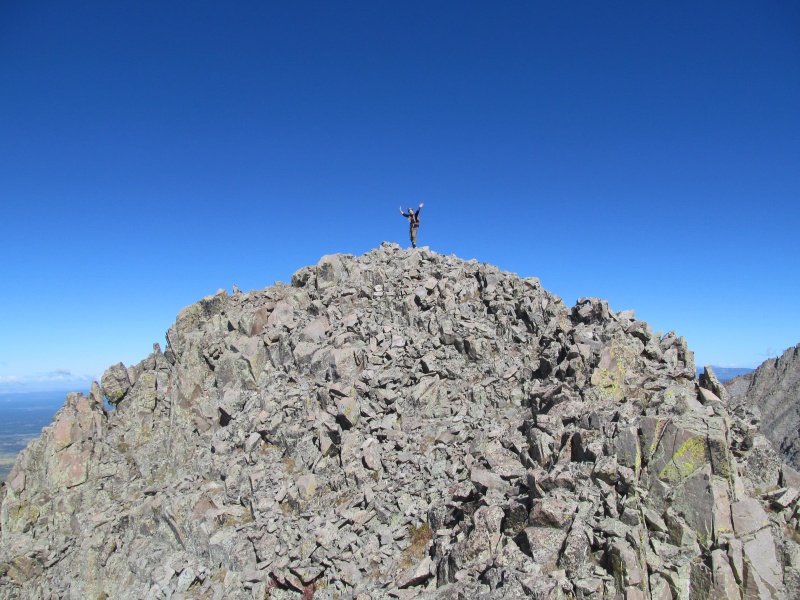 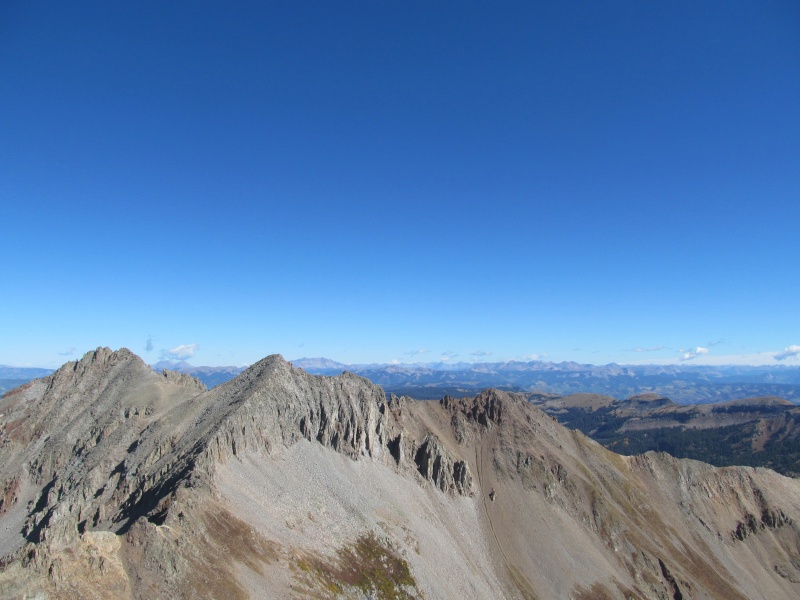 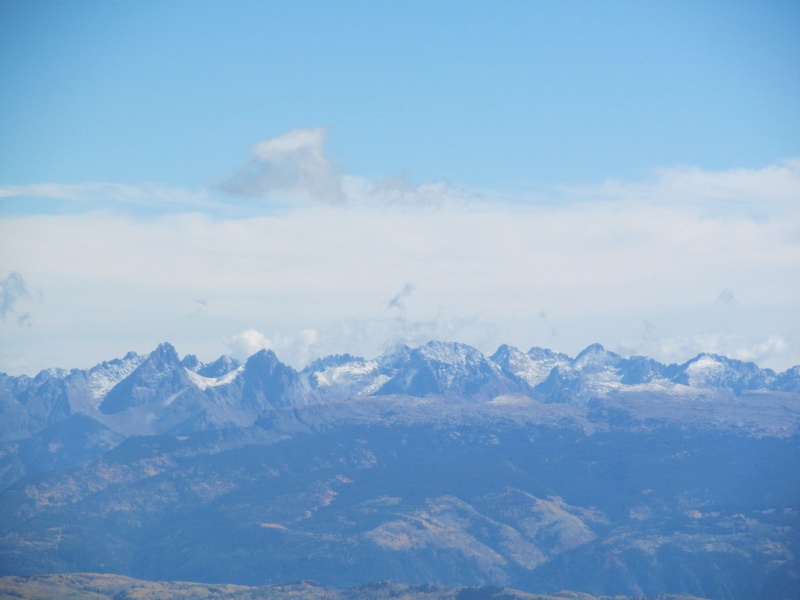 The Descent We retraced our steps back off the summit and across the exposed ridge to the false summit, then descended more or less the same fun scramble as our ascent. At one point our scrambling drifted us a little more left (east) of our ascent line on some grassy ledges that were an easier down climb and I caught something out of the corner of my eye. The top of the couloir that goes between the middle and east summit to the west of the sharkstooth feature you saw from the county road 124 drive in. So I decided to take a closer look and peered down the couloir where I could see almost all the way to the bottom.  Far enough anyway to know it was a clean couloir. No cliff bands. Hmm, is there a way in it? There is a fairly wide talus ledge that looks like it might get in it but I didn't have a complete view of it so went exploring. Jackpot! I let Rachael know that we have our exit, a class 2+ route down the so-called "Wrong" couloir from our beta. We cross the talus ledge towards a needle of rock in the saddle with the sharkstooth and have a little bit of loose rock (2+) to downclimb over a small ledge to enter. 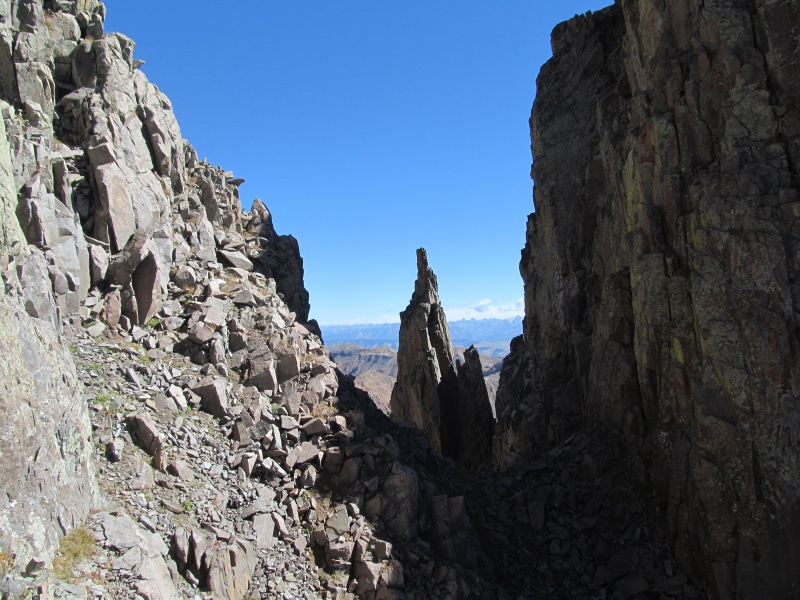 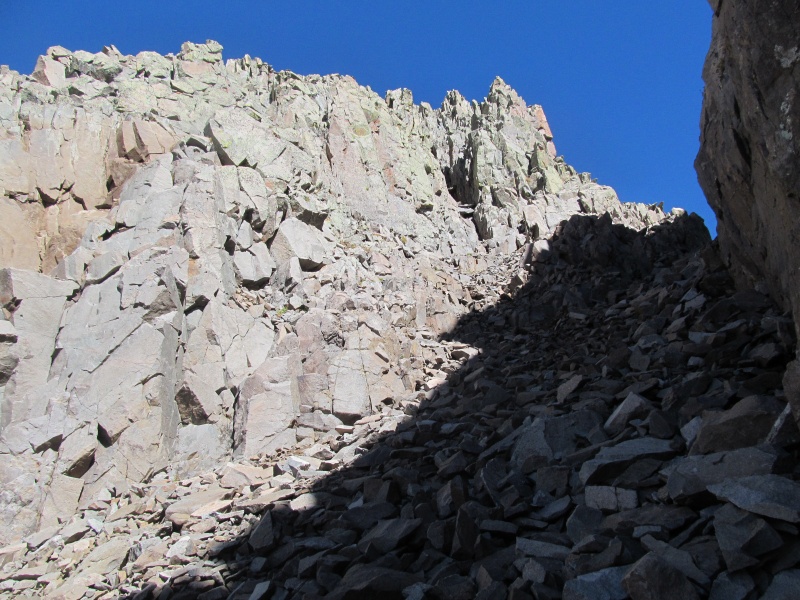 Looks like a straight shot down. Near the bottom there is that large mass of rock splitting the base, so we decide to descend by hugging the left (east) wall initially then cross over to the right side lower down. As such, I did not get a look at what the gully on the opposite side of this mass may hold. Along the side of the cliffs we go, the rock quality is manageable, at least as good as the non-mud parts of the other gully. 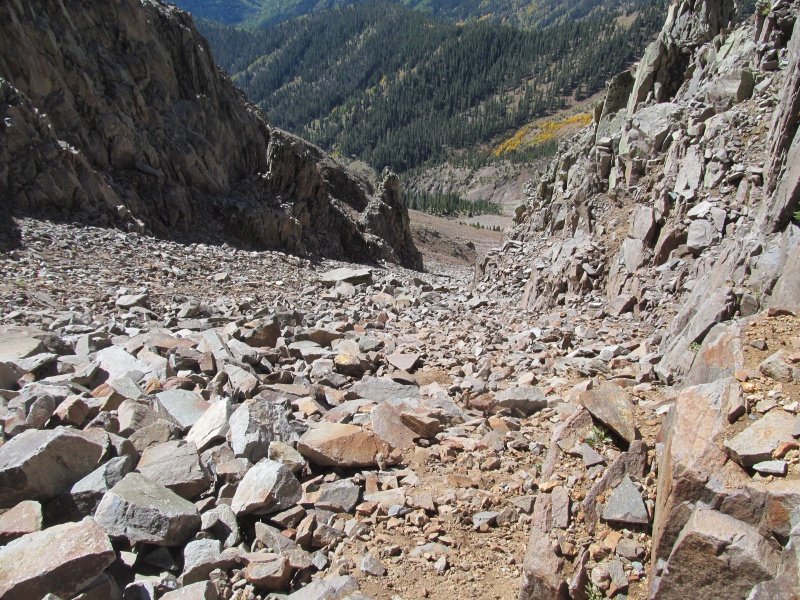 The only problem is the poles are in the bottom of the other gully, so at the bottom I traverse across the base of the rocky mass, cross another small gully, then cross our ascent gully and pick up our poles while Rachael heads straight down to the grass. We meet up in the grass and exit the rest of the way. Hit the old mine road and enjoy the beautiful sunshine as we stroll out past some bovine friends to our car. 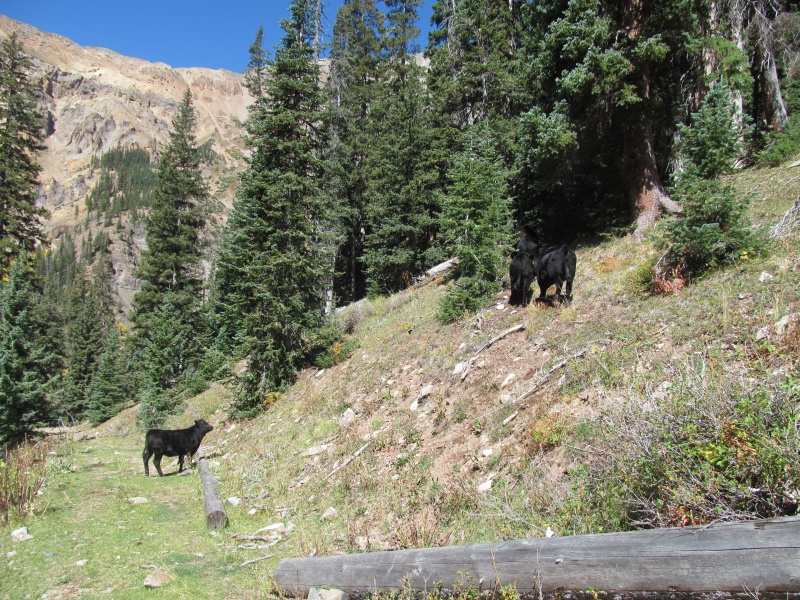 Route Notes Okay, so as you may have figured out the gully network on this peak is confusing! From the base of the cliffs/gully system you really can't tell what is what or which summit it goes to. A map would be completely useless, as the gullies don't even show up in the topo. The only way to explain it is with the below photos. One is a zoom shot from the approach road (County 124), one is a zoom shot from the Boren Creek Road, and the third is a zoom shot from the mine site at the end of Boren Creek Road. You will see a sharkstooth in the saddle between the eastern and middle summits, you want the gully that heads towards the base of that sharkstooth and take the left branch as it splits near the top. That is our descent route off the middle summit massif. Honestly its less confusing in person, the problem with photos is that they are all taken at different elevations and the character of the base of each gully changes as you ascend. The key is really to identify your gully from the end of the Boren Creek Road, and keep looking up every couple of minutes on your way up the slope to not lose it. The peak is actually really fun, it can have a bit of reputation, but if you stay on route the gullies work, and the scrambling above is really a gem. Super fun peak, we would repeat it all the time if we lived in Durango. The couloirs are probably some great spring skiing too! Annotated route photos below to help identify the correct summit and gully. 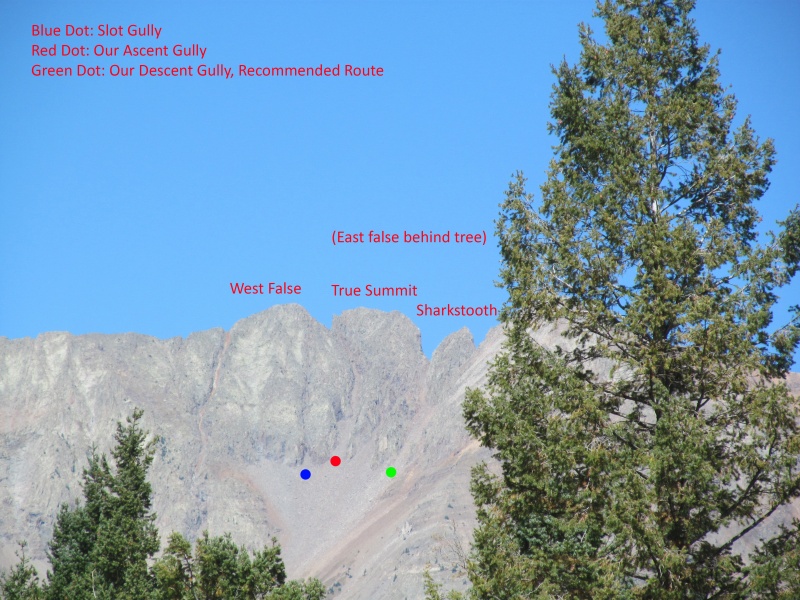 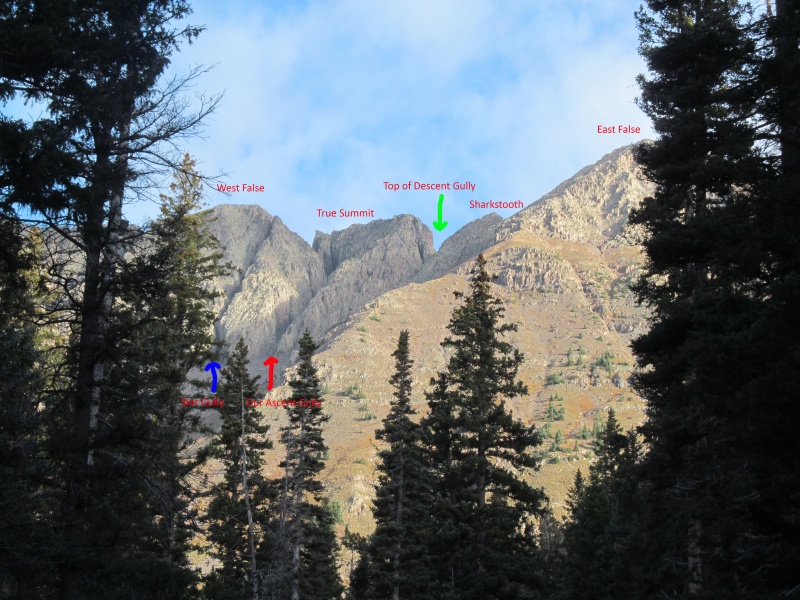 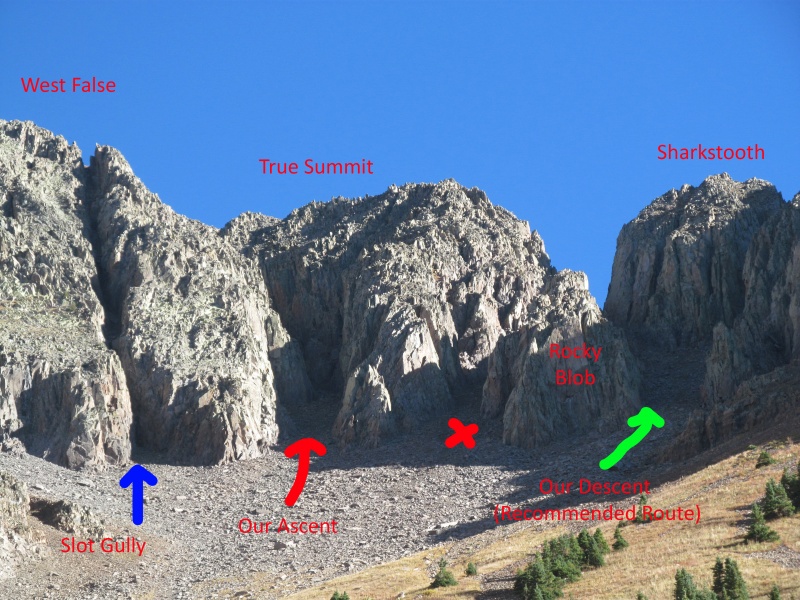 Thumbnails for uploaded photos (click to open slideshow): ")
")
")
")
")
")
")
")
")
")
")
")
")
")
")
")
")
")
")
")
")
")
")
")
")
")
|
| Comments or Questions | ||||||||||||
|---|---|---|---|---|---|---|---|---|---|---|---|---|
|
Caution: The information contained in this report may not be accurate and should not be the only resource used in preparation for your climb. Failure to have the necessary experience, physical conditioning, supplies or equipment can result in injury or death. 14ers.com and the author(s) of this report provide no warranties, either express or implied, that the information provided is accurate or reliable. By using the information provided, you agree to indemnify and hold harmless 14ers.com and the report author(s) with respect to any claims and demands against them, including any attorney fees and expenses. Please read the 14ers.com Safety and Disclaimer pages for more information.
Please respect private property: 14ers.com supports the rights of private landowners to determine how and by whom their land will be used. In Colorado, it is your responsibility to determine if land is private and to obtain the appropriate permission before entering the property.