| Report Type | Full |
| Peak(s) |
Tenmile Traverse - 7342 |
| Date Posted | 07/20/2018 |
| Modified | 07/21/2018 |
| Date Climbed | 07/17/2018 |
| Author | CHWitte |
| Additional Members | Markwise |
| Tenmile Ten-Mile 10 Mile Traverse Frisco to Breck |
|---|
|
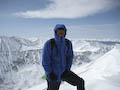
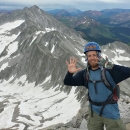
Mount Royal (10,502) Upon completing the 58 14ers in July 2015, my brother, father and I started looking at other hikes in Colorado to tackle and provide us with a new challenge, excitement, and some class 3 mountaineering. We considered several options with the tenmile traverse being one of them. We had hoped to climb Ellingwood Ridge on La Plata but a bad weather report led us away. Earlier in the week my brother and I climbed Quandary via the West ridge and then Elbert with my nephew and father. After climbing Quandary on Saturday, July 14th via the West Ridge, we noticed several folks camping in and around Blue Lakes by the dam. We thought this might be a good place to camp before hitting the trailhead for Mount Royal in Frisco. At the time we were staying in Buena Vista which added an hour plus to our journey. However, we decided to get a good night's sleep in a real bed and leave extra early at around 3:00 AM in order to make our way to Frisco. We arrived around 4:15 AM and were on the trail by 4:30. If you have never been to the Mount Royal trailhead, you might be fooled by some signage. The trailhead is along the bike path with no parking directly in front of it. So, we parked East of the trailhead at a bike path parking lot. In order to get into this parking lot you have to go through a residential neighborhood and past a sign that says, "No Parking in Alley." Well, the parking lot is just through the alley and once in there, the sign says "No overnight parking." Well, it was morning so we were good to go. We hiked the half mile West on the bike path until we made it to the Mount Royal trailhead. We had our headlamps on and used them for around an hour until the some was completely up. Previously, we had hiked Mount Royal around 4-5 times and so we knew the area well. The trail up Mount Royal is actually quite strenuous with long stretches of elevation gain. We made it to the sign where the trail for Royal breaks right and the trail for Peak 1 breaks left/straight. We made the turn left and started heading up Peak 1. Total elevation gain from the parking lot in Frisco to Peak 1 is around 3,700 feet. We started at 9,110 and hiked up to Peak 1 at 12,805. The hike from the parking lot to near the summit of Mount Victoria (11,775 right in front of Peak 1 on the ridge) is strenuous. After you break off from the Mount Royal trail and head South, the trail has a few short switchbacks and pretty much heads right up the ridge. Here is a shot of a steep portion of the trail: 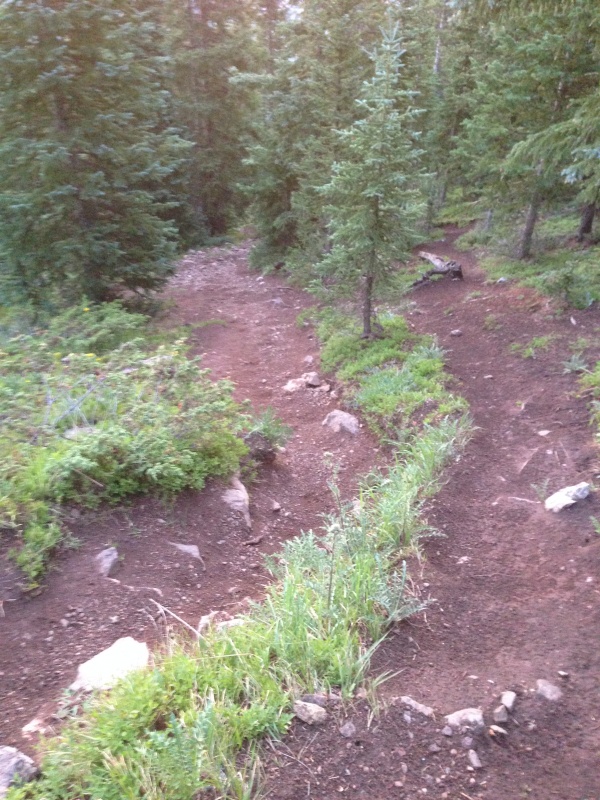 After passing the communications building on the ridge on your way up to Mount Victoria, 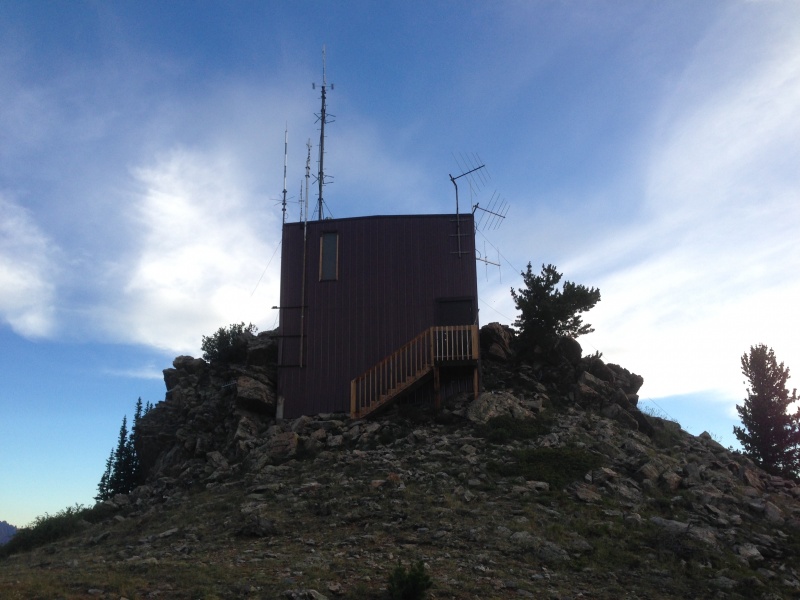 You will now get your first view of Peak 1: 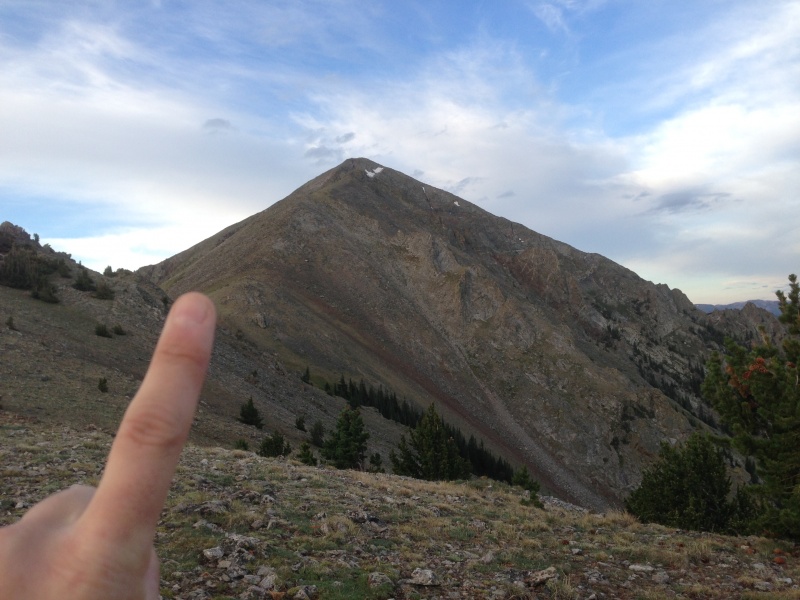 The trek up Peak 1 pretty much has trail the entire way as shown here on the Northeast ridge: 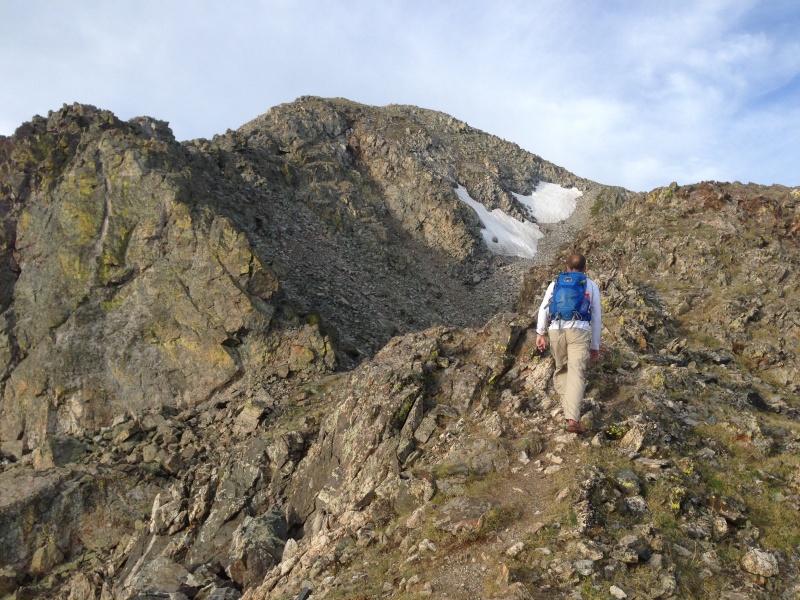 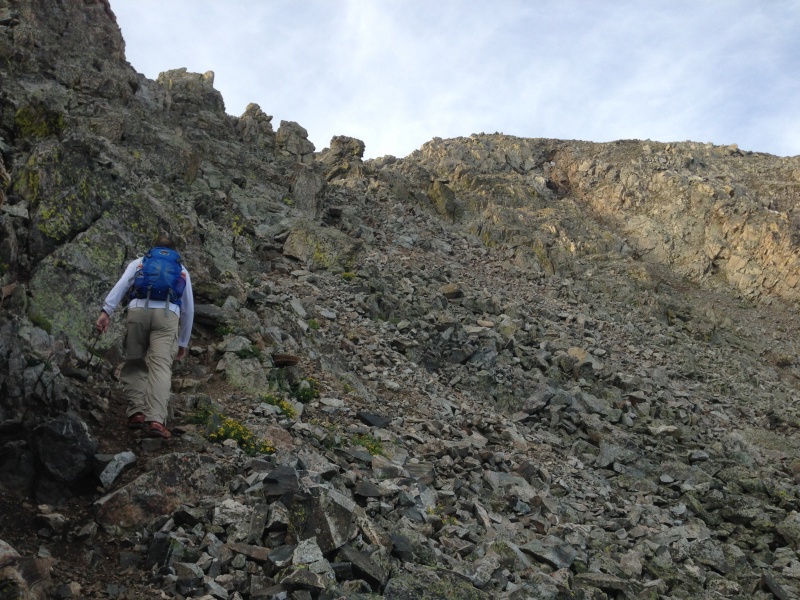 Here is my Peak 1 summit photo looking back at Frisco: 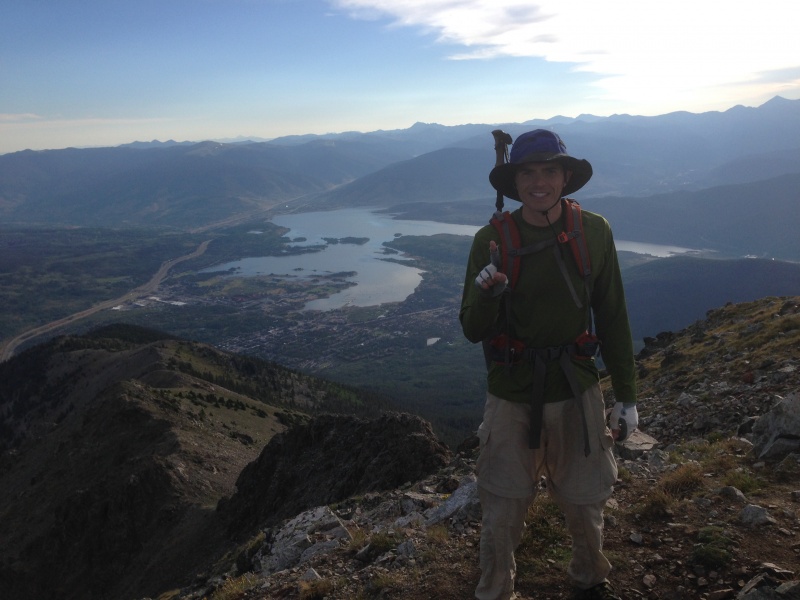 Upon reaching the summit of Peak 1, the mental game of the Tenmile Traverse begins. You just hiked 3,700 feet, normal elevation gain on a typical 14er, to reach the summit. You now have a view of Peak 2 and the traverse looks like it goes on for a long ways: 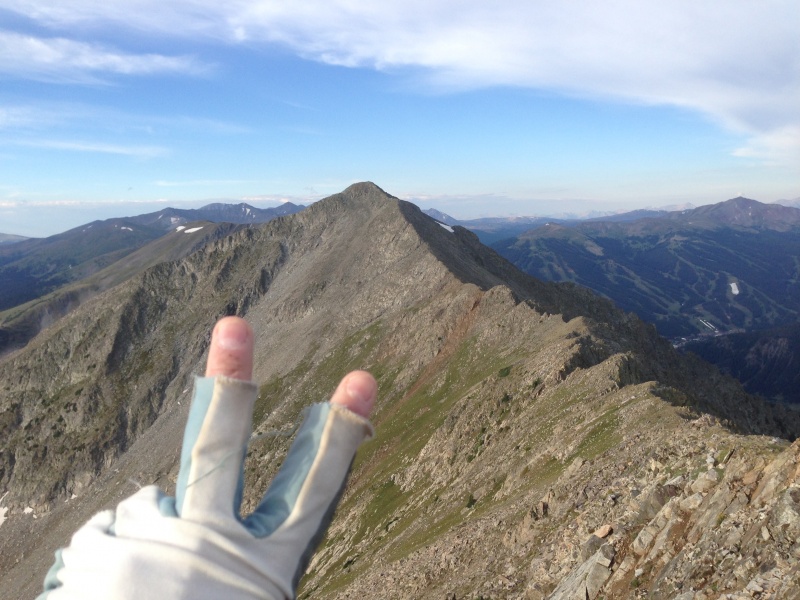 The traverse from Peak 1 to Peak 2 is more class 2+ with nothing major. The ridge so far is a fun hike with pretty good rock: 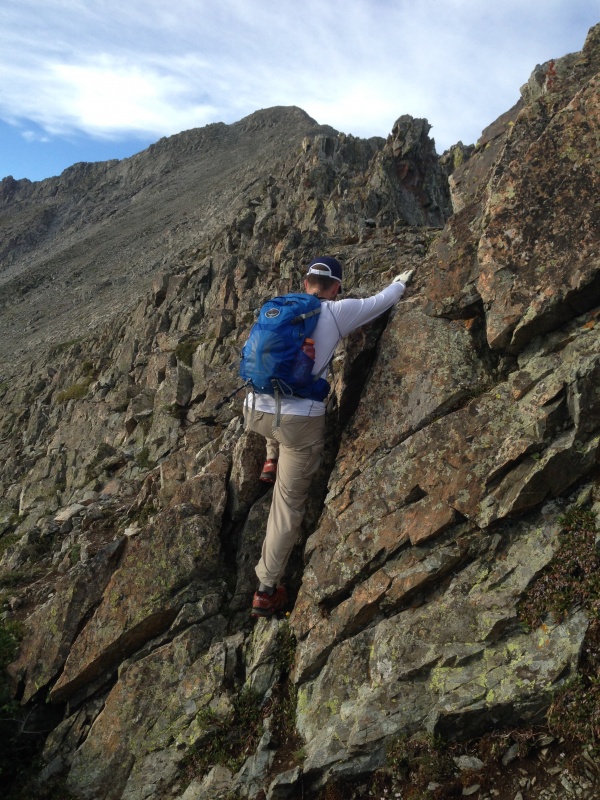 Mark making his way across the ridge from Peak 1 to Peak 2 with a little bit of exposure: 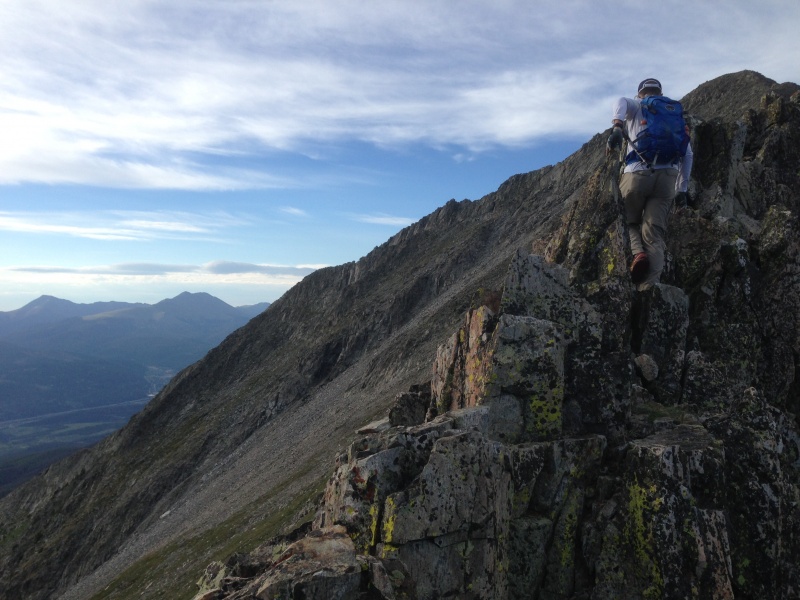 This is me standing on top of Peak 2 looking back at Peak 1: 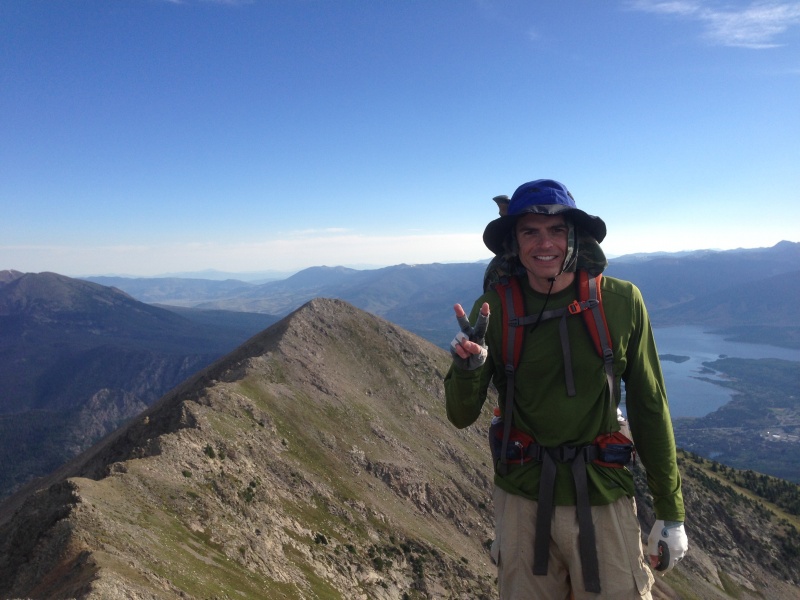 Here is a better shot of the ridge between Peak 1 and Peak 2. I'm taking the picture from the summit of Peak 2: 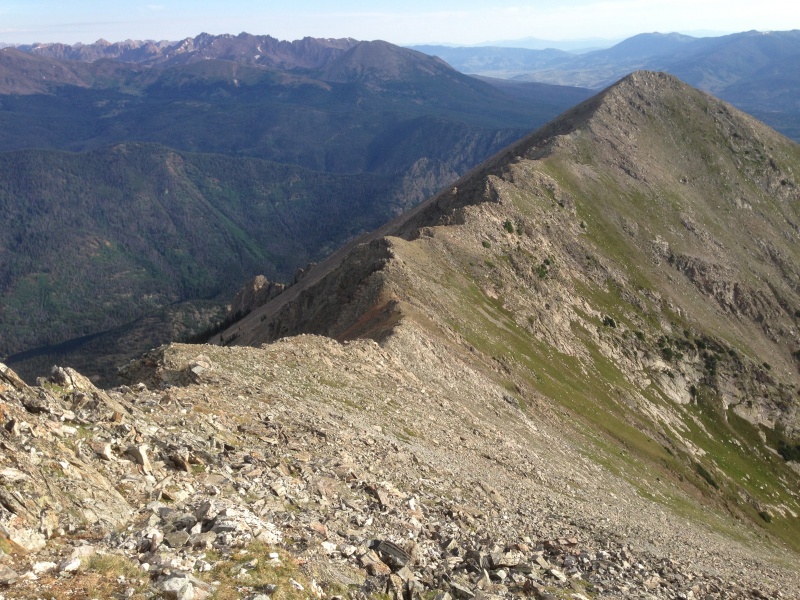 When you turn around, you now see Peak 3: 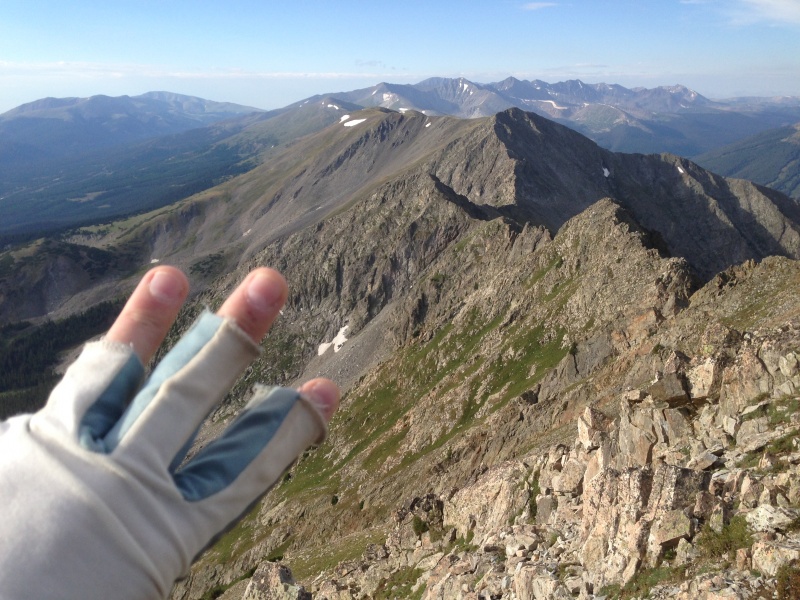 Now is when the fun begins. The traverse between peaks 2-4 provides the climber with the thrill they have been looking for as the class 3 begins. As you make your way off the summit and down several hundred feet, you have several steep areas that require some good hand and foot holds for safety. Here is one: 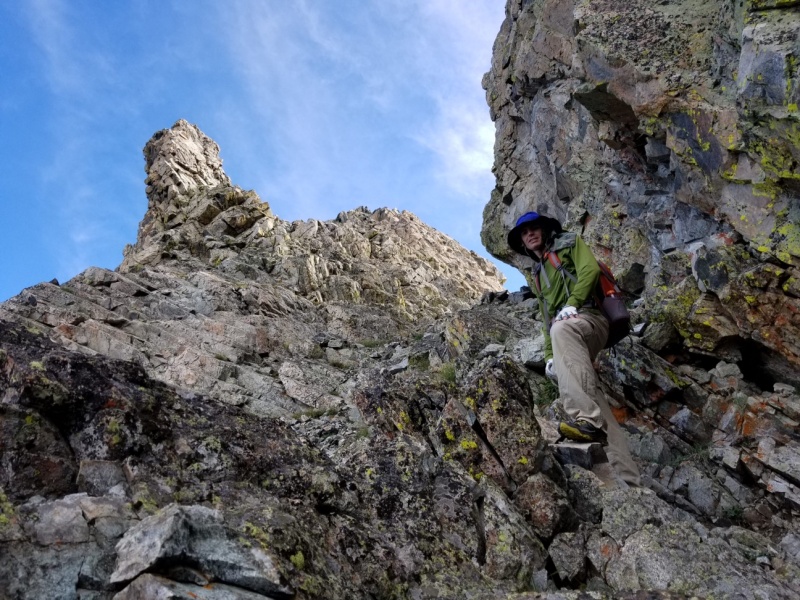 After this, you will run into the first gendarme. You can go around this one with a trail that takes you to the right: 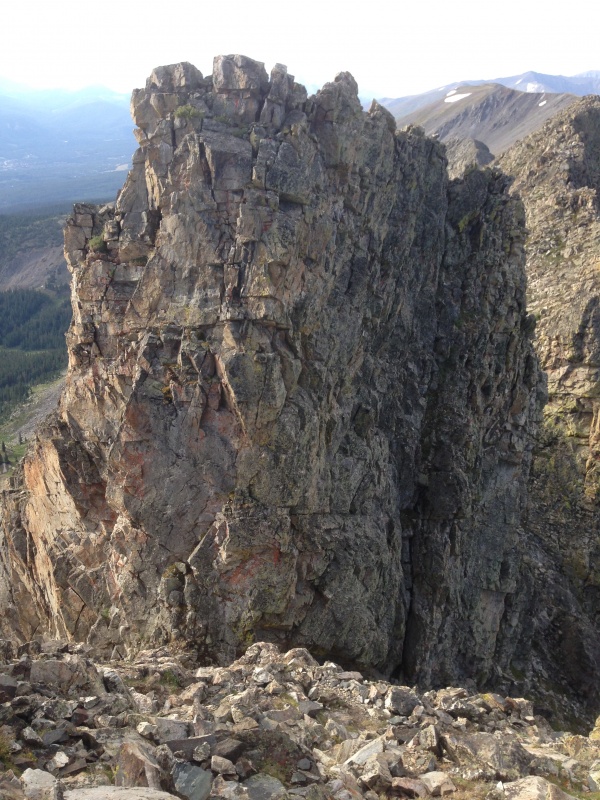 Traverse to the right and below to avoid the class 5 climb over the top of it.  Once around the gendarme, the ridge has several locations of class 3 that will begin to challenge your ability. They are very fun and exciting as you take in the views of Copper Mountain to the West and Breckenridge to the East. Here is a nice shot of Mark traversing the ridge between Peak 2 and Peak 3:  You will find yourself switching from the right side to the left side of the ridge crest several times while on this portion of the ridge. After making a couple of class 3 moves across the ridge you come upon the Dragon's Back. At this point, you should be on the left side of the ridge (East) as you make your way to the Dragon's Back: 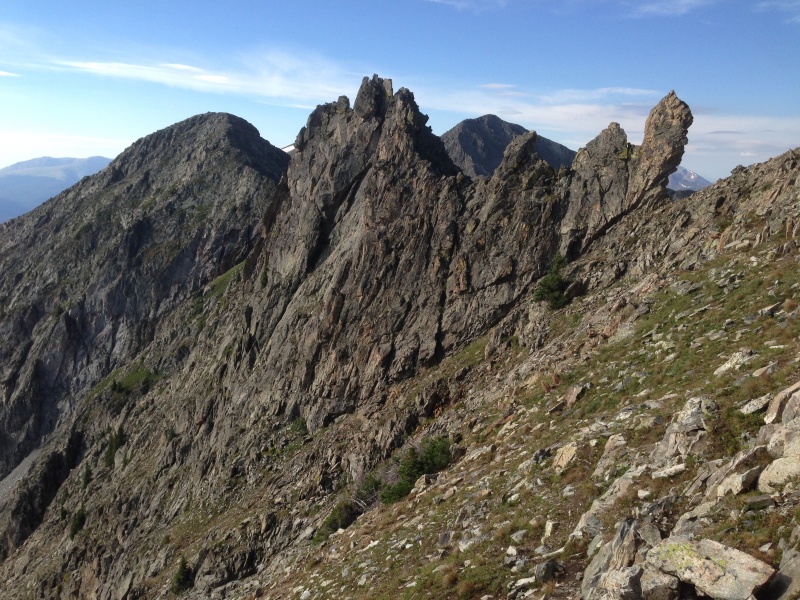 The Dragon's Back is easily the sharpest and most rugged portion of the ridge between Peak 2 and Peak 3. There are several ways to accomplish this portion. First, the only way to access the Dragon's Back is to head to the right down a short path. If you so desire, you can then access some steep rocks to climb up onto the Dragon's Back by heading left and up these rocks to the top of the ridge. We did not do this as there is significant exposure and plenty of steep rocks. We continued on the trail to the right down about 100 feet from the ridge which easily and conveniently avoids the Dragon's back by coming back up to the ridge on the other side. I know, class 1, easy and no fun but it did avoid the dangers of the Dragon's Back. It did appear that you could gain the Dragon's Back, traverse across it, and then find a very steep class 4 pitch back down the other side but climber beware of this portion if you so decide to do it. Here is a cairn marking the trail to the right of the Dragon's back and the portion that leads down 100 feet or so:  Here is a shot looking back at the ridge from the beginning of the Dragon's Back showing how far down we descended off to the left before switching over to the right side of the ridge crest before the Dragon's Back. 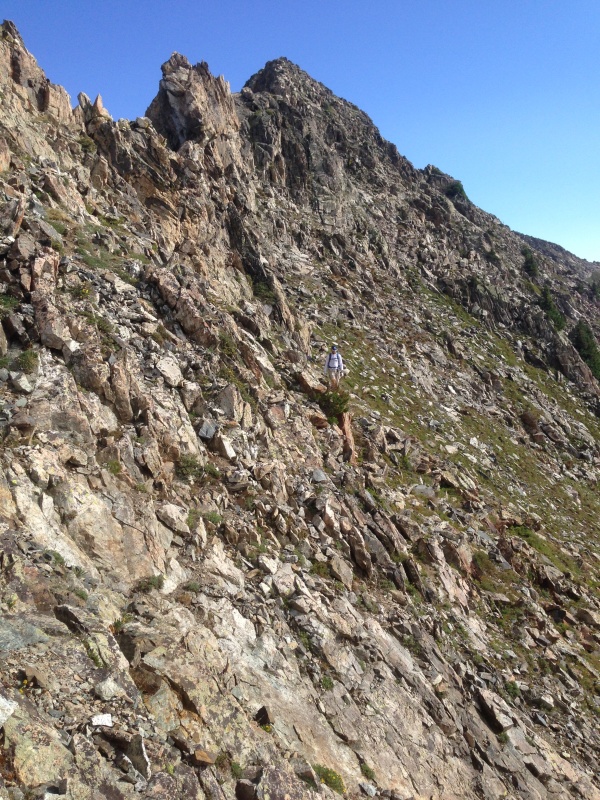 After the Dragon's Back, you have a pretty decent trek to the top of Peak 3. Here is my summit photo of Peak 3 with the ridge from Peak 2 in the background: 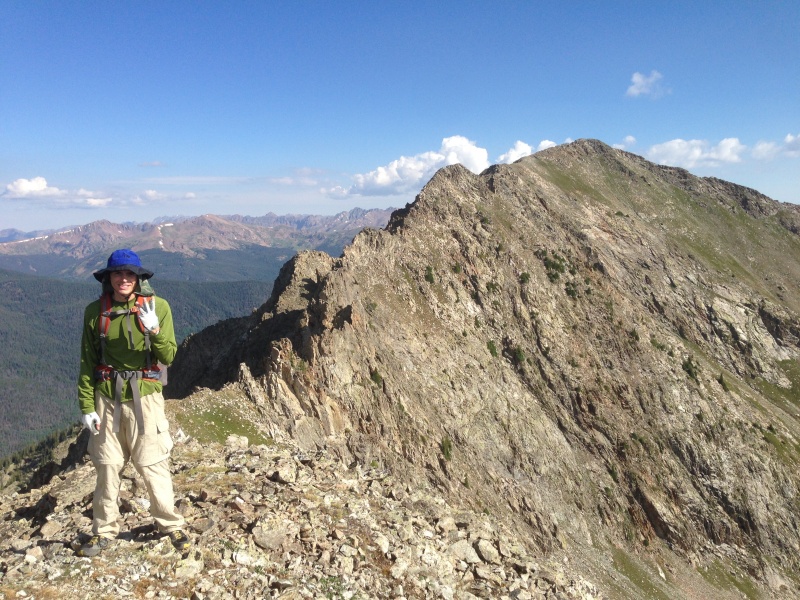 Here is a view of Peak 4 while standing on the summit of Peak 3: 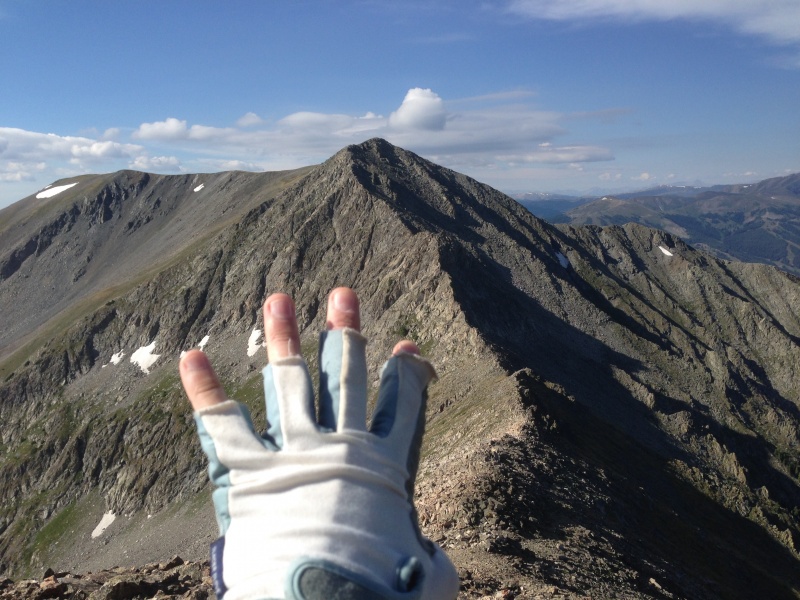 The initial descent off of Peak 3 is very easy all the way down to the saddle. However, once you hit the saddle, this is where the best climbing of the entire tenmile traverse begins. Here is a shot of Mark at the saddle between Peak 3 and Peak 4, right before the class 3 begins: 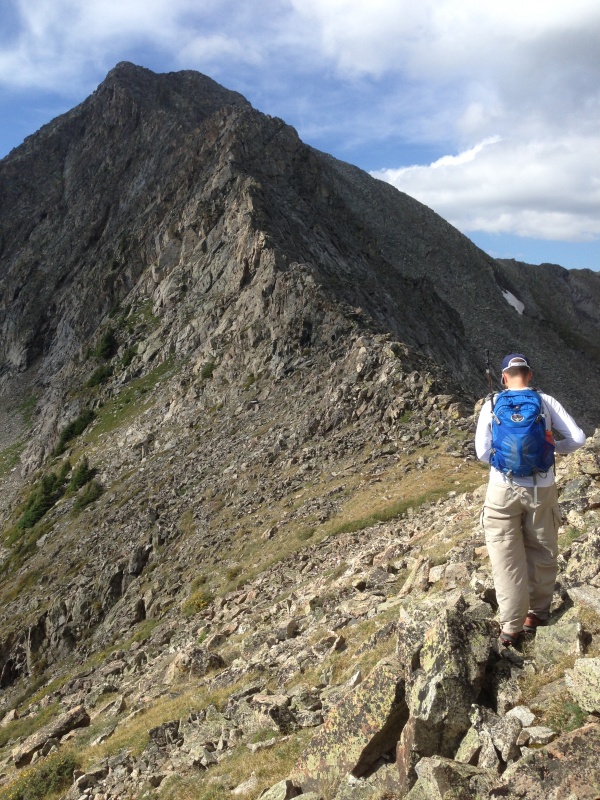 Here are several shots of the first initial ascent up the class 3 from the saddle:  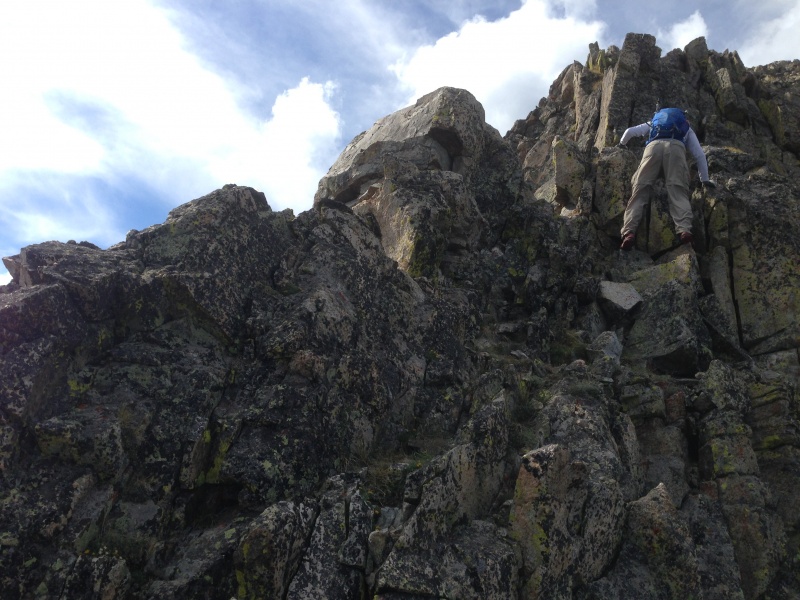 About half way up the ascent, you come upon the Tenmile Traverse knife edge. Not nearly as long as the knife edge on Capitol Peak and not quite the elevation drop on each side but very similar exposure overall. Here are several shots of both Mark and I on the knife edge: 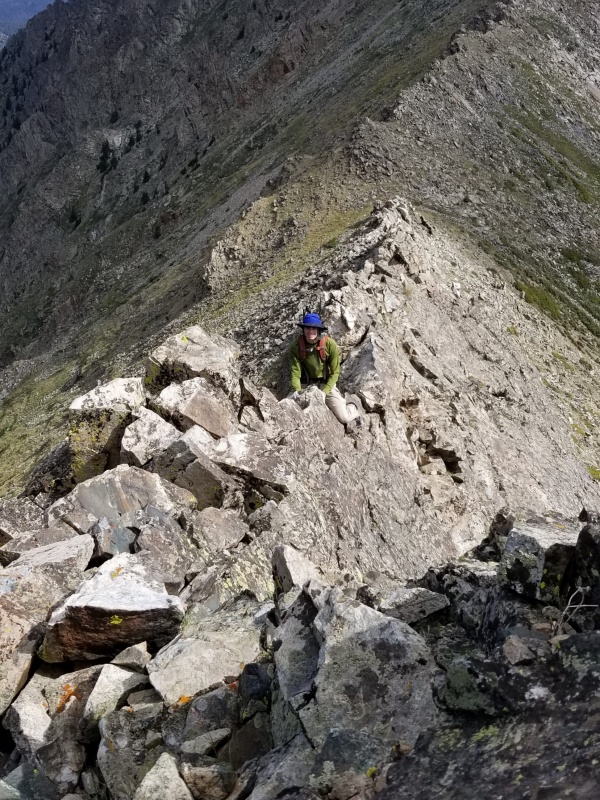 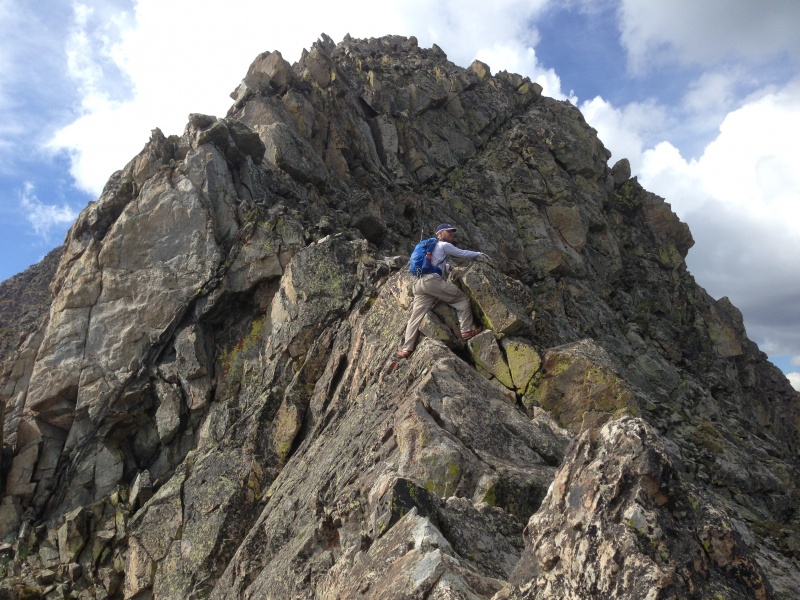 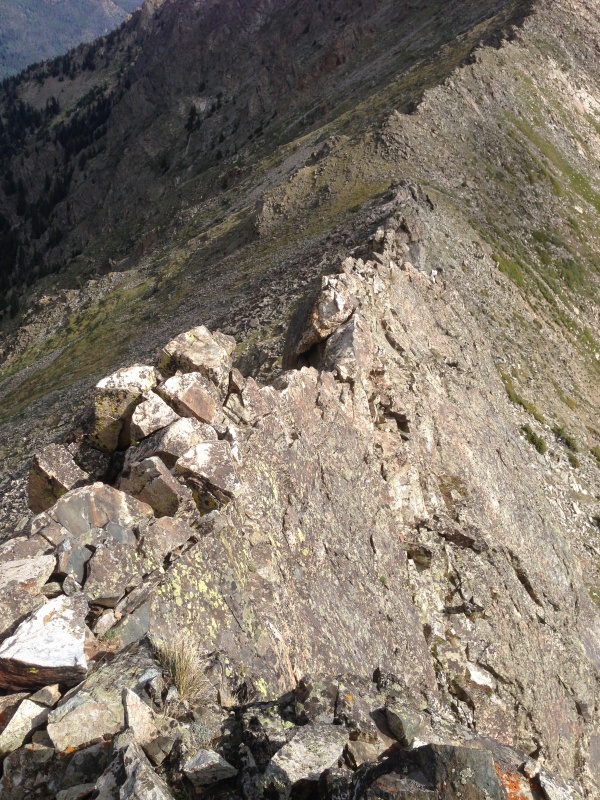 After the knife edge, the fun continues. There are several sections of "ledges" on the right. Here is an example of one where you need to really watch your footing and hand holds. The rock through this section is overall horrible. It is crumbly, loose, and falling off the mountain. We had to check every hand hold because the rocks felt like they would just pull right off the mountain. Keep the pressure on your feet and don't rely on your hands across the ledges: 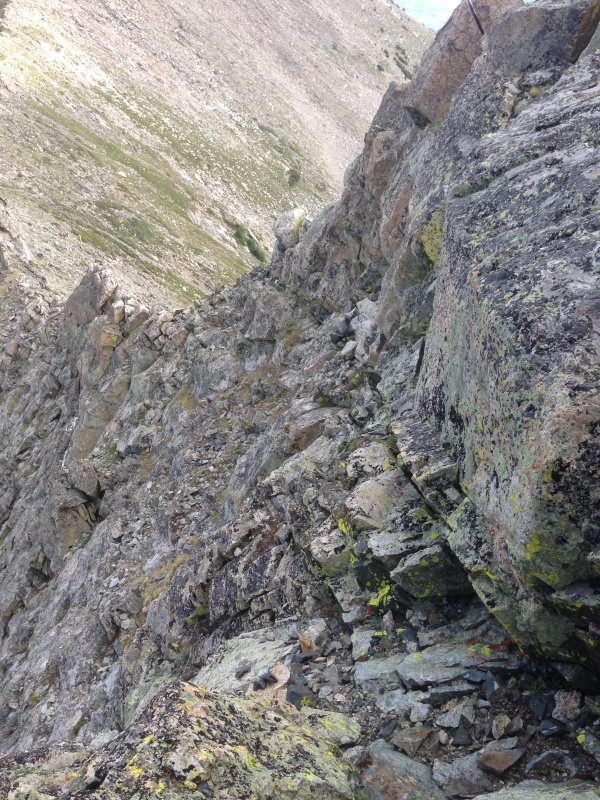 Here is Mark enjoying some of the class 3 above the knife edge, heading to Peak 4: 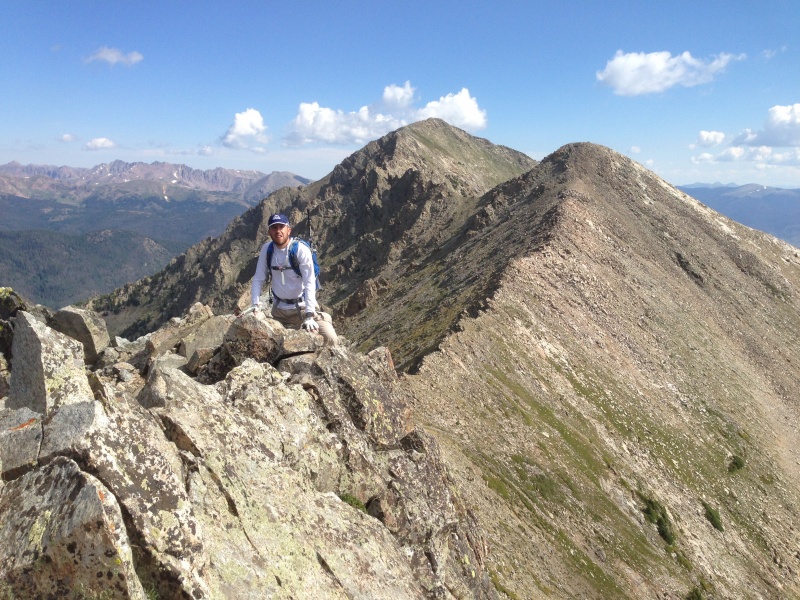 Here is the final summit push to Peak 4. Again, the traverse between Peak 3 and Peak 4 is easily the most difficult part of the entire traverse but also the most fun with the sustained class 3 and exposure: 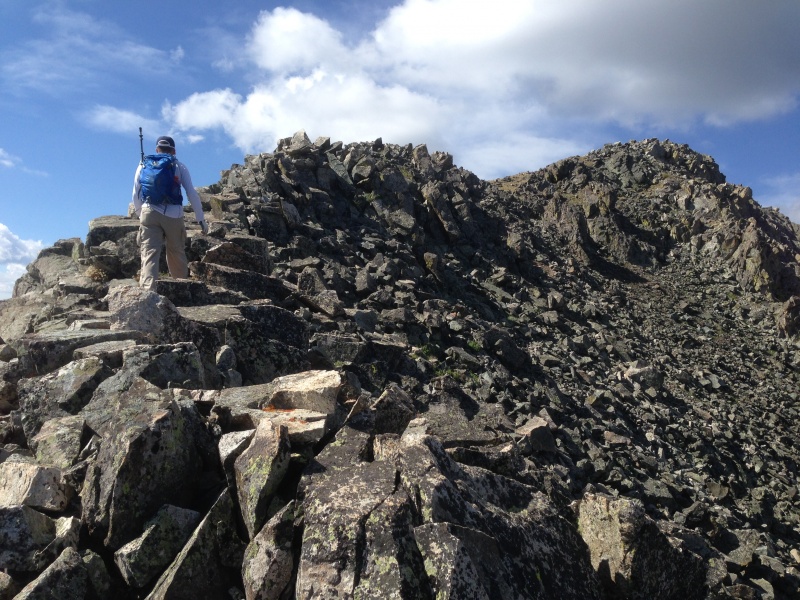 Once you reach the summit of Peak 4, you can let out a big sigh of relief. The class 3 is over, the exposure is over, and now your biggest worry becomes the weather as you start heading into the late morning and afternoon. Here is a shot of me on top of Peak 4 looking back at Peak 3: 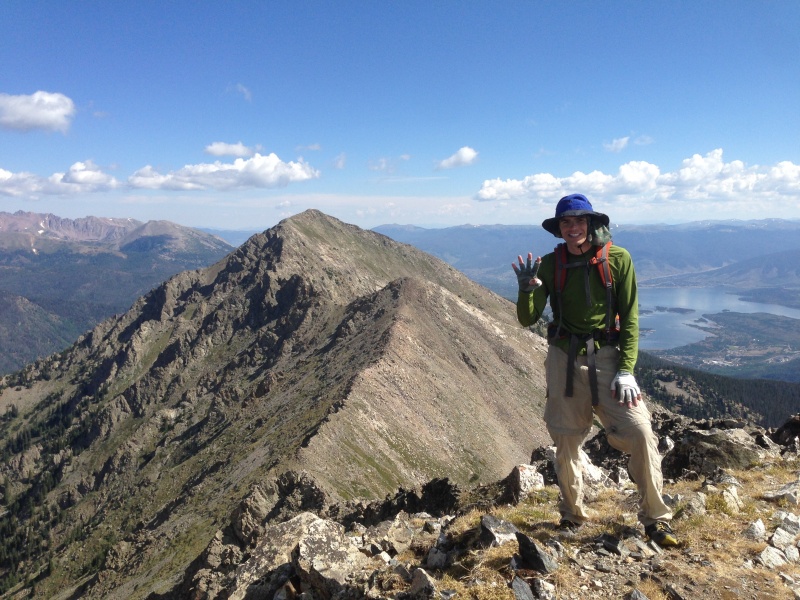 The summit of Peak 4 is very interesting because the mountain itself is super rugged and jagged on the north side as seen in the previous picture. But if you turn around, the peak turns into a nearly flat grassy slop on the south side. Unbelievable contrast between the two. Check out your view when you turn around and look at Peak 5: 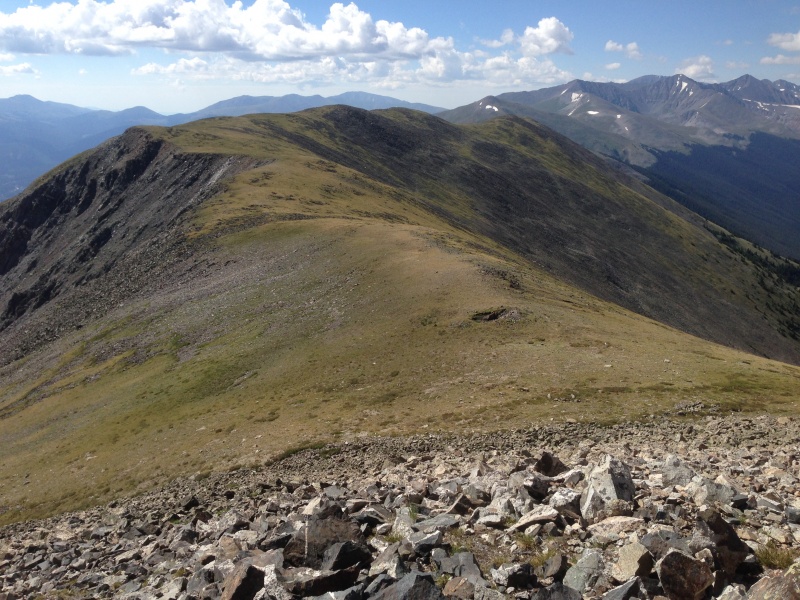 We really enjoyed the break from rock scrambling and exposure as we meandered down the slope of Peak 4 onto the grassy slope toward Peak 5. You can make good time through this area as it is a nice grassy walk all the way to Peak 5. Between Peak 4 and Peak 5, you only lose about 11 feet elevation so it truly is a nearly flat walk that is very enjoyable. Here are my summit photos from Peak 5: 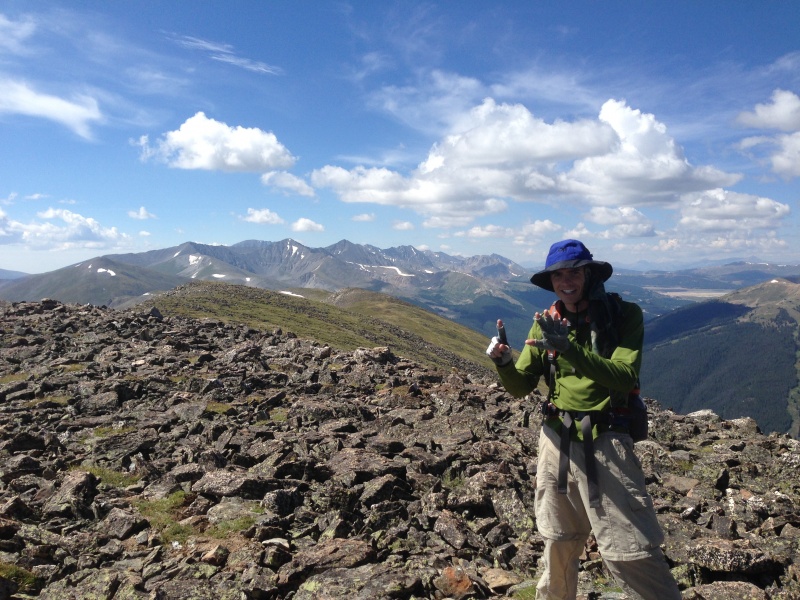 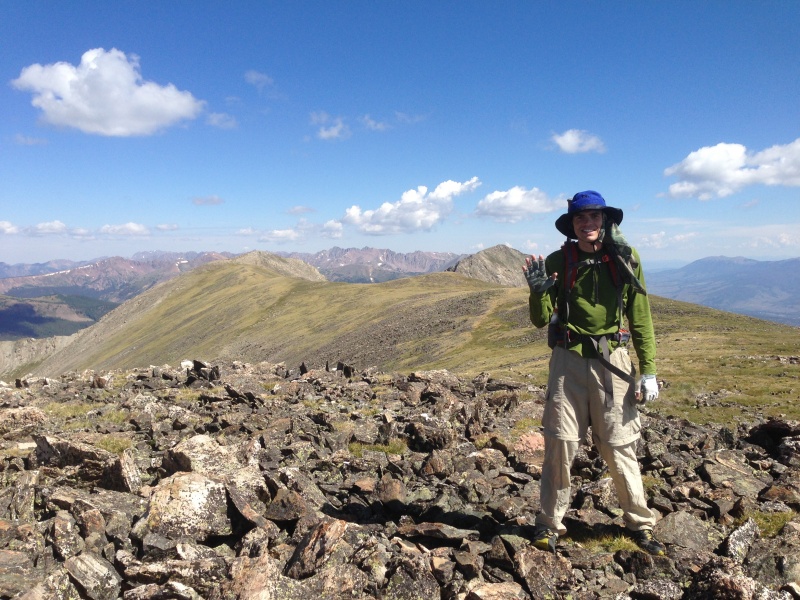 From Peak 5 to Peak 6 you only lose about 300 feet elevation and so the traverse is quite easy. In this portion of the traverse, you pick up the Colorado Trail where we saw one backpacker making his way over the pass and onto the West side in order to make his way down to Copper Mountain. You get a great view of the Copper Mountain Ski resort during this portion of the hike. Additionally, Peak 6 begins the Breckenridge Ski Resort with a ski lift nearly at the top of the mountain. In the following picture you can see the lift and the summit of Peak 6: 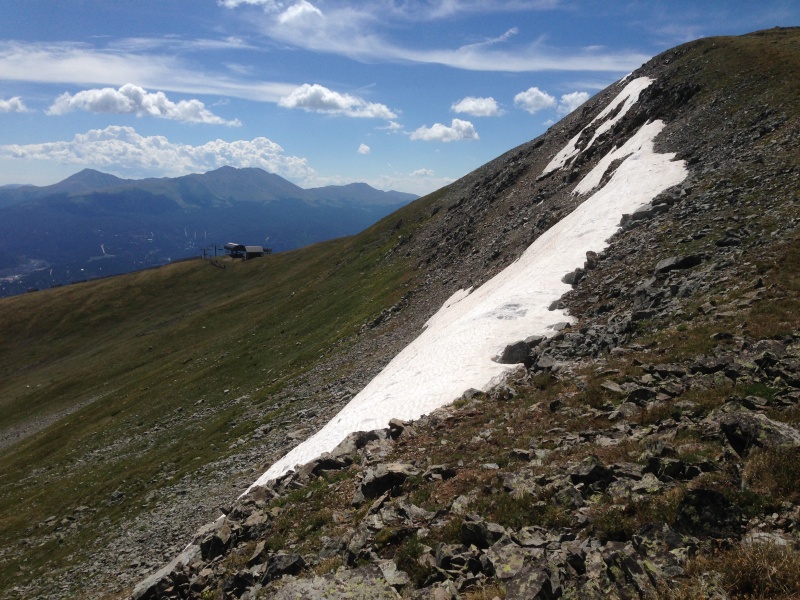 Here is a shot of Peak 7 from the summit of Peak 6:  Summit of Peak 6 looking back at Peak 5: 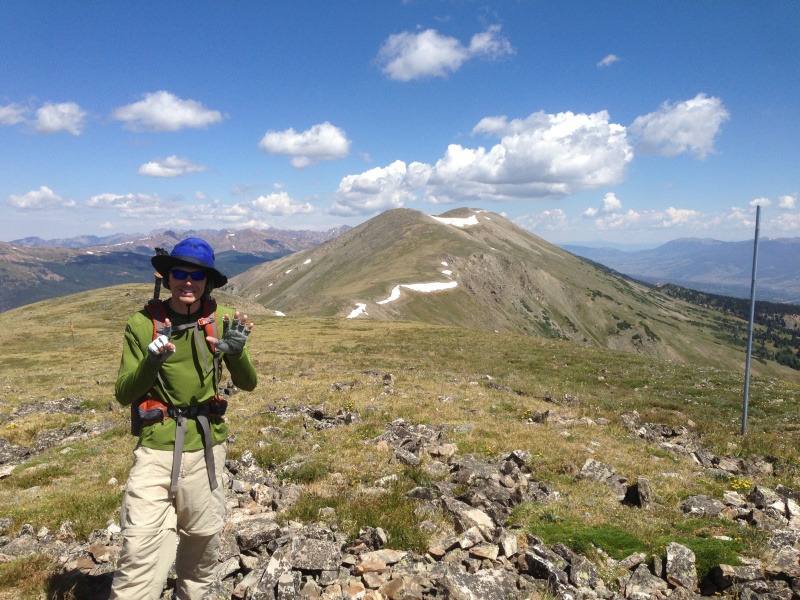 In between Peak 6 and Peak 7, you have a steep "death slog" up a slope that Breckinridge Ski resort built some wood breakers on. There is no trail and you must create your own switch backs unless you want to just hike straight up the steep slope. It's a piece of work after already hiking 5,000 feet elevation. Here is the slog up Peak 7: 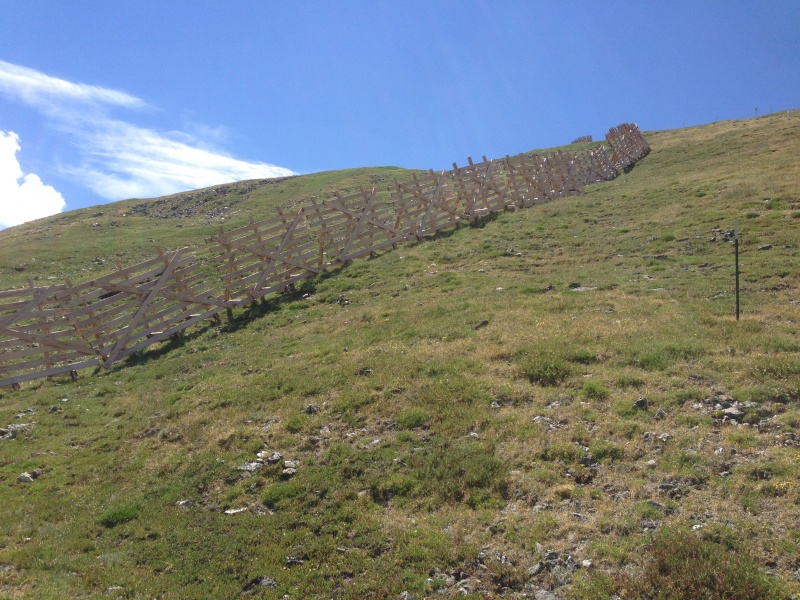 Here is my picture at the top of Peak 7 looking at Peak 8. Again, not a difficult trek up 300 feet. 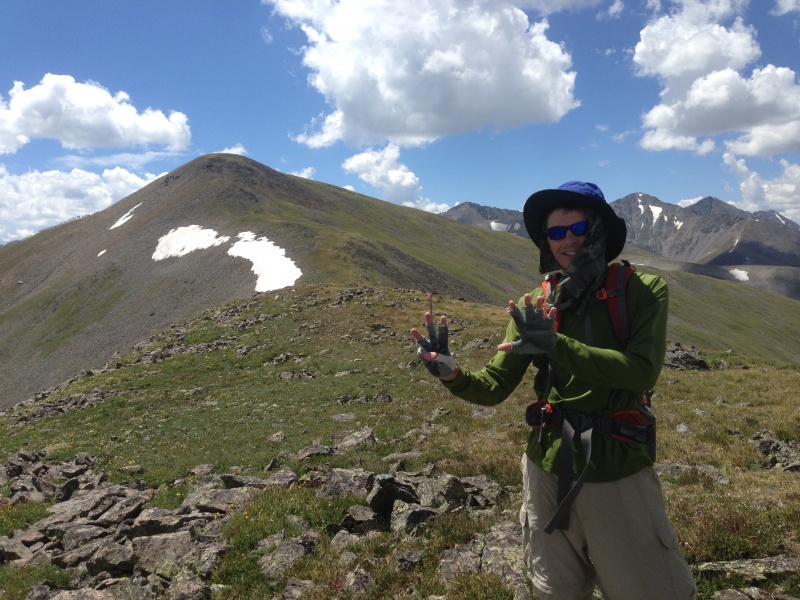 Nothing noteworthy between Peak 7 and Peak 8. Here is a shot from Peak 7 looking back at Peak 6: 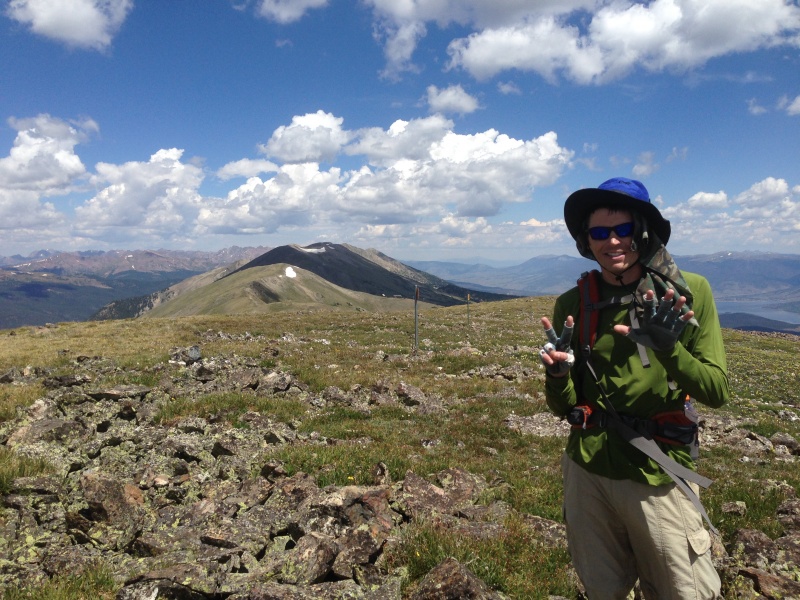 Here is my photo on top of Peak 8 looking at Peak 9: 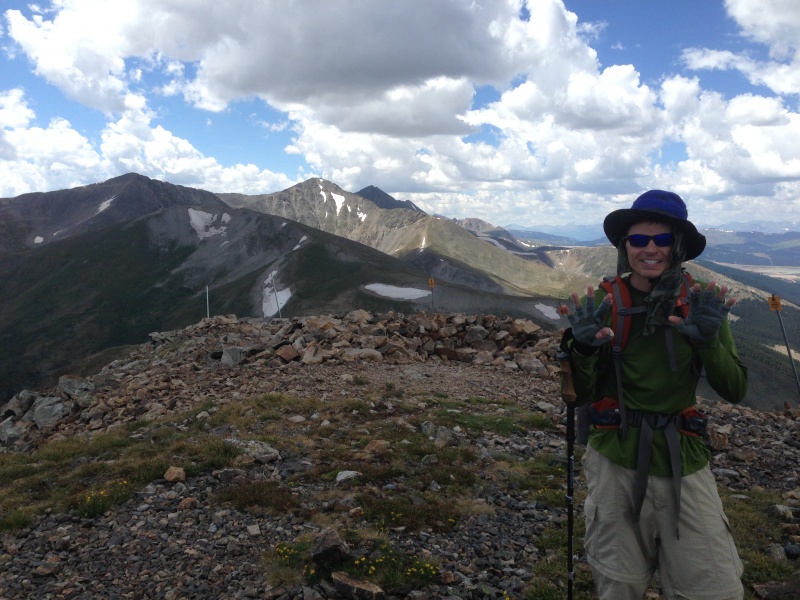 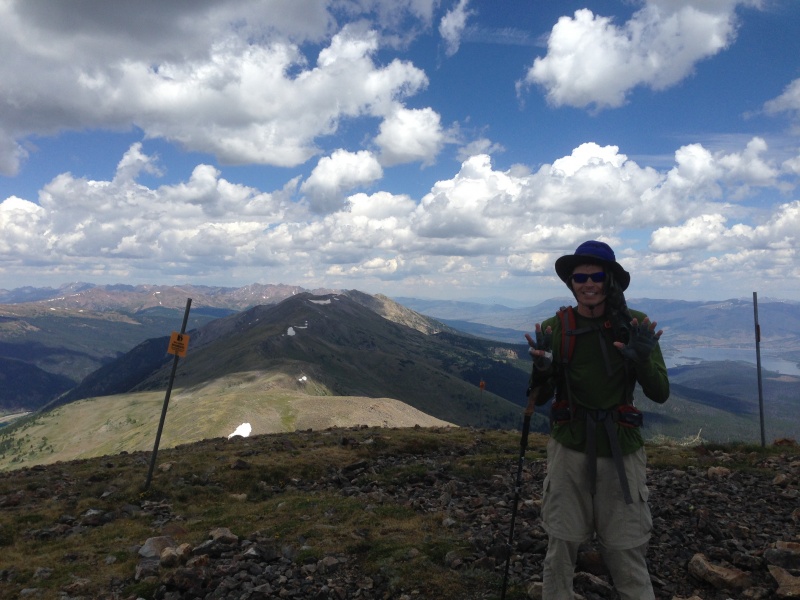 There is only a 200 foot difference between Peak 8 and Peak 9 but the drop to the saddle in between the two is significant. The middle peaks of the Tenmile Traverse are fairly easy but the mental game begins again from Peak 8 to Peak 9. By this point you are getting pretty tired and now you must complete 800 feet of pure Colorado elevation going above 13,000 feet to reach the summit. The trek up also starts to get a little rockier than the previous few peaks, adding some class 2+ to the hike again. Here is some of what that looked like heading up to Peak 9: 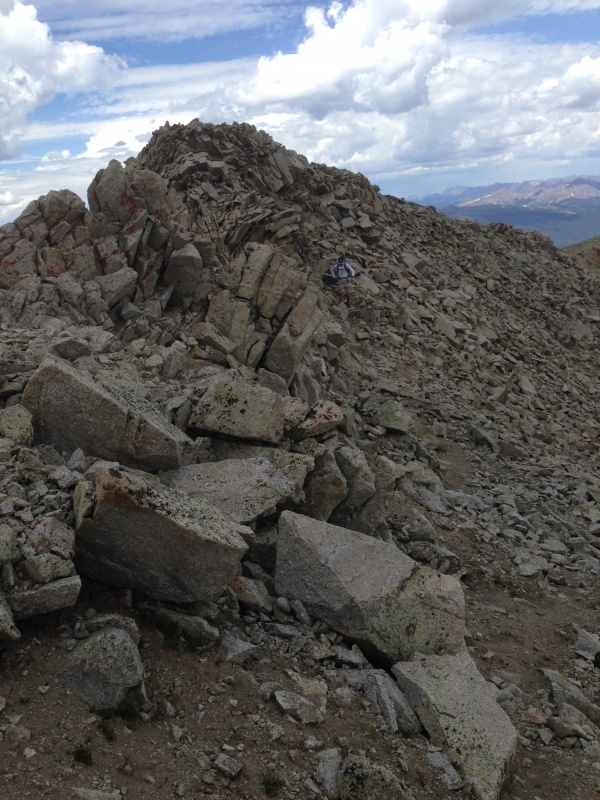 On the summit of Peak 8, we also started to notice the building up of clouds to the South where Peak 9 and 10 stood. We knew we had a race against the weather at this point. We quickly ascended Peak 9 and now had the end in sight: 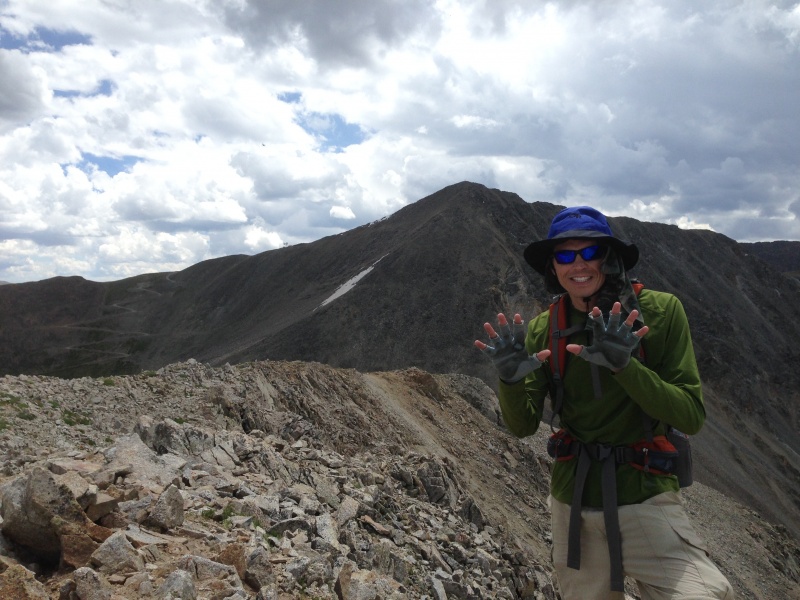 Here is a shot from the summit of Peak 9 looking back at Peak 8. Notice the large drop to the saddle and back up again, totaling around 800 feet. 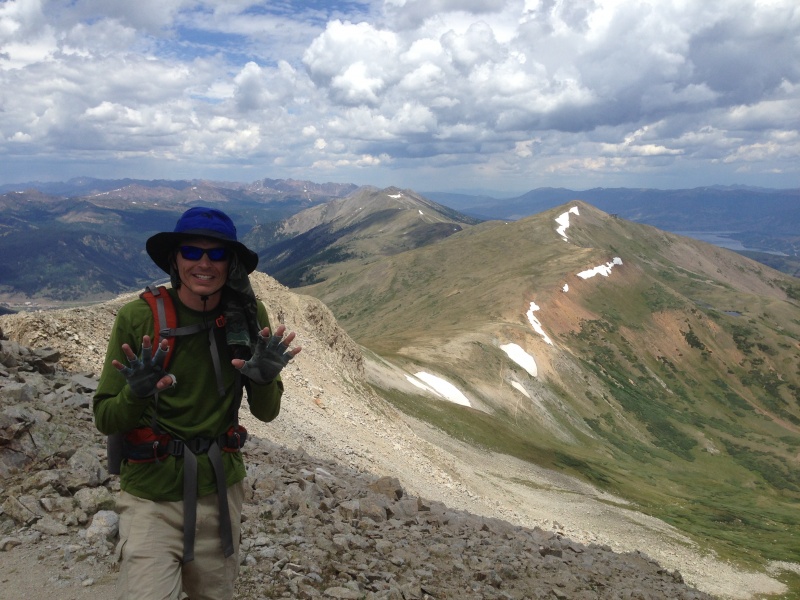 Upon departing Peak 9, the wind started to pick up and we hiked in the shade as clouds blocked the sun. We knew our chances of finishing were dwindling. We both agreed that we would quickly hike down the South slop of Peak 9 and traverse over to the road that led up to near the summit of Peak 10. Upon reaching the road, we hiked up it all the way to the ridge. The elevation gain to Peak 10 is another 800 feet, just like gaining Peak 9. Ouch! Here is the road up Peak 10: 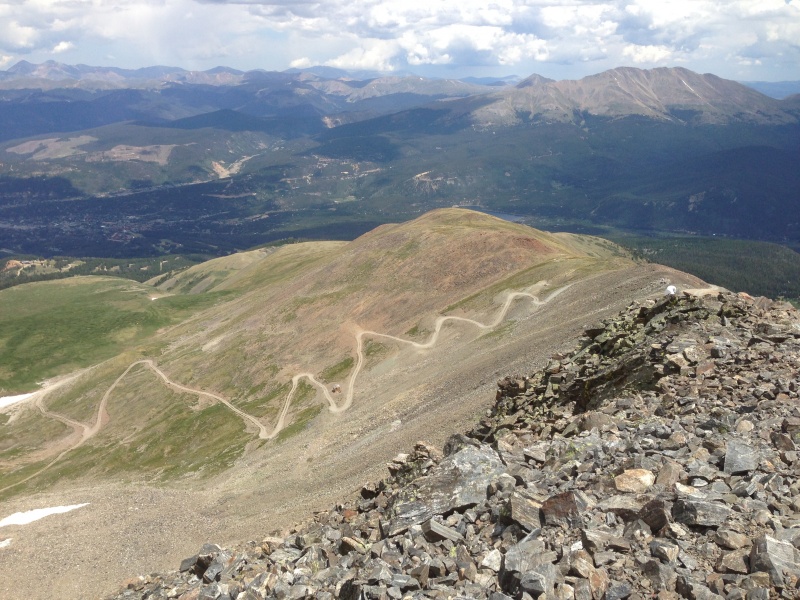 Our agreement was to re-evaluate the weather at the ridge before making any summit attempt of Peak 10. At the ridge you get a view of the weather to the South. Upon reaching the ridge, the weather looked a bit daunting but we decided to hike up a little further and see if it got worse. We then made it up to the end of the road and found two ladies sitting in a rental jeep chatting about the mountain. Their husbands were up on the summit of Peak 10. They offered to drive us down but we kindly refused and said we needed to "officially" complete the traverse. After the road ends, the peak goes up about 150 feet to the summit. We started going up...Shortly before the summit, the weather looked bad as shown in this picture:  However, after reaching the summit (a mere 49 minutes from Peak 9 summit), our earlier prayers for a window of weather were answered and the blue/black skies dissipated right around us. It was as if God gave us a small window right around the peak with sunny weather for about 15 minutes. We spent these 15 minutes taking pictures and enjoying the summit. Here is my summit photo with "Old Glory" that someone put up there: 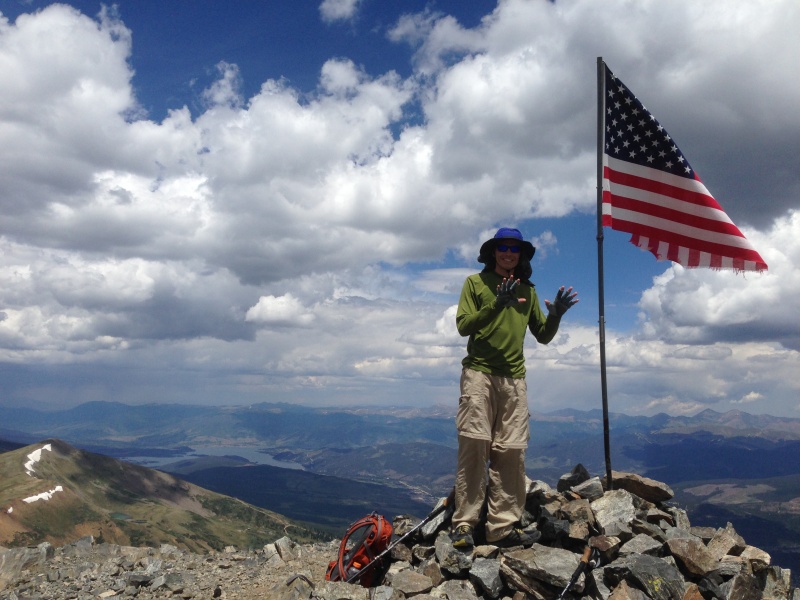 15 minutes was all we were given as the weather again started to close in around us. At least we had enough of a window to summit! We started making our way down quickly to the road. The two husbands arrived back at the rental jeep and they started back down around the same time we arrived back at the road. We ran into a guy with a dog heading up to the summit as we were coming down. He told his dog "Murphy" to stay put below the snowfield (which, by the way, you can easily hike around) while making your way up or down the ridge from the road to the summit of Peak 10. He asked us to tell Murphy to stay as we passed the dog coming down. We did as told. :) Once we reached the road, we quickly descended as the skies darkened. Here is the road looking down into Breckenridge:  The road has an excellent slope to it and is not a difficult four wheel drive road. We made good time. About half way down to the Peak 9 restaurant (now called "The Overlook Restaurant"), we felt a few rain drops and heard thunder. However, my father and my brother's son were waiting for us at the restaurant upon arriving back. The rain drops stopped as we finished. We made it! Overall, this was a great hike for my brother and I. Total hiking time was 10 hours 17 minutes. We hiked 16.71 miles and gained 7,342 feet elevation. The difficulty of the hike is definitely between Peaks 2-4 but it was fun and enjoyable. We loved the class 3 and the exposure. Send me a PM if you have any questions! Here is to you Old Glory. God Bless America! 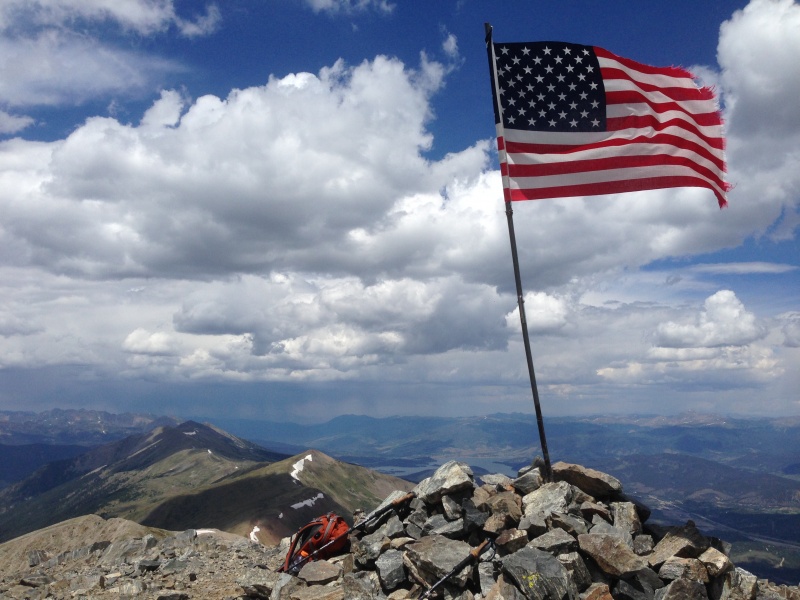 Thumbnails for uploaded photos (click to open slideshow): ")
")
")
")
")
")
")
")
")
")
")
")
")
")
")
")
")
")
")
")
")
")
")
")
")
")
")
")
")
")
")
")
")
")
")
")
")
")
")
")
")
")
")
")
")
")
")
")
")
")
|
| Comments or Questions | |||||||||||||||
|---|---|---|---|---|---|---|---|---|---|---|---|---|---|---|---|
|
Caution: The information contained in this report may not be accurate and should not be the only resource used in preparation for your climb. Failure to have the necessary experience, physical conditioning, supplies or equipment can result in injury or death. 14ers.com and the author(s) of this report provide no warranties, either express or implied, that the information provided is accurate or reliable. By using the information provided, you agree to indemnify and hold harmless 14ers.com and the report author(s) with respect to any claims and demands against them, including any attorney fees and expenses. Please read the 14ers.com Safety and Disclaimer pages for more information.
Please respect private property: 14ers.com supports the rights of private landowners to determine how and by whom their land will be used. In Colorado, it is your responsibility to determine if land is private and to obtain the appropriate permission before entering the property.