Download Agreement, Release, and Acknowledgement of Risk:
You (the person requesting this file download) fully understand mountain climbing ("Activity") involves risks and dangers of serious bodily injury, including permanent disability, paralysis, and death ("Risks") and you fully accept and assume all such risks and all responsibility for losses, costs, and damages you incur as a result of your participation in this Activity.
You acknowledge that information in the file you have chosen to download may not be accurate and may contain errors. You agree to assume all risks when using this information and agree to release and discharge 14ers.com, 14ers Inc. and the author(s) of such information (collectively, the "Released Parties").
You hereby discharge the Released Parties from all damages, actions, claims and liabilities of any nature, specifically including, but not limited to, damages, actions, claims and liabilities arising from or related to the negligence of the Released Parties. You further agree to indemnify, hold harmless and defend 14ers.com, 14ers Inc. and each of the other Released Parties from and against any loss, damage, liability and expense, including costs and attorney fees, incurred by 14ers.com, 14ers Inc. or any of the other Released Parties as a result of you using information provided on the 14ers.com or 14ers Inc. websites.
You have read this agreement, fully understand its terms and intend it to be a complete and unconditional release of all liability to the greatest extent allowed by law and agree that if any portion of this agreement is held to be invalid the balance, notwithstanding, shall continue in full force and effect.
By clicking "OK" you agree to these terms. If you DO NOT agree, click "Cancel"...
I was scouring the Trip Reports for information on the West Ridge of Quandary. It took to the bottom of the third page to find one. After that they were a little more common, helpful for sure, but also a bit dated. So here is my account.
Having climbed the Kelso Ridge of Torreys the day before, I felt ready for what seemed a step up to the other side of Quandary. Reading Bill's account I judged it would probably test me more than the other Class 3 routes I had taken. After all the Knife Edge on Torreys was effectively neutralized by straddling it and scooting across, it didn't seem like the walls on Quandary would be so easily neutralized.
When I left my hotel in Frisco the sky was cloudier than the previous morning and when I turned the corner to Breckenridge my heart sank, there was a dusting of fresh snow on the peaks. Hardly the stuff to ease my nerves, but rather than waiting for tomorrow, I thought I would give it a go and if I reached a point where I couldn't go on I'd retreat. The mountain would still be there.
DAM TO RIDGE
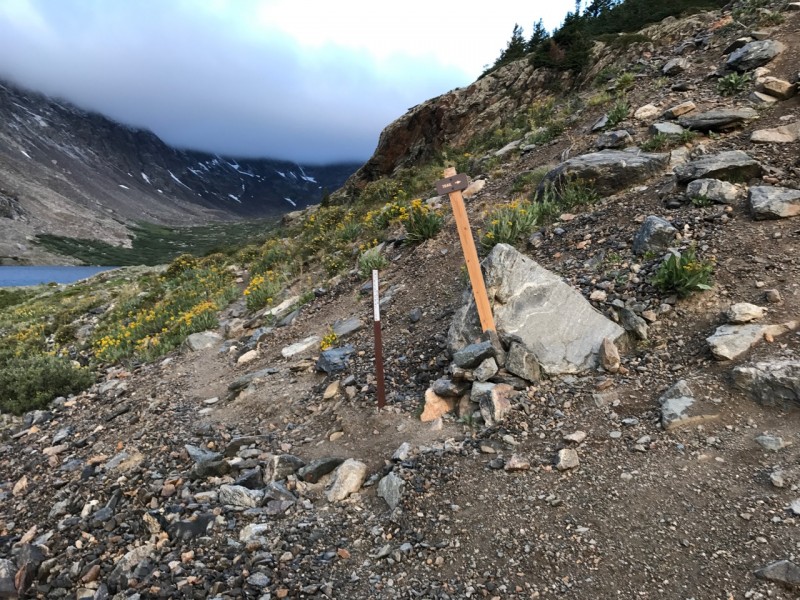
Since many of the reports were written the trail from the top of the dam is clearly signposted. I could see why so many had trouble. Instead of going straight ahead on the nice track you were pointed up a steep slope. The true trail starts at a huge yellow boulder about 100 feet (vertical) above the sign directing you up the hill. Don't go straight ahead
This trail was easy to follow and reached the stream coming out of the basin a 100 vertical feet below the lip. None of the bushwhacking in the willows others have described.
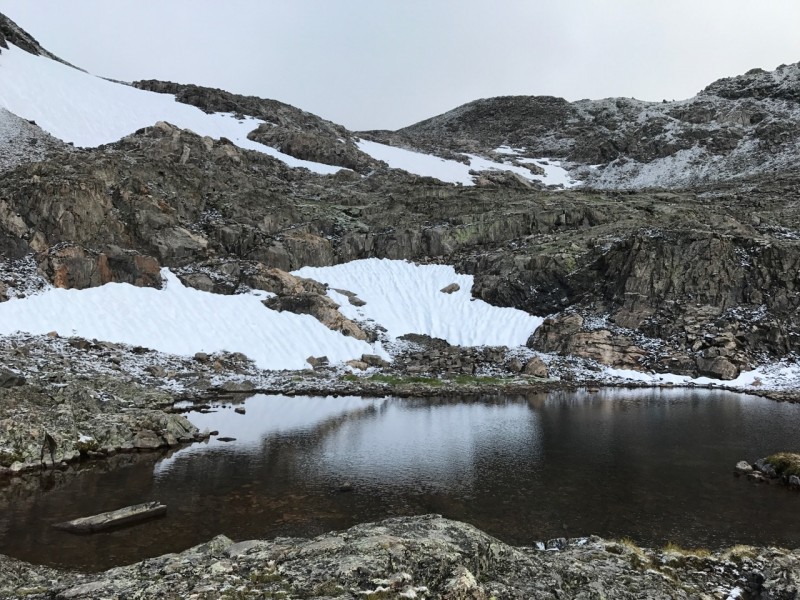
Soon after cresting the lip you pass an abandoned mine, two hundred feet beyond that the trail crosses the stream and continues up and around to the left towards the gully in pictured in Photo 5 of Bill's Route Description. I my case the gully was still full of snow (August 16, 2007) but it was easy to pick a path up through the rocks on the left side. While I was climbing it looked like you could get up right side as along a you started before the line of bluffs. Easy routefinding to the left of the snow
Once in the upper basin I picked a line towards the rock spur between the two large snowfields. The rock cairns were sporadic and in places the trail was discernable in the fresh snow. The Upper basin. Head to the rocky spur between the two snowfields
But if you couldn't find your own route up this you should take it as a strong sign to turn back! Even to this point is a lovely hike with lots of variety. I love Columbines
The rock spur leads to the left away from Quandary. From the flat area on top of it, the trail switches back to the right, beneath a large bump in the ridge between Fletcher and Quandary. It is quite easy to make out and leads up to a low point on the ridge with two small but distinctive rock towers on it. It took me 1:45 to reach here and I was surprised because it didn't seem that long. At top of rocky spur Trail goes up to right towards point in the ridge with two small rock towers in it
LOWER RIDGE
At this point on put on my helmet as the trail continued on the right side of the ridge below some rather fanciful looking towers. I figured that in the unlikely event one of them dropped a rock on me, the helmet was better on my head than in my pack.
After regaining the ridge the trail headed up towards an obvious bump and then traversed the slope to the left. After regaining the ridge I could make out a traverse line to the left. It was too low. You have to climb up the ridge past the obvious bump before the traverse proper starts. This was a long traverse that climbed relentlessly. Eventually it switched back up to the ridge. The trail lead on the right side of the ridge and appeared to disappear as it rounded a big rock outcropping. the road to nowhere?
After checking for the foot prints of the people ahead of me I gingerly followed the trail around the rock, and through a crack to an old mine building. Into the old mine
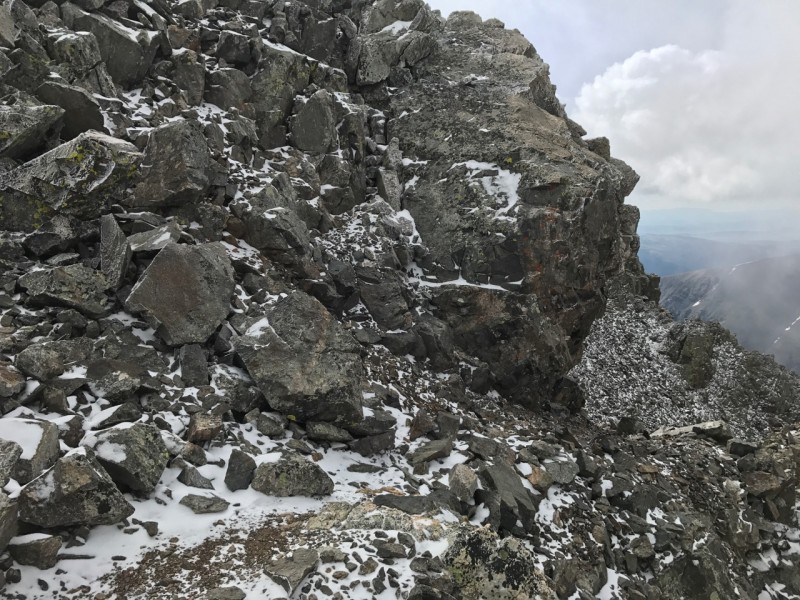
From there trail crossed to the left side of the ridge before abruptly turning and climbing a spur back to the ridge-line. Looking back down the scramble after crossing briefly to the other side of the ridge from the mine.
This was the point at which you got your first view of the people on the summit and the labyrinth of rock separating them from you. As this point I decided to put the trekking poles away. Clearly this was all-hands terrain. First view of people on summit (right of high point in photo), the top of the Big Gully is visible on the left as a line with
TWO GULLIES
The trail dropped down to the left and the first major obstacle I encountered; a short step across a steep gully. I could see the foot-prints of the people ahead of me in the snow, but un-nerved by the drop away I tried to climb above it. That was bad idea, but it did force me to reconsider my fear. I convinced myself that a slip would not be fatal and at worst I might have to scramble up 10-20 feet back to the trail. After this came the big gully (Photo 16 in Bill's Route), which felt much less exposed. I was able to scramble up it without a problem. Although it was not a place you would want to linger.
SMALL CRACKED WALL
From there to the small crack wall took longer than I expected. I contemplated various routes to the left and the right of the crack itself, but once I got in it I just ended up following it straight up. I had a wide pack on and I was able to squeeze through the top section without too much trouble. The footing was solid and the enclosed nature of the crack made me feel quite secure.
Beyond it, that was not the case. The trail traversed a narrow ridge with drops on either side. It was plenty wide for a more heady person to stroll across, but narrow enough for me to delve into my evolutionary history and pick my way across on all fours. At the end of this section you have to drop into a notch before the Great Wall.
Some people describe this descent as the crux of the route. I dropped to the right side down the whiter rocks as directed by Bill's route description. There were two ways down. I took the one to further to my right. At the bottom I had to hug my way around a rock where I encountered the footsteps of the people in front of me. They had come down a narrower shoot.
GREAT WALL
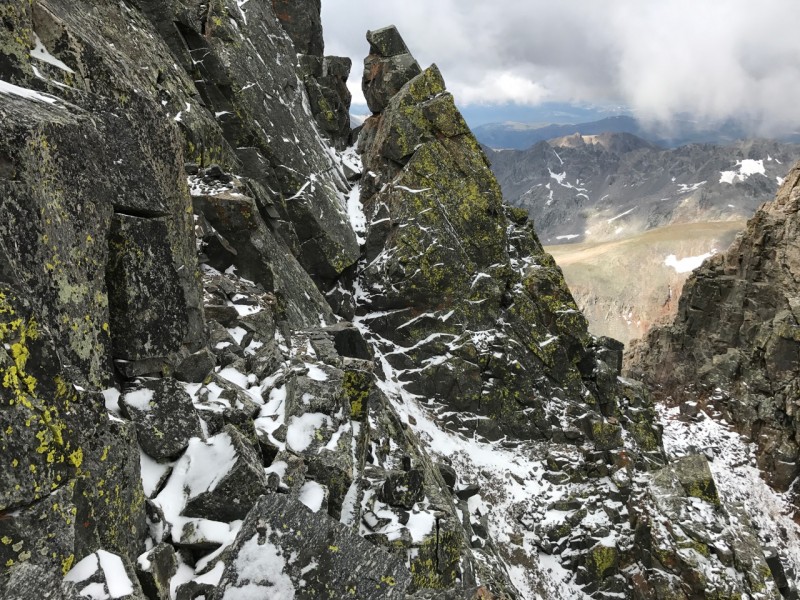
The Great Wall is described as the crux of the route. It was actually quite easy thanks to the advice in some previous trip reports. The hard part was getting to the rock steps at the base of the wall. It involved crossing another gully, filled with loose rock and covered in snow. This time there were more hand holds; give them a good wiggle before you put your weight on them as there are plenty of loose rocks on this route. With my long legs and the knowledge it was no worse than the gully that guarded my retreat I got onto the steps and followed them up. Rock steps at the base of the great wall, When you can touch the big rock with two red Lichens in bottom corner, look to the
When the steps end about halfway up the wall where the climber is in photo 18 on Bill's route description, or when you are facing the flat faced rock with two red lichens in the bottom right corner, look for an obvious ledge to the left. There is even a rock cairn marking the way. After you round the corner at the end of this ledge the ascent back to the ridge is easy. (I can't find the exact Trip Report or comment to credit the user for this tip) Of course if you want more class 3 or 4 scrambling you can follow the route in Photo 18. Looking back along the ledge halfway up the Final Wall. Down to right is the nasty gully guarding the steps, far right the de
It took about two hours from gaining the ridge to the summit. I would say this was the most challenging of the Class Three Routes I have done (Kelso Ridge, Keyhole, and East Ridge of Bierstadt). There were more significant obstacles, the rock was less reliable and the layer of snow didn't help. Over-all it was easier than I anticipated.
DESCENT
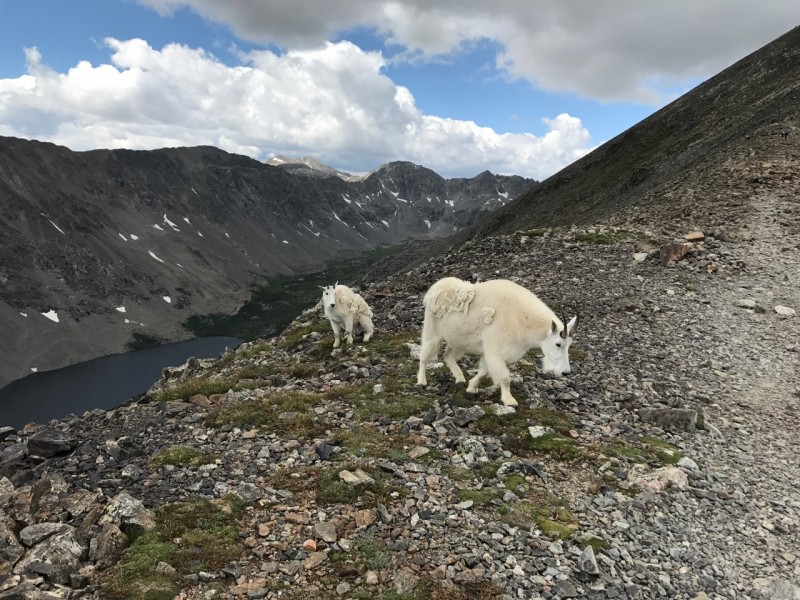
From the summit the route down the South Gully, Cristo Couloir is marked by a rock cairn. The cairn is west of the summit and down the slope aways. From the cairn you can see trail sections on the west side of the gully which is the preferred side. It was tempting to plunge down to the car, but I'd developed a blister on my foot descending Bross four days earlier. The one thing I forgot to pack on my trip was the bullet-proof tape. British brand Smith and Nephew. I can stick it on and hike for days without it coming off. The Nexcare, Band-Aid and Moleskin I brought in Frisco had all rubbed off within an hour. So it was into my trail runners for the long slog down to the main trail head. The local goats are quite comfortable around people
Thumbnails for uploaded photos (click to open slideshow):
I did the same route in August 3 years ago, and interestingly I had very similar conditions (snow and ice).
I was kind of taken by surprise by the first gully you described. It was narrow but pretty steep, enough to give me pause, and yet I have not seen it mentioned in any other trip reports. I'm glad you mentioned it for people looking at this in the future.
Thanks, I think I saw one other comment referring to the first gully in all my research. The comment was it was sketchy in the winter snow, but would be no problem in summer! Maybe it is that finding these features stressful is particular to us! I could tell by the footprints in the snow the person ahead of me seemed to have crossed without stopping. But I would have thought they would have tweaked a few more people's nerves and been mentioned more.
Gotta love that wind-blown rime on the rocks. You had it worse than me!
That first gully gave my group all kinds of trouble when we did this route in 2011. I described it in some detail in my TR, which I posted in January 2012. Long after we finished the route I convinced myself that there had to be some easier way across that we had missed, or else Bill's route description would have called it out. I decided the trail probably switchbacked at the gully, leading back up to the ridge, and the easy way to cross would have been at the saddle at the top of the gully. From your account I'm now thinking I might have been wrong about that.
Regardless, it was a gut-check spot. The wimpiest of our group (including me) ended up climbing a few feet up from the trail on solid rock directly to the right of the gully, and then a little ascending traverse across it to ledgy rock on the other side. We hope to tackle this route again in the next year or two; if so we will be on the lookout for some clarity on that spot.
Caution: The information contained in this report may not be accurate and should not be the only resource used in preparation for your climb. Failure to have the necessary experience, physical conditioning, supplies or equipment can result in injury or death. 14ers.com and the author(s) of this report provide no warranties, either express or implied, that the information provided is accurate or reliable. By using the information provided, you agree to indemnify and hold harmless 14ers.com and the report author(s) with respect to any claims and demands against them, including any attorney fees and expenses. Please read the 14ers.com Safety and Disclaimer pages for more information.
Please respect private property: 14ers.com supports the rights of private landowners to determine how and by whom their land will be used. In Colorado, it is your responsibility to determine if land is private and to obtain the appropriate permission before entering the property.