| Report Type | Full |
| Peak(s) |
Mt. Eolus - 14,087 feet North Eolus - 14,042 feet Sunlight Peak - 14,061 feet Windom Peak - 14,089 feet |
| Date Posted | 08/14/2017 |
| Modified | 07/09/2021 |
| Date Climbed | 08/06/2017 |
| Author | JQDivide |
| What to Expect for Chicago Basin |
|---|
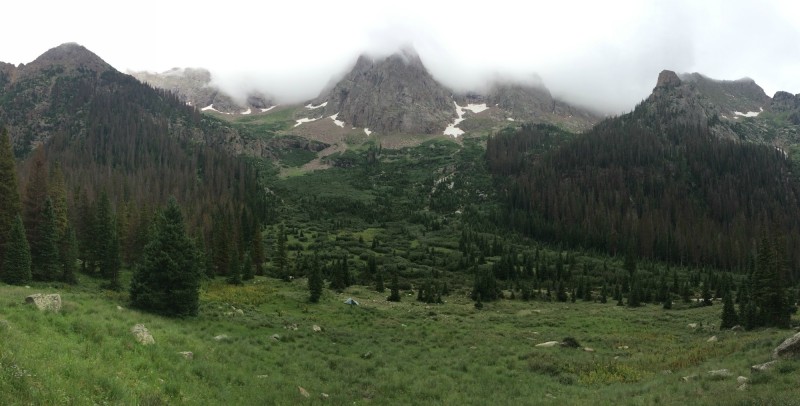
What to Expect for Chicago Basin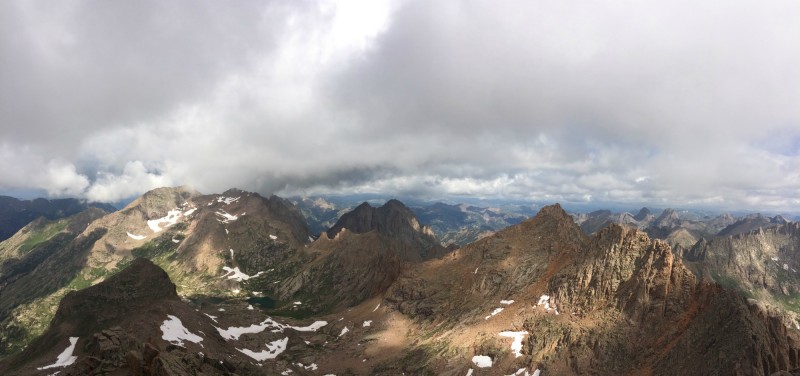 This was by far the best 14er/13er experience I've had in the years I've been climbing. It's a mini-adventure. Here are some thoughts and suggestions. Going In! Go from Durango. It might be quicker and cheaper going in from Silverton, but you miss most of the train ride. You also get to Needleton earlier, which to me seems better for finding a camping spot. Talk to the train staff, they have lots of interesting information. 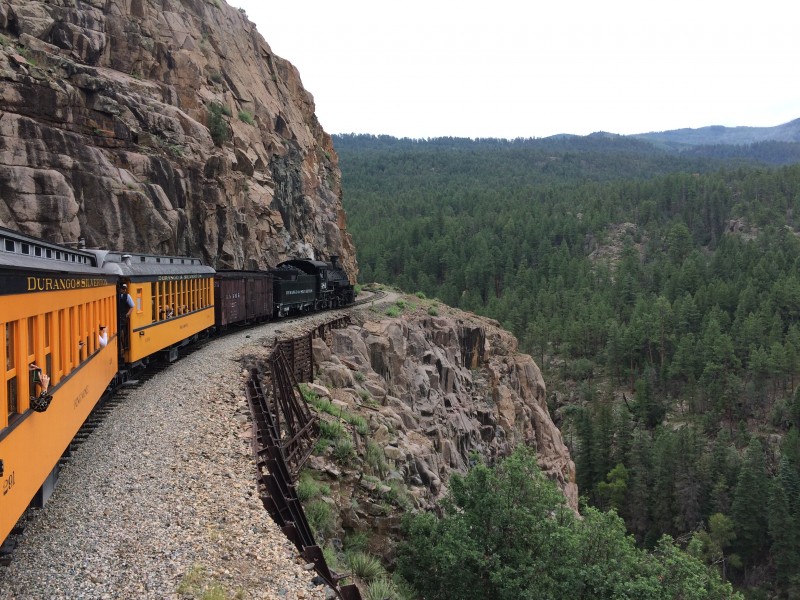 Book a seat in the open air gondola car, better views, better experience (just wear sunglasses, sometimes the coal soot blows in your eyes.) Expect your pack to get coal dirty in the old baggage car, and it will rub off on you. Your gear will be in a pile of other packs, so know anything on the outside is susceptible to damage, mostly due to the train bouncing and swaying. If you are taking a summit pack into the basin, use that as a carry-on bag for the train. Breakfast before the train There are numerous places to eat in Durango, but just a block away from the train station is Jean Pierre's French Bakery... the croissants are fabulous. Grab a cafe au lait and some fruit filled or sweet cream croissants for breakfast. For lunch on the train, get some ham and cheese croissants "to go" and a chocolate one for dessert. (It's all about carb loading... and it's delicious.) Needleton They drop you off, you grab your pack, they reload with those coming out and the train is gone. If you really wanted to, you could probably leave some fresh clothes/gear in Needleton, just hang it from a tree. More people were coming out, than going in on the Saturday we rode the train. We thought that was odd, but made us hopeful for a good camping spot. You could smell the body odor of those coming out... do everyone a favor, wash off in the creek before you get on the train. You cross the bridge and the trail is fairly flat until it reaches the registry (which was full of random and unorganized papers, no real registry). From here you take the creek trail. If you're going to stash beer (or margaritas, etc.) in the creek, this might be the best area to do it, easy to hide it. This is where we cached ours, shortly after the sign. I used a small mesh laundry bag, like you might use for delicates, and stuck a mixed six-pack of beer and a bottle of margarita in it. I tied it to a rock and placed it in the creek, with the rock on top to keep it from flowing away. 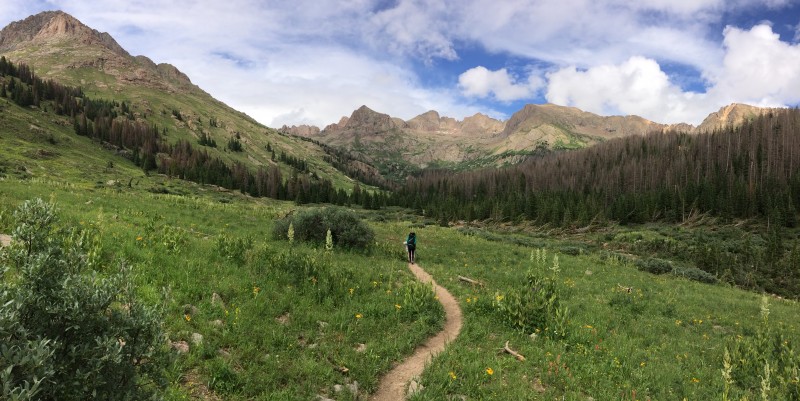 Hike In The hike in wasn't as bad as I suspected. But, we were all tired from the heavy packs. The trail gets steeper after you cross the bridge at the 2+ mile mark. It will begin to level out as you get closer to the basin. There is no obvious sign, or view, that lets you know you have reached the basin. It might just be that you see a tent. (We saw our first tent, way early, not in the basin). Then the views open up a bit and you know you're in there. Beautiful. Camping There are numerous camping spots. We saw people camping in the middle of fields and meadows, we saw people camping in the trees. The tree spots were obvious... flat dirt. But one thing we learned is that if you see one spot in the trees, look around there will probably be others. The spot we had, there were three other spots above us we didn't even know about until we started looking around after we set up camp. If you see a thin trail, there might just be a camping spot at the end of it. If you're with a group and you find a camp spot that works, it might be worth your time to have someone stay there, and have someone else go look for a better spot. We did that, and were pleased to find an even better spot, more shelter, bigger, closer to the water, etc. An extra 20 minutes well spent. The creek runs the entire basin, so water is readily available. Just remember you're not supposed to camp next to the creek. There were a few 4x4-wood posts in some areas to remind us. Where to camp? I say go higher... less extra mileage on climbing days. We were probably 2/3rds of the way up. There is a sign that says 'no more camping beyond this point'... but that is pretty high up, past where the Twin Lake and Pass trail splits. One of the best pieces of advice we followed was to take a tarp and paracord. We were able to set up our tents just on the edges of the tarp to provide a dry area when it rained. We camped in the trees, which provided ample places to tie up the tarp. I suggest at least a 10x10 foot tarp, and 30 to 50 feet of cord. This bit of extra weight will pay off with dry comfort for cooking, or just hanging out. Use a ground cloth to keep the wet from soaking into the tent and your bones. A cheap thin plastic painter's drop cloth works well, weighs nearly nothing. About a $1 at Walmart, just cut to fit. Just remember to check the slope of the ground, you don't want rain water getting between your ground cloth and the tent. No campfires in the basin. 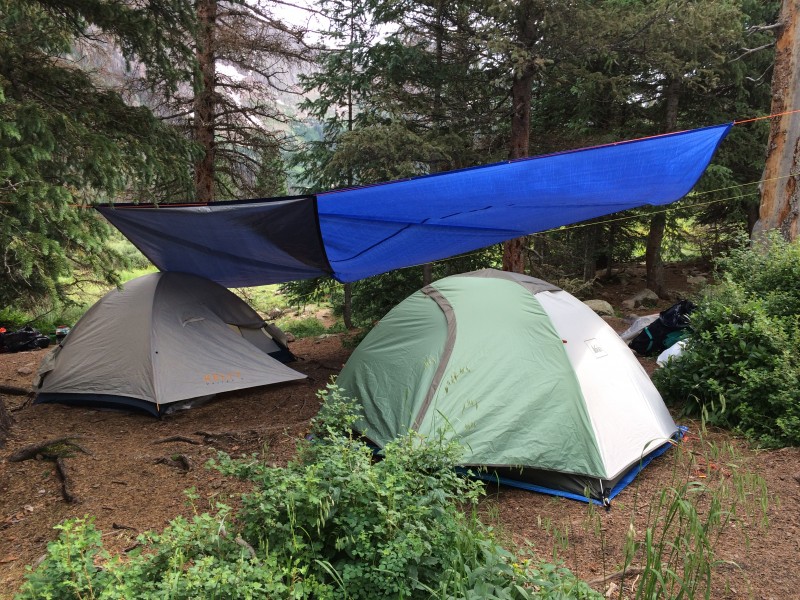 Goats and Marmots, Hanging Stuff We had goats visit, but they weren't the problem that some people experienced. We peed away from camp as much as possible. They found it, and dug at it. We kept the camp neat and hung pretty much everything to keep the little teeth away from our gear. Stored our trekking poles in the trees. I just used a backpack to hang our food and gear. Slung paracord between two trees and that worked. During the day I hung two packs, food and sleeping bags/gear, to prevent chewing on sweaty/salty stuff. We didn't leave much in camp while we climbed. I used a large 39gal trash bag to cover the pack from the rain. Just put a small hole in it (bottom) and used a small biner on the pack carry strap. Put the trash bag, 'upside down' over the pack before attaching the pack to the paracord. Don't forget the paracord... how much? 30 to 50 feet, so a total of 60 to 100 feet if hanging food and using a tarp. The Approach Most people will be within 1 hour to 1.5 hours from their camp to Twin Lakes, depending on your speed and camp location. The trail work CFI has completed is excellent work, building both stairs and walls in several sections. There are a few places with rock slabs that only have cairns to guide you. Start early... don't let afternoon weather ruin this trip, just because you wanted to sleep in. Get up and get down, before the rains, especially during monsoon season. We talked to people that skipped the summit block because it was wet and others that turned around due to weather. It was rainy up high on our way out. Chicago Basin can be a very wet area in the summer. Eolus/North Eolus The trail from the lake to Eolus is in great shape, again with sections of CFI rock stairs. It's a bit loose as you approach the ramp. There was still some snow which covered the main trail. And a patch of snow that covered the trail at the "green gully" so we skirted over to the right.  We hit North Eolus first, was short, quick and easy from the notch. And I'm glad we did that first, just so when we were done with Eolus, we were finished for the day. The Catwalk was easy to cross, no weird obstacles, and at times wide enough for two or three people. We followed the Eolus route description, and made our way below the wall and zig-zagged to the summit. Stays class 3 all the way, but there are numerous cairns that offer different routes, so pick a direction and don't follow a cairn too far from your path. If a move seems beyond Class 3, look around you'll find an easier move. About 20 feet below the summit there is an obvious trail to climber's left of the summit. If I do Eolus again, I'll try the ridge proper route from the Catwalk, stays 3/4. Go a bit right to get on it, but not too far right. 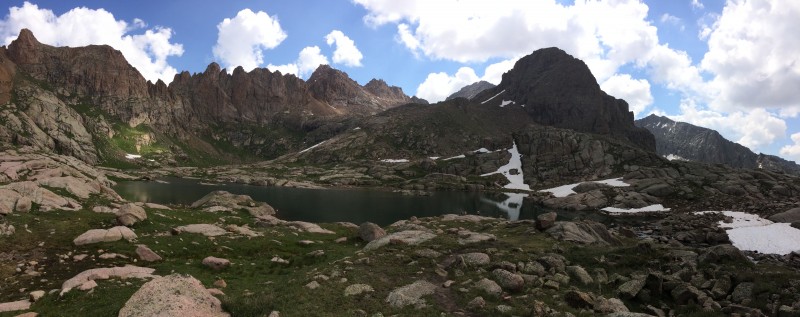 Sunlight/Windom The route takes you to the right of the lake, east. Past the lake, lots of large cairns, hard to get lost. The split to Windom wasn't obvious, but the route to Sunlight was. There is a large flat rocky area where the split should be. 90% is a trail or gully. I suggest wearing a helmet in the gully. The gully could be very loose, but it was damp and seemed to hold better. Once at the top of the gully, cairns led you left up to the summit on Class 3. The summit block... I was nervous. I watched five people go up on the right, to do the step over, (we did hands, knees and belly), then up to the top. I took my time and probably had the easiest time because I'm on the tall side. My wife got stuck on her way down. As she stretched backwards with her toes to reach the bottom step, her belt got caught and she couldn't move, hanging out over the drop-off between the rocks. The belt 'popped' loose and everyone heard it. She then easily slid back to reach footing. 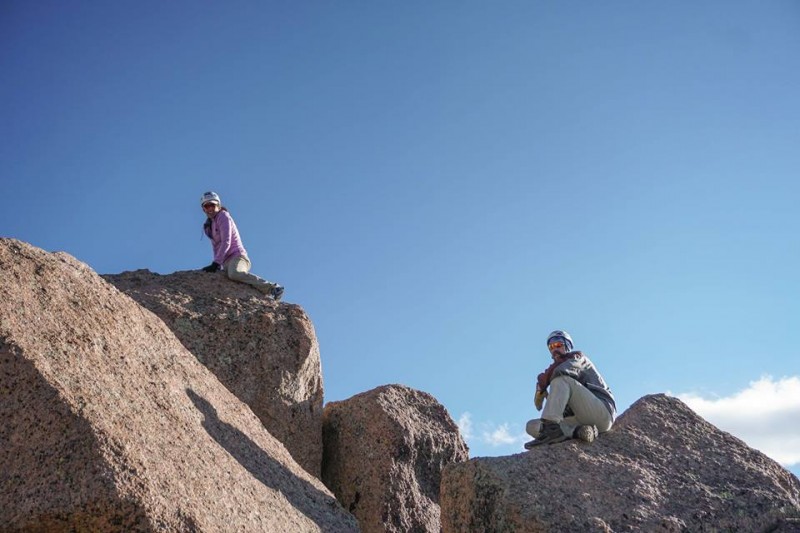 One bit of advice... once on the summit area, take off your shoes/boots and clean any dirt/mud off the sole, will give you a better grip on the tilted slabs. As far a mentally preparing... be calm, be ready. I want to do the summit block again, hopefully I won't be as nervous and be able to enjoy it more. It was crazy fun. Photos and videos don't truly relate the feeling of that exposure. 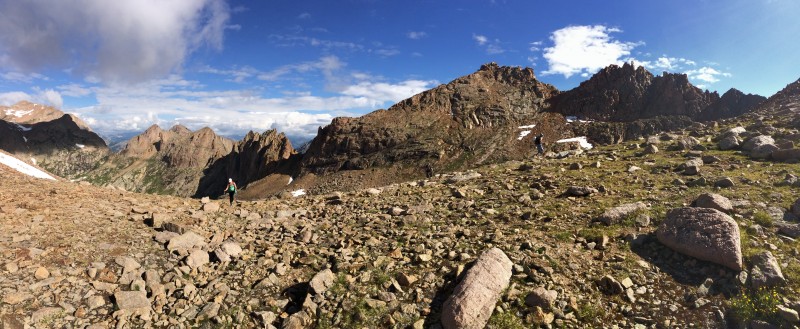 For Windom, we followed the Sunlight gully down, but not all the way, turned left, and did a half circle to reach the lower portion of the Windom route below its saddle. Windom was fun. Class 2+ or Class 3 depending on the route you picked. The summit was cool, with large square boulders that were stacked like Legos. One of the best summits of all the 14ers I've done so far. I mentioned the trail to Windom wasn't obvious at the split, but we easily followed cairns down from the saddle to the split. You just need to look around for the cairns on the way up, they're much smaller than the ones to Sunlight. We picked Windom to do last, just in case bad weather moved in and we had to bail. Thought it would be the easiest of the four to hit on our last day if we needed to get it before the train. But the weather held for us. The Views The views from the summits of these four peaks can't be beat. Amazing. Yes, the best scenery of any 14er or 13er I've done. Views of the basin are fantastic as well. The San Juans never disappoint. I'll go back again. 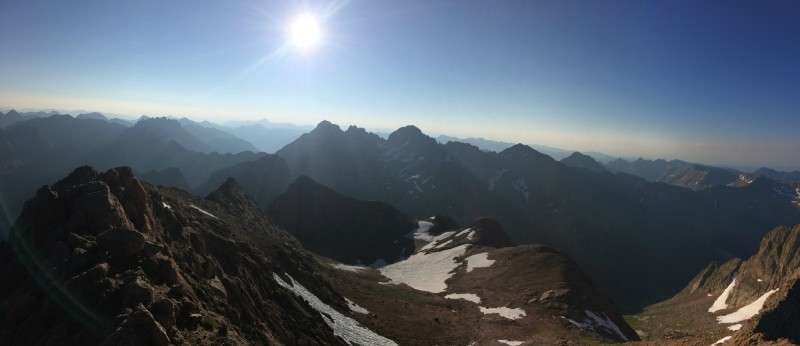 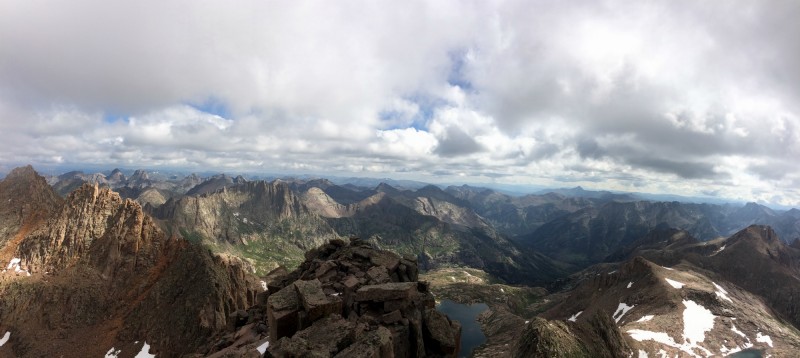 Heading Out It's about 2 hours, give or take 15 minutes, back to Needleton, depending on your speed and camp location. Take a bath in the creek/river. For those of you that stash beer, etc. They won't allow you to take it on the train. Drink it before you board or hide it. The concession car does sell beer and other snack items. If you're heading back to Durango, think about going to the train early and hit Silverton for lunch. You might not have your assigned seat, but they'll put you somewhere if there is room. 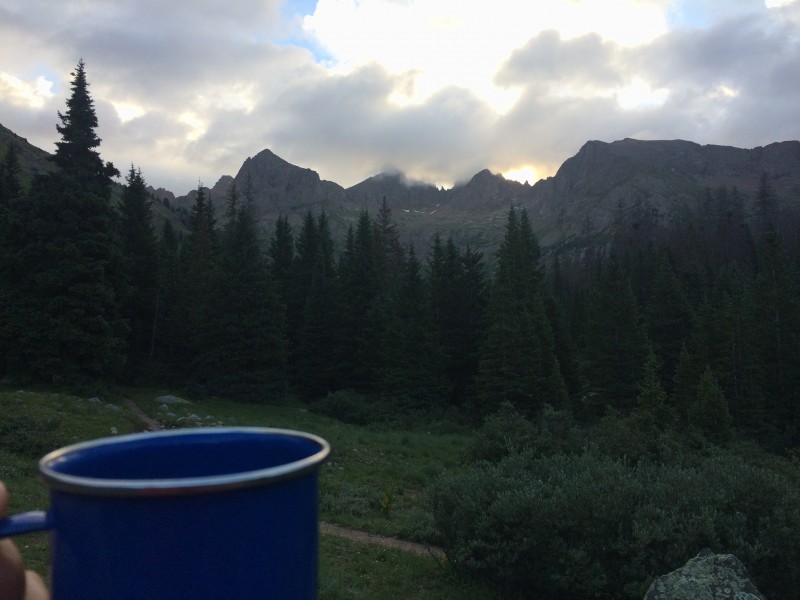 Durango pick up time was 3:30, Silverton was 11:30. We went early, rode the train for an hour and got a large hot lunch at the Grand Imperial Hotel. I can't say it was delicious... I ate it too fast to know, but it sure satisfied. Handlebars is another decent place to eat. 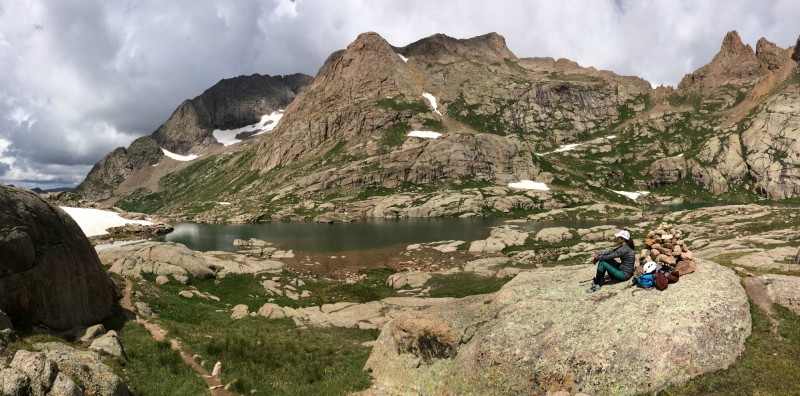 Other Stuff
 A good thread... Top 5 Things for Chicago Basin Times Needleton to Camp: About 3.5 hours, including time to stash beer and a 20-minute snack halfway up. Camp to Lake: 1:15 to 1:20, a few minutes slower the second day, but much easier. Would guess 1 hr to 1.5 hours depending on your speed and campsite location in the basin. (about 1 hour down from lake to camp.) Both hikes (Eolus/N Eolus and Sun/Win) can be done in under 8 hours from camp. Eolus and North Eolus Took us 7 hr and 40 min from camp to summit to camp, we were a bit on the slow side. 1:35 - lake to the start of the ramp 1:30 - ramp to North Eolus (from the notch to summit, is short, 10 to 15 minutes) 1:40 - start of Catwalk to Eolus summit 1:45 - Eolus summit to lake Sunlight and Windom Took us 9 hrs and 10 min (with an hour spent at the lake, watching goats, etc, on the way down) 1:25 - lake to top of Sunlight gully 1:15 - gully to Sunlight summit and back to gully 1:00 - top of gully, down and up to Windom saddle 0:40 - saddle to Windom summit, 800 feet (slow), probably spent 20-30 minutes on the summit 1:35 - Windom summit back to lake 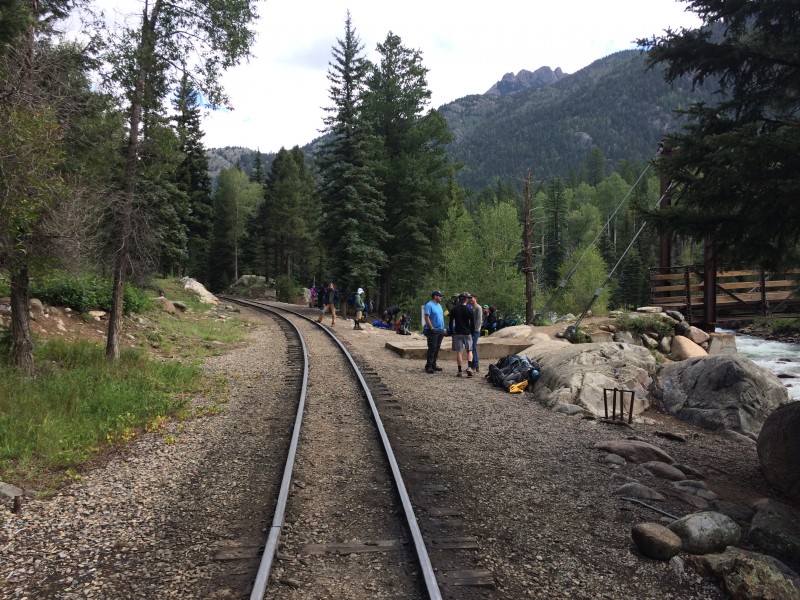 Thumbnails for uploaded photos (click to open slideshow):  Chicago Basin, just before our camp site. Notice the avy debris on the right, along the creek.")
 Camping with a tarp in the trees.")
 Eolus and the Catwalk from N. Eolus.")
 Sunlight, Sunlight Spire, a hint of Windom and 18.")
 The Windom saddle with Sunlight in the background.")
 Taken from Windom... Eolous, N. Eolus, Sunlight and Sunlight Spire.")
 Resting at Twin Lakes after Sunlight/Windom.")
 Waiting on the train.")
 Waiting for my turn.")
 Train photo.... of course....")
 Clouds moving into the basin on our way down.")
 Clouds move over Windom during our morning coffee on our last day in the Basin. It rained early that day.")
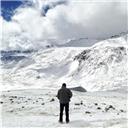
 View from N. Eolus")
 View from Windom")
|
| Comments or Questions | |||||||||||||||||||||
|---|---|---|---|---|---|---|---|---|---|---|---|---|---|---|---|---|---|---|---|---|---|
|
Caution: The information contained in this report may not be accurate and should not be the only resource used in preparation for your climb. Failure to have the necessary experience, physical conditioning, supplies or equipment can result in injury or death. 14ers.com and the author(s) of this report provide no warranties, either express or implied, that the information provided is accurate or reliable. By using the information provided, you agree to indemnify and hold harmless 14ers.com and the report author(s) with respect to any claims and demands against them, including any attorney fees and expenses. Please read the 14ers.com Safety and Disclaimer pages for more information.
Please respect private property: 14ers.com supports the rights of private landowners to determine how and by whom their land will be used. In Colorado, it is your responsibility to determine if land is private and to obtain the appropriate permission before entering the property.