Download Agreement, Release, and Acknowledgement of Risk:
You (the person requesting this file download) fully understand mountain climbing ("Activity") involves risks and dangers of serious bodily injury, including permanent disability, paralysis, and death ("Risks") and you fully accept and assume all such risks and all responsibility for losses, costs, and damages you incur as a result of your participation in this Activity.
You acknowledge that information in the file you have chosen to download may not be accurate and may contain errors. You agree to assume all risks when using this information and agree to release and discharge 14ers.com, 14ers Inc. and the author(s) of such information (collectively, the "Released Parties").
You hereby discharge the Released Parties from all damages, actions, claims and liabilities of any nature, specifically including, but not limited to, damages, actions, claims and liabilities arising from or related to the negligence of the Released Parties. You further agree to indemnify, hold harmless and defend 14ers.com, 14ers Inc. and each of the other Released Parties from and against any loss, damage, liability and expense, including costs and attorney fees, incurred by 14ers.com, 14ers Inc. or any of the other Released Parties as a result of you using information provided on the 14ers.com or 14ers Inc. websites.
You have read this agreement, fully understand its terms and intend it to be a complete and unconditional release of all liability to the greatest extent allowed by law and agree that if any portion of this agreement is held to be invalid the balance, notwithstanding, shall continue in full force and effect.
By clicking "OK" you agree to these terms. If you DO NOT agree, click "Cancel"...
My father (dennywitte), brother (markwise) and I (CHWitte) have been reading about, thinking about, and dreaming about both our 54th 14er and Capitol Peak. The weather this past week just happened to cause us to switch the order we had originally planned. Instead of leaving Evans for last so that our families could drive to the top for a celebration, we decided to move it to the beginning of the week as the road is still closed and the weather was not looking as good as the end of the week for Capitol. So, we climbed Evens via the Sawtooth on Monday and North Maroon on Wednesday to finish it off for my father who had to turn back a few years ago while my brother and I summitted. All we had left was Capitol Peak after Wednesday, July 22 to complete the 54.
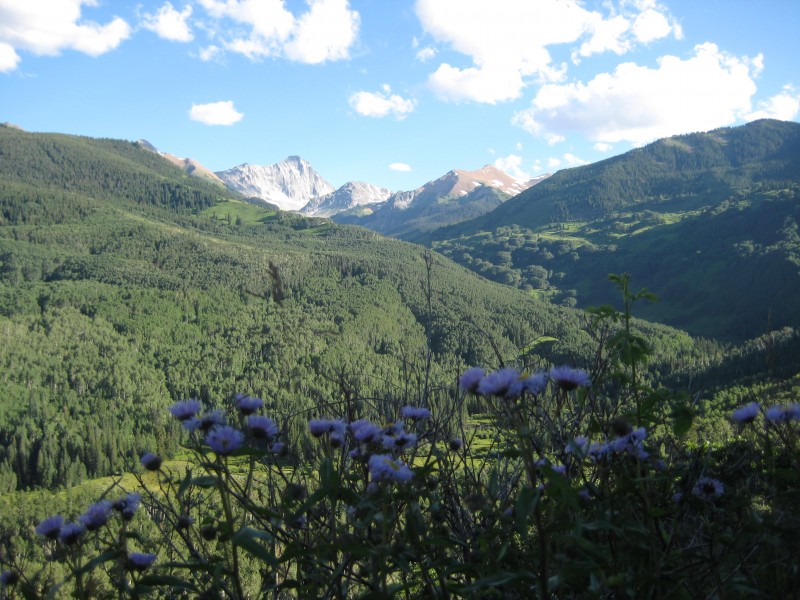
The weather report for Thursday (hike into Capitol Lake) and Friday (summit) was excellent and we scheduled our last 14er. We drove from Buena Vista to Aspen and finally to the Capitol Peak trailhead late on Thursday as we enjoyed the most time possible with family before our hike in. We arrived late in the afternoon, early evening, to discover that the weather was perfect, the trailhead was nearly packed and the views were gorgeous! View of Capitol Peak Parking Area at Trailhead View of Capitol Peak from Parking Area
We were already well aware of the bear issue at Capitol Lake and the requirement by the National Forest Service for bear canisters so we had one packed and used it! For those that just don't believe us, the signs are very clear at the trailhead about bear canisters. On our way down, just below Capitol Lake, we saw a black bear on the side of the mountain next to our trail. Bear canisters required!
The beginning hike from the trailhead is nice (when it's not raining) with some Aspen forests to go through and a gentle slope. On the way out, we got swamped in rain and the trail turned into a slippery mud pit (more on this later)
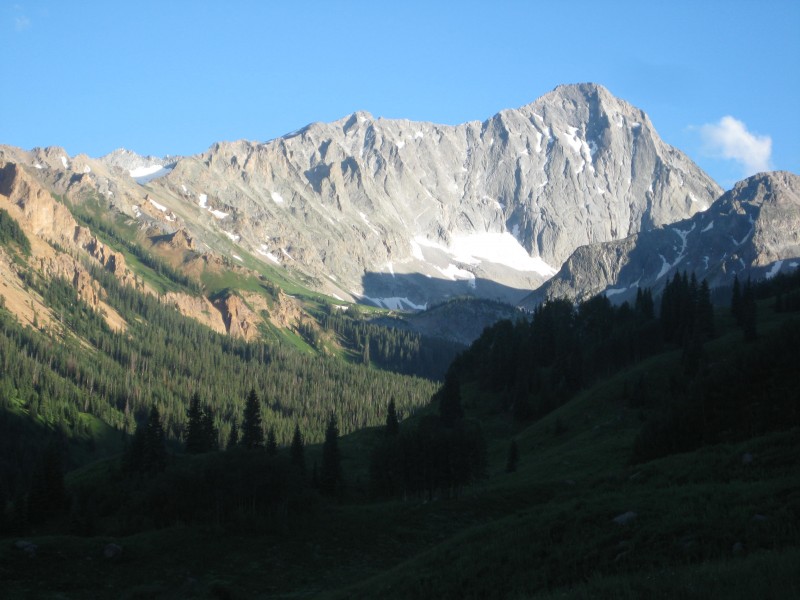
As people always say, you will have a great view of Capitol Peak the entire hike in which is awesome. View of Capitol from low on trail
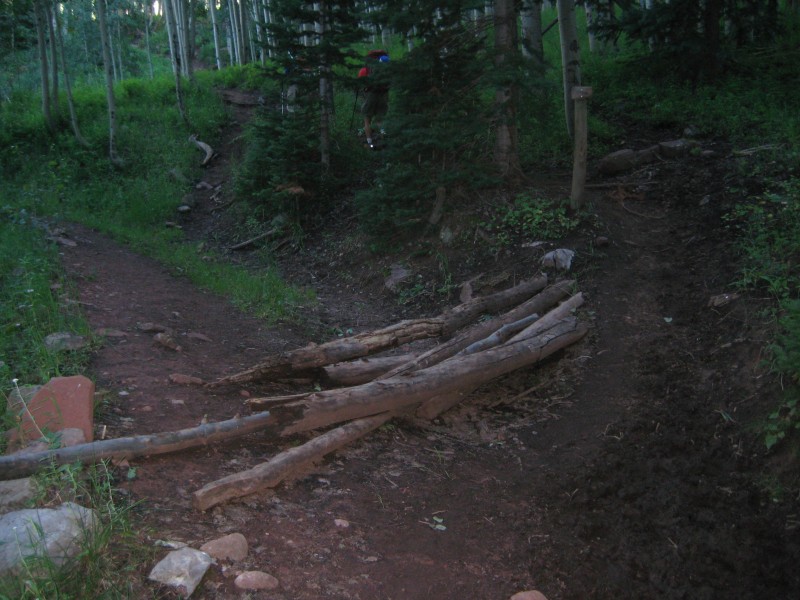
Early on, there is a small trail junction where what appears to be an old mining road or forest service road breaks off to the left and the trail heads up to the right. It's well marked with logs blocking the road but just be aware of this so you don't miss it. Trail junction. Go right.
The cows are notorious on the trail leading up to Capitol Lake. In fact, they are also destructive. If the trail has any moisture at all, the cows create trenches, mud, slop, and cow pies all the way up until you hit the fence (coming later). I'm a bit of an environmentalist myself, and I'll be contacting my Congressman about cattle grazing on National Forest Land in wilderness areas. It's a sad reality that well constructed trails are destroyed by cattle in these grazing areas. You can see from the following picture how this happens easily when it's wet. Ok, enough politics and back to Capitol Peak. Muddy trail, destroyed by cows
There really are some beautiful areas as you hike up into the bowl on this trail. Lot's of vegetation and views to be taken in.
View of Capitol as sun sets Vegetation on trail
Next, you get to the stream crossing. We had read that there was a better crossing area if you take the path to the right (pictured below). However, we looked for a good 10 minutes in this direction and did not find a crossing for the stream. So, we eventually just took our shoes and socks off and crossed at a short crossing up stream a little ways. On the way down, we crossed right where the trail shows it hits the stream crossing and just walked through it with shoes on because we were already soaking from the rain. This is not a great situation so be aware that you might have to get wet and you might want some extra socks or Tevas along for the crossing. There were not any good rocks or logs leading across the stream at any point nearby that we noticed.
Stream crossing junction Stream crossing
Next, (you can see it's getting dark already from my pic), you run into the cattle gate where the grazing ends. Thank God! Please make sure you close this door after going through (sign tells you to also) so that the cattle do not make it into the upper basin and Capitol Lake! I thought one cow along the way was going to charge me after I had to move him off the trail with my trekking pole.
Cattle gate
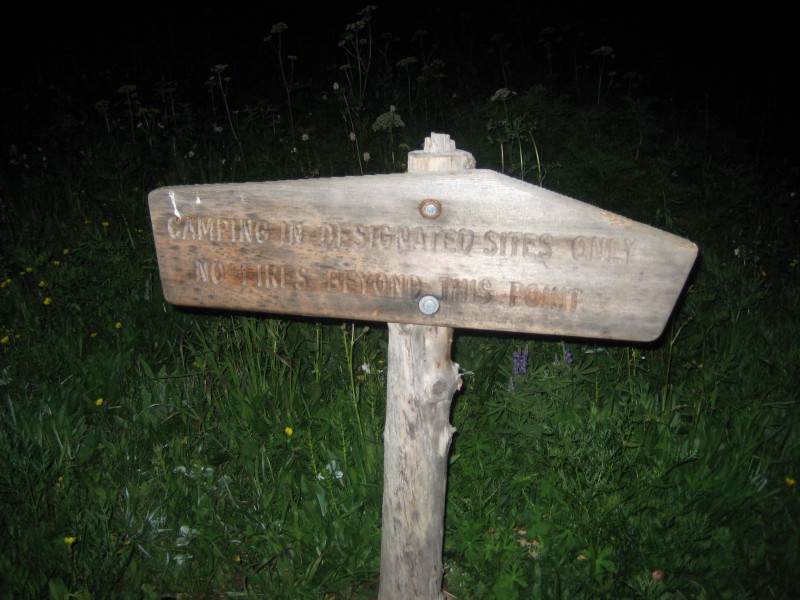
The 6.5 mile hike continues on as the trail starts to gain more elevation. There are still nice switchbacks and it's easy to follow all the way up to Capitol Lake. Just below you get to the campsites, you will see this sign:
Camping in designated sites only!
Camping in designated spots only. There are 8 different campsites at Capitol Lake that are all clearly labeled and designated with trail sign numbers, 1-8. Be careful as campsites 1-4 are lower and are all very close to each other. Campsites 5-8 are further up the trail closer to Capitol Lake. We stayed in campsite 3 in the lower area as we were late arriving and it was one of the only ones available! Some people say the campsites higher up are better but I don't know either way. Sorry, no pictures as it was completely dark when we woke up and raining buckets when we returned.
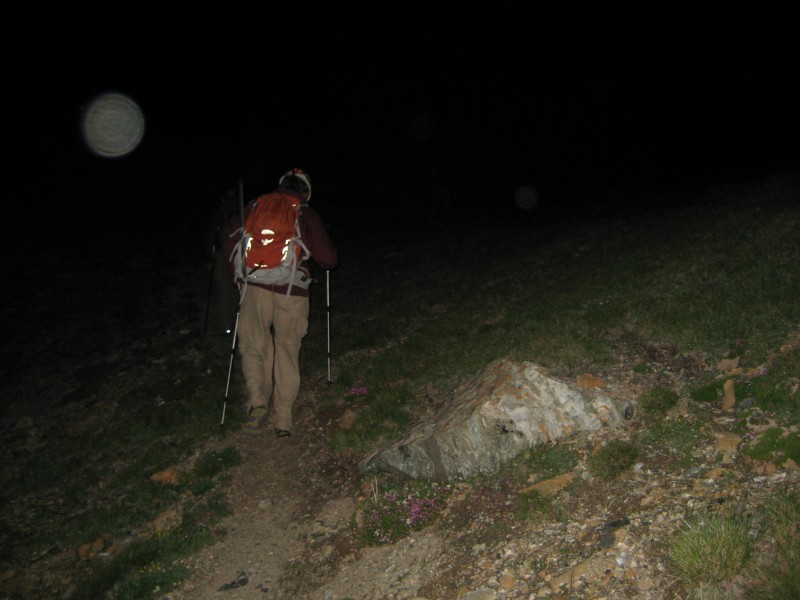
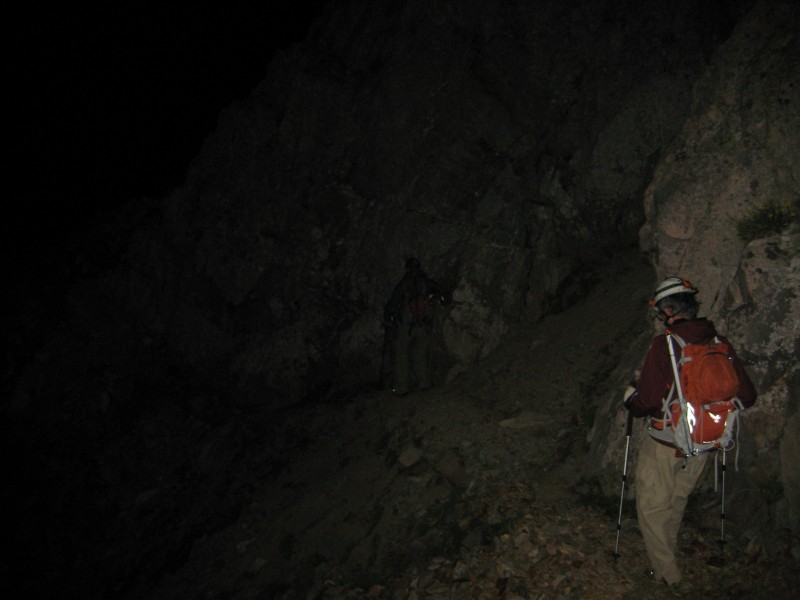
We woke up around 4:00 AM Friday morning up at Capitol Lake and hit the trail by 4:20 AM. The trail is still really easy to see and follow in the dark. You begin to make a pretty steep and direct ascent up to Daly Saddle. The trail is excellent, however, with lots of switchbacks and is very easy to follow all the way to Daly Saddle.
Hiking up to Daly Saddle
You don't want to start to early from Capitol Lake or you will arrive up at Daly Saddle before it's light. It only took us maybe 45 minutes to hike from Capitol Lake to the Saddle, and we are typically a slower group.
When we arrived at the saddle, light was just beginning to show through some of the clouds. From this point on, route finding begins. As you can see from the following picture, you go over the saddle to the left as the trail still shows a good route. However, this is where the route finding begins. About 50-100 feet after the saddle, look for a gully where people descend down a steep, switch backed filled area that will take you down at least 100 feet to a lower trail below the cliffs. Another climber who passed us on the trail up to Daly saddle, cliffed out shortly after missing this gully drop and turned around to join us on the trail. Again, sorry for no pics but it was dark. It's easy to miss the gully as it looks like trail continues beyond it high up where this other climber ventured into.
Cross over saddle to left side trail
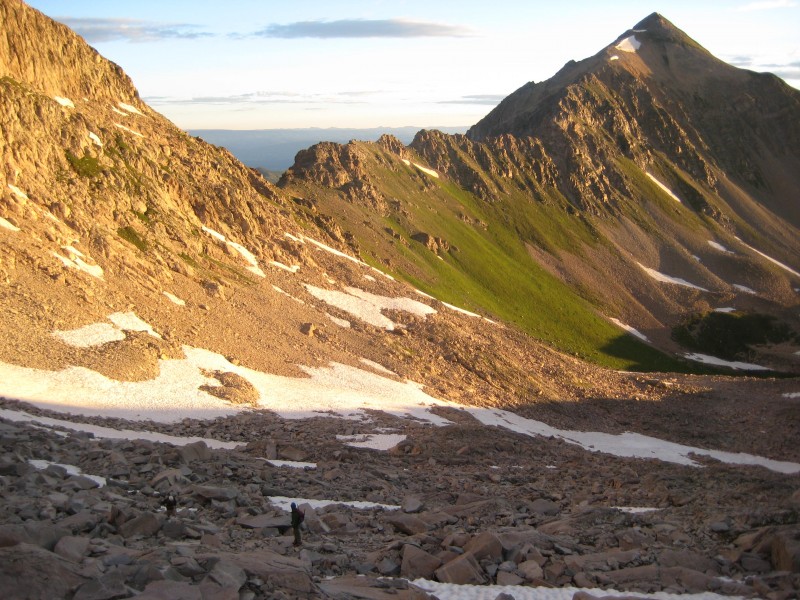
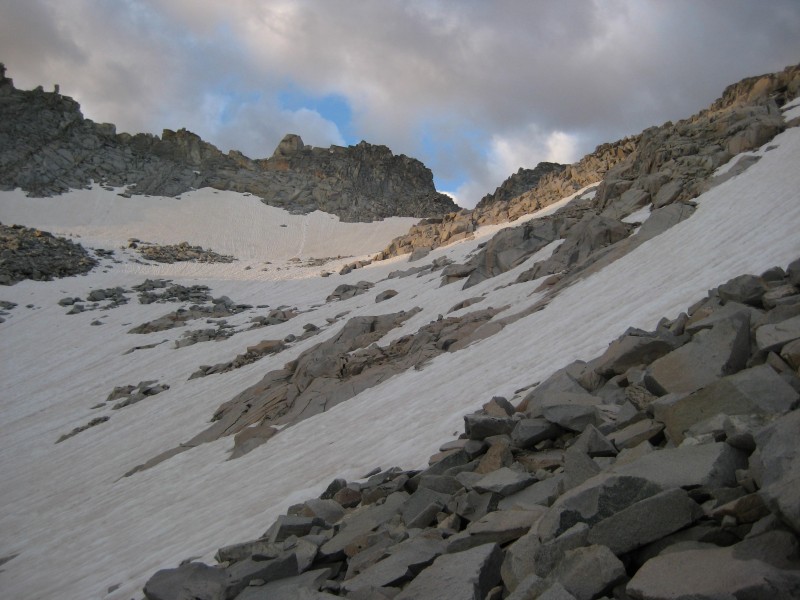
Once you get down to the bottom of the gully, you will continue traversing across a few ribs of gullies as you make your way into the bowl before getting high enough to make the final ascent to K2. The picture below is what you see once you make it around these ribs of the gullies. As you can see, there is quite a bit of snow in the bowl. We crossed around 4 snowfields. You can see the footprints going across the snow. In the video, I show the footprints going through snow that is really high up in the bowl. If you went up this snow as some have done, this takes you to the ridge which leads to K2. It's actually out of your way and very steep and dangerous. Once you get that high, stay to the right of the snow and go up the rock field toward K2. It's shorter and quicker.
View of bowl after crossing gully ribs
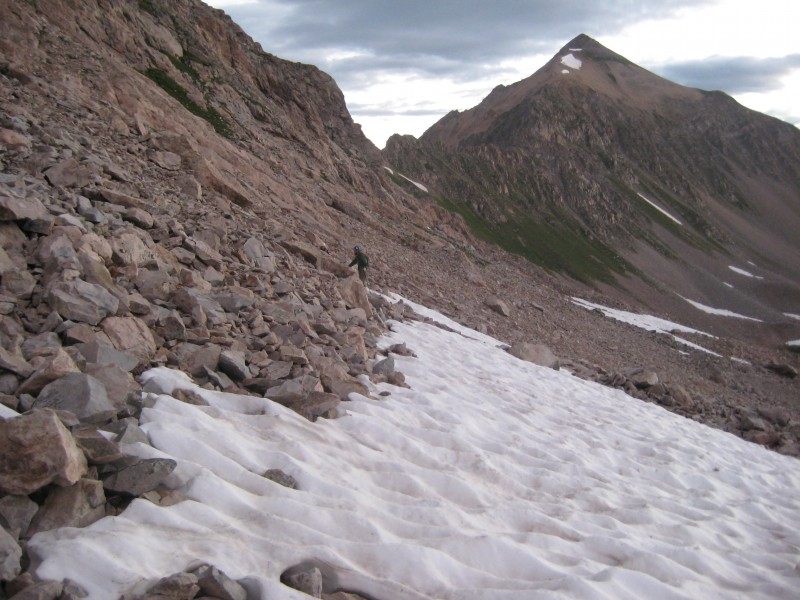
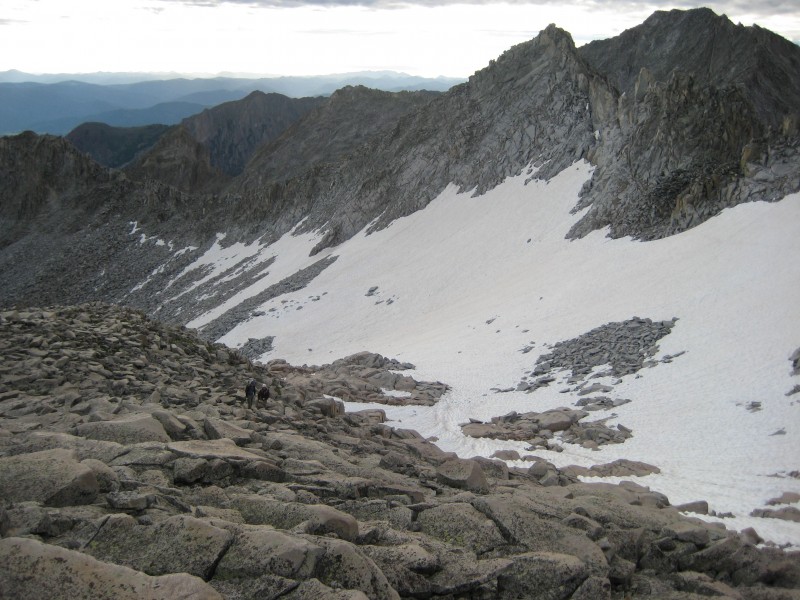
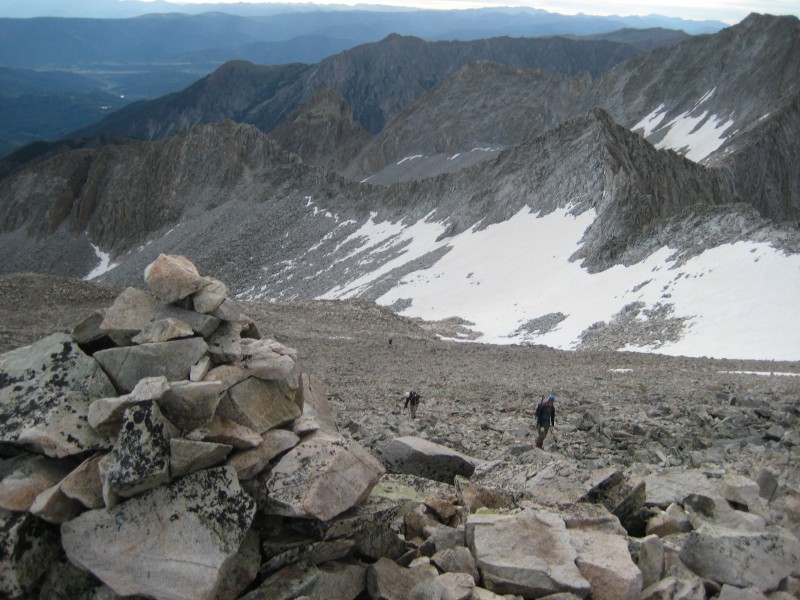
This next picture is looking back toward Daly Saddle. Notice the rock field you traverse after the gully ribs.
Looking back toward Daly Saddle
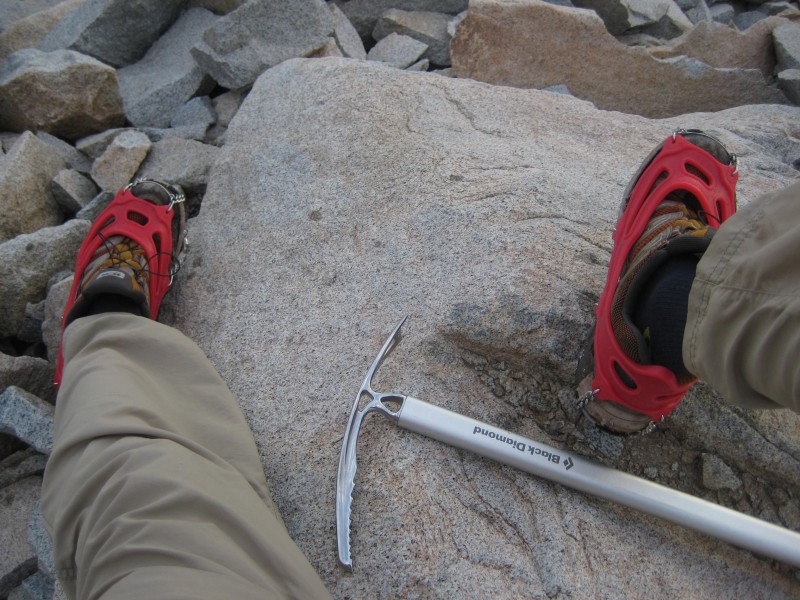
The video below is Mark crossing the first snowfield. We brought microspikes and ice axe. For safety, I highly recommend an ice axe at this point in July as there are some steep snow fields you must cross that could be hazardous if you fall. You don't necessarily need microspikes as I didn't use them on every snowfield, however, I would recommend them also.
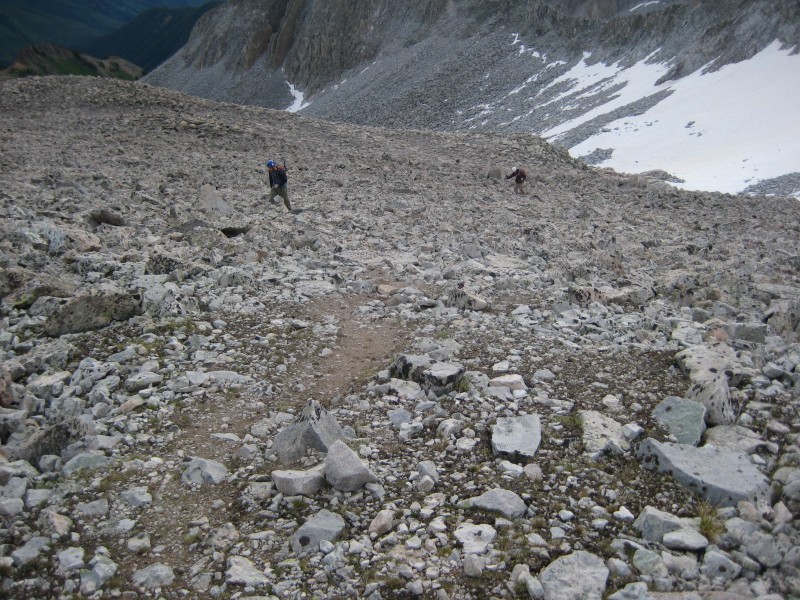
In this next picture, you can faintly see the trail coming across the rock up to the first snowfield from Daly Saddle. So far the climb is easy and fairly quick.
Looking back toward Daly Saddle trail
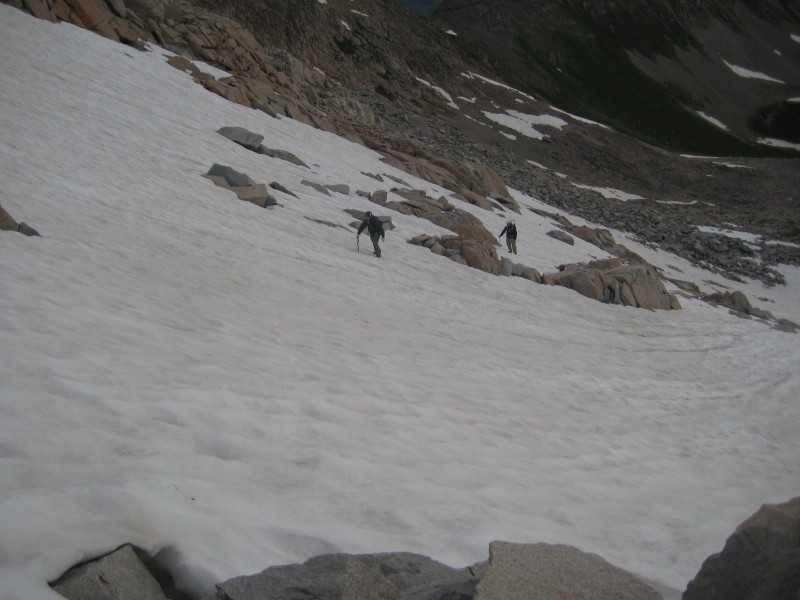
This picture is taken after the first snowfield crossing. You have a few more snowfields to traverse and they get steeper as you go on.
More snowfields to traverse across
Here the crew is crossing the second snowfield. Look for cairns on rocks poking out of the snow for the trail/route.
Here is a picture looking back toward Daly Saddle after 2nd snowfield traverse.
Looking back after second snowfield traverse
Notice how snowfields continue to get steeper the higher you go up.
steep snowfields traverssing
These work well: microspikes and ice axe
In the video, the rocks I show while saying "We will turn right shortly" are where you want to aim for and turn right up them. There is a higher route you can take that is mostly on rock and avoids almost all the snow except one snowfield. One hiker took this due to the fact he did not have microspikes or an ice axe. I still think it was dangerous to do what he did even with the one small snowfield crossing that was very steep high up.
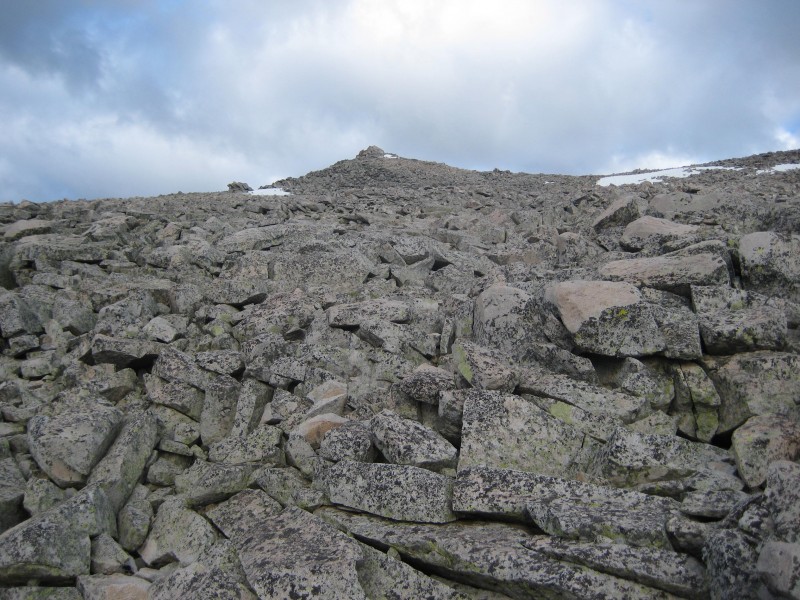
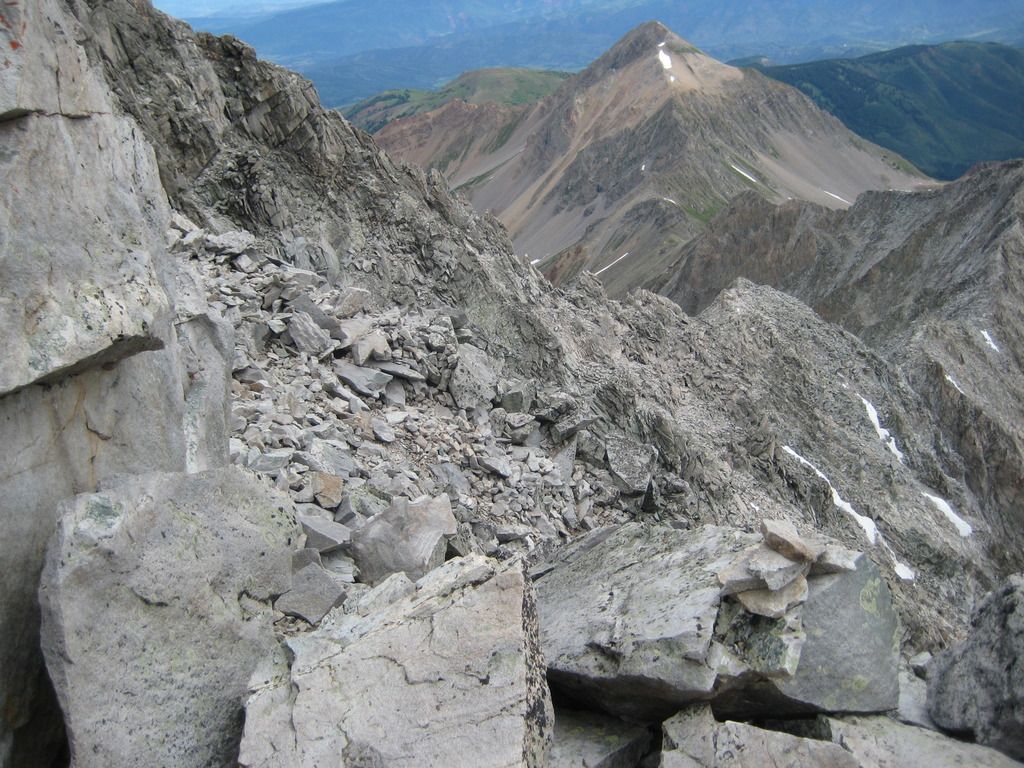
Once you get off the snow and up on the rock, you will begin to see the ascent to K2. The following picture looks back down the rock you gain after leaving snowfields.
looking back while on K2 ascent
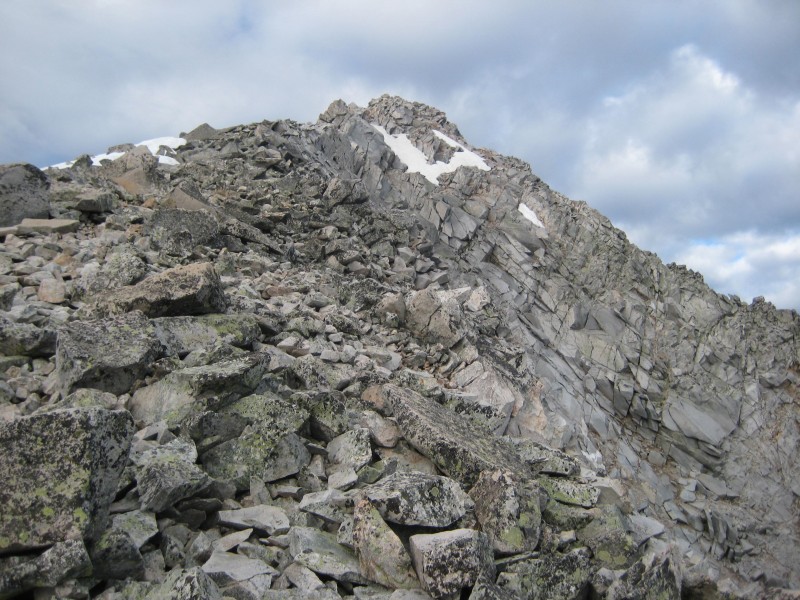
Here is look the opposite direction toward K2.
The video shows the ascent up the rock toward K2. I actually took the snow up higher than normal because I like hiking on snow. You can do this all the way into the bowl before you cut right onto the rock. However, my dad and brother took the rock all the way up.
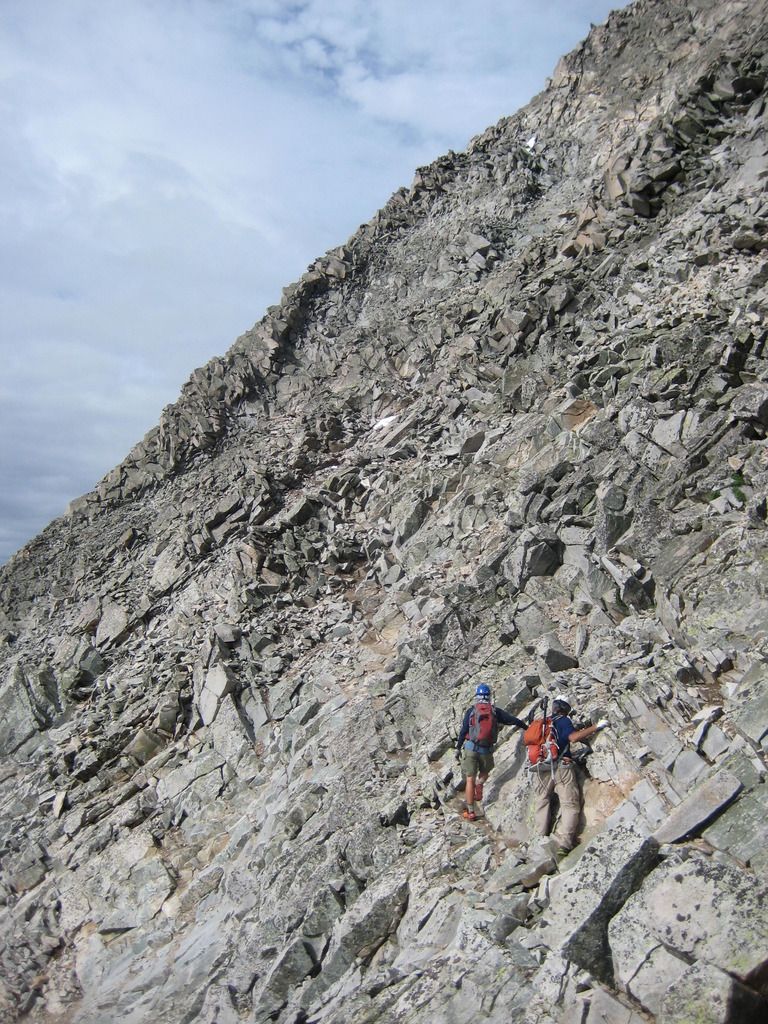
Once you are up on the rock, you are well on your way to K2. Every once in a while you will find some trail but for the most part, you are just picking your route up to K2. Here is a little bit of trail we found:
trail on rock scramble to K2
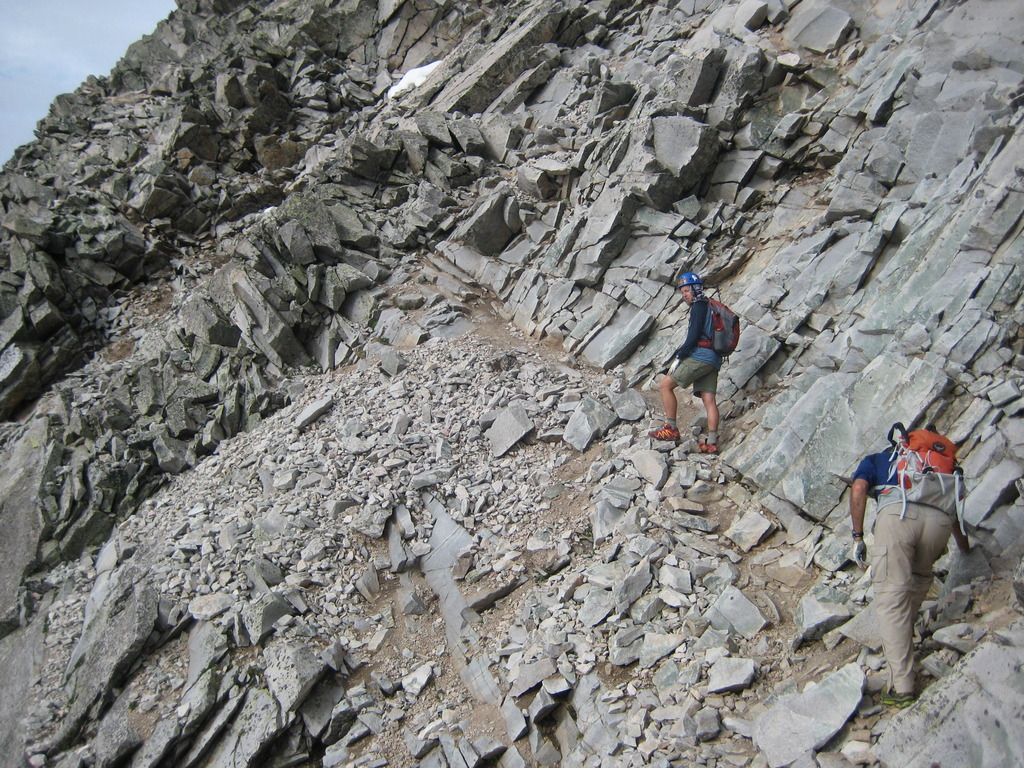
Some more "rock trail" on way to K2
rock trail up to K2
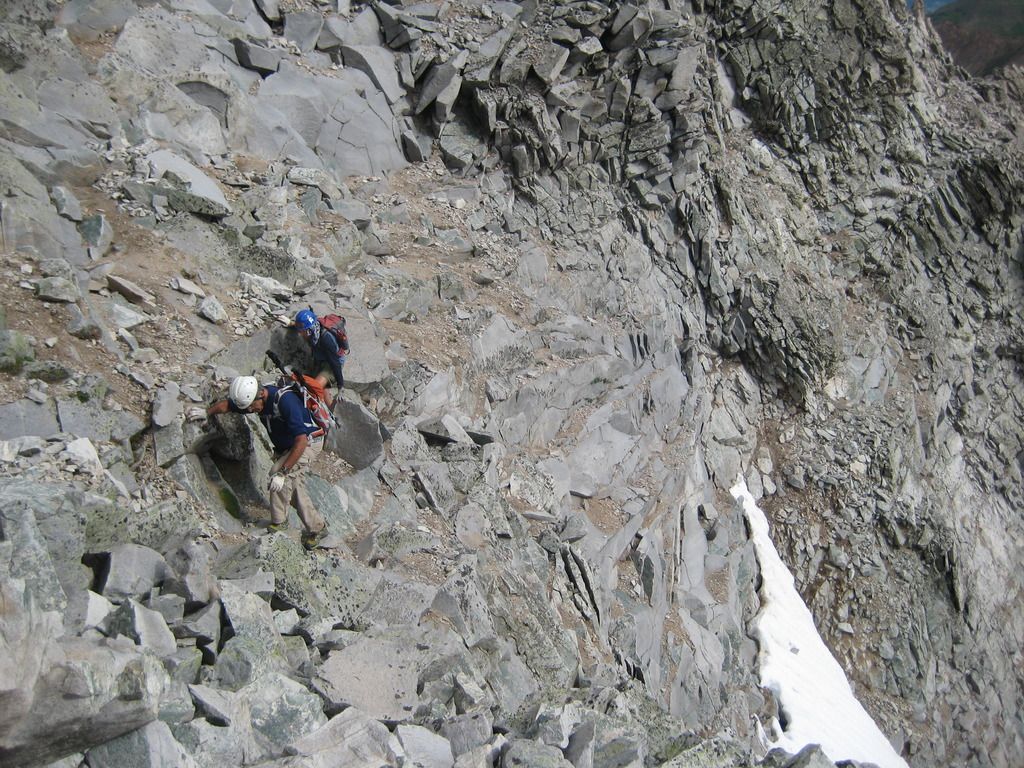
Aim for big cairn on way up to K2
cairn on way up to K2
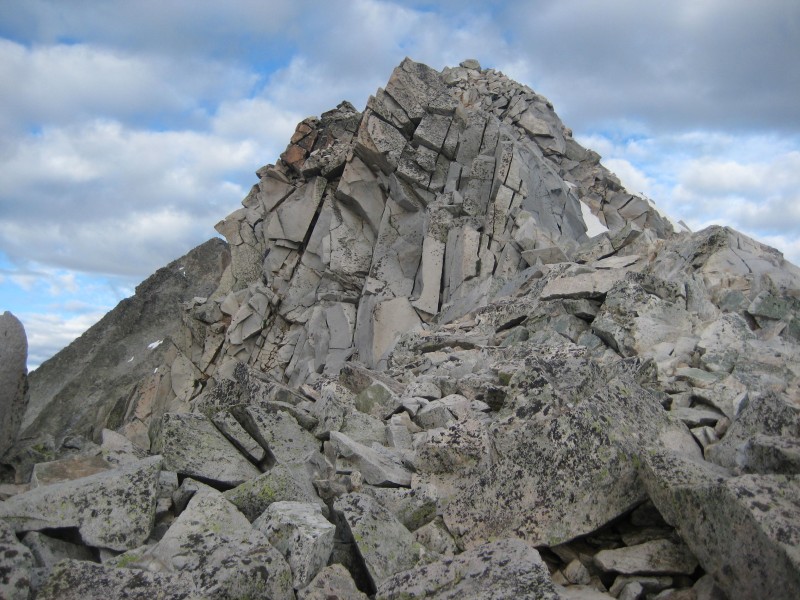
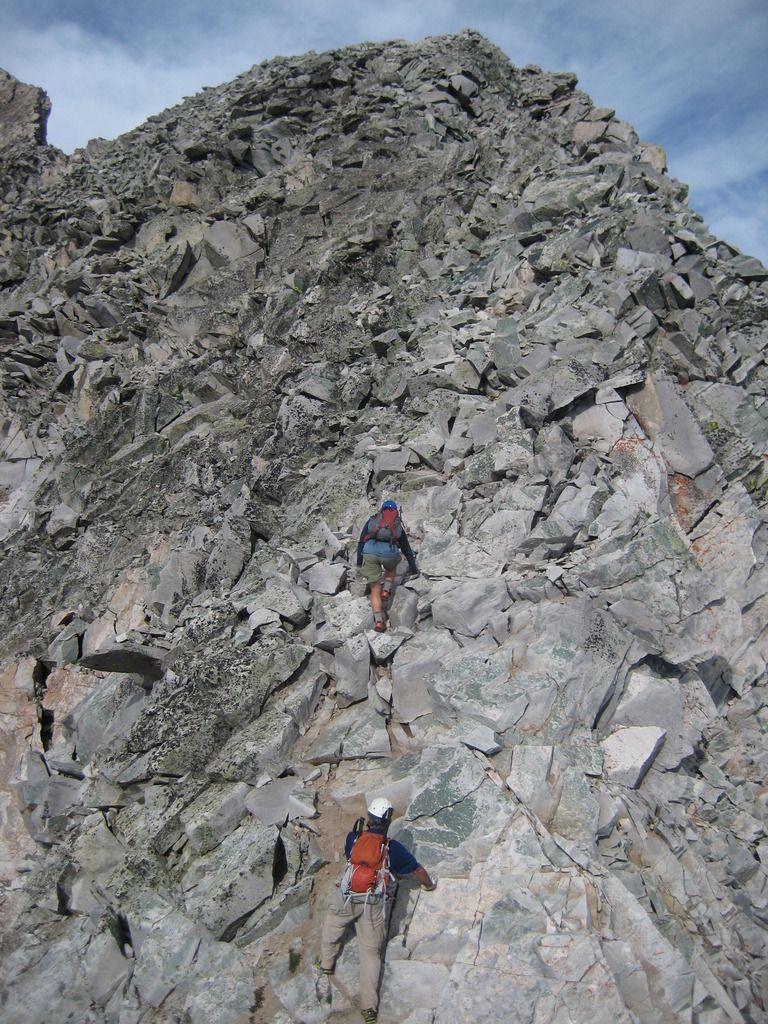
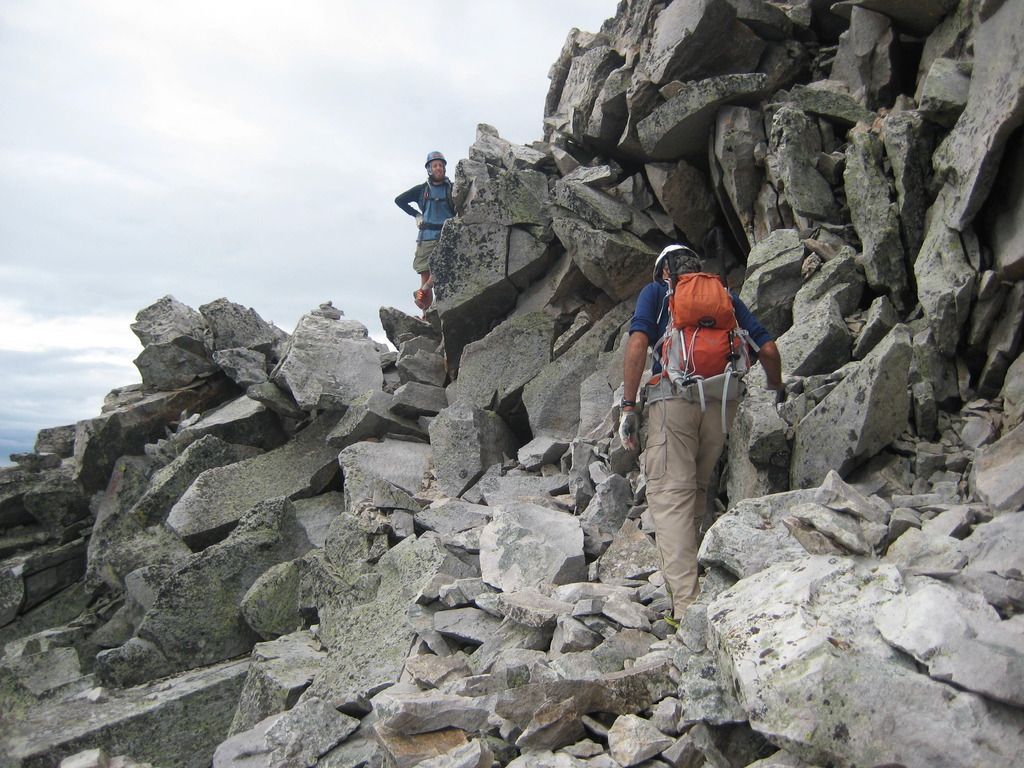
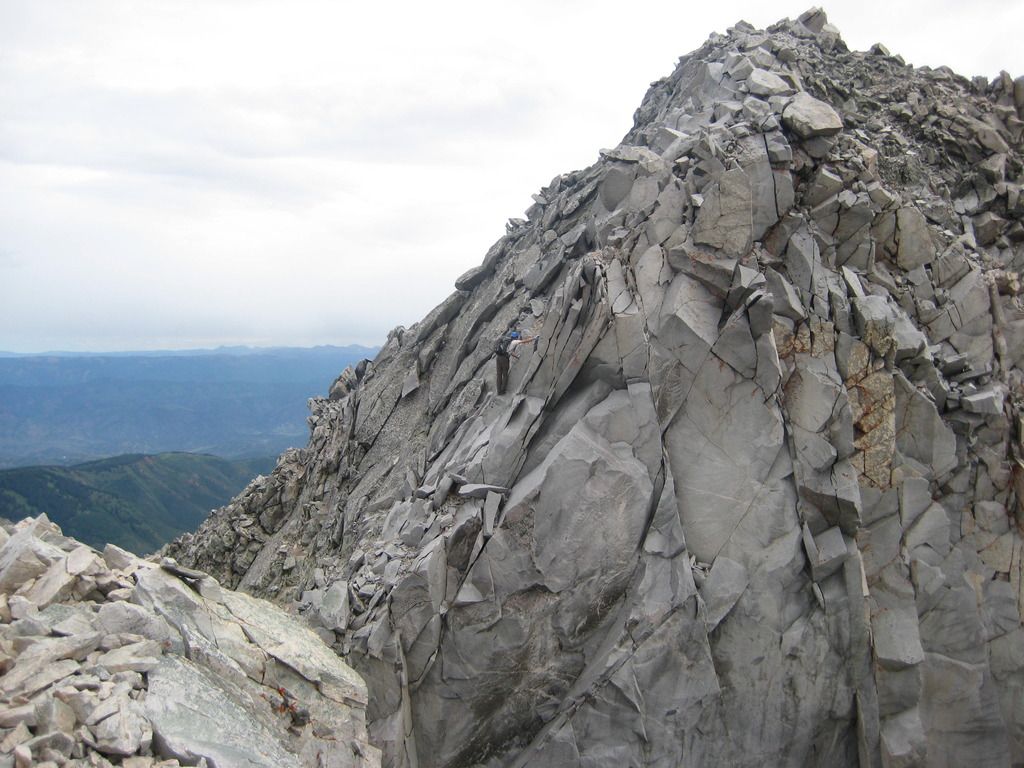
Below K2 scramble to summit
Final scramble to K2 summit
Sorry I get the peaks wrong in the video. Pyramid and the Bells are over in the same direction toward the beginning and Snowmass is the last mountain I identify as the "Maroon Bells"
NOW THE FUN BEGINS!
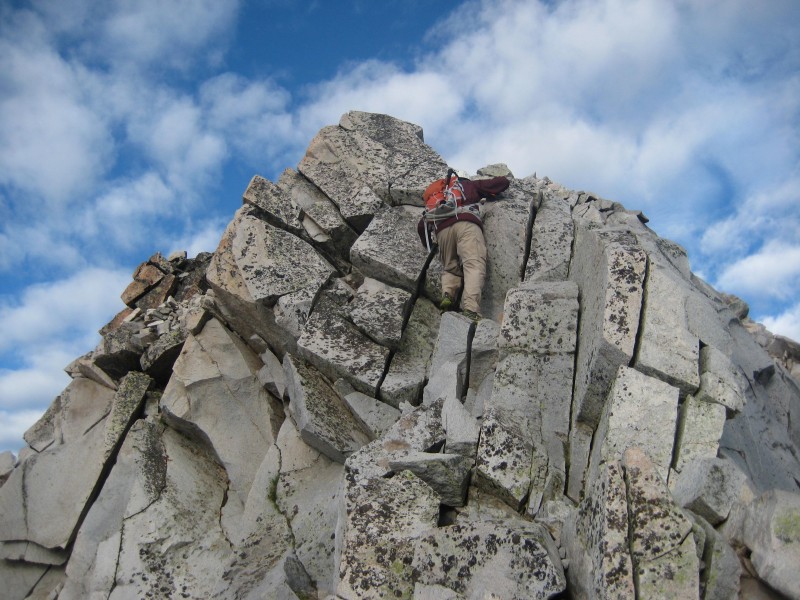
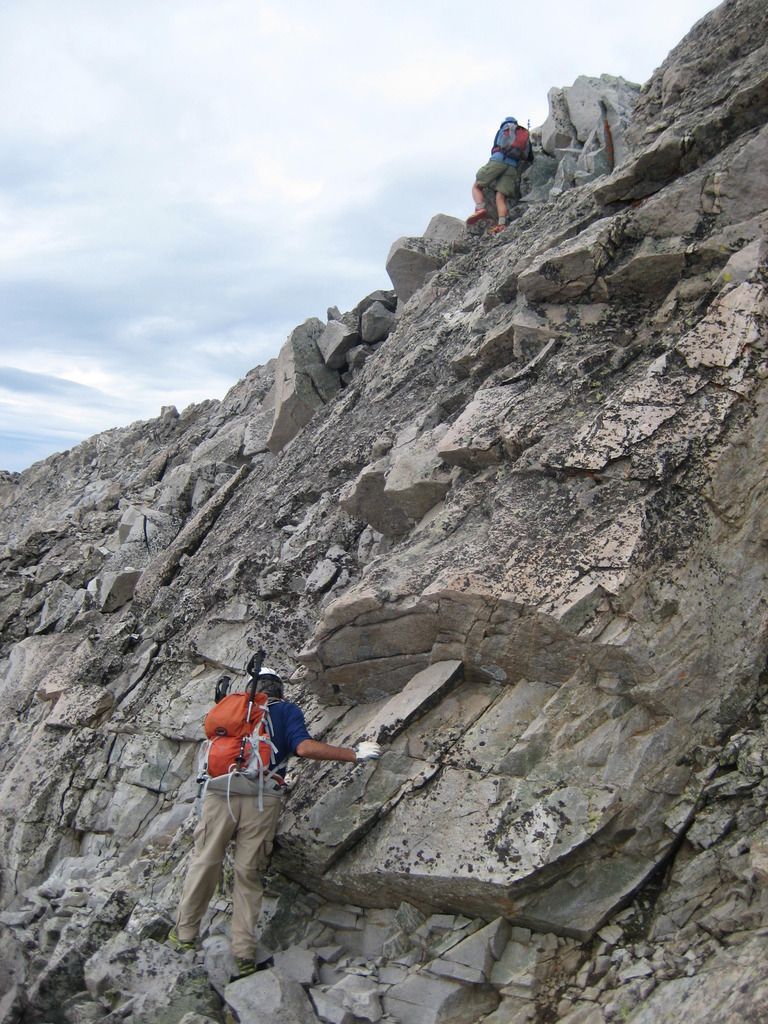
The next video is Mark going up the final summit scramble to K2. This really isn't a hard climb but I would say it's easy class 4 or 3+. There are pretty good hand and foot holds all the way up. In fact, going up over the summit of K2 has less exposure than doing the scramble traverse to the side of K2.
Dad climbing K2:
Dad climbing K2
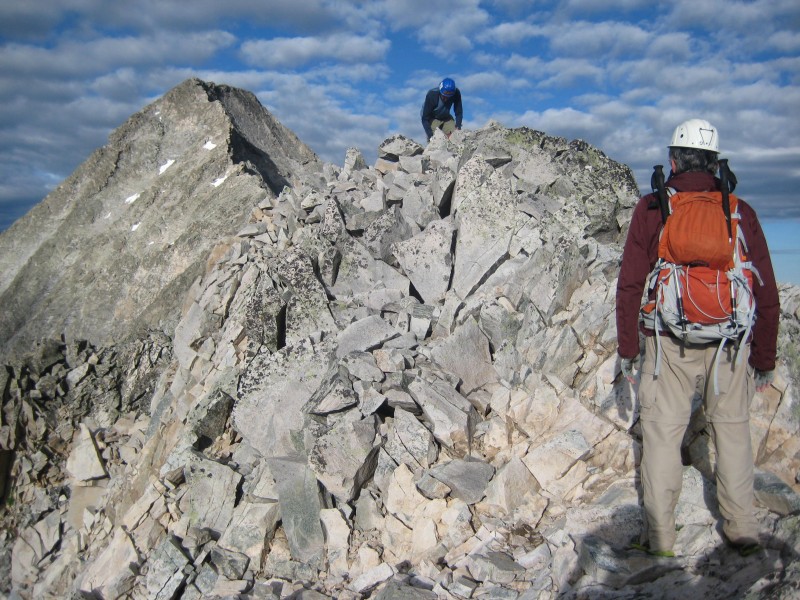
Mark standing on top of K2
Mark on K2
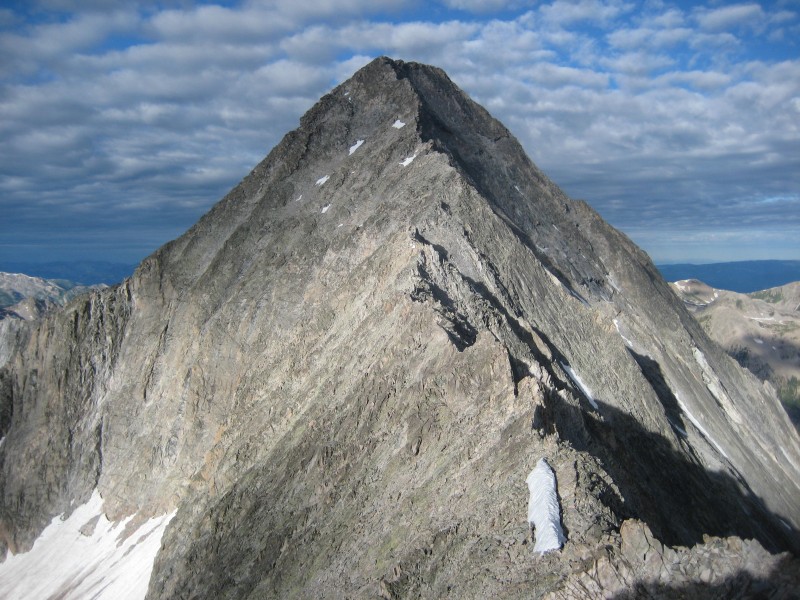
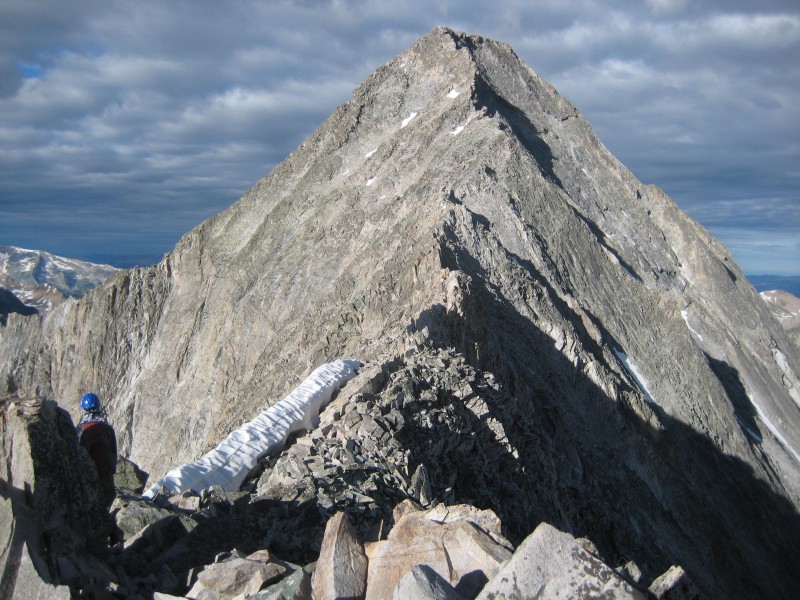
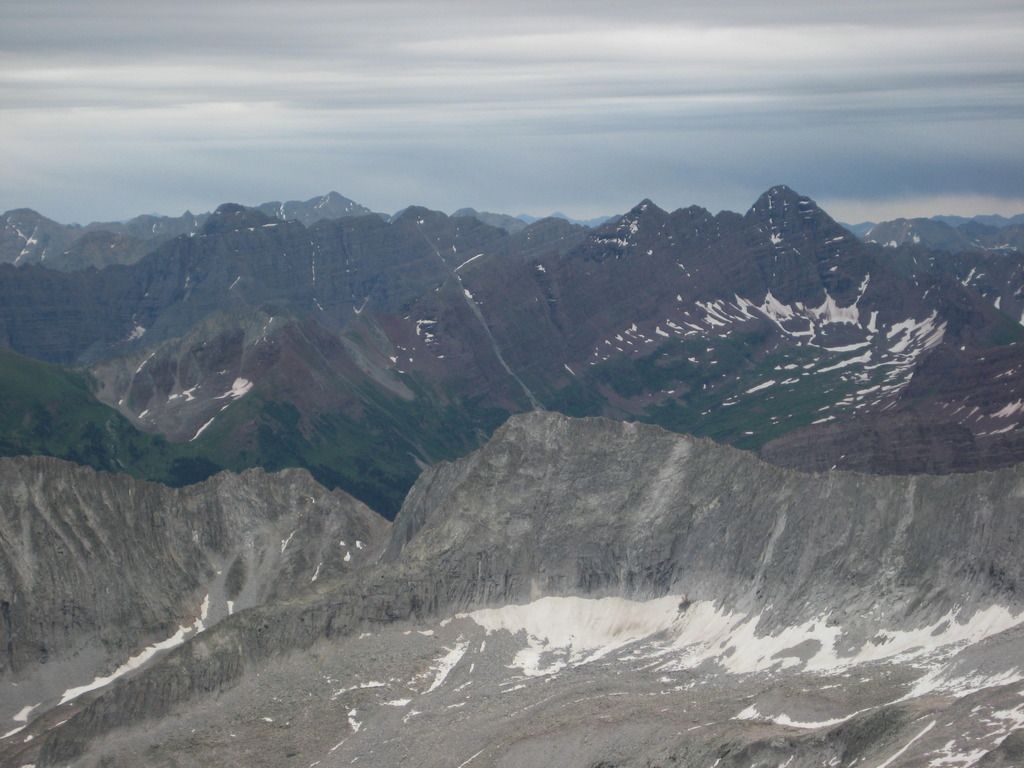
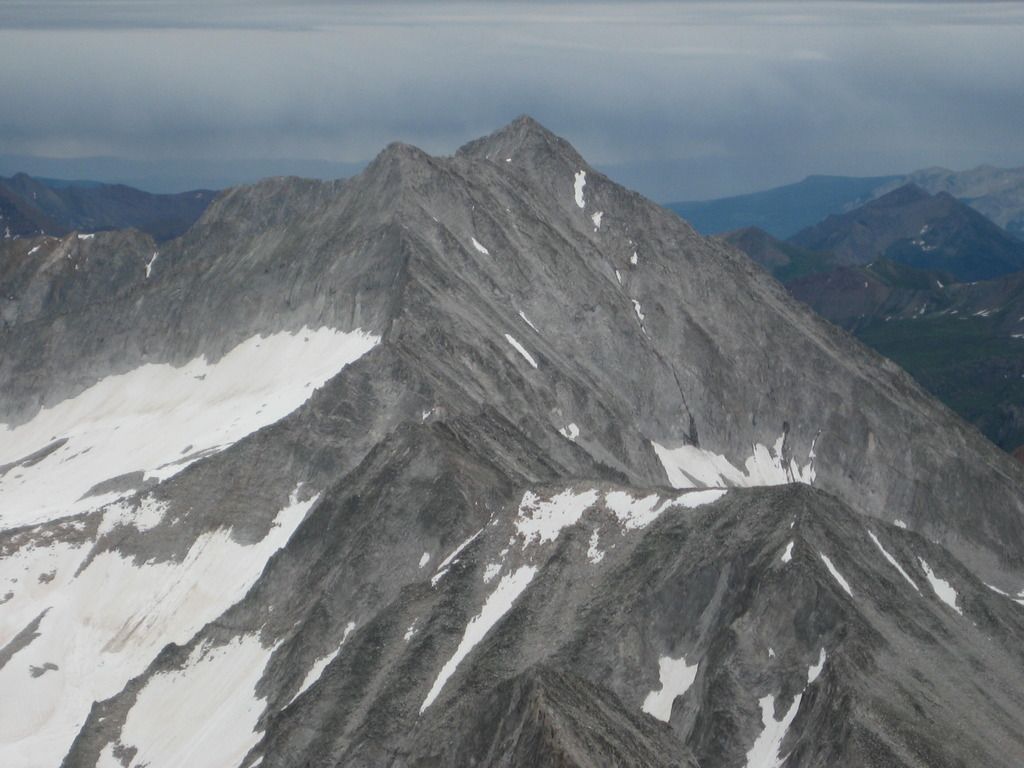
The infamous look at Captiol on top of K2
Capitol looking from top of K2
Video from on top of K2
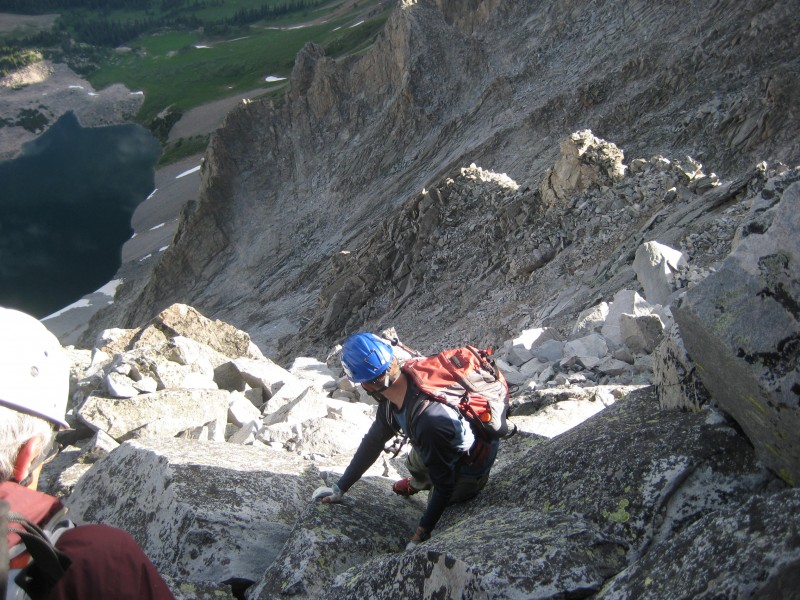
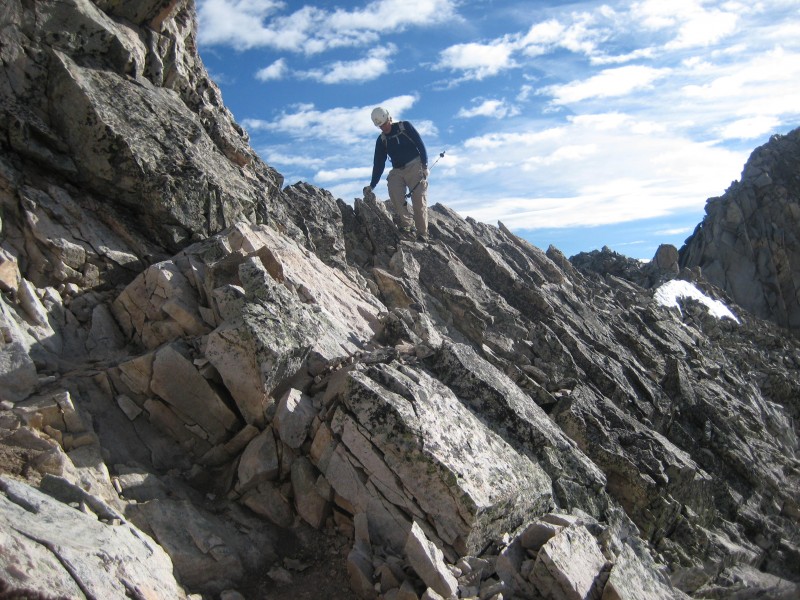
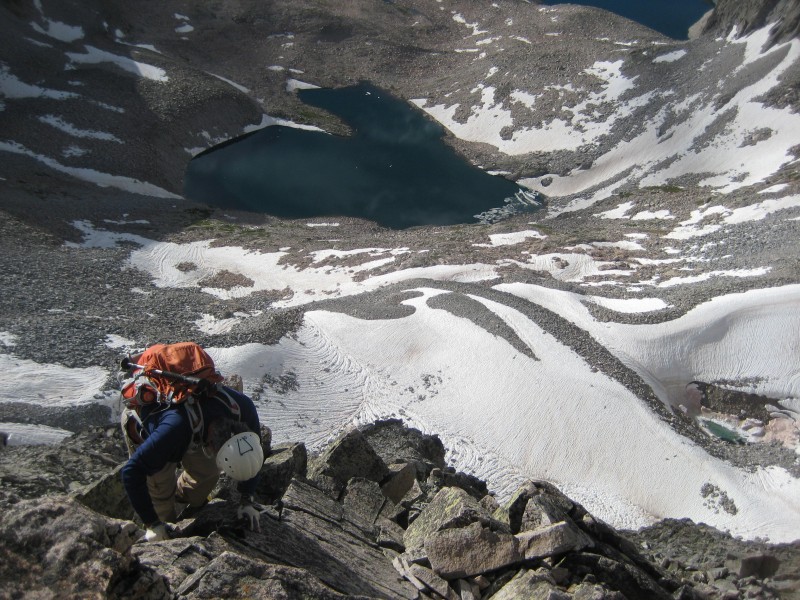
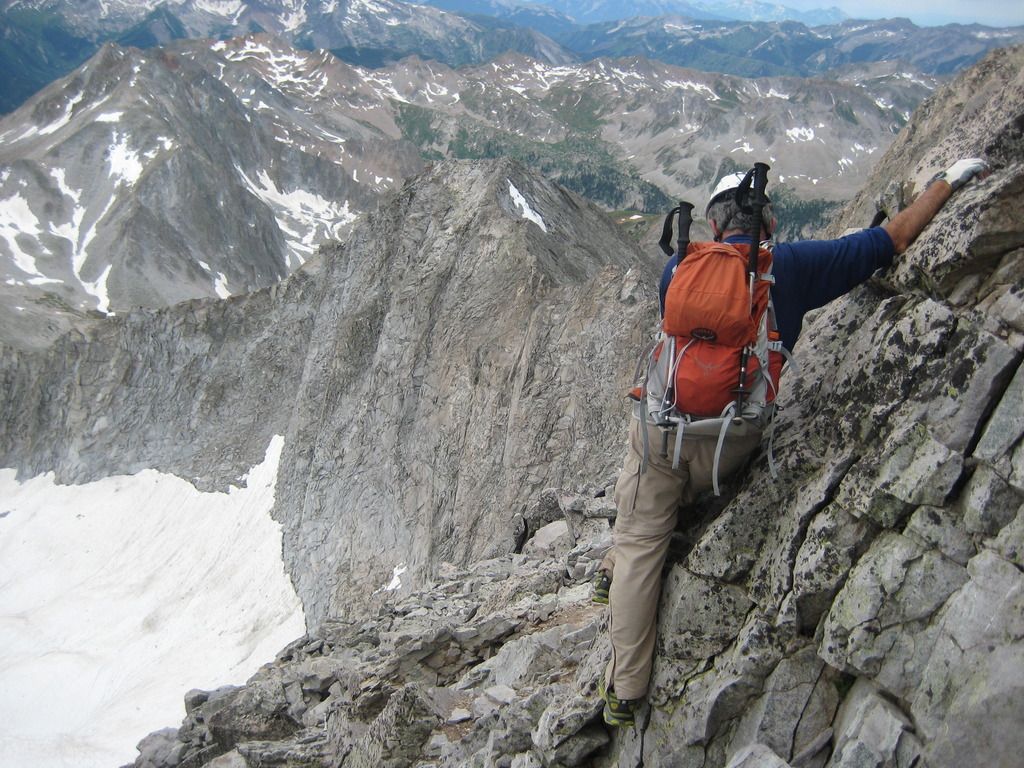
The descent off of K2 may actually be one of the most dangerous and difficult parts of the entire climb up Capitol. Once you get to the top, you turn right and literally descend straight down the face until you hit a traverse point to make it over to the ridge. Here is a picture beginning the descent from K2.
Beginning descent of K2
Middle of K2 descent
Middle of descent of K2
You want to descend here because if you continue over the top of K2, you will hit a cliff that literally bows out from top to bottom. Sheer rock face!
West face of K2. Ouch!
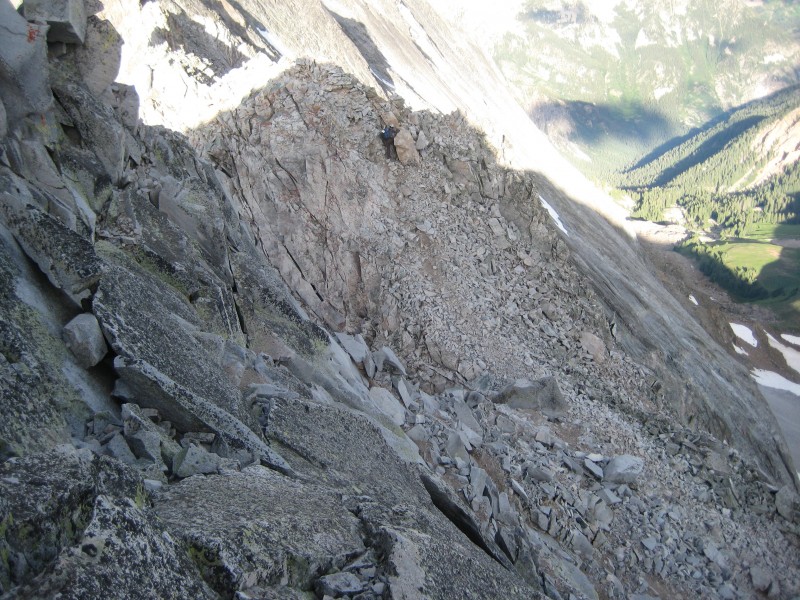
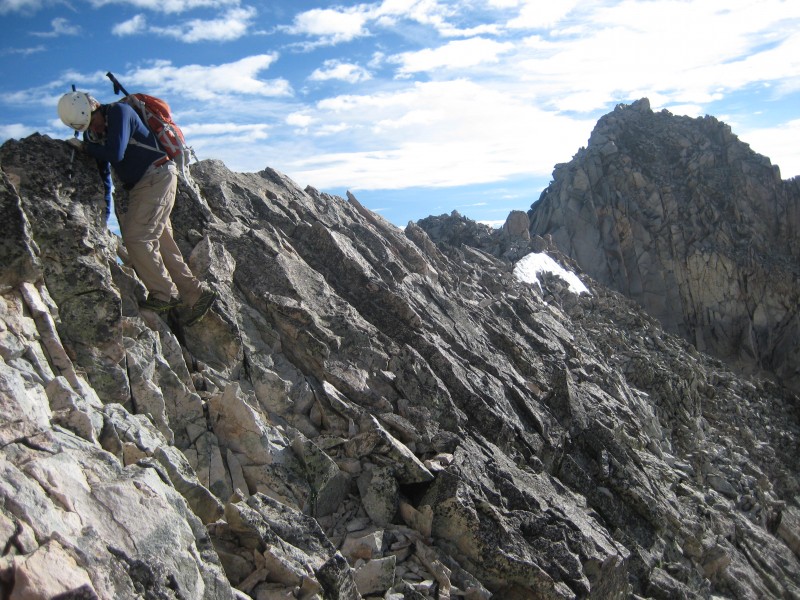
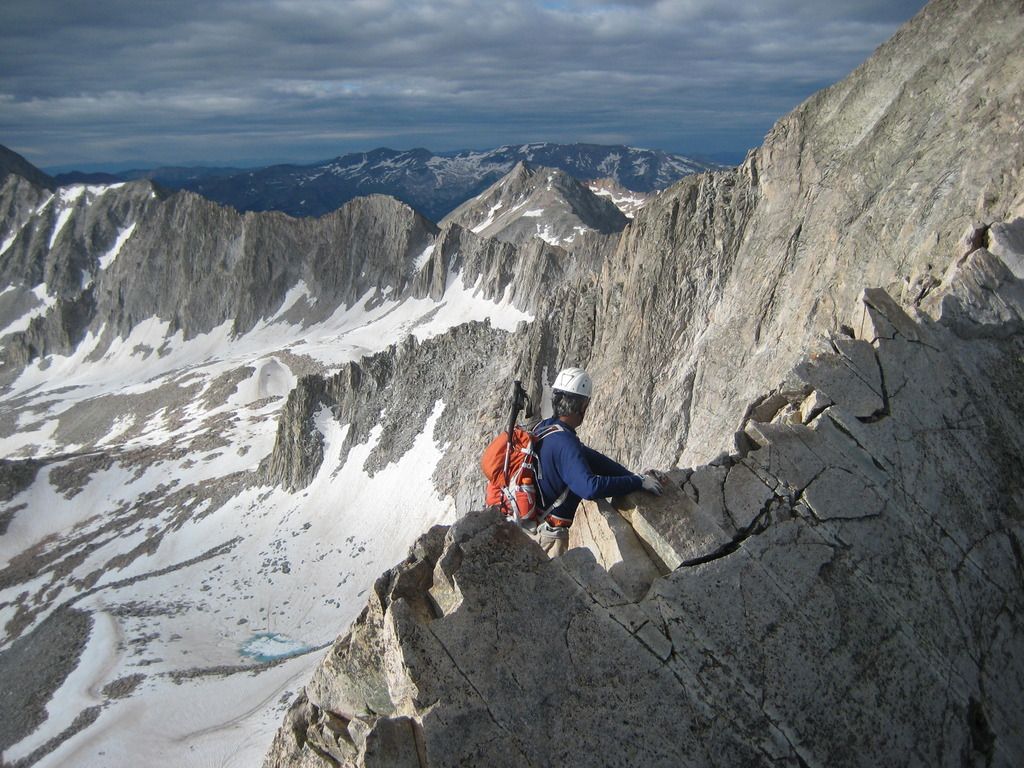
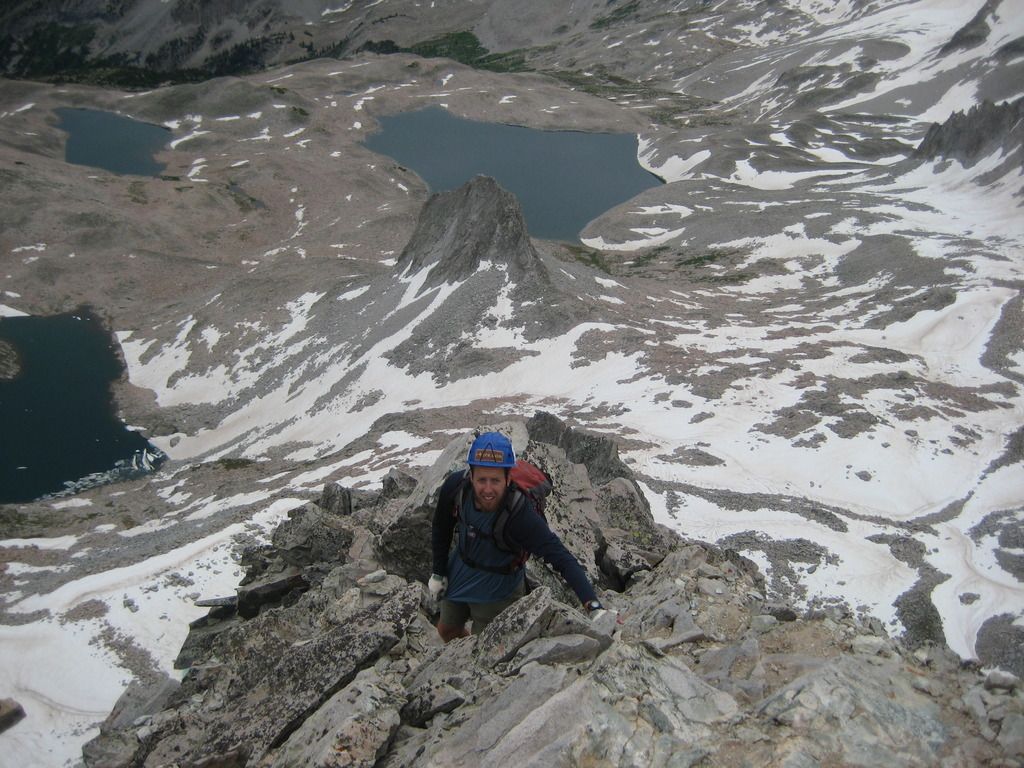
The picture below was taken in the middle of the K2 descent looking down toward the ridge you are aiming for. You can see it's a steep descent but on good rock.
Looking down descent of K2 toward trail on ridge Middle of K2 descent
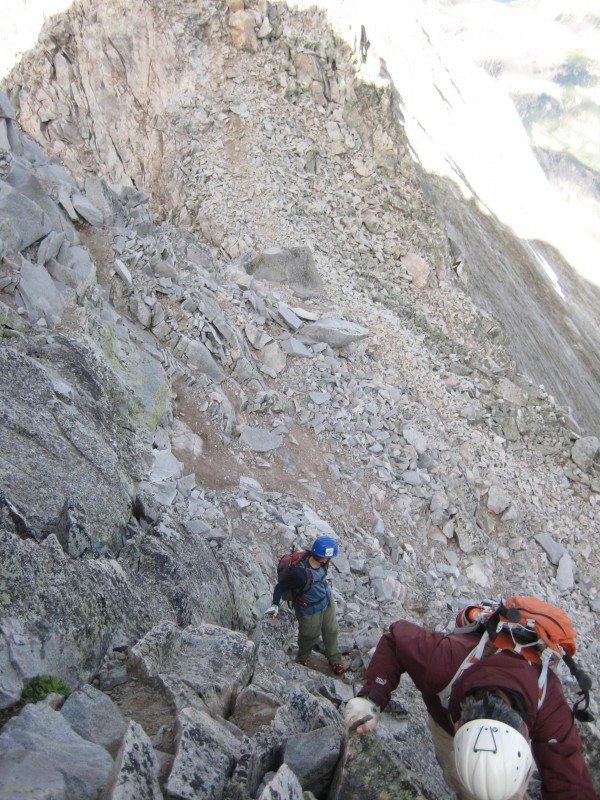
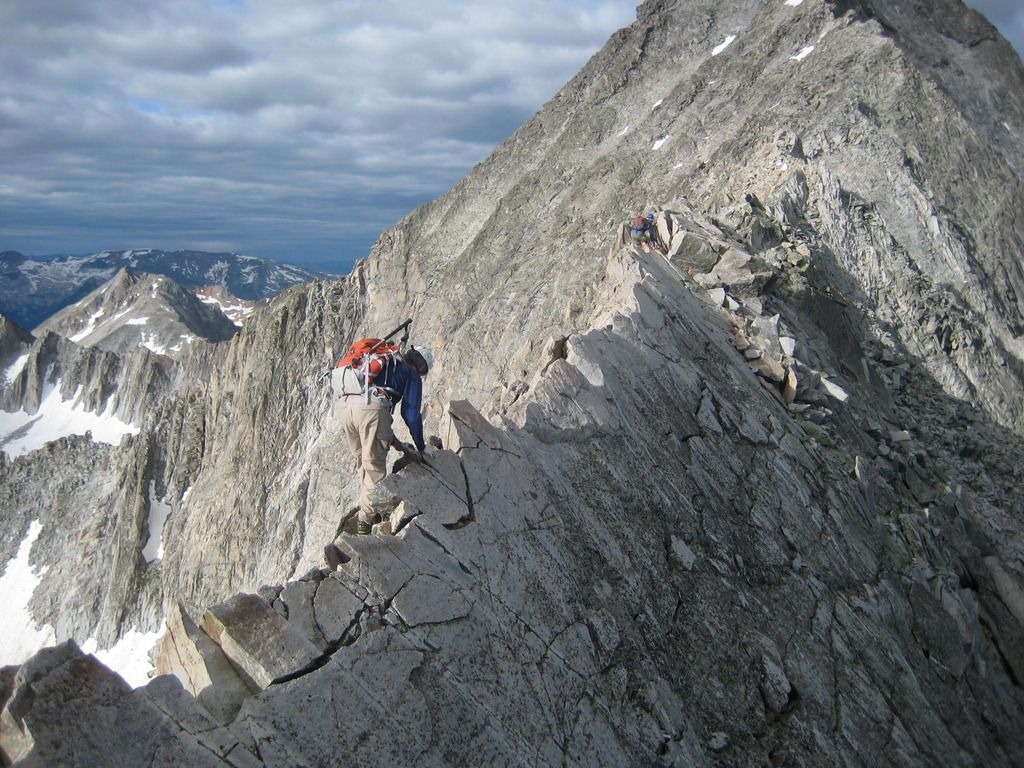
Once you reach the bottom of the 75 foot K2 descent, you will see this on the ridge.
Bottom of K2 descent on ridge
Looking back toward bottom of K2 on ridge traverse.
Looking back toward bottom of K2
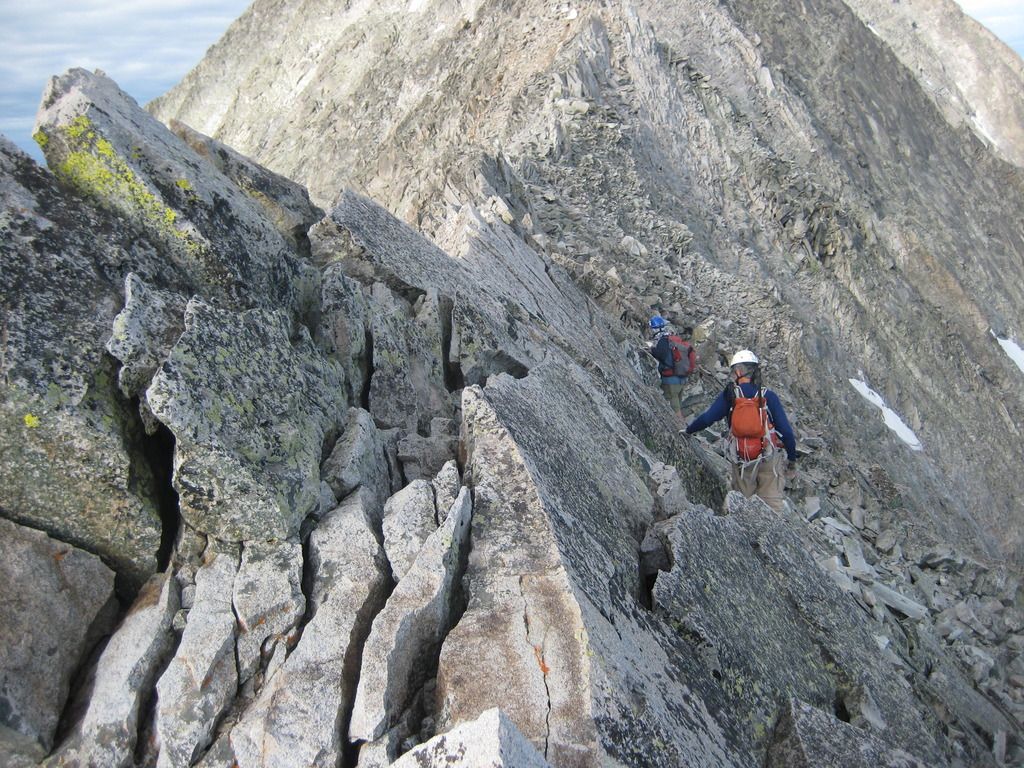
Once you gain the ridge, the first obstacle is what I call the "mini knife edge." You can skirt to the left of the "mini knife edge" and simply keep hand holds on the top of it. While on this ridge, you will typically always stay to the left of the actual ridge.
Dad crossing "mini-knife edge."
Dad crossing mini knife edge
After the "mini-knife edge," you will have a few more ups and downs on the ridge staying on the left side with DAUNTING exposure. However, none of these are very difficult with good rock.
Traversing ridge after mini-knife edge
Not long after the "mini-knife edge" and a few ups and downs, you hit the real knife edge. Here is Mark coming up on the knife edge:
Here is video of Mark and my dad crossing the knife edge:
KNIFE EDGE
Half way across knife edge:
Looking back across knife edge:
The knife edge is not technically difficult but it is something that will make every muscle in your body tense up for dear life, your heart race, and your focus will become 100% on the task at hand. It's definitely the most daunting part of the entire climb.
Right after knife edge the terrain is still dangerous with exposure but much easier. You start to utilize the right side of the ridge instead of the left.
Notice the drop down to the right side of the ridge:
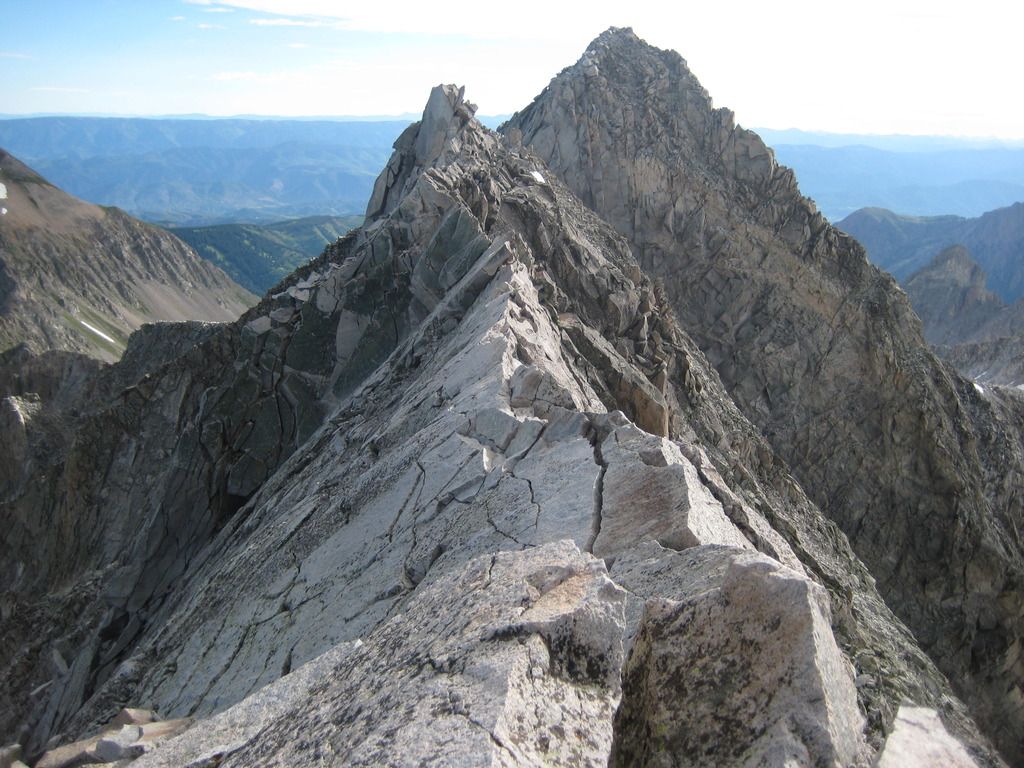
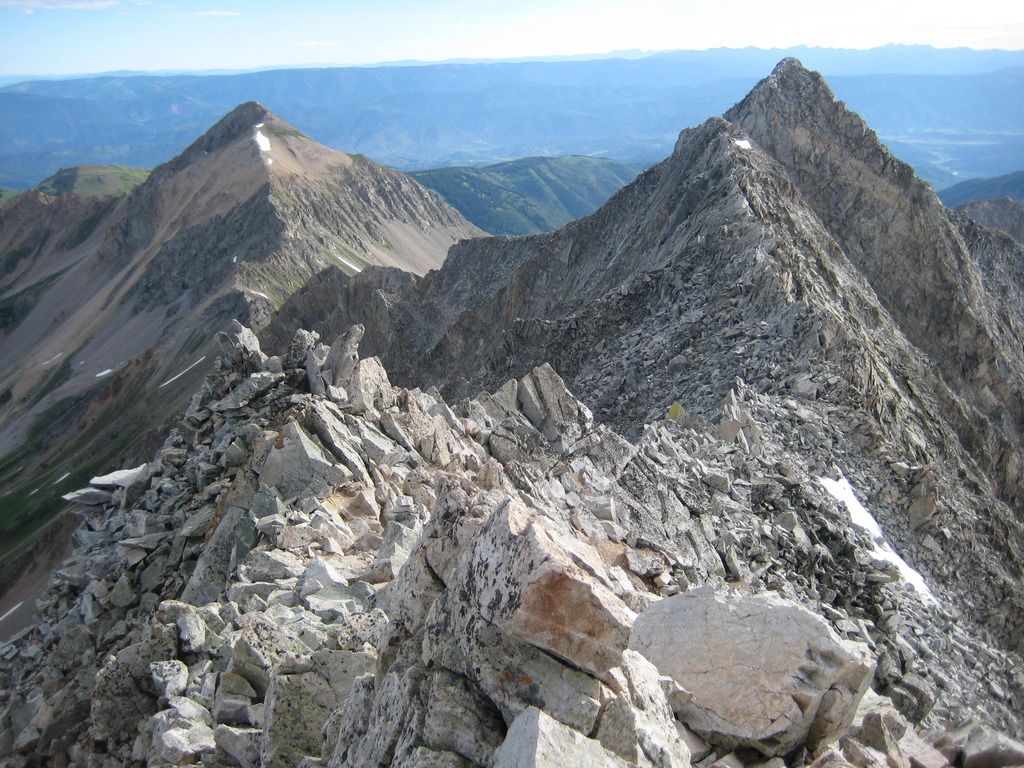
After the knife edge, the ridge continues to show some exposure but not too bad. It's not technically difficult either. The knife edge is the low point on the ridge so you start going up. This picture is looking back on the ridge toward the knife edge below.
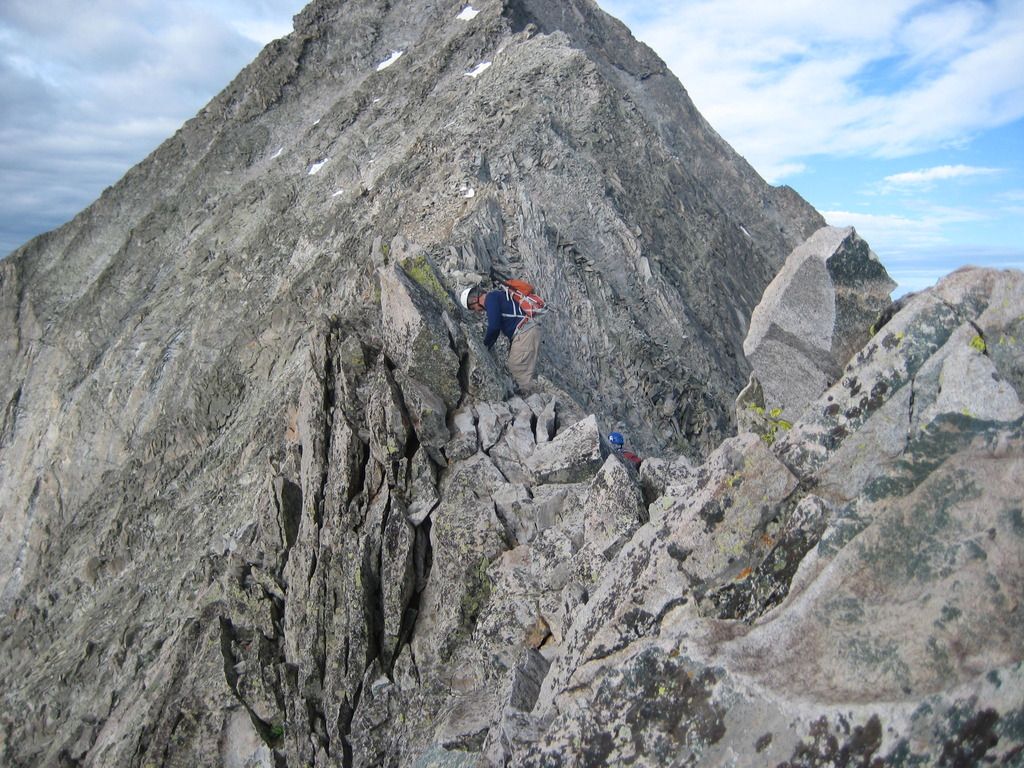
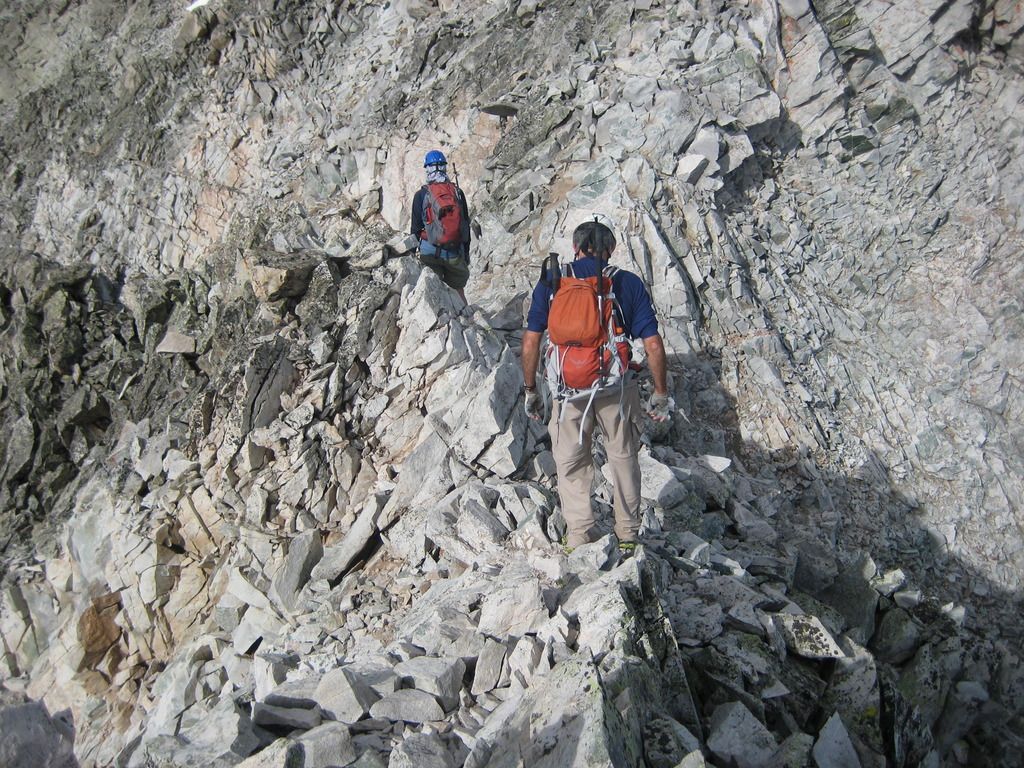
Eventually on the ridge you will come to a point where the trail clearly ventures off to the left and onto the face of Capitol Peak. You can see in the picture that the ridge starts go straight up and is very steep. Starting traversing the East side face of Capitol Peak as my brother is doing in the picture.
There is one small snow patch you must cross just after the switch over from the ridge to the East face.
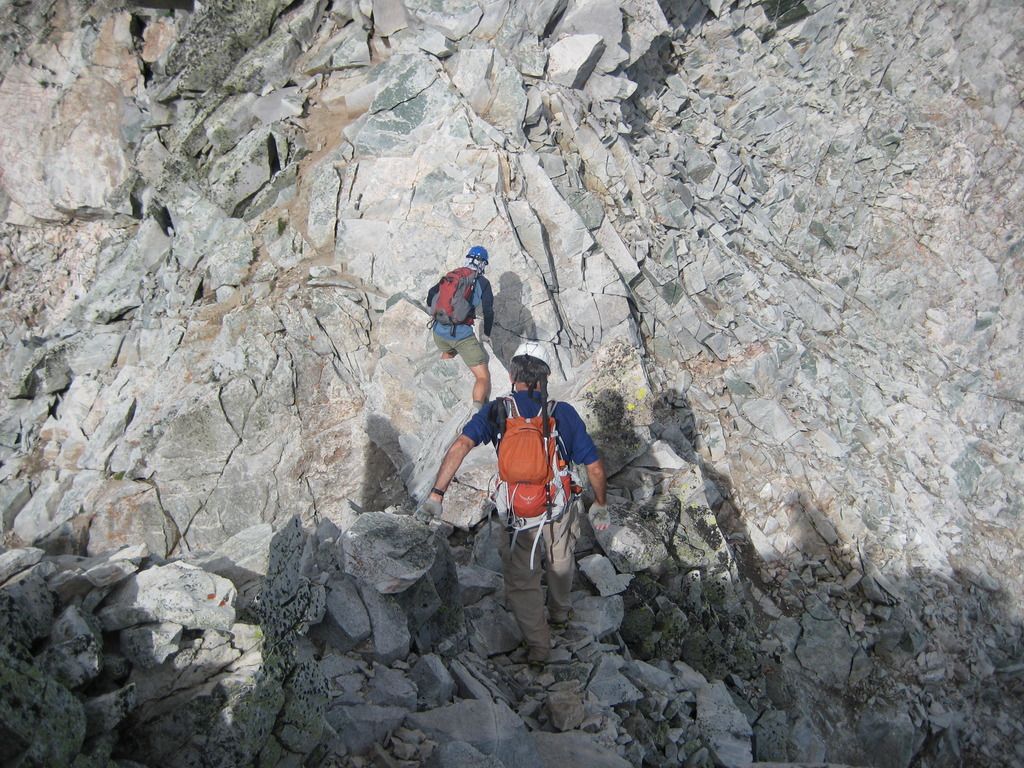
Next on the East face, you will cross through a few ribs of gullies with some pretty good ledges to go across. Traverse these gullies.
These gullies can get steep at some points with exposure. Be careful and follow cairns (sparse) and dirt paths that look well traveled.
The last part before hitting the notch is a big gully.
In this next picture, look for the cairns up on the ridge as you head to the southeast side of Capitol where you are aiming to reach the next ridge at a notch. The notch has a cairn at the top. So far, the East face of Capitol has not been technical with anything more than class 3. There is exposure but just keep traversing across from the end of the ridge the knife edge is on all the way to the next ridge on the southeast side where your end goal is the notch with a cairn.
I love exposure!
Arriving at the notch:
This next picture is looking back down the East face of Capitol (large gully) from the notch on the ridge.
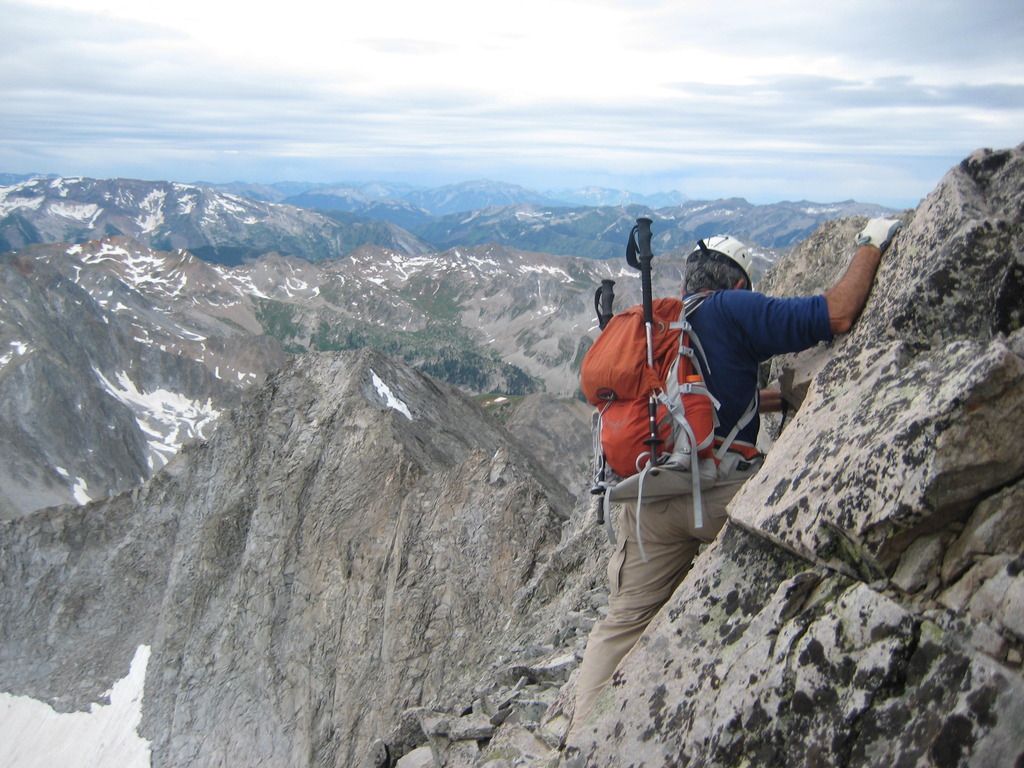
Once you reach the notch and turn right up the ridge, the terrain gets very steep and you have some nice class 3+ climbing to do. It's steep and exposed.
When you make this turn, it's also breathtaking. I love this shot of my father:
Once you make it up on this ridge, you have a nice steep climb to make it up to easier terrain:
You are now on the final ridge run to the top. The final ridge run is steep until you get within 50 feet of the top. Here is a shot of the last run up:
Final 50 feet to the top (Dad and brother are actually going down on this photo)
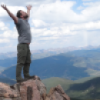
WE MADE IT!
The three of us completed our 54th 14er! Thank you Lord!
Summit photo of Pyramid and the Bells
Summit photo of Snowmass
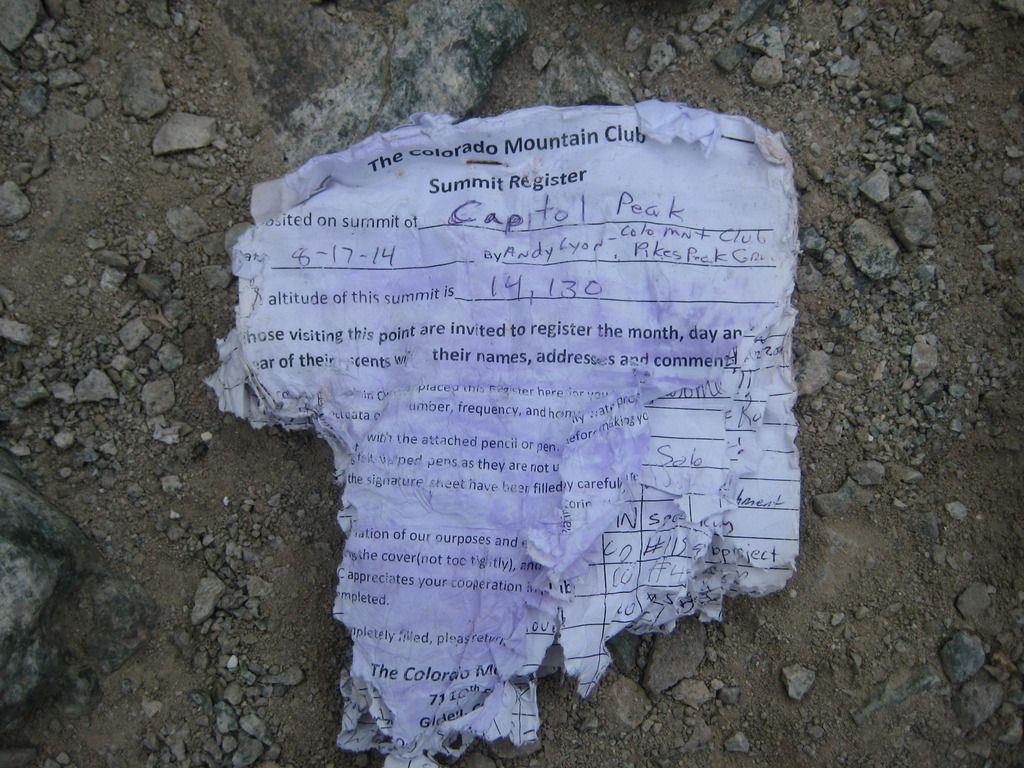
Summit log photo. Unfortunately it's a little torn up.
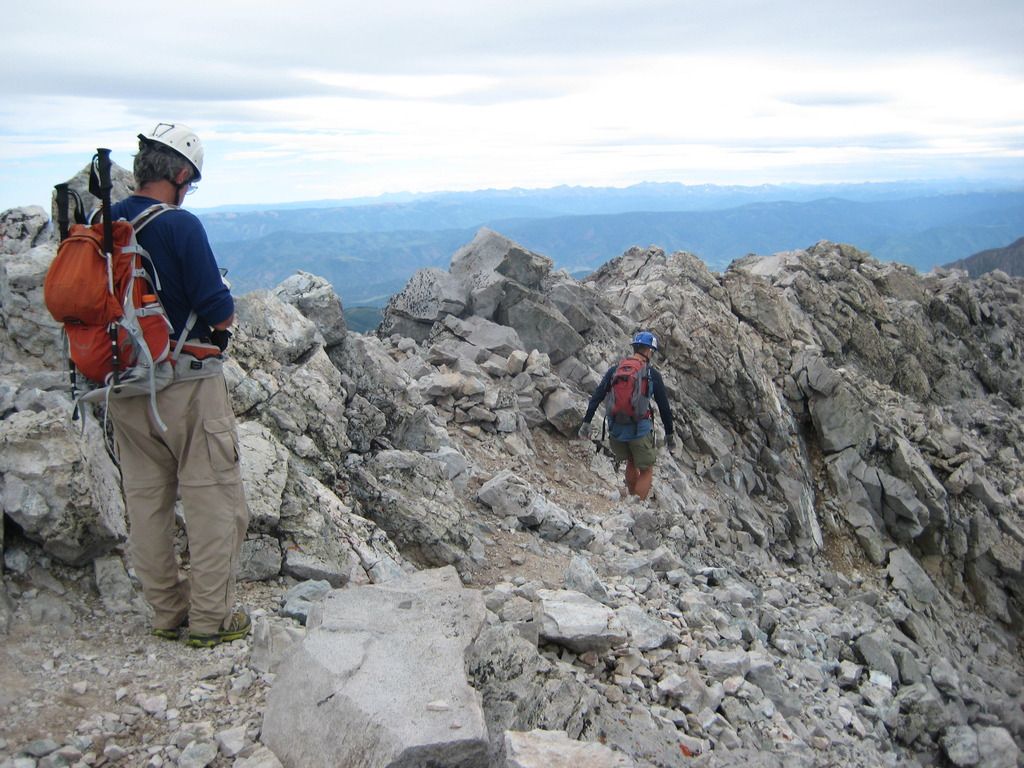
Heading down from the summit.
Heading back down from summit ridge to notch. Be careful, it's steep!
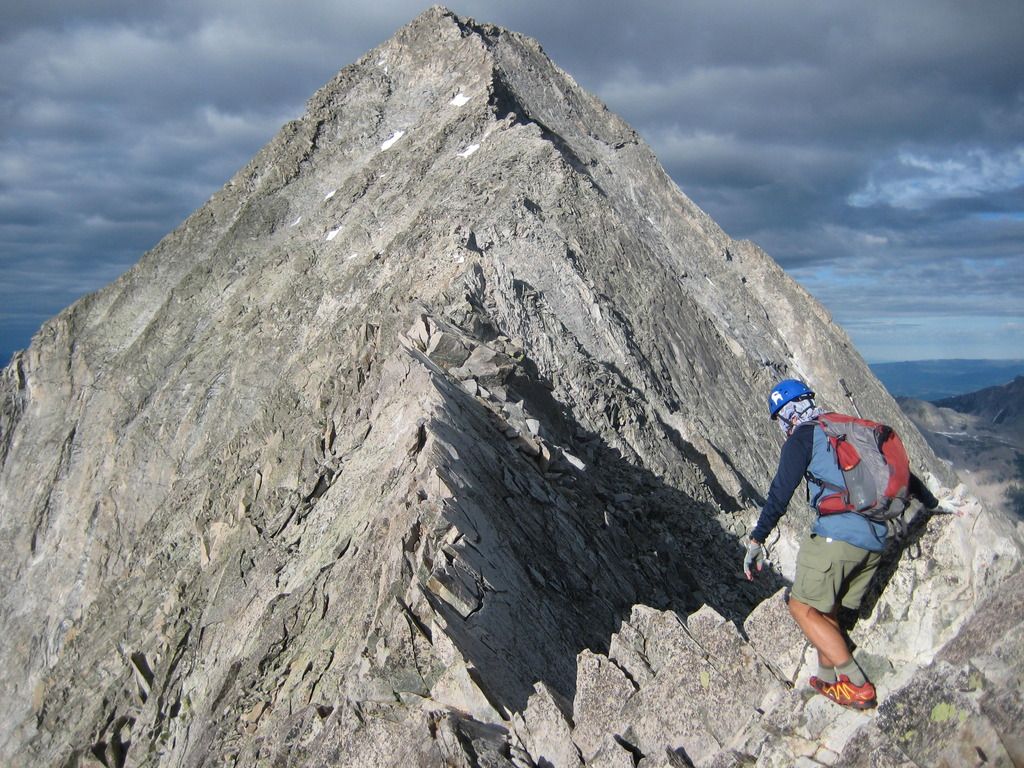
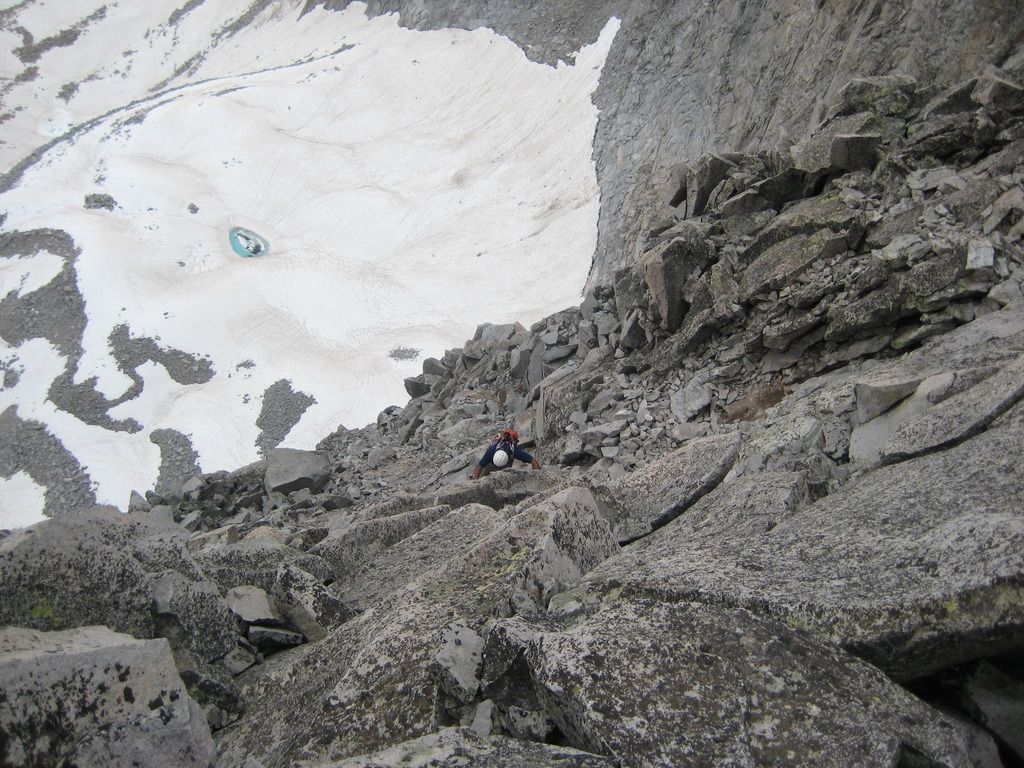
This next photo is a great shot of the descent from K2 to the ridge. We are of course on the way back at this point but you can see how far you have to climb down and of course climb up on the way back to the summit of K2. The guy you see climbing in the picture is not actually on the standard route. The rock face just beyond him has less exposure and much better hand foot holds.
And of course we have to have one last video of crossing the knife edge again.
Finally, my dad and I both had to glissade down one of the snowfields on the way down, well after K2.
Once we made it back into the bowl and were traversing back across to Daly saddle, it started to rain. It didn't end until we got back to the truck at the trailhead!
This was an amazing climb and easily one of the best we have ever done in Colorado. With this summit, we finished all 54 Colorado 14ers! I do have to say that Capitol Peak is one of the most difficult and dangerous climbs of the 14ers. Little Bear's bowling alley may be the most dangerous of them all, but Capitol definitely had its moments. Thank you 14er community for all your trip reports, condition reports, and updates on conditions that have helped us achieve this milestone. Let me know if you have any questions about Capitol Peak. I will still be a frequent and active member of 14ers.com!
Additionally, please see my brother's trip report of Capitol Peak which includes much more detail, information and emotion at the following link:
Mark's Trip Report
We thought the same thing once upon a time. However, the more we studied it and then when we actually got there, our experience kicked in and nothing seemed overly dangerous or beyond our comfort zone. It’s very doable. My goal was for this trip report to give people as much detail and knowledge about the mountain to make them feel more comfortable in climbing it themselves. Enjoy!
Truthfully, both the cameras I used are fairly old and not glamorous.
The video camera was a Panasonic TA–1 Ultrathin HD Pocket Camcorder. http://www.amazon.com/gp/product/B003WOLM62?psc=1&redirect=true&ref_=oh_aui_search_detailpage
The digital photo camera I used is a Canon PowerShot SD750 7.1MP Digital Elph Camera with 3x Optical Zoom (Silver). http://www.amazon.com/gp/product/B000NK6J6Q?psc=1&redirect=true&ref_=oh_aui_search_detailpage
Neither seem to even be sold anymore. Good pictures come from a good photographer, right? :D
Oh, and NO photoshop was used on any pictures. The good Lord just gave us good light and beautiful creation to make the pictures look nice!
Couldn’t have asked for a better report or for better timing. Making our push to summit Monday Aug 10th if the weather cooperates. Was concerned mostly about the Daly saddle to K2 lack of pics/info and the post knife edge to summit. You did a great job filling in the gaps. Congrats and hope to follow your lead
Congrats to the three of you – that’s a great finisher ! I also chose Capitol as my 14er finale, and like you, had rain on the way out. Even the last couple miles of a downpour and loud thunder couldn’t take the grin off my face. Job well done gentlemen. I hope you cherish the memories for many years to come.
I'm scouting a climb of Cap this summer and was looking for more details. This was perfect. Thanks for all the videos and photos!
Caution: The information contained in this report may not be accurate and should not be the only resource used in preparation for your climb. Failure to have the necessary experience, physical conditioning, supplies or equipment can result in injury or death. 14ers.com and the author(s) of this report provide no warranties, either express or implied, that the information provided is accurate or reliable. By using the information provided, you agree to indemnify and hold harmless 14ers.com and the report author(s) with respect to any claims and demands against them, including any attorney fees and expenses. Please read the 14ers.com Safety and Disclaimer pages for more information.
Please respect private property: 14ers.com supports the rights of private landowners to determine how and by whom their land will be used. In Colorado, it is your responsibility to determine if land is private and to obtain the appropriate permission before entering the property.