| Report Type | Full |
| Peak(s) |
Mount Shasta - 14197 |
| Date Posted | 07/24/2015 |
| Modified | 05/29/2016 |
| Date Climbed | 07/19/2015 |
| Author | nyker |
| Mount Shasta, One Day Sojourn |
|---|
|
Mountain: Mount Shasta Summit elevation: 14,179ft Elevation gain: +7,600ft Net (+7,300ft Gross) Mileage: ~12 miles Duration: ~13.5 hours roundtrip from TH Mount Shasta is a massive glaciated stratovolcano at the southern end of the Cascades. Shasta is a majestic peak and California 14er looming above the northern west coast landscape just south of Oregon. As you approach the mountain, you feel dwarfed by its huge prominence and you realize how large it is, larger in mass than even Mount Rainier, though a bit shorter. Driving up the day before, I was able to first see the mountain from 128 miles from the south. That's amazing, since sitting in my office I cannot even see six block ups Lexington Avenue! Even when it's 40 miles away, it seems close enough to touch. Amazing. Here is the awesome view as seen from the North.  I contemplated doing this climb as an overnighter and packed in my suitcase my tent and sleeping bag, but ended up just doing it as a one day trip. I'd be targeting the standard Avalanche Gulch Route. Snow conditions seemed to be holding on with enough snow for a solid snow climb with nearly +5,000ft on the snow, though it was melting fast down low. I knew it would be a Whitney-esque length day with a bit more elevation gain at +7,300ft gross, but less mileage with 12 miles roundtrip. My Stairmaster training will be put to the test on this one. The snow climbing reminded me of Snowmass in the Spring. The day I got into town, I drove straight up to Everitt Memorial Highway to the Bunny Flats trail head (~6,900ft) and did a warm up hike to about 10,000ft to Helen Lake. The purpose of this climb was to acclimatize, warm up my climbing legs and to be able to see in daylight what I'd be hiking up in the dark on the actual climb. I also realized there was no real water source on the mountain (more on this later). After a day of acclimatizing at Crater Lake (~7,000ft) to the north, I aimed to wake early the next morning and go for it. Consequently, if you've never been to Crater Lake, it is stunning and worth the drive. I need to go back and spend more time there. Staying in a town called Weed (really, that's the name of the town) I woke at midnight, drove to the trail head and started out leaving the trail head at 1:30AM sharp. While there were a couple cars in the lot, I was the only one heading up. I assumed the others were camping higher up. Permits You'll need both a Wilderness Permit and a Summit Permit for this climb. The Wilderness Permit is free, though the Summit Permit is $25 (as of July 2015) and both can be self-issued at the trail head kiosk. A Climbing Ranger did check my permits on the descent, so make sure you have them and keep them handy. A Summit Pass is required if you climb above 10,000 feet and its good for three days from issue date. Some local stores as well as Ranger Stations have the permits available. Check in the towns of Mt Shasta and Weed. There is no quota on Shasta as of July 2015 and no reservation is needed (unlike Mount Whitney which require both). You'll also need to carry wag bags. Lassen Peak To help my sea level lungs acclimatize, I climbed Lassen Peak two days before Shasta, getting me up to about 10,457ft. Lassen Volcanic National Park has some beautiful scenery and verdant evergreen woodlands. The climb of Lassen was all Class 1 and straightforward, but made for a nice leisurely hike to warm up. Elevation gain was ~ +2,000ft. Incidentally, I saw a black bear leaving the park, for those wondering...The photo below is the final route section before the summit. This is all pretty cool volcanic terrain on an another active, but dormant volcano! 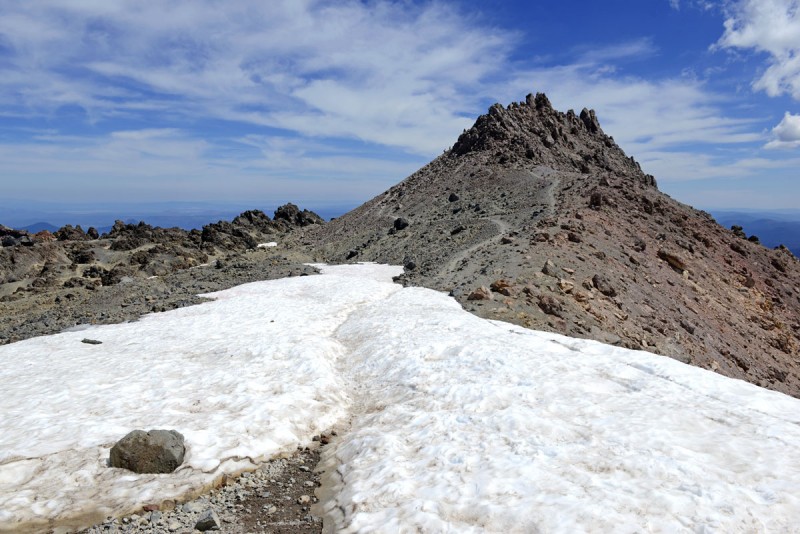 The Climb Starting out from Bunny Flats, you follow a well marked trail from the parking lot. This is the view you'll start out with..at least if you start in daylight. You can actually see much of the entire route from here. 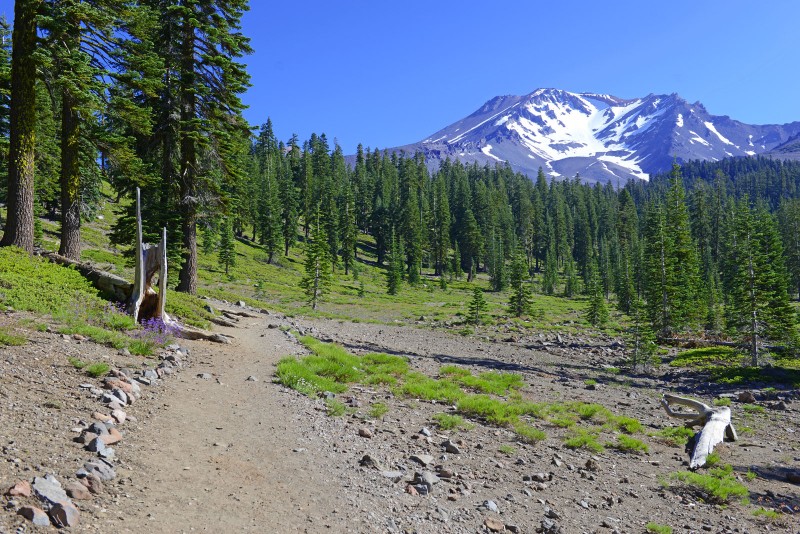 Under the beam of my headlamp I slowly made my way up into the dark night. Oddly, it was silent, nothing rustling, no coyotes in the background and of course, no cars. After a few hundred yards, you'll turn 90 degrees left on a trail which will bring you through the forest of Shasta Red Fir for a short while. Even under the dim light of a headlamp, you can make out the marked trail. You'll travel on the nice Class 1 well defined trail which goes until the Sierra Cabin at Horse Camp (7,900ft). This is a cool place to stop and see inside where you'll find prayer flags and a lot of literature as well as fresh running spring water outside, which is allegedly potable. The Sierra Cabin at Horse Camp 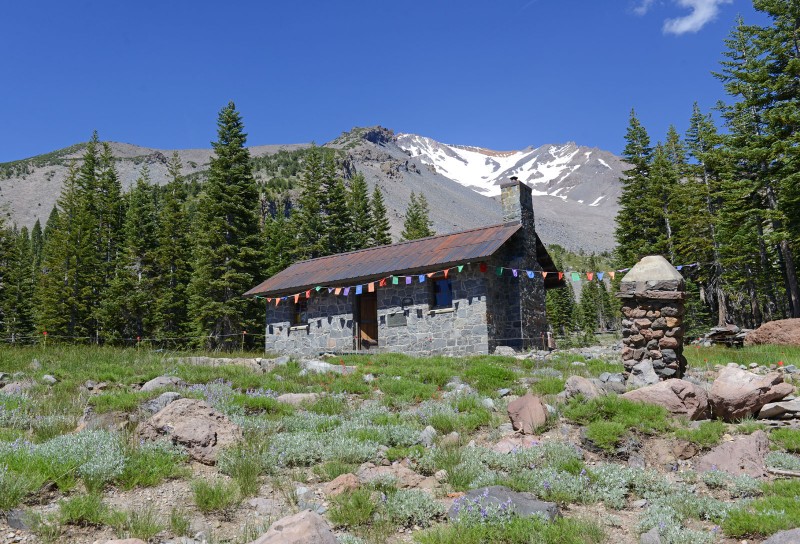 Prayer Flags in the Cabin  From the cabin there are stones/boulders forming a route put in place to help prevent erosion in the fragile alpine environment. You'd be advised to travel on the boulders rather than the ground along this mile or so stretch. 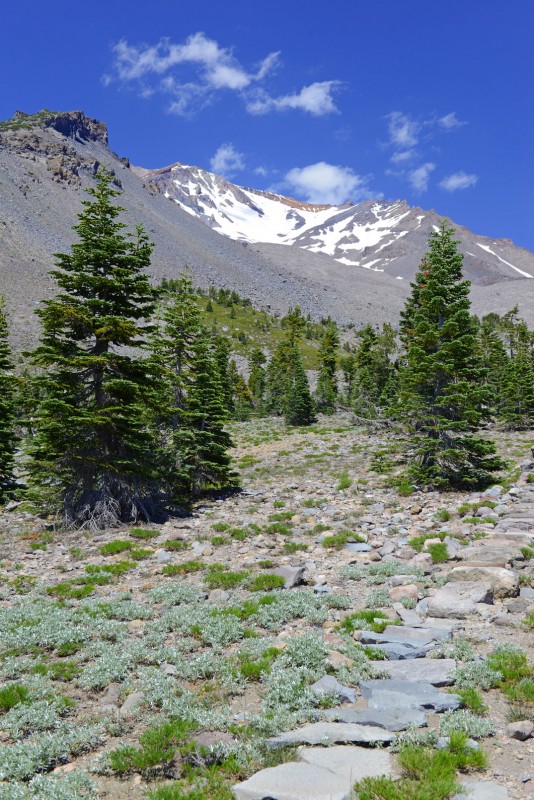 The short section of stones here cover an area with stunning postcard views of Mount Shasta and the surrounding terrain. If you need a rest, this is the place to take it. 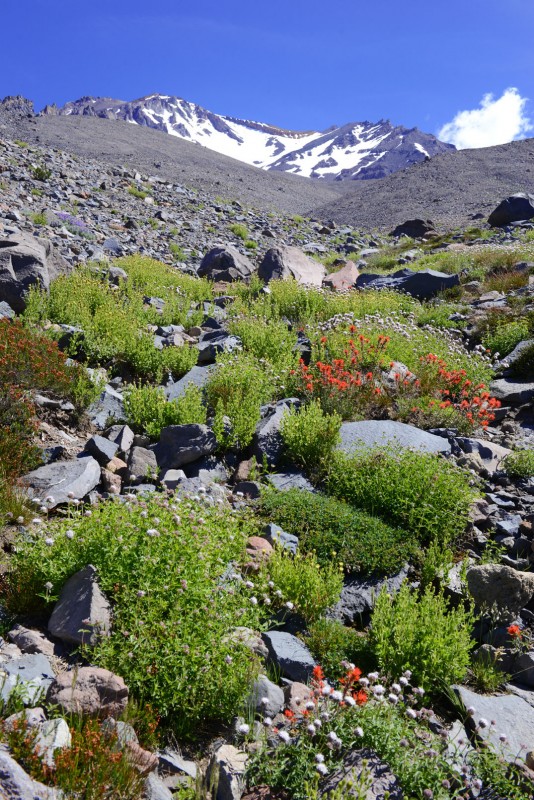 If rain is coming, the cabin will be the last place for shelter, but likely not shelter from lightning, only from getting wet and away from the wind. One thing to note for those doing this trip, particularly as a one day climb. There is little to no water on this route above the cabin. As the cabin is only 7,900ft, the water there doesn't do much to alleviate the need to carry it up high. There is a small spring seeping across the trail at about 9,000ft, but again, not much help higher up. Unless you want to bring the gear and spend the time to melt snow higher up, you must carry all your water. Given the need to get up and back down before the snow expectedly softens, I reluctantly carried 7 liters of water with me, split between pure water and electrolyte drink. If you are doing this as an overnighter then you will have the time to set up your stove and melt snow. 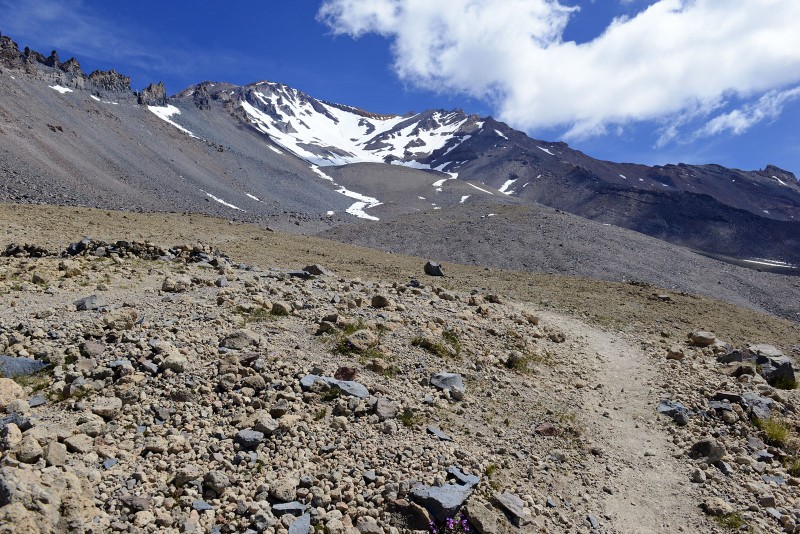 The route from cabin travels through an area called Hidden Valley, which might as well be called "Hidden Trail" since once you enter the rocks and climb, there are at least three "use trails" in a couple different directions, though they all sort of end around the end of the basin near Helen Lake, so if you are on one and you feel like it's the wrong one, keep going and you'll make your way towards a couple of campsites around Helen Lake. 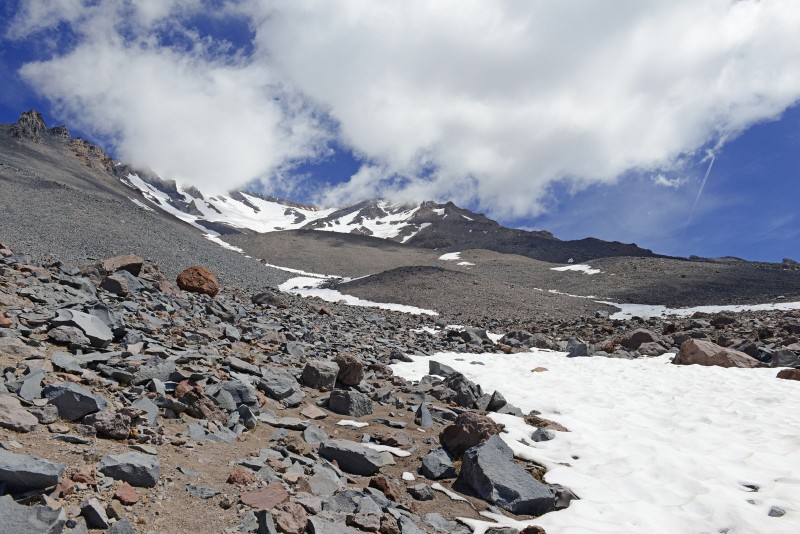 If you are camping overnight, there are a few mounds of rock in the moraine here on which you'll find campsites, so hunt around for the perfect one. The one below is one of the lower sites. The higher hill and Helen Lake right after it are the others. 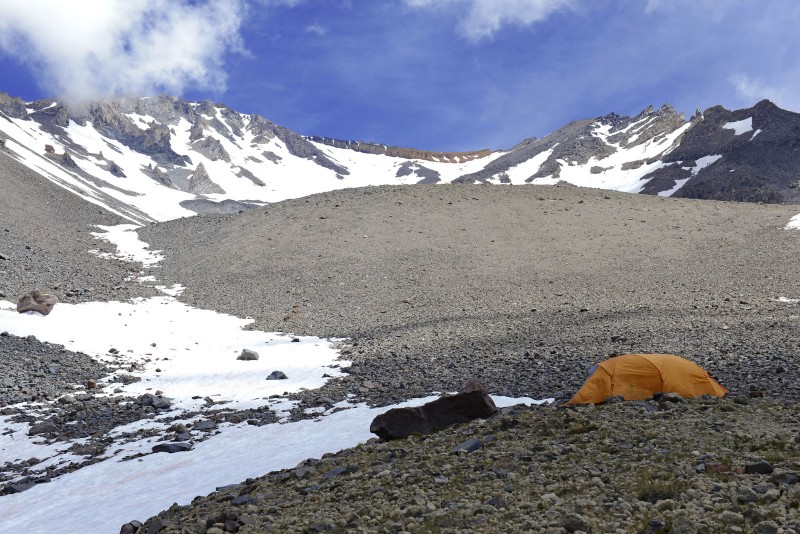 When I got to a point at about 10,000ft on the night/morning of my climb, I found a flat slab rock and kicked back and watched the night sky for a while. It was amazingly clear with the Milky Way right above and several meteorites shooting overhead. It was so relaxing, that I nearly fell asleep on the rock, but luckily a pair of climbers woke me up with the clambering up the trail. For a minute I forgot where I was! In NYC you're lucky to see a single star in Orion. Snow is melting down below, but there is plenty for a full snow climb to the top, save for the spots near the summit and near sulphur vents, which are dry (remember this IS a volcano!). The Route follows the "gulch" (i.e. Avalanche Gulch) between Sargents Ridge to climbers right and Casaval Ridge to climbers left. The Red Banks can be seen in the photo below as the reddish colored horizontal rock wall at the top, right third of the photo. 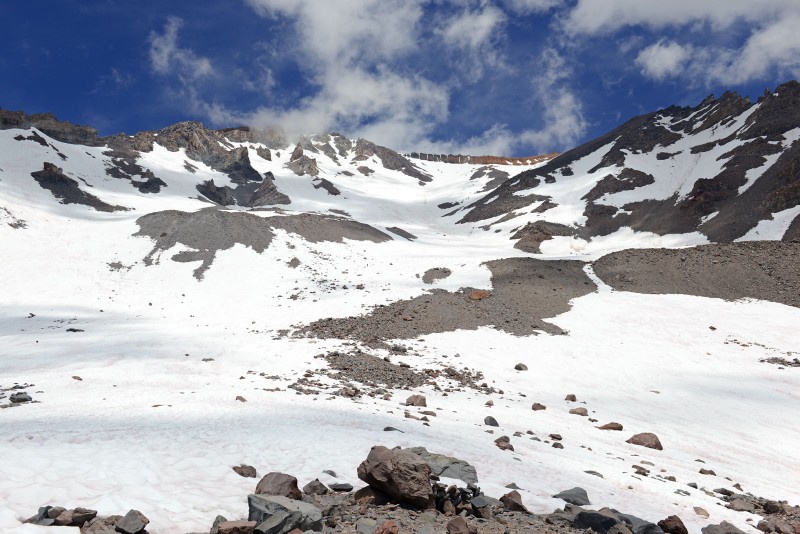 From Helen Lake, the fun begins. On this day, you could have picked up the snow either below Helen Lake or in front of it and start your climb in earnest. From here, the climb starts gradually and steepens as you go higher. Apparently, most of the time, Helen Lake isn't actually a lake but a depression in the snowpack, as it was today. There are a couple of campsite locations marked by stone semicircles around which to setup a tent. This is at the 10,400ft mark and this is where the snow began for the climb (on July 19th anyway). After Helen Lake, which effectively is high camp for many doing this as an overnighter, there is no trail or route, though there are a few ways to get up to the ridge. Oddly, there was no boot track to follow, so I just made my own way as I saw fit, aiming to the right of the "Heart" and up towards the Thumb Rock. There were about 25 people on the mountain when I was there, with 40-50% of them being guided and roped up. The steep snow and ice does require solid snow skills with ice axe and crampons. I saw a couple people on the snow without them, and it wasn't pretty. They made it to about 11,000 and kept slipping and falling and finally turned around. Looking up at the route (taken from the afternoon), note climber coming down for scale towards top/mid left side of photo. 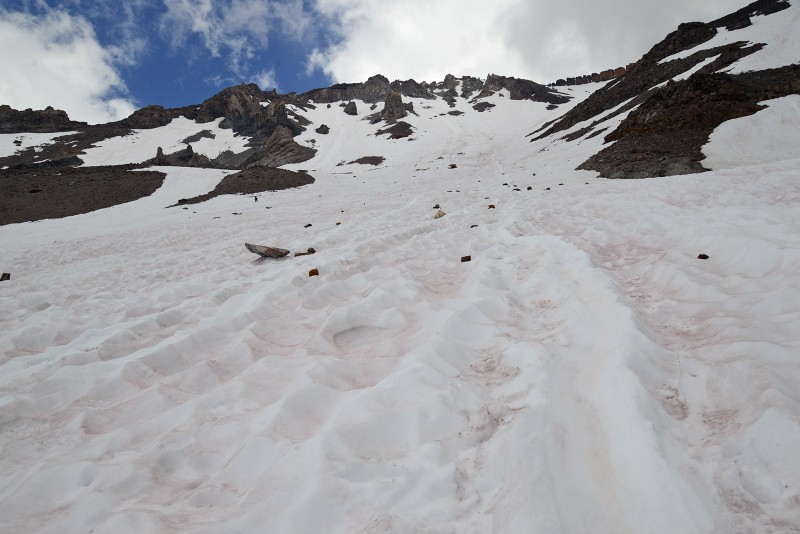 Looking up at the "route" to use the term loosely. Note glissade trail in the foreground and climber at top left of photo. (I took this shot on my way down later). Also not the scattered rocks in the snow which break off the Red Banks formation above. Be aware of this as these often will be silent when falling. 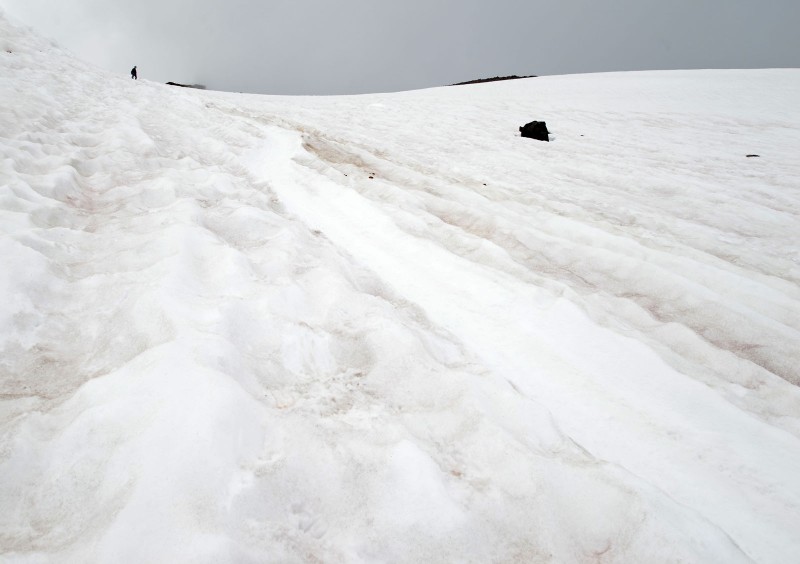 Another climber fell and apparently was pretty banged up with at least broken ribs from what I heard from a Guide who was nearby. Details of the fall were sketchy. Another Guide nearby saw the end of the fall and another climber or two came to his aid a thousand feet down below as I'd discover later on. It was possibly a fall while glissading. I saw a helicopter circling down lower but cannot be sure if it was there for the fallen climber or just a coincidence, though its usually not a good thing to see a helicopter in the mountains. Climbing up the chute in the Red Banks, I found his ice axe and sunglasses, which gave me an eery feeling. A member of the descending Guided group took them down. This reminded me of the time in June 2006 when I found a ski pole on top of freshly fallen snow on the Dragontail in RMNP; it turned out that climber died that day there from a fall. Best wishes for the climber who fell and hope he is ok. 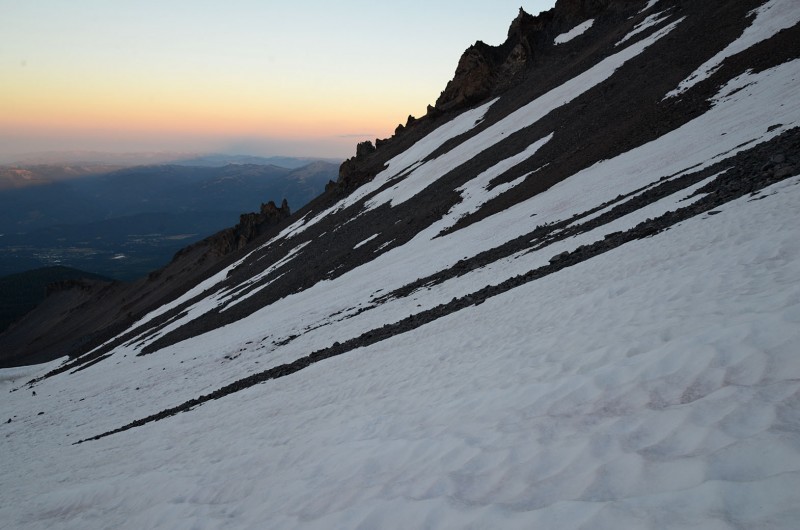 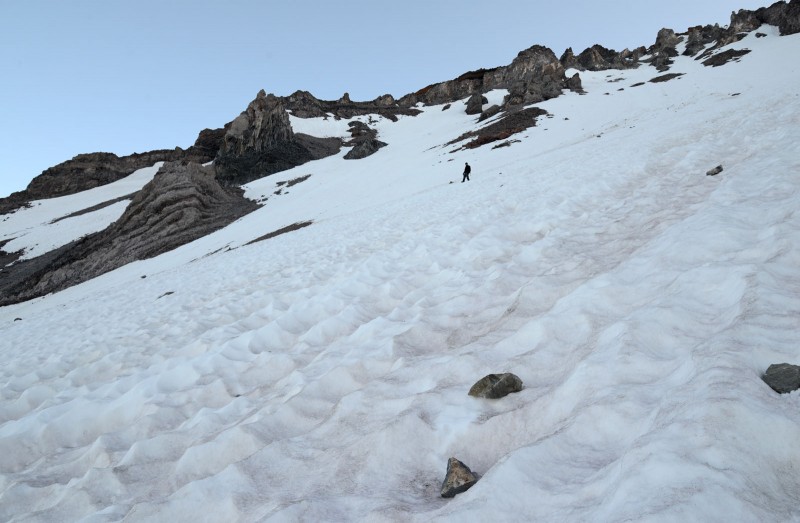 Looking down at the entire route from Helen Lake where the snow starts; note the rocks in the snow. Bring a helmet. These would be rolling and falling down all day, picking up speed as they moved. 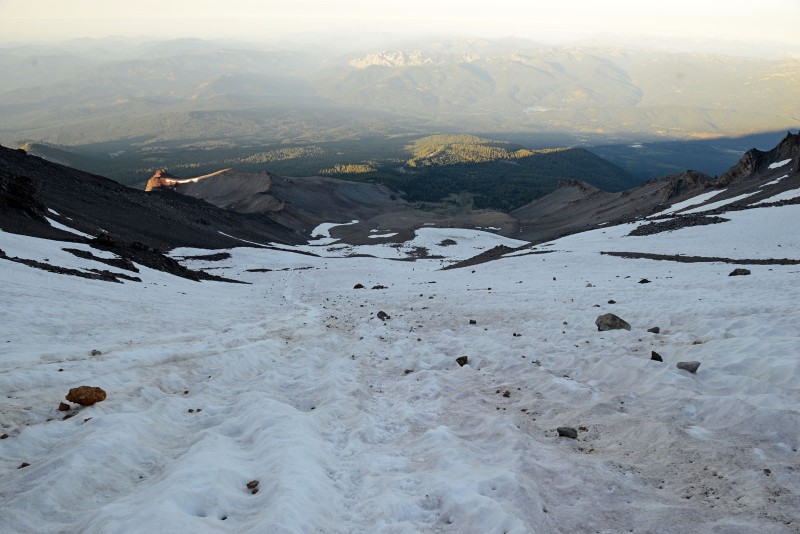 As you climb higher you'll encounter the Red Banks. Red Banks / Thumb Rock encompass a long section of lava cliffs on the top of the ridge which must be surmounted to gain access to the false summit, summit plateau and summit proper. Near the top under the Red Banks, looking down 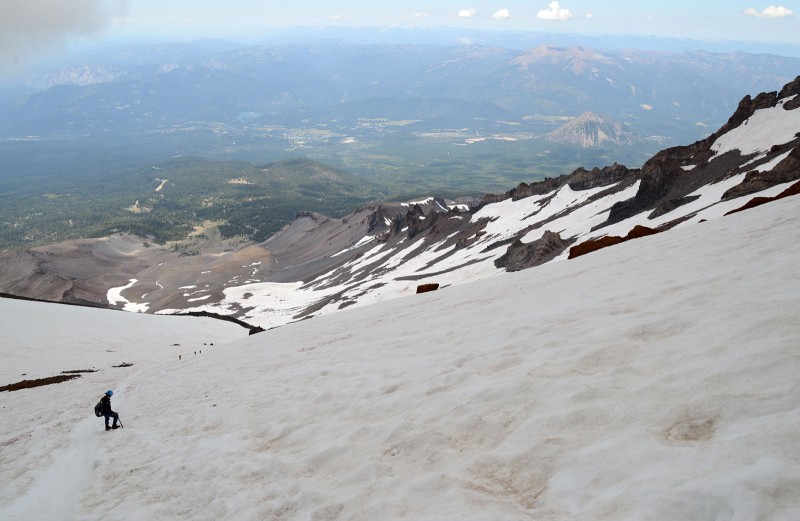 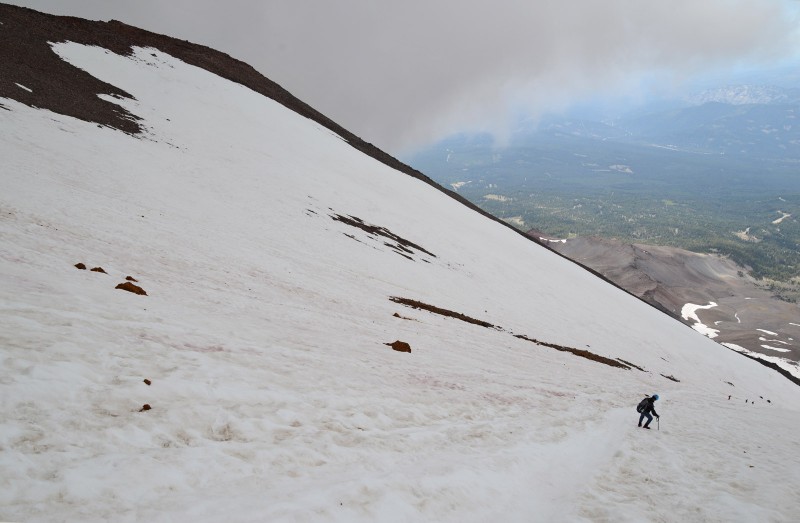 Note: Following the advice I got the day before from the outdoor store, a climbing Guide in town, as well as a couple Guide books, I followed a route to the climbers right and to the right of the Red Banks towards Thumb Rock, expecting to be able to cross here to gain the ridge to the slope leading to misery hill. This didn't work. Once I got on the ridge, I was standing on a huge cornice with a large bergschrund in front me with a gaping crack between me and where I needed to go with vertical drop offs into a glacier below. Apparently this is the preferred route in winter and Spring before any melting has occurred. I'd have to find another way at this time and sadly this would cost a few hundred feet to have to reascend once I downclimbed to an appropriate entrance point. The Large cornice and bergschrund - note climber in the distance on what appears to be a thin snow ramp in top center of photo. This is a huge place! You can see the tip of "Misery Hill" at the top right of the photo also. Its the black gravel hill. 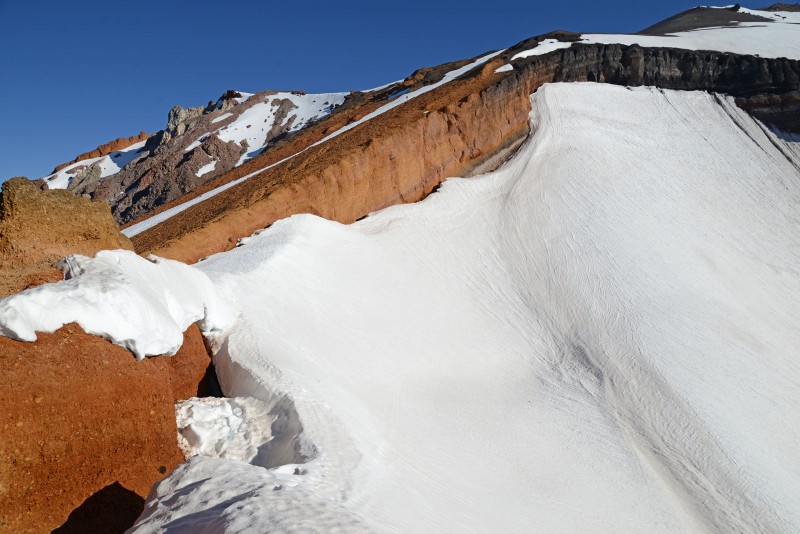 I turned back and made my way back down traversing down along the Red Banks until I came across one of the chutes leading up of which there are several to choose. These are steep chimneys of snow and ice which enable you to gain access through the Banks. This is the entrance of the chute, looking back down the route. Note climbers towards the bottom. The entrance was only about three feet wide and the chute was pretty steep, 45+ degrees and was packed snow and ice with the sun not hitting it. 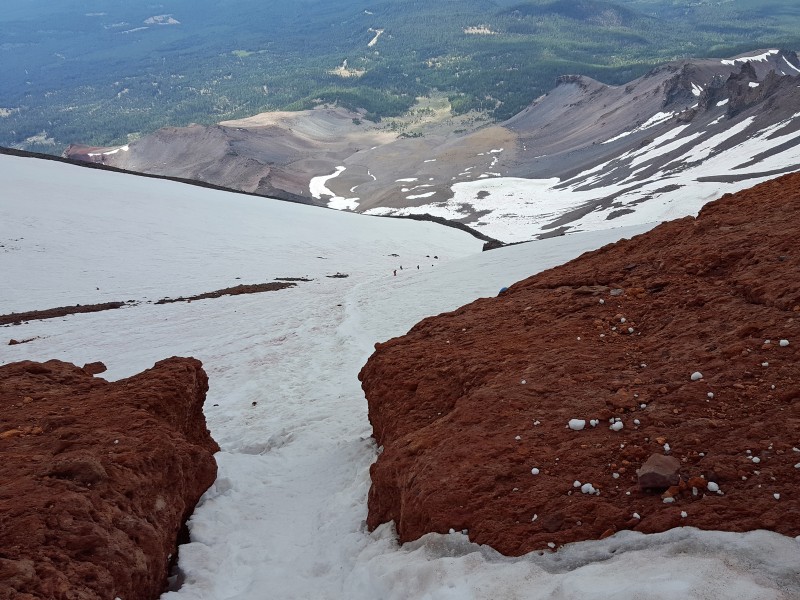 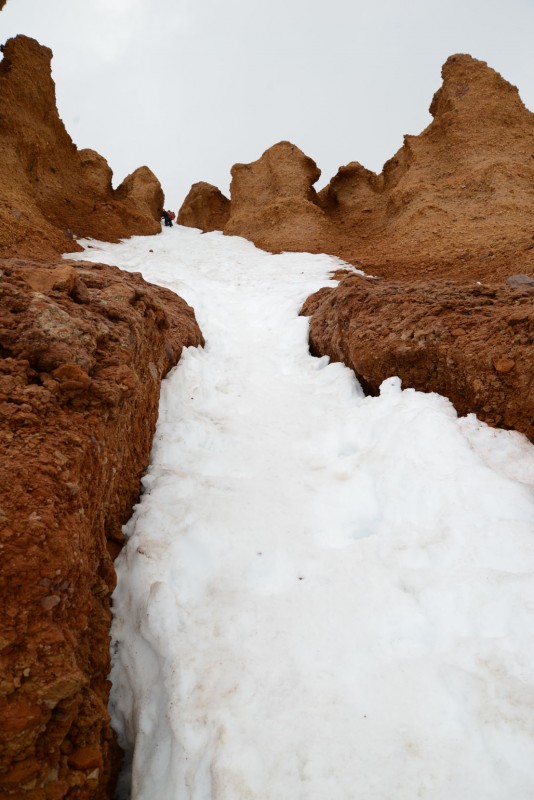 The chute widens as you climb. As you top out of this chute, you reach the False summit at around 13,000ft and then Misery Hill, which arguably could be considered another false summit. Climber at exit of chute near top 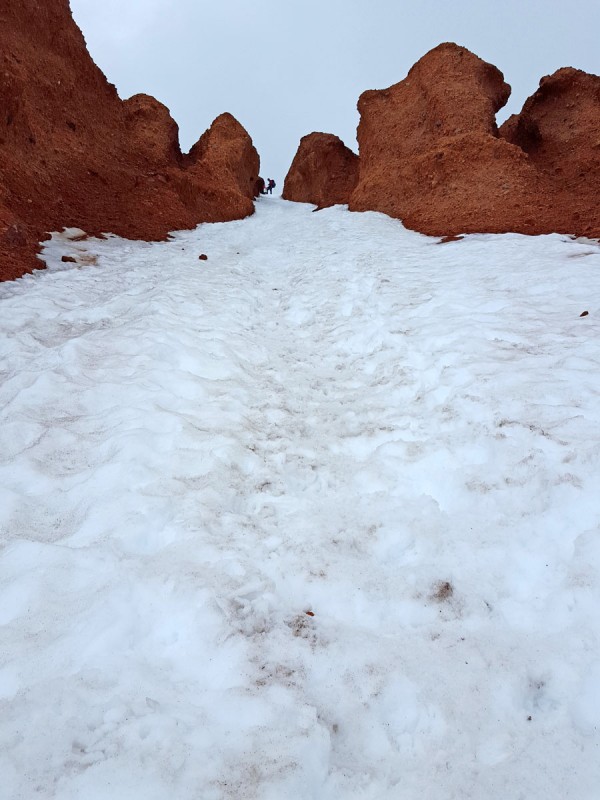 The snow thins out above the chute proper but continues to climb higher. Note climbers above top of photo for scale. I don't remember exactly, but this was maybe five-eight hundred vertical feet of climbing with the steepest section at the bottom. A short ice tool would have been handy here. Nearing the top of the snow exiting out of the chute where the angle mellows out.  Another Guided team making their way down from the top 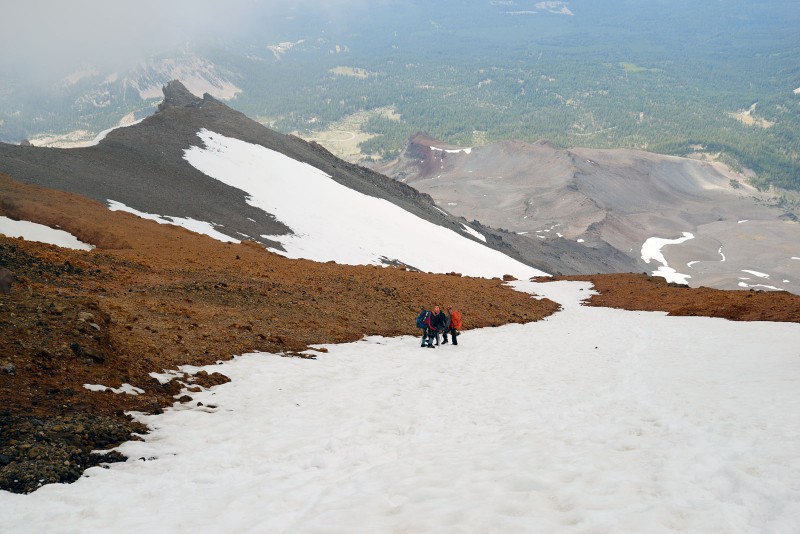 Moving across the summit snowfield, you can see the summit crater of Shastina, which looks wild!  Intermittent whiteout comes in obscuring the summit rocks and surrounding terrain. Note climbing team in the top of photo, left center. 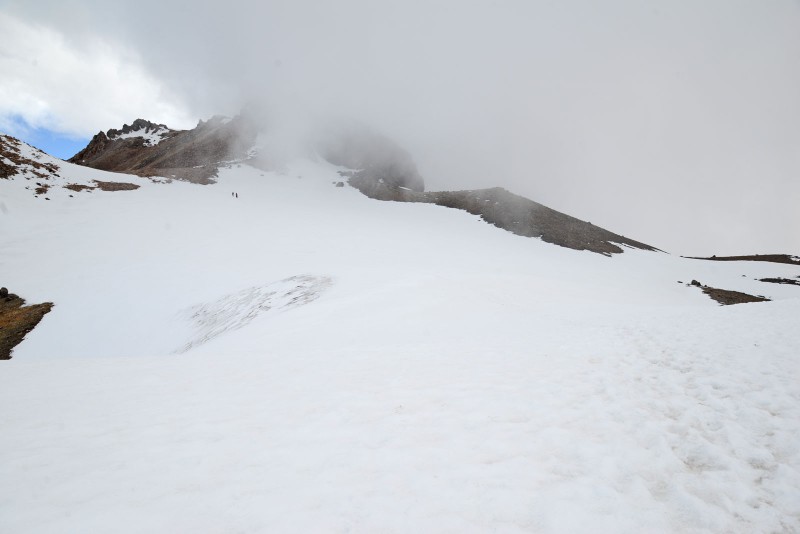 Approaching the summit snowfield and summit proper; the true summit is the high point just right of center. 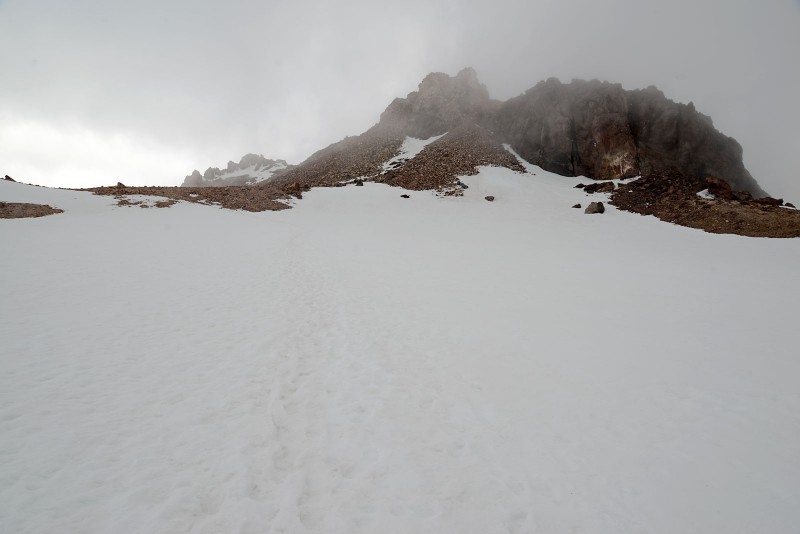 To the left here is a steep dropoff, weak snow and a cornice. Take care if you venture here to take a closer photo of the Shastina crater/cone. 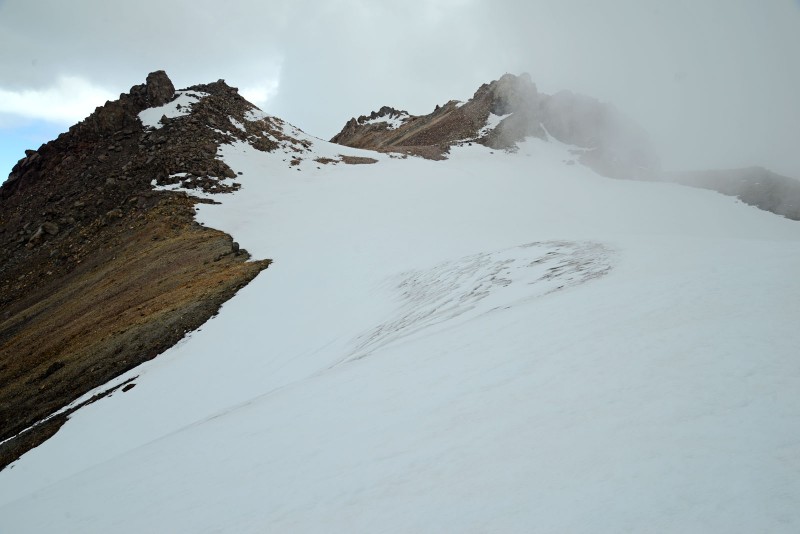 The final pitches to the summit, passing sulphur vents making breathing a bit hard! 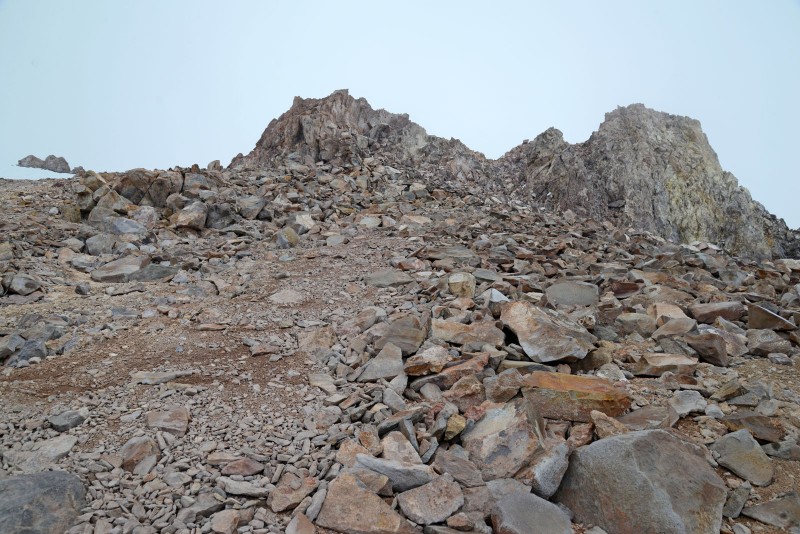 The summit! I removed my crampons from Misery Hill to the summit and put them back on to descend. 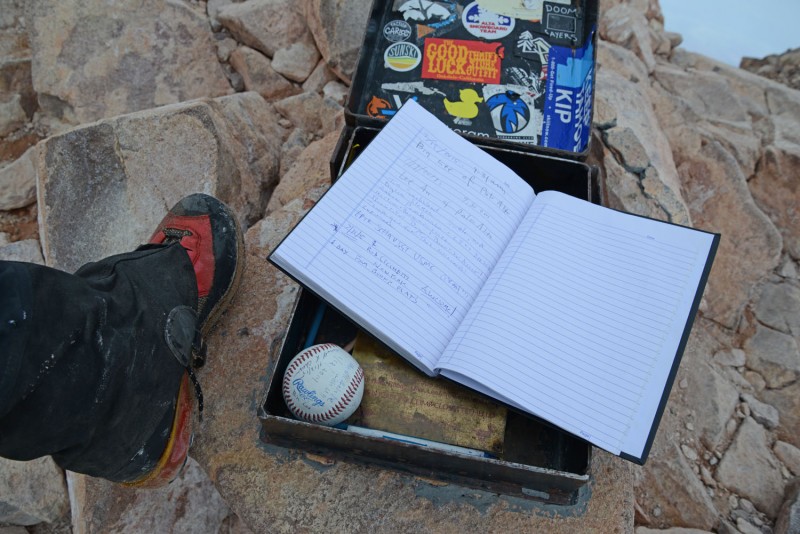 A Guided team coming down from the summit plateau 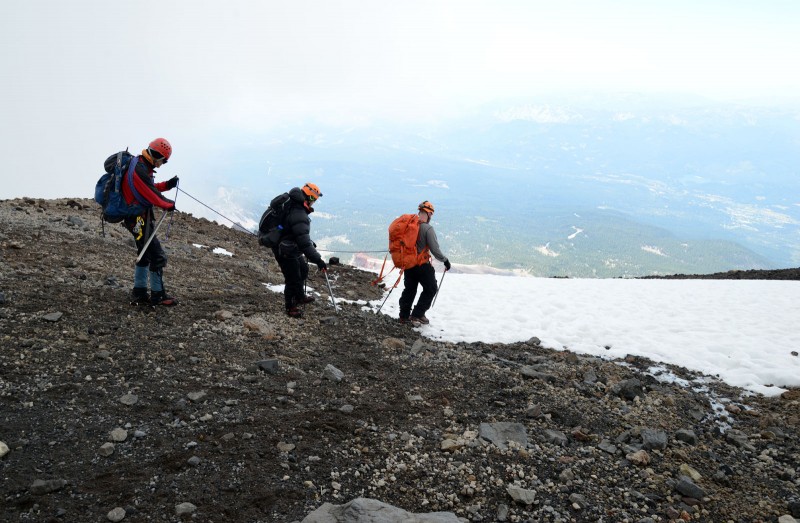 A view from the summit towards the route back. Shastina in the background with two climbers for scale. 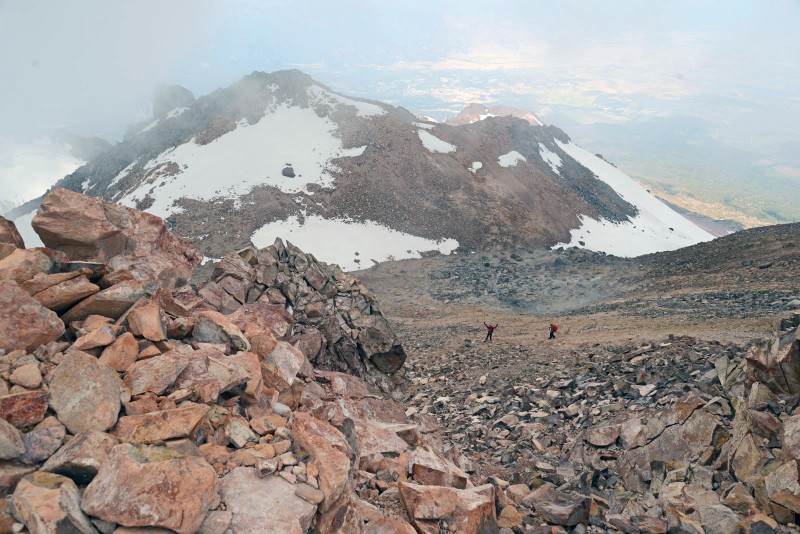 I summited a little after 10AM. I was hesitant to stay on the summit for very long for fear of softening snow conditions on the long climb up. As I'd discover, the snow remained firm throughout the entire descent. In short this was a great climb and fun, awesome one day climb and well worth the trip! Highly Recommended! Helpful Hints * Plan your hydration strategy for this mountain - there is little water above ~9,000 feet, assuming the spring is running, * Be Fit for this if going for it in one day, its a long climb * Bring your helmet and wear it. Rockfall will be your constant companion until the Red Banks * Ice axe and crampons are necessary, regardless of your step kicking skills. * Depending on the time of year, the Thumb Rock route option is not the best way up the mountain (or even possible) * Stay an extra day and climb Shastina (I wasn't able to) Thumbnails for uploaded photos (click to open slideshow): ")
")
")
")
")
")
")
")
")
")
")
")
")
")
")
")
")
")
")
")
")
")
")
")
")
")
")
")
")
")
")
")
|
| Comments or Questions | |||
|---|---|---|---|
|
Caution: The information contained in this report may not be accurate and should not be the only resource used in preparation for your climb. Failure to have the necessary experience, physical conditioning, supplies or equipment can result in injury or death. 14ers.com and the author(s) of this report provide no warranties, either express or implied, that the information provided is accurate or reliable. By using the information provided, you agree to indemnify and hold harmless 14ers.com and the report author(s) with respect to any claims and demands against them, including any attorney fees and expenses. Please read the 14ers.com Safety and Disclaimer pages for more information.
Please respect private property: 14ers.com supports the rights of private landowners to determine how and by whom their land will be used. In Colorado, it is your responsibility to determine if land is private and to obtain the appropriate permission before entering the property.


