Download Agreement, Release, and Acknowledgement of Risk:
You (the person requesting this file download) fully understand mountain climbing ("Activity") involves risks and dangers of serious bodily injury, including permanent disability, paralysis, and death ("Risks") and you fully accept and assume all such risks and all responsibility for losses, costs, and damages you incur as a result of your participation in this Activity.
You acknowledge that information in the file you have chosen to download may not be accurate and may contain errors. You agree to assume all risks when using this information and agree to release and discharge 14ers.com, 14ers Inc. and the author(s) of such information (collectively, the "Released Parties").
You hereby discharge the Released Parties from all damages, actions, claims and liabilities of any nature, specifically including, but not limited to, damages, actions, claims and liabilities arising from or related to the negligence of the Released Parties. You further agree to indemnify, hold harmless and defend 14ers.com, 14ers Inc. and each of the other Released Parties from and against any loss, damage, liability and expense, including costs and attorney fees, incurred by 14ers.com, 14ers Inc. or any of the other Released Parties as a result of you using information provided on the 14ers.com or 14ers Inc. websites.
You have read this agreement, fully understand its terms and intend it to be a complete and unconditional release of all liability to the greatest extent allowed by law and agree that if any portion of this agreement is held to be invalid the balance, notwithstanding, shall continue in full force and effect.
By clicking "OK" you agree to these terms. If you DO NOT agree, click "Cancel"...
An Awesome Weekend in the Sangres Part 1: Peak to Needle Traverse
Last Friday, my brother, sister, two friends, and I took off from Denver at 12:00 in a 15-passenger van to start a 4-day trip to the Sangre de Cristo range to climb the Crestones, Humboldt, and Lindsey. We made it all the way to the South Colony Lakes Trailhead, which we weren't expecting to do, but fortunately those vans have pretty good clearance! There were some rough spots, but nothing too bad. We were glad to have plenty of time to hike in, remembering our misadventure the week before on Snowmass, and hoping not to repeat it.
Day 1: Hike in to Lower South Colony Lake
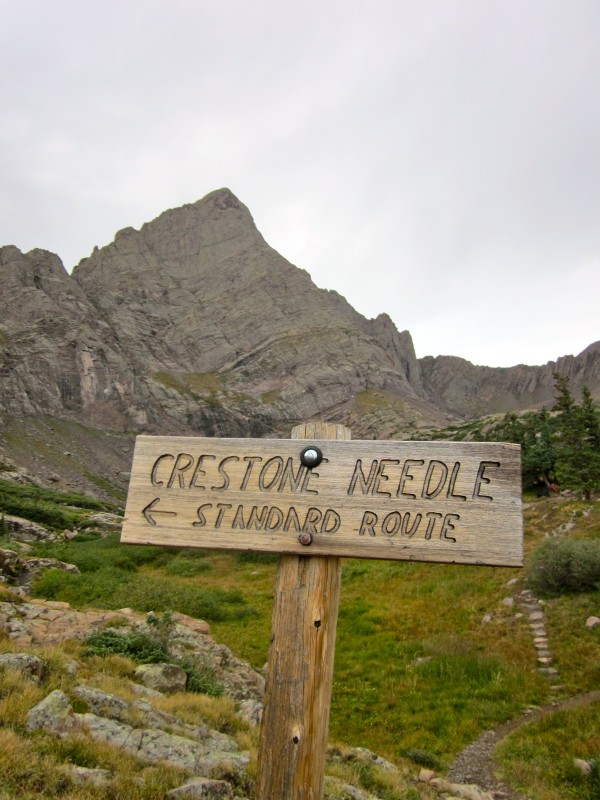
I had read about a shortcut trail that starts at the old 4WD trailhead and figured that it would be worth taking. When we got to the junction, we found a sign there:
The trail junction at the 4WD trailhead
As we hiked, it started to rain; fortunately, it stopped when we got to the top of the headwall below Lower South Colony Lake.
We found an excellent camping spot just off the standard trail for the Needle. We set up camp and built a fire with some difficulty, probably due to the wet wood. We roasted delicious hot dogs and went to bed early, hoping to get a good start on our big day.
Day 2: Crestone Peak-to-Needle Traverse
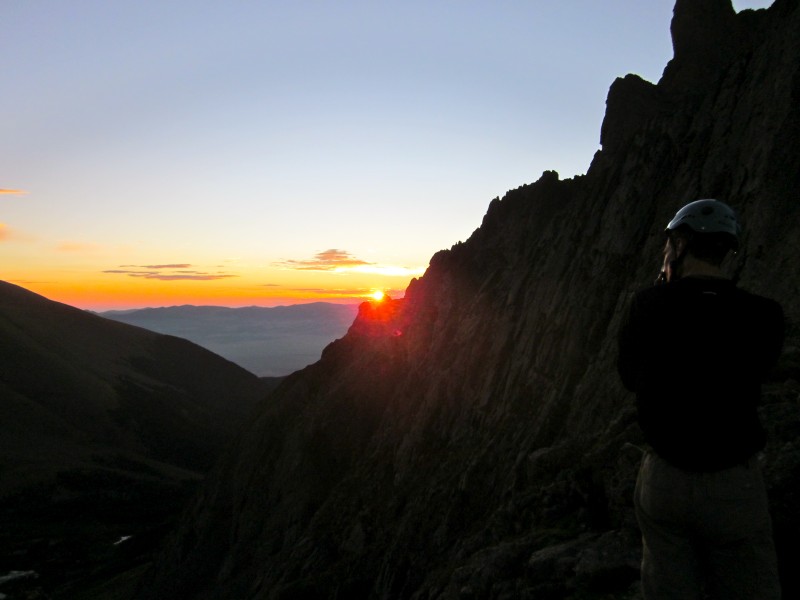
We planned to leave at 5:00 am, but I discovered the evening before that I had forgotten to bring the water filter! We had some iodine tablets which we ended up using the whole time, and with the resulting complication of getting our water ready, we didn't leave until 5:30. However, we made it to Broken Hand Pass in one hour and we were at the base of Crestone Peak's Red Gully at 7:20.
Sunrise
Hiking along Cottonwood Lake
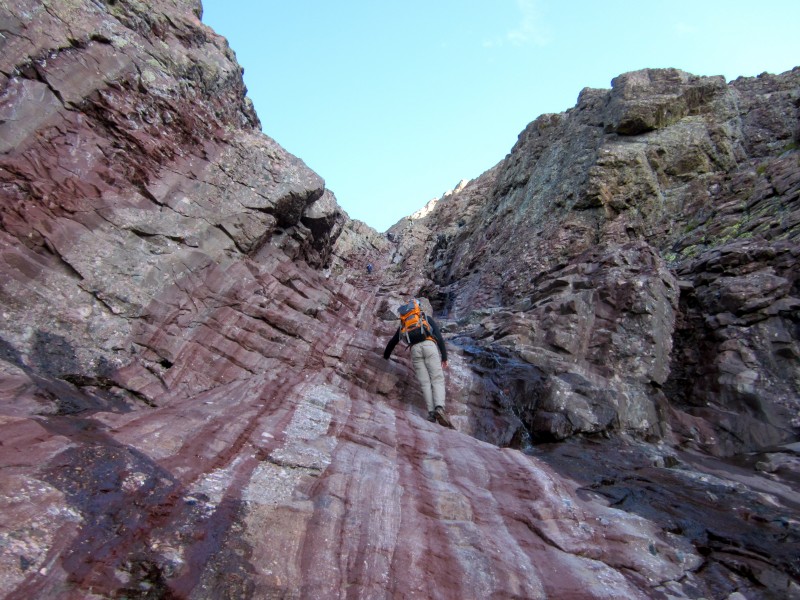
Climbing up the Red Gully
The red gully is mostly solid, but there are definitely plenty of loose rocks to look out for. We wore climbing helmets for this reason, especially because there are lots of other people climbing that can knock rocks on you. However, besides the loose rock, this is a very fun climb. We made it to the top of the gully in rather less time than expected, and from this point, all that remained was some fun ledge climbing to the summit. We reached the top at about 9:00.
Almost to the summit!
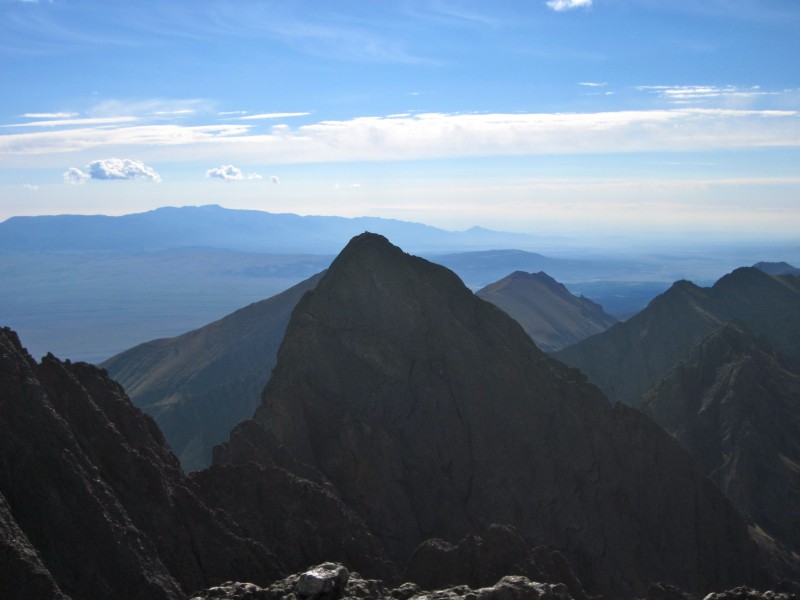
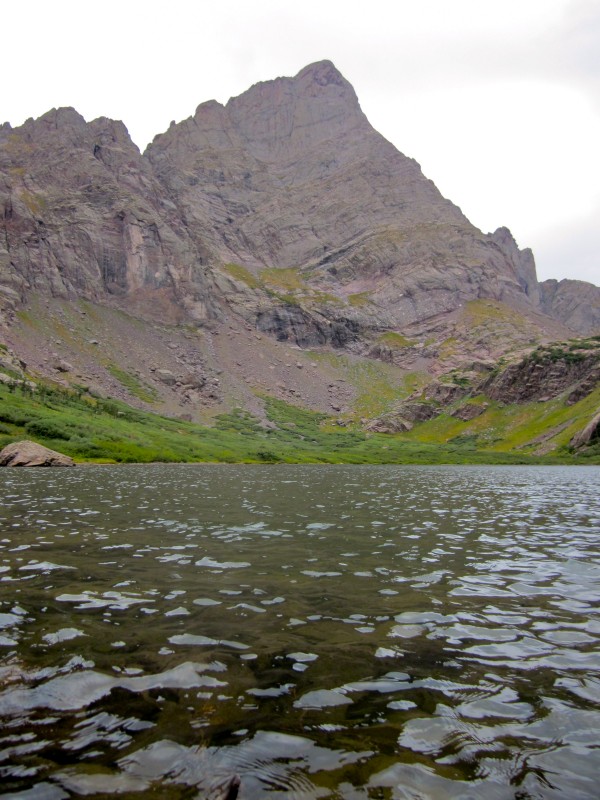
Crestone Needle from the summit of the Peak
Up to this point, we had been watching the weather carefully, as we didn't want to get stuck in a bad storm on the traverse. However, the weather was perfect, and we decided to go for it.
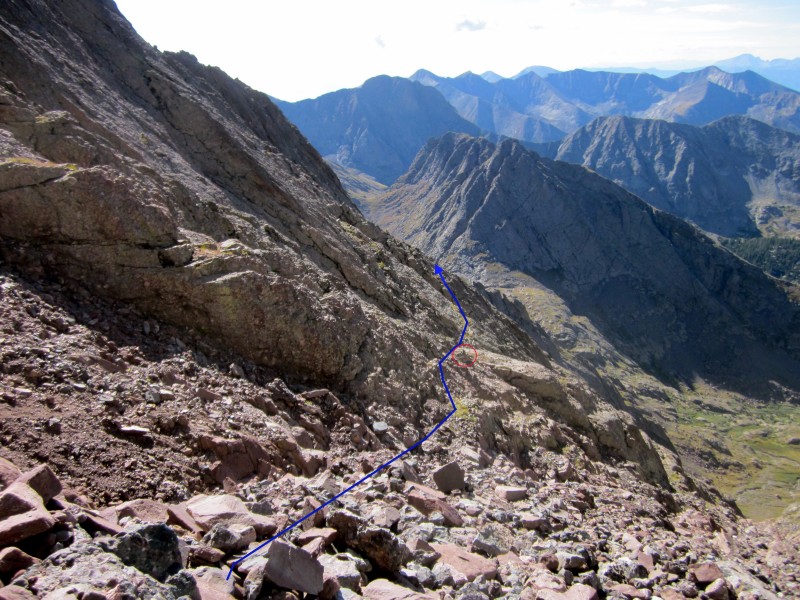
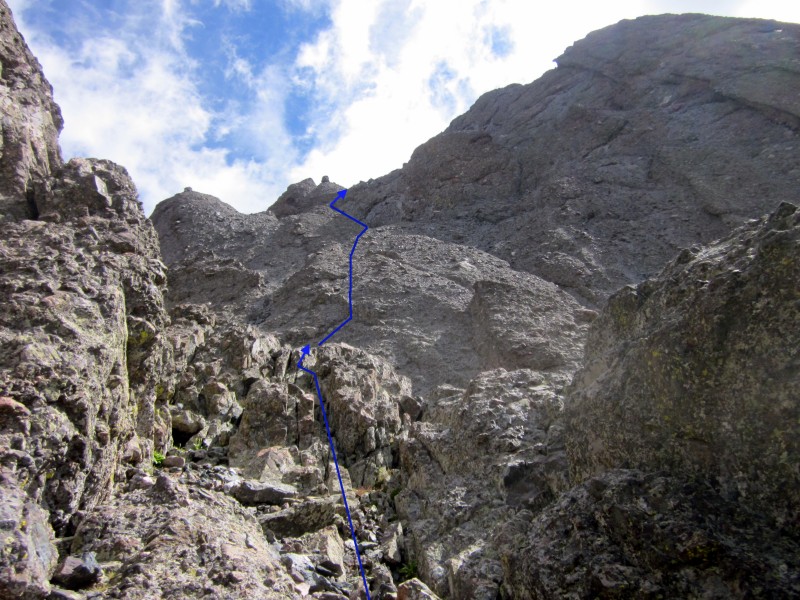
The point where you leave the red gully and start the traverse is marked by a cairn; also, at this point when descending the gully, the rock changes from solid and steep to smaller, loose rock. This is about where the traverse starts. I've marked some lines and cairns are circled in red.
The exit point and start of the traverse
Looking back at the exit point
At the start of the traverse, there are plenty of cairns that mark out the route very clearly. Keep following cairns as far as you can. Because there were so many, we were able to move quickly throughout the first half of the traverse.
About halfway across, looking up at the Needle
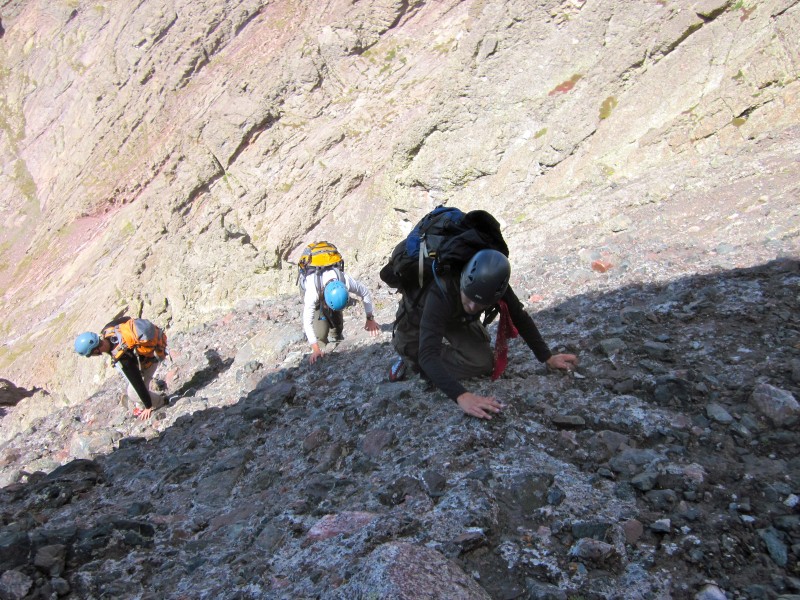
Before you reach the gully below the black gendarme, there is a large rib that you have to climb over. At this point, the cairns get more sparse, and you climb up a gully that holds some loose rock. We stuck to the sides as a general rule, and this worked out great. Note: I can't remember this part of the traverse very well, but this is the overall idea. Just keep searching for cairns in this area.
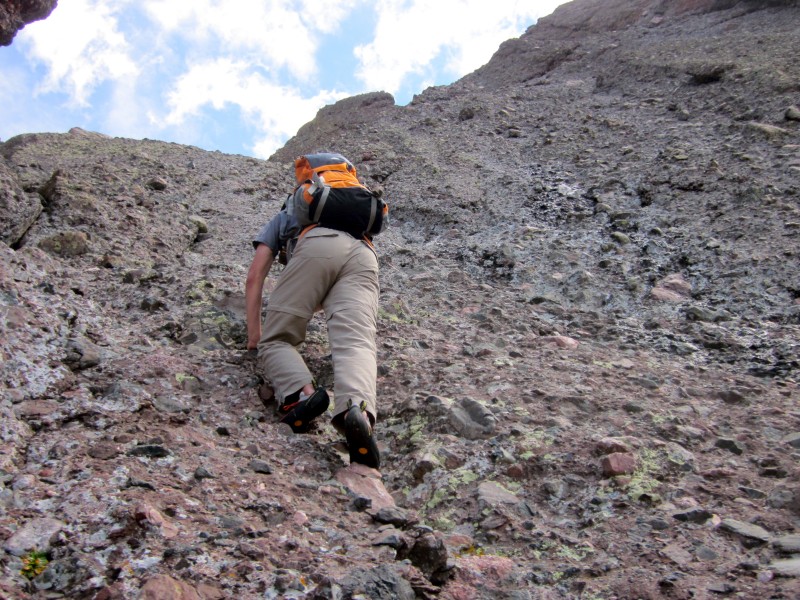
The route over the large rib
Climbing up the rib
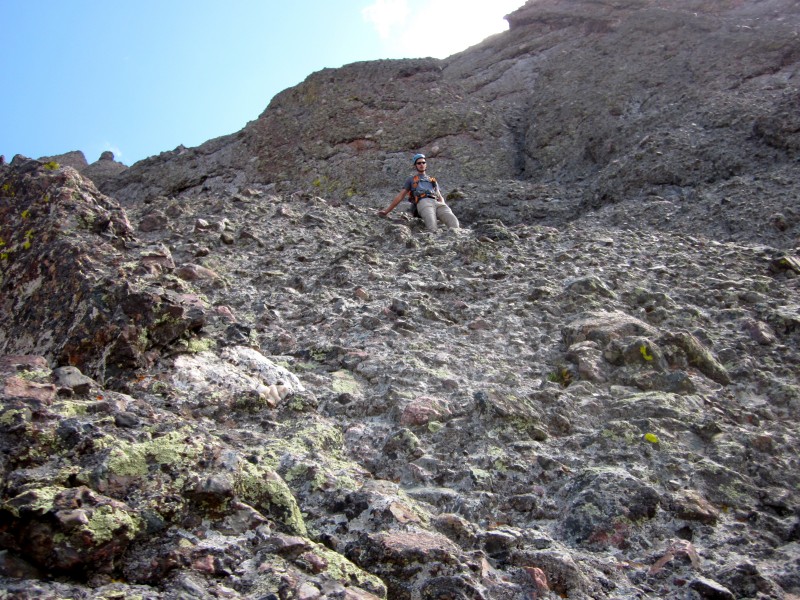
Approaching the top of the rib
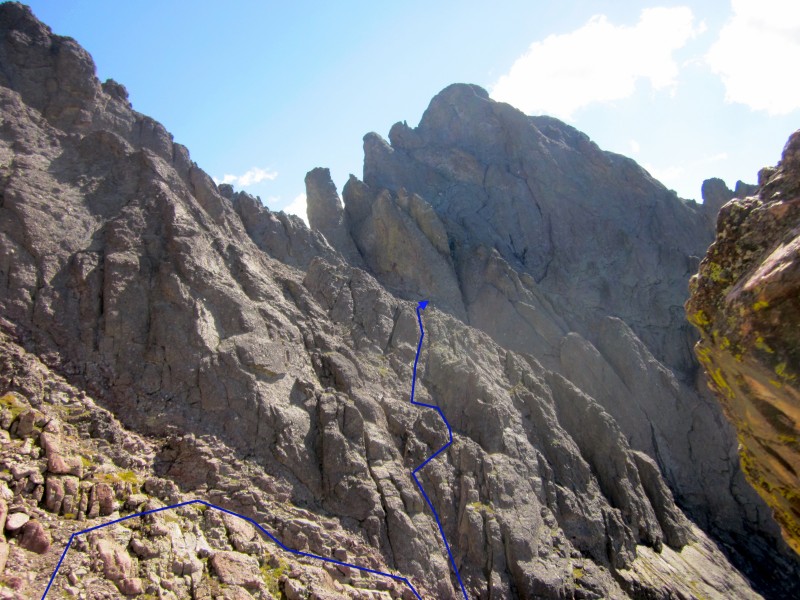
Once at the top of the rib, you have a great view of the more difficult route past the black gendarme.
The route from the gully below the black gendarme
Past the black gendarme, climb across a ledge until you can see a crack inside a big rock hump. It is difficult to see from this angle (see picture below), but the ledge cliffs out right before a narrow gully that splits this section of the route, so descend until you can cross into the gully, climb up, and into the crack. The route is easier than it looks once you get past the gully.
Crossing the narrow gully into the crack
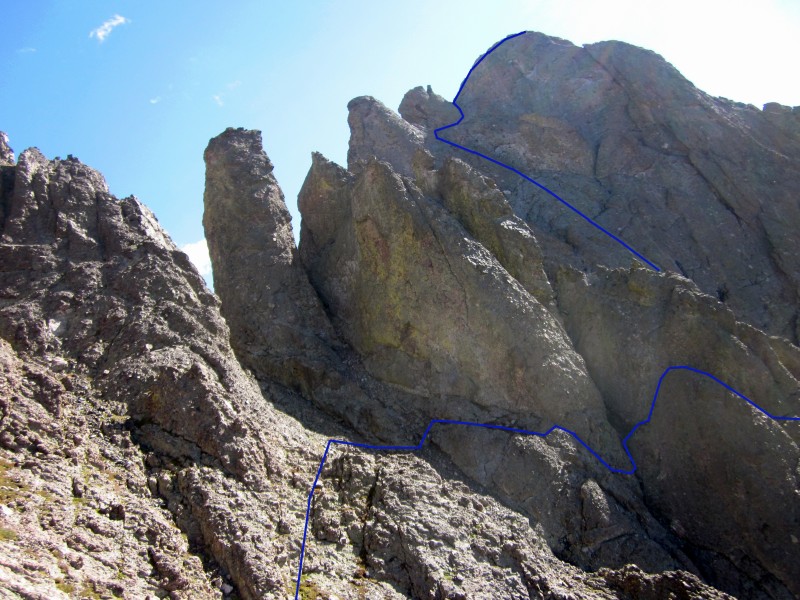
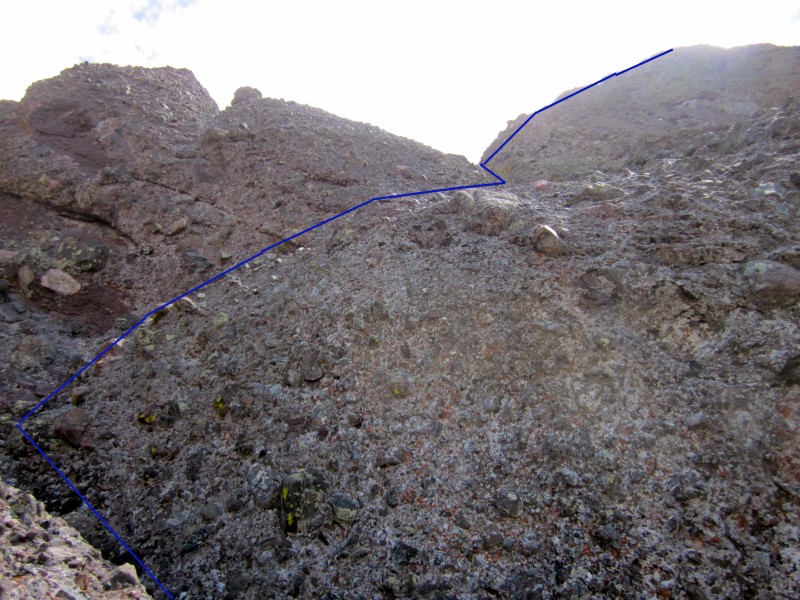
Keep traversing until you see a more or less direct line to the ridge crest past the last gendarme on the ridge, something like this:
Our route to the ridge crest
We couldn't tell at this point whether or not we were on the right track, but this worked. This part of the climb was a lot of fun.
Climbing up toward the ridge
Some fun Class 4 climbing
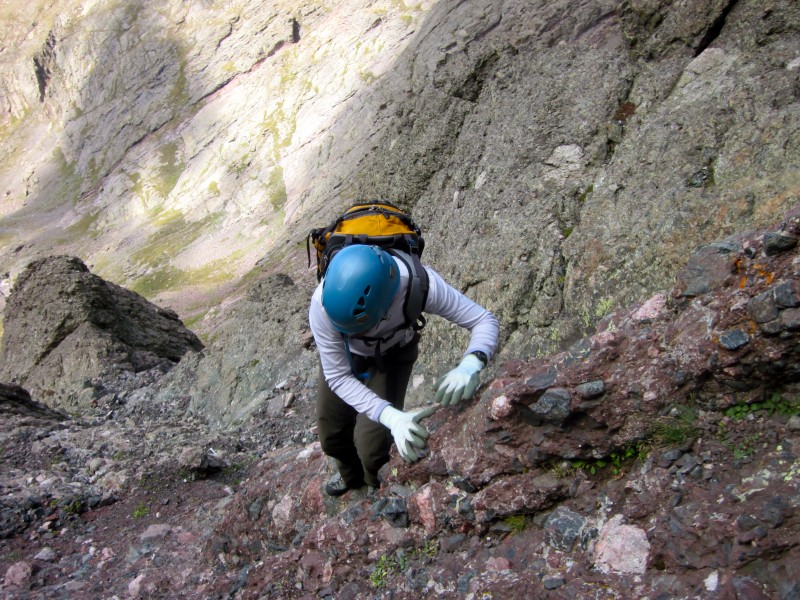
At one point, we encountered a split in the wall. From below, both sides look about the same, but the ascender's right side is Difficult Class 4 to Low Class 5; however, the left side is much easier, so take the left side unless you're confident with more technical terrain. The picture below is looking down on this area.
The split in the wall
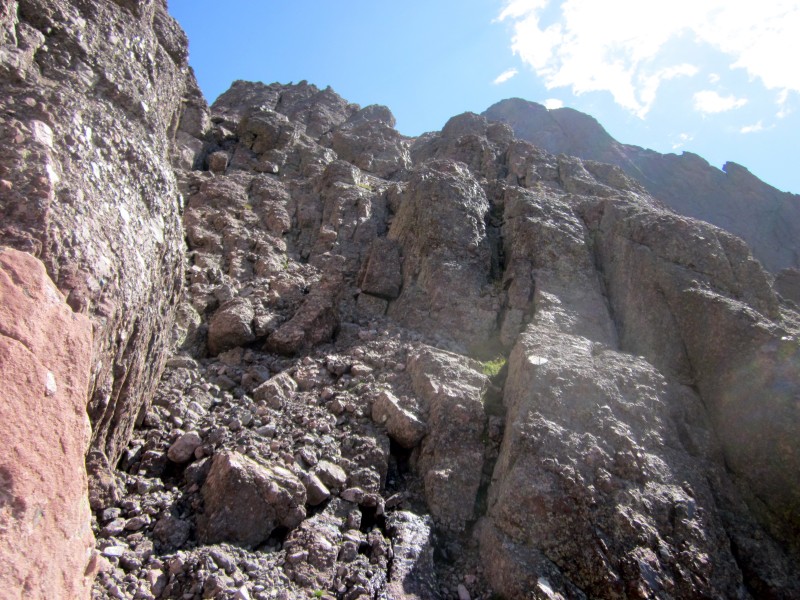
After this section, the climbing gets progressively easier until you reach the gully below the summit ridge and crux wall.
Approaching the gully below the summit ridge
The gully is loose enough that we decided to stick to the left of it, and the rock was very solid. Watch the rock rib to your right; once you get to the top of it, you want to turn right and cross a ledge with a cairn on it.
Looking up the gully
At the top of the gully before turning right
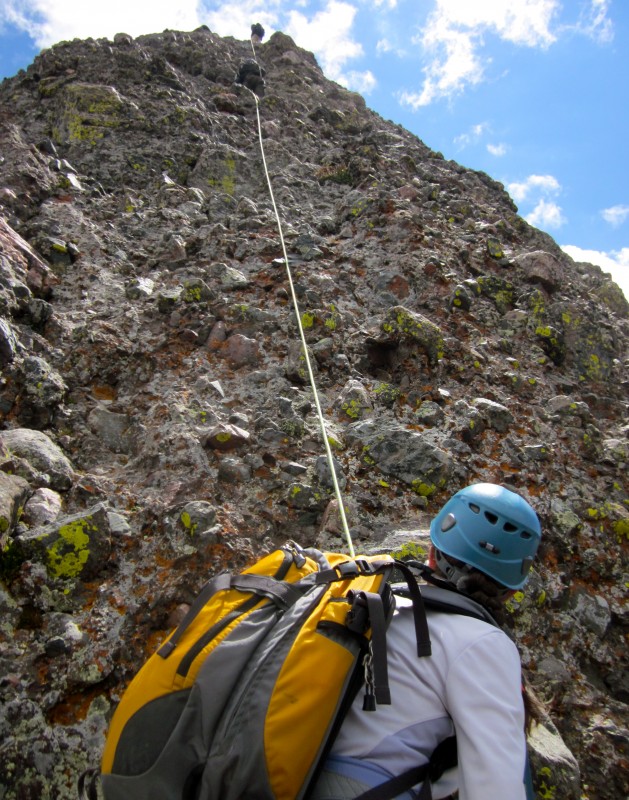
Once across the ledge, turn left and climb to the ridge crest in time for the final crux wall and climax of the route! We brought rope equipment on this route and so we decided to rope up for the crux, more to make use of it than anything! Whether we were on the correct side of the crux or not, there were about 2 moves of Low Class 5 right before the top of the crux. This was my favorite part of the route, partly because of the climbing, and partly because of the intensity!
Climbing the crux wall
The exposure to the left of the crux
Soon we were at the summit; we had completed the traverse! This was my first of the four great traverses, and I would love to do this again.
On the summit, looking at Humboldt
The climb down Crestone Needle is steep and tiring, especially after the traverse. We worked our way down carefully and were soon back on the trail. From here, the only difficulty was the descent of Broken Hand Pass, which is nasty! Oh well, we descended carefully and soon we were on the easy trail leading back to camp.
Descending the standard route of Crestone Needle
A look back at Crestone Needle
Soon we were back at camp. We enjoyed a hot meal and got to bed early, because we were tired out!
Stay tuned for part 2 of this report.
Thumbnails for uploaded photos (click to open slideshow):
I did the traverse a while back, and took a much different route from the Black Gendarme. We went up the coulior to the right where you took a hard right with some down climbing. Either way works- loved the pictures. Great job!
Caution: The information contained in this report may not be accurate and should not be the only resource used in preparation for your climb. Failure to have the necessary experience, physical conditioning, supplies or equipment can result in injury or death. 14ers.com and the author(s) of this report provide no warranties, either express or implied, that the information provided is accurate or reliable. By using the information provided, you agree to indemnify and hold harmless 14ers.com and the report author(s) with respect to any claims and demands against them, including any attorney fees and expenses. Please read the 14ers.com Safety and Disclaimer pages for more information.
Please respect private property: 14ers.com supports the rights of private landowners to determine how and by whom their land will be used. In Colorado, it is your responsibility to determine if land is private and to obtain the appropriate permission before entering the property.