| Report Type | Full |
| Peak(s) |
Grays Peak - 14,275 feet Torreys Peak - 14,272 feet |
| Date Posted | 09/21/2024 |
| Modified | 10/24/2024 |
| Date Climbed | 08/07/2023 |
| Author | ECF55 |
| First Class 3 - Kelso Ridge (Grays/Torreys) from the Interstate |
|---|
|
First Class 3 - Kelso Ridge from the Interstate (Grays and Torreys) 7 August 2023 (Monday) Hike Times: 4:37am - 2:18pm MDT (9h 41min hike duration) Distance/Elevation: 14.0 miles / 4,728 ft (MapMyRun estimates) Mountain Conditions: Full summer conditions. Weather Conditions: Really pleasant summer weather. Clear skies in the morning and increasingly cloudy by late morning, but precipitation did not materialize. Windy on Grays Peak, but somehow not on Kelso Ridge. Crowds: Throngs of hikers on the standard route, but significantly fewer along Kelso Ridge (~8 others). So you're thinking about your first Class 3 14er? It's a different undertaking, but I strongly recommend it if you're ready for a challenge. Bring a helmet. 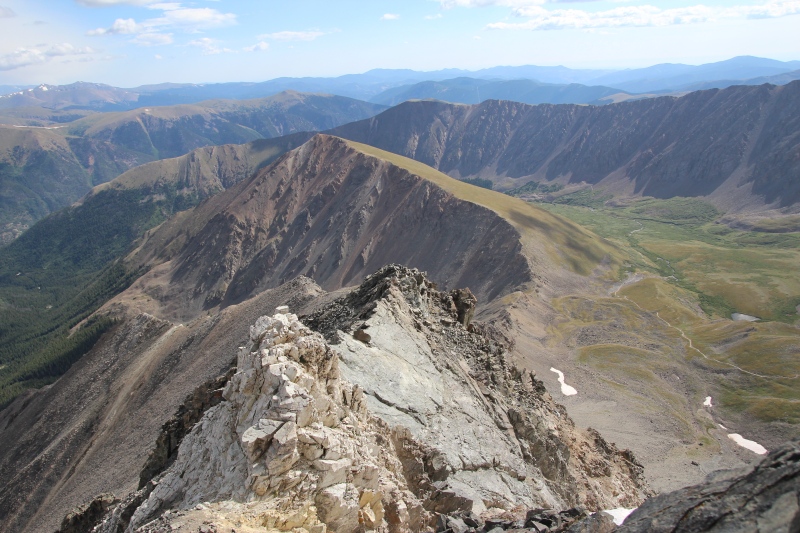
My 14er experience level before this hike was largely limited to big Sawatch Class 2 hike-ups in summer conditions (Elbert Black Cloud; Yale Denny Gulch; Princeton From the Bottom). However, I had just completed a March snow hike up Quandary and was suddenly interested in a Class 3 adventure. This community has annual debates on the merits of the various Class 3 introductory hikes, with Kelso Ridge (Torreys) and the Sawtooth (Bierstadt/Blue Sky) frequently mentioned as popular forays into the more difficult stuff. Daway8 has a great primer on the topic. After some internal deliberation, I decided to attempt Kelso Ridge as my first Class 3. Kelso Ridge is known to be a steep and varied alternative route up Torreys Peak with diverse terrain, a range of Class 3 features to overcome, some exposure and micro-route finding along the ridge, and a miniature knife's edge near the summit. I would also stress that Kelso Ridge offers Class 3 UP-CLIMBING, but you can finish the day with a Class 1 walk-down on the standard route. One-way Class 3 hiking reduces risk factors for getting back to your car safely (and on time) and it also decreases unexpected rockfall because you can better keep track of other hikers that are going your direction. I thought it was a challenging day and I had a blast working my way up the mountain. If you are comfortable with basic rock climbing moves and can deal with ridge navigation and moderate exposure, I would recommend Kelso Ridge as a introduction to Colorado Class 3. It went well for me. Just give yourself enough time to work your way up. Long Approach from the Lower Trailhead (I-70 Interstate) Most Grays/Torreys hikers drive up Stevens Gulch Road to the Upper Trailhead and start their day within striking distance of the peaks. The unpaved road is not particularly steep (~9% grade) and is generally passable with only a few rough spots. Parking at the Upper Trailhead has gotten more difficult since the pandemic with the explosion of interest in Colorado 14ers. Making matters more challenging, Clear Creek County has tried to limit Grays/Torreys Upper Trailhead parking to only lot spaces and has cracked down on overflow parking with tickets and/or towing. Given this new parking paradigm, G/T Upper Trailhead parking tends to fill up before 5am on weekends during the summer crush (and slightly later during the week). 
For those that decide to hike from the lower trailhead, the road has a couple views towards Torreys near the bottom, but it's basically a walk up an unpaved road in the woods. If you are starting in the dark, they are miles to be eaten--specifically 3 miles and 1,500 feet of gain. I have a history of senselessly hiking peaks "from the bottom," which adds mileage and elevation gain to already big days. I did this for Grays and Torreys because I'm an East Coaster traveling with a rental car, but I also like the idea of hiking up the whole prominence with my body. This approach is defendable at the end of a successful hike, but I often question this philosophy during the process. If you are not interested in adding six miles round-trip to your Grays and Torreys experience but aren't sure about the drive, I can confirm that I received two offers for rides on my ascent and numerous offers on descent. I think hitching a ride is totally doable and the road is much busier than, say, Princeton's access road. Getting to the Kelso Turnoff After reaching the Upper Trailhead, the hiking experience improves with the wide, well-worn, but well-engineered trail that meanders through alpine meadow. Stevens Gulch, the long and narrow glacial valley that leads you up to Grays and Torreys, is a beautiful, steep-sided valley with great views all along the way. Before long, the trail rounds Kelso Mountain and your 14er goals come into view. 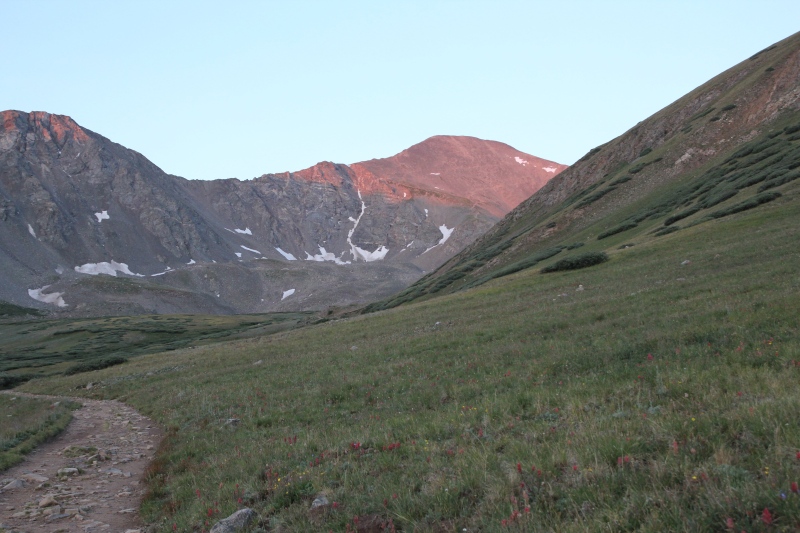
The Kelso Ridge trail peels off from the standard route after you hike up some hummocky terrain to the area immediately under the peaks. From here, you are less than two miles from your first summit. What I find curious about Grays and Torreys is that the hike is basically a long approach with all of the "business" happening immediately around in the peaks. This reaches comic proportions when starting from the interstate. 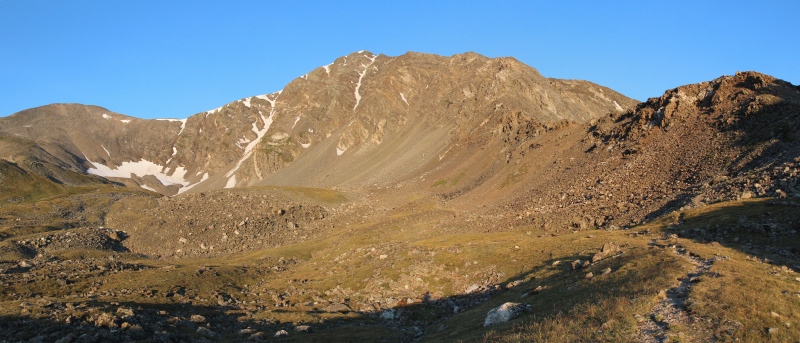
Climbing up Kelso Ridge Once you ascend onto lower Kelso Ridge, the hiking gets much more varied and interesting. The Torreys-Kelso saddle starts around 12,400 feet. After some hiking and initial scrambles, you reach some early rock outcroppings and can see much of the ridge ahead of you. Most of the day includes Class 2 ridgeline on generally good rock. You largely stay on the ridge, so your route finding is never really in doubt, but you do get to make decisions about the specific route you want to take along the ridge. Daway8 terms this "micro-route finding" and I think that really describes it well. Interspersed along the ridge are three Class 3 wall sections plus the knife-edge and white rock obstacle just below the summit. It's these features that really make the day. In addition to the normal Class 2/3 ridge hiking, Kelso Ridge has a handful of crappy, dirty slopes with rockfall hazards. These dirty gullies were slow, loose and energy sucking, but they are a relatively minor part of the hike so you just have to power through them. 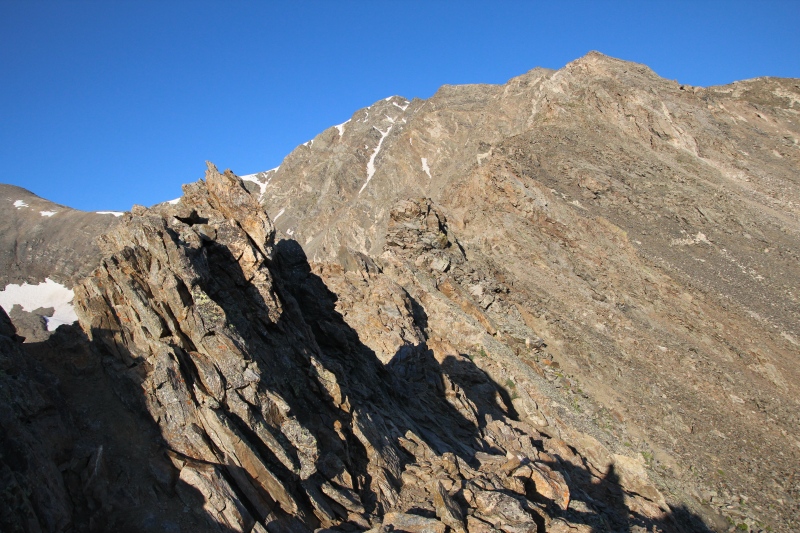
As you make your way up the ridge, it doesn't take that long to reach the first Class 3 rock wall at ~12,700'. The section has high quality rock with notches and good hand-holds. It didn't take me long to ascend and I really enjoyed it. It was unlike anything I had experienced on Colorado hikes. If you get to this point and don't feel confident about attacking the section, it's probably best to head back to the standard route because it doesn't get easier. 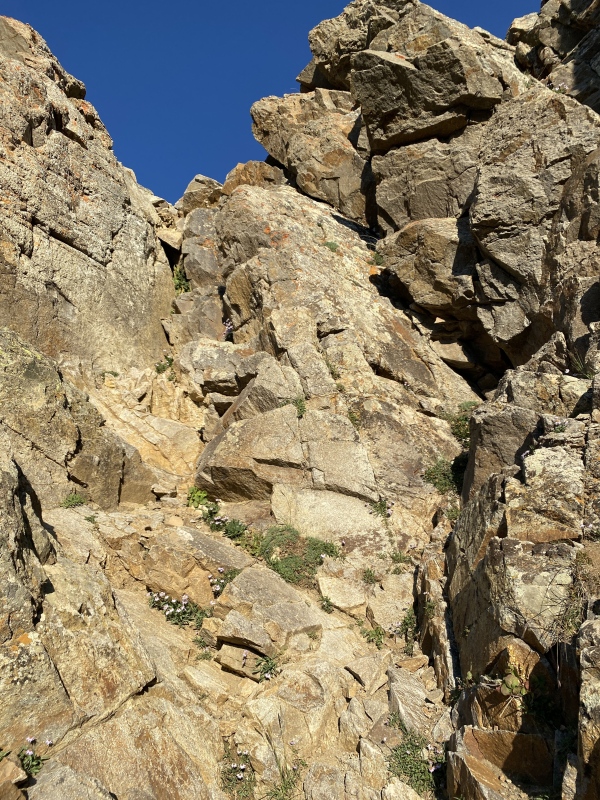
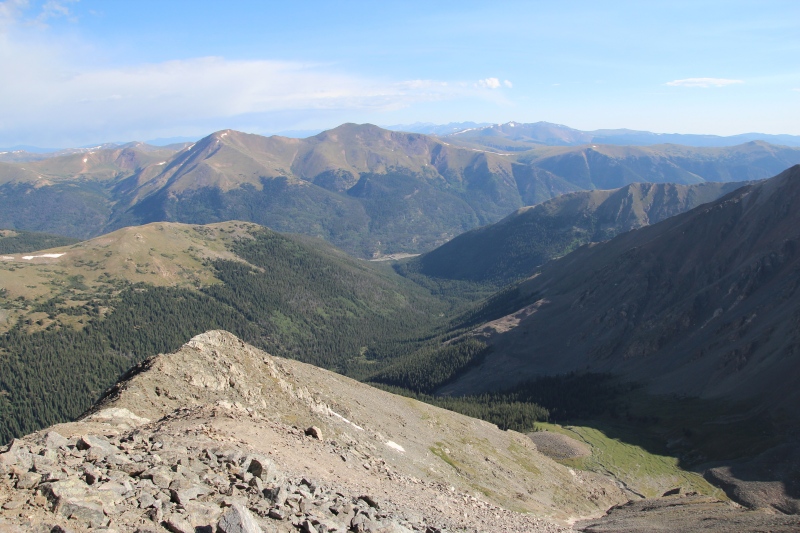
After the first obstacle, you basically just keep working your way up the ridge. The views are also superb, with Grays Peak on your left and Front Rage scenery surrounding you in all of the other directions. 
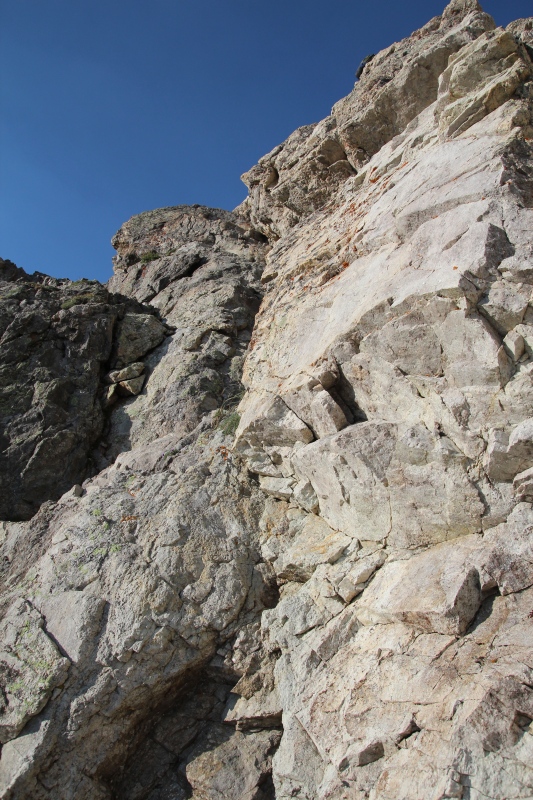
Eventually, after some scrambles up good rock and an ascent up a dirty gully, you get to the next major obstacle at around 12,900'...the White Wall. I had seen some pictures of the White Wall on several websites, but I was surprised by the scale of the feature. It's a substantial obstacle! (See picture below with climbers for scale.) There are two obvious Class 3 lines to climb up the White Wall, including one to the left and one to the right. The White Wall rock is high quality with lots of handholds, and it's a steep slope but nothing close to vertical. I thought it was the most fun feature of the day and you are at the top before you know it. 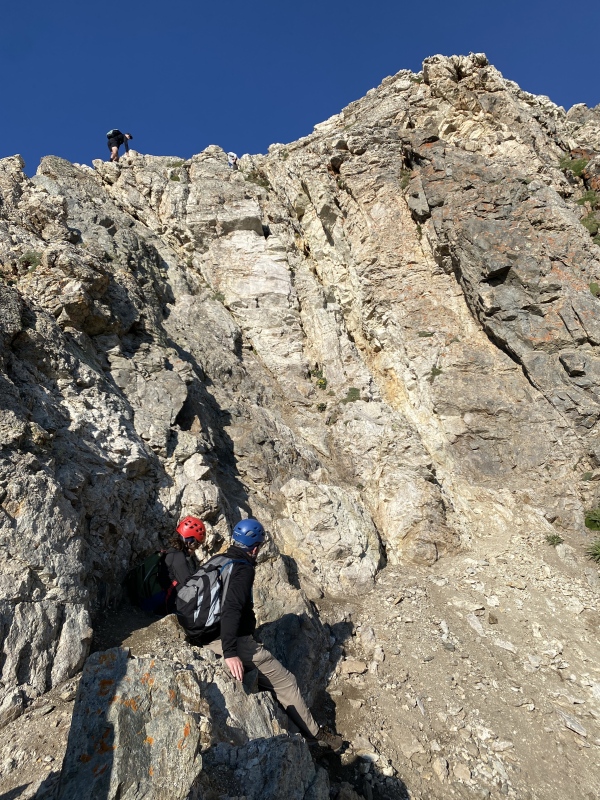
Above the White Wall, there's a big, dirty, crappy slope with lots of loose rocks that are precariously situated on the mountainside. It's one of those slopes where you treadmill up and slide back a bit, so the going is slow. It's also steep enough that any rocks that get kicked loose will quickly slide down the slope and pick up remarkable speed. It's an objective hazard to any hikers below you, so please be cautious as you ascend and call out "ROCK!" if you set anything loose. For me, it was this section where my helmet was most reassuring to have over my head. 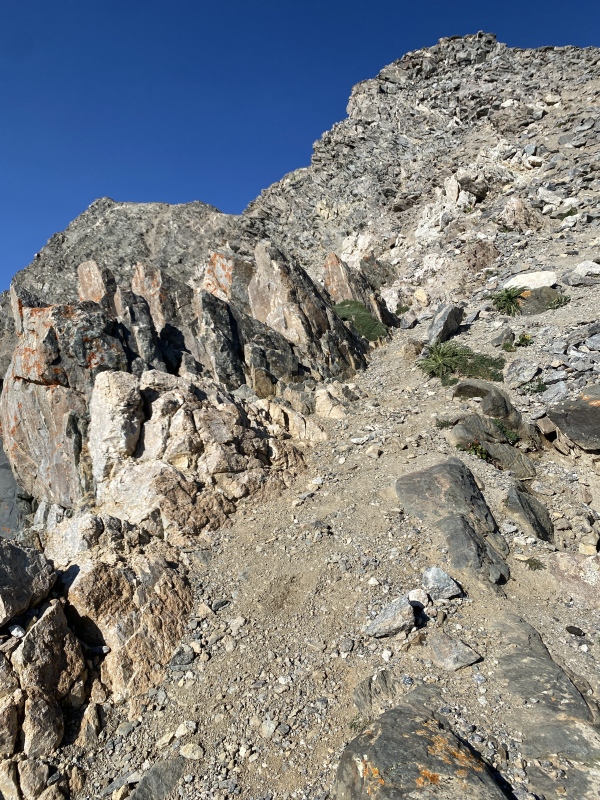
Above the White Wall and dirty gully, you encounter straightforward ridge trail with a good view of the remaining ridge and outstanding views into the surrounding Front Range. Of particular note, Longs Peak comes into distant view to the northeast, as well as the I-70 exit in the immediate foreground (where I started my day several hours earlier). 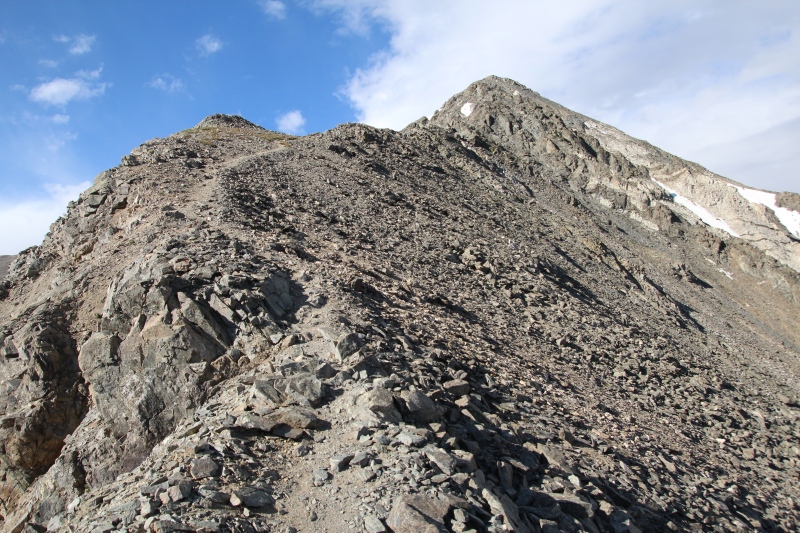
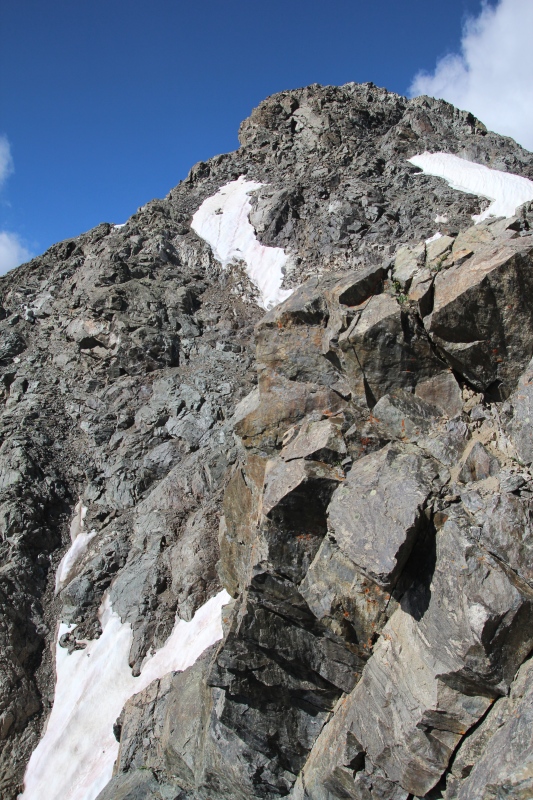
Around 14,000', you reach the final major obstacle just below the summit--Class 3 terrain followed by the knife-edge/white rock obstacle. I would describe this initial section as a steep, angled wall with lots of knobby hand-holds and ledges and some exposure off to the left. There was a little bit of choose-your-own-adventure in this section as the best route to the top wasn't entirely obvious. I stayed to the left and found a good line to ascend, but the drop-off into Dead Dog Couloir was dramatic and exhilarating. Rock quality was really good. 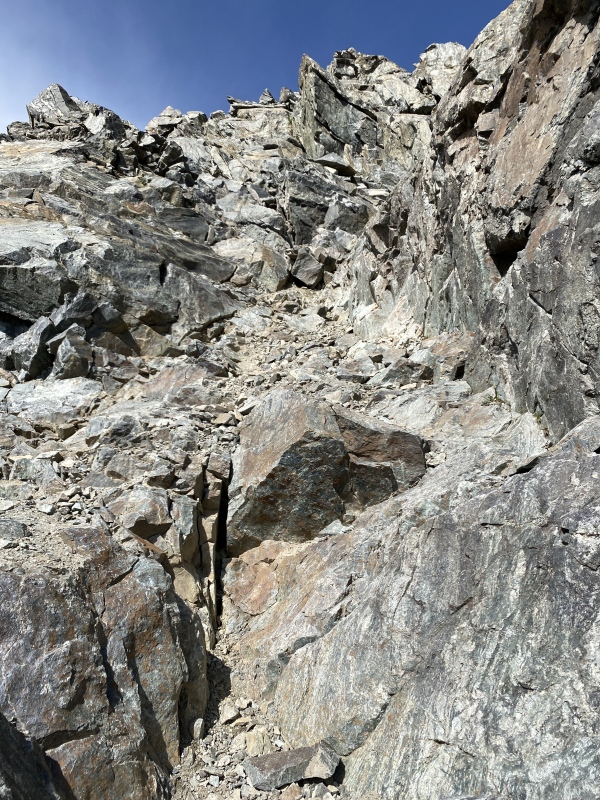
The final obstacle of the day is the one that gets the most press...the Kelso Ridge Knife-Edge! It is what it sounds like--a pointed slab of solid rock with dramatic exposure down both steep slopes. In actuality, I found the knife-edge to be a fun but somewhat awkward feature of the hike and it didn't take me that long to scoot across. I have seen two strategies for getting across the knife-edge: the straddle-scoot (like riding a horse) and a more perpendicular shuffle where you grab the top of the ridge and position your feet on small rock ledges. Both methods were viable and the views down the slopes were incredible. 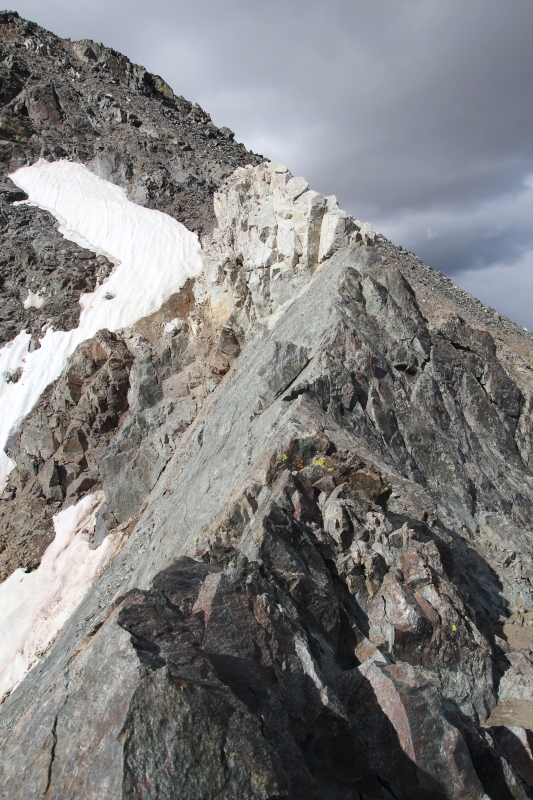
Without a question, the crux of the route for me was maneuvering around the white rock obstacle at the end of the knife-edge. There's an awkward transition at this point where you have to finish the knife-edge traverse and reorient your body to maneuver around the blocky white rock obstacle. 14ers.com recommends scrambling around the right side of the white rocks and hugging onto the blocky, uneven terrain. Some other sites suggest climbing directly over the top of the obstacle, although that option may push it briefly to Class 4 maneuvers. Regardless, there's significant exposure down a steep slope to the right and the transition move onto the right side of the obstacle was awkward and not without risk. I had some jitters but it worked out well. 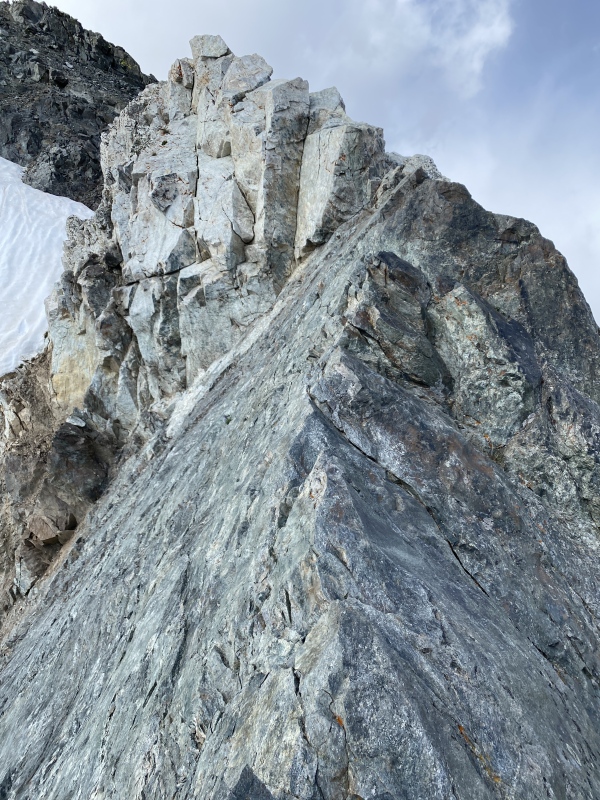
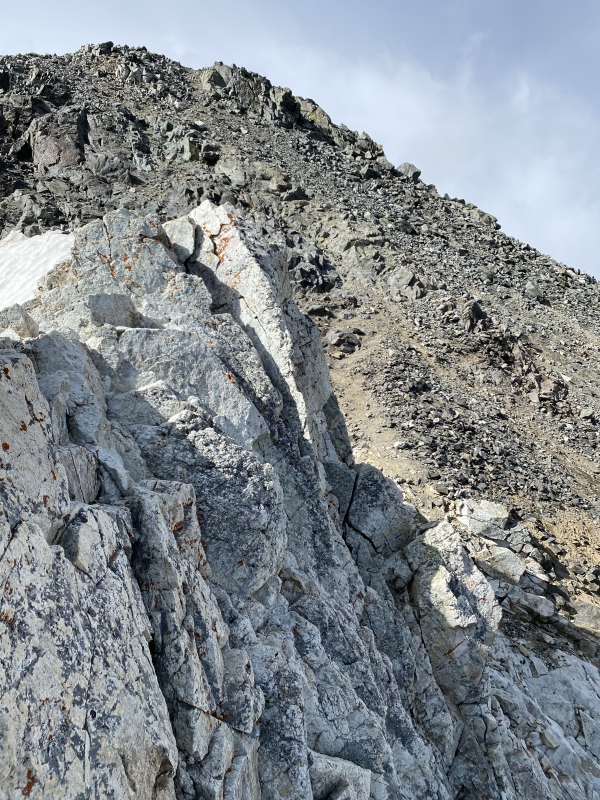
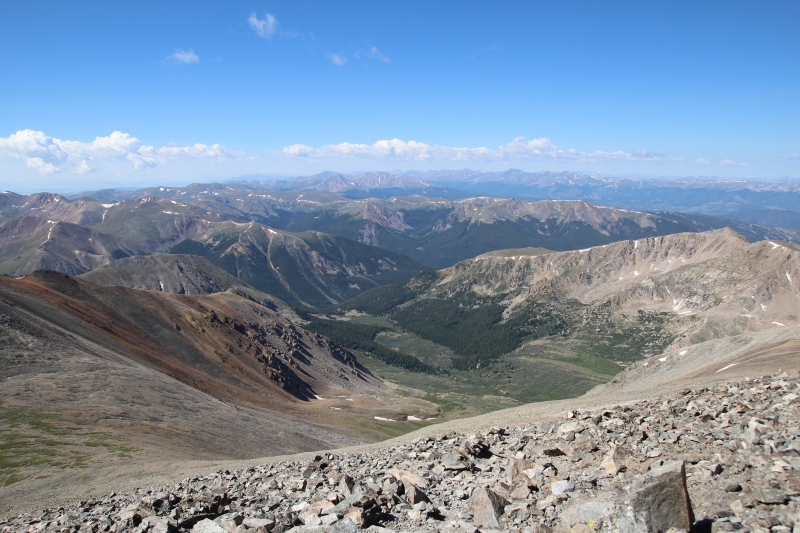
After you clear the white rock obstacle, there's just a short amount of ridge left before you reach the summit. Don't forget to turn around and admire the gnarly ridge that you just ascended! It's a memorable view. Overall, I spent 3 hours working my way up the ridge (1.1 miles and 1,900 feet of gain). I was really surprised that it took me that long--I had hoped it would be something closer to 2 hours. In retrospect, I took my time working my way up the ridge and took plenty of pictures. This hike was also "Day 4 in Colorado" for me and I was really feeling the my lack of altitude acclimation during the ascent (14,000 ft versus 440 ft). Finally, Class 2-3 ridge maneuvering is a completely different beast than standard trail hiking, so your priors on hiking pace probably won't predict your experience on Kelso Ridge. Budget accordingly. Torreys and Grays Summits After summiting Torreys Peak, I ate a snack, drank some water, and took in the views. I felt very pleased with myself for completing the ascent! Views from Torreys were superb and unlike the Sawatch Range where a gaggle of 14ers are bunched together, Grays and Torreys tower above almost all of their neighbors. Stevens Gulch views were also memorable. 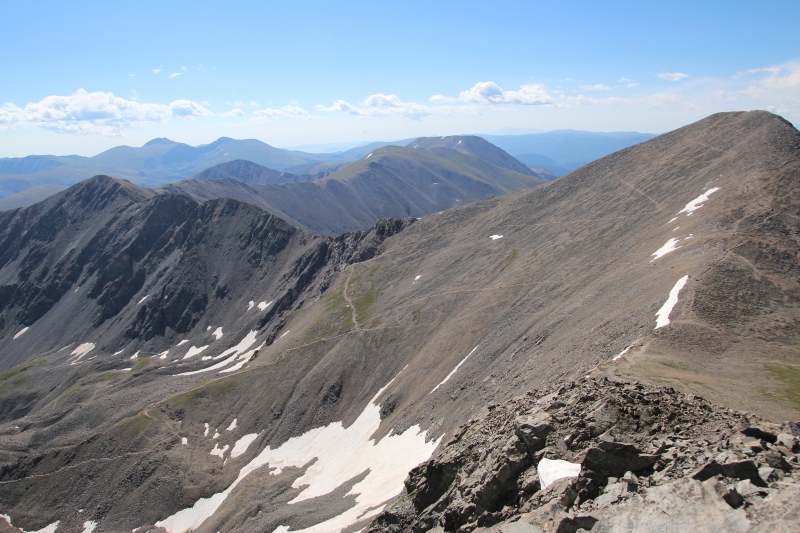
It's not quite one mile between the two summits. From Torreys summit (14,272 feet), you drop down to the broad saddle (13,700 feet) before hiking back up to Grays summit (14,275 feet). There's nothing technical about the remainder of the day, but connector trail is high altitude the whole way. 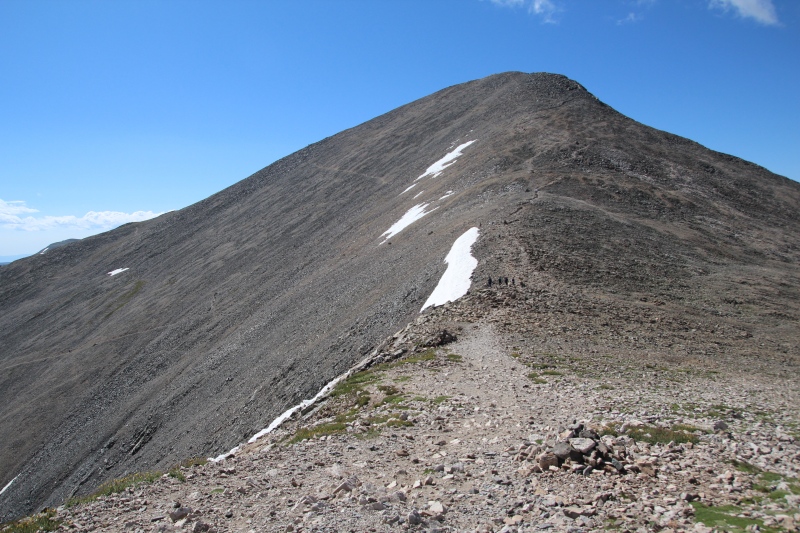
After quickly reaching the saddle, I started my Class 1 trudge up Grays Peak. Unfortunately, I was really struggling and started to bonk, so I plopped down and evaluated myself. It was around this time that I realized that I had been hiking for more than five hours and probably hadn't fueled myself enough during my adventure up Kelso Ridge. I scarfed down my lunch and pounded some water, and after a twenty minute break--during which time I was passed by two very friendly mountain goats--I started feeling stronger. Afterwards, I was able to knock out the last section of trail and gain the second summit of the day. 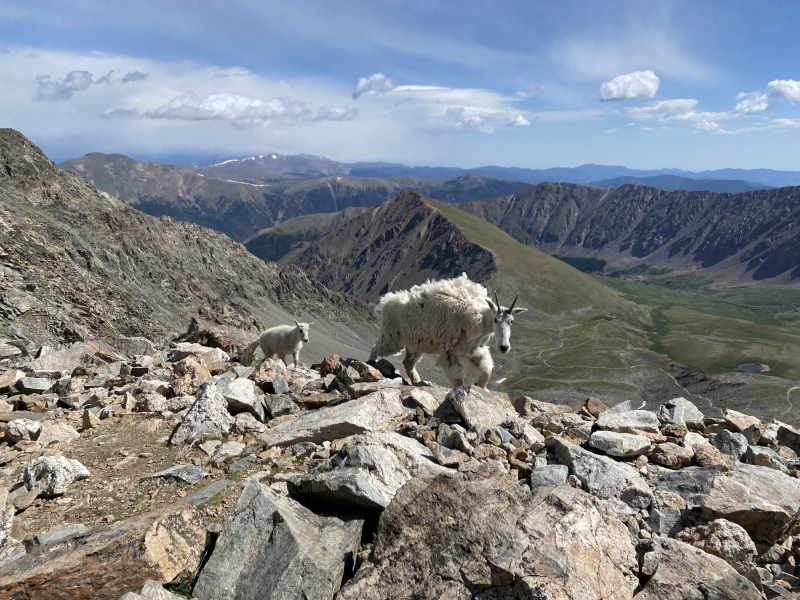
Views from Grays were similarly enjoyable, and there was a whole group of mountain goats that were enjoying life on the summit. Return Trip The return trip was uneventful. Colorado Fourteeners Initiative (CFI) has made substantial improvements to the Grays Standard Route and the path was a well-engineered wonder and a very fast descent. The Class 1 path down Grays significantly reduces your total hike time compared to what you would experience down the Class 3 Kelso descent and you should be able to get to your car before the afternoon storms start firing up (especially if you started your day at the upper parking lot). The Grays Peak standard route descent also affords great views of Kelso Ridge as you descend. The dichotomy between Torreys' rough eastern face and Grays' rounded, monotonous slope was remarkable. 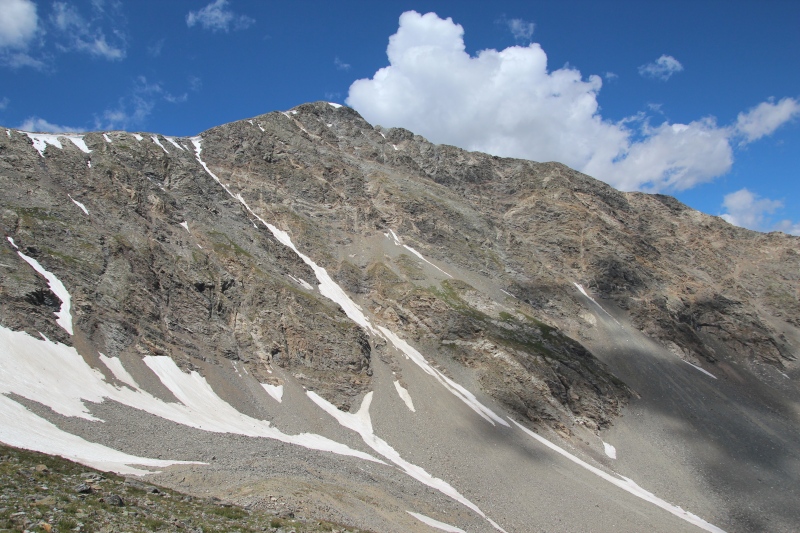
While the Stevens Gulch trail was lovely, Stevens Gulch Road was a boring clunker of a hike and I won't be doing that stretch again. A big thanks to all of the drivers who offered me a ride to the bottom (in spite of my obstinance to finish by hiking)! 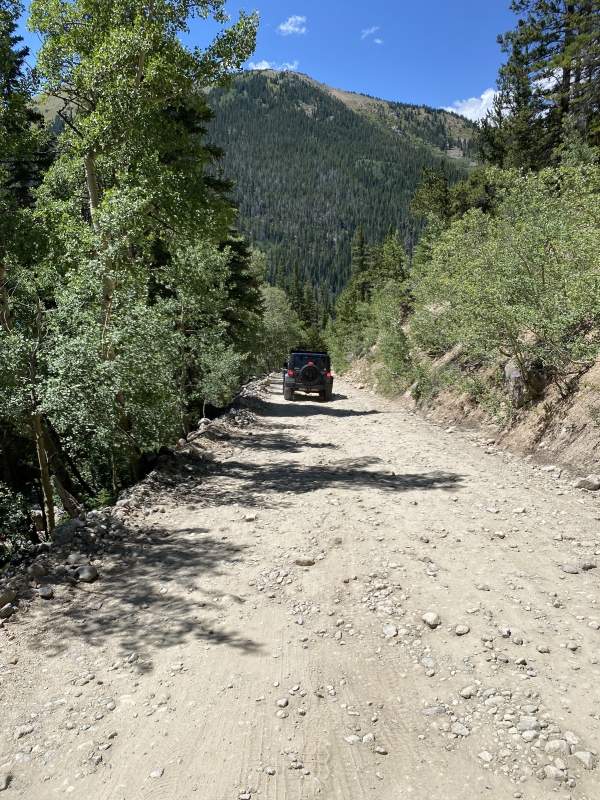
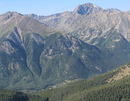
Near the bottom of Stevens Gulch Road, there's a clear view to Torreys Peak and the rough eastern ridge to its summit [Kelso Ridge]. From that vantage point, it certainly looks like a challenging ridge. 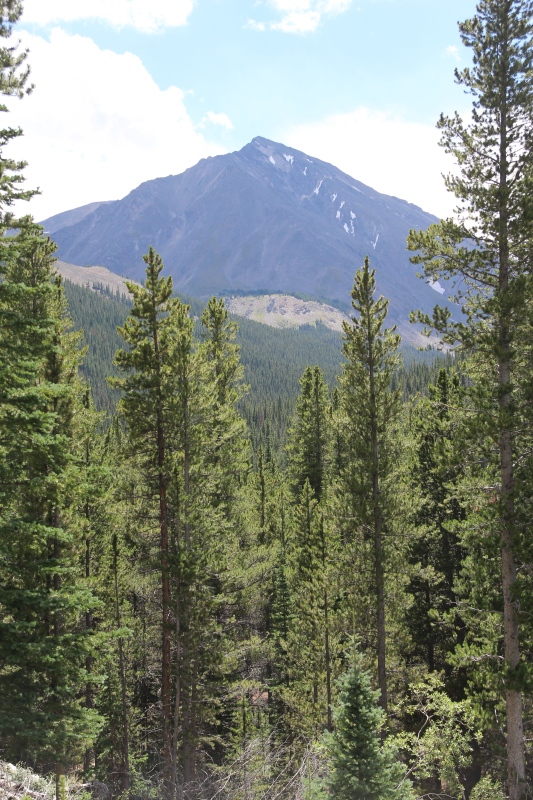
Comparison to Sneffels Southwest Ridge In the time that it took me to type up this trip report, I made a return trip to Colorado and successfully navigated a second Class 3 Ridge--Sneffels Southwest Ridge. Now with two data points, I can make the following comparisons: 1. Kelso Ridge is a much better Class 3 Starter than Sneffels SW Ridge. 2. Kelso Ridge route finding is more straightforward than Sneffels SW Ridge since you spend most of your time working up the spine of the ridge and your options never take you that far from the ridge (i.e., Daway8's "micro-route finding"). Sneffels SW Ridge has more gullies and gendarmes to navigate around, so route finding is slightly less straightforward (but still reasonable). However, if you get off-route on Sneffels, things can get a little hairy, ESPECIALLY if you find yourself in one of the wrong gullies towards/from the East Slopes. 3. Kelso Ridge has very high quality rock and relatively minor dirt gullies. Sneffels's slopes are covered with rocks and the dirt gulleys are epic. 4. Torreys' alternative descent path via the standard route is incomparable to Sneffels' South Slopes. With Grays/Torreys' standard route descent, you can race down the mountain. Sneffels' descent options are horrible, consisting mostly of excessive piles of block talus, scree and unconsolidated dirt at the angle of repose. It's a messy, slow descent that takes a ton of time and it's hard to speed it up. I really recommend a good weather day for Sneffels because you really don't want to get stuck on that ridge or on those slopes during a storm. 5. The Front Range is beautiful to this East Coaster, but nothing in Colorado really compares to the San Juans. The Sneffels Range is a towering stunner. Good luck with your adventures! Thumbnails for uploaded photos (click to open slideshow): ")
")
")
")
")
")
")
")
")
")
")
")
")
")
")
")
")
")
")
")
")
")
")
")
")
")
")
")
")
")
")
")
")
")
")
")
")
")
")
")
")
|
| Comments or Questions | |||||||||||||||
|---|---|---|---|---|---|---|---|---|---|---|---|---|---|---|---|
|
Caution: The information contained in this report may not be accurate and should not be the only resource used in preparation for your climb. Failure to have the necessary experience, physical conditioning, supplies or equipment can result in injury or death. 14ers.com and the author(s) of this report provide no warranties, either express or implied, that the information provided is accurate or reliable. By using the information provided, you agree to indemnify and hold harmless 14ers.com and the report author(s) with respect to any claims and demands against them, including any attorney fees and expenses. Please read the 14ers.com Safety and Disclaimer pages for more information.
Please respect private property: 14ers.com supports the rights of private landowners to determine how and by whom their land will be used. In Colorado, it is your responsibility to determine if land is private and to obtain the appropriate permission before entering the property.