| Report Type | Full |
| Peak(s) |
Mt. Buckskin - 13,871 feet Mt. Democrat - 14,154 feet Mt. Cameron - 14,248 feet Mt. Lincoln - 14,293 feet Mt. Bross - 14,178 feet "South Bross" - 14,020 feet |
| Date Posted | 09/05/2019 |
| Date Climbed | 09/02/2019 |
| Author | daway8 |
| Buckskin to Decalibron traverse plus South Bross |
|---|
|
On its own the Decalibron loop is among the comparatively easiest and most heavily travelled of 14er routes and given that it’s pretty straightforward and heavily documented I probably wouldn’t have bothered with a trip report for just that loop – especially since I could never compete with the grand ol’ stories of those who spoke of the days of being chased off Mount Bross by a crazy old miner on an ATV with a rifle while their friends sprinted to the top, or the people who talked of releasing a T-shirt line with the logo: “I got shot on Bross.” The legends and lore of Bross seem to get better with age… But the traverse from Buckskin (a Centennial) to Democrat was such a fun little gem of a choose your own adventure ridgeline and seems not to be very heavily documented on this site so I figured it would be good to write this report so I could:
This route is a great intro to ridge traversing for those who want a little extra fun but aren't quite ready for some of the more extreme routes out there. As has become my habit, there are large, bolded section headers that allow you to easily skip down to sections of interest if you’re only looking for certain tidbits. 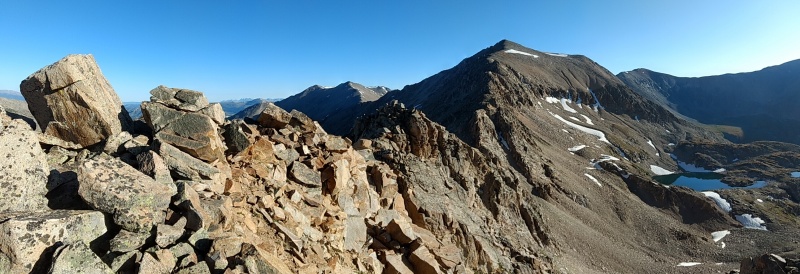
Decalibron logistics on Labor Day weekend The Kite Lake area is one of those places where there is a self-service pay station with a $3 fee for day use and a $12 fee for camping. There are some designated sites at the very end of the road by the restrooms and on the opposite side of the parking lot are some “no camping” signs. But it would seem that people have some very liberal definitions of “day use” and some fairly nuanced interpretations of what precisely is meant by “no camping.” There’s even a permit station a little ways down the road from the camping area – in the section where the masses who arrive late tend to end up parking along the road. Unlike the Maroon Bells, I did not get the impression that they are very aggressive about enforcing regulations (but I’m sure they must to some degree). So how do you get in past the crowds on a Labor Day weekend? Well, I chose to arrive on Sunday evening for an initial scout out just before sunset and found a dozen or two cars at the trailhead with room for plenty more and with the road not yet being lined with cars. I then pondered how to interpret the far too wordy regulation signs and went and chose an undisclosed location at which to rest for a while until I gave up and made an early start of it. A slow trickle of people starting showing up around perhaps 2am or so and by 5:30am as I looked back down at the trailhead from partway up Mount Buckskin I could see a growing stream of headlights coming up the road. As I occasionally caught glimpses of the area during the hike, a growing line of cars could be seen parked along the side of the road for a good ways before the trailhead. One tip for anyone pondering spending the night around there: people tend to arrive both really late at night and really early in the morning and only a few of them cut their headlights as they approach. Also, when the hikers start out real early in the morning they tend to wear their high power headlamps at full power the whole time they’re getting ready while being seemingly oblivious to the fact that they’re blasting everyone and everything within a 3 mile radius with the huge spotlights they have strapped to their heads (it’s hard to say which ones are intentionally being jerks vs. which ones are simply oblivious to the fact that the planet is inhabited or simply forget that those things are much brighter when being shined right in your face). Mount Buckskin Just a few words on going up Mount Buckskin itself. In the daylight this would be trivial to go up. But having started earlier than I originally intended I found it somewhat uncomfortable to try to navigate in the dark, without a trail, on my own through unfamiliar territory. What threw me for an extra loop is that, at least at the particular spot where I approached the power lines, they were shockingly low to the ground – it looked like no more than maybe a few feet above the ground. 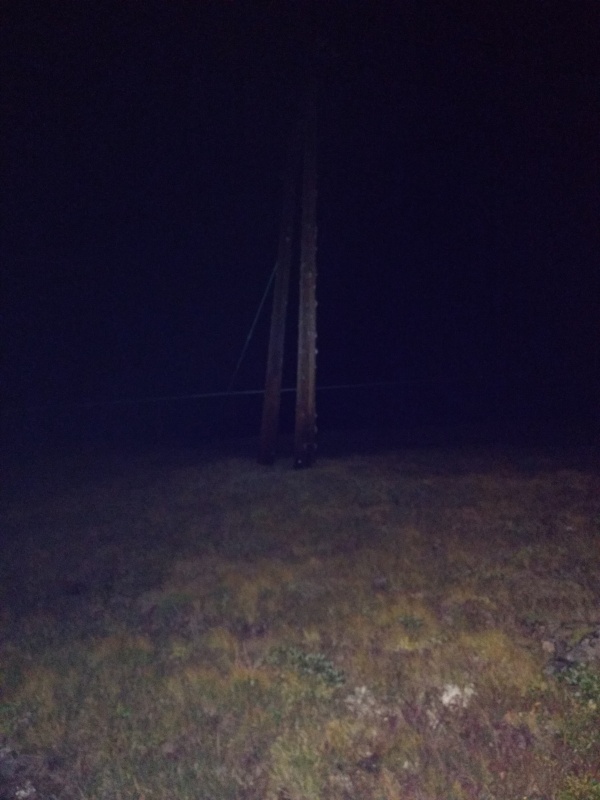
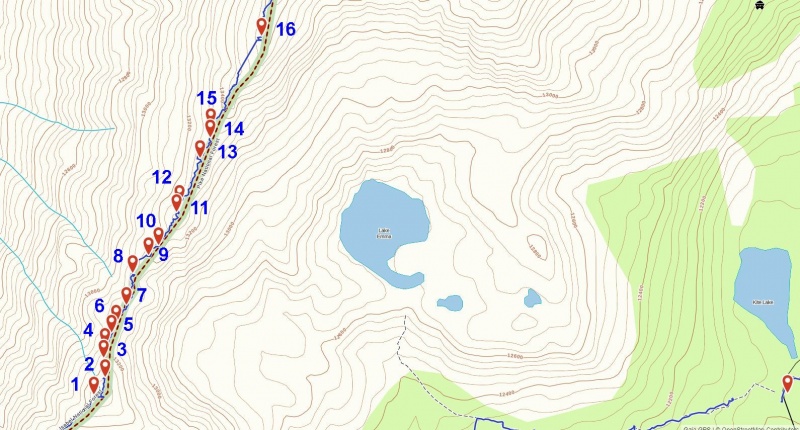
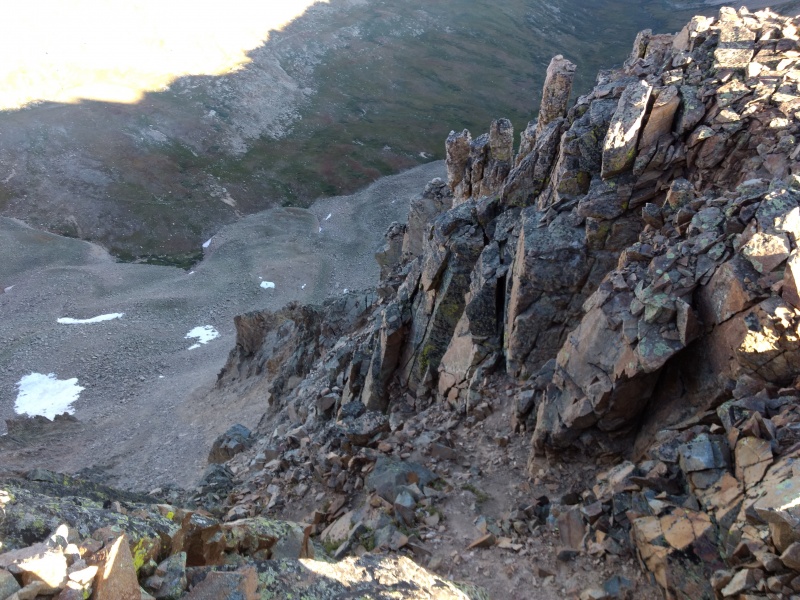
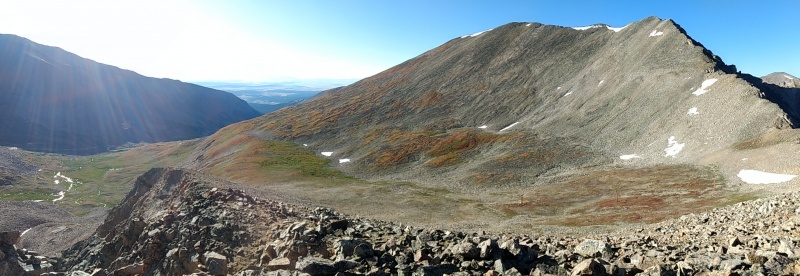
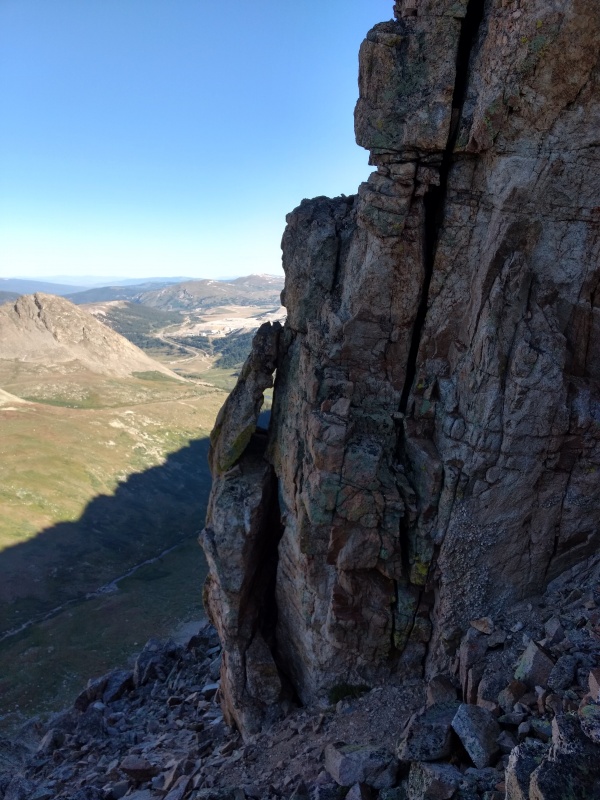
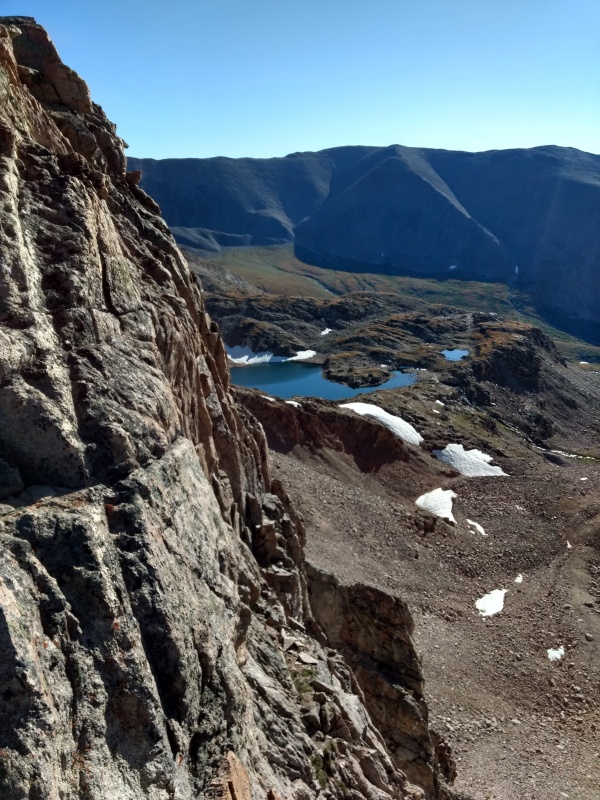
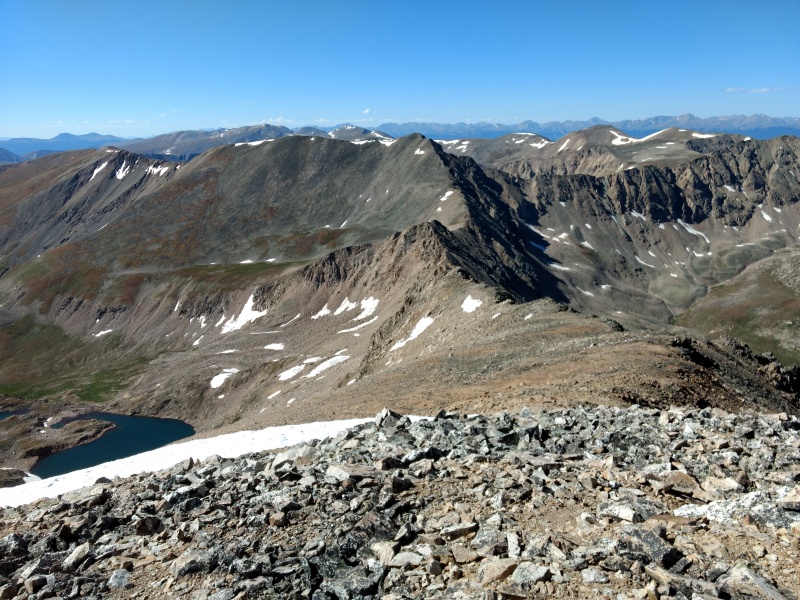
Having once been stuck on a live 220V line and nearly electrocuted, I was more than a little paranoid about getting too close to those heavy duty power lines. I walked along parallel to them for a while before I found a spot where they were high enough off the ground that I felt like I could pass under without doing a shocking version of the limbo. They also didn’t really stand out very well in the dark, even in the light of my headlamp. I didn’t spot any smoldering carcasses nearby but I couldn’t help but wonder if an unwary wanderer in the dark might be able to suddenly light up the night if they didn’t pay attention (I decided not to test out whether or not shorting one wire to ground with your body would allow current to flow…). Buckskin to Democrat Traverse Now for the heart of the report – this is one of the main things that drew me back to this region and was hands down the highlight of the day on this extended Decalibron hike. This route looks somewhat intense but as you actually go over it you’ll find you can just about pick whatever level of difficulty you want – much of it can surprisingly be basically class 2 with some class 3 sections at times if you spend a little time to scope out options along the top of or either side of the ridge. In general, between waypoints 1-16 (i.e. between the prominent spur on the east side of the ridge near Buckskin and about 13,600ft near the Democrat side) the east side of the ridge tends to be rather cliffy and exposed. The west side of the ridge tends to be less steep but covered in loose rock – the west side most often gives your easiest bypass option when the ridge gets too spicy. But overall, staying on the ridge proper gives you the easiest route with the least exposure since it's often fairly broad. I tried to map out some exceptions to this with the waypoints. You could probably manage the entire thing without requiring much if any class 4 moves but you can easily find a number of simple class 4 moves – or extended and more difficult class 4 or even 5 if you intentionally seek it out. The gym is the only place I typically tackle class 5 so I can’t really evaluate it in terms of class 5.whatever but there were a few spots where I was like “Nope – not going over that one. I’ll take the bypass.” This may be an overkill level of detail but I tagged a bunch of waypoints as I hiked along the ridge with some brief descriptions of each and in at least some cases have matching photos for them (this was my first time trying this level of documenting so some of my photos I couldn’t match to my notes). You’ll note in the overview of the route GPS data that the interesting part of the ridge, when coming from the Buckskin side, doesn’t really begin until you get up to where the large, prominent spur juts out on the east side. Or if you come from the Democrat side the fun doesn’t really start until you drop a little below 13,600ft. For the section in between, I’ll give a blow by blow overview using the numbered waypoints with some pictures included. 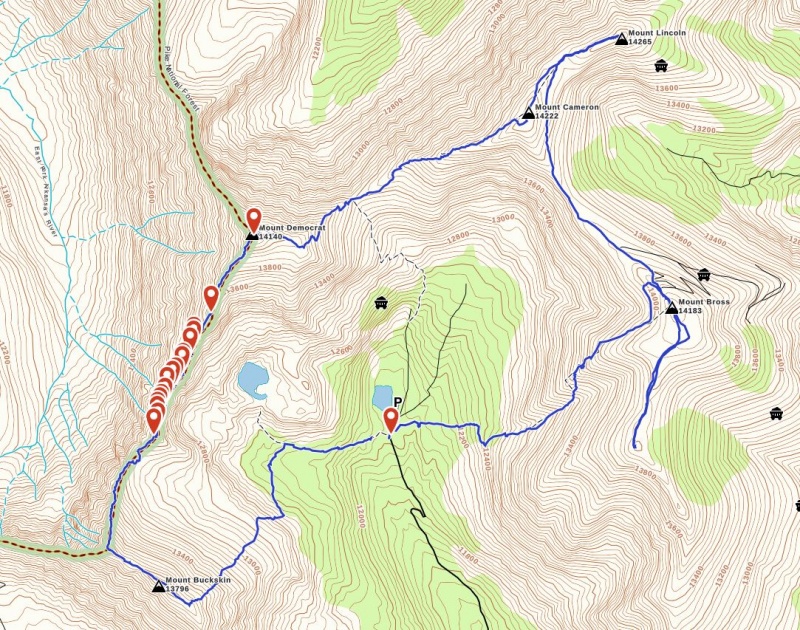

Descent from Buckskin side: Oddly the GPS track doesn’t seem to reflect it but I dropped down a little too much to the right (east) as I came off the next hump past Mount Buckskin (I think somewhere I saw it referred to as Northwest Buckskin). The rock there was large and loose. In retrospect I think it would have been better to stick to the ridge starting from the very top (and for much of the way across). If you hug the very edge there is some decent exposure but it’s easy to stay back if it bothers you. 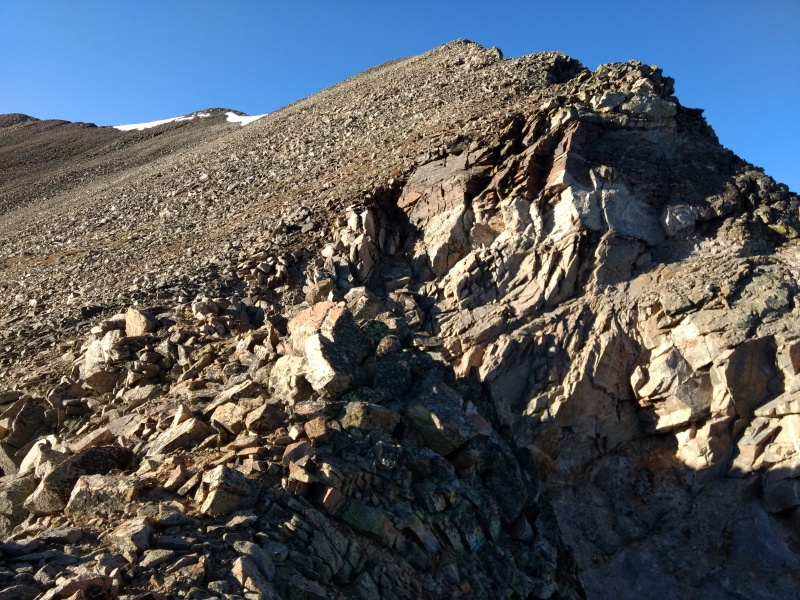
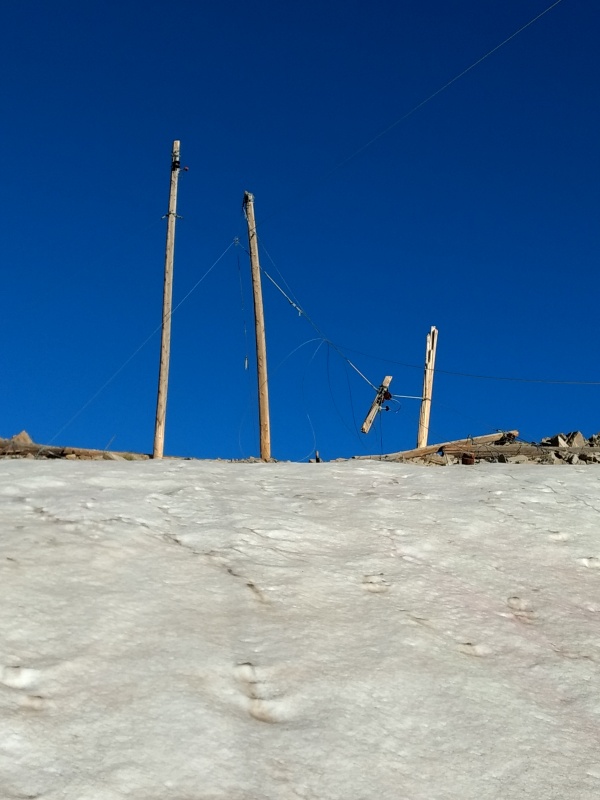
Summit to spur: The section from the smaller summit (~1.8 miles in to the hike) to where the large spur juts off to the east is easy going. There’s even a hint of a slight trail for a little bit at the very beginning if you stay right on the ridge. As you come to the low point before the spur the power lines run over the ridge here (this was about 2.28 miles in on the hike from Kite Lake). 
Once again, they come uncomfortably low to the ground in spots plus there are all sorts of support wires strung haphazardly around, apparently helping to brace up the poles. I didn’t feel like playing electrical roulette in deciding which wires were or weren’t hot so I dropped below the small snow patch and went under right next to the next set of poles to the east (that’s where you see the big jog to the east in the GPS track). NOTE: from the location of the power lines you could easily bail out back down to the trailhead if a storm snuck up on you. After this bail out options become more limited and potentially tricky. 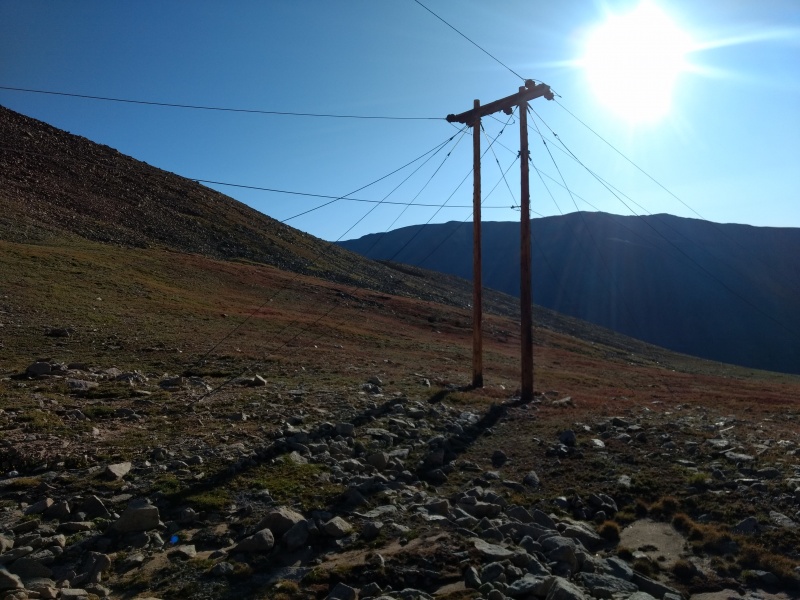
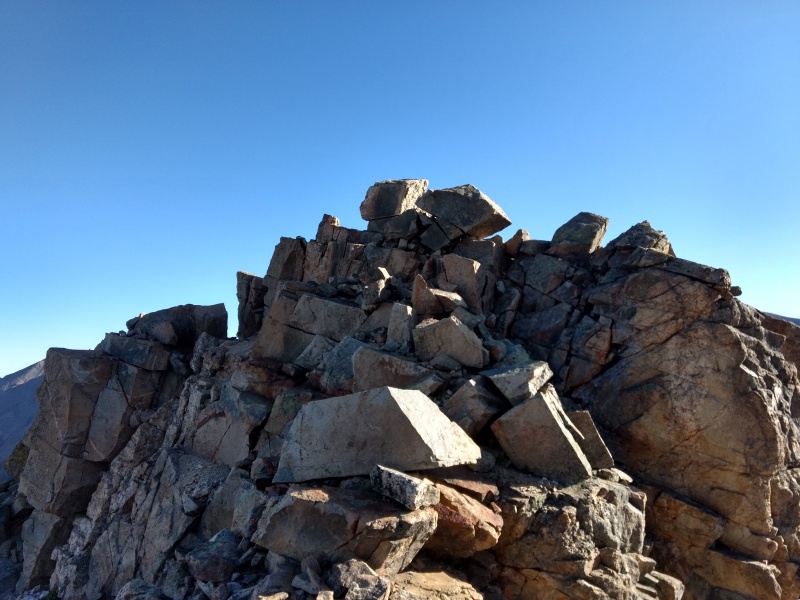
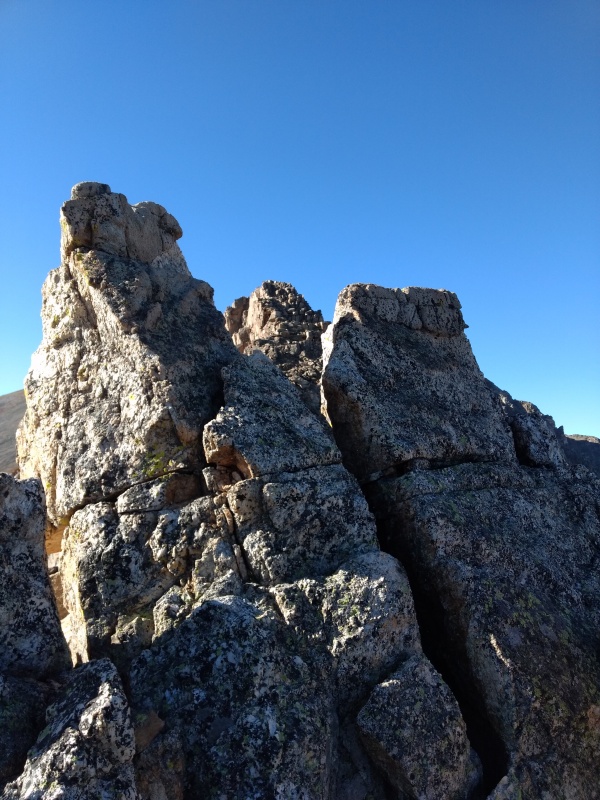
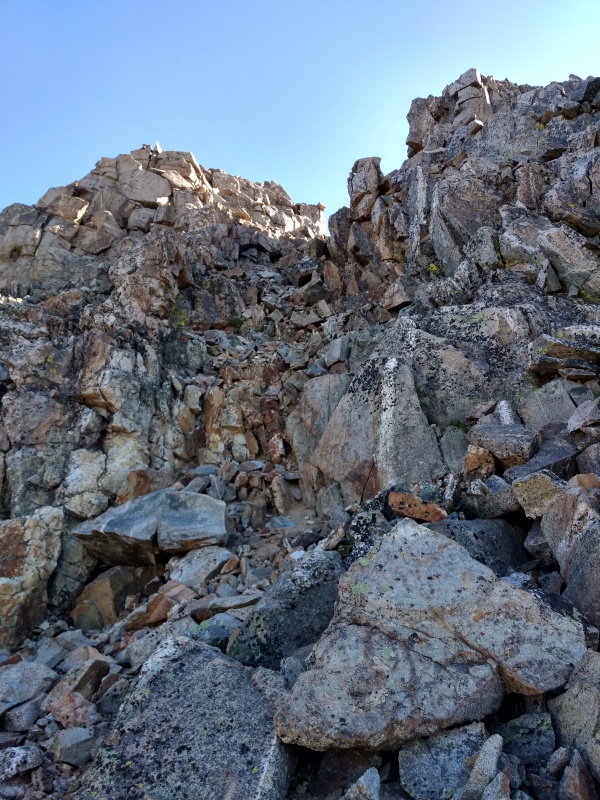
Waypoint 1: Top of first big hump. ~13,250ft. This signifies that the fun is about to start. This looked ugly on the left (west) and sloppy on the right (east) so I went straight over the top. The rocks are mostly fairly solid but every now and then a rather large one would wobble significantly. 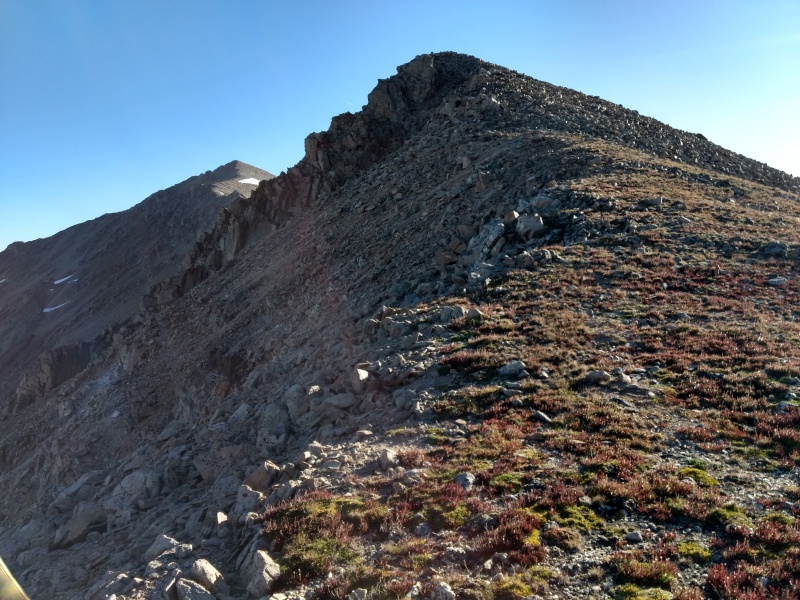

Waypoint 2: Other large hump at start of the fun section. From here on it’s kind of like a Mexican restaurant that serves a lot of gringos – you can choose how spicy you want it to be, from pico de gallo to habanero. You might even be able to find an occasional ghost pepper move if you go hunting for it but you can easily stick with a pleasant Pace Picante if you prefer. 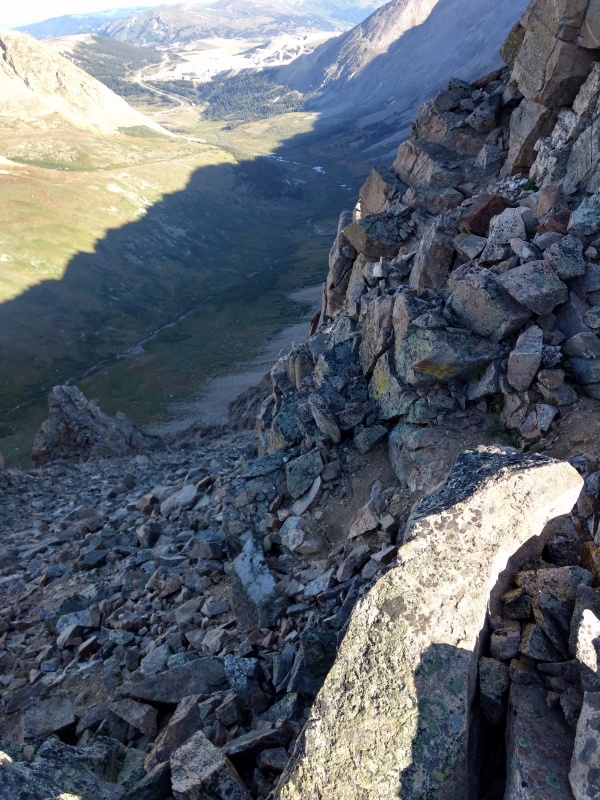

Waypoint 3: Left side bypass, ~2.46 miles into the hike. This section might not have been that bad but I was solo and didn’t yet have my courage up so this chunk of rock I opted to bypass on the left (west) side. 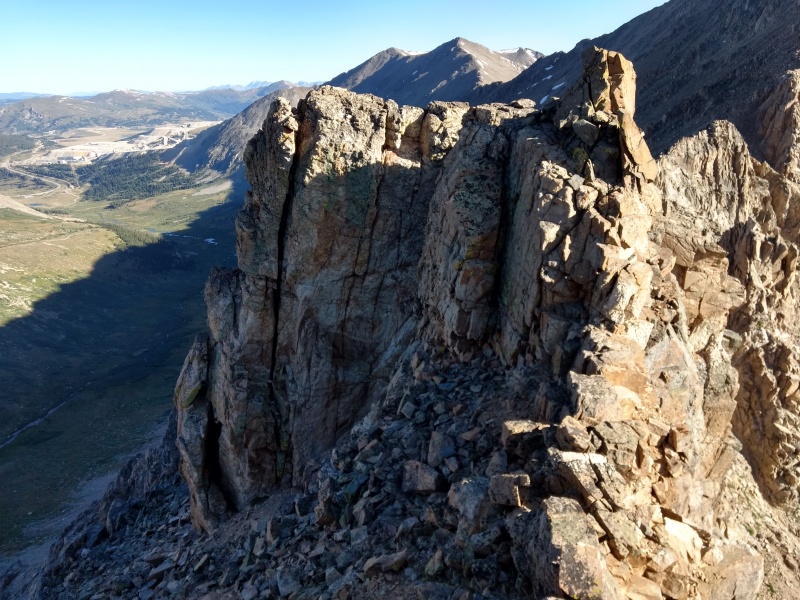
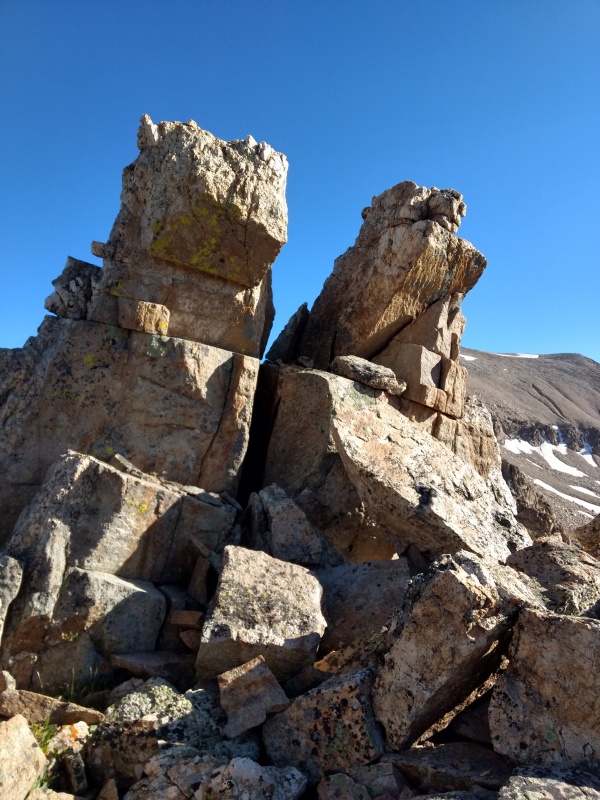
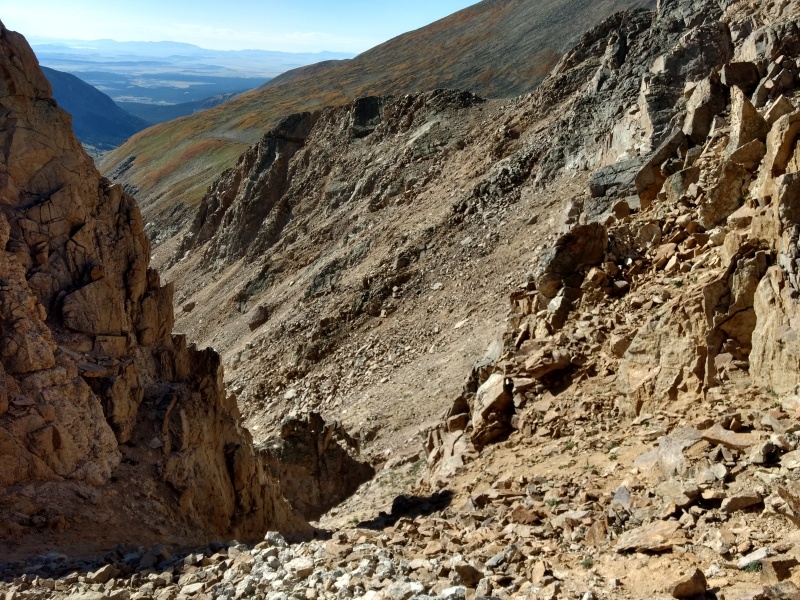
Waypoint 4: Possible bail out point down to lake (in case of bad weather). 13,137ft. Use at your own risk – I only glimpsed from above and it looked like MAYBE you could make an emergency descent safely here if needed. Waypoint 5: Twin Towers. ~2.49 miles into hike. This small gendarme was a fun little spot on the ridge. I went straight up through the Twin Towers, though there’s a large triangular rock on the Democrat side that was very wobbly coming over. Looked like you could bypass on the left (west) side of the ridge if you don’t mind loose rock on a somewhat steep but not overly exposed slope. Bypassing to the right (east) side of the ridge would put you on more cliffy terrain with greater exposure. 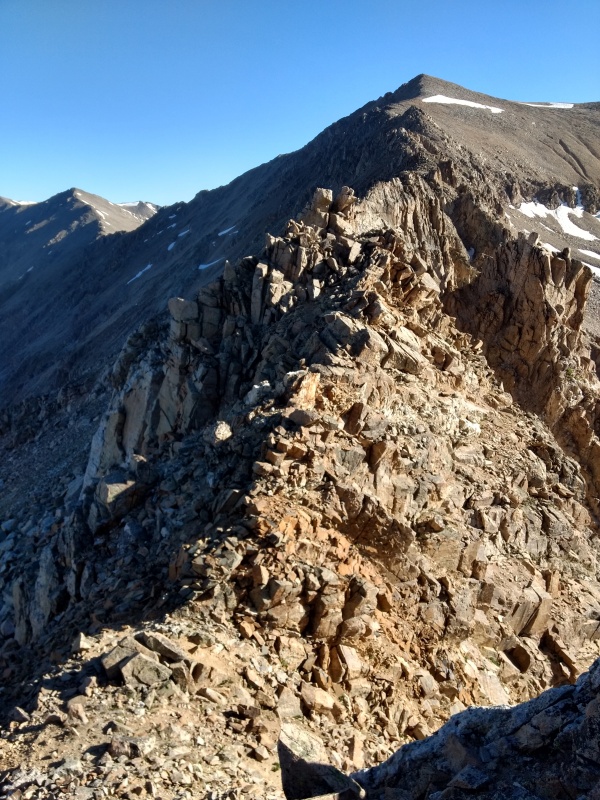
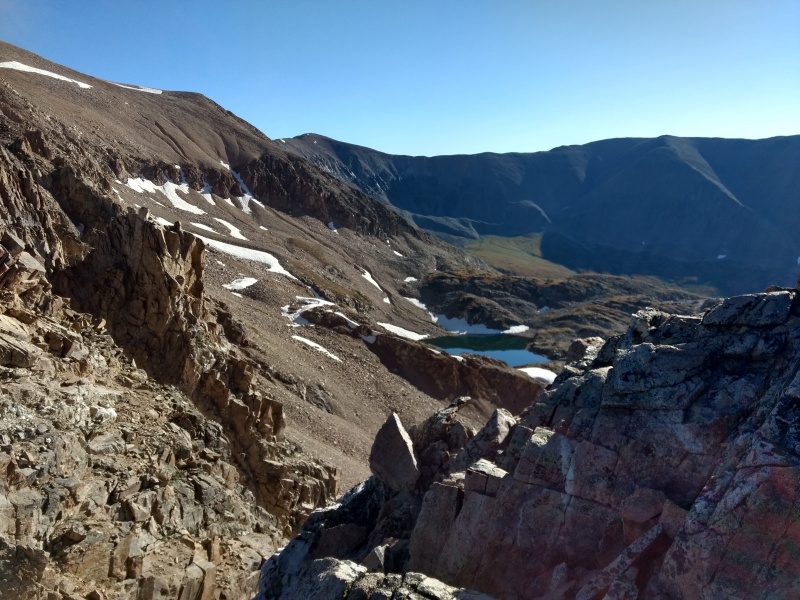
Waypoint 6: Possible gully bail point to below Lake Emma. Another spot that might possibly provide a semi-safe emergency bail out to the lake, but it would be a rather steep descent. 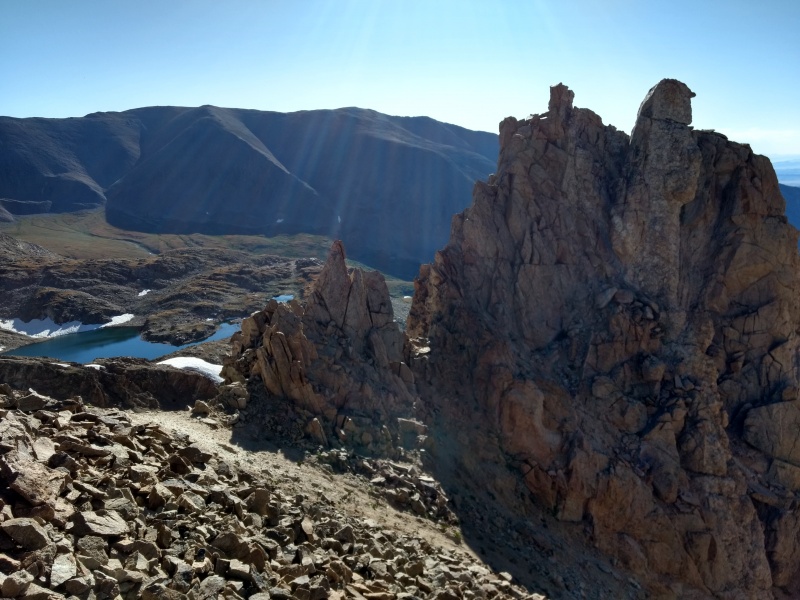
Waypoint 7: Last hump before climb. 13,232ft. ~2.54 miles into hike. 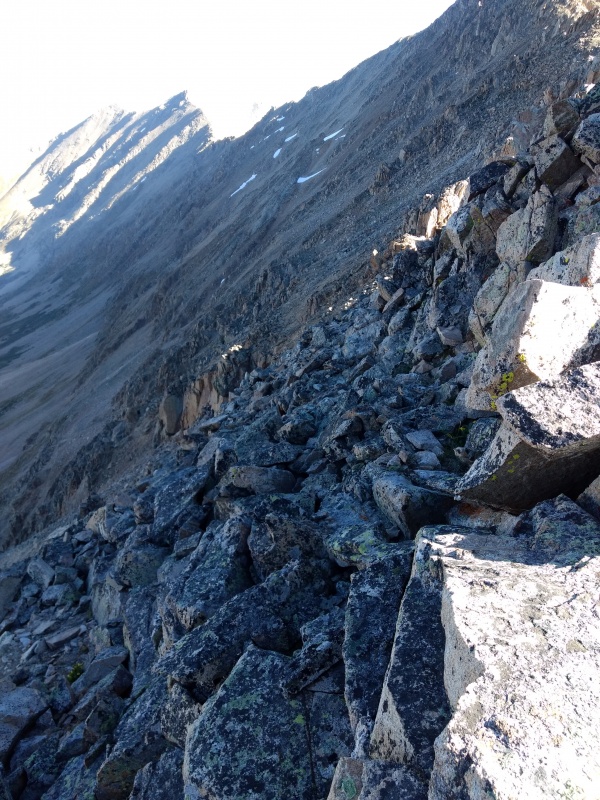
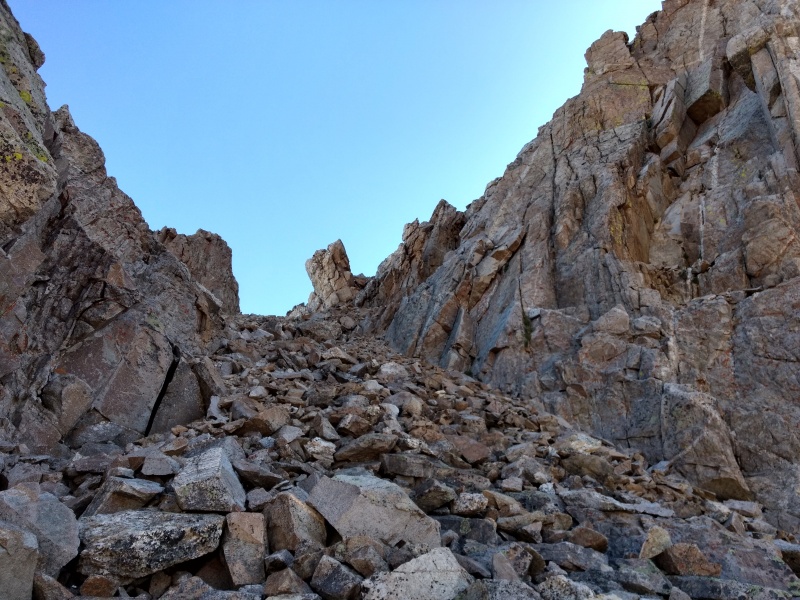
Waypoint 8: Last large low point before start climbing up in the direction of Democrat. 13,136ft. Waypoint 9: Gully on west side of cliff face. ~2.58 miles into hike. Here you have some choices. There’s a bit of a ship’s prow type formation on the west side of the ridge. I dropped to that and bypassed on the left before coming up into the gully that runs along the west side of a small cliff face which runs right down the center of the ridge. The center of the gully is slightly more stable than the edges. 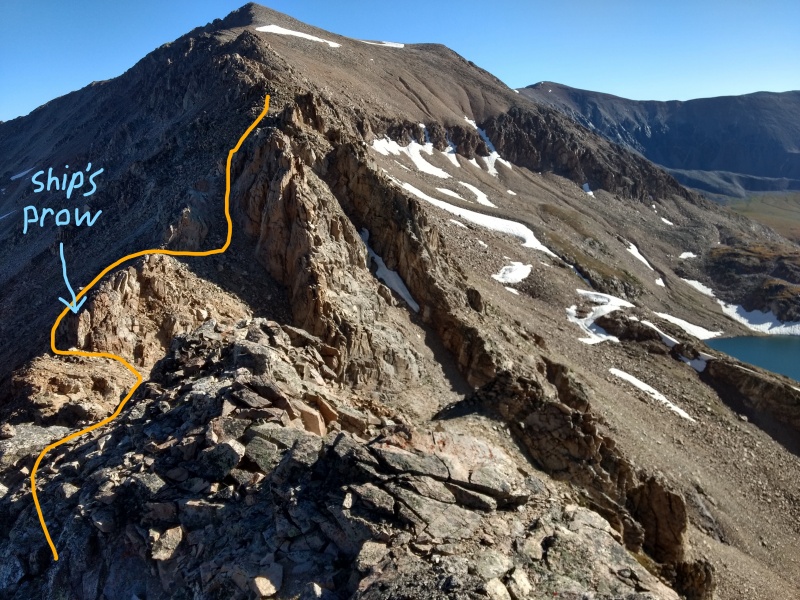

Waypoint 10: Ridgeline above the small cliff face gully. 
Waypoint 11: High point W/SW of Lake Emma. 13,353ft. ~2.71 miles into hike. There’s a bit of a loose, sloppy ramp on the right (east) side you can drop down. The rocks are a little more stable than the dirt. At this point you are basically due west of Lake Emma and the ridge gets a bit more spicy. 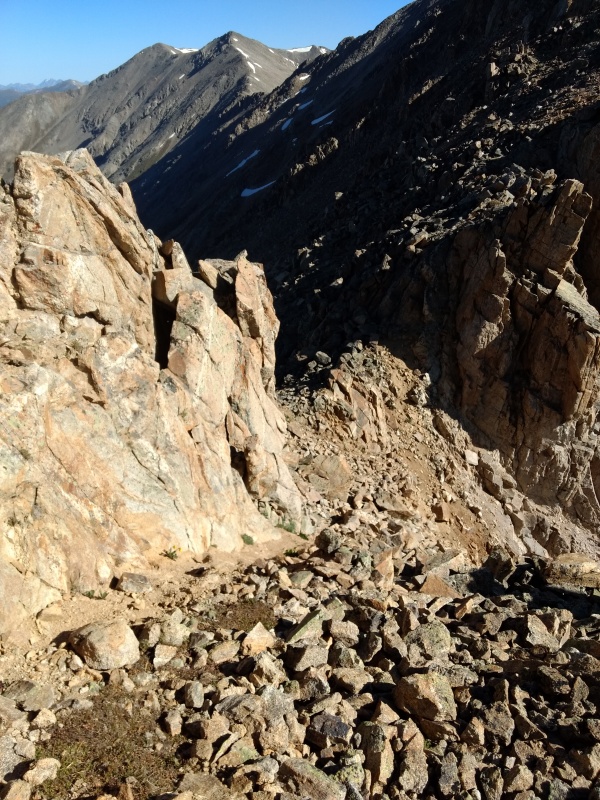
Waypoint 12: Gully to Lake Emma. Another possible emergency bail out point – one of the more promising looking ones. 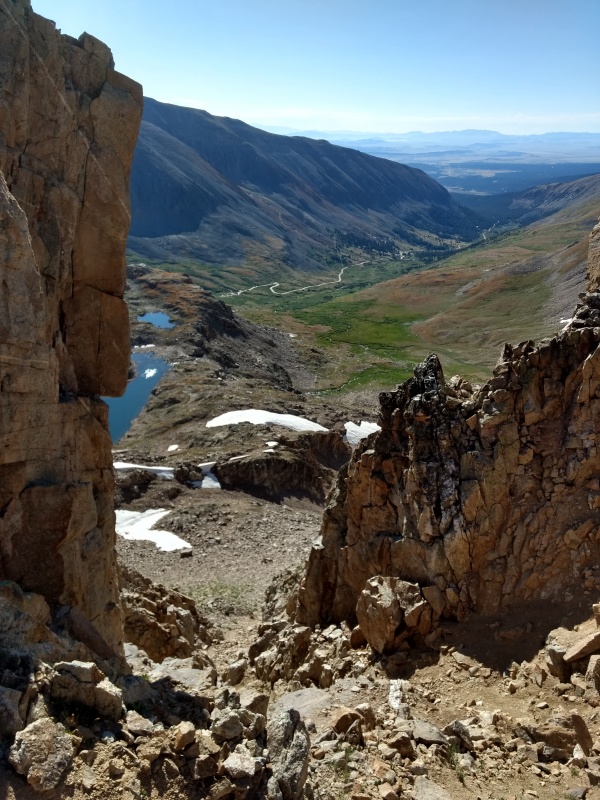
Waypoint 13: More spicy ridgeline. The region W, NW of Lake Emma has some of the more interesting opportunities for spicing up the climb. I was starting to freely slide between the east and west sides of the ridge in order to find a path that wasn’t too crazy but if you’re comfortable climbing class 4 or low class 5 (perhaps higher in spots) there are plenty of options around here. 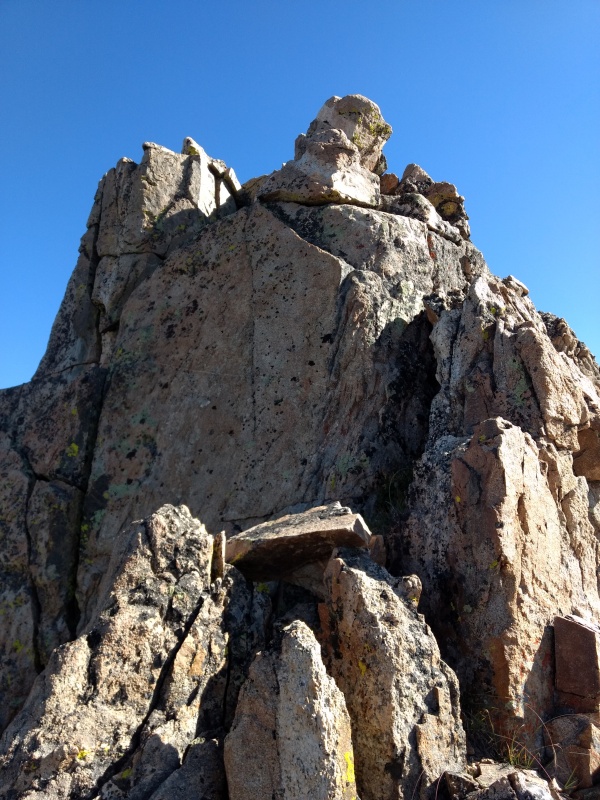
Waypoint 14: High point west of lake. 13,425ft. ~2.84 miles into hike. 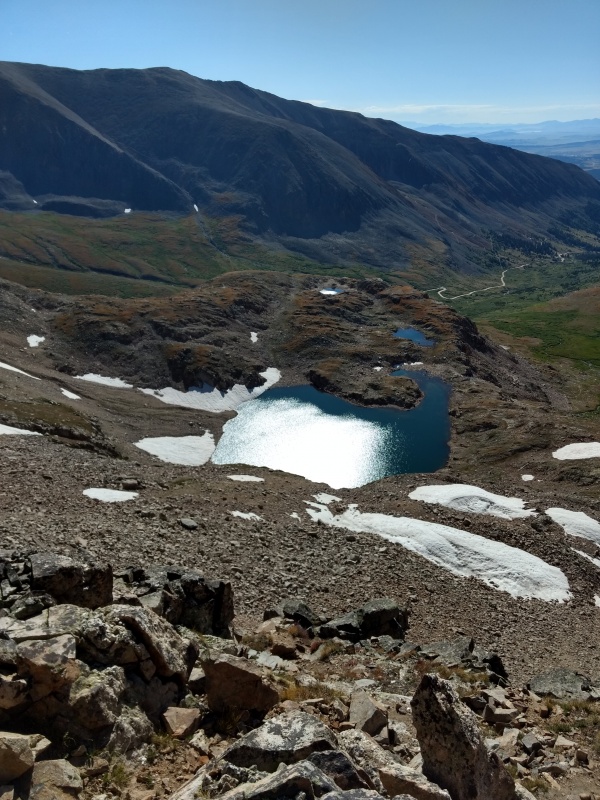
Waypoint 15: Low point west of ridge. Waypoint 16: Top of last major hump before hike up to Democrat. 13,606ft. ~2.96 miles into hike. 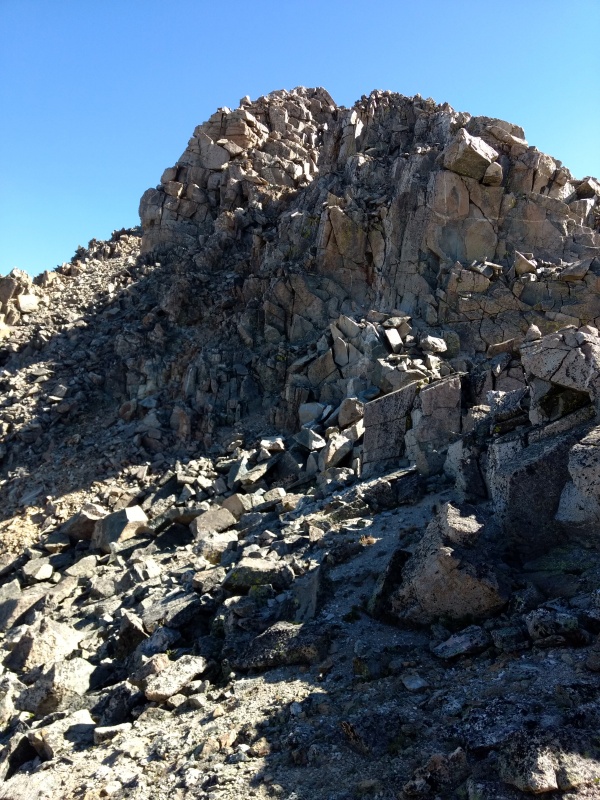
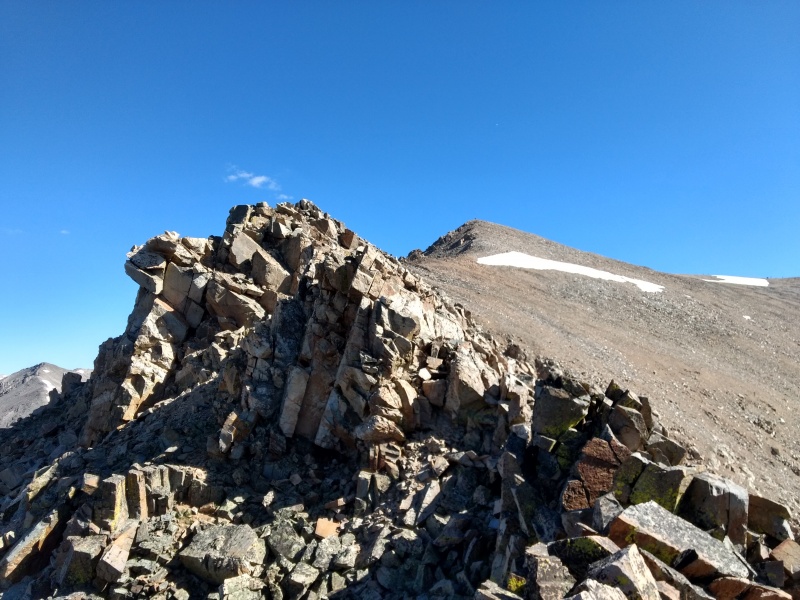
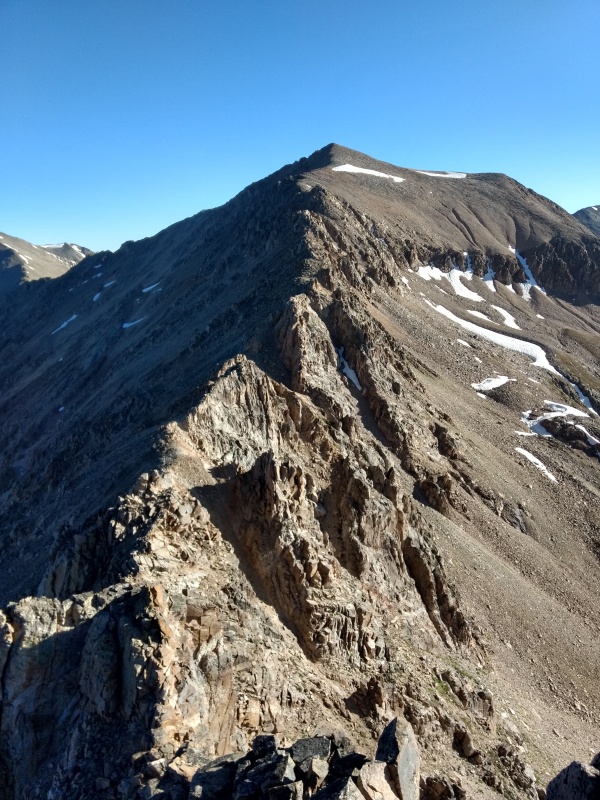
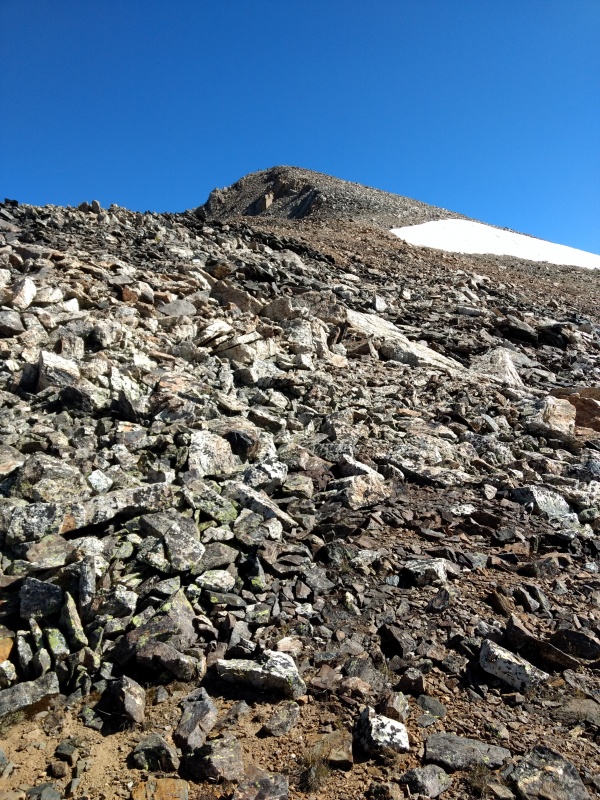
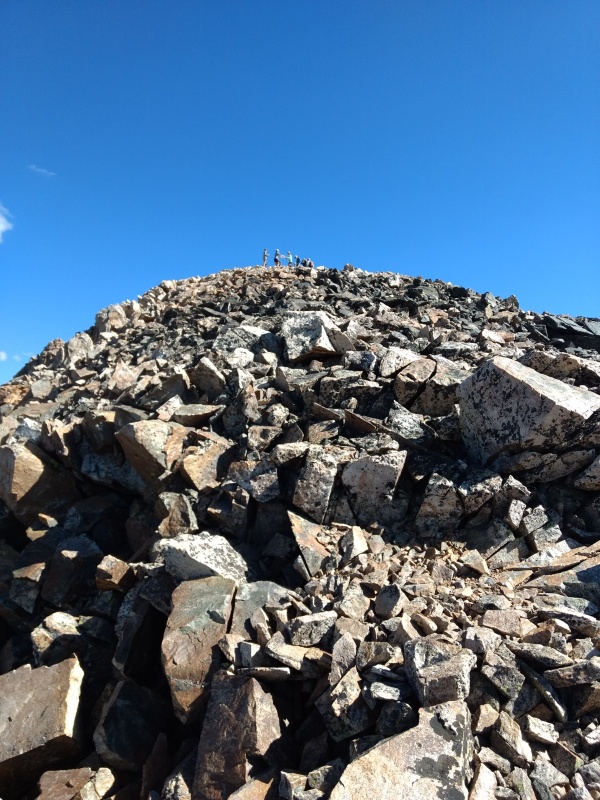
Final stretch up to Democrat: The final stretch up to Mount Democrat is somewhat of a long push but very straightforward. Now the cliffy side moves over to the west while the east is a very gentle slope of mixed quality rock. Stay along the ridge proper until just before the final hump to the summit then cut east to go up the more gently sloped region to the summit of Democrat. 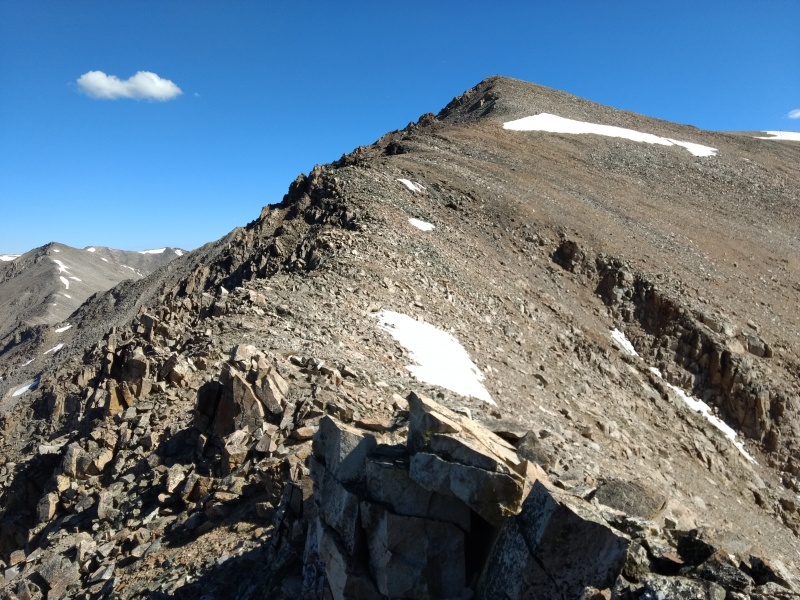
Decalibron (including microspikes for Bross descent) Not too much to say on the main Decalibron loop other than a reminder this is an incredibly barren wasteland and you’ll very much thank yourself if you bring microspikes and trekking poles to help ease the descent off of Bross. The last time I did the Decalibron I only had poles and it was miserable descending Bross. This time, with the addition of microspikes, it was SO much easier. 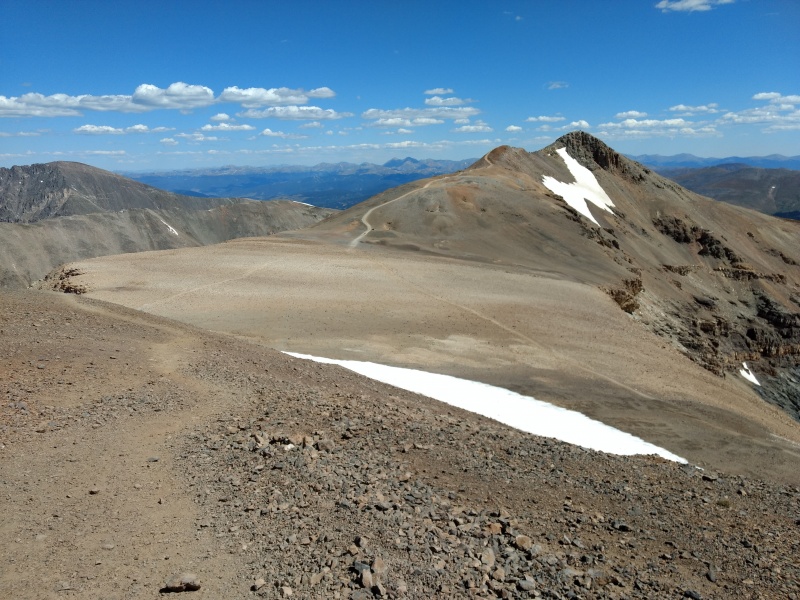

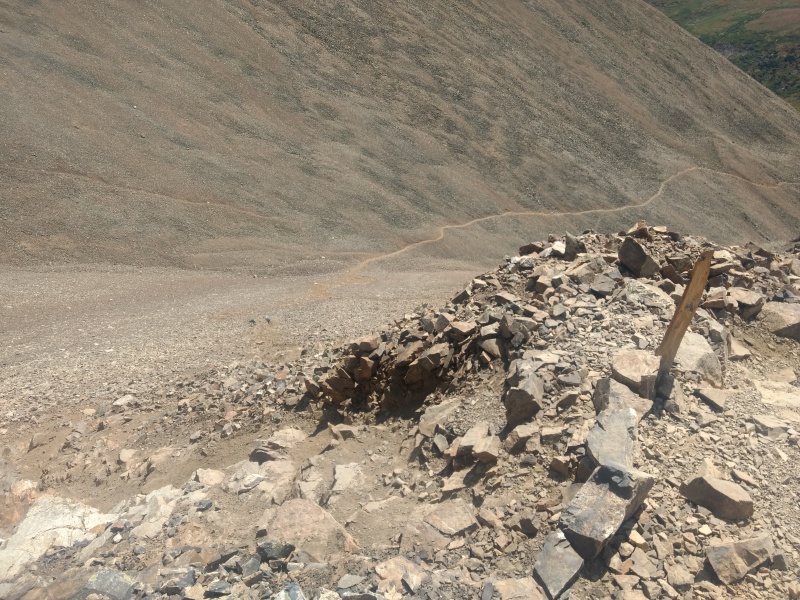
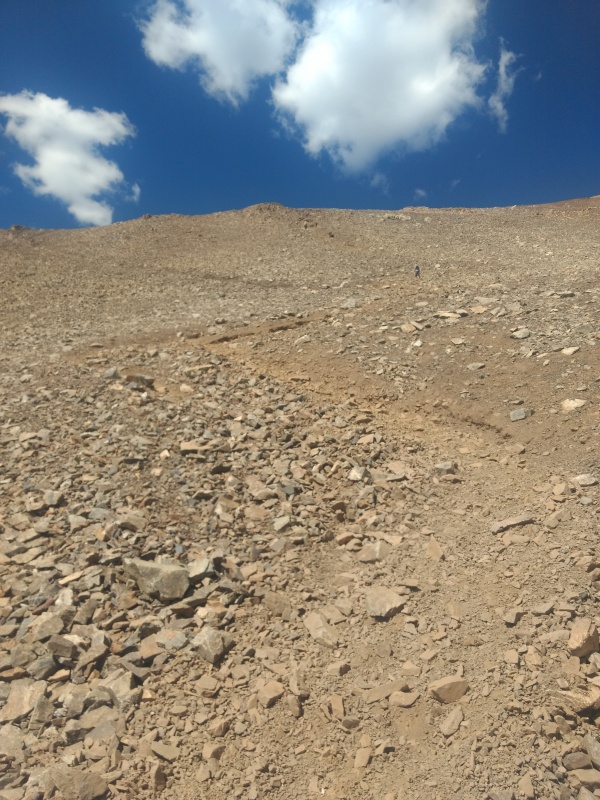
South Bross (i.e. total solitude on the Decalibron on Labor Day weekend) Is it even possible to find solitude on the Decalibron on a holiday weekend? Why, yes, it is. You just have to trudge over to the barren wasteland that is South Bross. Now if you’ve been on the Decalibron you might be thinking the whole upper portion of all four of those peaks is pretty much a barren wasteland. Sure, down at Kite Lake it’s pretty enough, but up top are sections of the flattest, barest, blandest terrain out of all the 14ers. Does it get any blander than that? Why, yes, it does as you can see in this photo coming back from South Bross. 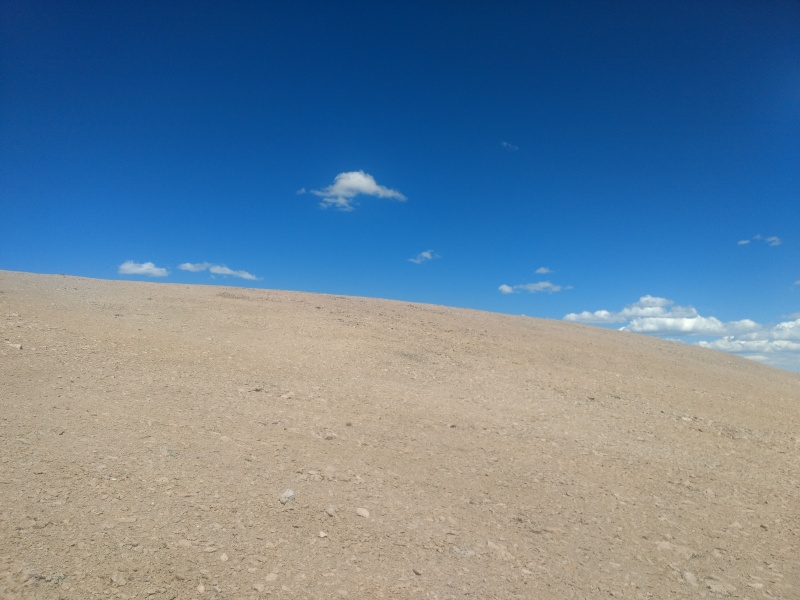
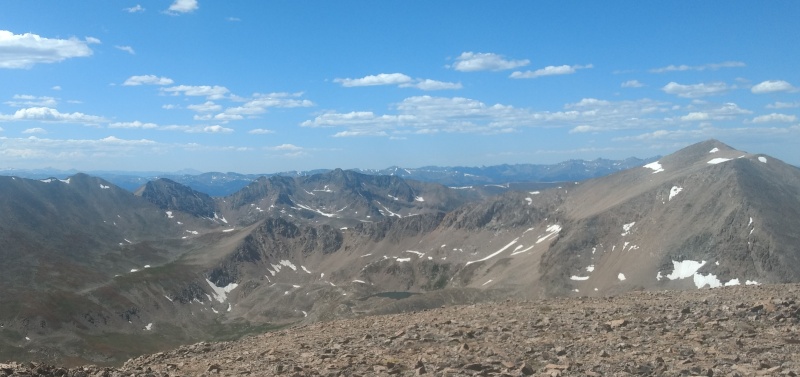
So is it worth it to go over to South Bross? Not really, unless you’re looking to check off all the 14er sub-summits, you’re desperate for solitude on this heavily travelled route, or you urgently need to do a #2 and can’t find any other private place. If you do go, you can head towards the huge cairn on the far side of the barren flat top of Mount Bross but then cut to the right. Helps to have a GPS with you because otherwise South Bross is so subtle it’s a little tricky to be sure you’re really there – it’s only slightly higher than its surroundings. So as not to end with the Ugly Duckling - below are some shots after coming off Bross and getting back near Kite Lake. 

Times My times for this hike were all over the map due to various circumstances (from starting much earlier than intended and then hesitating on how much to do in the dark, to going slow on the ridge to document and take lots of photos to pushing too hard on the Decalibron while fighting off the need for a pit stop, etc). So these may not be very representative times off of which to base any sort of normal pacing… 4:30am on Labor Day – start hike from Kite Lake (moved slow in dark off trail on unfamiliar ground) 5:37am ducked under power lines going up Mount Buckskin (Centennial) 6:44am Buckskin summit 7:00am top of NW Buckskin at top of traverse 8:07am pass the electrical wires at the low point before the spur (was moving real slow, taking pictures and analyzing the ridge ahead). 8:55am at the Twin Towers (waypoint 5) 10:07am top of last major hump before final push up to Democrat (still moving very slow to document everything) 10:33am summit Democrat 10:56am base of Democrat- Cameron saddle 11:41am summit Cameron (I’m cruising right along with little to no stopping…) 12:02pm summit Lincoln 1:10pm summit Bross 1:29pm reach South Bross (seems overkill to call it summiting). 1:57pm head on after finally taking a much needed break 2:20pm back on Mount Bross summit – head down by wrong route then have to swing back uphill – uugghh! 2:53pm reach base of the ugliest part of the descent but leave microspikes on till almost back at trailhead. 3:20pm back at Kite Lake trailhead Note that the waypoints in the GPX file tend to show different elevation readings than what I recorded while standing there (the numbers I recorded while standing there seem to match the topo map better). Thumbnails for uploaded photos (click to open slideshow): ")
")
")
")
")
")
")
")
")
")
")
")
")
")
")
")
")
")
")
")
")
")
")
")
")
")
")
")
")
")
")
")
")
")
")
")
")
")
")
")
")
")
")
")
")
")
")
")
")
")
|
| Comments or Questions | |||||||||||||||
|---|---|---|---|---|---|---|---|---|---|---|---|---|---|---|---|
|
Caution: The information contained in this report may not be accurate and should not be the only resource used in preparation for your climb. Failure to have the necessary experience, physical conditioning, supplies or equipment can result in injury or death. 14ers.com and the author(s) of this report provide no warranties, either express or implied, that the information provided is accurate or reliable. By using the information provided, you agree to indemnify and hold harmless 14ers.com and the report author(s) with respect to any claims and demands against them, including any attorney fees and expenses. Please read the 14ers.com Safety and Disclaimer pages for more information.
Please respect private property: 14ers.com supports the rights of private landowners to determine how and by whom their land will be used. In Colorado, it is your responsibility to determine if land is private and to obtain the appropriate permission before entering the property.