Download Agreement, Release, and Acknowledgement of Risk:
You (the person requesting this file download) fully understand mountain climbing ("Activity") involves risks and dangers of serious bodily injury, including permanent disability, paralysis, and death ("Risks") and you fully accept and assume all such risks and all responsibility for losses, costs, and damages you incur as a result of your participation in this Activity.
You acknowledge that information in the file you have chosen to download may not be accurate and may contain errors. You agree to assume all risks when using this information and agree to release and discharge 14ers.com, 14ers Inc. and the author(s) of such information (collectively, the "Released Parties").
You hereby discharge the Released Parties from all damages, actions, claims and liabilities of any nature, specifically including, but not limited to, damages, actions, claims and liabilities arising from or related to the negligence of the Released Parties. You further agree to indemnify, hold harmless and defend 14ers.com, 14ers Inc. and each of the other Released Parties from and against any loss, damage, liability and expense, including costs and attorney fees, incurred by 14ers.com, 14ers Inc. or any of the other Released Parties as a result of you using information provided on the 14ers.com or 14ers Inc. websites.
You have read this agreement, fully understand its terms and intend it to be a complete and unconditional release of all liability to the greatest extent allowed by law and agree that if any portion of this agreement is held to be invalid the balance, notwithstanding, shall continue in full force and effect.
By clicking "OK" you agree to these terms. If you DO NOT agree, click "Cancel"...
Prelude: This was an absolutely fantastic route that had just the right amount of spice and just the right amount of chill tundra plodding. I mapped out the individual ridgelines based on some basic information in a guide book, but for the most part we didn't really know much about the ridges outside of the overall class (i.e. class 1, 2, 3, etc.). To be honest, it's more fun that way sometimes! Anyway, after an eventful skimo season full of classic lines and big days, my partner and I took Friday and Saturday to have some much needed R&R. We thought about taking a rest day on Sunday as well, but I would have regretted letting an entire weekend of perfect weather in July slip by without doing some kind of linkup, and boy did this one deliver! The mountains around Horn Creek Basin are incredibly lush and green with beautiful rock striations that really create some unique patterns unlike anywhere else in Colorado. That, combined with the 6000' of prominence on either side of the mountains, made for a truly gorgeous day in the mountains... albeit, with lots of bugs...
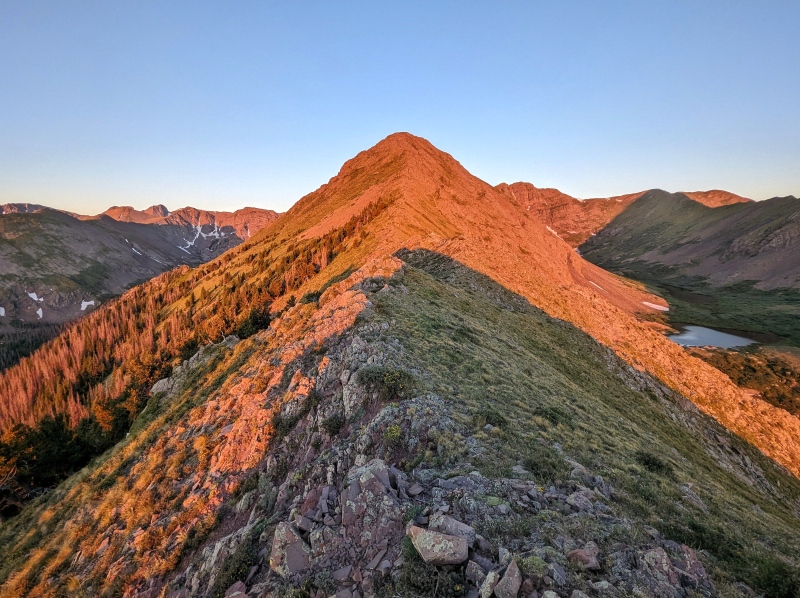
Approach: We woke up at 12 AM in Golden and were on the road by 12:30 AM. We arrived at the trailhead right around 3:30 AM and were on the trail by 3:40 AM. After about a mile of hiking, we turned off the trail and followed a defined ridge feature up to the summit ridge. The route we took was off-trail and quite spur of the moment as the original plan had been to take the trail into the basin and head up the steep grassy slopes to the summit of Little Horn Peak. The slope angle along the ridge was lower and we thought there might be a better chance of catching sunrise above tree line if we took the ridge. Thankfully, the ridge went with surprisingly low BS! There was some deadfall, but it was generally easy to avoid and there were no willows. Two hours later and we were above tree line with a fantastic sunrise as our reward. With the sun illuminating the entirety of the ridge we planned to traverse that day, we set off with new energy that only the first light after a long hike in the dark can provide.
Route Information: Mileage: Approximately 16.5 Miles Elevation: Approximately 7200' Class: 4 Time to Complete: 13 Hours
Exposure: High Rockfall: Low Route-Finding: High Commitment: High
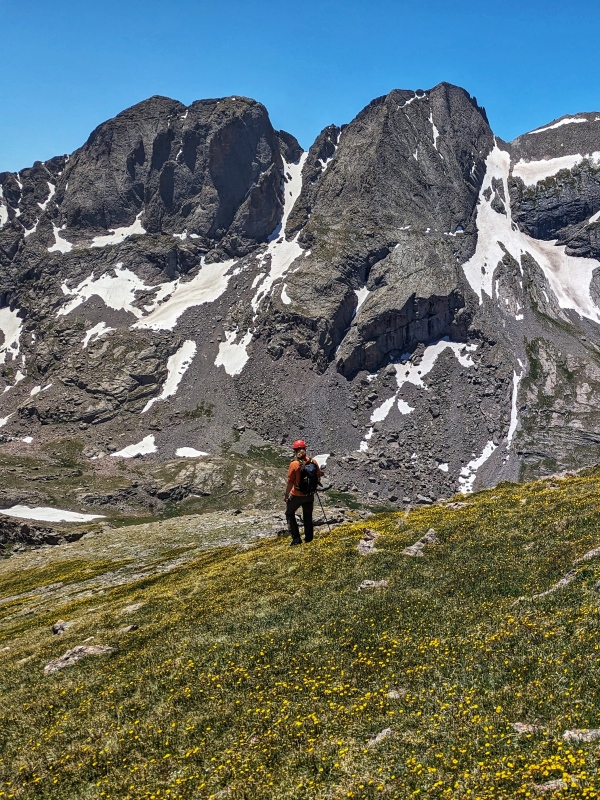
Sunrise Looking Towards Kit Carson and Crestone PeakLooking Towards Little Horn's Summit w/ Fluted to the Right and the Unnamed 13ers to the Left. Adams is out of View. Golden Hour Continues with a beautiful view of Horn Peak
Little Horn Peak - East Ridge (Class 3)
The East Ridge up Little Horn Peak was consistently uphill and primarily Class 1/2. There was a short section of Class 3 scrambling leading up to the summit. Route finding was simple - follow the ridge crest! Rock was was also solid and a ton of fun. Based on the slope angle and ease of navigation, I would definitely put this on the list for avalanche safe winter routes in the Sangres as well.
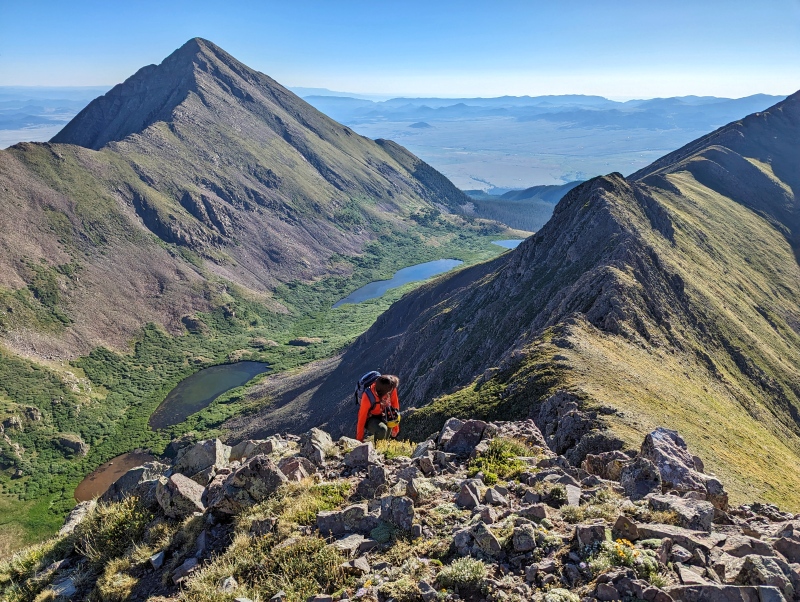
Scrambling Up Little Horn's East RidgeMore ScrambliesSummit of Little Horn! Adams is Finally Making an Appearance. Not so Secretly Noting all the Fantastic Looking Couloirs... Much to Gina's Annoyance.
Fluted Peak (East-to-South Ridge - Class 1/2)
The Ridge from Little Horn to Fluted Peak was primarily class 1 with a bit of class 2. Super chill with lots of beautiful views!
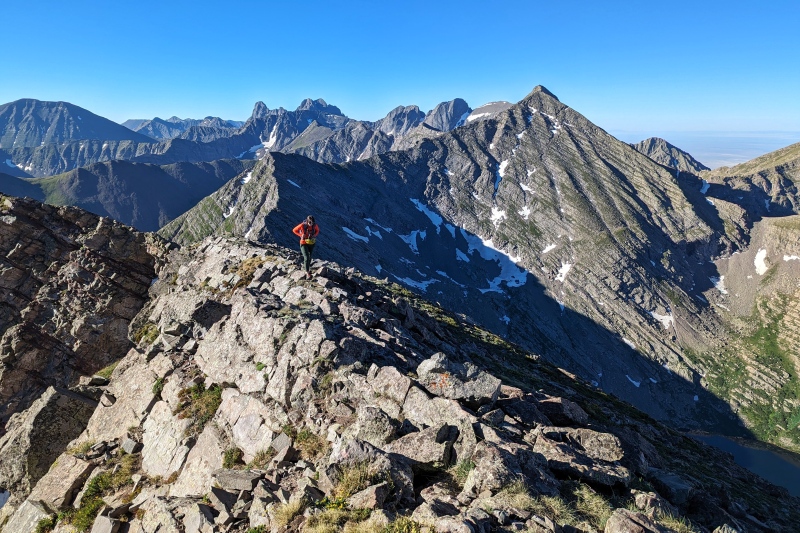
Making Our Way Along the Ridge from Little Horn to Fluted PeakPretty Rocks and a Lump on a Bigger LumpGina on the Summit Ridge of Fluted. Adams Looking Very Impressive in the Background Along with KCC and the Crestones
Mount Adams - Northeast Ridge (Class 4)
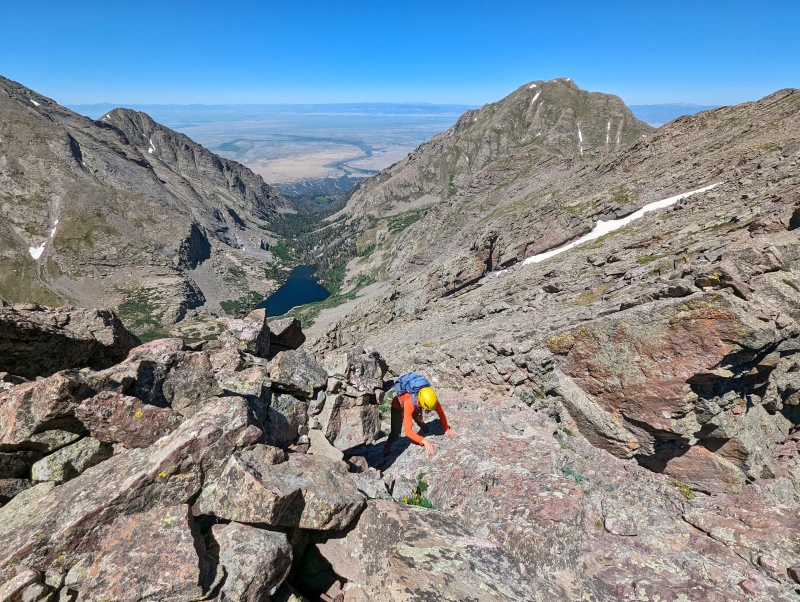
The Ridge from Fluted to the summit of Adams was initially very relaxed and primarily went at Class 1 to the saddle. From the saddle, there's sustained scrambling on solid rock to the next prominent bump on the ridge where the ridge turns towards the West. The route finding is fairly simple - essentially staying on the ridge crest along a semi-knife-edge feature - outside of two well-defined steps. For the first step, we ascended a gully/dihedral feature on the left side. A bit of straightforward scrambling later, and we reached the second step, which we ascended up the center and slightly to the right on a pile of stable, stacked rocks. Once you reach the point where the ridge changes direction, the scrambling eases. While the two steps were challenging, both were short and over fairly quickly. The remaining ridge to the summit is mostly Class 2 with some brief sections of Class 3 scrambling.
Moving Towards the Saddle Between Fluted and AdamsSo Begins the ScramblingFluted in the BackgroundA Bit of Exposure to the EastGina Working Her Way up the First Step. There Were a Few Options on the Left Side that Went Without too Much DifficultyTopping Out Onto the First StepGina Looking Towards the Second Step. We Ascended Just to the Right of Center on the Shaded RockOn Top of the Second StepThe Scrambling Eases - Mostly Class 2+ With a Few Sections of Class 3 to Go! One of the Small Sections of Class 3 - North Crestone Lake in the BackgroundNearing the Summit Block of Mount Adams - We Traversed one of the Grassy Ledges to the Left and Ascended a Grassy Gully to the Summit (Didn't Exceed Class 2+)Looking out Towards the Unranked 13ers that Comprised our Remaining Ridge Romp with KCC and the Crestones in the BackgroundLooking West from the Summit - Interesting Looking Bump Along the Ridge... May Have to Come Back for that One!Happy to be at the Highest Point of our Traverse - It's All Downhill From Here!
UN 13,580A - South Ridge of Adams (Class 3) to the North Ridge of 13,580A (Class 2)
The next stop along our ridge was unnamed Peak 13,580A. As you approach Mt. Adams from the NE, it won't look like there's any way off the summit in the direction of the unnamed 13ers without some serious 4th or 5th class downclimbing. We were very relieved to see that wasn't the case! Do not try to descend the gully that appears to go directly from the summit. Walk a another 20-30 feet West along the summit ridge and you'll look down to find a rather pleasant-looking grassy slope that starts off at Class 2. There were a few ledges that required some brief Class 3 movements, but exposure was low (at least in comparison to the NE ridge). Staying at/near the ridge proper appeared to plop you right at the easiest point to navigate the ledges. From the saddle, it's an easy hike to the summit of 13,580A, which turned out to be a beautiful peak, somewhat reminiscent of the Dolomites with a broad grassy slope on one side and cliffs to the East.
Probably the Hardest Ledge with the Summit of Adams in the Background. Looks intimidating, but it's not. The SaddleLooking Down Towards Willow Lake - The Class 2+ Gully up Challenger Point Still has Snow in it.
UN 13,580A to UN 13,517B - South Ridge of UN 13,580A (Class 1/2) to North Ridge of UN 13,517B (Class 4)
The descent off 13,580A to the saddle was easy, but the difficulty ramped up quickly from there. The North Ridge of UN 13,517B was definitely the crux of the route, with several airy, exposed movements, knife edges, class 4 slabs, and one very nerve wracking descent into a notch that necessitated a small jump. There's not really a bail option to the East at this point (bailing in that direction would necessitate going back to Adams and descending some aspect of the East Face). Once you're on this part of the ridge, you're committed. If there's one section scrambling that should be your go/no-go decision point for this linkup, it's this one. It may be possible these difficulties could have been bypassed, but we didn't see a viable alternate route, even if you were to lose significant elevation. That being said, the rock is very solid and super enjoyable to scramble on. Once you're past the notch, the terrain eases momentarily. Staying ridge proper would require 5th class climbing to access the summit. Traverse a grassy ledge on the West side of the summit block to access a rock gully with good rock quality (Class 3/4) that takes you to the summit. Despite all the cautionary statements, this was my favorite part of the traverse!
Chill Descent to the SaddleThe Ridge Difficulties Begin with a Knife Edge - Rock is SUPER BomberA Knife Edge Downclimb (Reminiscent of Music's South Ridge)A Very Well Defined Ledge Takes you Across This Interesting, Conglomerate Slab - Summit is Back and to the LeftRight After the Ledge is a Highly Exposed Knife Edge Section... Probably the Most Airy Part of the Traverse... Also Passively Noting the Very Interesting Looking CouloirCool RocksAfter the Airy Knife Edge, There's a Short Downclimb on Solid Conglomerate. Hand and Foot Holds AboundAnother Look at the Downclimb - Looks a Bit Less Steep from this AngleAaaaaaaaand Back Up (Downclimb Slab is Just to the Right)A View of the Slope Angle on the ClimbOnce at the Top of the Flatiron, Downclimb Around to the Left Side and Traverse ad Short DistanceGina Downclimbing - Step Down onto the Big Rock in the Bottom Left of the PhotoThe Hardest Moves of the Route Involved the Greenish Rock on the Other Side of the Notch. Using the Crack that Splits the Middle of the Face, Carefully Descend to the Edge of the Lip. From There, It's a Short Jump into the Notch, Luckily with Minimal Exposure. The Rock is Slick. Definitely Send your Strongest Climber First and Have Them Spot Everyone Else. You Wouldn't Die if you Slid Here, but Definitely Not a Good Spot for Any Injuries. After the Notch, Ascend on Class 3 Rock (Fantastic Hands and Feet). After Exiting the Notch, Follow Grassy Ledges Around the West Side of the Peak and Take One of Two Gullies That Lead Up to the Small Divot in the Summit Ridge. We Took the More Inset, Shaded One. Ascending the Gully (Class 4). The Other Gully May Go at Class 3. From the Top of the Gully - It's a Quick Class 2+ Walk to the Summit
UN 13,517B to UN 13,541 - Class 2
UN 13,517B marked the end of our originally planned ridge traverse, but since we still had some energy left and it was a gorgeous day, we decided to bag UN 13,541 as well. Whether you decide to descend directly off the summit towards Little Baldy Mountain or bag UN 13,541, the remainder of your day won't exceed Class 2. We headed over and up to the summit of UN 13,541 and were happy we did - this unnamed summit has some of the best views of Kit Carson, Challenger, and Obstruction Peak! It took us 30 minutes to hike up and back down to the saddle. From the saddle, we traversed UN 13,517B's grassy SE slopes to reach the E Ridge. Try not to loose elevation as you traverse from the saddle over to the East Ridge as the terrain gets steeper as you descend the SE slopes. Walk the Class 1/2 Ridge up and over Little Baldy Mountain, then over the next bump (not a named summit). The next obvious divot in the ridge is where you want to start heading down into the basin. I actually highly recommend following our GPX track for both the entrance and the exit for this ridge traverse as we experienced almost non-existent BS getting back to the main trail!
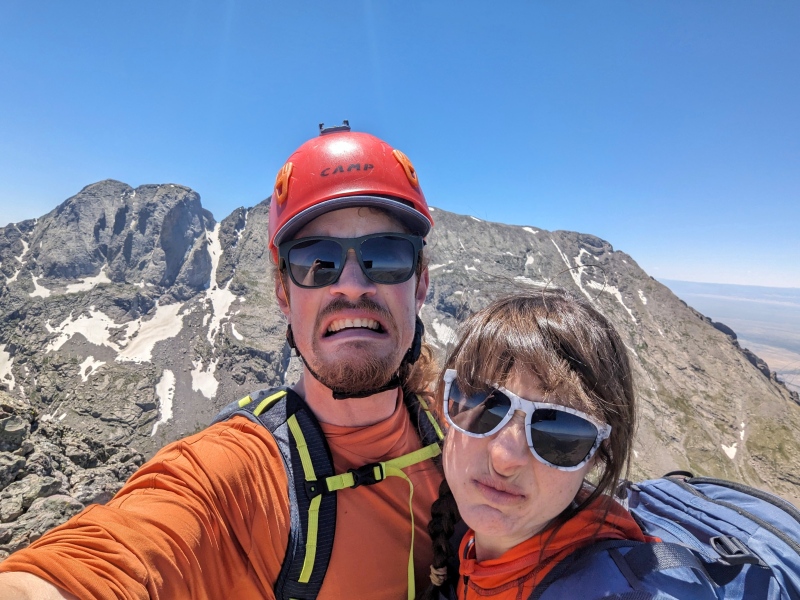
Approaching the SaddleKit Carson Looking Very Majestic in the Background. The Pole Definitely Helped with the Sore Knees at this Point (Along with the Ibuprofen)Looking Towards an Unnamed Lake (Macey Creek Basin?). Little Baldy Mountain is on the Ridge to the LeftWe Want Mexican Food and Slushies (Summit of 13,541)Heading Down Towards the Main Trail - We Traverse Over to the Left, Aiming for the Patch of Light Colored Grass in the Trees, Right of the TarnLooking Back Towards 13,517B... Couloirs (I'm not Obsessed)TRAIL!!! We Refilled on Water Before Hiking the Remaining 4 Miles Out. We Arrived Back at the Trailhead at 4:35 and were Home by 7:45!
GPS Track(s) on Google Maps (made from a .GPX file upload):
Very impressive! Fluted is near the top of my to do list, I did Little Horn via Horn lakes last year, that was a full day for me. Amazing photos, thanks for sharing, great to look at !
You guys made a wise decision to head up the ridge instead of going into the basin. That trail near the wilderness boundary has some of the worst deadfall I have ever seen. I mean huge trees piled up everywhere. Imagine trying to negotiate that in the darkness. Even with a headlamp it would have been challenging. Nice adventure y'all pulled off!
Nice report! Your route looks amazing - thanks for sharing and your pictures are awesome.
I did Little Horn > Fluted > Horn a week ago and found some really fun scrambling on Little Horn by hiking the trail far into the basin (not taking the ridge, as you did) and then taking a hard north turn toward the ridge shortly after the wilderness boundary. yes there was deadfall to deal with as boudreaux notes, but I wanted to stay on the trail until sunrise and I found the bushwhack to be ok. Getting up Little Horn was very exciting because I didn't know if the scramble would go, and it was solid Sangre rock. Anyway, I'm too lazy to write up a trip report (and I took very few helpful pictures), but I'd be happy to share my gpx if anyone is reading these comments other than the OP :) Just another variation on a fun peak.
I saw a couple nice looking routes I wanted to try on the southface of Little Horn. I bet you went up some coulior about 2/3 way up the trail? PM me that gpx, would love to see your route.
@boudreaux - Not quite! We ended up departing from the trail right around 9700'. Essentially, there was a ridge contour that showed up pretty low on the slope angle shading that we decided to give a go because route finding would be fairly simple in dark and it merged directly into the summit ridge - I included my gpx in the bottom of the trip report so you should be able to download it directly from the site!
@dubsho3000 - The number of available options for scrambling becomes quite overwhelming when you consider that every rock rib and/or dry couloir has the potential to be an excellent scrambling route... or a pile of rubble lol. Nice work! Curious if you found conglomerate on the slopes of Little Horn or granite... the geological variation in these mountains is crazy.
Did you by any chance get a look at the connecting ridge between Obstruction Peak and UN13541? Could be an interesting alpine loop from Willow Creek side.
@donovanrice I did not, but I believe 13541 to the saddle between the two goes at Class 3. I hear the ridge up to Obstruction from there is quite a bit more convoluted. Justin Simoni has done the complete Sangres traverse multiple times and I remember seeing some information on that section in one of his videos or write-ups!
Caution: The information contained in this report may not be accurate and should not be the only resource used in preparation for your climb. Failure to have the necessary experience, physical conditioning, supplies or equipment can result in injury or death. 14ers.com and the author(s) of this report provide no warranties, either express or implied, that the information provided is accurate or reliable. By using the information provided, you agree to indemnify and hold harmless 14ers.com and the report author(s) with respect to any claims and demands against them, including any attorney fees and expenses. Please read the 14ers.com Safety and Disclaimer pages for more information.
Copyright: Route information, text, risk factors, maps, GPX files, charts, photos, 14ers.com-created map imagery, flythroughs, and other content provided in this route description are copyrighted by 14ers.com and may not be copied, reproduced, republished, distributed, modified, or used to create derivative works without prior written permission.
Please respect private property: 14ers.com supports the rights of private landowners to determine how and by whom their land will be used. In Colorado, it is your responsibility to determine if land is private and to obtain the appropriate permission before entering the property.