Fletcher+Drift Traverse
Peaks Included: Fletcher Mountain, "Drift Peak"
Difficulty Class 3
Risk FactorsExposure: High
Rockfall: Considerable
Route-Finding: Considerable
Commitment: Considerable
Rockfall: Considerable
Route-Finding: Considerable
Commitment: Considerable
TrailheadBlue Lakes
Start11,700 feet
Summit13,943 feet
Total Gain2,800 feet
RT Length5.5 miles
AuthorBillMiddlebrook
Last UpdatedMay 2023

Parking
Trailhead
From Breckenridge, drive 8 miles south on Colorado 9. On a sharp corner of Colorado 9, turn west onto the 850 road (Blue Lakes road). Continue on Blue Lakes road as it climbs west. Near 1.4 miles, if the gate is closed, you'll have to park in this area because Colorado Springs Utilities has closed the remaining road to the dam. Follow the road another 3/4 mile to reach the dam.
Route
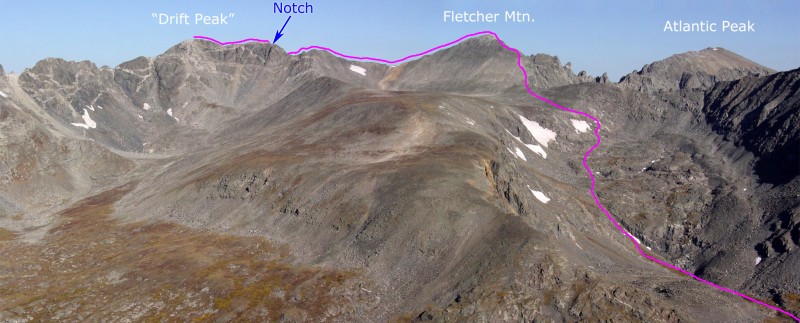
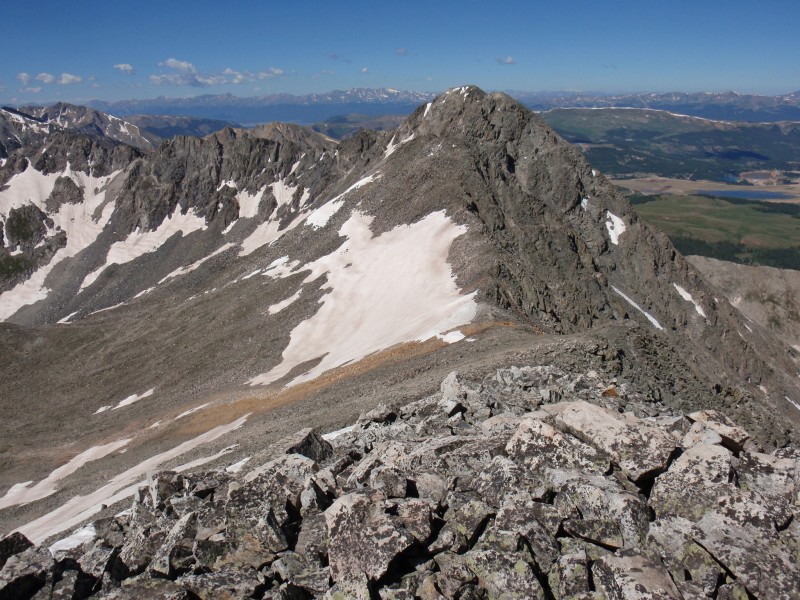
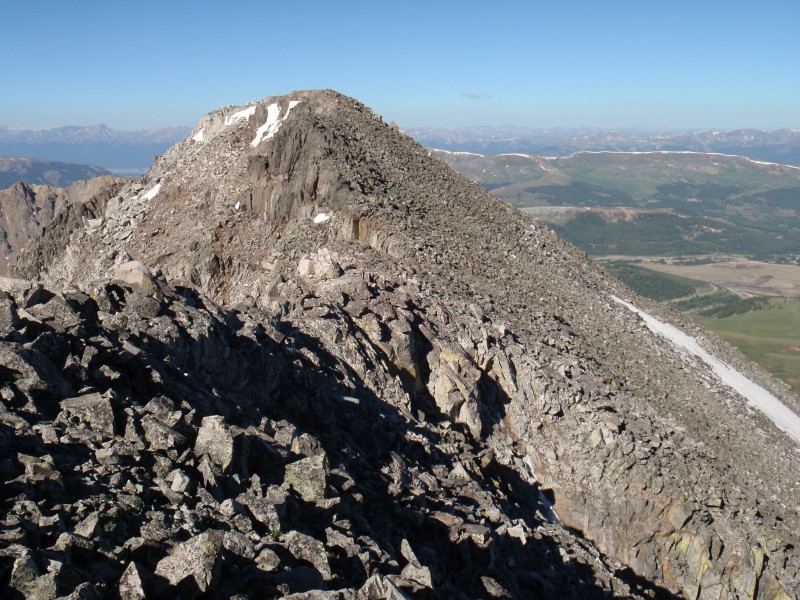
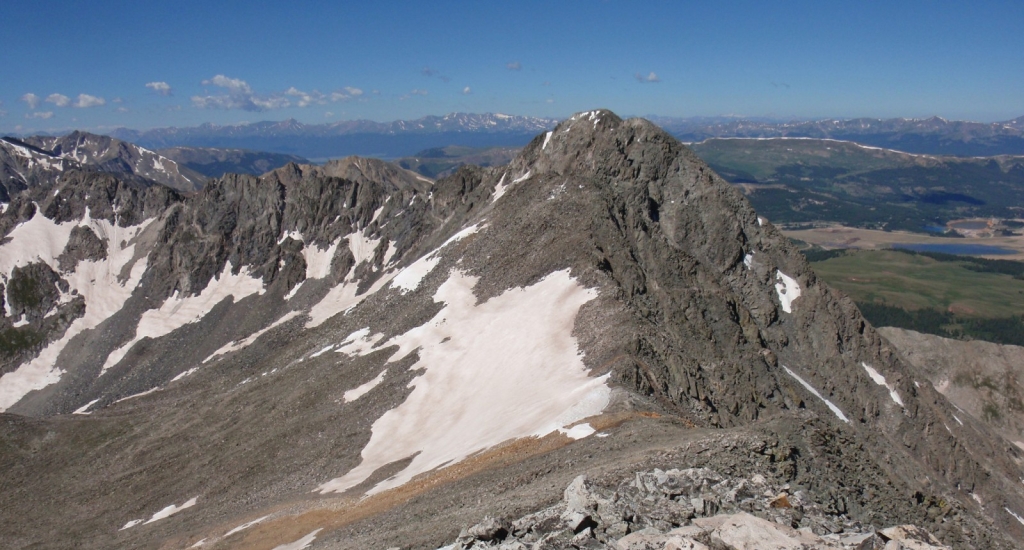
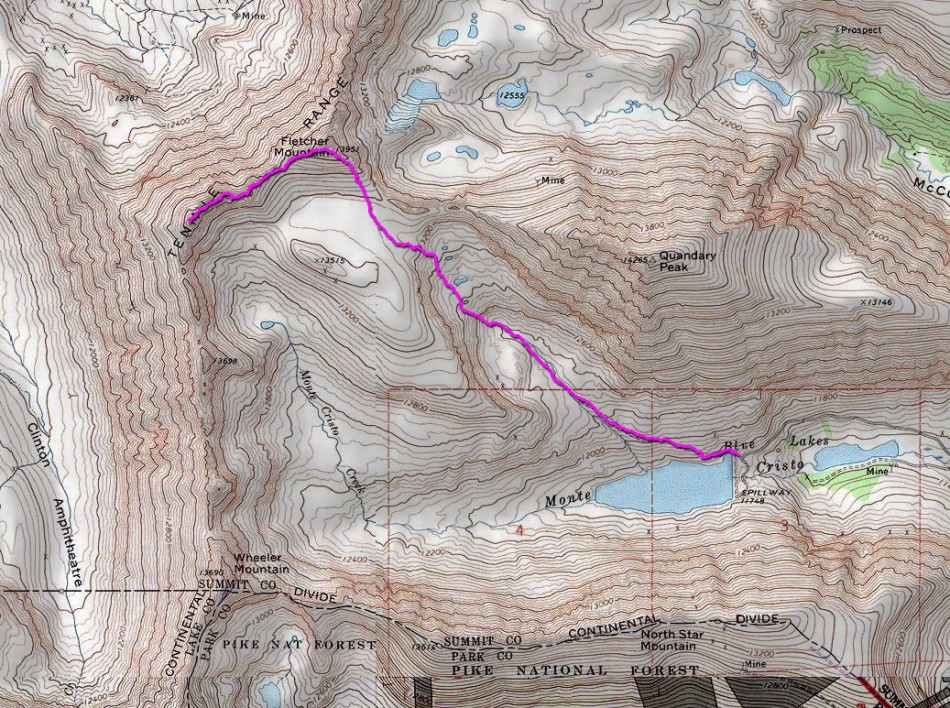
1 shows most of the climb and has a spot labeled "Notch," where the route's crux is located, half way across the ridge between Fletcher and "Drift." First, climb Fletcher's southeast ridge route. From the summit of Fletcher, you get a clear view of Drift to the southwest, but the exact difficulties of the connecting ridge are difficult to see - 2.
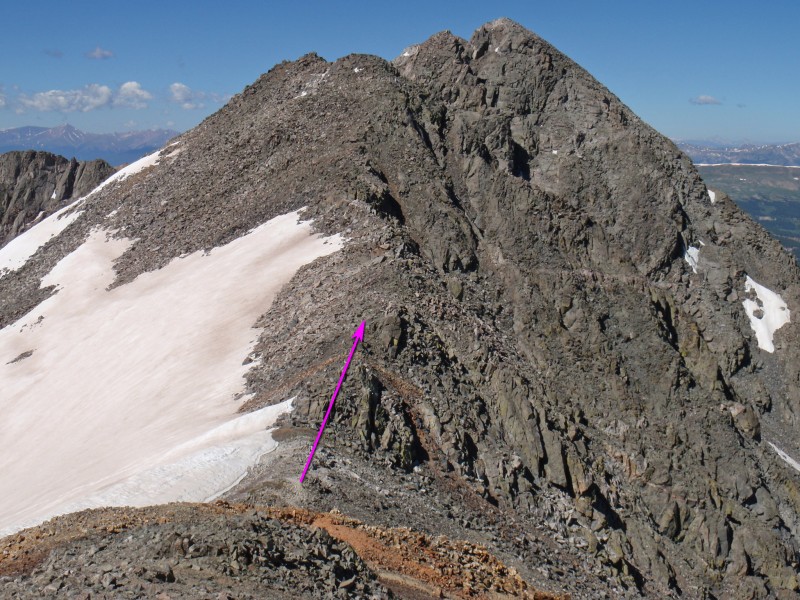
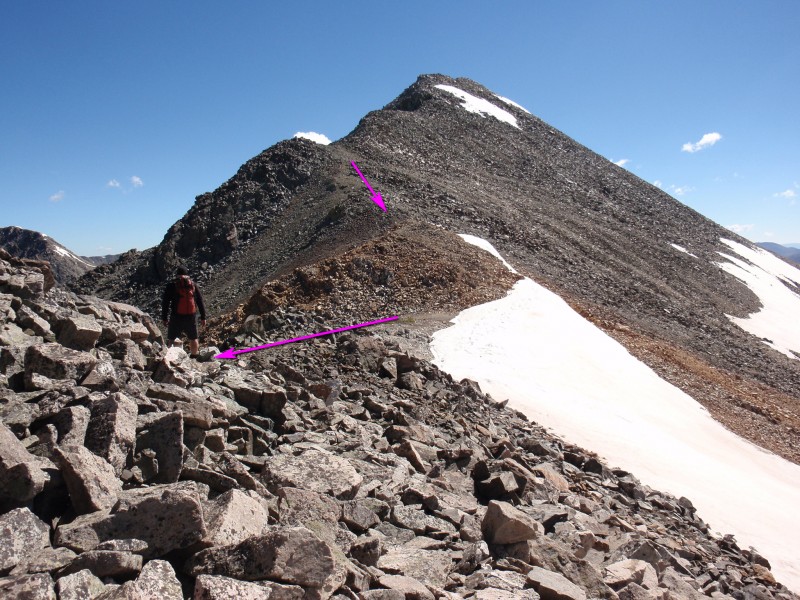
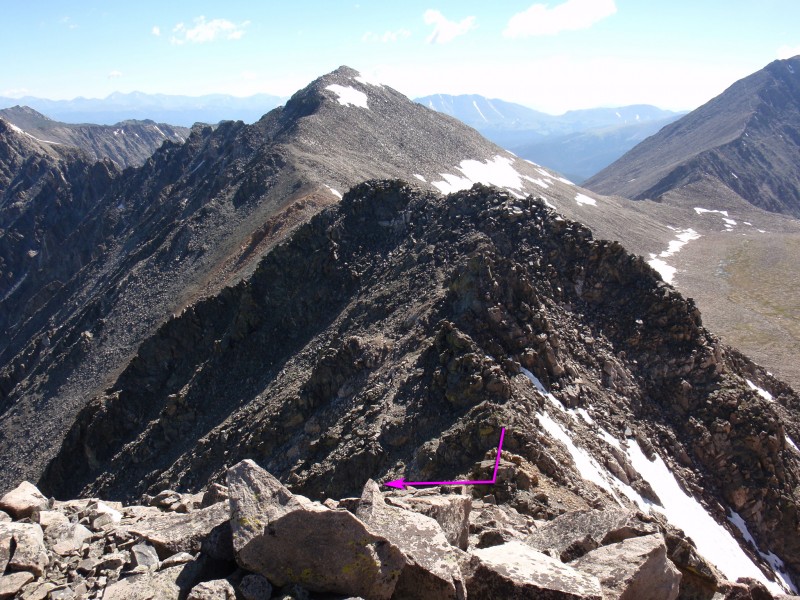
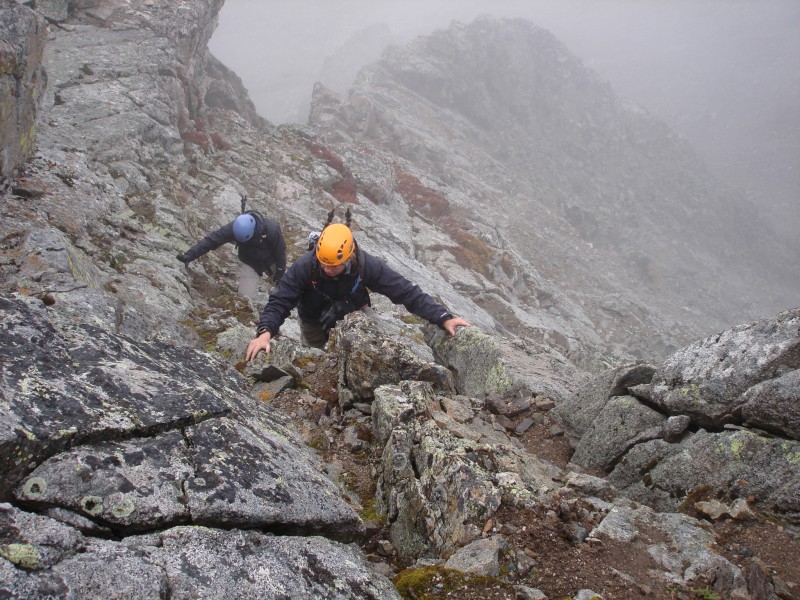
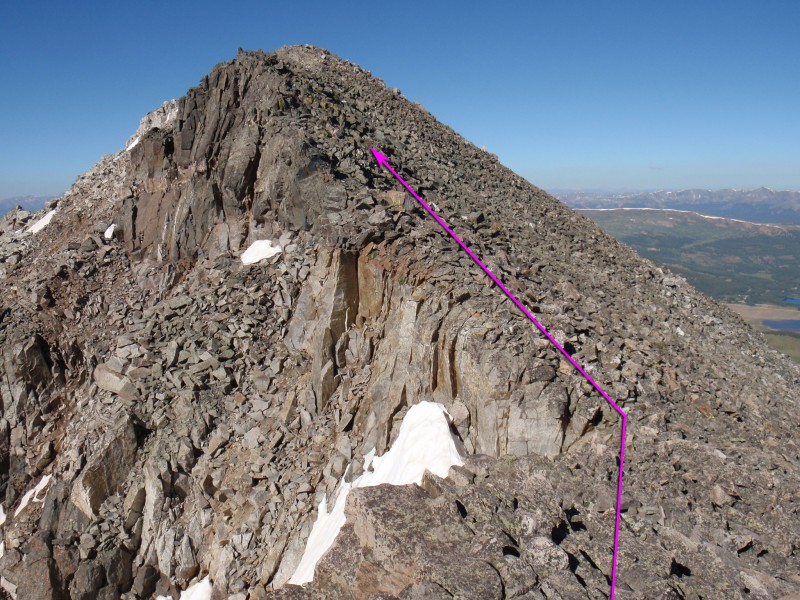
Hike 0.2 mile down Fletcher's southwest ridge ( 3) to reach the Fletcher-Drift saddle - 4. Continue southwest towards Drift on the straightforward ridge ( 5) as it gradually becomes more difficult. Ascend the bump seen in 6 and you'll get a view of the summit - 7. Scramble along the ridge ( 8 and 9) to reach a small section of rust-colored rock just before a large point on the ridge - 10. Beyond the large point is a sheer drop-off and it's best to pass the point on the right (north) side.
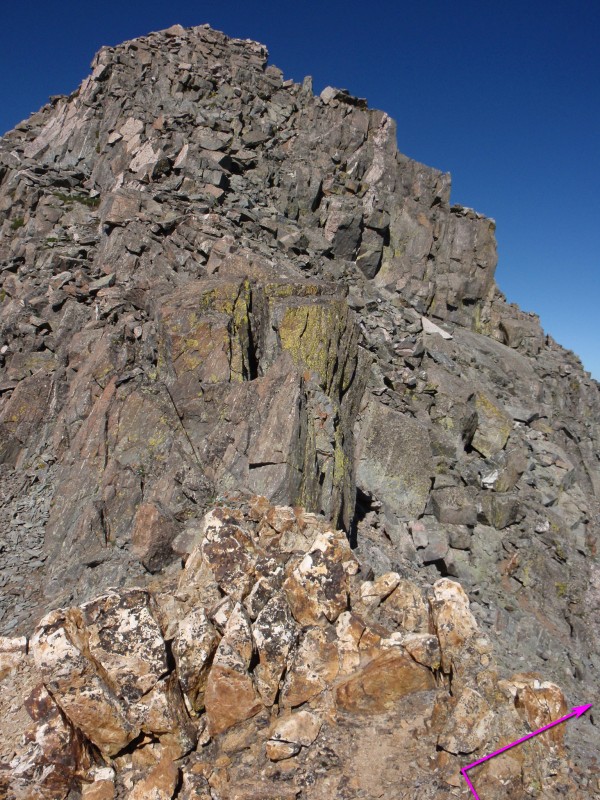
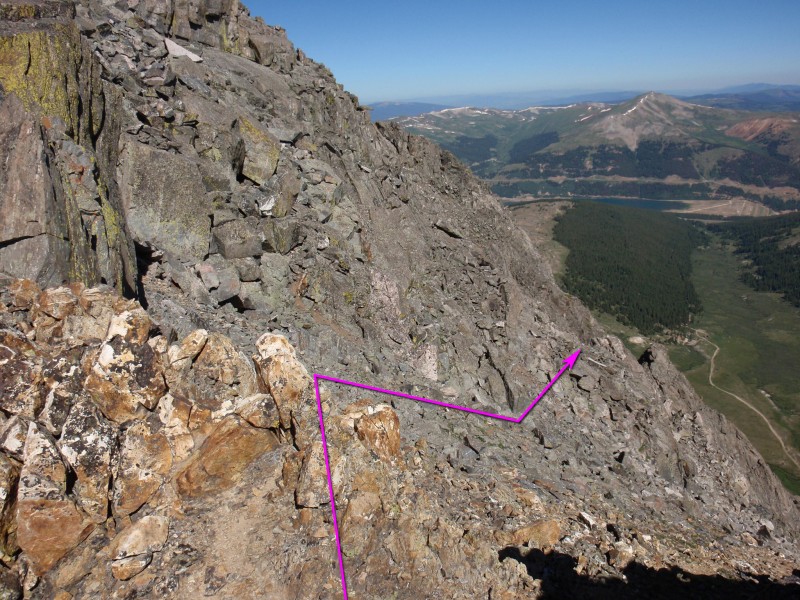
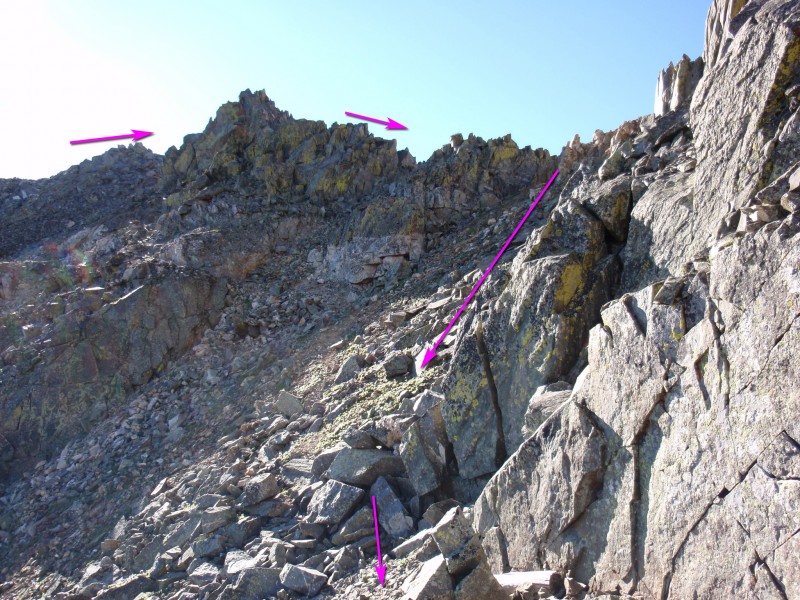
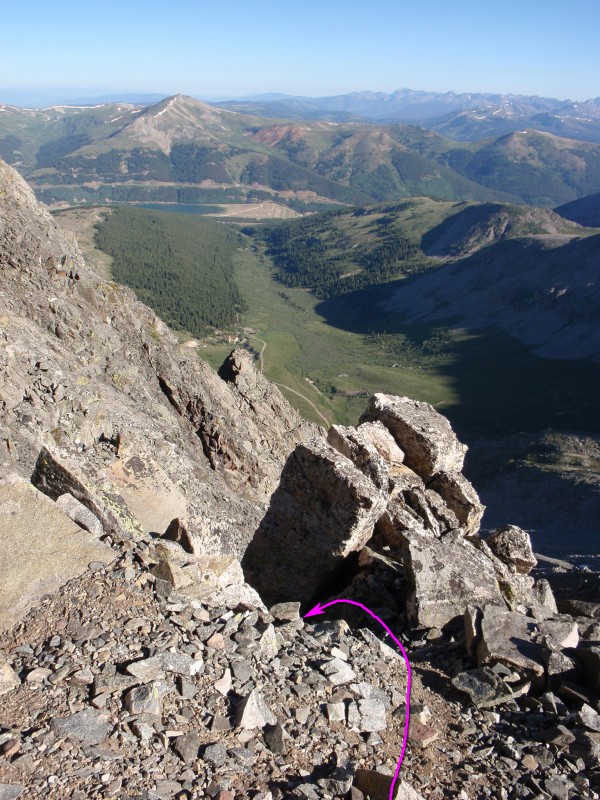
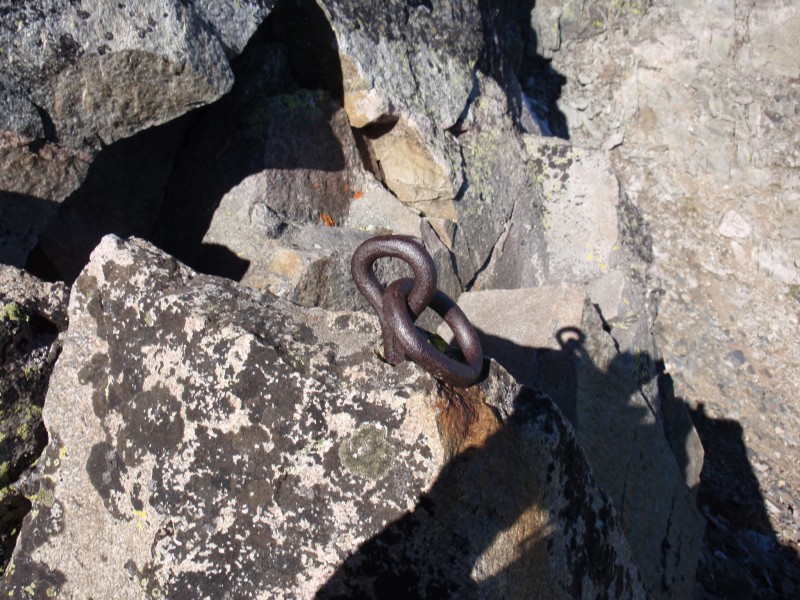
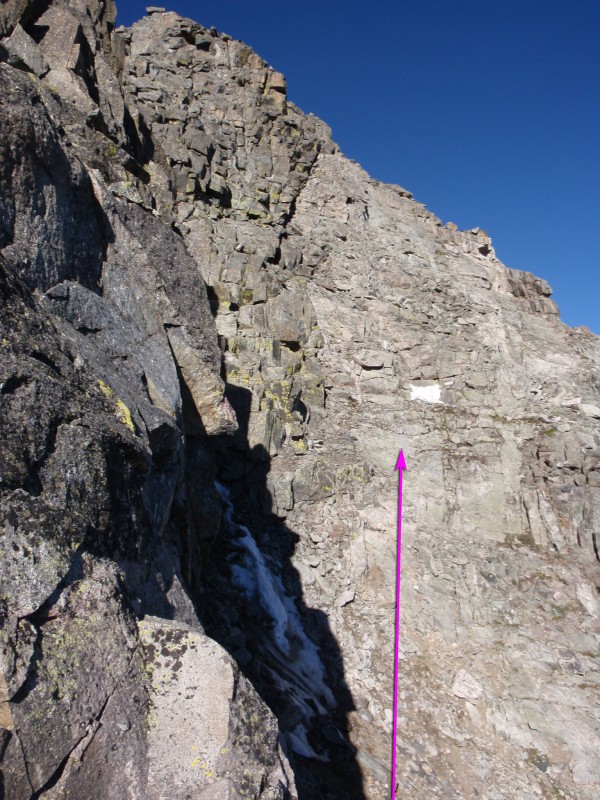
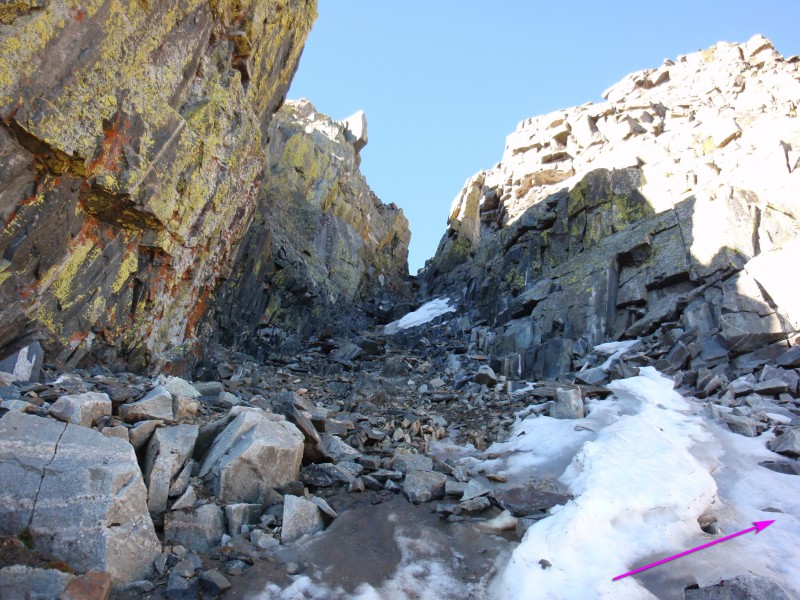
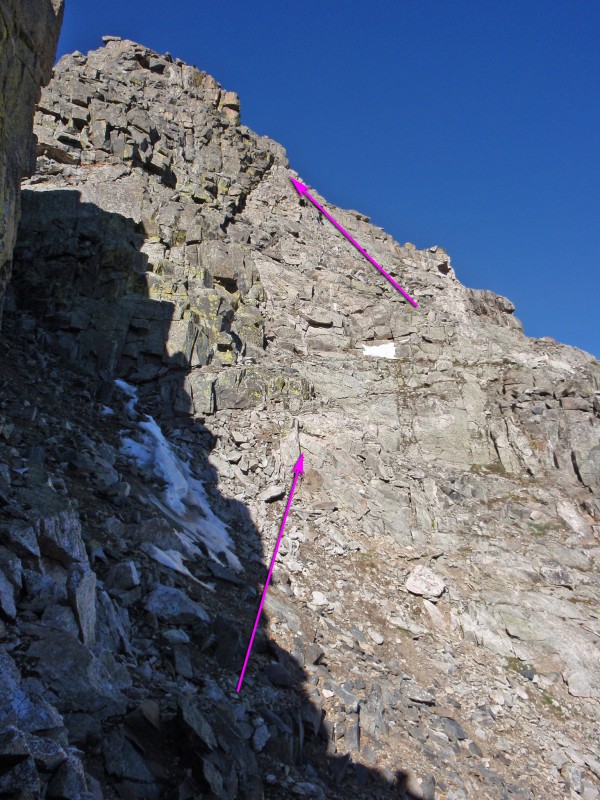
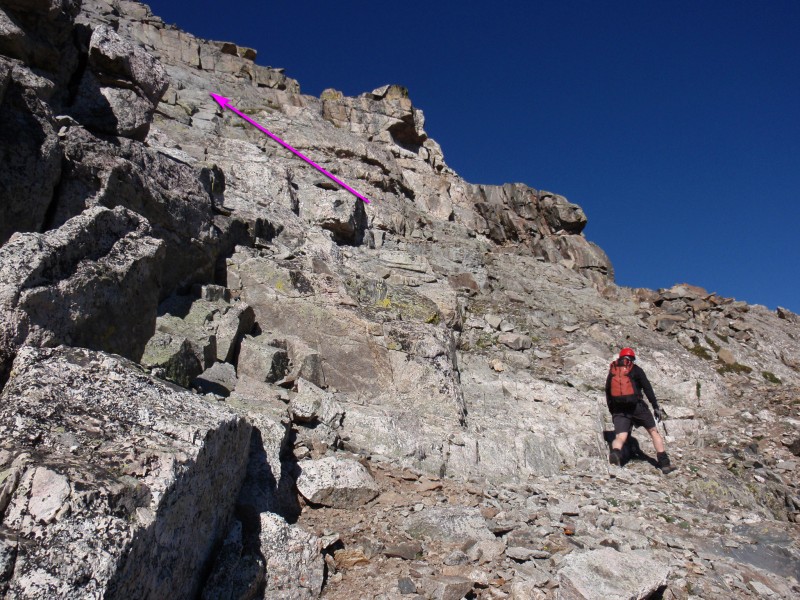
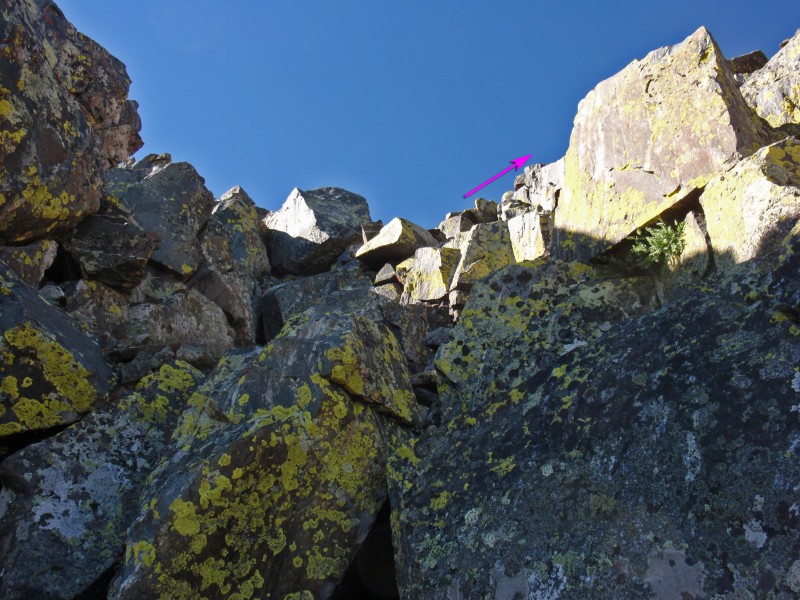
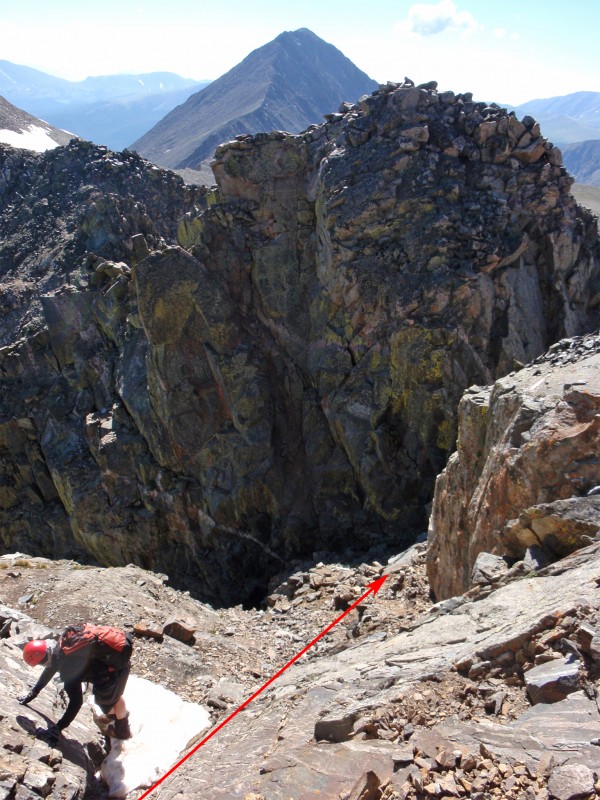
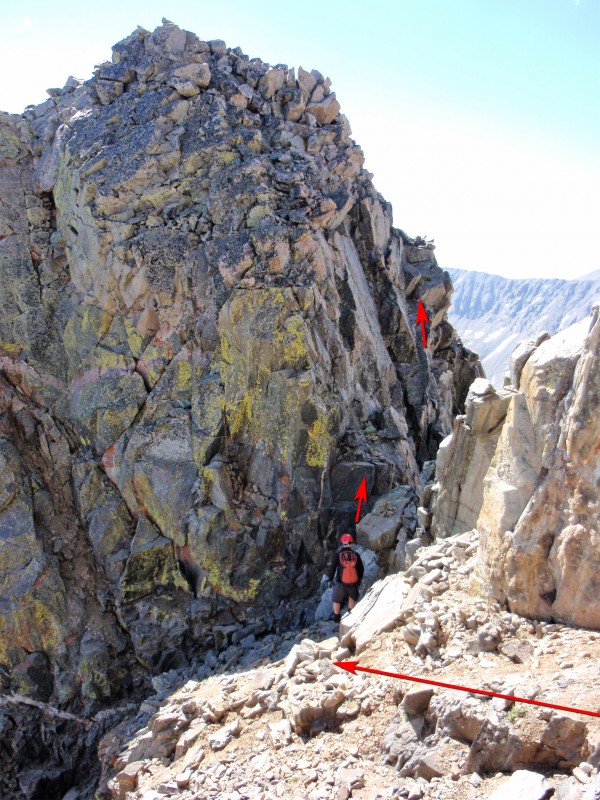
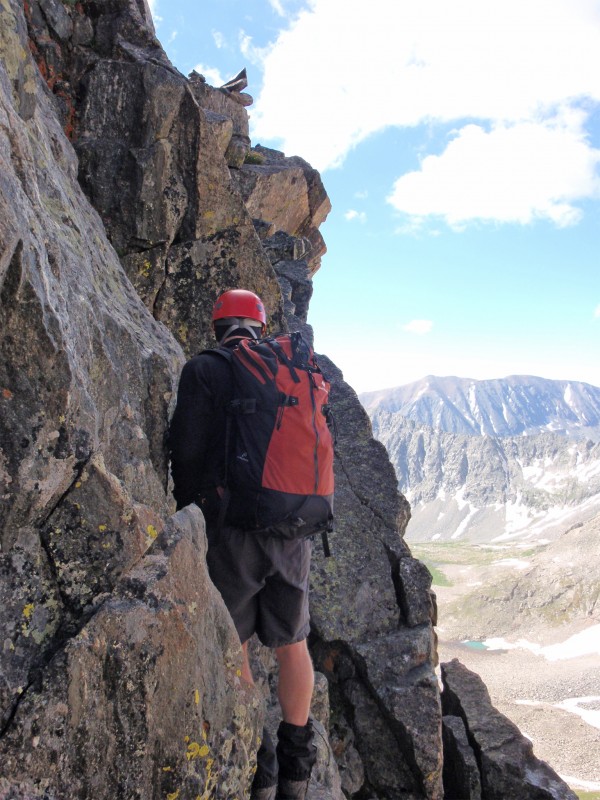
From the rust-colored rock, turn right ( 11) and begin a short traverse to the north. 12 and 13 show the "bypass" from various angles. Drop slightly and locate an excellent spot to drop into the gully on the other side of the point - 14. This was a mining area and you might notice a bolt/ring in the rocks ( 15) right next to this location. From this area, you should be able to look west over the gully beyond the point - 16. Drop into the gully ( 17 and 18), cross it and begin scrambling up some light-colored rock on the north side of the ridge - 19. Now that you've bypassed the steep notch, your next objective is to regain the ridge crest. Continue up the steepening, light-colored rock ( 20) and find a reasonable line back toward the ridge - 21 and 22. The pitch is steep near the top but you should be able to keep it at Class 3 - 23. Once back on the ridge, turn right (west) and continue toward the summit - 24 and 25. 26 looks back along the ridge.
For the descent, it's best to retrace your route back to the low point of the Drift-Fletcher saddle and descend southeast from the saddle or back over Fletcher. If you descend from the saddle, walk east over a large, flat area to reach your approach line, near 13,300'.
Class 5.2 Variation:
If you want to spice up this route, there's a Class 5 plus Class 4 pitch on the south side of the large point which was bypassed in the previous route description. If you climbed Fletcher first, this variation can be done after you've done the traverse and are returning to Fletcher. If you climbed Drift first (probably via Drift's Northwest Ridge Route), you could climb this variation on your way over to Fletcher and return to Drift via the Class 3 description above. Either way, from the summit of Drift, scramble directly along the ridge crest and downclimb a steep (Class 3) pitch to reach the notch before the point bypassed in the main route description - 27 and 28. Drop into the notch and turn right into a passage where you can see to the south. Just to your left, locate a couple of large blocks which provide access to ledges up on the south side of the point - 29. Make a couple of Class 5.2 moves to gain the first two blocks and carefully ascend a narrow, Class 4 ledge up to the right - 30 and 31. The difficulty soon eases as you scramble up to the left and onto the point - 32.
Notes
None
 |
Caution: The information contained in this route may not be accurate and should not be the only resource used in preparation for your climb. Failure to have the necessary experience, physical conditioning, supplies or equipment can result in injury or death. 14ers.com and the author(s) of this route provide no warranties, either express or implied, that the information provided is accurate or reliable. By using the information provided, you agree to indemnify and hold harmless 14ers.com and the route author(s) with respect to any claims and demands against them, including any attorney fees and expenses. Please read the 14ers.com Safety and Disclaimer pages for more information.
