| Report Type | Full |
| Peak(s) |
Mt. Williamson (14,380') Mt. Tyndall (14,026') |
| Date Posted | 02/07/2025 |
| Date Climbed | 09/01/2024 |
| Author | glodder |
| Mt. Williamson/Mt. Tyndall, via Shepherd Pass |
|---|
|
Steve and I had been talking all throughout the spring and summer of 2024 about whether we were going to try to climb some California 14ers this year. Ultimately, in mid-August, we finally had a serious discussion about it, decided that yes, we wanted to climb something, and pondered which mountain(s) would be best. California 14ers are way more difficult to plan out for us than Colorado's 14ers, obviously with the significantly more-lengthy travel to California from Kansas, and with the difficulty and length of many of the California 14ers. It is challenging to plan out multiple mountains on one trip out there, as the lengthy approaches many times require multi-day trips. To make a long trip to California for just 1 mountain seems inefficient, but I think I’ve learned it is just part of the deal with the California 14ers. More peaks require a longer trip out there, longer than we're used to… multi-peak trips are tough to come by out there without spending A LOT of time on the trip. But, with proximity next to each other, only requiring one approach and one high camp, we did identify the relatively seldom-climbed Mt. Williamson (14,380') and Mt. Tyndall (14,026') as a great California 14er combination trip. We decided to go for this combination, and we began our detailed research and review of route descriptions and trip reports on these mountains. Obviously we found out very quickly that this trip is gargantuan. And Mt. Williamson is gargantuan. The approach to these peaks is brutal, and the climb of Mt. Williamson by itself from a high camp is a long arduous day. But we were up for the challenge! Most trip reports describe 3 nights of camping up at Anvil Camp and/or Shepherd Pass Lake. Also, many of these trip reports identify Mt. Tyndall as the choice of the first mountain to climb on the trip. We bucked the trend and planned for: DAY 1: A long pack in to Shepherd Pass with a high camp at Shepherd Pass Lake. DAY 2: Summit Mt. Williamson and return to camp. DAY 3: Summit Mt. Tyndall, return to camp, and pack out all the way back to the trailhead. We thought we could manage this and end up with just 2 nights on the mountain with 3 big days of hiking/climbing. We secured our permits for a Shepherd Pass Trail entry for Sunday 9/1, and exit on Tuesday 9/3. (I was able to log in to recreation.org and secure those permits 2 weeks prior on Sunday morning 8/18… additional permits for many of these California 14er hikes open up on the portal exactly 2 weeks before entry date at 9:00 a.m.) We boarded and made our flights to Las Vegas on Saturday 8/31, rented a jeep at the Vegas Airport, and drove the 3.5 hours to Lone Pine, CA on Saturday afternoon. We drove through Death Valley National Park en route… this was the 3rd time I had been there. We had stayed at the Quality Inn in Lone Pine on a previous trip to climb Mt. Whitney and Mt. Muir, so we stayed there again on this trip on Saturday night, with a dinner at the solid Mt. Whitney Café in Lone Pine on this evening. On Sunday morning 9/1, we ate breakfast also at the Mt. Whitney Café, and we then made our way toward the Shepherd Pass Trailhead. We began by driving about 20 miles north to Independence, CA on U.S. 395. We had this view of the massive Mt. Williamson on this stretch of U.S. 395. 
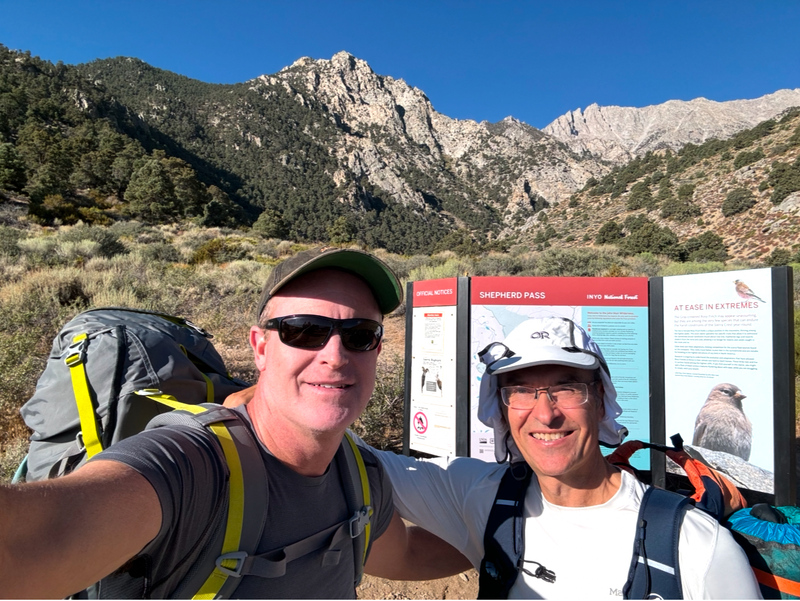
We took an obvious left turn in Independence on Market Street, or the Onion Valley Road, taking us west. After 4.3 miles, we turned left onto Foothill Road (dirt) and we measured from this point. We went south for a bit, and then the road veers back to the west. Ultimately, after about 5 miles, we reached the trailhead. Veer right at any forks. This road was mostly 2WD and it got slightly rougher toward the end of it, but I would imagine most decent 2WD vehicles could make it up that road. We arrived at the Shepherd Pass Trailhead (6,300 feet), took the last parking place at the trailhead lot, got our packs ready, and we were off on the trail at 9:00. Our goal on this day was to hike up 9 miles and 6,500 feet of gross elevation gain (6,500’ up, 800’ down, net 5,700’) to Shepherd Pass at 12,000 feet. Pics from the trailhead: 
Starting on the trail, we shortly reached Symmes Creek, and the trail continued up on the south side of the creek. The trail actually crosses the creek several times in the next stretch, and it is somewhat tricky to find the cairns indicating the creek crossings. We worked our way up this stretch along the creek, and we missed all of the creek crossings on our way up. But fortunately we managed to continue to re-find the trail on the south side of the creek. Ultimately, after about 1 mile, the trail leaves the creek on the south side and starts a brutal series of switchbacks up a hill. Here is a pic of Steve of me just beginning the slog up this hill: 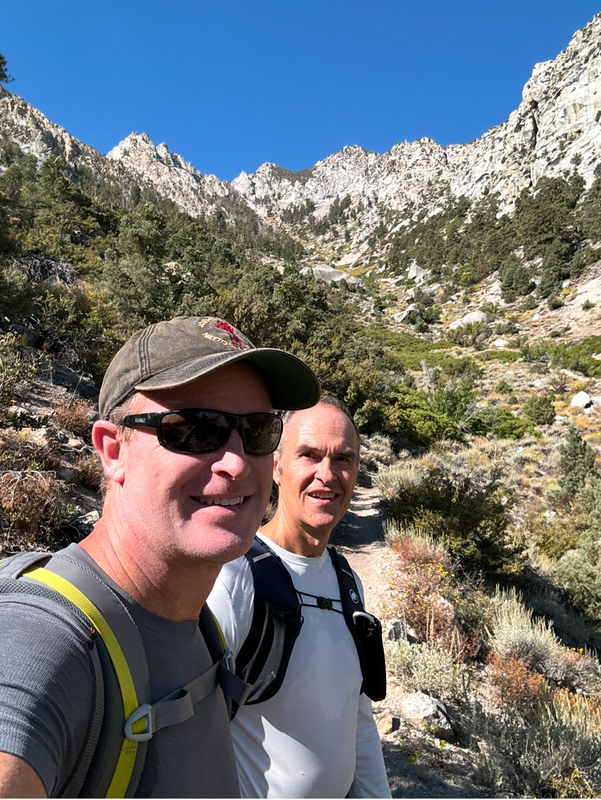
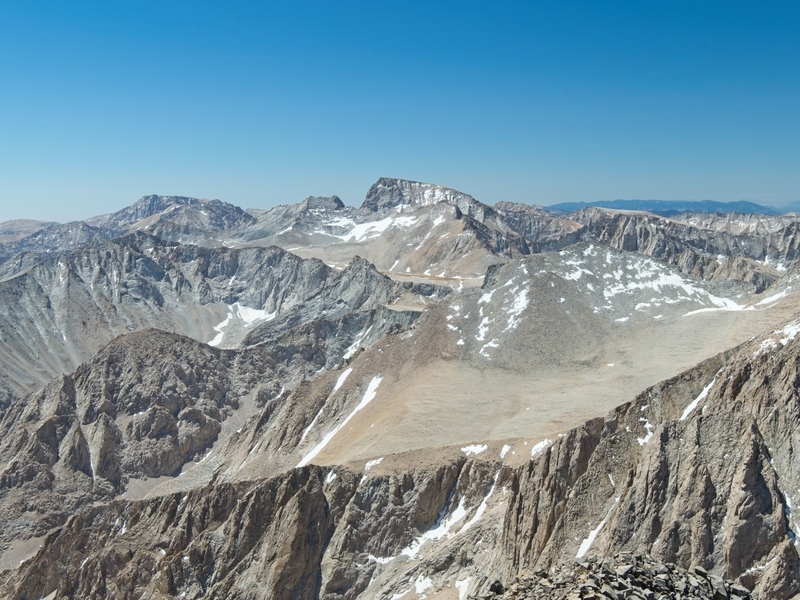
We plowed our way up these switchbacks, apparently there are 54 of them, and after about 2 hours and a total of 3 miles and 2,800 feet of elevation gain from the trailhead, we reached the top of a pass with an absolutely incredible view of Mt. Williamson. Mt. Williamson is absolutely massive! We took a break here. 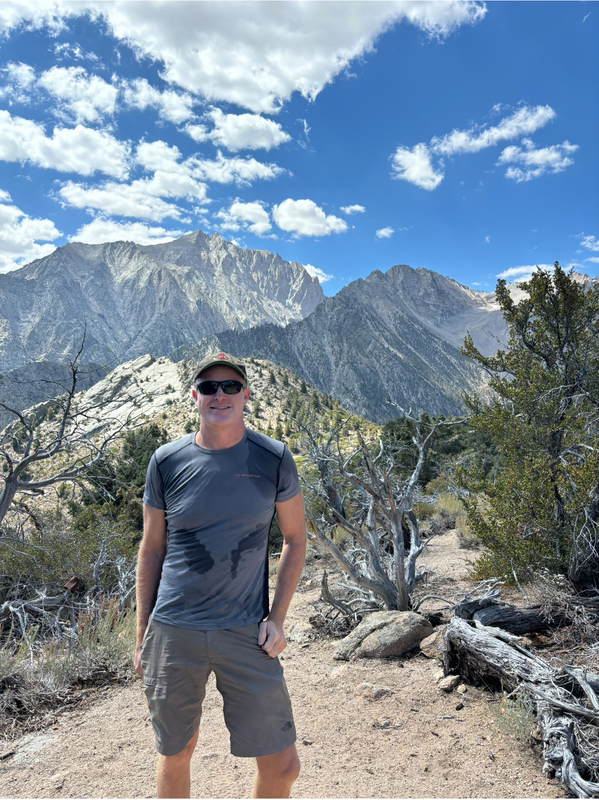

Unfortunately, the next mile of trail DESCENDS about 700 feet in elevation into the Shepherd Creek drainage. Although we were expecting this, it was tough to stomach this loss in elevation knowing how much mileage and elevation gain we were already undertaking on this day with our heavy packs. At the bottom of this fairly lengthy (maybe 1 mile or so) 700-foot descent, there was a water source from a subsidiary creek draining down the hill into Shepherd Creek. This was the first water source we had seen since we left Symmes Creek several hours before. We did not stop at this subsidiary creek but took note of it in case we would need water on our descent 2 days from now. We began ascending again, and after about 3 more miles, we reached Anvil Camp. It took us about 5.5 hours to get to Anvil Camp from the trailhead. Anvil Camp is at 10,300 feet and it was about 7 miles in to our adventure. We stopped here for a break, and we decided to add to our water supply here from Shepherd Creek, which runs directly through Anvil Camp. 
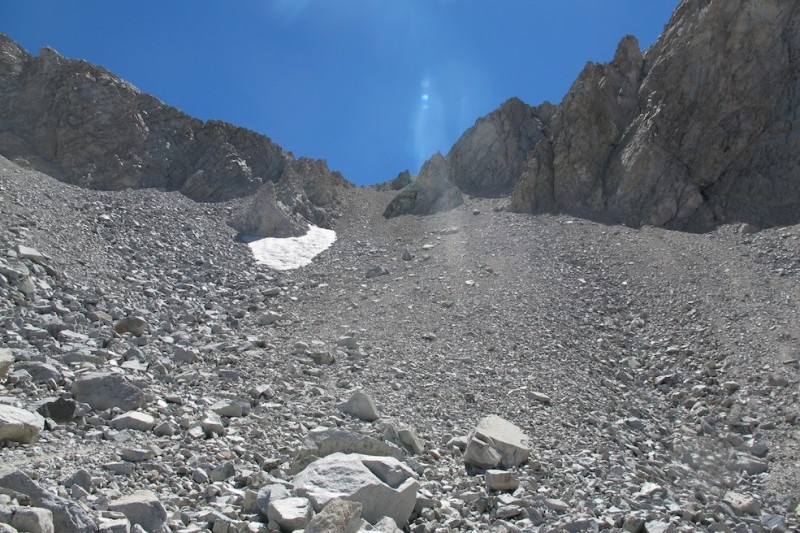
One thing to note at this point is the tree cover is surprisingly scarce on the 7 miles up to Anvil Camp. Although there were trees around, they were not thick enough to really provide us much cover from the sun. As we approached Anvil Camp, the cover was better and we felt like we were more in a forest, but other than the area around Anvil Camp, there is not much tree cover. And above Anvil Camp, treeline approaches quickly so there is obviously no cover there either. The trail in the area above Anvil Camp becomes very rocky and loose, and when peering up at the final stretch up to Shepherd Pass, it looks absolutely brutal and steep to get up there. Amazingly, the trail winds through the rocks and the steep sections, and the fact that this trail exists through here is a big deal especially considering many people hiking through here have heavy packs. The last 500 feet or so up to the Pass is steep and loose. Significant care needs to be taken here, as a potential fall here could be serious. Pics in this rocky, steep area: 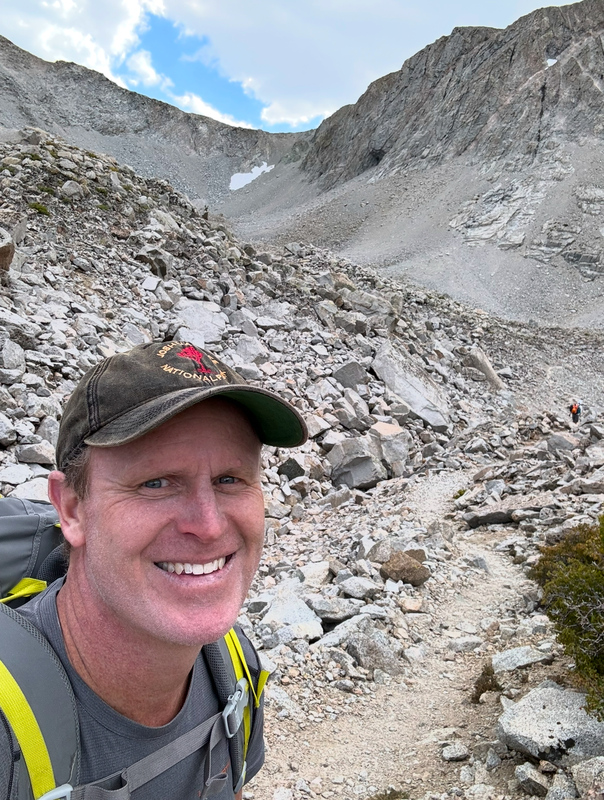

We plowed up this trail and finally made it to the top. It was a great sense of relief arriving at Shepherd Pass! Only about 50 feet further after reaching the Pass, Shepherd Pass Lake appeared and was obvious on the left side. We walked over toward the Lake and found a perfect campsite, and plopped our packs down, at 5:00 on this afternoon. The hike today from the Shepherd Pass Trailhead to Shepherd Pass was 9 miles and 6,500 of gross elevation gain, and it took us about 8 hours. Shepherd Pass Lake has an elevation of 12,000 feet. 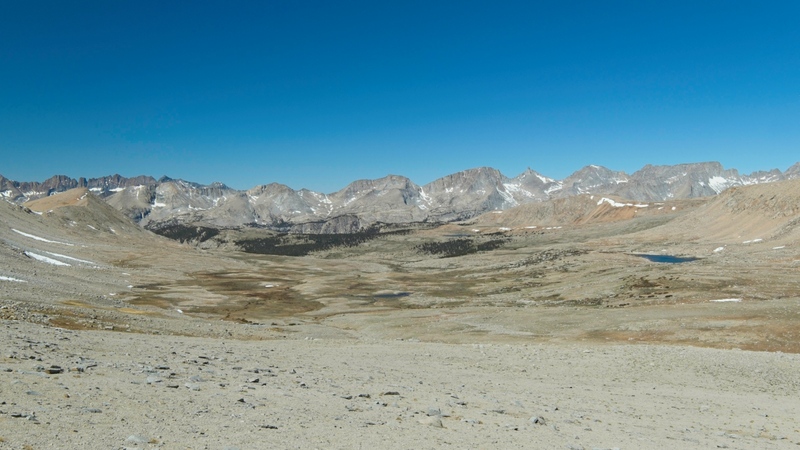
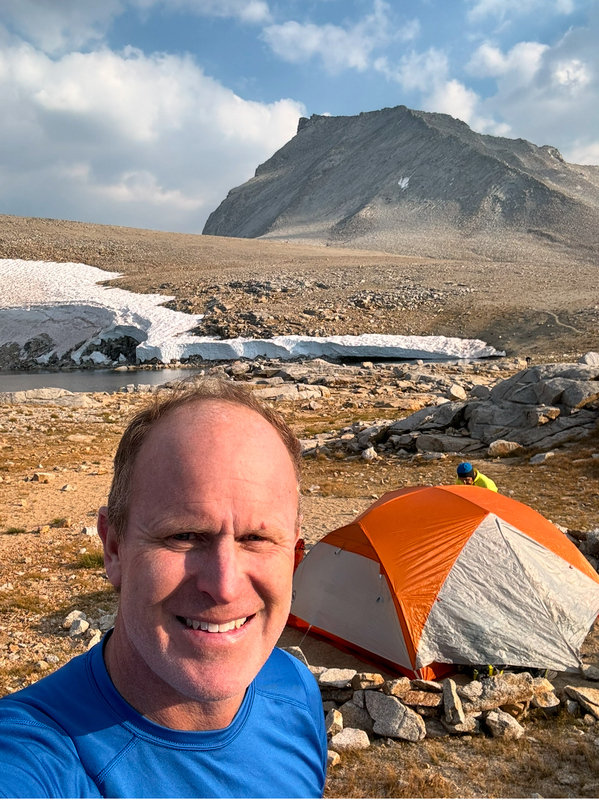
As we walked over to the Lake, we ran across a woman and began a conversation with her. As we began talking, she said that she recognized me. And then we discovered that she was Rose Angry, a Colorado climber, and Steve and I recognized her as well. We knew she had been on some climbs with our friend and climbing partner, Brad McQueen. It was really fun and crazy coincidental to run into her up there! On this day, Rose had summited Mt. Williamson, her last California 14er she needed to finish them all. Obviously some major congratulations were in order! After our conversation, she began her descent to Anvil Camp, and she stayed there for the night and packed out the next day. From the whole area around Shepherd Pass and Shepherd Pass Lake, Mt. Tyndall was staring us smack in the face… what an incredible view of Tyndall from our campsite. To the left of Mt. Tyndall and straight above the Lake, there was a hill which blocked our views of Mt. Williamson… we knew those views would be reserved for the next day. We set up our camp at a nice established spot probably 150 feet from the Lake. Pics of camp and the view of Mt. Tyndall from there: 

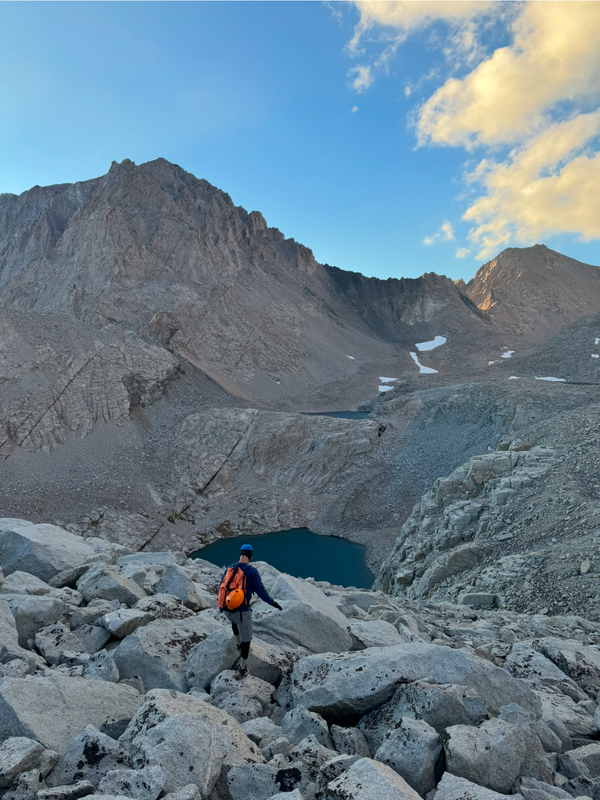
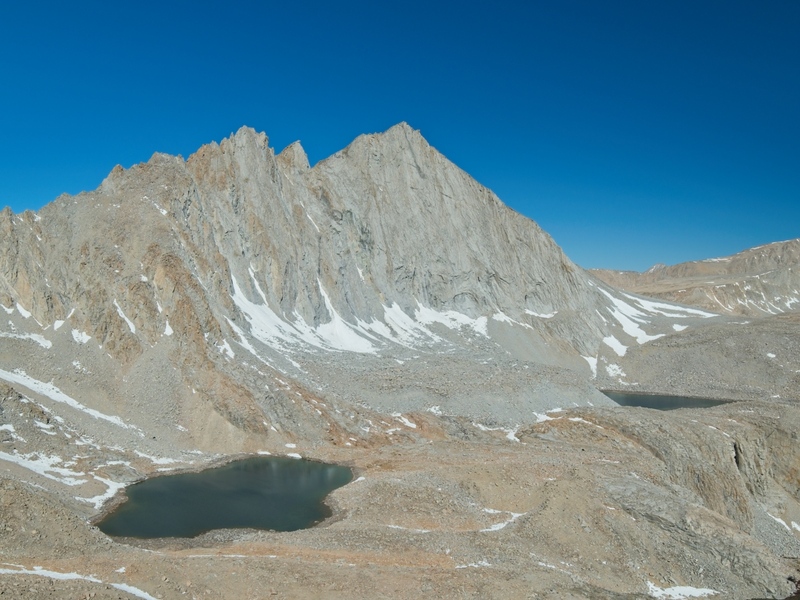
We organized all of our gear and hunkered down for the night. Eventually, as the evening progressed, several other climbers showed up at the Lake, resulting in 3 other tents not far away from us. So we would not be alone in our adventure the next day. The next morning, Monday 9/2, we were up at around 5:30 for a 6:00 start time on the climb to Mt. Williamson. I had a Camelback day pack I used for the summit bids. The first part of the hike was to climb the hill to the left of Mt. Tyndall. This hill was kind of a gentle start to the day. The terrain here was sandy and it was a gradual ascent of about 500 feet in elevation hiking up this hill. At the top of the hill, we were greeted with amazing views of Mt. Williamson and the Williamson Bowl. Up to our right here was an outstanding and neck-bending view of Mt. Tyndall towering above us. 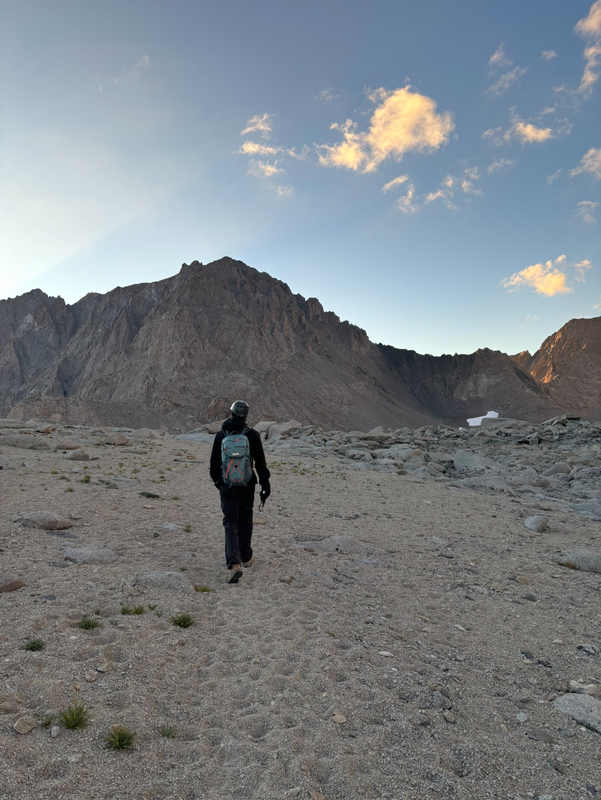
After taking in the amazing views, we began studying the Williamson Bowl. This is a great perch to look at the up-and-down traverse ahead. The initial aim is obvious, to descend down into the Bowl and hike across the protrusion between the first two lakes. From there, it is not so obvious as some of the terrain is obscured from view by the many hills ahead of us. Based on our research, we knew the route traversed through the basin and eventually turned left at a “Black Stain” marker which could be seen once arriving at a certain spot past all of the lakes. From here, the Black Stain cannot be seen, but we were confident we could make our way through the Bowl and easily find it. We began our traverse through the Bowl. These 2 pics help to show where the left turn up to the Black Stain and main couloir is: 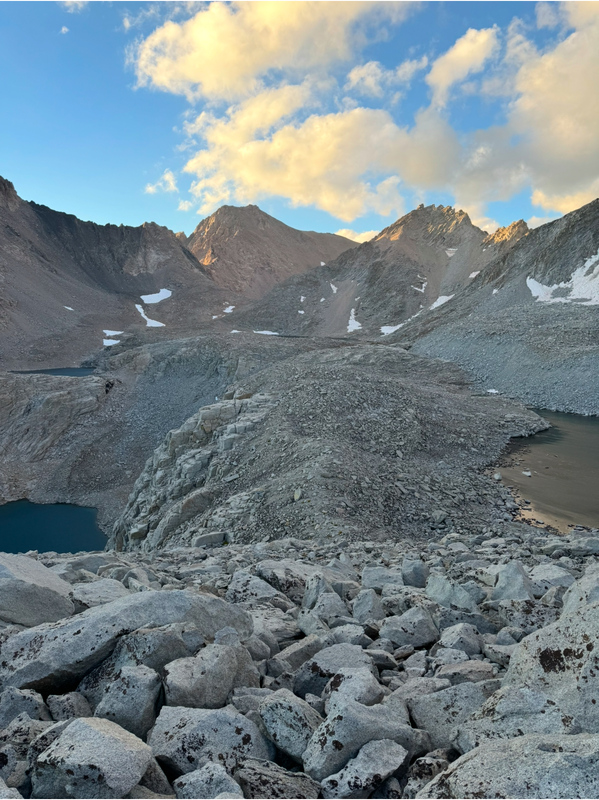
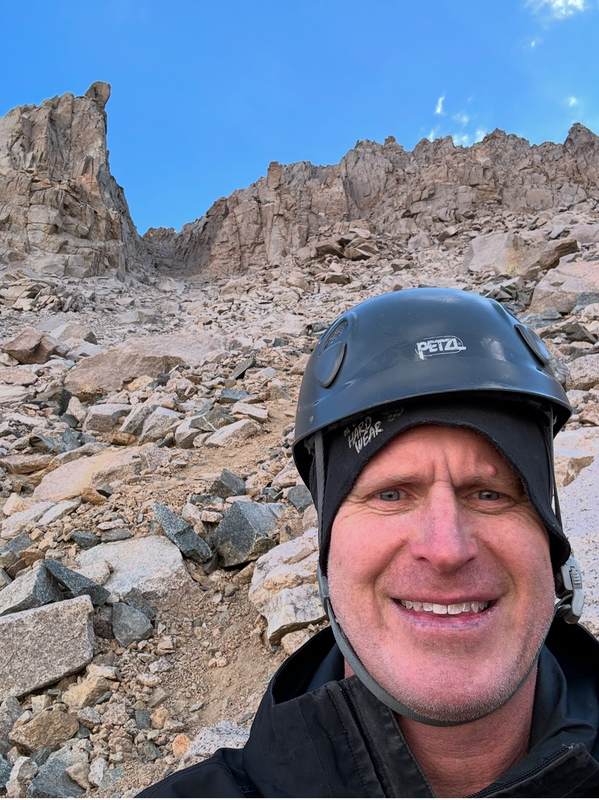
The initial descent was probably about 500 feet in elevation loss to reach the protrusion between the first 2 lakes. We hiked along this hill for a bit and then arrived at another shorter descent section. After making this 100-foot or so descent, we turned slightly to the right and hiked through a drainage of sorts, eventually arriving at another lake. We hiked through talus along the left side of this lake for a bit, and finally arrived at a spot just past this lake, marking the end of our “up-and-mostly-down traverse” and the beginning of our ascent. There had been cairns on our route through the Bowl, but sometimes they were scarce and difficult to locate. From our initial perch this morning with the great views of Mt. Williamson, we estimate we probably lost about 800 feet in elevation getting down to this final lake. There were 2 snowfields ahead of us on the upslope here, and in this section we identified the Black Stain up to our left. We also spotted another group of climbers ahead of us in the Black Stain area, about to enter the main couloir above the Black Stain. We approached the 2 snowfields ahead of us and then made a left turn between the snowfields, and began our ascent up toward the Black Stain. Once we made this left turn, we realized very quickly the long introduction to this hike/climb was over… the climb had just become extremely steep up the slope, and we were on our way up toward the main couloir and toward the ridgeline. I already had my helmet on... Steve helmeted up in this area. On our approach to the Black Stain, the couloir beyond became evident. There is a dramatic point to the left of the couloir and it becomes very obvious where the route goes. Pics: 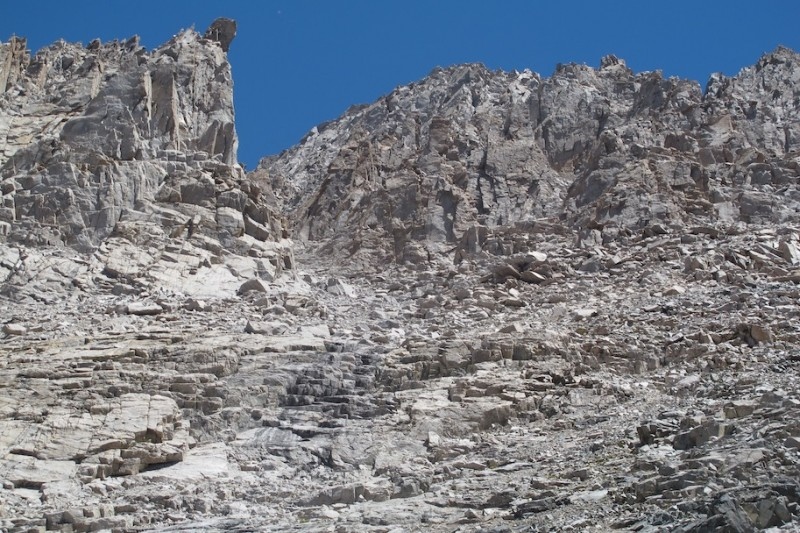

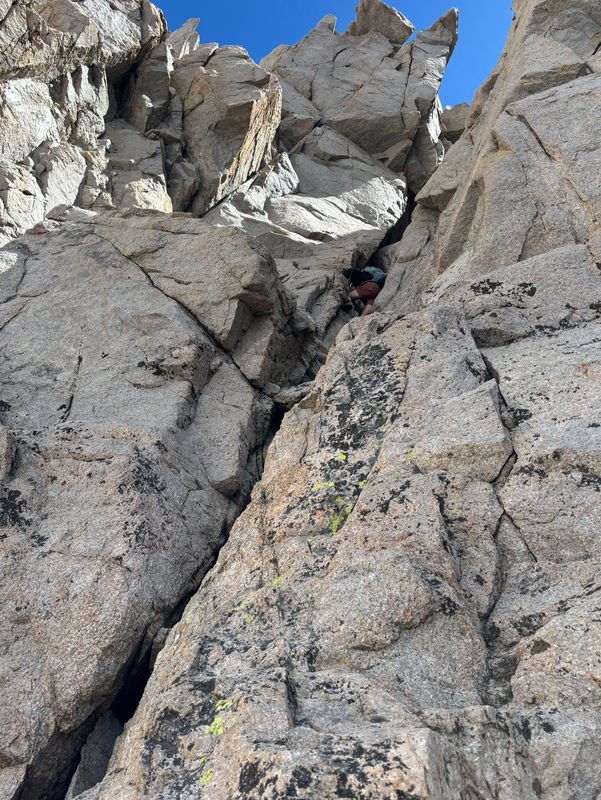
Steve and I entered the couloir and started our plow up it. It was a steep couloir, mostly Class 2, full of horribly loose rock, choss, dirt alleys, and scree. We just kept trying to find the best paths of least resistance and slowly made our way up the couloir. Toward the top of this couloir, the couloir splits to a certain degree, and although it is relatively obvious which one to ascend, we did ask ourselves the question at one point. Take the right couloir. Not long after this split, and after about 2,000-2,500 feet of brutal climbing up this couloir from the last lake and snowfields, we reached the crux wall climb up to the ridgeline. 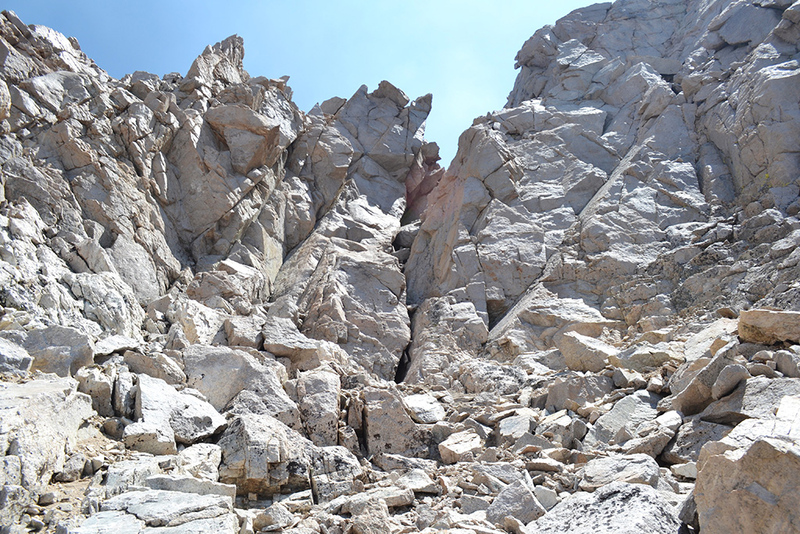
Steve and I have a decent amount of experience with Class 3 and Class 4 climbing, especially on Colorado’s 14ers. This crux wall on Mt. Williamson is about 100 feet long and high, and it is very similar to the Class 3 and Class 4 stuff we have encountered many times before in Colorado. For part of the initial climb up this wall, the ascent is up a crack which becomes somewhat inset for about 30-40 feet or so. The inset part is where the most tricky climbing resides. I would say most of the crack is Class 3, with 2-3 spots where you have to consider your hand and foot placements more carefully, possibly making these spots in the Class 4 range instead of Class 3. But if you have similar Class 3 and 4 experience to what I discuss here, you should not have any problems with this wall. 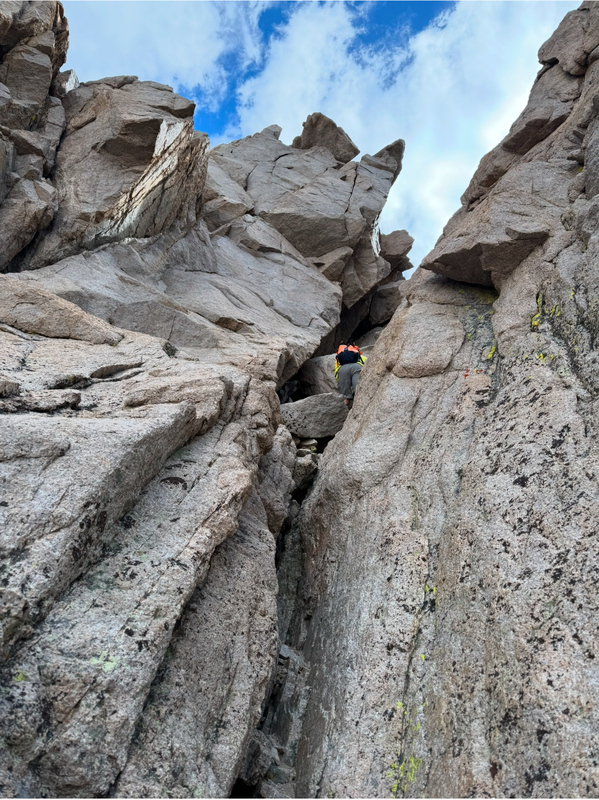

At the top of the wall, we climbed through a gap in the ridge to a wide-open summit-plateau-type of area on the other side, and Mt. Williamson’s eastern sub-summit was directly ahead of us. 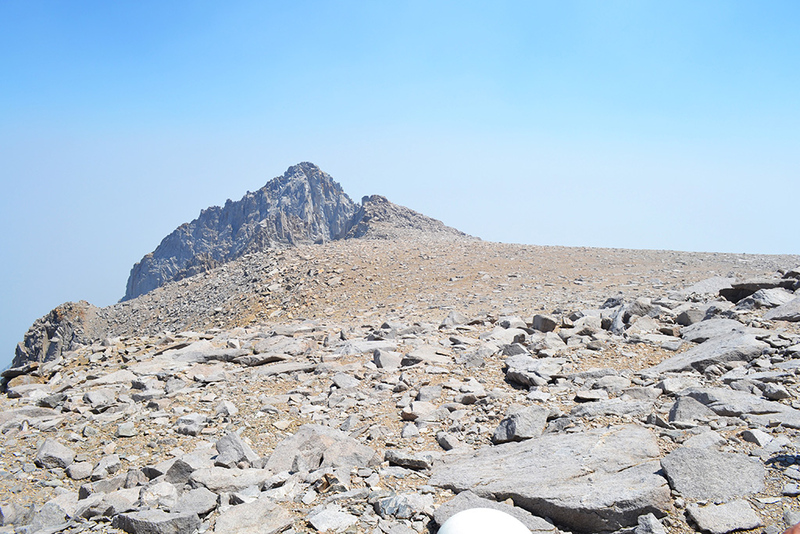

The remaining route up to the summit was a talus climb up a ridge to our right. From this spot, it was only about 10-15 minutes and about 200 vertical feet up this talus to the Mt. Williamson summit! The summit elevation is 14,380 feet. 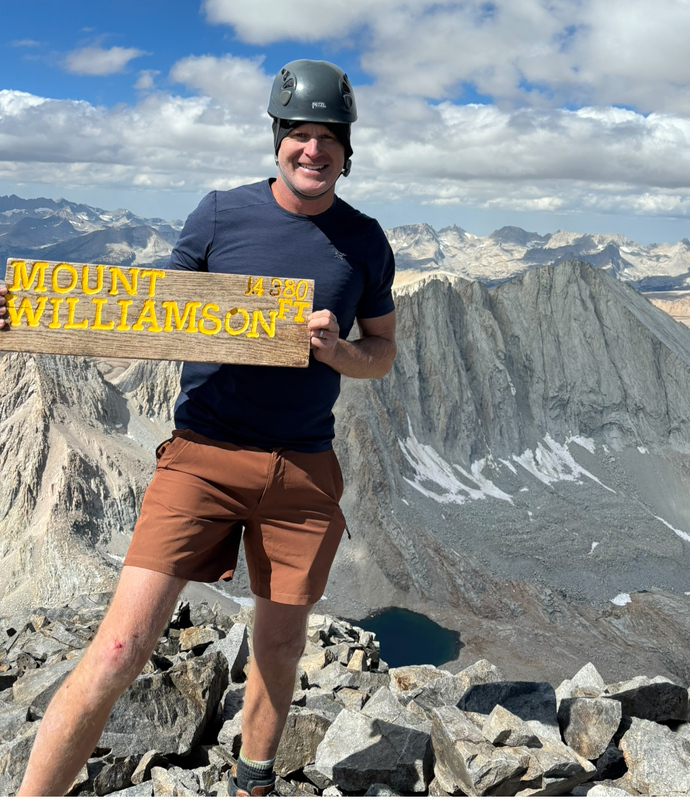
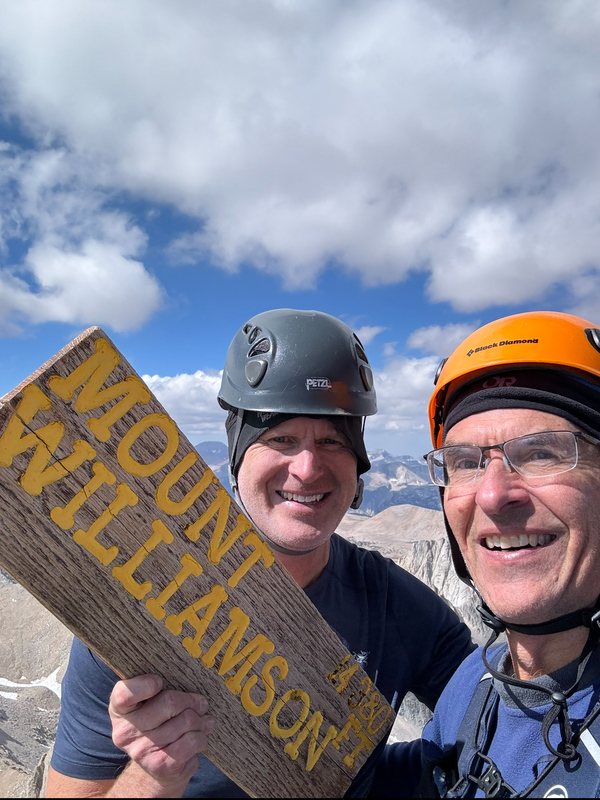
We arrived at the summit at 10:30! So it was about 4.5 hours to the summit from camp. It was a true rush and incredible sense of achievement to be at the Mt. Williamson summit, after so much effort and mileage the past two days to get up there. The views were incredible, and we had a great weather day on our hands, with the exception of a bit of non-threatening cloud build-up to the northeast. We could obviously see Mt. Whitney and Mt. Russell to the south, and many, many high peaks to the north. We were on the summit for about 15 minutes before starting to head back down. We retraced our steps back to the saddle gap, and the descent of the crux was probably more difficult than the ascent. There were a few spots where we downclimbed facing in, to be the safest. But generally, it was not a difficult descent. The descent down the couloir back into the Williamson Bowl, however, was long, strenuous and annoying, with the constant loose rock and scree. We slowly and carefully made our way down the couloir back to more reasonable ground in the area below the Black Stain and the 2 snowfields, and then retraced our up-and-down steps through the Williamson Bowl and between the lakes in the Bowl. Once across the Bowl, we had an ascent of about 500 feet up to climb out of the Bowl back to the original perch from this morning. This ascent was tiring, but not too bad as we slowly made our way up. At the top, we again marveled at the incredible views around us from this perch, and then we made the easy and gentle descent back to the Lake at Shepherd Pass. We arrived at the Lake at around 2:30 that afternoon, so it was an 8.5 hour day, covering about 6 miles on the round-trip. It was a beautiful and sunny afternoon, and we relaxed at our campsite for several hours in the really nice and relatively warm weather. It was interesting to note that no other climbers were present on this afternoon/evening… it appeared all of the other climbers and campers had cleared out as the extended weekend was ending. Indeed, we did not see another soul the rest of the trip above Anvil Camp. 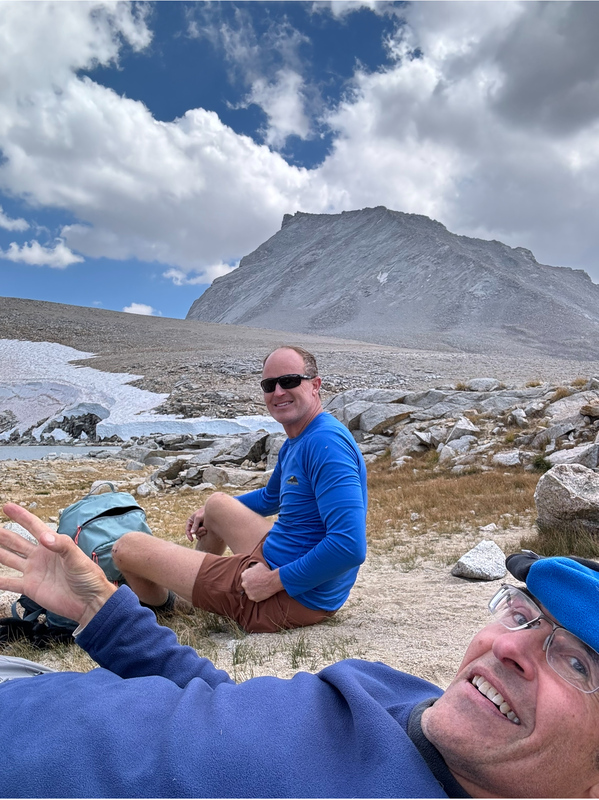
We ate dinner, organized gear, and retired for the night in the tent at around 6:00 or so as the temperature cooled down up there. Wake-up time on Tuesday morning 9/3 was 5:00, and we were able to start on our climb of Mt. Tyndall at about 5:30. We retraced our initial steps from the previous day, and about halfway up the hill from the Lake, we made a right turn toward Mt. Tyndall. View behind us at this point with the sun coming up: 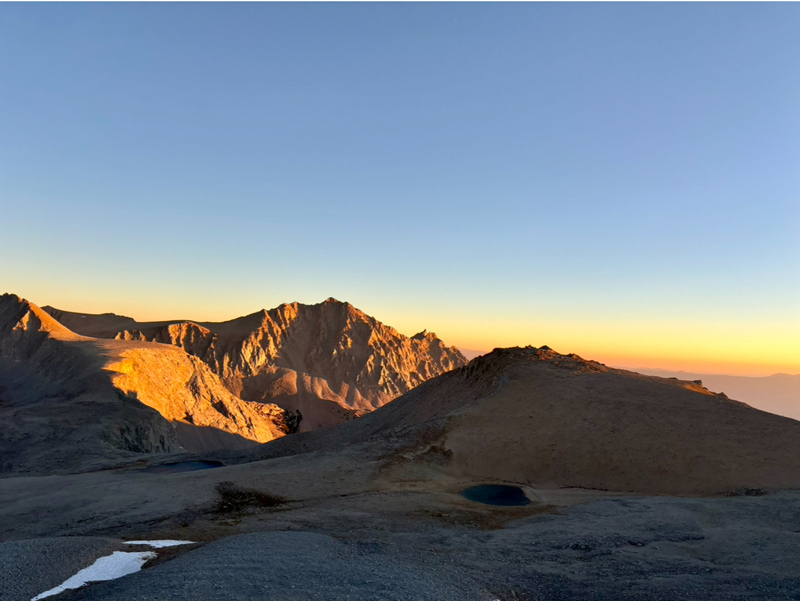
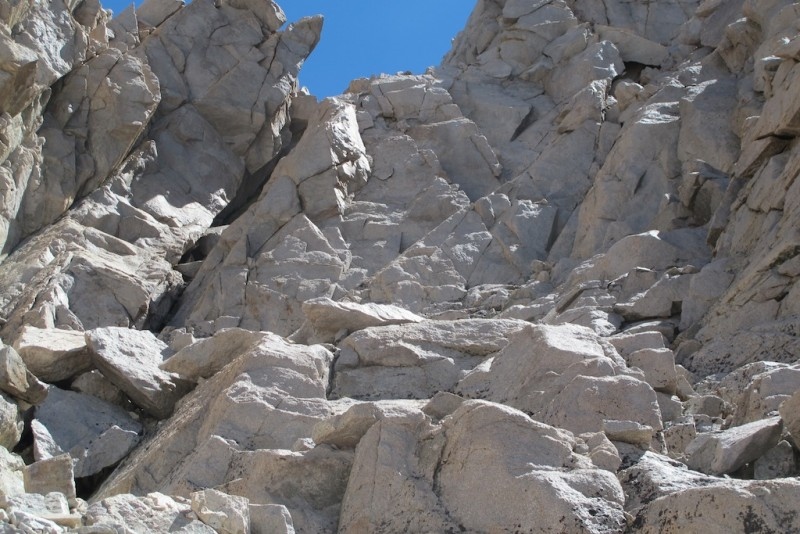
The view of Mt. Tyndall from the Lake makes it appear Tyndall has a long flat summit, with the true summit residing on the far left end of this long flat-looking summit. As we approached Mt. Tyndall, our aim was for the obvious rib/protrusion that extends from the base of the mountain all the way up to about halfway between the ends of the long flat-looking summit. The best route up Tyndall is staying just to the right side of this rib/protrusion, all the way up to just short of the ridgeline. Pic: 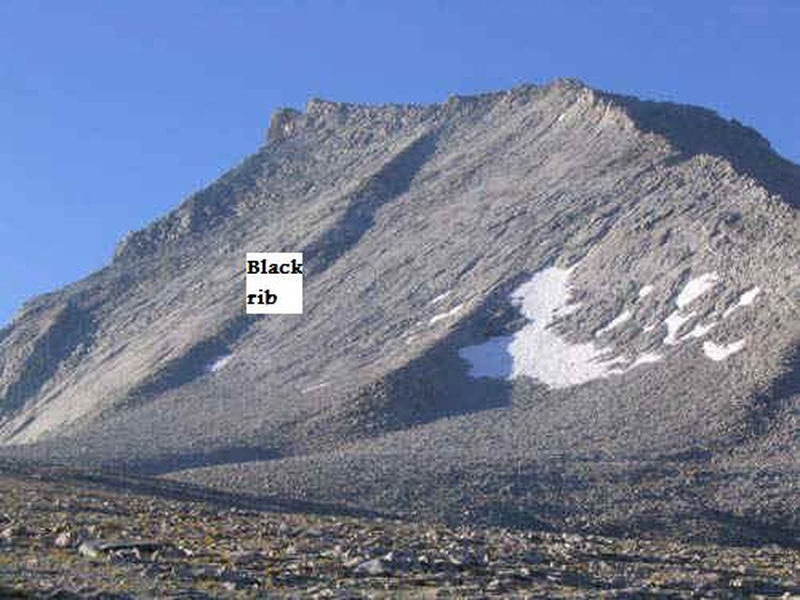
We engaged this part of the mountain, and the route was full of junky choss, scree, talus, and loose rock all the way up. There were a few areas with some solid rock as relief, but it was mostly junk going up this slope, and it was primarily Class 2 with maybe a few easier Class 3 sections. We plowed up just like we did the day before in Williamson’s scree chute, although this ascent was a decent bit shorter than the couloir on Williamson. Pics of me climbing: 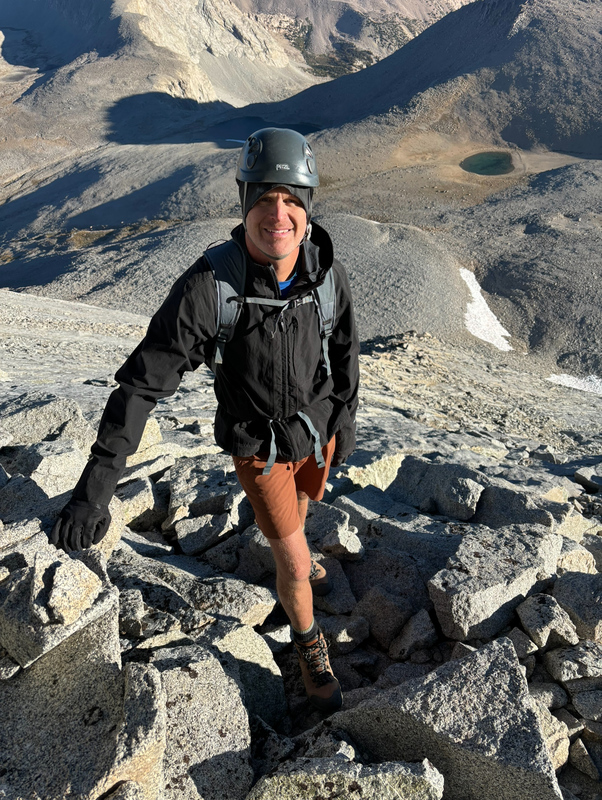
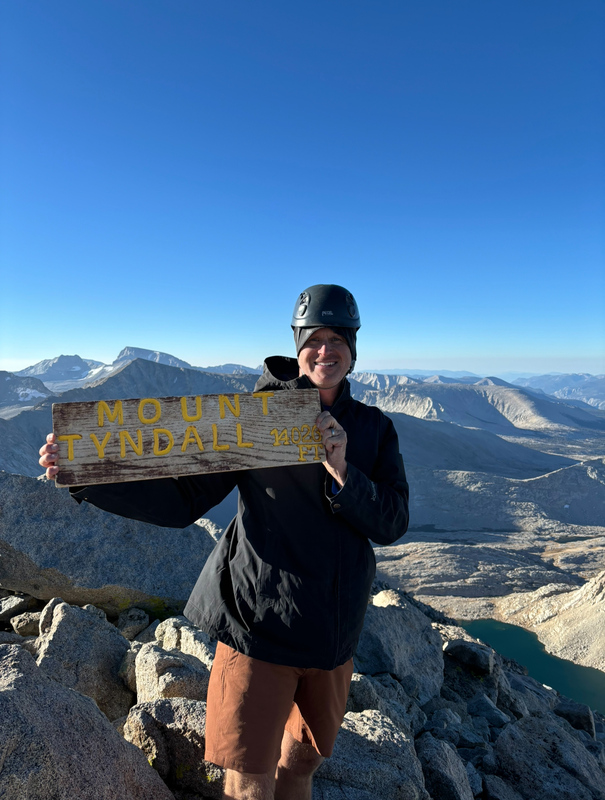
We reached a point about 100 feet below the ridge, where we crossed over to the left of the rib/protrusion, kind of where the rib/protrusion ended, and then we ascended a short Class 2 couloir up to the ridgeline. It was very windy once we reached the ridge. The traverse across the ridge was fun on large talus, and it only took us about 10 minutes to cross the ridge and reach the summit, at about 7:45. Mt. Tyndall is an airy and outstanding summit, at an elevation of 14,026 feet. It was a blast and rush to be up there and to complete this climb! We spent about 10 minutes up there in the windy and cold conditions and took in the absolutely stunning views of Mt. Williamson, Mt. Whitney, and the rest of the Sierra! 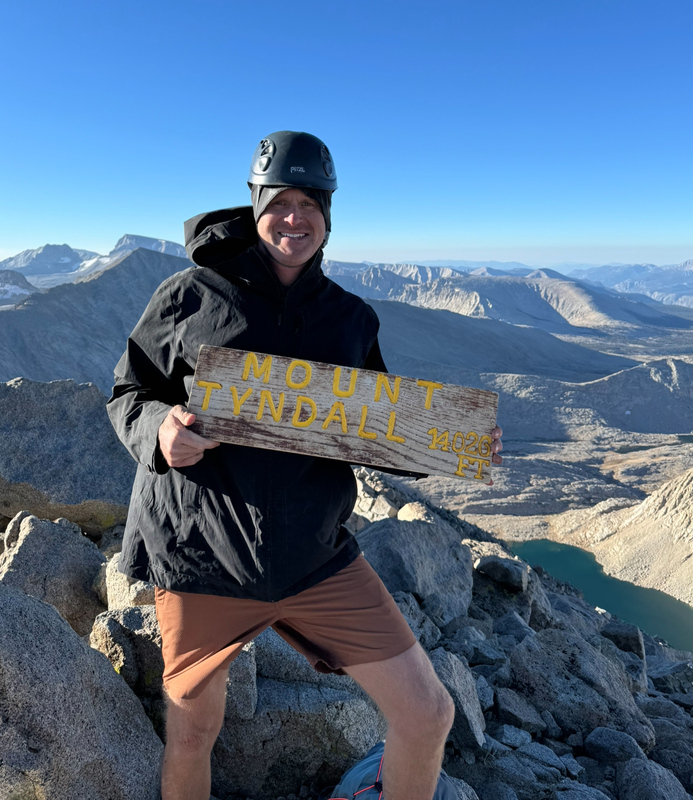

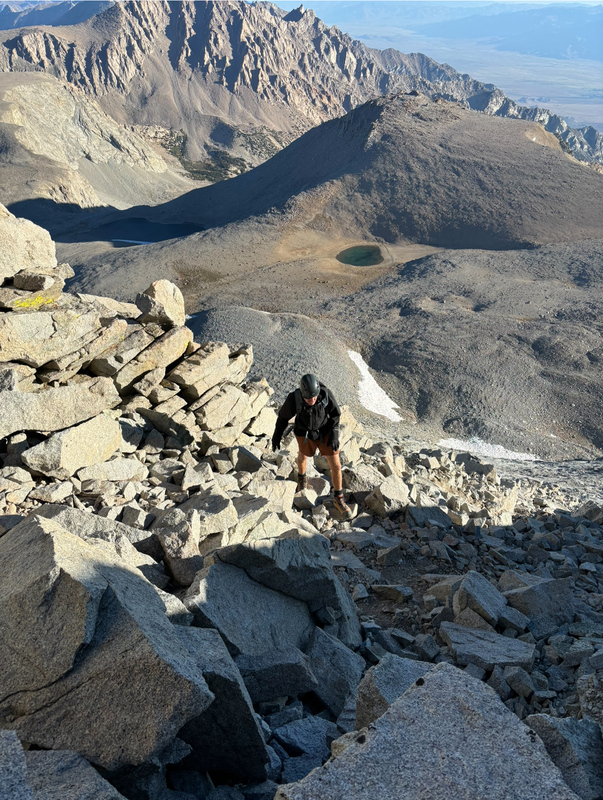
The descent down Mt. Tyndall was straightforward and we just retraced our steps back down the same route. Here I am on the descent within the choss: 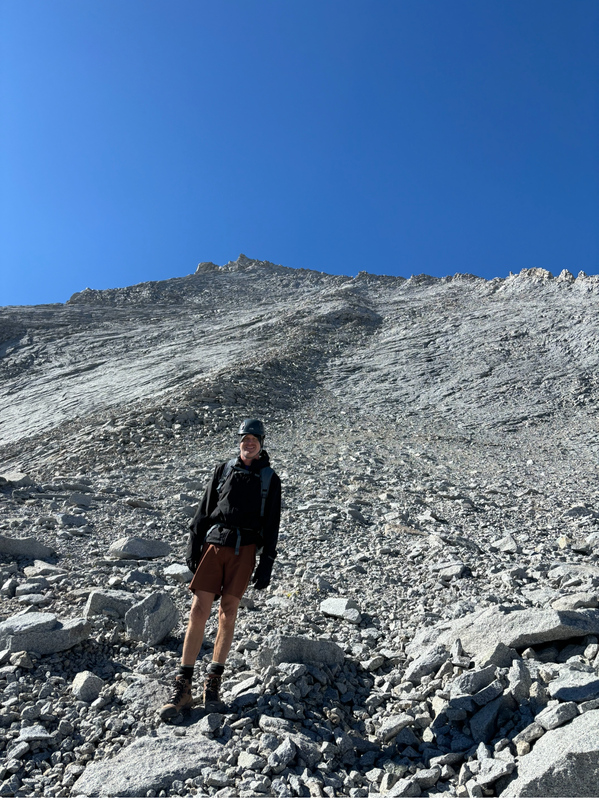
Before long, we were through all of the loose rock and on more reasonable terrain, and we returned to the Lake by about 9:30. The trip up to Mt. Tyndall and back took us about 4 hours and covered about 2 miles on the round-trip. After taking a short break, we packed up all of our gear into our heavy packs, and began our 9-mile descent back to the trailhead. The initial descent from the Pass was dangerous and again extreme care needs to be taken here especially because of the heavy packs we were carrying. After descending these switchbacks, the trail was relatively gentle for a long while, through Anvil Camp and back down to the small stream crossing mentioned before as a water source. This was the spot on our approach where the 700-foot descent had ended and we began the ascent to Anvil Camp. But here, on the descent, we would need to climb up the 700 feet out of the Shepherd Creek drainage to the pass, and we were not relishing this part of the hike. We took a break here and refilled our water bottles before beginning the 700-foot ascent. This ascent was tough, but not too bad when considering the overall effort this whole trip had taken and the other more difficult facets to the adventure! We made our way up to the pass, and we arrived there at about 2:00 and took in one final incredible view of Mt. Williamson from there. We then made the descent back into the Symmes Creek area and hiked down the creek area on trail back to the trailhead. The creek crossings in this area were kind of annoying but were easier to find on the descent than they were on the ascent two days earlier. We made it back to the trailhead and completed this incredible adventure at about 3:30 on that afternoon, so it was 10 hours on the trail on this day. All in all, we were on the trail from 9:00 a.m. on Sunday 9/1 until 3:30 p.m. on Tuesday 9/3 and were successful in summiting both Mt. Williamson and Mt. Tyndall on this trip. Our 3 days were broken up with 8 hours of hiking on the first day, 8.5 hours of hiking/climbing on the second day, and 10 hours of hiking/climbing on the third day. The total mileage on this adventure was approximately 26 miles, with a total gross elevation gain of approximately 12,600 feet. The total time actually hiking/climbing was about 26.5 hours. What an incredible trip, and it was a huge sense of accomplishment to be successful on these mountains and a relief that we made it according to plan with no hitches! After finishing the adventure, we started driving, picked up something to eat in Lone Pine, and made the drive back to Vegas that evening. We booked a hotel in Vegas and flew back to Kansas the next morning (Wednesday 9/4). Great trip! Thumbnails for uploaded photos (click to open slideshow): ")
")
")
")
")
")
")
")
")
")
")
")
")
")
")
")
")
")
")
")
")
")
")
")
")
")
")
")
")
")
")
")
")
")
")
")
")
")
")
")
")
|
| Comments or Questions | ||||||||||||
|---|---|---|---|---|---|---|---|---|---|---|---|---|
|
Caution: The information contained in this report may not be accurate and should not be the only resource used in preparation for your climb. Failure to have the necessary experience, physical conditioning, supplies or equipment can result in injury or death. 14ers.com and the author(s) of this report provide no warranties, either express or implied, that the information provided is accurate or reliable. By using the information provided, you agree to indemnify and hold harmless 14ers.com and the report author(s) with respect to any claims and demands against them, including any attorney fees and expenses. Please read the 14ers.com Safety and Disclaimer pages for more information.
Please respect private property: 14ers.com supports the rights of private landowners to determine how and by whom their land will be used. In Colorado, it is your responsibility to determine if land is private and to obtain the appropriate permission before entering the property.


