Download Agreement, Release, and Acknowledgement of Risk:
You (the person requesting this file download) fully understand mountain climbing ("Activity") involves risks and dangers of serious bodily injury, including permanent disability, paralysis, and death ("Risks") and you fully accept and assume all such risks and all responsibility for losses, costs, and damages you incur as a result of your participation in this Activity.
You acknowledge that information in the file you have chosen to download may not be accurate and may contain errors. You agree to assume all risks when using this information and agree to release and discharge 14ers.com, 14ers Inc. and the author(s) of such information (collectively, the "Released Parties").
You hereby discharge the Released Parties from all damages, actions, claims and liabilities of any nature, specifically including, but not limited to, damages, actions, claims and liabilities arising from or related to the negligence of the Released Parties. You further agree to indemnify, hold harmless and defend 14ers.com, 14ers Inc. and each of the other Released Parties from and against any loss, damage, liability and expense, including costs and attorney fees, incurred by 14ers.com, 14ers Inc. or any of the other Released Parties as a result of you using information provided on the 14ers.com or 14ers Inc. websites.
You have read this agreement, fully understand its terms and intend it to be a complete and unconditional release of all liability to the greatest extent allowed by law and agree that if any portion of this agreement is held to be invalid the balance, notwithstanding, shall continue in full force and effect.
By clicking "OK" you agree to these terms. If you DO NOT agree, click "Cancel"...
The creek crossings to get to the Rockdale Trailhead were easier than I’d anticipated. 6-8 inches of water weren’t difficult to pass (it’s now September in a lower snow year). In the dark the willows and water made navigation fun. Colorado pinstriping indeed.
There were only two stream crossings, just at the beginning of the 4WD road, but tons of short ups and downs and puddles. I drove slowly and I’m pretty good at navigation, but still managed to hit the underside of my truck a couple of times (I have a stock Tundra). This picture is from one of the easier areas of the drive. Most of the difficult areas have tree cover, making pictures difficult.
At 10880’ there’s a sign that says the road ends (even though it looks like it goes further). There are several large camping sites here. I parked my truck and got out my gear
I was on the trail at 5am, following the 4WD dirt road south.
After hiking for .3 of a mile I came to the ‘old’ parking area, now covered by an avalanche. There’s a nice trail through this if you stick to the left.
After the avalanche area the 4WD road picks up again
After hiking for .75 miles total I came to the junction of the trail and the road. Both ways go around the lake. I chose to go up and over the hill
Giving me a good look at Cholsey Lake
And then I followed the trail back down the hill and into the basin.
This is a class 1 trail that heads south through pine trees, willows, and some small creek crossings
At around 3 miles of hiking the trail started turning left, curving southeast. Here the trail became faint, but there were plenty of well-constructed cairns to guide the way up to the pass at 12,500’. Off to my left I saw a huge bull elk, bounding away.
At this point the trail was now gone, but I had a great view of Pear Lake. Pear Lake wasn’t where I was headed however. I turned left and followed the ridge northeast, staying as high as possible.
My goal was to aim for this gully. There are a lot of ups and downs here, so I tried to stay high.
Here’s the path I took, step by step, to get to the gully
The safest way to approach this gully is to start out by going left around this boulder, and then straight up, following the scree trail
There are a lot of loose rocks here, the kind that cause rockslides, so watch your footing.
The top of the gully put me at 12,860’. Now it was time to head back down, staying as high as possible, but still losing about 300’ of elevation as I traversed my way over to Magdalene’s ridge. Here’s an overall of the route I took
And step by step: First, down the gully. The most stable area is to stick to the left, near the rock
Then I headed southeast, staying high
The rocks give way to tundra. I kept aiming for the ridge
Keeping Silver King Lake to my right, I made it to the base of the ridge. Here there’s a cairned trail that picks up and will lead you to the summit. It starts by zig-zagging up and around the first ledge
Then following the well cairned trail to the saddle
It looks like the trail has been covered in rockfall in areas, but the cairns help to stay on course
Once at the saddle I turned right and followed the ridge southwest
There are several social trails up this ridge, but I was able to summit by sticking to the ridge proper, keeping this class 2
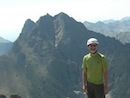
I summited Magdalene Mountain at 9:40am
Magdalene Mountain:
There are 2 summit registers here.
Time to head back the way I came. First, down the ridge
Once at the saddle I turned left and followed the trail back down the mountain
Here’s an overview of the route back to the pass
And step by step:
Here’s looking back up at the gully. Once again, I stayed north to ascend
From the top of the gully, here’s the overall route back to the pass
And step by step. Down the gully and across the rocks
Staying high
Then taking the plateau back to the pass, where the trail picks back up again
I turned right at the cairns and headed back down to the basin
I looked longingly at the ridge that connects Pear Peak with PT 13517. I really wanted to do that ridge today. It was an absolutely perfect day, but I was short on time, as the drive in had taken longer than expected. I had to get back home and finish working for the day. Oh well, it will be a fun adventure in the future. Here are some pictures of the route back down. Spirits high, I rather enjoyed the hike out.
Back to the lake and up the hill
Past the avalanche area
And back to my truck. I made it back to my truck at 2pm, making this a 15.32 mile hike with 4074’ of elevation gain in 9 hours
Thumbnails for uploaded photos (click to open slideshow):
All of the trip reports I've seen use this route or doing the slog all the way up Pine Creek. In early August a friend and I did it differently. We started at the top of Cottonwood Pass, went N on the CDT to Texas Creek Trail, east to Magdalene Mine Trail junction, and camped. The next day we went N on the Magdalene Mine trail to about 11,800, West to the ridge at about 12,400, then North to the sub peak and East to the summit. Back to camp for another beautiful night and out the next morning. We loved being in the basin and doing the approach that way. I realize that many people don't have the luxury of time or are pursuing goals based on speed, but for me I enjoy sipping it like a Bordeaux, rather than slug it like PBR. I did something similar on Ice and North Apostle the next week, and was in the basin alone all night. Magical.
Caution: The information contained in this report may not be accurate and should not be the only resource used in preparation for your climb. Failure to have the necessary experience, physical conditioning, supplies or equipment can result in injury or death. 14ers.com and the author(s) of this report provide no warranties, either express or implied, that the information provided is accurate or reliable. By using the information provided, you agree to indemnify and hold harmless 14ers.com and the report author(s) with respect to any claims and demands against them, including any attorney fees and expenses. Please read the 14ers.com Safety and Disclaimer pages for more information.
Please respect private property: 14ers.com supports the rights of private landowners to determine how and by whom their land will be used. In Colorado, it is your responsibility to determine if land is private and to obtain the appropriate permission before entering the property.