Download Agreement, Release, and Acknowledgement of Risk:
You (the person requesting this file download) fully understand mountain climbing ("Activity") involves risks and dangers of serious bodily injury, including permanent disability, paralysis, and death ("Risks") and you fully accept and assume all such risks and all responsibility for losses, costs, and damages you incur as a result of your participation in this Activity.
You acknowledge that information in the file you have chosen to download may not be accurate and may contain errors. You agree to assume all risks when using this information and agree to release and discharge 14ers.com, 14ers Inc. and the author(s) of such information (collectively, the "Released Parties").
You hereby discharge the Released Parties from all damages, actions, claims and liabilities of any nature, specifically including, but not limited to, damages, actions, claims and liabilities arising from or related to the negligence of the Released Parties. You further agree to indemnify, hold harmless and defend 14ers.com, 14ers Inc. and each of the other Released Parties from and against any loss, damage, liability and expense, including costs and attorney fees, incurred by 14ers.com, 14ers Inc. or any of the other Released Parties as a result of you using information provided on the 14ers.com or 14ers Inc. websites.
You have read this agreement, fully understand its terms and intend it to be a complete and unconditional release of all liability to the greatest extent allowed by law and agree that if any portion of this agreement is held to be invalid the balance, notwithstanding, shall continue in full force and effect.
By clicking "OK" you agree to these terms. If you DO NOT agree, click "Cancel"...
Trails to nowhere and Mikes' or Leftys' day on Lindsey
Trails to nowhere and Mikes' or Leftys' day on Lindsey
I have never been on a route with so many conflicting trails. Usually, I refer to Bill's route descriptions for crux info, but Lindsey is a hike that needs good study of the map, the contours, exactly where things were in relation to mountains, creeks, etc.
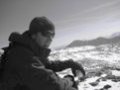
I drove down to the trailhead on Friday afternoon in a rental Mazda AWD. The little traction light only came on once or twice as the road is pretty easy to make it all the way to the trailhead. Lower clearance vehicles or 2wd probably need to mind tire placement a bit, and always a good idea to note your last turnout in case you have to back up, as the road is narrow. I pulled in around 5pm, and snagged a spot near the trailhead sign. There seem to be 3-4 spots just to the left and downhill of the trailhead sign, and those are the only mostly flat ones in the parking area. This guy was hanging around, and did so until after dark.
I was worried that critters might get under my car overnight, but a gal pulled in next to me with a dog. She let the dog run around (on leash) and it sufficiently tracked all around my car; whether it was his scent or luck, I didn't hear a thing.
I did some recon down into the valley Friday evening, but didn't go far enough (see below) to see the river crossing, and didn't see anything resembling a log crossing. Back to the car, and settled in for a poor nights sleep. The Mazda's seats don't fold completely flat, so it felt that I was on a broken Craftsmatic adjustable bed.
It was windy and (light) rainy all night, so I snoozed through the alarm and didn't get going until 5:45am when the clouds were clearing. It was a nice to start without the headlamp; I wouldn't want to try to decipher the route in the dark. Looking down into the first valley (taken on the way out)
Down into the valley, after working my way south on many joined and muddy trails, I came to this area. On close study of the route description, this clearly isn't the Lily Lake junction, but it is close enough to be confusing.
Take the main trail up and to the right. It will leave the river, but rejoin shortly. Finally I came to the true junction, no sign, but a previous TR suggested to look for the cuts in the trees, and there they are.
Very shortly after this, if you are looking left, you will come across the log crossing. It isn't much, but it works. Poles extended all the way, careful on the logs because none of them are secure, some of them want to sink a bit, but I came across dry.
Following the trail up next to the boulder field was steep and tiring. Again, there are many joined trail segments. I tended to stay near the boulders, and managed to get up without much trouble. Finally, I popped out against the creek and came to the crossing. I found it to be better to stay on the left side for another 50 feet or so, and then the crossing was much easier. You can see in the photo that there are bigger rocks farther upstream, and that is the place to cross.
A little ways farther up the trail, looking back down on the creek
Again, evident if you study the route, but a ways into the basin, the trail stays on the right side of the creek, and is quite a bit higher than the drainage. You drop down a bit to cross the basin.
From across the basin, looking back. Important to remember that you swing wide to the left to gain the ridge on the way down. Once again, a false trail went down the center of the drainage, and I had to backtrack some to get on route.
Looking up toward the saddle; you can't see a boulder field that must be crossed to gain the saddle. What looks like the saddle, or just below it, is the flat area before the boulder field.
Looking down from the saddle; the folks in the far distance are near the flat area described in the route description.
And the look ahead. By now, there was a group of about 6 people on the saddle; and we all were hoping the ridge was easier than it looked. Only 4 of us chose the ridge, the rest took the gully.
I took this on the way down, but it shows a rib area (dark rocks in upper center). If you don't want the practice or fun, you could easily stay on the trail to just past here and then climb up to the south of the rib, after you walk past it. I think it is just beyond a tight switchback.
Looking back down on the lower ridge. The guy in the photo came up the right hand (as you are climbing) side of the rib and had to cross over near the top
If you look closely, the other two guys are right of center, crossing over the rib about half way up. If you follow the rib to the top, there is a bit of exposure and scrambling. Enough to notice, but nothing compared to what is ahead.
Looking up. Perhaps can't tell from the photo, but it does look easier the closer you get. What was concerning to me was it looked like a whole lot more than the 30' that the route description advertises
And no surprise, we stayed too high on the ridge. We were together at this point. I elected to backtrack, downclimb about 50' and traverse into the gully up to the chimney. The others downclimbed the sharp points. You can see from the photo that for an average hiker (me), it is just as quick to backtrack, as I am above these guys at this point. I traversed across in the lower right part of the photo, where you can see the grass clumps, with no trouble.
Interesting thing about the route up to the chimney (if you traverse low into it), is that it is not that bad at all. If you are focused on your hands and footing, you easily find yourself up at a small ledge area with (surprise) about 30' left to get to the top. Taken from around that ledge area, the two lead guys went up and right, the guy in blue was coming across and to the left, and I ended up the center with the upper left exit.
Maybe the grass is always greener, but it looked like the right side had the toughest climbing.
For me, it was up the chimney. I didn't think the chimney itself was too bad up to the top 10-15' or so, but the traverse around was exposed with a very narrow ledge. It is pretty obvious where the chimney gets tough and time to exit left
From the same ledge area, if you look left, this is the class 3 route around. I can't remember which line I took coming down, but it isn't bad at all.
Topped out, looking down into the gully. I had to come back down the ridge about 10-15' to get this view, as the class 3 or the chimney left will put you on the ridge uphill a bit. Notice the cairn on the right side of the photo (it is circled in a later photo), this is an important landmark if descending the ridge.
The other two guys popping out from the climber's right side route
And the guy in blue after the class 3 option. I think that the chimney left puts you out above the cairn. The route moves off to the climbers left and gains the ridge a bit higher up.
It was interesting that from the photo above, the climber couldn't see a ready exit, but from back on the ridge, we could see that he only had one more push and he would be up on the easy ledge. I have been in his shoes; we pointed the route and he made quick work of the ascent.
Above the crux, the "easier ground" is no cakewalk, but is a fun walk/scramble up the ridge. It did seem a bit long to me.
Finally from the false to the true summit, we were on top. Interesting to see the clouds below us. I summited at about 9:15am approximately 3.5 hours up
It was also interesting, and I have no idea how this was discovered, but out of the 7 people on the summit, there were 3-4 guys named Mike, and 3-4 guys who were left handed. There was only one person who was neither named Mike nor was left handed. World domination by the lefty Mikes is underway.
A few of the guys left the summit for the gully, and I followed. Before the trail split, I bid my goodbye; I had to try the ridge on the way down. I took the class 3 option coming down. It was a fun downclimb, with only a couple of face in points.
Although the light isn't great, this show captures a lot of key points for the crux. First, it shows the class 3 work around; second and circled is the ledge area where climbing the chimney gets more tough, and third, it shows how far below the ridge one needs to be to keep the traversing easy
As a time note, I met back up with the gully guys right about where the routes come back together. Again for an average hiker, it seems that either route coming down takes about the same time. Parting shot of the gully
And zoomed in with climbers circled for perspective
It took me about 3 hours to come down from the summit, for about 7 hours on the trail and about 20 minutes on top. It was nice to finish a hike shortly after noon, I packed up and headed down the road.
Lindsey is a fun, but challenging hike. Route finding is important with all the false trails. The ridge, as reported, is easier than it looks. It seems that everybody likes the ridge over the gully. Since I didn't take the gully, I can't compare, but it was a fun up and down.
Thanks for reading.
Thumbnails for uploaded photos (click to open slideshow):
I am a lefthanded Mike who was up there with you. If was fun! I did Culebra and Red Mtn today and was hammered by an storm after regaining Culebra. I couldn‘t shorten my poles to stow them because they were shocking my gloved fingers! I almost just left them there. Everyone made it out, so it was a happy ending, but very intense!
Lefthanded Mvonkaenel - I climbed Culebra and Red Mountain on the 27th as well. I think my buddy Aaron and I met you in the saddle on our descent back to Culebra. That storm developed so quickly. Aarons poles actually arched when we got back to the large cairn. Neither of us had ever experienced electricity like that. We ran down the mountain. I kept thinking and hoping everyone else was ok since there were still 15 or so people up above us.
I was hiking up with you and can‘t believe the pictures you took. I was one of the lefties. I would love to get those pictures. Josh - I summited Culebra with you on the 27th. We made it down before the storm hit. It looked horrible. Glad everyone was safe.
The right side of that headwall definitely holds the hardest climbing. You are looking at 5th class moves on some of the right side of the face and it is pretty exposed. Great TR.
Great info, thanks. I appreciate the effort you put into the report. It will be very helpful.
Caution: The information contained in this report may not be accurate and should not be the only resource used in preparation for your climb. Failure to have the necessary experience, physical conditioning, supplies or equipment can result in injury or death. 14ers.com and the author(s) of this report provide no warranties, either express or implied, that the information provided is accurate or reliable. By using the information provided, you agree to indemnify and hold harmless 14ers.com and the report author(s) with respect to any claims and demands against them, including any attorney fees and expenses. Please read the 14ers.com Safety and Disclaimer pages for more information.
Please respect private property: 14ers.com supports the rights of private landowners to determine how and by whom their land will be used. In Colorado, it is your responsibility to determine if land is private and to obtain the appropriate permission before entering the property.


")
")
")
")
")
")
")
")
")
")
")
")
")
")
")
")
")
")
")
")
")
")
")
")
")
")
")
")
")
")